


 Download code from GitHub
Swift is a programming language developed by Apple primarily to allow developers to continue to push their platforms forward. It is their attempt to make iOS, OS X, watchOS, and tvOS app development more modern, safe, and powerful.
However, Apple has also released Swift as Open Source and begun an effort to add support for Linux with the intent to make Swift even better and a general purpose programming language available everywhere. Some developers have already begun using it to create command-line scripts as a replacement/supplement of the existing scripting languages, such as Python or Ruby and many can't wait to be able to share some of their app code with Web backend code. Apple's priority, at least for now, is to make it the best language possible, to facilitate app development. However, the most important thing to remember is that modern app development almost always requires pulling together multiple platforms into a single-user experience. If a language could bridge those gaps and stay enjoyable to write, safe, and performant, we would have a much easier time making amazing products. Swift is well on its way to reach that goal.
Developing software is like building a table. You can learn the basics of woodworking and nail a few pieces of wood together to make a functional table, but you are very limited in what you can do because you lack advanced woodworking skills. If you want to make a truly great table, you need to step away from the table and focus first on developing your skill set. The better you are at using the tools, the greater the number of possibilities that open up to you to create a more advanced and higher quality piece of furniture. Similarly, with a very limited knowledge of Swift, you can start to piece together a functional app from the code you find online. However, to really make something great, you have to put the time and effort into refining your skill set with the language. Every language feature or technique that you learn opens up more possibilities for your app.
In order to use Swift, you will need to run OS X, the operating system that comes with all Macs. The only piece of software that you will need is called Xcode (version 7 and higher). This is the environment that Apple provides, which facilitates development for its platforms. You can download Xcode for free from the Mac App Store at www.appstore.com/mac/Xcode.
Once downloaded and installed, you can open the app and it will install the rest of Apple's developer tool components. It is as simple as that! We are now ready to run our first piece of Swift code.
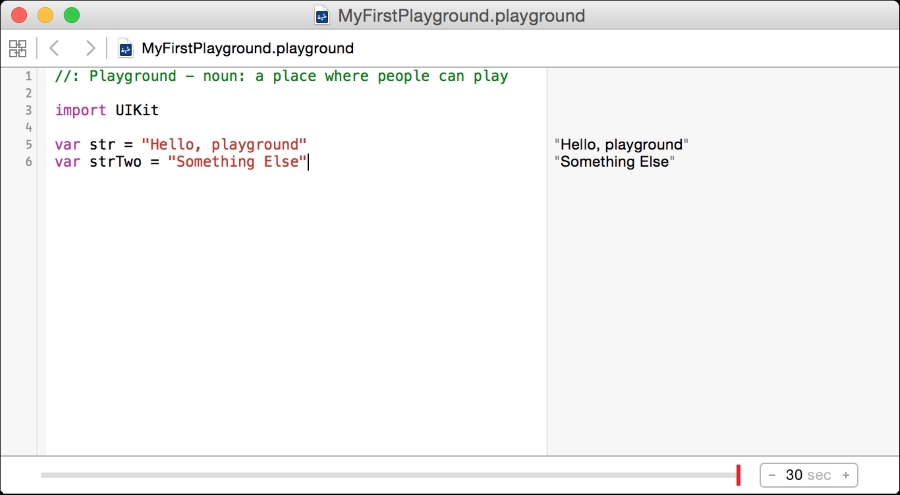
We will start by creating a new Swift playground. As the name suggests, a playground is a place where you can play around with code. With Xcode open, navigate to File | New | Playground… from the menu bar, as shown in the following screenshot:

Name it MyFirstPlayground, leave the platform as iOS, and save it wherever you wish.
Once created, a playground window will appear with some code already populated inside it for you:

You have already run your first Swift code. A playground in Xcode runs your code every time you make a change and shows you the code results in the sidebar, on the right-hand side of the screen.
If you are familiar with other programming languages, many of them require some sort of line terminator. In Swift, you do not need anything like that.

Tip
You can download the example code files for this book from your account at http://www.packtpub.com. If you purchased this book elsewhere, you can visit http://www.packtpub.com/support and register to have the files e-mailed directly to you.
You can download the code files by following these steps:
- Log in or register to our website using your e-mail address and password.
- Hover the mouse pointer on the SUPPORT tab at the top.
- Click on Code Downloads & Errata.
- Enter the name of the book in the Search box.
- Select the book for which you're looking to download the code files.
- Choose from the drop-down menu where you purchased this book from.
- Click on Code Download.
Once the file is downloaded, please make sure that you unzip or extract the folder using the latest version of:
- WinRAR/7-Zip for Windows
- Zipeg/iZip/UnRarX for Mac
- 7-Zip/PeaZip for Linux
A playground is not truly a program. While it does execute code like a program, it is not really useful outside of the development environment. Before we can understand what the playground is doing for us, we must first understand how Swift works.
Swift is a compiled language, which means that for Swift code to be run, it must first be converted into a form that the computer can actually execute. The tool that does this conversion is called a compiler. A compiler is actually a program and it is also a way to define a programming language.
Once the machine code is generated, Xcode can wrap the machine code up inside an app that users can run. However, we are running Swift code inside our playground, so clearly building an app is not the only way to run code; something else is going on here.
The learning process of this book follows very closely to the philosophy behind playgrounds. You will get the most out of this book if you play around with the code and ideas that we discuss. Instead of just passively reading through this, glancing at the code, put the code into a playground, and observe how it really works. Make changes to the code, try to break it, try to extend it, and you will learn far more. If you have a question, don't default to looking up the answer, try it out.
In this chapter, we will cover:
Every programming language needs to name a piece of information so that it can be referenced later. This is the fundamental way in which code remains readable after it is written. Swift provides a number of core types that help you represent your information in a very comprehensible way.
Swift provides two types of information: a constant and a variable:
All constants are defined using the let keyword followed by a name, and all variables are defined using the var keyword. Both constants and variables in Swift must contain a value before they are used. This means that, when you define a new one, you will most likely give it an initial value. You do so by using the assignment operator (=) followed by a value.
The only difference between the two is that a constant can never be changed, whereas a variable can be. In the preceding example, the code defines a constant called pi that stores the information 3.14 and a variable called name that stores the information "Sarah". It makes sense to make pi a constant because pi will always be 3.14. However, we need to change the value of name in the future so we defined it as a variable.
One of the hardest parts of managing a program is the state of all the variables. As a programmer, it is often impossible to calculate all the different possible values a variable might have, even in relatively small programs. Since variables can often be changed by distant, seemingly unrelated code, more states will cause more bugs that are harder to track down. It is always best to default to using constants until you run into a practical scenario in which you need to modify the value of the information.
It is often helpful to give a name to more complex information. We often have to deal with a collection of related information or a series of similar information like lists. Swift provides three main collection types called tuples, arrays, and dictionaries.
A tuple is a fixed sized collection of two or more pieces of information. For example, a card in a deck of playing cards has three properties: color, suit, and value. We could use three separate variables to fully describe a card, but it would be better to express it in one:
Another way to access specific values in a tuple is to capture each of them in a separate variable:
An array is essentially a list of information of variable length. For example, we could create a list of people we want to invite to a party, as follows:
You can then add values to an array by adding another array to it, like this:
Note that += is the shorthand for the following:
The index is specified using square brackets ([]) immediately after the name of the array. Indexes start at 0 and go up from there like tuples. So, in the preceding example, index 2 returned the third element in the array, Marcos. There is additional information you can retrieve about an array, like the number of elements that you can see as we move forward.
A dictionary is a collection of keys and values. Keys are used to store and look up specific values in the container. This container type is named after a word dictionary in which you can look up the definition of a word. In that real life example, the word would be the key and the definition would be the value. As an example, we can define a dictionary of television shows organized by their genre:
As a bonus, this can also be used to change the value for an existing key.
You might have noticed that all of my variable and constant names begin with a lower case letter and each subsequent word starts with a capital letter. This is called camel case and it is the widely accepted way of writing variable and constant names. Following this convention makes it easier for other programmers to understand your code.
Now that we know about Swift's basic containers, let's explore what they are in a little more detail.
Swift is a strongly typed language, which means that every constant and variable is defined with a specific type. Only values of matching types can be assigned to them. So far, we have taken advantage of a feature of Swift called Type Inference. This means that the code does not have to explicitly declare a type if it can be inferred from the value being assigned to it during the declaration.
Without Type Inference, the name variable declaration from before would be written as follows:
A string is defined by a series of characters. This is perfect for storing text, as in our name example. The reason that we don't need to specify the type is that Sarah is a
string literal. Text surrounded by quotation marks is a string literal and can be inferred to be of the type String. That means that name must be of the type String if you make its initial value Sarah.
The code is much cleaner and easier to understand if we leave the types out as the original examples showed. Just keep in mind that these types are always implied to be there, even if they are not written explicitly. If we tried to assign a number to the name variable, we would get an error, as shown:


As was expected, the variable was indeed inferred to be of the type String.
It is very useful to write output to a log so that you can trace the behavior of code. As a codebase grows in complexity, it gets hard to follow the order in which things happen and exactly what the data looks like as it flows through the code. Playgrounds help a lot with this but it is not always enough.
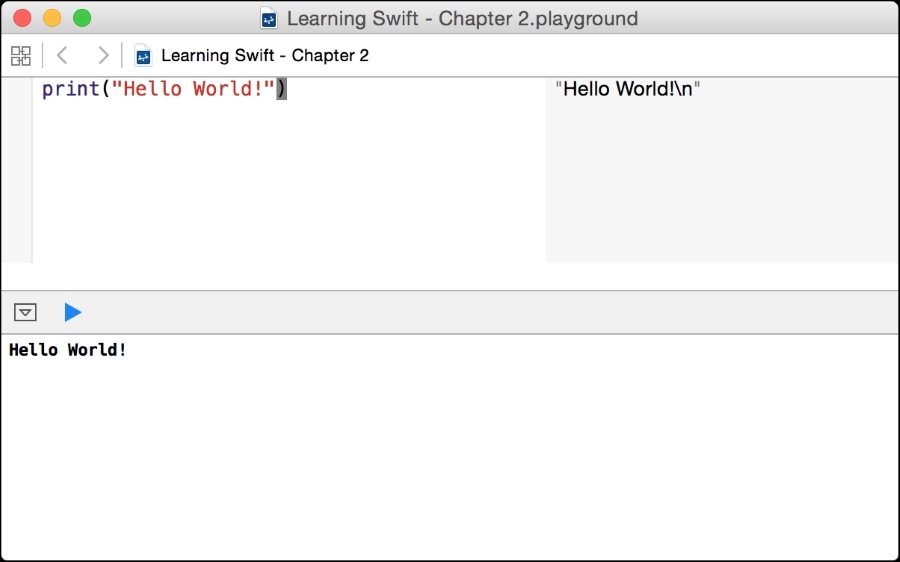
You can even use a feature of Swift called string interpolation to insert variables into a string, like this:
At any point in a string literal, even when not printing, you can insert the results of the code by surrounding the code with \( and ). Normally this would be the name of a variable but it could be any code that returns a value.
Printing to the console is even more useful when we start using more complex code.
A program wouldn't be very useful if it were a single fixed list of commands that always did the same thing. With a single code path, a calculator app would only be able to perform one operation. There are a number of things we can do to make an app more powerful and collect the data to make decisions as to what to do next.
The most basic way to control the flow of a program is to specify code that should only be executed if a certain condition is met. In Swift, we do that with an if statement. Let's look at an example:
Semantically, the preceding code reads; if the number of invitees is greater then 20, print 'Too many people invited". This example only executes one line of code if the condition is true, but you can put as much code as you like inside the curly brackets ({}).
As an exercise, I recommend adding an additional scenario to the preceding code in which, if there were exactly zero invitees, it would print "One is the loneliest number". You can test out your code by adjusting how many invitees you add to the invitees declaration. Remember that the order of the conditions is very important.
A switch is a more expressive way of writing a series of if statements. A direct translation of the example from the conditionals section would look like this:
A switch consists of a value and a list of conditions for that value with the code to execute if the condition is true. The value to be tested is written immediately after the switch command and all of the conditions are contained in curly brackets ({}). Each condition is called a
case. Using that terminology, the semantics of the preceding code is "Considering the number of invitees, in the case that it is greater than 20, print "Too many people invited", otherwise, in the case that it is less than or equal to three, print "Too many people invited", otherwise, by default print "Just right".
The most common way to handle that is by using a default case as designated by the default keyword. Sometimes, you don't actually want to do anything in the default case, or possibly even in a specific case. For that, you can use the break keyword, as shown here:
Note that the default case must always be the last one.
Switches don't only work with numbers. They are great for performing any type of test:
This code shows some other interesting features of switches. The first case is actually made up of two separate conditions. Each case can have any number of conditions separated by commas (,). This is useful when you have multiple cases that you want to use the same code for.
There are many different types of loops but all of them execute the same code repeatedly until a condition is no longer true. The most basic type of loop is called a while loop:
A while loop consists of a condition to test and code to be run until that condition fails. In the preceding example, we have looped through every element in the invitees array. We used the variable index to track which invitee we were currently on. To move to the next index, we used a new operator += which added one to the existing value. This is the same as writing index = index + 1.
In this case, we get access to both the key and the value of the dictionary. This should look familiar because (genre, show) is actually a tuple used for each iteration through the loop. It may be confusing to determine whether or not you have a single value from a for-in loop like arrays or a tuple like dictionaries. At this point, it would be best for you to remember just these two common cases. The underlying reasons will become clear when we start talking about
sequences in Chapter 6, Make Swift Work For You – Protocols and Generics.
Now, the loop will only be run for each of the invitees that start with the letter A.
This code runs the loop using the variable index from the value 0 up to but not including invitees.count. There are actually two types of ranges. This one is called a half open range because it does not include the last value. The other type of range, which we saw with switches, is called a
closed range:
The break keyword is used to immediately exit a loop:
As soon as a break is encountered, the execution jumps to after the loop. In this case, it jumps to the final line.
switch is a more expressive way of writing a series of if statements. A direct translation of the example from the conditionals section would look like this:
A switch consists of a value and a list of conditions for that value with the code to execute if the condition is true. The value to be tested is written immediately after the switch command and all of the conditions are contained in curly brackets ({}). Each condition is called a
case. Using that terminology, the semantics of the preceding code is "Considering the number of invitees, in the case that it is greater than 20, print "Too many people invited", otherwise, in the case that it is less than or equal to three, print "Too many people invited", otherwise, by default print "Just right".
The most common way to handle that is by using a default case as designated by the default keyword. Sometimes, you don't actually want to do anything in the default case, or possibly even in a specific case. For that, you can use the break keyword, as shown here:
Note that the default case must always be the last one.
Switches don't only work with numbers. They are great for performing any type of test:
This code shows some other interesting features of switches. The first case is actually made up of two separate conditions. Each case can have any number of conditions separated by commas (,). This is useful when you have multiple cases that you want to use the same code for.
There are many different types of loops but all of them execute the same code repeatedly until a condition is no longer true. The most basic type of loop is called a while loop:
A while loop consists of a condition to test and code to be run until that condition fails. In the preceding example, we have looped through every element in the invitees array. We used the variable index to track which invitee we were currently on. To move to the next index, we used a new operator += which added one to the existing value. This is the same as writing index = index + 1.
In this case, we get access to both the key and the value of the dictionary. This should look familiar because (genre, show) is actually a tuple used for each iteration through the loop. It may be confusing to determine whether or not you have a single value from a for-in loop like arrays or a tuple like dictionaries. At this point, it would be best for you to remember just these two common cases. The underlying reasons will become clear when we start talking about
sequences in Chapter 6, Make Swift Work For You – Protocols and Generics.
Now, the loop will only be run for each of the invitees that start with the letter A.
This code runs the loop using the variable index from the value 0 up to but not including invitees.count. There are actually two types of ranges. This one is called a half open range because it does not include the last value. The other type of range, which we saw with switches, is called a
closed range:
The break keyword is used to immediately exit a loop:
As soon as a break is encountered, the execution jumps to after the loop. In this case, it jumps to the final line.
are many different types of loops but all of them execute the same code repeatedly until a condition is no longer true. The most basic type of loop is called a while loop:
A while loop consists of a condition to test and code to be run until that condition fails. In the preceding example, we have looped through every element in the invitees array. We used the variable index to track which invitee we were currently on. To move to the next index, we used a new operator += which added one to the existing value. This is the same as writing index = index + 1.
In this case, we get access to both the key and the value of the dictionary. This should look familiar because (genre, show) is actually a tuple used for each iteration through the loop. It may be confusing to determine whether or not you have a single value from a for-in loop like arrays or a tuple like dictionaries. At this point, it would be best for you to remember just these two common cases. The underlying reasons will become clear when we start talking about
sequences in Chapter 6, Make Swift Work For You – Protocols and Generics.
Now, the loop will only be run for each of the invitees that start with the letter A.
This code runs the loop using the variable index from the value 0 up to but not including invitees.count. There are actually two types of ranges. This one is called a half open range because it does not include the last value. The other type of range, which we saw with switches, is called a
closed range:
The break keyword is used to immediately exit a loop:
As soon as a break is encountered, the execution jumps to after the loop. In this case, it jumps to the final line.
All of the code we have explored so far is very linear down the file. Each line is processed one at a time and then the program moves onto the next. This is one of the great things about programming: everything the program does can be predicted by stepping through the program yourself mentally, one line at a time.
There are various different types of functions but each builds on the previous type.
The most basic type of function simply has a name with some static code to be executed later. Let's look at a simple example. The following code defines a function named sayHello:
A function can take zero or more parameters, which are input values. Let's modify our sayHello function to be able to say Hello to an arbitrary name using string interpolation:
As mentioned before, a function can take more than one parameter. A parameter list looks a lot like a tuple. Each parameter is given a name and a type separated by a colon (:), and these are then separated by commas (,). On top of that, functions can not only take in values but can also return values to the calling code.
The type of value to be returned from a function is defined after the end of all of the parameters separated by an arrow ->. Let's write a function that takes a list of invitees and one other person to add to the list. If there are spots available, the function adds the person to the list and returns the new version. If there are no spots available, it just returns the original list, as shown here:
In this function, we tested the number of names on the invitee list and, if it was greater than 20, we returned the same list as was passed in to the invitees parameter. Note that return is used in a function in a similar way to break in a loop. As soon as the program executes a line that returns, it exits the function and provides that value to the calling code. So, the final return line is only run if the if statement does not pass. It then adds the newinvitee parameter to the list and returns that to the calling code.
You would call this function like so:

You can use the arrow keys to move up and down the list to select the function you want to type and then press the Tab key to make Xcode finish typing the function for you. Not only that, but it highlights the first parameter so that you can immediately start typing what you want to pass in. When you are done defining the first parameter, you can press Tab again to move on to the next parameter. This greatly increases the speed with which you can write your code.
This is a great feature of Swift that allows you to have a function called with
named parameters. We can do this by giving the second parameter two names, separated by a space. The first name is the one to be used when calling the function, otherwise referred to as the
external name. The second name is the one to be used when referring to the constant being passed in from within the function, otherwise referred to as the
internal name. As an exercise, try to change the function so that it uses the same external and internal names and see what Xcode suggests. For more of a challenge, write a function that takes a list of invitees and an index for a specific invitee to write a message to ask them to just bring themselves. For example, it would print Sarah, just bring yourself for the index 0 in the preceding list.
Sometimes we write functions where there is a parameter that commonly has the same value. It would be great if we could provide a value for a parameter to be used if the caller did not override that value. Swift has a feature for this called default arguments. To define a default value for an argument, you simply add an equal sign after the argument, followed by the value. We can add a default argument to the sayHelloToName: function, as follows:
This means that we can now call this function with or without specifying a name:
When using default arguments, the order of the arguments becomes unimportant. We can add default arguments to our addInvitee:ifPossibleToList: function and then call it with any combination or order of arguments:
The last feature of functions that we are going to discuss is another type of conditional called a
guard statement. We have not discussed it until now because it doesn't make much sense unless it is used in a function or loop. A guard statement acts in a similar way to an if statement but the compiler forces you to provide an else condition that must exit from the function, loop, or switch case. Let's rework our addInvitee:ifPossibleToList: function to see what it looks like:
Semantically, the guard statement instructs us to ensure that the number of invitees is less than 20 or else return the original list. This is a reversal of the logic we used before, when we returned the original list if there were 20 or more invitees. This logic actually makes more sense because we are stipulating a prerequisite and providing a failure path. The other nice thing about using the guard statement is that we can't forget to return out of the else condition. If we do, the compiler will give us an error.
It is important to note that guard statements do not have a block of code that is executed if it passes. Only an else condition can be specified with the assumption that any code you want to run for the passing condition will simply come after the statement. This is safe only because the compiler forces the else condition to exit the function and, in turn, ensures that the code after the statement will not run.
basic type of function simply has a name with some static code to be executed later. Let's look at a simple example. The following code defines a function named sayHello:
A function can take zero or more parameters, which are input values. Let's modify our sayHello function to be able to say Hello to an arbitrary name using string interpolation:
As mentioned before, a function can take more than one parameter. A parameter list looks a lot like a tuple. Each parameter is given a name and a type separated by a colon (:), and these are then separated by commas (,). On top of that, functions can not only take in values but can also return values to the calling code.
The type of value to be returned from a function is defined after the end of all of the parameters separated by an arrow ->. Let's write a function that takes a list of invitees and one other person to add to the list. If there are spots available, the function adds the person to the list and returns the new version. If there are no spots available, it just returns the original list, as shown here:
In this function, we tested the number of names on the invitee list and, if it was greater than 20, we returned the same list as was passed in to the invitees parameter. Note that return is used in a function in a similar way to break in a loop. As soon as the program executes a line that returns, it exits the function and provides that value to the calling code. So, the final return line is only run if the if statement does not pass. It then adds the newinvitee parameter to the list and returns that to the calling code.
You would call this function like so:
You can use the arrow keys to move up and down the list to select the function you want to type and then press the Tab key to make Xcode finish typing the function for you. Not only that, but it highlights the first parameter so that you can immediately start typing what you want to pass in. When you are done defining the first parameter, you can press Tab again to move on to the next parameter. This greatly increases the speed with which you can write your code.
This is a great feature of Swift that allows you to have a function called with
named parameters. We can do this by giving the second parameter two names, separated by a space. The first name is the one to be used when calling the function, otherwise referred to as the
external name. The second name is the one to be used when referring to the constant being passed in from within the function, otherwise referred to as the
internal name. As an exercise, try to change the function so that it uses the same external and internal names and see what Xcode suggests. For more of a challenge, write a function that takes a list of invitees and an index for a specific invitee to write a message to ask them to just bring themselves. For example, it would print Sarah, just bring yourself for the index 0 in the preceding list.
Sometimes we write functions where there is a parameter that commonly has the same value. It would be great if we could provide a value for a parameter to be used if the caller did not override that value. Swift has a feature for this called default arguments. To define a default value for an argument, you simply add an equal sign after the argument, followed by the value. We can add a default argument to the sayHelloToName: function, as follows:
This means that we can now call this function with or without specifying a name:
When using default arguments, the order of the arguments becomes unimportant. We can add default arguments to our addInvitee:ifPossibleToList: function and then call it with any combination or order of arguments:
The last feature of functions that we are going to discuss is another type of conditional called a
guard statement. We have not discussed it until now because it doesn't make much sense unless it is used in a function or loop. A guard statement acts in a similar way to an if statement but the compiler forces you to provide an else condition that must exit from the function, loop, or switch case. Let's rework our addInvitee:ifPossibleToList: function to see what it looks like:
Semantically, the guard statement instructs us to ensure that the number of invitees is less than 20 or else return the original list. This is a reversal of the logic we used before, when we returned the original list if there were 20 or more invitees. This logic actually makes more sense because we are stipulating a prerequisite and providing a failure path. The other nice thing about using the guard statement is that we can't forget to return out of the else condition. If we do, the compiler will give us an error.
It is important to note that guard statements do not have a block of code that is executed if it passes. Only an else condition can be specified with the assumption that any code you want to run for the passing condition will simply come after the statement. This is safe only because the compiler forces the else condition to exit the function and, in turn, ensures that the code after the statement will not run.
can take zero or more parameters, which are input values. Let's modify our sayHello function to be able to say Hello to an arbitrary name using string interpolation:
As mentioned before, a function can take more than one parameter. A parameter list looks a lot like a tuple. Each parameter is given a name and a type separated by a colon (:), and these are then separated by commas (,). On top of that, functions can not only take in values but can also return values to the calling code.
The type of value to be returned from a function is defined after the end of all of the parameters separated by an arrow ->. Let's write a function that takes a list of invitees and one other person to add to the list. If there are spots available, the function adds the person to the list and returns the new version. If there are no spots available, it just returns the original list, as shown here:
In this function, we tested the number of names on the invitee list and, if it was greater than 20, we returned the same list as was passed in to the invitees parameter. Note that return is used in a function in a similar way to break in a loop. As soon as the program executes a line that returns, it exits the function and provides that value to the calling code. So, the final return line is only run if the if statement does not pass. It then adds the newinvitee parameter to the list and returns that to the calling code.
You would call this function like so:
You can use the arrow keys to move up and down the list to select the function you want to type and then press the Tab key to make Xcode finish typing the function for you. Not only that, but it highlights the first parameter so that you can immediately start typing what you want to pass in. When you are done defining the first parameter, you can press Tab again to move on to the next parameter. This greatly increases the speed with which you can write your code.
This is a great feature of Swift that allows you to have a function called with
named parameters. We can do this by giving the second parameter two names, separated by a space. The first name is the one to be used when calling the function, otherwise referred to as the
external name. The second name is the one to be used when referring to the constant being passed in from within the function, otherwise referred to as the
internal name. As an exercise, try to change the function so that it uses the same external and internal names and see what Xcode suggests. For more of a challenge, write a function that takes a list of invitees and an index for a specific invitee to write a message to ask them to just bring themselves. For example, it would print Sarah, just bring yourself for the index 0 in the preceding list.
Sometimes we write functions where there is a parameter that commonly has the same value. It would be great if we could provide a value for a parameter to be used if the caller did not override that value. Swift has a feature for this called default arguments. To define a default value for an argument, you simply add an equal sign after the argument, followed by the value. We can add a default argument to the sayHelloToName: function, as follows:
This means that we can now call this function with or without specifying a name:
When using default arguments, the order of the arguments becomes unimportant. We can add default arguments to our addInvitee:ifPossibleToList: function and then call it with any combination or order of arguments:
The last feature of functions that we are going to discuss is another type of conditional called a
guard statement. We have not discussed it until now because it doesn't make much sense unless it is used in a function or loop. A guard statement acts in a similar way to an if statement but the compiler forces you to provide an else condition that must exit from the function, loop, or switch case. Let's rework our addInvitee:ifPossibleToList: function to see what it looks like:
Semantically, the guard statement instructs us to ensure that the number of invitees is less than 20 or else return the original list. This is a reversal of the logic we used before, when we returned the original list if there were 20 or more invitees. This logic actually makes more sense because we are stipulating a prerequisite and providing a failure path. The other nice thing about using the guard statement is that we can't forget to return out of the else condition. If we do, the compiler will give us an error.
It is important to note that guard statements do not have a block of code that is executed if it passes. Only an else condition can be specified with the assumption that any code you want to run for the passing condition will simply come after the statement. This is safe only because the compiler forces the else condition to exit the function and, in turn, ensures that the code after the statement will not run.
we write functions where there is a parameter that commonly has the same value. It would be great if we could provide a value for a parameter to be used if the caller did not override that value. Swift has a feature for this called default arguments. To define a default value for an argument, you simply add an equal sign after the argument, followed by the value. We can add a default argument to the sayHelloToName: function, as follows:
This means that we can now call this function with or without specifying a name:
When using default arguments, the order of the arguments becomes unimportant. We can add default arguments to our addInvitee:ifPossibleToList: function and then call it with any combination or order of arguments:
The last feature of functions that we are going to discuss is another type of conditional called a
guard statement. We have not discussed it until now because it doesn't make much sense unless it is used in a function or loop. A guard statement acts in a similar way to an if statement but the compiler forces you to provide an else condition that must exit from the function, loop, or switch case. Let's rework our addInvitee:ifPossibleToList: function to see what it looks like:
Semantically, the guard statement instructs us to ensure that the number of invitees is less than 20 or else return the original list. This is a reversal of the logic we used before, when we returned the original list if there were 20 or more invitees. This logic actually makes more sense because we are stipulating a prerequisite and providing a failure path. The other nice thing about using the guard statement is that we can't forget to return out of the else condition. If we do, the compiler will give us an error.
It is important to note that guard statements do not have a block of code that is executed if it passes. Only an else condition can be specified with the assumption that any code you want to run for the passing condition will simply come after the statement. This is safe only because the compiler forces the else condition to exit the function and, in turn, ensures that the code after the statement will not run.
feature of functions that we are going to discuss is another type of conditional called a
guard statement. We have not discussed it until now because it doesn't make much sense unless it is used in a function or loop. A guard statement acts in a similar way to an if statement but the compiler forces you to provide an else condition that must exit from the function, loop, or switch case. Let's rework our addInvitee:ifPossibleToList: function to see what it looks like:
Semantically, the guard statement instructs us to ensure that the number of invitees is less than 20 or else return the original list. This is a reversal of the logic we used before, when we returned the original list if there were 20 or more invitees. This logic actually makes more sense because we are stipulating a prerequisite and providing a failure path. The other nice thing about using the guard statement is that we can't forget to return out of the else condition. If we do, the compiler will give us an error.
It is important to note that guard statements do not have a block of code that is executed if it passes. Only an else condition can be specified with the assumption that any code you want to run for the passing condition will simply come after the statement. This is safe only because the compiler forces the else condition to exit the function and, in turn, ensures that the code after the statement will not run.
At this point, we have learned a lot about the basic workings of Swift. Let's take a moment to bring many of these concepts together in a single program. We will also see some new variations on what we have learned.
Before we look at the code, I will mention the three small new features that I will use:
Lastly, rand returns a number anywhere from 0 to a very large number but, as you will see, we want to restrict the random number to between 0 and the number of invitees. To do this, we use the remainder operator (%). This operator gives you the remainder after dividing the first number by the second number. For example, 14 % 4 returns 2 because 4 goes into 14, 3 times with 2 left over. The great feature of this operator is that it forces a number of any size to always be between 0 and 1 less than the number you are dividing by. This is perfect for changing all of the possible random values.
The full code for generating a random number looks like this:
Lastly, the third feature we will use is a variation of the while loop called a repeat-while loop. The only difference with a repeat-while loop is that the condition is checked at the end of the loop instead of at the beginning. This is significant because, unlike with a while loop, a repeat-while loop will always be executed at least once, as shown:
This first section of code gives us a localized place in which to put all of our data. We can easily come back to the program and change the data if we want and we don't have to go searching through the rest of the program to update it:
Here, I have provided a number of functions that simplify more complex code later on in the program. Each one is given a meaningful name so that, when they are used, we do not have to go and look at their code to understand what they are doing:
Let's also look at an interesting limitation of this implementation. This program is going to run into a major problem if the number of invitees is less than the number of shows. The repeat-while loop will continue forever, never finding an invitee that was not invited. Your program doesn't have to handle every possible input but you should at least be aware of its limitations.
In Chapter 2, Building Blocks – Variables, Collections, and Flow Control, we developed a very simple program that helped organize a party. Even though we separated parts of the code in a logical way, everything was written in a single file and our functions were all lumped together. As projects grow in complexity, this way of organizing code is not sustainable. In the same way we use functions to separate out logical components in our code at scale, we also need to be able to separate out the logical components of our functions and data. To do this, we can define code in different files and we can also create our own types that contain custom data and functionality. These types are commonly referred to as objects, as a part of the programming technique called object-oriented programming. In this chapter we will cover the following:
The most basic way that we can group together data and functionality into a logical unit or object is to define something called a structure. Essentially, a structure is a named collection of data and functions. Actually, we have already seen several different structures because all of the types such as string, array, and dictionary that we have seen so far are structures. Now we will learn how to create our own.
Let's jump straight into defining our first structure to represent a contact:
Initializing is the formal name for creating a new instance. We initialize a new Contact like this:
You may have noticed that this looks a lot like calling a function and that is because it is very similar. Every type must have at least one special function called an
initializer. As the name implies, this is a function that initializes a new instance of the type. All initializers are named after their type and they may or may not have parameters, just like a function. In our case, we have not provided any parameters so the first and last names will be left with the default values that we provided in our specification: First and Last.
If we define a second contact structure that does not provide default values, it changes how we call the initializer. Since there are no default values, we must provide the values when initializing it:
The two variables, firstName and lastName, are called
member variables and, if we change them to be constants, they are then called
member constants. This is because they are pieces of information associated with a specific instance of the type. You can access member constants and variables on any instance of a structure:
This is in contrast to a static constant. We could add a static constant to our type by adding the following line to its definition:
Member and static constants and variables all fall under the category of properties. A property is simply a piece of information associated with an instance or a type. This helps reinforce the idea that every type is an object. A ball, for example, is an object that has many properties including its radius, color, and elasticity. We can represent a ball in code in an object-oriented way by creating a ball structure that has each of those properties:
Note that this Ball type does not define default values for its properties. If default values are not provided in the declaration, they are required when initializing an instance of the type. This means that an empty initializer is not available for that type. If you try to use one, you will get an error:
Just like with normal variables and constants, all properties must have a value once initialized.
Just as you can define constants and variables within a structure, you can also define member and static functions. These functions are referred to as methods to distinguish them from global functions that are not associated with any type. You declare member methods in a similar way to functions but you do so inside the type declaration, as shown:
In order for a method to modify self, it must be declared as a
mutating method using the mutating keyword:
We can define static properties that apply to the type itself but we can also define
static methods that operate on the type by using the static keyword. We can add a static method to our Contact structure that prints the available phone prefixes, as shown here:
I recommend avoiding this feature of Swift. I want to make you aware of it so you are not confused when looking at other people's code but I feel that always using self greatly increases the readability of your code. self makes it instantly clear that the variable is attached to the instance instead of only defined in the function. You could also create bugs if you add code that creates a variable that hides a member variable. For example, you would create a bug if you introduced the firstName variable to the printFullName method in the preceding code without realizing you were using firstName to access the member variable later in the code. Instead of accessing the member variable, the later code would start to only access the local variable.
So far, it seems that properties are used to store information and methods are used to perform calculations. While this is generally true, Swift has a feature called computed properties. These are properties that are calculated every time they are accessed. To do this, you define a property and then provide a method called a getter that returns the calculated value, as shown:
You can even provide a second function called a setter that allows you to assign a value to this property like normal properties:
This provides a nice concise way of defining read-only computed properties.
It is pretty common to need to perform an action whenever a property is changed. One way to achieve this is to define a computed property with a setter that performs the necessary action. However, Swift provides a better way of doing this. You can define a willSet function or a didSet function on any stored property. WillSet is called just before the property is changed and it is provided with a variable newValue. didSet is called just after the property is changed and it is provided with a variable oldValue, as you can see here:
In this scenario, if you set the radius, it triggers a change on the diameter which triggers another change on the radius and that then continues on forever.
You may also have realized that there is another way that we have interacted with a structure in the past. We have used square brackets ([]) with both arrays and dictionaries to access elements. These are called
subscripts and we can use them on our custom types as well. The syntax for them is similar to the computed properties that we saw before except that you define it more like a method with parameters and a return type, as you can see here:
You may have noticed a question mark (?) in the return type. This is called an
optional and we will discuss this more in the next chapter. For now, you only need to know that this is the type that is returned when accessing a dictionary by key because a value does not exist for every possible key.
Just like with computed properties, you can define a subscript as read-only without using the get syntax:
If you are not satisfied with the default initializers provided to you, you can define your own. This is done using the init keyword, as shown:
This is a great tool for reducing duplicate code in multiple initializers. However, when using this, there is an extra rule that you must follow. You cannot access self before calling the other initializer:
This guarantees that all the properties have a valid value before any method is called.
Structures are an incredibly powerful tool in programming. They are an important way that we, as programmers, can abstract away more complicated concepts. As we discussed in Chapter 2, Building Blocks – Variables, Collections, and Flow Control, this is the way we get better at using computers. Other people can provide these abstractions to us for concepts that we don't understand yet or in circumstances where it isn't worth our time to start from scratch. We can also use these abstractions for ourselves so that we can better understand the high-level logic going on in our app. This will greatly increase the reliability of our code. Structures make our code more understandable both for other people and for ourselves in the future.
A class can do everything that a structure can do except that a class can use something called inheritance. A class can inherit the functionality from another class and then extend or customize its behavior. Let's jump right into some code.
Firstly, let's define a class called Building that we can inherit from later:
Predictably, a class is defined using the class keyword instead of struct. Otherwise, a class looks extremely similar to a structure. However, we can also see one difference. With a structure, the initializer we created before would not be necessary because it would have been created for us. With classes, initializers are not automatically created unless all of the properties have default values.
Now let's look at how to inherit from this building class:
Here, we have created a new class called House that inherits from our Building class. This is denoted by the colon (:) followed by Building in the class declaration. Formally, we would say that House is a
subclass of Building and Building is a
superclass of House.

The trunk of the tree is the topmost superclass and each subclass is a separate branch off of that. The topmost superclass is commonly referred to as the base class as it forms the foundation for all the other classes.
Because of the hierarchical nature of classes, the rules for their initializers are more complex. The following additional rules are applied:
Inheritance also creates four types of initializers shown here:
A
required initializer is a type of initializer for superclasses. If you mark an initializer as required, it forces all of the subclasses to also define that initializer. For example, we could make the Building initializer required, as shown:
Then, if we implemented our own initializer in House, we would get an error like this:
This time, when declaring this initializer, we repeat the required keyword instead of using override:
To discuss designated initializers, we first have to talk about convenience initializers. The normal initializer that we started with is really called a designated initializer. This means that they are core ways to initialize the class. You can also create convenience initializers which, as the name suggests, are there for convenience and are not a core way to initialize the class.
All convenience initializers must call a designated initializer and they do not have the ability to manually initialize properties like a designated initializer does. For example, we can define a convenience initializer on our Building class that takes another building and makes a copy:
Now, as a convenience, you can create a new building using the properties from an existing building. The other rule about convenience initializers is that they cannot be used by a subclass. If you try to do that, you will get an error like this:
This is one of the main reasons that convenience initializers exist. Ideally, every class should only have one designated initializer. The fewer designated initializers you have, the easier it is to maintain your class hierarchy. This is because you will often add additional properties and other things that need to be initialized. Every time you add something like that, you will have to make sure that every designated initializer sets things up properly and consistently. Using a convenience initializer instead of a designated initializer ensures that everything is consistent because it must call a designated initializer that, in turn, is required to set everything up properly. Basically, you want to funnel all of your initialization through as few designated initializers as possible.
Just as with initializers, subclasses can override methods and computed properties. However, you have to be more careful with these. The compiler has fewer protections.
Even though it is possible, there is no requirement that an overriding method calls its superclass implementation. For example, let's add clean methods to our Building and House classes:
This is a great example of the need to override methods. We can provide common functionality in a superclass that can be extended in each of its subclasses instead of rewriting the same functionality in multiple classes.
We have already talked about how classes are great for sharing functionality between a hierarchy of types. Another thing that makes classes powerful is that they allow code to interact with multiple types in a more general way. Any subclass can be used in code that treats it as if it were its superclass. For example, we might want to write a function that calculates the total square footage of an array of buildings. For this function, we don't care what specific type of building it is, we just need to have access to the squareFootage property that is defined in the superclass. We can define our function to take an array of buildings and the actual array can contain House instances:
This provides us with an even more powerful abstraction tool than the one we had when using structures. For example, let's consider a hypothetical class hierarchy of images. We might have a base class called Image with subclasses for the different types of encodings like JPGImage and PNGImage. It is great to have the subclasses so that we can cleanly support multiple types of images but, once the image is loaded, we no longer need to be concerned with the type of encoding the image is saved in. Every other class that wants to manipulate or display the image can do so with a well-defined image superclass; the encoding of the image has been abstracted away from the rest of the code. Not only does this create easier to understand code but it also makes maintenance much easier. If we need to add another image encoding like
GIF, we can create another subclass and all the existing manipulation and display code can get GIF support with no changes to that code.
There are actually two different types of casting. So far, we have only seen the type of casting called upcasting. Predictably, the other type of casting is called downcasting.
What we have seen so far is called upcasting because we are going up the class tree that we visualized earlier by treating a subclass as its superclass. Previously, we upcasted by assigning a subclass instance to a variable that was defined as its superclass. We could do the same thing using the as operator instead, like this:
It is really personal preference as to which you should use.
Downcasting means that we treat a superclass as one of its subclasses.
While upcasting can be done implicitly by using it in a function declared to use its superclass or by assigning it to a variable with its superclass type, downcasting must be done explicitly. This is because upcasting cannot fail based on the nature of its inheritance, but downcasting can. You can always treat a subclass as its superclass but you cannot guarantee that a superclass is, in fact, one of its specific subclasses. You can only downcast an instance that is, in fact, an instance of that class or one of its subclasses.
define a class called Building that we can inherit from later:
Predictably, a class is defined using the class keyword instead of struct. Otherwise, a class looks extremely similar to a structure. However, we can also see one difference. With a structure, the initializer we created before would not be necessary because it would have been created for us. With classes, initializers are not automatically created unless all of the properties have default values.
Now let's look at how to inherit from this building class:
Here, we have created a new class called House that inherits from our Building class. This is denoted by the colon (:) followed by Building in the class declaration. Formally, we would say that House is a
subclass of Building and Building is a
superclass of House.
The trunk of the tree is the topmost superclass and each subclass is a separate branch off of that. The topmost superclass is commonly referred to as the base class as it forms the foundation for all the other classes.
Because of the hierarchical nature of classes, the rules for their initializers are more complex. The following additional rules are applied:
Inheritance also creates four types of initializers shown here:
A
required initializer is a type of initializer for superclasses. If you mark an initializer as required, it forces all of the subclasses to also define that initializer. For example, we could make the Building initializer required, as shown:
Then, if we implemented our own initializer in House, we would get an error like this:
This time, when declaring this initializer, we repeat the required keyword instead of using override:
To discuss designated initializers, we first have to talk about convenience initializers. The normal initializer that we started with is really called a designated initializer. This means that they are core ways to initialize the class. You can also create convenience initializers which, as the name suggests, are there for convenience and are not a core way to initialize the class.
All convenience initializers must call a designated initializer and they do not have the ability to manually initialize properties like a designated initializer does. For example, we can define a convenience initializer on our Building class that takes another building and makes a copy:
Now, as a convenience, you can create a new building using the properties from an existing building. The other rule about convenience initializers is that they cannot be used by a subclass. If you try to do that, you will get an error like this:
This is one of the main reasons that convenience initializers exist. Ideally, every class should only have one designated initializer. The fewer designated initializers you have, the easier it is to maintain your class hierarchy. This is because you will often add additional properties and other things that need to be initialized. Every time you add something like that, you will have to make sure that every designated initializer sets things up properly and consistently. Using a convenience initializer instead of a designated initializer ensures that everything is consistent because it must call a designated initializer that, in turn, is required to set everything up properly. Basically, you want to funnel all of your initialization through as few designated initializers as possible.
Just as with initializers, subclasses can override methods and computed properties. However, you have to be more careful with these. The compiler has fewer protections.
Even though it is possible, there is no requirement that an overriding method calls its superclass implementation. For example, let's add clean methods to our Building and House classes:
This is a great example of the need to override methods. We can provide common functionality in a superclass that can be extended in each of its subclasses instead of rewriting the same functionality in multiple classes.
We have already talked about how classes are great for sharing functionality between a hierarchy of types. Another thing that makes classes powerful is that they allow code to interact with multiple types in a more general way. Any subclass can be used in code that treats it as if it were its superclass. For example, we might want to write a function that calculates the total square footage of an array of buildings. For this function, we don't care what specific type of building it is, we just need to have access to the squareFootage property that is defined in the superclass. We can define our function to take an array of buildings and the actual array can contain House instances:
This provides us with an even more powerful abstraction tool than the one we had when using structures. For example, let's consider a hypothetical class hierarchy of images. We might have a base class called Image with subclasses for the different types of encodings like JPGImage and PNGImage. It is great to have the subclasses so that we can cleanly support multiple types of images but, once the image is loaded, we no longer need to be concerned with the type of encoding the image is saved in. Every other class that wants to manipulate or display the image can do so with a well-defined image superclass; the encoding of the image has been abstracted away from the rest of the code. Not only does this create easier to understand code but it also makes maintenance much easier. If we need to add another image encoding like
GIF, we can create another subclass and all the existing manipulation and display code can get GIF support with no changes to that code.
There are actually two different types of casting. So far, we have only seen the type of casting called upcasting. Predictably, the other type of casting is called downcasting.
What we have seen so far is called upcasting because we are going up the class tree that we visualized earlier by treating a subclass as its superclass. Previously, we upcasted by assigning a subclass instance to a variable that was defined as its superclass. We could do the same thing using the as operator instead, like this:
It is really personal preference as to which you should use.
Downcasting means that we treat a superclass as one of its subclasses.
While upcasting can be done implicitly by using it in a function declared to use its superclass or by assigning it to a variable with its superclass type, downcasting must be done explicitly. This is because upcasting cannot fail based on the nature of its inheritance, but downcasting can. You can always treat a subclass as its superclass but you cannot guarantee that a superclass is, in fact, one of its specific subclasses. You can only downcast an instance that is, in fact, an instance of that class or one of its subclasses.
of the hierarchical nature of classes, the rules for their initializers are more complex. The following additional rules are applied:
Inheritance also creates four types of initializers shown here:
A
required initializer is a type of initializer for superclasses. If you mark an initializer as required, it forces all of the subclasses to also define that initializer. For example, we could make the Building initializer required, as shown:
Then, if we implemented our own initializer in House, we would get an error like this:
This time, when declaring this initializer, we repeat the required keyword instead of using override:
To discuss designated initializers, we first have to talk about convenience initializers. The normal initializer that we started with is really called a designated initializer. This means that they are core ways to initialize the class. You can also create convenience initializers which, as the name suggests, are there for convenience and are not a core way to initialize the class.
All convenience initializers must call a designated initializer and they do not have the ability to manually initialize properties like a designated initializer does. For example, we can define a convenience initializer on our Building class that takes another building and makes a copy:
Now, as a convenience, you can create a new building using the properties from an existing building. The other rule about convenience initializers is that they cannot be used by a subclass. If you try to do that, you will get an error like this:
This is one of the main reasons that convenience initializers exist. Ideally, every class should only have one designated initializer. The fewer designated initializers you have, the easier it is to maintain your class hierarchy. This is because you will often add additional properties and other things that need to be initialized. Every time you add something like that, you will have to make sure that every designated initializer sets things up properly and consistently. Using a convenience initializer instead of a designated initializer ensures that everything is consistent because it must call a designated initializer that, in turn, is required to set everything up properly. Basically, you want to funnel all of your initialization through as few designated initializers as possible.
Just as with initializers, subclasses can override methods and computed properties. However, you have to be more careful with these. The compiler has fewer protections.
Even though it is possible, there is no requirement that an overriding method calls its superclass implementation. For example, let's add clean methods to our Building and House classes:
This is a great example of the need to override methods. We can provide common functionality in a superclass that can be extended in each of its subclasses instead of rewriting the same functionality in multiple classes.
We have already talked about how classes are great for sharing functionality between a hierarchy of types. Another thing that makes classes powerful is that they allow code to interact with multiple types in a more general way. Any subclass can be used in code that treats it as if it were its superclass. For example, we might want to write a function that calculates the total square footage of an array of buildings. For this function, we don't care what specific type of building it is, we just need to have access to the squareFootage property that is defined in the superclass. We can define our function to take an array of buildings and the actual array can contain House instances:
This provides us with an even more powerful abstraction tool than the one we had when using structures. For example, let's consider a hypothetical class hierarchy of images. We might have a base class called Image with subclasses for the different types of encodings like JPGImage and PNGImage. It is great to have the subclasses so that we can cleanly support multiple types of images but, once the image is loaded, we no longer need to be concerned with the type of encoding the image is saved in. Every other class that wants to manipulate or display the image can do so with a well-defined image superclass; the encoding of the image has been abstracted away from the rest of the code. Not only does this create easier to understand code but it also makes maintenance much easier. If we need to add another image encoding like
GIF, we can create another subclass and all the existing manipulation and display code can get GIF support with no changes to that code.
There are actually two different types of casting. So far, we have only seen the type of casting called upcasting. Predictably, the other type of casting is called downcasting.
What we have seen so far is called upcasting because we are going up the class tree that we visualized earlier by treating a subclass as its superclass. Previously, we upcasted by assigning a subclass instance to a variable that was defined as its superclass. We could do the same thing using the as operator instead, like this:
It is really personal preference as to which you should use.
Downcasting means that we treat a superclass as one of its subclasses.
While upcasting can be done implicitly by using it in a function declared to use its superclass or by assigning it to a variable with its superclass type, downcasting must be done explicitly. This is because upcasting cannot fail based on the nature of its inheritance, but downcasting can. You can always treat a subclass as its superclass but you cannot guarantee that a superclass is, in fact, one of its specific subclasses. You can only downcast an instance that is, in fact, an instance of that class or one of its subclasses.
discuss designated initializers, we first have to talk about convenience initializers. The normal initializer that we started with is really called a designated initializer. This means that they are core ways to initialize the class. You can also create convenience initializers which, as the name suggests, are there for convenience and are not a core way to initialize the class.
All convenience initializers must call a designated initializer and they do not have the ability to manually initialize properties like a designated initializer does. For example, we can define a convenience initializer on our Building class that takes another building and makes a copy:
Now, as a convenience, you can create a new building using the properties from an existing building. The other rule about convenience initializers is that they cannot be used by a subclass. If you try to do that, you will get an error like this:
This is one of the main reasons that convenience initializers exist. Ideally, every class should only have one designated initializer. The fewer designated initializers you have, the easier it is to maintain your class hierarchy. This is because you will often add additional properties and other things that need to be initialized. Every time you add something like that, you will have to make sure that every designated initializer sets things up properly and consistently. Using a convenience initializer instead of a designated initializer ensures that everything is consistent because it must call a designated initializer that, in turn, is required to set everything up properly. Basically, you want to funnel all of your initialization through as few designated initializers as possible.
Just as with initializers, subclasses can override methods and computed properties. However, you have to be more careful with these. The compiler has fewer protections.
Even though it is possible, there is no requirement that an overriding method calls its superclass implementation. For example, let's add clean methods to our Building and House classes:
This is a great example of the need to override methods. We can provide common functionality in a superclass that can be extended in each of its subclasses instead of rewriting the same functionality in multiple classes.
We have already talked about how classes are great for sharing functionality between a hierarchy of types. Another thing that makes classes powerful is that they allow code to interact with multiple types in a more general way. Any subclass can be used in code that treats it as if it were its superclass. For example, we might want to write a function that calculates the total square footage of an array of buildings. For this function, we don't care what specific type of building it is, we just need to have access to the squareFootage property that is defined in the superclass. We can define our function to take an array of buildings and the actual array can contain House instances:
This provides us with an even more powerful abstraction tool than the one we had when using structures. For example, let's consider a hypothetical class hierarchy of images. We might have a base class called Image with subclasses for the different types of encodings like JPGImage and PNGImage. It is great to have the subclasses so that we can cleanly support multiple types of images but, once the image is loaded, we no longer need to be concerned with the type of encoding the image is saved in. Every other class that wants to manipulate or display the image can do so with a well-defined image superclass; the encoding of the image has been abstracted away from the rest of the code. Not only does this create easier to understand code but it also makes maintenance much easier. If we need to add another image encoding like
GIF, we can create another subclass and all the existing manipulation and display code can get GIF support with no changes to that code.
There are actually two different types of casting. So far, we have only seen the type of casting called upcasting. Predictably, the other type of casting is called downcasting.
What we have seen so far is called upcasting because we are going up the class tree that we visualized earlier by treating a subclass as its superclass. Previously, we upcasted by assigning a subclass instance to a variable that was defined as its superclass. We could do the same thing using the as operator instead, like this:
It is really personal preference as to which you should use.
Downcasting means that we treat a superclass as one of its subclasses.
While upcasting can be done implicitly by using it in a function declared to use its superclass or by assigning it to a variable with its superclass type, downcasting must be done explicitly. This is because upcasting cannot fail based on the nature of its inheritance, but downcasting can. You can always treat a subclass as its superclass but you cannot guarantee that a superclass is, in fact, one of its specific subclasses. You can only downcast an instance that is, in fact, an instance of that class or one of its subclasses.
have already talked about how classes are great for sharing functionality between a hierarchy of types. Another thing that makes classes powerful is that they allow code to interact with multiple types in a more general way. Any subclass can be used in code that treats it as if it were its superclass. For example, we might want to write a function that calculates the total square footage of an array of buildings. For this function, we don't care what specific type of building it is, we just need to have access to the squareFootage property that is defined in the superclass. We can define our function to take an array of buildings and the actual array can contain House instances:
This provides us with an even more powerful abstraction tool than the one we had when using structures. For example, let's consider a hypothetical class hierarchy of images. We might have a base class called Image with subclasses for the different types of encodings like JPGImage and PNGImage. It is great to have the subclasses so that we can cleanly support multiple types of images but, once the image is loaded, we no longer need to be concerned with the type of encoding the image is saved in. Every other class that wants to manipulate or display the image can do so with a well-defined image superclass; the encoding of the image has been abstracted away from the rest of the code. Not only does this create easier to understand code but it also makes maintenance much easier. If we need to add another image encoding like
GIF, we can create another subclass and all the existing manipulation and display code can get GIF support with no changes to that code.
There are actually two different types of casting. So far, we have only seen the type of casting called upcasting. Predictably, the other type of casting is called downcasting.
What we have seen so far is called upcasting because we are going up the class tree that we visualized earlier by treating a subclass as its superclass. Previously, we upcasted by assigning a subclass instance to a variable that was defined as its superclass. We could do the same thing using the as operator instead, like this:
It is really personal preference as to which you should use.
Downcasting means that we treat a superclass as one of its subclasses.
While upcasting can be done implicitly by using it in a function declared to use its superclass or by assigning it to a variable with its superclass type, downcasting must be done explicitly. This is because upcasting cannot fail based on the nature of its inheritance, but downcasting can. You can always treat a subclass as its superclass but you cannot guarantee that a superclass is, in fact, one of its specific subclasses. You can only downcast an instance that is, in fact, an instance of that class or one of its subclasses.
we have seen so far is called upcasting because we are going up the class tree that we visualized earlier by treating a subclass as its superclass. Previously, we upcasted by assigning a subclass instance to a variable that was defined as its superclass. We could do the same thing using the as operator instead, like this:
It is really personal preference as to which you should use.
Downcasting means that we treat a superclass as one of its subclasses.
While upcasting can be done implicitly by using it in a function declared to use its superclass or by assigning it to a variable with its superclass type, downcasting must be done explicitly. This is because upcasting cannot fail based on the nature of its inheritance, but downcasting can. You can always treat a subclass as its superclass but you cannot guarantee that a superclass is, in fact, one of its specific subclasses. You can only downcast an instance that is, in fact, an instance of that class or one of its subclasses.
means that we treat a superclass as one of its subclasses.
While upcasting can be done implicitly by using it in a function declared to use its superclass or by assigning it to a variable with its superclass type, downcasting must be done explicitly. This is because upcasting cannot fail based on the nature of its inheritance, but downcasting can. You can always treat a subclass as its superclass but you cannot guarantee that a superclass is, in fact, one of its specific subclasses. You can only downcast an instance that is, in fact, an instance of that class or one of its subclasses.
So far, we have covered two of the three types of classification in Swift: structure and class. The third classification is called enumeration. Enumerations are used to define a group of related values for an instance. For example, if we want values to represent one of the three primary colors, an enumeration is a great tool.
An enumeration is made up of cases much like a switch and uses the keyword enum instead of struct or class. An enumeration for primary colors should look like this:
You can then define a variable with this type and assign it one of the cases:
Enumeration instances can be tested for a specific value as with any other type, using the equality operator (==):
This method of comparison is familiar and useful for one or two possible values. However, there is a better way to test an enumeration for different values. Instead of using an if statement, you can use a switch. This is a logical solution considering that enumerations are made up of cases and switches test for cases:
Enumerations are great because they provide the ability to store information that is not based on the basic types provided by Swift such as strings, integers, and doubles. There are many abstract concepts like our color example, that are not at all related to a basic type. However, you often want each enumeration case to have a raw value that is another type. For example, if we wanted to represent all of the coins in United States currency along with their monetary value, we could make our enumeration have an integer raw value type, like this:
The raw value type is specified in the same way that inheritance is specified with classes and then each case is individually assigned a specific value of that type.
You can access the raw value of a case at any time by using the rawValue property:
Raw values are great for when every case in your enumeration has the same type of value associated with it and its value never changes. However, there are also scenarios where each case has different values associated with it and those values are different for each instance of the enumeration. You may even want a case that has multiple values associated with it. To do this, we use a feature of enumerations called associated values.
In the imperial case, the preceding code assigned feet to a temporary constant and inches to a temporary variable. The names match the labels used for the associated values but that is not necessary. The metric case shows that, if you want all of the temporary values to be constant, you can declare let before the enumeration case. No matter how many associated values there are, let only has to be written once instead of once for every value. The other case is the same as the metric case except that it creates a temporary variable instead of a constant.
This shows you that, with enumerations, switches have even more power than we saw previously.
Now that you understand how to use associated values, you might have noticed that they can change the conceptual nature of enumerations. Without associated values, an enumeration represents a list of abstract and constant possible values. An enumeration with associated values is different because two instances with the same case are not necessarily equal; each case could have different associated values. This means that the conceptual nature of enumerations is really a list of ways to look at a certain type of information. This is not a concrete rule but it is common and it gives you a better idea of the different types of information that can best be represented by enumerations. It will also help you make your own enumerations more understandable. Each case could theoretically represent a completely unrelated concept from the rest of the cases using associated values but that should be a sign that an enumeration may not be the best tool for that particular job.
Enumerations are actually very similar to structures. As with structures, enumerations can have methods and properties. To improve the Height enumeration, we could add methods to access the height in any measurement system we wanted. As an example, let's implement a meters method, as follows:
You now have a great overview of all of the different ways in which we can organize Swift code in a single file to make the code more understandable and maintainable. It is now time to discuss how we can separate our code into multiple files to improve it even more.
are great because they provide the ability to store information that is not based on the basic types provided by Swift such as strings, integers, and doubles. There are many abstract concepts like our color example, that are not at all related to a basic type. However, you often want each enumeration case to have a raw value that is another type. For example, if we wanted to represent all of the coins in United States currency along with their monetary value, we could make our enumeration have an integer raw value type, like this:
The raw value type is specified in the same way that inheritance is specified with classes and then each case is individually assigned a specific value of that type.
You can access the raw value of a case at any time by using the rawValue property:
Raw values are great for when every case in your enumeration has the same type of value associated with it and its value never changes. However, there are also scenarios where each case has different values associated with it and those values are different for each instance of the enumeration. You may even want a case that has multiple values associated with it. To do this, we use a feature of enumerations called associated values.
In the imperial case, the preceding code assigned feet to a temporary constant and inches to a temporary variable. The names match the labels used for the associated values but that is not necessary. The metric case shows that, if you want all of the temporary values to be constant, you can declare let before the enumeration case. No matter how many associated values there are, let only has to be written once instead of once for every value. The other case is the same as the metric case except that it creates a temporary variable instead of a constant.
This shows you that, with enumerations, switches have even more power than we saw previously.
Now that you understand how to use associated values, you might have noticed that they can change the conceptual nature of enumerations. Without associated values, an enumeration represents a list of abstract and constant possible values. An enumeration with associated values is different because two instances with the same case are not necessarily equal; each case could have different associated values. This means that the conceptual nature of enumerations is really a list of ways to look at a certain type of information. This is not a concrete rule but it is common and it gives you a better idea of the different types of information that can best be represented by enumerations. It will also help you make your own enumerations more understandable. Each case could theoretically represent a completely unrelated concept from the rest of the cases using associated values but that should be a sign that an enumeration may not be the best tool for that particular job.
Enumerations are actually very similar to structures. As with structures, enumerations can have methods and properties. To improve the Height enumeration, we could add methods to access the height in any measurement system we wanted. As an example, let's implement a meters method, as follows:
You now have a great overview of all of the different ways in which we can organize Swift code in a single file to make the code more understandable and maintainable. It is now time to discuss how we can separate our code into multiple files to improve it even more.
are great for when every case in your enumeration has the same type of value associated with it and its value never changes. However, there are also scenarios where each case has different values associated with it and those values are different for each instance of the enumeration. You may even want a case that has multiple values associated with it. To do this, we use a feature of enumerations called associated values.
In the imperial case, the preceding code assigned feet to a temporary constant and inches to a temporary variable. The names match the labels used for the associated values but that is not necessary. The metric case shows that, if you want all of the temporary values to be constant, you can declare let before the enumeration case. No matter how many associated values there are, let only has to be written once instead of once for every value. The other case is the same as the metric case except that it creates a temporary variable instead of a constant.
This shows you that, with enumerations, switches have even more power than we saw previously.
Now that you understand how to use associated values, you might have noticed that they can change the conceptual nature of enumerations. Without associated values, an enumeration represents a list of abstract and constant possible values. An enumeration with associated values is different because two instances with the same case are not necessarily equal; each case could have different associated values. This means that the conceptual nature of enumerations is really a list of ways to look at a certain type of information. This is not a concrete rule but it is common and it gives you a better idea of the different types of information that can best be represented by enumerations. It will also help you make your own enumerations more understandable. Each case could theoretically represent a completely unrelated concept from the rest of the cases using associated values but that should be a sign that an enumeration may not be the best tool for that particular job.
Enumerations are actually very similar to structures. As with structures, enumerations can have methods and properties. To improve the Height enumeration, we could add methods to access the height in any measurement system we wanted. As an example, let's implement a meters method, as follows:
You now have a great overview of all of the different ways in which we can organize Swift code in a single file to make the code more understandable and maintainable. It is now time to discuss how we can separate our code into multiple files to improve it even more.
If we want to move away from developing with a single file, we need to move away from playgrounds and create our first project. In order to simplify the project, we are going to create a command-line tool. This is a program without a graphical interface. As an exercise, we will redevelop our example program from Chapter 2, Building Blocks – Variables, Collections, and Flow Control which managed invitees to a party. We will develop an app with a graphical interface in Chapter 11, A Whole New World – Developing an App.
To create a new command-line tool project, open Xcode and from the menu bar on the top, select File | New | Project…. A window will appear allowing you to select a template for the project. You should choose Command Line Tool from the OS X | Application menu:

From there, click Next and then give the project a name like Learning Swift Command Line. Any Organization Name and Identifier are fine. Finally, make sure that Swift is selected from the Language dropdown and click Next again. Now, save the project somewhere that you can find later and click Create.

This should feel pretty similar to a playground except that we can no longer see the output of the code on the right. In a regular project like this, the code is not run automatically for you. The code will still be analyzed for errors as you write it, but you must run it yourself whenever you want to test it. To run the code, you can click the run button on the toolbar, which looks like a play button.
Now that we have successfully created our command-line project, let's create our first new file. It is common to create a separate file for each type that you create. Let's start by creating a file for an invitee class. We want to add the file to the same file group as the main.swift file, so click on that group. You can then click on the plus sign (+) in the lower left of the window and select New File. From that window, select OS X | Source | Swift File and click Next:

The new file will be placed in whatever folder was selected before entering the dialog. You can always drag a file around to organize it however you want. A great place for this file is next to main.swift. Name your new file Invitee.swift and click Create. Let's add a simple Invitee structure to this file. We want Invitee to have a name and to be able to ask them to the party with or without a show:
An important principle in code design is called separation of concerns. The idea is that every file and every type should have a clear and well-defined concern. You should avoid having two files or types responsible for the same thing and you want it to be clear why each file and type exists.
Now that we have our basic data structures, we can use a smarter container for our list of invitees. This list contains the logic for assigning a random invitee a genre. Let's start by defining the structure with some properties:
This makes our other methods cleaner and easier to understand. The first thing we want to allow is the inviting of a random invitee and then asking them to bring a show from a specific genre:
Lastly, we want to be able to invite everyone else to just bring themselves:
We now have all of our custom types and we can return to the main.swift file to finish the logic of the program. To switch back, you can just click on the file again in Project Navigator (the list of files on the left). Here, all we want to do is to create our invitee list and a list of genres with example shows. Then, we can loop through our genres and ask our invitee list to do the inviting:
As your project gets larger, it can be cumbersome to have just one single list of files. It helps to organize your files into folders to help differentiate which role they are playing in your app. In Project Navigator, folders are called groups. You can create a new group by selecting the group you would like to add the new group to, and going to File | New | Group. It isn't terribly important exactly how you group your files; the important thing is that you should be able to come up with a relatively simple system that makes sense. If you are having trouble doing that, you should consider how you could improve the way you are breaking up your code. If you are having trouble categorizing your files, then your code is probably not being broken up in a maintainable way.
I would recommend using lots of files and groups to better separate your code. However, the drawback of that is that Project Navigator can fill up pretty quickly and become hard to navigate around. A great trick in Xcode to navigate to files more quickly is to use the keyboard shortcut Command + Shift + O. This displays the Open Quickly search. Here, you can start to type the name of the file you want to open and Xcode shows you all of the matching files. Use the arrow keys to navigate up and down and press Enter to open the file you want.
From there, click Next and then give the project a name like Learning Swift Command Line. Any Organization Name and Identifier are fine. Finally, make sure that Swift is selected from the Language dropdown and click Next again. Now, save the project somewhere that you can find later and click Create.
This should feel pretty similar to a playground except that we can no longer see the output of the code on the right. In a regular project like this, the code is not run automatically for you. The code will still be analyzed for errors as you write it, but you must run it yourself whenever you want to test it. To run the code, you can click the run button on the toolbar, which looks like a play button.
Now that we have successfully created our command-line project, let's create our first new file. It is common to create a separate file for each type that you create. Let's start by creating a file for an invitee class. We want to add the file to the same file group as the main.swift file, so click on that group. You can then click on the plus sign (+) in the lower left of the window and select New File. From that window, select OS X | Source | Swift File and click Next:
The new file will be placed in whatever folder was selected before entering the dialog. You can always drag a file around to organize it however you want. A great place for this file is next to main.swift. Name your new file Invitee.swift and click Create. Let's add a simple Invitee structure to this file. We want Invitee to have a name and to be able to ask them to the party with or without a show:
An important principle in code design is called separation of concerns. The idea is that every file and every type should have a clear and well-defined concern. You should avoid having two files or types responsible for the same thing and you want it to be clear why each file and type exists.
Now that we have our basic data structures, we can use a smarter container for our list of invitees. This list contains the logic for assigning a random invitee a genre. Let's start by defining the structure with some properties:
This makes our other methods cleaner and easier to understand. The first thing we want to allow is the inviting of a random invitee and then asking them to bring a show from a specific genre:
Lastly, we want to be able to invite everyone else to just bring themselves:
We now have all of our custom types and we can return to the main.swift file to finish the logic of the program. To switch back, you can just click on the file again in Project Navigator (the list of files on the left). Here, all we want to do is to create our invitee list and a list of genres with example shows. Then, we can loop through our genres and ask our invitee list to do the inviting:
As your project gets larger, it can be cumbersome to have just one single list of files. It helps to organize your files into folders to help differentiate which role they are playing in your app. In Project Navigator, folders are called groups. You can create a new group by selecting the group you would like to add the new group to, and going to File | New | Group. It isn't terribly important exactly how you group your files; the important thing is that you should be able to come up with a relatively simple system that makes sense. If you are having trouble doing that, you should consider how you could improve the way you are breaking up your code. If you are having trouble categorizing your files, then your code is probably not being broken up in a maintainable way.
I would recommend using lots of files and groups to better separate your code. However, the drawback of that is that Project Navigator can fill up pretty quickly and become hard to navigate around. A great trick in Xcode to navigate to files more quickly is to use the keyboard shortcut Command + Shift + O. This displays the Open Quickly search. Here, you can start to type the name of the file you want to open and Xcode shows you all of the matching files. Use the arrow keys to navigate up and down and press Enter to open the file you want.
successfully created our command-line project, let's create our first new file. It is common to create a separate file for each type that you create. Let's start by creating a file for an invitee class. We want to add the file to the same file group as the main.swift file, so click on that group. You can then click on the plus sign (+) in the lower left of the window and select New File. From that window, select OS X | Source | Swift File and click Next:
The new file will be placed in whatever folder was selected before entering the dialog. You can always drag a file around to organize it however you want. A great place for this file is next to main.swift. Name your new file Invitee.swift and click Create. Let's add a simple Invitee structure to this file. We want Invitee to have a name and to be able to ask them to the party with or without a show:
An important principle in code design is called separation of concerns. The idea is that every file and every type should have a clear and well-defined concern. You should avoid having two files or types responsible for the same thing and you want it to be clear why each file and type exists.
Now that we have our basic data structures, we can use a smarter container for our list of invitees. This list contains the logic for assigning a random invitee a genre. Let's start by defining the structure with some properties:
This makes our other methods cleaner and easier to understand. The first thing we want to allow is the inviting of a random invitee and then asking them to bring a show from a specific genre:
Lastly, we want to be able to invite everyone else to just bring themselves:
We now have all of our custom types and we can return to the main.swift file to finish the logic of the program. To switch back, you can just click on the file again in Project Navigator (the list of files on the left). Here, all we want to do is to create our invitee list and a list of genres with example shows. Then, we can loop through our genres and ask our invitee list to do the inviting:
As your project gets larger, it can be cumbersome to have just one single list of files. It helps to organize your files into folders to help differentiate which role they are playing in your app. In Project Navigator, folders are called groups. You can create a new group by selecting the group you would like to add the new group to, and going to File | New | Group. It isn't terribly important exactly how you group your files; the important thing is that you should be able to come up with a relatively simple system that makes sense. If you are having trouble doing that, you should consider how you could improve the way you are breaking up your code. If you are having trouble categorizing your files, then your code is probably not being broken up in a maintainable way.
I would recommend using lots of files and groups to better separate your code. However, the drawback of that is that Project Navigator can fill up pretty quickly and become hard to navigate around. A great trick in Xcode to navigate to files more quickly is to use the keyboard shortcut Command + Shift + O. This displays the Open Quickly search. Here, you can start to type the name of the file you want to open and Xcode shows you all of the matching files. Use the arrow keys to navigate up and down and press Enter to open the file you want.
gets larger, it can be cumbersome to have just one single list of files. It helps to organize your files into folders to help differentiate which role they are playing in your app. In Project Navigator, folders are called groups. You can create a new group by selecting the group you would like to add the new group to, and going to File | New | Group. It isn't terribly important exactly how you group your files; the important thing is that you should be able to come up with a relatively simple system that makes sense. If you are having trouble doing that, you should consider how you could improve the way you are breaking up your code. If you are having trouble categorizing your files, then your code is probably not being broken up in a maintainable way.
I would recommend using lots of files and groups to better separate your code. However, the drawback of that is that Project Navigator can fill up pretty quickly and become hard to navigate around. A great trick in Xcode to navigate to files more quickly is to use the keyboard shortcut Command + Shift + O. This displays the Open Quickly search. Here, you can start to type the name of the file you want to open and Xcode shows you all of the matching files. Use the arrow keys to navigate up and down and press Enter to open the file you want.
Up until this point, we had to define our entire custom type in a single file. However, it is sometimes useful to separate out part of our custom types into different files, or even just in the same file. To achieve this, Swift provides a feature called extensions. Extensions allow us to add additional functionality to existing types from anywhere.
This functionality is limited to additional functions and additional computed properties:
This is just one simple idea, but it is often incredibly useful to extend the built-in types.
Now that we have a good overview of what tools we have at our disposal for organizing our code, it is time to discuss an important concept in programming called scope.
Scope is all about which code has access to which other pieces of code. Swift makes it relatively easy to understand because all scope is defined by curly brackets ({}). Essentially, code in curly brackets can only access other code in the same curly brackets.
To illustrate scope, let's look at some simple code:
As you can see, outer can be accessed from both in and out of the if statement. However, since inner was defined in the curly brackets of the if statement, it cannot be accessed from outside of them. This is true of structs, classes, loops, functions, and any other structure that involves curly brackets. Everything that is not in curly brackets is considered to be at
global scope, meaning that anything can access it.
Sometimes, it is useful to control scope yourself. To do this, you can define types within other types:
This can be useful to better segment your code but it is also great for hiding code that is not useful to any code outside other code. As you program in bigger projects, you will start to rely on Xcode's autocomplete feature more and more. In big code bases, autocomplete offers a lot of options, and nesting types into other types is a great way to reduce unnecessary clutter in the autocomplete list.
scope, let's look at some simple code:
As you can see, outer can be accessed from both in and out of the if statement. However, since inner was defined in the curly brackets of the if statement, it cannot be accessed from outside of them. This is true of structs, classes, loops, functions, and any other structure that involves curly brackets. Everything that is not in curly brackets is considered to be at
global scope, meaning that anything can access it.
Sometimes, it is useful to control scope yourself. To do this, you can define types within other types:
This can be useful to better segment your code but it is also great for hiding code that is not useful to any code outside other code. As you program in bigger projects, you will start to rely on Xcode's autocomplete feature more and more. In big code bases, autocomplete offers a lot of options, and nesting types into other types is a great way to reduce unnecessary clutter in the autocomplete list.
useful to control scope yourself. To do this, you can define types within other types:
This can be useful to better segment your code but it is also great for hiding code that is not useful to any code outside other code. As you program in bigger projects, you will start to rely on Xcode's autocomplete feature more and more. In big code bases, autocomplete offers a lot of options, and nesting types into other types is a great way to reduce unnecessary clutter in the autocomplete list.
Swift provides another set of tools that helps to control what code other code has access to called access controls. All code is actually given three levels of access control:
This is a fantastic way of improving the idea of abstractions. The simpler the outside view of your code, the easier it is to understand and use your abstraction. You should look at every file and every type as a small abstraction. In any abstraction, you want the outside world to have as little knowledge of the inner workings of it as possible. You should always keep in mind how you want your abstraction to be used and hide any code that does not serve that purpose. This is because code becomes harder and harder to understand and maintain as the walls between different parts of the code break down. You will end up with code that resembles a bowl of pasta. In the same way that it can be difficult to find where one noodle starts and ends, code with lots of interdependencies and minimal barriers between code components is very hard to make sense of. An abstraction that provides too much knowledge or access about its internal workings is often called a leaky abstraction.
Public code is defined in the same way, except that you would use the public keyword instead of private. However, since we will not study designing your own modules, this is not useful to us. It is good to know it exists for future learning but the default
internal access level is enough for our apps.
As we discussed in Chapter 2, Building Blocks – Variables, Collections, and Flow Control, all variables and constants must always have a value before they are used. This is a great safety feature because it prevents you from creating a scenario where you forget to give a variable an initial value. It may make sense for some number variables, such as the number of sandwiches ordered to start at zero, but it doesn't make sense for all variables. For example, the number of bowling pins standing should start at 10, not zero. In Swift, the compiler forces you to decide what the variable should start at, instead of providing a default value that could be incorrect.
However, there are other scenarios where you will have to represent the complete absence of a value. A great example is if you have a dictionary of word definitions and you try to lookup a word that isn't in the dictionary. Normally, this will return a String, so you could potentially return an empty String, but what if you also need to represent the idea that a word exists without a definition? Also, for another programmer who is using your dictionary, it will not be immediately obvious what will happen when they look up a word that doesn't exist. To satisfy this need to represent the absence of a value, Swift has a special type called an optional.
In this chapter, we will cover the following topics:
So we know that the purpose of optionals in Swift is to allow the representation of the absence of a value, but what does that look like and how does it work? An optional is a special type that can "wrap" any other type. This means that you can make an optional String, optional Array, and so on. You can do this by adding a question mark (?) to the type name, as shown:
Note that this code does not specify any initial values. This is because all optionals, by default, are set to no value at all. If we want to provide an initial value we can do so similar to any other variable:
You can see all the forms a variable can take by putting the following code into a playground:
You can even remove the value within an optional by assigning it to nil:
There are multiple ways to unwrap an optional. All of them essentially assert that there is truly a value within the optional. This is a wonderful safety feature of Swift. The compiler forces you to consider the possibility that an optional lacks any value at all. In other languages, this is a very commonly overlooked scenario that can cause obscure bugs.
The safest way to unwrap an optional is to use something called optional binding. With this technique, you can assign a temporary constant or variable to the value contained within the optional. This process is contained within an if statement, so that you can use an else statement when there is no value. Optional binding looks similar to the following code:
We can also use a temporary variable in an optional binding:
Now, the value wrapped inside possibleInt has actually been updated.
This generally produces more readable code.
This construct allows us to access the unwrapped values after the guard statement, because the guard statement guarantees that we would have exited the function before reaching that code, if the optional value was nil.
This way of unwrapping is great, but saying that optional binding is the safest way to access the value within an optional, implies that there is an unsafe way to unwrap an optional. This way is called forced unwrapping.
The shortest way to unwrap an optional is to use forced unwrapping. It is done using an exclamation mark (!) after the variable name when being used:
Here, we have defined a superclass called FileSystemItem that both File and Directory inherit from. The content of a directory is a list of FileSystemItem. We define contents as a calculated variable and store the real value within the realContents property. The calculated property checks if there is a value loaded for realContents; if there isn't, it loads the contents and puts them into the realContents property. Based on this logic, we know for 100% certainty that there will be a value within realContents by the time we get to the return statement, so it is perfectly safe to use forced unwrapping.
In addition to optional binding and forced unwrapping, Swift also provides an operator called the
nil coalescing operator to unwrap an optional. This is represented by a double question mark (??). Basically, this operator lets us provide a default value for a variable or operation result, in case it is nil. This is a safe way to turn an optional value into a non-optional value and it would look similar to the following code:
to optional binding and forced unwrapping, Swift also provides an operator called the
nil coalescing operator to unwrap an optional. This is represented by a double question mark (??). Basically, this operator lets us provide a default value for a variable or operation result, in case it is nil. This is a safe way to turn an optional value into a non-optional value and it would look similar to the following code:
A common scenario in Swift is to have an optional that you must calculate something from. If the optional has a value, you will want to store the result of the calculation on it, but if it is nil, the result should just be set to nil:
This is pretty verbose. To shorten this up in an unsafe way, we could use forced unwrapping:
You can chain as many calls as you want, both optional and non-optional, together in this way:
If the chain makes it all the way to uppercaseString, there is no longer a failure path and it will definitely return an actual value. You will notice that there are exactly two question marks being used in this chain and there are two possible failure reasons.
We also have the case where we try to use an optional chain inappropriately:
There is a second type of optional called an implicitly unwrapped optional. There are really two ways to look at what an implicitly unwrapped optional is; one way is to say that it is a normal variable that can also be nil; the other way is to say that it is an optional that you don't have to unwrap to use. The important thing to understand about them is that, similar to optionals, they can be nil, but you do not have to unwrap them like a normal variable.
You can define an implicitly unwrapped optional with an exclamation mark (!) instead of a question mark (?) after the type name:
Notice that we have actually declared two implicitly unwrapped optionals. The first is a connection to a button. We know that this is a connection because it is preceded by @IBOutlet. This is declared as an implicitly unwrapped optional because connections are not set up until after initialization, but they are still guaranteed to be set up before any other methods are called on the view.
You may have noticed that we had to dive pretty deep into app development to find a valid use case for implicitly unwrapped optionals and this is arguably only because UIKit is implemented in Objective-C, as we will learn more about in Chapter 10, Harnessing the Past – Understanding and Translating Objective-C. This is another testament to the fact that they should be used sparingly.
We have already seen a couple of the compiler errors we will commonly see because of optionals. If we try to call a method on an optional that we intended to call on the wrapped value, we will get an error. If we try to unwrap a value that is not actually optional, we will also get an error. We also need to be prepared for the runtime errors that optionals can cause.
When an app tries to unwrap a nil value, if you are currently debugging the app, Xcode will show you the line that is trying to do the unwrapping. The line will report that there was an EXC_BAD_INSTRUCTION error and you will also get a message in the console saying fatal error: unexpectedly found nil while unwrapping an Optional value:


Here, you can click around different levels of code to see the state of things. This will become even more important if the program is crashing within one of Apple's framework, where you do not have access to the code. In that case, you will want to move up the call stack to the point where your code called into the framework. You may also be able to look at the names of the functions to help you figure out what may have gone wrong.
Anywhere on the call stack, you can look at the state of the variables in the debugger, as shown:

As powerful as the debugger is, if you find that it isn't helping you find the problem, you can always put print statements in important parts of the code. It is always safe to print out an optional, as long as you don't forcefully unwrap it as shown in the preceding example. As we have seen before, when an optional is printed, it will print nil if it doesn't have a value, or it will print Optional(<value>) if it has a value.
At this point, you should have a pretty strong grasp of what an optional is and how to use and debug it, but it will be valuable to look a little deeper at optionals to see how they actually work.
The one part of this that you have not seen yet is the angled bracket syntax (<T>). This is called a generic and it essentially allows the enumeration to have an associated value of any type. We will cover generics in-depth in Chapter 6, Make Swift Work For You – Protocols and Generics.
Realizing that optionals are simply enumerations will help you understand how to use them. It also gives you some insight into how concepts are built on top of other concepts. Optionals seem really complex until you realize that they are just a two case enumeration. Once you understand enumerations, you can pretty easily understand optionals as well.
So far, we have been programming using the paradigm called object-oriented programming, where everything in a program is represented as an object that can be manipulated and passed around to other objects. This is the most popular way to create apps because it is a very intuitive way to think about software and it goes well with the way Apple has designed their frameworks. However, there are some drawbacks to this technique. The biggest one is that the state of data can be very hard to track and reason about. If we have a thousand different objects floating around in our app, all with different information, it can be hard to track down where the bugs occurred and it can be hard to understand how the whole system fits together. Another paradigm of programming that can help with this problem is called functional programming.
Before we jump into writing code, let's discuss the ideas and motivations behind functional programming.
Functional programming makes it significantly easier to think of each component in isolation. This includes things such as types, functions, and methods. If we can wrap our minds around everything that is input into these code components and everything that should be returned from them, we could analyze the code easily to ensure that there are no bugs and it performs well. Every type is created with a certain number of parameters and each method and function in a program has a certain number of parameters and return values. Normally, we think about these as the only inputs and outputs, but the reality is that often there are more. We refer to these extra inputs and outputs as state.
This is a great example of a
stateless function. No matter what else is happening in the entire universe of the program, this method will always return the same value, if it is given the same input. An input of 2 will always return 4.
Now, let's look at a method with state:
Side effects are an even worse type of extra input or output. They are the unexpected changes to state, seemingly unrelated to the code being run. If we simply rename our preceding method to something a little less clear, its effect on the instance becomes unexpected:
Besides predictability, the other effect that functional programming has on our code is that it becomes more declarative. This means that the code shows us how we expect information to flow through our application. This is in contrast to what we have been doing with object-oriented programming, which we call imperative code. This is the difference between writing a code that loops through an array to add only certain elements to a new array and running a filter on the array. The former would look similar to this:
Running a filter on the array would look similar to this:
So far, with our imperative code, most of it just defines what our data should look like and how it can be manipulated. Even with high quality abstractions, understanding a section of code can often involve jumping between lots of methods, tracing the execution. In declarative code, logic can be more centralized and often more easily read, based on well-named methods.
In Swift, functions are considered first-class citizens, which means that they can be treated the same as any other type. They can be assigned to variables and be passed in and out of other functions. When treated this way, we call them closures. This is an extremely critical piece to write more declarative code because it allows us to treat functionalities like objects. Instead of thinking of functions as a collection of code to be executed, we can start to think about them more like a recipe to get something done. Just like you can give just about any recipe to a chef to cook, you can create types and methods that take a closure to perform some customizable behavior.
Let's take a look at how closures work in Swift. The simplest way to capture a closure in a variable is to define the function and then use its name to assign it to a variable:
As you can see, doubleClosure can be used just like the normal function name after being assigned. There is actually no difference between using double and doubleClosure. Note that we can now think of this closure as an object that will double anything passed to it.
Using this syntax, we can also define our closure inline, such as:
We can define a function to take a closure as a parameter, using the same type syntax we saw previously:
Here, we have a function that can find the first number in an array that passes some arbitrary test. The syntax at the end of the function declaration may be confusing but it should be clear if you work from the inside out. The type for passingTest is (number: Int) -> Bool. That is then the second parameter of the whole firstInNumbers function, which returns an Int?. If we want to use this function to find the first number greater than three, we can create a custom test and pass that into the function:
We can even define our test right in a call to the function:
First, we can make use of type inference for the type of number. The compiler knows that number needs to be Int based on the definition of firstInNumbers:passingTest:. It also knows that the closure has to return Bool. Now, we can rewrite our call, as shown:
This looks cleaner, but the parentheses around number are not required; we could leave those out. In addition, if we have closure as the last parameter of a function, we can provide the closure outside the parentheses for the function call:
This makes it clear that the closure is a test to see which number we want to pull out of the list.
define a function to take a closure as a parameter, using the same type syntax we saw previously:
Here, we have a function that can find the first number in an array that passes some arbitrary test. The syntax at the end of the function declaration may be confusing but it should be clear if you work from the inside out. The type for passingTest is (number: Int) -> Bool. That is then the second parameter of the whole firstInNumbers function, which returns an Int?. If we want to use this function to find the first number greater than three, we can create a custom test and pass that into the function:
We can even define our test right in a call to the function:
First, we can make use of type inference for the type of number. The compiler knows that number needs to be Int based on the definition of firstInNumbers:passingTest:. It also knows that the closure has to return Bool. Now, we can rewrite our call, as shown:
This looks cleaner, but the parentheses around number are not required; we could leave those out. In addition, if we have closure as the last parameter of a function, we can provide the closure outside the parentheses for the function call:
This makes it clear that the closure is a test to see which number we want to pull out of the list.
The first thing to realize is that Swift is not a functional programming language. At its core, it will always be an object-oriented programming language. However, since functions in Swift are first-class citizens, we can use some of the core techniques. Swift provides some built-in methods to get us started.
The first method we are going to discuss is called filter. As the name suggests, this method is used to filter elements in a list. For example, we can filter our numbers array to include only even numbers:
Swift also provides a method called reduce. The purpose of reduce is to condense a list down to a single value. Reduce works by iterating over every value and combining it with a single value that represents all previous elements. This is just like mixing a bunch of ingredients in a bowl for a recipe. We will take one ingredient at a time and combine it in the bowl until we are left with just a single bowl of ingredients.
Reduce is another great vocabulary item to add to our skill-set. It can reduce any list of information into a single value by analyzing data to generate a document from a list of images and much more.
Map is a method to transform every element in a list to another value. For example, we can add one to every number in the list:
The map method is a great choice to perform calculations on each element of a list, but it should be used only when it makes sense to put the result of the calculation back into a list. You could technically use it to iterate through a list and perform some other action, but in that case, a for-in loop is more appropriate.
The last built-in functional method we will discuss is called sorted. As the name suggests, sorted allows you to change the order of a list. For example, if we want to reorder our numbers list to go from largest to smallest:
There are more built-in functional methods and we will learn to write our own in the next chapter on generics, but these are a core few to help you start thinking about certain problems in a functional way. So how do these methods help us avoid state?
You can also see that complex transformations can all be declared in a concise and centralized place. A reader of the code doesn't need to trace the changing values of many variables; they can simply look at the code and see what processes it will go through.
A powerful feature of Swift is the ability to make these operations lazily evaluated. This means that, just like a lazy person would do, a value is only calculated when it is absolutely necessary and at the latest point possible.
This even applies to looping through a result:
Each number is converted to a string only upon the next iteration of the for-in loop. If we were to break out of that loop early, the rest of the values would not be calculated. This is a great way to save processing time, especially on large lists.
Let's take a look at what this looks like in practice. We can use some of the techniques we learned in this chapter to write a different and possibly better implementation of our party inviter.
We can start by defining the same input data:
So let's write the random genre function:
Now we can use that function to map the invitees to a list of invitations:
Here we try to pick a random genre. If we can't, we return an invitation saying that the invitee should just bring themselves. If we can, we return an invitation saying what genre they should bring with the example show. The one new thing to note here is that we are using the sequence "\n" in our string. This is a newline character and it signals that a new line should be started in the text.
Now, all we have to do is add a call to this function to our sequence:
This implementation is not necessarily better than our previous implementations, but it definitely has its advantages. We have taken steps towards reducing the state by implementing it as a series of data transformations. The big hiccup in that is that we are still maintaining state in the genre dictionary. We can certainly do more to eliminate that as well, but this gives you a good idea of how we can start to think about problems in a functional way. The more ways in which we can think about a problem, the higher our odds of coming up with the best solution.
As we learned in Chapter 2, Building Blocks – Variables, Collections, and Flow Control, Swift is a strongly typed language, which means that every piece of data must have a type. Not only can we take advantage of this to reduce the clutter in our code, we can also leverage it to let the compiler catch bugs for us. The earlier we catch a bug, the better. Besides not writing them in the first place, the earliest place where we can catch a bug is when the compiler reports an error.
Two big tools that Swift provides to achieve this are called protocols and generics. Both of them use the type system to make our intentions clear to the compiler so that it can catch more bugs for us.
In this chapter, we will cover the following topics:
The first tool we will look at is protocols. A protocol is essentially a contract that a type can sign, specifying that it will provide a certain interface to other components. This relationship is significantly looser than the relationship a subclass has with its superclass. A protocol does not provide any implementation to the types that implement them. Instead, a type can implement them in any way that they like.
Let's take a look at how we define a protocol, in order to understand them better.
Let's say we have some code that needs to interact with a collection of strings. We don't actually care what order they are stored in and we only need to be able to add and enumerate elements inside the container. One option would be to simply use an array, but an array does way more than we need it to. What if we decide later that we would rather write and read the elements from the file system? Furthermore, what if we want to write a container that would intelligently start using the file system as it got really large? We can make our code flexible enough to do this in the future by defining a string container protocol, which is a loose contract that defines what we need it to do. This protocol might look similar to the following code:
A type "signs the contract" of a protocol in the same way that a class inherits from another class except that structures and enumerations can also implement protocols:
The count property will always just return the number of elements in our strings array. The addString: method can simply add the string to our array. Finally, our enumerateString: method just needs to loop through our array and call the handler with each element.
With this implementation we are doing something slightly strange with the dictionary. We defined it to have no values; it is simply a collection of keys. This allows us to store our strings without any regard to the order they are in.
Protocols can be made more flexible using a feature called type aliases. They act as a placeholder for a type that will be defined later when the protocol is being implemented. For example, instead of creating an interface that specifically includes strings, we can create an interface for a container that can hold any type of value, as shown:
Now, we can create another string bag that uses the new Container protocol with a type alias instead of the StringContainer protocol. To do this, we not only need to implement each of the methods, we also need to give a definition for the type alias, as shown:
The only difference between these two pieces of code is that the type alias has been defined to be an integer in the second case instead of a string. We could use copy and paste to create a container of virtually any type, but as usual, doing a lot of copy and paste is a sign that there is a better solution. Also, you may notice that our new Container protocol isn't actually that useful on its own because with our existing techniques, we can't treat a variable as just a Container. If we are going to interact with an instance that implements this protocol, we need to know what type it has assigned the type alias to.
Swift provides a tool called generics to solve both of these problems.
A generic is very similar to a type alias. The difference is that the exact type of a generic is determined by the context in which it is being used, instead of being determined by the implementing types. This also means that a generic only has a single implementation that must support all possible types. Let's start by defining a generic function.
In Chapter 5, A Modern Paradigm – Closures and Functional Programming, we created a function that helped us find the first number in an array of numbers that passes a test:
This would be great if we only ever dealt with arrays of integers, but clearly it would be helpful to be able to do this with other types. In fact, dare I say, all types? We achieve this very simply by making our function generic. A generic function is declared similar to a normal function, but you include a list of comma-separated placeholders inside angled brackets (<>) at the end of the function name, as shown:
We use this function similarly to any other function, as shown:
So what happens if the type we use in our closure doesn't match the type of array we pass in?
As you can see, we get an error that the types don't match.
You may have noticed that we have actually used generic functions before. All of the built in functions we looked at in Chapter 5, A Modern Paradigm – Closures and Functional Programming, such as map and filter are generic; they can be used with any type.
We have even experienced generic types before. Arrays and dictionaries are also generic. The Swift team didn't have to write a new implementation of array and dictionary for every type that we might want to use inside the containers; they created them as generic types.
Similar to a generic function, a generic type is defined just like a normal type but it has a list of placeholders at the end of its name. Earlier in this chapter, we created our own containers for strings and integers. Let's make a generic version of these containers, as shown:
One interesting case to consider is if we try to initialize a bag with an empty array:
This is great because not only can the compiler determine the generic placeholder types based on the variables we pass to them, it can also determine the type based on how we are using the result.
Before we jump right into solving the problem, let's take a look at a simpler form of type constraints.
Let's say that we want to write a function that can determine the index of an instance within an array using an equality check. Our first attempt will probably look similar to the following code:
A type constraint looks similar to a type implementing a protocol using a colon (:) after a placeholder name. Now, the compiler is satisfied that every possible type can be compared using the equality operator. If we were to try to call this function with a type that is not equatable, the compiler would produce an error:
This is another case where the compiler can save us from ourselves.
Now the compiler is happy and we can start to use our Bag2 struct with any type that is Hashable. We are close to solving our Container problem, but we need a constraint on the type alias of Container, not Container itself. To do that, we can use a where clause.
You can specify any number of where clauses you want after you have defined each placeholder type. They allow you to represent more complicated relationships. If we want to write a function that can check if our container contains a particular value, we can require that the element type is equatable:
Chapter 5, A Modern Paradigm – Closures and Functional Programming, we created a function that helped us find the first number in an array of numbers that passes a test:
This would be great if we only ever dealt with arrays of integers, but clearly it would be helpful to be able to do this with other types. In fact, dare I say, all types? We achieve this very simply by making our function generic. A generic function is declared similar to a normal function, but you include a list of comma-separated placeholders inside angled brackets (<>) at the end of the function name, as shown:
We use this function similarly to any other function, as shown:
So what happens if the type we use in our closure doesn't match the type of array we pass in?
As you can see, we get an error that the types don't match.
You may have noticed that we have actually used generic functions before. All of the built in functions we looked at in Chapter 5, A Modern Paradigm – Closures and Functional Programming, such as map and filter are generic; they can be used with any type.
We have even experienced generic types before. Arrays and dictionaries are also generic. The Swift team didn't have to write a new implementation of array and dictionary for every type that we might want to use inside the containers; they created them as generic types.
Similar to a generic function, a generic type is defined just like a normal type but it has a list of placeholders at the end of its name. Earlier in this chapter, we created our own containers for strings and integers. Let's make a generic version of these containers, as shown:
One interesting case to consider is if we try to initialize a bag with an empty array:
This is great because not only can the compiler determine the generic placeholder types based on the variables we pass to them, it can also determine the type based on how we are using the result.
Before we jump right into solving the problem, let's take a look at a simpler form of type constraints.
Let's say that we want to write a function that can determine the index of an instance within an array using an equality check. Our first attempt will probably look similar to the following code:
A type constraint looks similar to a type implementing a protocol using a colon (:) after a placeholder name. Now, the compiler is satisfied that every possible type can be compared using the equality operator. If we were to try to call this function with a type that is not equatable, the compiler would produce an error:
This is another case where the compiler can save us from ourselves.
Now the compiler is happy and we can start to use our Bag2 struct with any type that is Hashable. We are close to solving our Container problem, but we need a constraint on the type alias of Container, not Container itself. To do that, we can use a where clause.
You can specify any number of where clauses you want after you have defined each placeholder type. They allow you to represent more complicated relationships. If we want to write a function that can check if our container contains a particular value, we can require that the element type is equatable:
we jump right into solving the problem, let's take a look at a simpler form of type constraints.
Let's say that we want to write a function that can determine the index of an instance within an array using an equality check. Our first attempt will probably look similar to the following code:
A type constraint looks similar to a type implementing a protocol using a colon (:) after a placeholder name. Now, the compiler is satisfied that every possible type can be compared using the equality operator. If we were to try to call this function with a type that is not equatable, the compiler would produce an error:
This is another case where the compiler can save us from ourselves.
Now the compiler is happy and we can start to use our Bag2 struct with any type that is Hashable. We are close to solving our Container problem, but we need a constraint on the type alias of Container, not Container itself. To do that, we can use a where clause.
You can specify any number of where clauses you want after you have defined each placeholder type. They allow you to represent more complicated relationships. If we want to write a function that can check if our container contains a particular value, we can require that the element type is equatable:
The two main generics that we will probably want to extend are arrays and dictionaries. These are the two most prominent containers provided by Swift and are used in virtually every app. Extending a generic type is simple once you understand that an extension itself does not need to be generic.
Knowing that an array is declared as struct Array<Element>, your first instinct to extend an array might look something similar to this:
This is more dangerous because the compiler doesn't detect an error. This is wrong because you are actually declaring a new placeholder Element to be used within the method. This new Element has nothing to do with the Element defined in Array itself. For example, you might get a confusing error if you tried to compare a parameter to the method to an element of the Array:
As you can see, we continue to use the placeholder Element within our extension. This allows us to call the passed in test closure for each element in the array. Now, what if we want to be able to add a method that will check if an element exists using the equality operator? The problem that we will run into is that array does not place a type constraint on Element requiring it to be Equatable. To do this, we can add an extra constraint to our extension.
We first discussed how we can extend existing types in Chapter 3, One Piece at a Time – Types, Scopes, and Projects. In Swift 2, Apple added the ability to extend protocols. This has some fascinating implications, but before we dive into those, let's take a look at an example of adding a method to the Comparable protocol:
extension Comparable {
func isBetween(a: Self, b: Self) -> Bool {
return a < self && self < b
}
}This is a really powerful tool. In fact, this is how the Swift team implemented many of the functional methods we saw in Chapter 5, A Modern Paradigm – Closures and Functional Programming. They did not have to implement the map method on arrays, dictionaries, or on any other sequence that should be mappable; instead, they implemented it directly on SequenceType.
This shows that similarly, protocol extensions can be used for inheritance, and it can also be applied to both classes and structures and types can also inherit this functionality from multiple different protocols because there is no limit to the number of protocols a type can implement. However, there are two major differences between the two.
First, types cannot inherit stored properties from protocols, because extensions cannot define them. Protocols can define read only properties but every instance will have to redeclare them as properties:
protocol Building {
var squareFootage: Int {get}
}
struct House: Building {
let squareFootage: Int
}
struct Factory: Building {
let squareFootage: Int
}Second, method overriding does not work in the same way with protocol extensions. With protocols, Swift does not intelligently figure out which version of a method to call based on the actual type of an instance. With class inheritance, Swift will call the version of a method that is most directly associated with the instance. Remember, when we called clean on an instance of our House subclass in Chapter 3, One Piece at a Time – Types, Scopes, and Projects, it calls the overriding version of clean, as shown:
class Building {
// ...
func clean() {
print(
"Scrub \(self.squareFootage) square feet of floors"
)
}
}
class House: Building {
// ...
override func clean() {
print("Make \(self.numberOfBedrooms) beds")
print("Clean \(self.numberOfBathrooms) bathrooms")
}
}
let building: Building = House(
squareFootage: 800,
numberOfBedrooms: 2,
numberOfBathrooms: 1
)
building.clean()
// Make 2 beds
// Clean 1 bathroomWhen we call clean on the house variable which is of type House, it calls the house version; however, when we cast the variable to a Building and then call it, it calls the building version.
how we can extend existing types in Chapter 3, One Piece at a Time – Types, Scopes, and Projects. In Swift 2, Apple added the ability to extend protocols. This has some fascinating implications, but before we dive into those, let's take a look at an example of adding a method to the Comparable protocol:
extension Comparable {
func isBetween(a: Self, b: Self) -> Bool {
return a < self && self < b
}
}This is a really powerful tool. In fact, this is how the Swift team implemented many of the functional methods we saw in Chapter 5, A Modern Paradigm – Closures and Functional Programming. They did not have to implement the map method on arrays, dictionaries, or on any other sequence that should be mappable; instead, they implemented it directly on SequenceType.
This shows that similarly, protocol extensions can be used for inheritance, and it can also be applied to both classes and structures and types can also inherit this functionality from multiple different protocols because there is no limit to the number of protocols a type can implement. However, there are two major differences between the two.
First, types cannot inherit stored properties from protocols, because extensions cannot define them. Protocols can define read only properties but every instance will have to redeclare them as properties:
protocol Building {
var squareFootage: Int {get}
}
struct House: Building {
let squareFootage: Int
}
struct Factory: Building {
let squareFootage: Int
}Second, method overriding does not work in the same way with protocol extensions. With protocols, Swift does not intelligently figure out which version of a method to call based on the actual type of an instance. With class inheritance, Swift will call the version of a method that is most directly associated with the instance. Remember, when we called clean on an instance of our House subclass in Chapter 3, One Piece at a Time – Types, Scopes, and Projects, it calls the overriding version of clean, as shown:
class Building {
// ...
func clean() {
print(
"Scrub \(self.squareFootage) square feet of floors"
)
}
}
class House: Building {
// ...
override func clean() {
print("Make \(self.numberOfBedrooms) beds")
print("Clean \(self.numberOfBathrooms) bathrooms")
}
}
let building: Building = House(
squareFootage: 800,
numberOfBedrooms: 2,
numberOfBathrooms: 1
)
building.clean()
// Make 2 beds
// Clean 1 bathroomWhen we call clean on the house variable which is of type House, it calls the house version; however, when we cast the variable to a Building and then call it, it calls the building version.
One cool part of Swift is generators and sequences. They provide an easy way to iterate over a list of values. Ultimately, they boil down to two different protocols: GeneratorType and SequenceType. If you implement the SequenceType protocol in your custom types, it allows you to use the for-in loop over an instance of your type. In this section, we will look at how we can do that.
The most critical part of this is the GeneratorType protocol. Essentially, a generator is an object that you can repeatedly ask for the next object in a series until there are no objects left. Most of the time you can simply use an array for this, but it is not always the best solution. For example, you can even make a generator that is infinite.
The implementation looks similar to this:
We need to set up some sort of a condition so that the loop doesn't go on forever. In this case, we break out of the loop once the numbers get above 10. However, this code is pretty ugly, so Swift also defines the protocol called SequenceType to clean it up.
SequenceType is another protocol that is defined as having a type alias for a GeneratorType and a method called generate that returns a new generator of that type. We could declare a simple sequence for our FibonacciGenerator, as follows:
In this version of FibonacciSequence, we create a new generator every time generate is called that takes a closure that does the same thing that our original FibonacciGenerator was doing. We declare the values variable outside of the closure so that we can use it to store the state between calls to the closure. If your generator is simple and doesn't require a complicated state, using the AnyGenerator generic is a great way to go.
Now let's use this FibonacciSequence to solve the kind of math problem that computers are great at.
What if we want to know what is the result of multiplying every number in the Fibonacci sequence under 50? We can try to use a calculator and painstakingly enter in all of the numbers, but it is much more efficient to do it in Swift.
Notice that when we refer to the element type, we must go through the generator type.
We can even add an extension to SequenceType with a method that will create a limiter for us:
Now, we can easily limit our Fibonacci sequence to only values under 50:
Almost instantaneously, our program will return the result 2,227,680. Now we can really understand why we call these devices computers.
SequenceType is
In this version of FibonacciSequence, we create a new generator every time generate is called that takes a closure that does the same thing that our original FibonacciGenerator was doing. We declare the values variable outside of the closure so that we can use it to store the state between calls to the closure. If your generator is simple and doesn't require a complicated state, using the AnyGenerator generic is a great way to go.
Now let's use this FibonacciSequence to solve the kind of math problem that computers are great at.
What if we want to know what is the result of multiplying every number in the Fibonacci sequence under 50? We can try to use a calculator and painstakingly enter in all of the numbers, but it is much more efficient to do it in Swift.
Notice that when we refer to the element type, we must go through the generator type.
We can even add an extension to SequenceType with a method that will create a limiter for us:
Now, we can easily limit our Fibonacci sequence to only values under 50:
Almost instantaneously, our program will return the result 2,227,680. Now we can really understand why we call these devices computers.
When using an app, there is nothing worse than it being slow and unresponsive. Computer users have come to expect every piece of software to respond immediately to every interaction. Even the most feature-rich app will be ruined if it is unpleasant to use because it doesn't manage the device resources effectively. Also, with the growing popularity of mobile computers and devices, it is more important than ever to write software that uses battery power efficiently. One of the aspects of writing software that has the largest impact on both responsiveness and battery power is memory management.
Before we start looking at the code, we need to understand in some detail how data is represented in a computer. The common cliché is that all data in a computer is in 1s and 0s. This is true, but not so important when talking about memory management. Instead, we are concerned about where the data is stored. All computers, whether a desktop, laptop, tablet, or phone, store data in two places.
The first place we normally think of is the file system. It is stored on a dedicated piece of hardware; this is called a hard disk drive in many computers, but more recently, some computers have started to use solid-state drives. The other thing we hear about when buying computers is the amount of "memory" it has. Computer memory comes in "sticks" which hold less information than normal drives. All data, even if primarily stored on the Internet somewhere, must be loaded into the computer's memory so that we can interact with it.
Let's take a look at what that means for us as programmers.
The file system is designed for long-term storage of data. It is far slower to access than memory, but it is much more cost effective for storing a lot of data. As the name implies, the file system is simply a hierarchical tree of files, which we as users can interact with directly using the Finder on a Mac. This file system still exists on iPhones and iPads but it is hidden from us. However, software can still read and write the file system, thus allowing us to store data permanently, even after turning the device off.
Memory is a little more complex than the file system. It is designed to store the necessary data, temporarily for the software running currently. Unlike with a file system, all memory is lost as soon as you turn off your device. The analogy is similar to how we humans have short-term and long-term memory. While we are having a conversation or thinking about something, we have a certain subset of the information we are actively thinking about and the rest is in our long-term memory. In order to actively think about something, we have to recall it from our long-term memory into our short-term memory.
This is important to consider when programming because we want to reduce the amount of memory that we use at any given time. Using a lot of memory doesn't only negatively affect our own software; it can negatively affect the entire computer's performance. Also, when the operating system has to resort to using the file system, the extra processing and extra access to a second piece of hardware causes more power usage.
Now that we understand our goal, we can start discussing how we manage memory better in Swift.
All variables and constants in Swift are stored in memory. In fact, unless you explicitly write data to the file system, everything you create is going to be in memory. In Swift, there are two different categories of types. These two categories are value types and reference types. The only way in which they differ is in the way they behave when they get assigned to new variables, passed into methods, or captured in closures. Essentially, they only differ when you try to assign a new variable or constant to the value of an existing variable or constant.
A value type is any type that is defined as either a structure or an enumeration, while all classes are reference types. This is easy to determine for your own custom types based on how you declared them. Beyond that, all of the built-in types for Swift, such as strings, arrays, and dictionaries are value types. If you are ever uncertain, you can test any of the two types you want in a playground, to see if its behavior is consistent with a value type or a reference type. The simplest behavior to check is what happens on assignment.
When a value type is reassigned, it is copied so that afterwards each variable or constant holds a distinct value that can be changed independently. Let's take a look at a simple example using a string:

On the other hand, let's take a look at what happens with a reference type:

In the real world, this would be like two kids sharing a toy. Both can play with the toy but if one breaks the toy, it is broken for both kids.

This will be like buying a new toy for one of the kids.
This shows you that a reference type is actually a special version of a value type. The difference is that a reference type is not itself an instance of any type. It is simply a way to refer to another instance, sort of like a placeholder. You can copy the reference so that you have two variables referencing the same instance, or you can give a variable a completely new reference to a new instance. With reference types, there is an extra layer of indirection based on sharing instances between multiple variables.
Another place where the behavior of a value type differs from a reference type is when passing them into functions and methods. However, the behavior is very simple to remember if you look at passing a variable or constant into a function as just another assignment. This means that when you pass a value type into a function, it is copied while a reference type still shares the same instance:
func setNameOfPerson(person: Person, var to name: String) { person.name = name name = "Other Name" }
However, when we change the string within the function, the String passed into it remains unchanged.

If we simply change the value of this variable, we will get the same behavior as if it were not an inout parameter. However, we can also change where the inner reference is referring to by declaring it as an inout parameter:


However, we then also assign insidePerson to a completely new instance of the Person reference type. This results in person and person2 outside of the function pointing at two completely different instances of Person leaving the name of person2 to be "New Name" and updating the name of person to "New Person":

The last behavior we have to worry about is when variables are captured within closures. This is what we did not cover about closures in Chapter 5, A Modern Paradigm – Closures and Functional Programming. Closures can actually use the variables that were defined in the same scope as the closure itself:
var nameToPrint = "Kai"
var printName = {
print(nameToPrint)
}
printName() // "Kai"This is very different from normal parameters that we have seen before. We actually do not specify nameToPrint as a parameter, nor do we pass it in when calling the method. Instead, the closure captures the nameToPrint variable that is defined before it. These types of captures act similarly to inout parameters in functions.
When a value type is captured, it can be changed and it will change the original value as well:
var outsideName = "Kai"
var setName = {
outsideName = "New Name"
}
print(outsideName) // "Kai"
setName()
print(outsideName) // "New Name"As you can see, outsideName was changed after the closure was called. This is exactly like an inout parameter.
When a reference type is captured, any changes will also be applied to the outside version of the variable:
var outsidePerson = Person(name: "Kai")
var setPersonName = {
outsidePerson.name = "New Name"
}
print(outsidePerson.name) // "Kai"
setPersonName()
print(outsidePerson.name) // "New Name"This is also exactly like an inout parameter.
The other part of closure capture that we need to keep in mind is that changing the captured value after the closure is defined will still affect the value within the closure. We can take advantage of this to use the printName closure we defined in the preceding section to print any name:
nameToPrint = "Kai" printName() // Kai nameToPrint = "New Name" printName() // "New Name"
Another way to avoid this behavior is to use a feature called capture lists. With this, you can specify the variables that you want to capture by copying them:
is any type that is defined as either a structure or an enumeration, while all classes are reference types. This is easy to determine for your own custom types based on how you declared them. Beyond that, all of the built-in types for Swift, such as strings, arrays, and dictionaries are value types. If you are ever uncertain, you can test any of the two types you want in a playground, to see if its behavior is consistent with a value type or a reference type. The simplest behavior to check is what happens on assignment.
When a value type is reassigned, it is copied so that afterwards each variable or constant holds a distinct value that can be changed independently. Let's take a look at a simple example using a string:
On the other hand, let's take a look at what happens with a reference type:
In the real world, this would be like two kids sharing a toy. Both can play with the toy but if one breaks the toy, it is broken for both kids.
This will be like buying a new toy for one of the kids.
This shows you that a reference type is actually a special version of a value type. The difference is that a reference type is not itself an instance of any type. It is simply a way to refer to another instance, sort of like a placeholder. You can copy the reference so that you have two variables referencing the same instance, or you can give a variable a completely new reference to a new instance. With reference types, there is an extra layer of indirection based on sharing instances between multiple variables.
Another place where the behavior of a value type differs from a reference type is when passing them into functions and methods. However, the behavior is very simple to remember if you look at passing a variable or constant into a function as just another assignment. This means that when you pass a value type into a function, it is copied while a reference type still shares the same instance:
func setNameOfPerson(person: Person, var to name: String) { person.name = name name = "Other Name" }
However, when we change the string within the function, the String passed into it remains unchanged.
If we simply change the value of this variable, we will get the same behavior as if it were not an inout parameter. However, we can also change where the inner reference is referring to by declaring it as an inout parameter:
However, we then also assign insidePerson to a completely new instance of the Person reference type. This results in person and person2 outside of the function pointing at two completely different instances of Person leaving the name of person2 to be "New Name" and updating the name of person to "New Person":
The last behavior we have to worry about is when variables are captured within closures. This is what we did not cover about closures in Chapter 5, A Modern Paradigm – Closures and Functional Programming. Closures can actually use the variables that were defined in the same scope as the closure itself:
var nameToPrint = "Kai"
var printName = {
print(nameToPrint)
}
printName() // "Kai"This is very different from normal parameters that we have seen before. We actually do not specify nameToPrint as a parameter, nor do we pass it in when calling the method. Instead, the closure captures the nameToPrint variable that is defined before it. These types of captures act similarly to inout parameters in functions.
When a value type is captured, it can be changed and it will change the original value as well:
var outsideName = "Kai"
var setName = {
outsideName = "New Name"
}
print(outsideName) // "Kai"
setName()
print(outsideName) // "New Name"As you can see, outsideName was changed after the closure was called. This is exactly like an inout parameter.
When a reference type is captured, any changes will also be applied to the outside version of the variable:
var outsidePerson = Person(name: "Kai")
var setPersonName = {
outsidePerson.name = "New Name"
}
print(outsidePerson.name) // "Kai"
setPersonName()
print(outsidePerson.name) // "New Name"This is also exactly like an inout parameter.
The other part of closure capture that we need to keep in mind is that changing the captured value after the closure is defined will still affect the value within the closure. We can take advantage of this to use the printName closure we defined in the preceding section to print any name:
nameToPrint = "Kai" printName() // Kai nameToPrint = "New Name" printName() // "New Name"
Another way to avoid this behavior is to use a feature called capture lists. With this, you can specify the variables that you want to capture by copying them:
last behavior we have to worry about is when variables are captured within closures. This is what we did not cover about closures in Chapter 5, A Modern Paradigm – Closures and Functional Programming. Closures can actually use the variables that were defined in the same scope as the closure itself:
var nameToPrint = "Kai"
var printName = {
print(nameToPrint)
}
printName() // "Kai"This is very different from normal parameters that we have seen before. We actually do not specify nameToPrint as a parameter, nor do we pass it in when calling the method. Instead, the closure captures the nameToPrint variable that is defined before it. These types of captures act similarly to inout parameters in functions.
When a value type is captured, it can be changed and it will change the original value as well:
var outsideName = "Kai"
var setName = {
outsideName = "New Name"
}
print(outsideName) // "Kai"
setName()
print(outsideName) // "New Name"As you can see, outsideName was changed after the closure was called. This is exactly like an inout parameter.
When a reference type is captured, any changes will also be applied to the outside version of the variable:
var outsidePerson = Person(name: "Kai")
var setPersonName = {
outsidePerson.name = "New Name"
}
print(outsidePerson.name) // "Kai"
setPersonName()
print(outsidePerson.name) // "New Name"This is also exactly like an inout parameter.
The other part of closure capture that we need to keep in mind is that changing the captured value after the closure is defined will still affect the value within the closure. We can take advantage of this to use the printName closure we defined in the preceding section to print any name:
nameToPrint = "Kai" printName() // Kai nameToPrint = "New Name" printName() // "New Name"
Another way to avoid this behavior is to use a feature called capture lists. With this, you can specify the variables that you want to capture by copying them:
Now that we understand the different ways in which data is represented in Swift, we can look into how we can manage the memory better. Every instance that we create takes up memory. Naturally, it wouldn't make sense to keep all data around forever. Swift needs to be able to free up memory so that it can be used for other purposes, once our program doesn't need it anymore. This is the key to managing memory in our apps. We need to make sure that Swift can free up all the memory that we no longer need, as soon as possible.
In Chapter 3, One Piece at a Time – Types, Scopes, and Projects we already discussed when a variable is accessible or not in the section about scopes. This makes memory management very simple for value types. Since value types are always copied when they are reassigned or passed into functions, they can be immediately deleted once they go out of scope. We can look at a simple example to get the full picture:
func printSomething() {
let something = "Hello World!"
print(something)
}The key to ARC is that every object has relationships with one or more variables. This can be extended to include the idea that all objects have a relationship with other objects. For example, a car object would contain objects for its four tires, engine, and so on. It will also have a relationship with its manufacturer, dealership, and owner. ARC uses these relationships to determine when an object can be deleted. In Swift, there are three different types of relationships: strong, weak, and unowned.
The first, and default type of relationship is a strong relationship. It says that a variable requires the instance it is referring to always exist, as long as the variable is still in scope. This is the only behavior available for value types. When an instance no longer has any strong relationships to it, it will be deleted.
A great example of this type of relationship is with a car that must have a steering wheel:
If we were to create a new instance of Car and store it in a variable, that variable would have a strong relationship to the car:

This means that the Car instance will be deleted as soon as the car constant goes out of scope. On the other hand, the SteeringWheel instance will only be deleted after both the wheel constant goes out of scope and the Car instance is deleted.
The next type of relationship in Swift is a weak relationship. It allows one object to reference another without enforcing that it always exists. A weak relationship does not contribute to the reference counter of an instance, which means that the addition of a weak relationship does not increase the counter nor does it decrease the counter when removed.
If the car is ever deleted, the car property of SteeringWheel will automatically be set to nil. This allows us to gracefully handle the scenario that a weak relationship refers to an instance that has been deleted.
The final type of relationship is an unowned relationship. This relationship is almost identical to a weak relationship. It also allows one object to reference another without contributing to the strong reference count. The only difference is that an unowned relationship does not need to be declared as optional and it uses the unowned keyword instead of weak. It acts similar to an implicitly unwrapped optional. You can interact with an unowned relationship as if it were a strong relationship, but if the unowned instance has been deleted and you try to access it, your entire program will crash. This means that you should only use unowned relationships in scenarios where the unowned object will never actually be deleted while the primary object still exists.
to ARC is that every object has relationships with one or more variables. This can be extended to include the idea that all objects have a relationship with other objects. For example, a car object would contain objects for its four tires, engine, and so on. It will also have a relationship with its manufacturer, dealership, and owner. ARC uses these relationships to determine when an object can be deleted. In Swift, there are three different types of relationships: strong, weak, and unowned.
The first, and default type of relationship is a strong relationship. It says that a variable requires the instance it is referring to always exist, as long as the variable is still in scope. This is the only behavior available for value types. When an instance no longer has any strong relationships to it, it will be deleted.
A great example of this type of relationship is with a car that must have a steering wheel:
If we were to create a new instance of Car and store it in a variable, that variable would have a strong relationship to the car:
This means that the Car instance will be deleted as soon as the car constant goes out of scope. On the other hand, the SteeringWheel instance will only be deleted after both the wheel constant goes out of scope and the Car instance is deleted.
The next type of relationship in Swift is a weak relationship. It allows one object to reference another without enforcing that it always exists. A weak relationship does not contribute to the reference counter of an instance, which means that the addition of a weak relationship does not increase the counter nor does it decrease the counter when removed.
If the car is ever deleted, the car property of SteeringWheel will automatically be set to nil. This allows us to gracefully handle the scenario that a weak relationship refers to an instance that has been deleted.
The final type of relationship is an unowned relationship. This relationship is almost identical to a weak relationship. It also allows one object to reference another without contributing to the strong reference count. The only difference is that an unowned relationship does not need to be declared as optional and it uses the unowned keyword instead of weak. It acts similar to an implicitly unwrapped optional. You can interact with an unowned relationship as if it were a strong relationship, but if the unowned instance has been deleted and you try to access it, your entire program will crash. This means that you should only use unowned relationships in scenarios where the unowned object will never actually be deleted while the primary object still exists.
A strong reference cycle is when two instances directly or indirectly hold strong references to each other. This means that neither object can ever be deleted, because both are ensuring that the other will always exist.
A strong reference cycle between objects is when two types directly or indirectly contain strong references to each other.
A great example of a strong reference cycle between objects is if we rewrite our preceding car example without using a weak reference from SteeringWheel to Car:

Two objects can also indirectly hold strong references to each other through one or more third parties:

The best way as a developer to detect them is to use a tool built into Xcode called Instruments. Instruments can do many things, but one of those things is called Leaks. To run this tool you must have an Xcode Project; you cannot run it on a Playground. It is run by selecting Product | Profile from the menu bar.
This will build your project and display a series of profiling tools:


You can even select the Cycles & Roots view for the leaked objects and Instruments will show you a visual representation of your strong reference cycle. In the following screenshot, you can see that there is a cycle between SteeringWheel and Car:

Clearly, Leaks is a powerful tool and you should run it periodically on your code, but it will not catch all strong reference cycles. The last line of defense is going to be you staying vigilant with your code, always thinking about the ownership graph.
Of course, spotting cycles is only part of the battle. The other part of the battle is fixing them.
The easiest way to break a strong reference cycle is to simply remove one of the relationships completely. However, this is very often not going to be an option. A lot of the time, it is important to have a two-way relationship.
Now Car has a strong reference to SteeringWheel but there is only a weak reference back:

Unowned relationships are good for scenarios where the connection will never be missing. In our example, there are times that a SteeringWheel exists without a car reference. If we change it so that the SteeringWheel is created in the Car initializer, we could make the reference unowned:
As we found out in Chapter 5, A Modern Paradigm – Closures and Functional Programming, closures are just another type of object, so they follow the same ARC rules. However, they are subtler than classes because of their ability to capture variables from their surrounding scope. These captures create strong references from the closures to the captured variable that are often overlooked because capturing variables looks so natural compared to conditionals, for loops and other similar syntax.
It is very common to provide closure properties that will be called whenever something occurs. These are generally called callbacks. Let's look at a ball class that has a callback for when the ball bounces:
This type of setup makes it easy to inadvertently create a strong reference cycle:
strong reference cycle between objects is when two types directly or indirectly contain strong references to each other.
A great example of a strong reference cycle between objects is if we rewrite our preceding car example without using a weak reference from SteeringWheel to Car:
Two objects can also indirectly hold strong references to each other through one or more third parties:
The best way as a developer to detect them is to use a tool built into Xcode called Instruments. Instruments can do many things, but one of those things is called Leaks. To run this tool you must have an Xcode Project; you cannot run it on a Playground. It is run by selecting Product | Profile from the menu bar.
This will build your project and display a series of profiling tools:
You can even select the Cycles & Roots view for the leaked objects and Instruments will show you a visual representation of your strong reference cycle. In the following screenshot, you can see that there is a cycle between SteeringWheel and Car:
Clearly, Leaks is a powerful tool and you should run it periodically on your code, but it will not catch all strong reference cycles. The last line of defense is going to be you staying vigilant with your code, always thinking about the ownership graph.
Of course, spotting cycles is only part of the battle. The other part of the battle is fixing them.
The easiest way to break a strong reference cycle is to simply remove one of the relationships completely. However, this is very often not going to be an option. A lot of the time, it is important to have a two-way relationship.
Now Car has a strong reference to SteeringWheel but there is only a weak reference back:
Unowned relationships are good for scenarios where the connection will never be missing. In our example, there are times that a SteeringWheel exists without a car reference. If we change it so that the SteeringWheel is created in the Car initializer, we could make the reference unowned:
As we found out in Chapter 5, A Modern Paradigm – Closures and Functional Programming, closures are just another type of object, so they follow the same ARC rules. However, they are subtler than classes because of their ability to capture variables from their surrounding scope. These captures create strong references from the closures to the captured variable that are often overlooked because capturing variables looks so natural compared to conditionals, for loops and other similar syntax.
It is very common to provide closure properties that will be called whenever something occurs. These are generally called callbacks. Let's look at a ball class that has a callback for when the ball bounces:
This type of setup makes it easy to inadvertently create a strong reference cycle:
found out in Chapter 5, A Modern Paradigm – Closures and Functional Programming, closures are just another type of object, so they follow the same ARC rules. However, they are subtler than classes because of their ability to capture variables from their surrounding scope. These captures create strong references from the closures to the captured variable that are often overlooked because capturing variables looks so natural compared to conditionals, for loops and other similar syntax.
It is very common to provide closure properties that will be called whenever something occurs. These are generally called callbacks. Let's look at a ball class that has a callback for when the ball bounces:
This type of setup makes it easy to inadvertently create a strong reference cycle:
It is a great idea to always keep strong reference cycles in mind, but if we are too aggressive with the use of weak and unowned references, we can run into the opposite problem, where an object is deleted before we intended it to be.
With an object this will happen if all of the references to the object are weak or unowned. This won't be a fatal mistake if we use weak references, but if this happens with an unowned reference it will crash your program.
For example, let's look at the preceding example with an extra weak reference:
Now that we have a good understanding of memory management, we are ready to discuss the full trade-offs we make when we choose to design a type as a structure or a class. With our ability to extend protocols like we saw in the previous chapter, we can achieve very similar functionality to the inheritance we saw with classes in Chapter 3, One Piece at a Time – Types, Scopes, and Projects. This means that we are often choosing between using a structure or a class based on the memory implications, or in other words, whether we want our type to be a value type or a reference type.
Value types have an advantage because they are very simple to reason about. You don't have to worry about multiple variables referencing the same instance. Even better, you don't have to worry about all of the potential problems we have discussed with strong reference cycles. However, there is still an advantage to reference types.
Reference types are advantageous when it really makes sense to share an instance between multiple variables. This is especially true when you are representing some sort of physical resource that makes no sense to copy like a port on the computer or the main window of an application. Also, some will argue that reference types use memory more efficiently, because it doesn't take up more memory with lots of copies floating around. However, the Swift compiler will actually do a lot of optimizing of our code and reduce or eliminate most of the copying that actually occurs when possible. For example, if we pass a value type into a function that never modifies the value, there is no reason to actually create that copy. Ultimately, I don't recommend optimizing for something like that before it becomes necessary. Sometimes you will run into memory problems with your application and then it can be appropriate to convert large types to classes if they are being copied a lot.
Ultimately, I recommend using structures and protocols as a default, because they greatly reduce complexity and fall back to classes only when it is required. I even recommend using protocols instead of super classes when possible, because they are easier to shift around and make it an easier transition between value types and reference types.
One of the biggest changes in Swift 2 is that Apple added a feature called error handling. Handling error situations is often the least fun part of programming. It is usually much more exciting to handle a successful case, often referred to as the happy path because that is where the exciting functionality is. However, to make a truly great user experience and therefore a truly great piece of software, we must pay careful attention to what our software does when errors occur. The error-handling features of Swift help us in handling these situations succinctly and discourage us from ignoring errors in the first place.
Before we talk about handling an error, we need to discuss how we can signal that an error has occurred in the first place. The term for this is throwing an error.
The first part of throwing an error is defining an error that we can throw. Any type can be thrown as an error as long as it implements the ErrorType protocol, as shown:
Let's define a function that will take a string and repeat it until it is at least a certain length. This will be very simple to implement but there will be a problem scenario. If the passed in string is empty, it will never become longer, no matter how many times we repeat it. In this scenario, we should throw an error.
The throws keyword always comes after the parameters and before a return type.
Now, we can test if the passed in string is empty and throw an error if it is. To do this, we use the throw keyword with an instance of our error:
An important thing to note here is that when we throw an error, it immediately exits the function. In the preceding case, if the string is empty, it goes to the throw line and then it does not execute the rest of the function. In this case, it is often more appropriate to use a guard statement instead of a simple if statement, as shown in the following code:
If we try to call a function, such as normal, Swift is going to give us an error, as shown in the following example:
Now, let's get back to using the try keyword. There are actually three forms of it: try, try?, and try!. Let's start by discussing the exclamation point form, as it is the simplest form.
The try! keyword is called the forceful try. The error will completely go away if you use it, by using the following code:
We can also use the try? keyword, which is referred to as an optional try. Instead of allowing for the possibility of a crash, this will turn the result of the function into an optional:
You can check the result for nil to determine if an error was thrown.
The biggest drawback to this technique is that there is no way to determine the reason an error was thrown. This isn't a problem for our repeatString:untilLongerThan: function because there is only one error scenario, but we will often have functions or methods that can fail in multiple ways. Especially, if these are called based on user input, we will want to be able to report to the user exactly why an error occurred.
To get an idea of the usefulness of catching an error, let's look at writing a new function that will create a list of random numbers. Our function will allow the user to configure how long the list should be and also what the range of possible random numbers should be.
This function begins by checking the error scenarios. It first checks to make sure that we are not trying to create a list of negative length. It then checks to make sure that the high value of the range is in fact greater than the low one. After that, we repeatedly add a random number to the output array for the requested number of times.
Note that this implementation uses the rand function, which we used in Chapter 2, Building Blocks – Variables, Collections, and Flow Control. To use it, you will need to import Foundation and also seed the random number with srand again.
Also, this use of random is a bit more complicated. Previously, we only needed to make sure that the random number was between zero and the length of our array; now, we need it to be between two arbitrary numbers. First, we determine the amount of different numbers we can generate, which is the difference between the high and low number plus one, because we want to include the high number. Then, we generate the random number within that range and finally, shift it to the actual range we want by adding the low number to the result. To make sure this works, let's think through a simple scenario. Lets say we want to generate a number between 4 and 10. The range size here will be 10 - 4 + 1 = 7, so we will be generating random numbers between 0 and 6. Then, when we add 4 to it, it will move that range to be between 4 and 10.
So, we now have a function that throws a couple of types of errors. If we want to catch the errors, we have to embed the call inside a do block and also add the try keyword:
do {
try createRandomListContaininingXNumbers(
5,
between: 5,
and: 10
)
}However, if we put this into a playground, within the main function, we will still get an error that the errors thrown from here are not handled. This will not produce an error if you put it at the root level of the playground because the playground will handle any error thrown by default. To handle them within a function, we need to add catch blocks. A catch block works the same as a switch case, just as if the switch were being performed on the error:
do {
try createRandomListContaininingXNumbers(
5,
between: 5,
and: 10
)
}
catch RandomListError.NegativeListLength {
print("Cannot create with a negative number of elements")
}
catch RandomListError.FirstNumberMustBeLower {
print("First number must be lower than second number")
}Note that currently there is no way to specify what type of error can be thrown from a specific function; so with this implementation there is no way for the compiler to ensure that we are covering every case of our error enumeration. We could instead perform a switch within a catch block, so that the compiler will at least force us to handle every case:
Instead of throwing enumeration cases, we are creating instances of the UserError type with a text description of the problem. Now, when we call the function, we can just catch the error as a UserError type and print out the value of its userReadableDescription property:
Now we can create an enumeration for our specific errors that implements that protocol:
With this, our implementation of the function looks the same as earlier:
Keep in mind that the order of our catch blocks is very important, just like the order of switch cases is important. If we put our UserErrorType block before the NegativeListLength block, we would always just report it to the user, because once a catch block is satisfied, the program will skip every remaining block.
The last option for handling an error is to allow it to propagate. This is only possible when the containing function or method is also marked as throwing errors, but it is simple to implement if that is true:
func parentFunction() throws { try createRandomListContaininingXNumbers3( 5, between: 5, and: 10 ) }
However, while this can be a useful technique, I would be careful not to do it too much. The earlier you handle the error situations, the simpler your code can be. Every possible error thrown is like adding a new road to a highway system; it becomes harder to determine where someone took a wrong turn if they are going the wrong way. The earlier we handle errors, the fewer chances we have to create additional code paths in the parent functions.
try! keyword is
We can also use the try? keyword, which is referred to as an optional try. Instead of allowing for the possibility of a crash, this will turn the result of the function into an optional:
You can check the result for nil to determine if an error was thrown.
The biggest drawback to this technique is that there is no way to determine the reason an error was thrown. This isn't a problem for our repeatString:untilLongerThan: function because there is only one error scenario, but we will often have functions or methods that can fail in multiple ways. Especially, if these are called based on user input, we will want to be able to report to the user exactly why an error occurred.
To get an idea of the usefulness of catching an error, let's look at writing a new function that will create a list of random numbers. Our function will allow the user to configure how long the list should be and also what the range of possible random numbers should be.
This function begins by checking the error scenarios. It first checks to make sure that we are not trying to create a list of negative length. It then checks to make sure that the high value of the range is in fact greater than the low one. After that, we repeatedly add a random number to the output array for the requested number of times.
Note that this implementation uses the rand function, which we used in Chapter 2, Building Blocks – Variables, Collections, and Flow Control. To use it, you will need to import Foundation and also seed the random number with srand again.
Also, this use of random is a bit more complicated. Previously, we only needed to make sure that the random number was between zero and the length of our array; now, we need it to be between two arbitrary numbers. First, we determine the amount of different numbers we can generate, which is the difference between the high and low number plus one, because we want to include the high number. Then, we generate the random number within that range and finally, shift it to the actual range we want by adding the low number to the result. To make sure this works, let's think through a simple scenario. Lets say we want to generate a number between 4 and 10. The range size here will be 10 - 4 + 1 = 7, so we will be generating random numbers between 0 and 6. Then, when we add 4 to it, it will move that range to be between 4 and 10.
So, we now have a function that throws a couple of types of errors. If we want to catch the errors, we have to embed the call inside a do block and also add the try keyword:
do {
try createRandomListContaininingXNumbers(
5,
between: 5,
and: 10
)
}However, if we put this into a playground, within the main function, we will still get an error that the errors thrown from here are not handled. This will not produce an error if you put it at the root level of the playground because the playground will handle any error thrown by default. To handle them within a function, we need to add catch blocks. A catch block works the same as a switch case, just as if the switch were being performed on the error:
do {
try createRandomListContaininingXNumbers(
5,
between: 5,
and: 10
)
}
catch RandomListError.NegativeListLength {
print("Cannot create with a negative number of elements")
}
catch RandomListError.FirstNumberMustBeLower {
print("First number must be lower than second number")
}Note that currently there is no way to specify what type of error can be thrown from a specific function; so with this implementation there is no way for the compiler to ensure that we are covering every case of our error enumeration. We could instead perform a switch within a catch block, so that the compiler will at least force us to handle every case:
Instead of throwing enumeration cases, we are creating instances of the UserError type with a text description of the problem. Now, when we call the function, we can just catch the error as a UserError type and print out the value of its userReadableDescription property:
Now we can create an enumeration for our specific errors that implements that protocol:
With this, our implementation of the function looks the same as earlier:
Keep in mind that the order of our catch blocks is very important, just like the order of switch cases is important. If we put our UserErrorType block before the NegativeListLength block, we would always just report it to the user, because once a catch block is satisfied, the program will skip every remaining block.
The last option for handling an error is to allow it to propagate. This is only possible when the containing function or method is also marked as throwing errors, but it is simple to implement if that is true:
func parentFunction() throws { try createRandomListContaininingXNumbers3( 5, between: 5, and: 10 ) }
However, while this can be a useful technique, I would be careful not to do it too much. The earlier you handle the error situations, the simpler your code can be. Every possible error thrown is like adding a new road to a highway system; it becomes harder to determine where someone took a wrong turn if they are going the wrong way. The earlier we handle errors, the fewer chances we have to create additional code paths in the parent functions.
So far, we have not had to be too concerned about what happens in a function after we throw an error. There are times when we will need to perform a certain action before exiting a function, regardless of if we threw an error or not.
An important part to remember about throwing errors is that the execution of the current scope exits. This is easy to think about for functions if you think of it as just a call to return. Any code after the throw will not be executed. It is a little less intuitive within do-catch blocks. A do-catch can have multiple calls to functions that may throw errors, but as soon as a function throws an error, the execution will jump to the first catch block that matches the error:
Now if function1 throws an error, the whole program will crash and if function2 throws an error, it will just continue right on with executing function3.
Now, as I hinted before, there will be circumstances where we need to perform some action before exiting a function or method regardless of if we throw an error or not. You could potentially put that functionality into a function which is called before throwing each error, but Swift provides a better way called a defer block. A defer block simply allows you to give some code to be run right before exiting the function or method. Let's take a look at an example of a personal chef type that must always clean up after attempting to cook some food:
In fact, defer even works when returning from a function or method at any point:
Here, we have defined a small ingredient type and a pantry type. The pantry has a list of ingredients and a method to help us get an ingredient out of it. When we go to get an ingredient, we first have to open the door, so we need to make sure that we close the door at the end, whether or not we find an ingredient. This is another perfect scenario for a defer block.
Ultimately, it is a great idea to use defer any time you perform some action that will require clean-up. You may not have any extra returns or throws when first implementing it, but it will make it much safer to make updates to your code later.
hinted before, there will be circumstances where we need to perform some action before exiting a function or method regardless of if we throw an error or not. You could potentially put that functionality into a function which is called before throwing each error, but Swift provides a better way called a defer block. A defer block simply allows you to give some code to be run right before exiting the function or method. Let's take a look at an example of a personal chef type that must always clean up after attempting to cook some food:
In fact, defer even works when returning from a function or method at any point:
Here, we have defined a small ingredient type and a pantry type. The pantry has a list of ingredients and a method to help us get an ingredient out of it. When we go to get an ingredient, we first have to open the door, so we need to make sure that we close the door at the end, whether or not we find an ingredient. This is another perfect scenario for a defer block.
Ultimately, it is a great idea to use defer any time you perform some action that will require clean-up. You may not have any extra returns or throws when first implementing it, but it will make it much safer to make updates to your code later.
We call these patterns, design patterns. Design patterns is a massive topic with countless books, tutorials, and other resources. We spend our entire careers practicing, shaping, and perfecting the use of these patterns in practical ways. We give each pattern a name so that we can have smoother conversations with fellow programmers and also organize them better in our own minds.
To do all that, we will cover the following topics in this chapter:
Let's delve a little deeper into what a design pattern is before we dive into the specific patterns. As you may have begun to understand, there are unlimited ways to write a program that does even a simple thing. A design pattern is a solution to solve a recurrent and common problem. These problems are often so ubiquitous, that even if you don't use a pattern deliberately, you will almost certainly be using one or more patterns inadvertently; especially, if you are using third-party code.
Coupling is the degree to which individual code components depend on other components. We want to reduce the coupling in our code so that all our code components operate as independently as possible. We want to be able to look at them and understand each component on its own without needing a full understanding of the entire system. Low coupling also allows us to make changes to one component without drastically affecting the rest of the code.
Cohesion is a reference to how well different code components fit together. We want code components that can operate independently, but they should still fit together with other components in a cohesive and understandable way. This means that to have low coupling and high cohesion, we want code components that are designed to have a single purpose and a small interface to the rest of our code. This applies to every level of our code, from how the different sections of our app fit together, down to how functions interact with each other.
Both of these measurements have a high impact on our final measurement: complexity. Complexity is basically just how difficult it is to understand the code, especially when it comes to practical things like adding new features or fixing bugs. By having low coupling and high cohesion, we will generally be writing much less complex code. However, taken to their extremes, these principles can sometimes actually cause greater complexity. Sometimes the simplest solution is the quickest and most effective one because we don't want to get bogged down into architecting the perfect solution when we can implement a near perfect solution ten times faster. Most of us cannot afford to code on an unlimited budget.
Behavioral patterns are patterns that describe how objects will communicate with each other. In other words, it is how one object will send information to another object, even if that information is just that some event has occurred. They help to lower the code's coupling by providing a more detached communication mechanism that allows one object to send information to another, while having as little knowledge about the other object as possible. The less any type knows about the rest of the types in the code base, the less it will depend on those types. These behavior patterns also help to increase cohesion by providing straightforward and understandable ways to send the information.
The first behavioral pattern we will discuss is called the iterator pattern. We are starting with this one because we have actually already made use of this pattern in Chapter 6, Make Swift Work For You – Protocols and Generics. The idea of the iterator pattern is to provide a way to step through the contents of a container independent of the way the elements are represented inside the container.
As we saw, Swift provides us with the basics of this pattern with the GeneratorType and SequenceType protocols. It even implements those protocols for its array and dictionary containers. Even though we don't know how the elements are stored within an array or dictionary, we are still able to step through each value contained within them. Apple can easily change the way the elements are stored within them and it would not affect how we loop through the containers at all. This shows a great decoupling between our code and the container implementations.
If you remember, we were even able to create a generator for the infinite Fibonacci sequence:
struct FibonacciGenerator: GeneratorType {
typealias Element = Int
var values = (0, 1)
mutating func next() -> Element? {
self.values = (
self.values.1,
self.values.0 + self.values.1
)
return self.values.0
}
}The "container" doesn't even store any elements but we can still iterate through them as if it did.
The iterator pattern is a great introduction to how we make real world use of design patterns. Stepping through a list is such a common problem that Apple built the pattern directly into Swift.
The other behavioral pattern that we will discuss is called the observer pattern. The basic idea of this pattern is that you have one object that is designed to allow other objects to be notified when something occurs.
In Swift, the easiest way to achieve this is to provide a closure property on the object that you want to be observable and have that object call the closure whenever it wants to notify its observer. The property will be optional, so that any other object can set their closure on this property:
Now, any object can define its own closure on the callback and be notified whenever cash is withdrawn:
A notification center is a central object that manages events for other types. We can implement a notification center for ATM withdrawals:
With this implementation, any object can start observing by passing a unique key and callback to the addObserverForKey:callback: method. It doesn't have to have any reference to an instance of an ATM. An observer can also be removed by passing the same unique key to removeObserverForKey:. At any point, any object can trigger the notification by calling the trigger: method and all the registered observers will be notified.
behavioral pattern we will discuss is called the iterator pattern. We are starting with this one because we have actually already made use of this pattern in Chapter 6, Make Swift Work For You – Protocols and Generics. The idea of the iterator pattern is to provide a way to step through the contents of a container independent of the way the elements are represented inside the container.
As we saw, Swift provides us with the basics of this pattern with the GeneratorType and SequenceType protocols. It even implements those protocols for its array and dictionary containers. Even though we don't know how the elements are stored within an array or dictionary, we are still able to step through each value contained within them. Apple can easily change the way the elements are stored within them and it would not affect how we loop through the containers at all. This shows a great decoupling between our code and the container implementations.
If you remember, we were even able to create a generator for the infinite Fibonacci sequence:
struct FibonacciGenerator: GeneratorType {
typealias Element = Int
var values = (0, 1)
mutating func next() -> Element? {
self.values = (
self.values.1,
self.values.0 + self.values.1
)
return self.values.0
}
}The "container" doesn't even store any elements but we can still iterate through them as if it did.
The iterator pattern is a great introduction to how we make real world use of design patterns. Stepping through a list is such a common problem that Apple built the pattern directly into Swift.
The other behavioral pattern that we will discuss is called the observer pattern. The basic idea of this pattern is that you have one object that is designed to allow other objects to be notified when something occurs.
In Swift, the easiest way to achieve this is to provide a closure property on the object that you want to be observable and have that object call the closure whenever it wants to notify its observer. The property will be optional, so that any other object can set their closure on this property:
Now, any object can define its own closure on the callback and be notified whenever cash is withdrawn:
A notification center is a central object that manages events for other types. We can implement a notification center for ATM withdrawals:
With this implementation, any object can start observing by passing a unique key and callback to the addObserverForKey:callback: method. It doesn't have to have any reference to an instance of an ATM. An observer can also be removed by passing the same unique key to removeObserverForKey:. At any point, any object can trigger the notification by calling the trigger: method and all the registered observers will be notified.
behavioral pattern that we will discuss is called the observer pattern. The basic idea of this pattern is that you have one object that is designed to allow other objects to be notified when something occurs.
In Swift, the easiest way to achieve this is to provide a closure property on the object that you want to be observable and have that object call the closure whenever it wants to notify its observer. The property will be optional, so that any other object can set their closure on this property:
Now, any object can define its own closure on the callback and be notified whenever cash is withdrawn:
A notification center is a central object that manages events for other types. We can implement a notification center for ATM withdrawals:
With this implementation, any object can start observing by passing a unique key and callback to the addObserverForKey:callback: method. It doesn't have to have any reference to an instance of an ATM. An observer can also be removed by passing the same unique key to removeObserverForKey:. At any point, any object can trigger the notification by calling the trigger: method and all the registered observers will be notified.
With this implementation, any object can start observing by passing a unique key and callback to the addObserverForKey:callback: method. It doesn't have to have any reference to an instance of an ATM. An observer can also be removed by passing the same unique key to removeObserverForKey:. At any point, any object can trigger the notification by calling the trigger: method and all the registered observers will be notified.
Structural patterns are patterns that describe how objects should relate to each other so that they can work together to achieve a common goal. They help us lower our coupling by suggesting an easy and clear way to break down a problem into related parts and they help raise our cohesion by giving us a predefined way that those components will fit together.
The first structural pattern we are going to look at is called the composite pattern. The concept of this pattern is that you have a single object that can be broken down into a collection of objects just like itself. This is like the organization of many large companies. They will have teams that are made up of smaller teams, which are then made up of even smaller teams. Each sub-team is responsible for a small part and they come together to be responsible for a larger part of the company.
A computer ultimately represents what is on the screen with a grid of pixel data. However, it does not make sense for every program to be concerned with each individual pixel. Instead, most programmers use frameworks, often provided by the operating system, to manipulate what is on the screen at a much higher level. A graphical program is usually given one or more windows to draw within and instead of drawing pixels within a window; a program will usually set up a series of "views". A view will have lots of different properties but they will most importantly have a position, size, and background color.
Let's look at our own implementation of a View class:
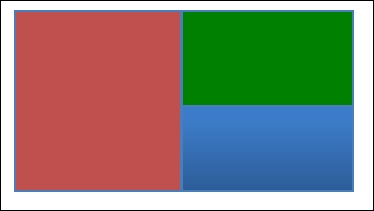
To produce this with our class, we could write a code similar to:
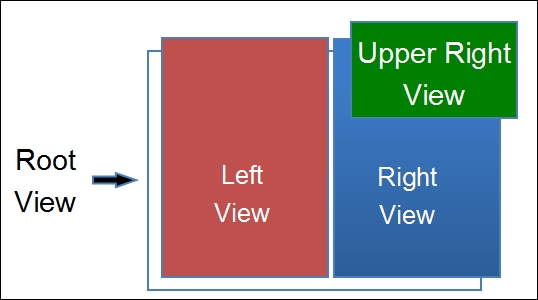
It is important to note that the position of upperRightView is left at 0, 0. That is because the positioning of all sub-views will always be relative to their immediate parent view. This allows us to pull any view out of the hierarchy without affecting any of its sub-views; drawing rightView within rootView will look exactly the same as if it were drawn on its own.
As you can see, the composite pattern is ideal for any situation where an object can be broken down into pieces that are just like it. This is great for something seemingly infinite like a hierarchy of views, but it is also a great alternative to subclassing. Subclassing is actually the tightest form of coupling. A subclass is extremely dependent on its superclass. Any change to a superclass is almost certainly going to affect all of its subclasses. We can often use the composite pattern as a less coupled alternative to subclassing.
As an example, let's explore the concept of representing a sentence. One way to look at the problem is to consider the sentence a special kind of string. Any kind of specialization like this will usually lead us to create a subclass; after all, a subclass is a specialization of its superclass. So we could create a Sentence subclass of String. This will be great because we can build strings using our sentence class and then pass them to methods that are expecting a normal string.
This is a much better alternative to subclassing in this scenario.
One of the most commonly used design patterns in Apple's frameworks is called the delegate pattern. The idea behind it is that you set up an object to let another object handle some of its responsibilities. In other words, one object will delegate some of its responsibilities to another object. This is like a manager hiring employees to do a job that the manager cannot or does not want to do themselves.
These protocols define only the methods necessary to allow the table view to properly function. This means that the delegate and dataSource properties can be any type as long as they implement the necessary methods. For example, one of the critical methods the data source must implement is tableView:numberOfRowsInSection:. This method provides the table view and an integer referring to the section that it wants to know about. It requires that an integer be returned for the number of rows in the referenced section. This is only one of multiple methods that data source must implement, but it gives you an idea of how the table view no longer has to figure out what data it contains. It simply asks the data source to figure it out.
This provides a very loosely coupled way to implement a specific table view and this same pattern is reused all over the programming world. You would be amazed at what Apple has been able to do with its table view, with very little to no pain inflicted on third party developers. The table view is incredibly optimized to handle thousands upon thousands of rows if you really wanted it to. The table has also changed a lot since the first developer kit for iOS, but these protocols have very rarely been changed except to add additional features.
Model view controller is one of the highest levels and most abstract design patterns. Variations of it are pervasive across a huge percentage of software, especially Apple's frameworks. It really can be considered the foundational pattern for how all of Apple's code is designed and therefore how most third party developers design their own code. The core concept of model view controller is that you split all of your types into three categories, often referred to as layers: model, view, and controller.
In the ideal implementation of model view controller, no model type should ever have any knowledge of the existence of a view type and no view type should know about a model type. Often, a model view controller is visualized sort of like a cake:
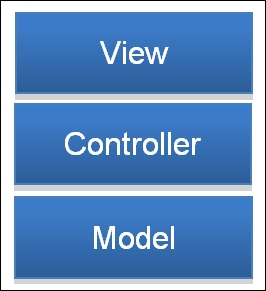
Another huge benefit of model view controller is that most components will be very reusable. You should be able to easily reuse views with different types of data like you can use a table view to display virtually any kind of data without changing the table view type and you should be able to display something like an address book in lots of different ways without changing the address book type.
As useful as this pattern is, it is also extremely hard to stick to. You will probably spend your entire development career evolving your sense for how to effectively breakdown your problems into these layers. It is often helpful to create explicit folders for each layer, forcing yourself to put every type into only one of the categories. You will also probably find yourself creating a bloated controller layer, especially in iOS, because it is often convenient to stick business logic there. More than any other design pattern, model view controller is probably the one that can be most described as something you strive for but rarely ever perfectly achieve.
first structural pattern we are going to look at is called the composite pattern. The concept of this pattern is that you have a single object that can be broken down into a collection of objects just like itself. This is like the organization of many large companies. They will have teams that are made up of smaller teams, which are then made up of even smaller teams. Each sub-team is responsible for a small part and they come together to be responsible for a larger part of the company.
A computer ultimately represents what is on the screen with a grid of pixel data. However, it does not make sense for every program to be concerned with each individual pixel. Instead, most programmers use frameworks, often provided by the operating system, to manipulate what is on the screen at a much higher level. A graphical program is usually given one or more windows to draw within and instead of drawing pixels within a window; a program will usually set up a series of "views". A view will have lots of different properties but they will most importantly have a position, size, and background color.
Let's look at our own implementation of a View class:
To produce this with our class, we could write a code similar to:
It is important to note that the position of upperRightView is left at 0, 0. That is because the positioning of all sub-views will always be relative to their immediate parent view. This allows us to pull any view out of the hierarchy without affecting any of its sub-views; drawing rightView within rootView will look exactly the same as if it were drawn on its own.
As you can see, the composite pattern is ideal for any situation where an object can be broken down into pieces that are just like it. This is great for something seemingly infinite like a hierarchy of views, but it is also a great alternative to subclassing. Subclassing is actually the tightest form of coupling. A subclass is extremely dependent on its superclass. Any change to a superclass is almost certainly going to affect all of its subclasses. We can often use the composite pattern as a less coupled alternative to subclassing.
As an example, let's explore the concept of representing a sentence. One way to look at the problem is to consider the sentence a special kind of string. Any kind of specialization like this will usually lead us to create a subclass; after all, a subclass is a specialization of its superclass. So we could create a Sentence subclass of String. This will be great because we can build strings using our sentence class and then pass them to methods that are expecting a normal string.
This is a much better alternative to subclassing in this scenario.
One of the most commonly used design patterns in Apple's frameworks is called the delegate pattern. The idea behind it is that you set up an object to let another object handle some of its responsibilities. In other words, one object will delegate some of its responsibilities to another object. This is like a manager hiring employees to do a job that the manager cannot or does not want to do themselves.
These protocols define only the methods necessary to allow the table view to properly function. This means that the delegate and dataSource properties can be any type as long as they implement the necessary methods. For example, one of the critical methods the data source must implement is tableView:numberOfRowsInSection:. This method provides the table view and an integer referring to the section that it wants to know about. It requires that an integer be returned for the number of rows in the referenced section. This is only one of multiple methods that data source must implement, but it gives you an idea of how the table view no longer has to figure out what data it contains. It simply asks the data source to figure it out.
This provides a very loosely coupled way to implement a specific table view and this same pattern is reused all over the programming world. You would be amazed at what Apple has been able to do with its table view, with very little to no pain inflicted on third party developers. The table view is incredibly optimized to handle thousands upon thousands of rows if you really wanted it to. The table has also changed a lot since the first developer kit for iOS, but these protocols have very rarely been changed except to add additional features.
Model view controller is one of the highest levels and most abstract design patterns. Variations of it are pervasive across a huge percentage of software, especially Apple's frameworks. It really can be considered the foundational pattern for how all of Apple's code is designed and therefore how most third party developers design their own code. The core concept of model view controller is that you split all of your types into three categories, often referred to as layers: model, view, and controller.
In the ideal implementation of model view controller, no model type should ever have any knowledge of the existence of a view type and no view type should know about a model type. Often, a model view controller is visualized sort of like a cake:
Another huge benefit of model view controller is that most components will be very reusable. You should be able to easily reuse views with different types of data like you can use a table view to display virtually any kind of data without changing the table view type and you should be able to display something like an address book in lots of different ways without changing the address book type.
As useful as this pattern is, it is also extremely hard to stick to. You will probably spend your entire development career evolving your sense for how to effectively breakdown your problems into these layers. It is often helpful to create explicit folders for each layer, forcing yourself to put every type into only one of the categories. You will also probably find yourself creating a bloated controller layer, especially in iOS, because it is often convenient to stick business logic there. More than any other design pattern, model view controller is probably the one that can be most described as something you strive for but rarely ever perfectly achieve.
commonly used design patterns in Apple's frameworks is called the delegate pattern. The idea behind it is that you set up an object to let another object handle some of its responsibilities. In other words, one object will delegate some of its responsibilities to another object. This is like a manager hiring employees to do a job that the manager cannot or does not want to do themselves.
These protocols define only the methods necessary to allow the table view to properly function. This means that the delegate and dataSource properties can be any type as long as they implement the necessary methods. For example, one of the critical methods the data source must implement is tableView:numberOfRowsInSection:. This method provides the table view and an integer referring to the section that it wants to know about. It requires that an integer be returned for the number of rows in the referenced section. This is only one of multiple methods that data source must implement, but it gives you an idea of how the table view no longer has to figure out what data it contains. It simply asks the data source to figure it out.
This provides a very loosely coupled way to implement a specific table view and this same pattern is reused all over the programming world. You would be amazed at what Apple has been able to do with its table view, with very little to no pain inflicted on third party developers. The table view is incredibly optimized to handle thousands upon thousands of rows if you really wanted it to. The table has also changed a lot since the first developer kit for iOS, but these protocols have very rarely been changed except to add additional features.
Model view controller is one of the highest levels and most abstract design patterns. Variations of it are pervasive across a huge percentage of software, especially Apple's frameworks. It really can be considered the foundational pattern for how all of Apple's code is designed and therefore how most third party developers design their own code. The core concept of model view controller is that you split all of your types into three categories, often referred to as layers: model, view, and controller.
In the ideal implementation of model view controller, no model type should ever have any knowledge of the existence of a view type and no view type should know about a model type. Often, a model view controller is visualized sort of like a cake:
Another huge benefit of model view controller is that most components will be very reusable. You should be able to easily reuse views with different types of data like you can use a table view to display virtually any kind of data without changing the table view type and you should be able to display something like an address book in lots of different ways without changing the address book type.
As useful as this pattern is, it is also extremely hard to stick to. You will probably spend your entire development career evolving your sense for how to effectively breakdown your problems into these layers. It is often helpful to create explicit folders for each layer, forcing yourself to put every type into only one of the categories. You will also probably find yourself creating a bloated controller layer, especially in iOS, because it is often convenient to stick business logic there. More than any other design pattern, model view controller is probably the one that can be most described as something you strive for but rarely ever perfectly achieve.
of the highest levels and most abstract design patterns. Variations of it are pervasive across a huge percentage of software, especially Apple's frameworks. It really can be considered the foundational pattern for how all of Apple's code is designed and therefore how most third party developers design their own code. The core concept of model view controller is that you split all of your types into three categories, often referred to as layers: model, view, and controller.
In the ideal implementation of model view controller, no model type should ever have any knowledge of the existence of a view type and no view type should know about a model type. Often, a model view controller is visualized sort of like a cake:
Another huge benefit of model view controller is that most components will be very reusable. You should be able to easily reuse views with different types of data like you can use a table view to display virtually any kind of data without changing the table view type and you should be able to display something like an address book in lots of different ways without changing the address book type.
As useful as this pattern is, it is also extremely hard to stick to. You will probably spend your entire development career evolving your sense for how to effectively breakdown your problems into these layers. It is often helpful to create explicit folders for each layer, forcing yourself to put every type into only one of the categories. You will also probably find yourself creating a bloated controller layer, especially in iOS, because it is often convenient to stick business logic there. More than any other design pattern, model view controller is probably the one that can be most described as something you strive for but rarely ever perfectly achieve.
The final type of design patterns we will discuss is called creational patterns. These patterns relate to the initialization of new objects. At first, the initialization of an object probably seems simple and not a very important place to have design patterns. After all, we already have initializers. However, in certain circumstances, creational patterns can be extremely helpful.
The first patterns we will discuss are the singleton and shared instance patterns. We are discussing them together because they are extremely similar. First we will discuss shared instance, because it is the less strict form of the singleton pattern.
The idea of the shared instance pattern is that you provide an instance of your class to be used by other parts of your code. Let's look at a quick example of this in Swift:
Now, the different thing about the singleton pattern is that you would write your code in such a way that it is not even possible to create a second instance of your class. Even though our preceding address book class provides a shared instance, there is nothing to stop someone from creating their own instance using the normal initializers. We could pretty easily change our address book class to a singleton instead of a shared instance, as shown:
Using these patterns can also create hidden dependencies. Usually, it is pretty clear what dependencies an instance has based on what it must be initialized with, but a singleton or shared instance does not get passed into the initializer, so it can often go unnoticed as a dependency. Even though there is some initial extra overhead to passing an object into an initializer, it will often reduce the coupling and maintain a clearer picture of how your types interact. The bottom line is, like with any other pattern, think carefully about each use of the singleton and shared instance patterns and be sure it is the best tool for the job.
The final pattern we will discuss here is called abstract factory. It is based on a simpler pattern called factory. The idea of a factory pattern is that you implement an object for creating other objects, much like you would create a factory for assembling cars. The factory pattern is great when the initializing of a type is very complex or you want to create a bunch of similar objects. Let's take a look at the second scenario. What if we were creating a two-player ping-pong game and we had some scenario in the game where we would add additional balls that a specific player needed to keep in play? The ball class might look something like this:
Now, we could pass this factory into whatever object is responsible for handling the ball creation event and that object is no longer responsible for determining the color of the ball or any other properties we might want. This is great for reducing the number of responsibilities that object has and also keeps the code very flexible to add additional ball properties in the future without having to change the ball creation event object.
An abstract factory is a special form of factory where the instances the factory creates may be one of many subclasses of a single other class. A great example of this would be an image creation factory. As we discussed in Chapter 3, One Piece at a Time – Types, Scopes, and Projects, computers have an enormous number of ways to represent images. In that chapter we hypothesized having a superclass called just "Image" that would have a subclass for each type of image. This would help us write classes to handle any type of image very easily by always having them work with the image superclass. Similarly, we could create an image factory that would virtually eliminate any need for an external type to know anything about the different types of images. We could design an abstract factory that takes the path to any image, loads the image into the appropriate subclass, and returns it simply as the image superclass. Now, neither the code that loads an image, nor the code that uses the image, needs to know what type of image they are dealing with. All of the complexity of different image representations is abstracted away inside the factory and the image class hierarchy. This is a huge win for making our code easier to understand and more maintainable.
pattern we will discuss here is called abstract factory. It is based on a simpler pattern called factory. The idea of a factory pattern is that you implement an object for creating other objects, much like you would create a factory for assembling cars. The factory pattern is great when the initializing of a type is very complex or you want to create a bunch of similar objects. Let's take a look at the second scenario. What if we were creating a two-player ping-pong game and we had some scenario in the game where we would add additional balls that a specific player needed to keep in play? The ball class might look something like this:
Now, we could pass this factory into whatever object is responsible for handling the ball creation event and that object is no longer responsible for determining the color of the ball or any other properties we might want. This is great for reducing the number of responsibilities that object has and also keeps the code very flexible to add additional ball properties in the future without having to change the ball creation event object.
An abstract factory is a special form of factory where the instances the factory creates may be one of many subclasses of a single other class. A great example of this would be an image creation factory. As we discussed in Chapter 3, One Piece at a Time – Types, Scopes, and Projects, computers have an enormous number of ways to represent images. In that chapter we hypothesized having a superclass called just "Image" that would have a subclass for each type of image. This would help us write classes to handle any type of image very easily by always having them work with the image superclass. Similarly, we could create an image factory that would virtually eliminate any need for an external type to know anything about the different types of images. We could design an abstract factory that takes the path to any image, loads the image into the appropriate subclass, and returns it simply as the image superclass. Now, neither the code that loads an image, nor the code that uses the image, needs to know what type of image they are dealing with. All of the complexity of different image representations is abstracted away inside the factory and the image class hierarchy. This is a huge win for making our code easier to understand and more maintainable.
Good programming is about more than just grand, universal concepts of how to write effective code. The best programmers know how to play to the strengths of the tools at hand. We are now going to move from looking at the core tenants of programming design to some of the gritty details of enhancing your code with the power of Swift.
The first thing we will look at is making effective use of the associated value of an enumeration. Associated values are a pretty unique feature of Swift, so they open up some pretty interesting possibilities.
We have already seen in Chapter 3, One Piece at a Time – Types, Scopes, and Projects that we can use an enumeration with associated values to represent a measurement like distance in multiple measurement systems:
enum Height {
case Imperial(feet: Int, Inches: Double)
case Metric(meters: Double)
case Other(String)
}We can generalize this use case as using an enumeration to flatten out a simple class hierarchy. Instead of the enumeration, we could have created a height superclass or protocol with subclasses for each measurement system. However, this would be a more complex solution and we would lose the benefits of using a value type instead of a reference type. The enumeration solution is also very compact, making it very easy to understand at a glance instead of having to analyze how multiple different classes fit together.
Let's look at an even more complex example. Let's say we want to create a fitness app and we want to be able to track multiple types of workouts. Sometimes people workout to do a certain number of repetitions of various movements; other times they are just going for a certain amount of time. We could create a class hierarchy for this, but an enumeration with associated values works great:
enum Workout {
case ForTime(seconds: Int)
case ForReps(movements: [(name: String, reps: Int)])
}Now, when we want to create a workout, we only need to define values relevant to the type of workout we are interested in without having to use any classes at all.
Another great use of enumerations with associated values is to represent the state of something. The simplest example of this would be a result enumeration that can either contain a value or an error description if an error occurs:
This allows us to write a function that can fail and give a reason that it failed:
have already seen in Chapter 3, One Piece at a Time – Types, Scopes, and Projects that we can use an enumeration with associated values to represent a measurement like distance in multiple measurement systems:
enum Height {
case Imperial(feet: Int, Inches: Double)
case Metric(meters: Double)
case Other(String)
}We can generalize this use case as using an enumeration to flatten out a simple class hierarchy. Instead of the enumeration, we could have created a height superclass or protocol with subclasses for each measurement system. However, this would be a more complex solution and we would lose the benefits of using a value type instead of a reference type. The enumeration solution is also very compact, making it very easy to understand at a glance instead of having to analyze how multiple different classes fit together.
Let's look at an even more complex example. Let's say we want to create a fitness app and we want to be able to track multiple types of workouts. Sometimes people workout to do a certain number of repetitions of various movements; other times they are just going for a certain amount of time. We could create a class hierarchy for this, but an enumeration with associated values works great:
enum Workout {
case ForTime(seconds: Int)
case ForReps(movements: [(name: String, reps: Int)])
}Now, when we want to create a workout, we only need to define values relevant to the type of workout we are interested in without having to use any classes at all.
Another great use of enumerations with associated values is to represent the state of something. The simplest example of this would be a result enumeration that can either contain a value or an error description if an error occurs:
This allows us to write a function that can fail and give a reason that it failed:
Another powerful feature that we briefly covered in Chapter 3, One Piece at a Time – Types, Scopes, and Projects is the ability to extend existing types. We saw that we could add an extension to the string type that would allow us to repeat the string multiple times. Let's look at a more practical use case for this and discuss its benefits in terms of improving our code.
Perhaps we are creating a grade-tracking program where we are going to be printing out a lot of percentages. A great way to represent percentages is by using a float with a value between zero and one. Floats are great for percentages because we can use the built-in math functions and they can represent pretty granular numbers. The hurdle to cross when using a float to represent a percentage is printing it out. If we simply print out the value, it will most likely not be formatted the way we would want. People prefer percentages to be out of 100 and have a percent symbol after it.
One feature we have not yet discussed is the concept of lazy properties. Marking a property as lazy allows Swift to wait to initialize it until the first time it is accessed. This can be useful in at least a few important ways.
The most obvious way to use lazy properties is to avoid unnecessary memory usage. Let's look at a very simple example first:
An alternative to using lazy properties to achieve our goals above would be to use optional properties instead and simply assign those values later as needed. This is an OK solution, especially if our only goal is to reduce unnecessary memory usage or processing. However, there is one other great benefit to the lazy property solution. It produces more legible code by connecting the logic to calculate a property's value right by its definition. If we simply had an optional property it would have to be initialized in either an initializer or by some other method. It would not be immediately clear when looking at the property what its value will be and when it will be set, if it will be set at all.
This is a critically important advantage as your code base grows in size and age. It is very easy to get lost in a code base, even if it is your own. The more straight lines you can draw from one piece of logic to another, the easier it will be able to find the logic you are looking for when you come back to your code base later.
This is a critically important advantage as your code base grows in size and age. It is very easy to get lost in a code base, even if it is your own. The more straight lines you can draw from one piece of logic to another, the easier it will be able to find the logic you are looking for when you come back to your code base later.
As we discussed already, Objective-C was previously the primary language for developing on Apple's platforms. This means that Objective-C had a lot of influence on Swift; the largest of which is that Swift was designed to interoperate with Objective-C. Swift code can call Objective-C code and, likewise, Objective-C code can call Swift code.
Before we can talk about the details of Objective-C, we need to acknowledge its history. Objective-C is based on a language called simply "C". The C programming language was one of the first highly portable languages. Portable means that the same C code could be compiled to run on any processor as long as someone writes a compiler for that platform. Before that, most of the code was written in Assembly; which always had to be written specifically for each processor it would run on.
Now, we are ready to dive into the basics of the Objective-C language. Objective-C has constants and variables very similar to Swift but they are declared and worked with slightly differently. Let's take a look at declaring a variable in both Swift and Objective-C:
The first line should look familiar, as it is Swift. The Objective-C version doesn't actually look all that different. The important difference is that the type of the variable is declared before the name instead of after. It is also important to note that Objective-C has no concept of type inference. Every time a variable is declared, it must be given a specific type. You will also see that there is a semicolon after the name. This is because every line of code in Objective-C must end with a semicolon. Lastly, you should notice that we have not explicitly declared number as a variable. This is because all information is assumed to be variable in Objective-C unless specified otherwise. To define number as a constant, we will add the const keyword before its type:
The number we declared above is a value type in both languages. They are copied if they are passed to another function and there cannot be more than one variable referencing the exact same instance.
Objective-C actually allows you to make any type a reference type by adding an asterisk:
A pointer can also always be tested for nil:
To access the referenced value, you must dereference it:
You can dereference a pointer by adding an asterisk before it.
This is how pointers are similar to optionals in Swift. The difference is that there is no way to declare a non-optional reference type in Objective-C. Every reference type could technically be nil, even if you design it to never actually be nil. This can often add a lot of unnecessary nil checking and means every function you write that accepts a reference type should probably deal with the nil case.
actually allows you to make any type a reference type by adding an asterisk:
A pointer can also always be tested for nil:
To access the referenced value, you must dereference it:
You can dereference a pointer by adding an asterisk before it.
This is how pointers are similar to optionals in Swift. The difference is that there is no way to declare a non-optional reference type in Objective-C. Every reference type could technically be nil, even if you design it to never actually be nil. This can often add a lot of unnecessary nil checking and means every function you write that accepts a reference type should probably deal with the nil case.
Objective-C has the same exact core containers that Swift does, with the two exceptions being that they are named slightly differently, and all of the containers in Objective-C are reference types because of the basic requirement that all Objective-C types must be reference types.
In Objective-C arrays are called NSArray. Let's take a look at the initialization of an array in both Swift and Objective-C side-by-side:
There is also an alternative to calling alloc and init; it's called simply new:
You may have noticed that we have not specified what type this array is supposed to hold. This is because it is actually not possible. All arrays in Objective-C can contain any mix of types as long as they are not C types. This means that an NSArray cannot contain an int (there is an NSNumber class instead), but it can contain any mix of NSStrings, NSArrays, or any other Objective-C type. The compiler will not do any form of type checking for you, which means that we can write code expecting the wrong type to be in the array. This is yet another classification of bug that Swift makes impossible.
We can also use square brackets, similar to Swift:
Lastly, to remove an object from a mutable array, we can use the removeObjectAtIndex: method:
Array literals start with an @ symbol just like a string, but then it is defined by a list of objects within square brackets just like Swift.
Following the same pattern as arrays, dictionaries in Objective-C are called NSDictionary and NSMutableDictionary. A dictionary is initialized in the exact same way as shown:
To set a value, we use the setObject:forKey: method:
Now to access a value we can use the objectForKey: method or square brackets again:
Lastly, to remove an object, we can use the removeObjectForKey: method:
Again, we have to start our literal with an @ symbol. We can also see that we can use numbers as objects in our containers as long as we put an @ symbol before each one. Instead of creating something such as an int type, this creates an NSNumber instance. You shouldn't need to know much about the NSNumber class except that it is a class to represent many different forms of numbers as objects.
Objective-C has many of the same control flow paradigms as Swift. We will go through each of them quickly, but before we do, let's take a look at the Objective-C equivalent of print:
Now, we are ready to look at the different methods of control flow in Objective-C.
A conditional looks exactly the same in both Swift and Objective-C except parentheses are required in Objective-C:
You can also include those parentheses in Swift, but they are optional. Here, you also see that Objective-C still has the idea of the dot syntax for calling some methods. In this case, we have used invitees.count instead of [invitees count]. This is only an option when we are accessing a property of the instance or we are calling a method that takes no arguments and returns something, as if it were a calculated property.
Switches in Objective-C are profoundly less powerful than switches in Swift. In fact, switches are a feature of strict C and are not enhanced at all by Objective-C. Switches cannot be used like a series of conditionals; they can only be used to do equality comparisons:
Just like conditionals, loops in Objective-C are very similar to Swift. While-loops are identical except that the parentheses are required:
This loop is made up of three parts: an initial value, a condition to run until, and an operation to perform after each loop. This version loops through the numbers 1 to 10 just like the Swift version. Clearly, it is still possible to translate the Swift code into Objective-C; it just isn't as clean.
This loop is made up of three parts: an initial value, a condition to run until, and an operation to perform after each loop. This version loops through the numbers 1 to 10 just like the Swift version. Clearly, it is still possible to translate the Swift code into Objective-C; it just isn't as clean.
So far we have called some Objective-C functions but we have not defined any yet. Let's see what the Objective-C versions are of the functions we defined in Chapter 2, Building Blocks – Variables, Collections, and Flow Control.
Our most basic function definition didn't take any arguments and didn't return anything. The Objective-C version looks similar to the following code:
func sayHello() {
print("Hello World!");
}
sayHello()
void sayHello() {
NSLog(@"Hello World!");
}
sayHello();Objective-C functions always starts with the type that the function returns instead of the keyword func. In this case, we aren't actually returning anything, so we use the keyword void to indicate that.
Functions that take arguments and return values have more of a disparity between the two languages:
func addInviteeToListIfSpotAvailable
    (
    invitees: [String],
    newInvitee: String
    )
    -> [String]
{
    if invitees.count >= 20 {
        return invitees
    }
    return invitees + [newInvitee]
}
addInviteeToListIfSpotAvailable(invitees, newInvitee: "Roana")
NSArray *addInviteeToListIfSpotAvailable
(
NSArray *invitees,
NSString *newInvitee
)
{
if (invitees.count >= 20) {
return invitees;
}
NSMutableArray *copy = [invitees mutableCopy];
[copy addObject:newInvitee];
return copy;
}
addInviteeToListIfSpotAvailable(invitees, @"Roana");Again, the Objective-C version defines what it is returning at the beginning of the function. Also, just like variables, parameters to functions must have their type defined before their name instead of after. The rest however, is pretty similar: the arguments are contained within parentheses and separated by commas; the code of the function is contained within curly brackets and we use the return keyword to indicate what we want to return.
The type system in Objective-C is a little bit more disparate than Swift. This is because the structures and enumerations in Objective-C come from C. Only classes and categories come from the Objective-C extension.
In Swift, structures are very similar to classes, but in Objective-C, they are much more different. Structures in Objective-C are essentially just a way of giving a name to a collection of individual types. They cannot contain methods. Even more restrictive than that, structures can't contain Objective-C types. This leaves us with only basic possibilities:
Enumerations are also much more restrictive in Objective-C. They are really just a simple mechanism to represent a finite list of related possible values. This allows us to still represent possible primary colors:
Just like with structures, Objective-C enumerations start with the keyword typedef followed by enum with the name at the end of the definition. Each case is contained within the curly brackets and separated by a comma.
Unlike Objective-C structures and enumerations, classes are very similar to their Swift counterparts. Objective-C classes can contain methods and properties, use inheritance, and get initialized. However, they look pretty different. Most notably, a class in Objective-C is split into two parts: its interface and its implementation. The interface is intended to be the public interface to the class, while the implementation includes the implementation of that interface in addition to any other private methods.
Let's start by looking again at our contact class from Chapter 3, One Piece at a Time – Types, Scopes, and Projects and what it looks like in Objective-C:
class Contact {
var firstName: String = "First"
var lastName: String = "Last"
}
@interface Contact : NSObject {
NSString *firstName;
NSString *lastName;
}
@end
@implementation Contact
@endAlready Objective-C is taking a lot more lines of code. First, we have the interface declaration. This begins with the @interface keyword and ends with the @end keyword. Within the square brackets is a list of attributes. These are essentially the same as the attributes of a structure, except that you can include Objective-C objects in the attributes. These attributes are not commonly written like this because using the properties will create these automatically, as we will see later.
You will also notice that our class is inheriting from a class called NSObject, as indicated by : NSObject. This is because every class in Objective-C must inherit from NSObject, which makes NSObject the most basic form of class. However, don't let the term "basic" fool you; NSObject provides a lot of functionality. We won't really get into that here, but you should at least be aware of it.
The other part of the class is the implementation. It starts with the @implementation keyword followed by the name of the class we are implementing and then ends again with the @end keyword. Here, we have not actually added any extra functionality to our contact class. However, you may notice that our class is missing something that the Swift version has.
Objective-C does not allow specifying default values for any attributes or properties. This means that we have to implement an initializer that sets the default values:
In Objective-C, initializers are the exact same as a method, except that by convention they start with the name init. This is actually just a convention but it is important, as it will cause problems down the line with memory management and interacting with the code from Swift.
The Objective-C version of the contact class still isn't exactly like the Swift version because the firstName and lastName attributes are not accessible from outside the class. To make them accessible we need to define them as public properties and we can drop them from being explicit attributes:
Alternatively, you can just set the values using self:
Also, just as you can define weak references in Swift, you can do so in Objective-C:
In addition to weak or strong, you can also specify that a property is readonly or readwrite:
Each property attribute should be written inside the parentheses separated by a comma. As the readonly name implies, this makes it so that the property can be read but not written to. Every property is read-write by default, so normally it is not necessary to include it.
We have already seen an example of a method in the form of an initializer, but let's take a look at some methods that take parameters:
Just as all of our classes so far have inherited from NSObject, any class can inherit from any other class just like in Swift and all the same rules apply. Methods and properties are inherited from their superclass and you can choose to override methods in subclasses. However, the compiler enforces the rules much less. The compiler does not force you to specify that you intend your method to override another. The compiler does not enforce any rules around initializers and whom they call. However, all the conventions exist because those conventions were the inspiration for the Swift requirements.
Categories in Objective-C are just like Swift extensions. They allow you to add new methods to existing classes. They look very similar to plain classes:
These types of properties are very similar to calculated properties. If you need to allow reading from a property, you must implement a method with the exact same name that takes no parameters and returns the same type. If you want to be able to write to the property you will have to implement a method that starts with set, followed by the same property name with a capital first letter, that takes the property type as a parameter and returns nothing. This allows outside classes to interact with the property as if it were an attribute, when in fact it is just another set of methods. Again, this is possible within a class or a category.
Like Swift, Objective-C has the idea of protocols. Their definition looks similar to this:
Here, we are using the @protocol keyword instead of @interface and it still ends with the @end keyword. We can define any properties or methods that we want. We can then say that a class implements the protocol similar to this:
Lastly, blocks are the Objective-C alternative to closures in Swift. They are actually a late addition to Objective-C so their syntax is somewhat complex:
Note that the type id signifies any Objective-C object and even though it doesn't have an asterisk, it is a reference type. The usage above looks exactly like a standalone block usage. However, the syntax looks somewhat different in a method:
Here we use the keyword __weak (that has two underscores) to indicate that the weakBall variable should only have a weak reference to ball. We can then safely reference the weakBall variable within the block and not create a circular reference.
Objective-C structures and enumerations, classes are very similar to their Swift counterparts. Objective-C classes can contain methods and properties, use inheritance, and get initialized. However, they look pretty different. Most notably, a class in Objective-C is split into two parts: its interface and its implementation. The interface is intended to be the public interface to the class, while the implementation includes the implementation of that interface in addition to any other private methods.
Let's start by looking again at our contact class from Chapter 3, One Piece at a Time – Types, Scopes, and Projects and what it looks like in Objective-C:
class Contact {
var firstName: String = "First"
var lastName: String = "Last"
}
@interface Contact : NSObject {
NSString *firstName;
NSString *lastName;
}
@end
@implementation Contact
@endAlready Objective-C is taking a lot more lines of code. First, we have the interface declaration. This begins with the @interface keyword and ends with the @end keyword. Within the square brackets is a list of attributes. These are essentially the same as the attributes of a structure, except that you can include Objective-C objects in the attributes. These attributes are not commonly written like this because using the properties will create these automatically, as we will see later.
You will also notice that our class is inheriting from a class called NSObject, as indicated by : NSObject. This is because every class in Objective-C must inherit from NSObject, which makes NSObject the most basic form of class. However, don't let the term "basic" fool you; NSObject provides a lot of functionality. We won't really get into that here, but you should at least be aware of it.
The other part of the class is the implementation. It starts with the @implementation keyword followed by the name of the class we are implementing and then ends again with the @end keyword. Here, we have not actually added any extra functionality to our contact class. However, you may notice that our class is missing something that the Swift version has.
Objective-C does not allow specifying default values for any attributes or properties. This means that we have to implement an initializer that sets the default values:
In Objective-C, initializers are the exact same as a method, except that by convention they start with the name init. This is actually just a convention but it is important, as it will cause problems down the line with memory management and interacting with the code from Swift.
The Objective-C version of the contact class still isn't exactly like the Swift version because the firstName and lastName attributes are not accessible from outside the class. To make them accessible we need to define them as public properties and we can drop them from being explicit attributes:
Alternatively, you can just set the values using self:
Also, just as you can define weak references in Swift, you can do so in Objective-C:
In addition to weak or strong, you can also specify that a property is readonly or readwrite:
Each property attribute should be written inside the parentheses separated by a comma. As the readonly name implies, this makes it so that the property can be read but not written to. Every property is read-write by default, so normally it is not necessary to include it.
We have already seen an example of a method in the form of an initializer, but let's take a look at some methods that take parameters:
Just as all of our classes so far have inherited from NSObject, any class can inherit from any other class just like in Swift and all the same rules apply. Methods and properties are inherited from their superclass and you can choose to override methods in subclasses. However, the compiler enforces the rules much less. The compiler does not force you to specify that you intend your method to override another. The compiler does not enforce any rules around initializers and whom they call. However, all the conventions exist because those conventions were the inspiration for the Swift requirements.
Categories in Objective-C are just like Swift extensions. They allow you to add new methods to existing classes. They look very similar to plain classes:
These types of properties are very similar to calculated properties. If you need to allow reading from a property, you must implement a method with the exact same name that takes no parameters and returns the same type. If you want to be able to write to the property you will have to implement a method that starts with set, followed by the same property name with a capital first letter, that takes the property type as a parameter and returns nothing. This allows outside classes to interact with the property as if it were an attribute, when in fact it is just another set of methods. Again, this is possible within a class or a category.
Like Swift, Objective-C has the idea of protocols. Their definition looks similar to this:
Here, we are using the @protocol keyword instead of @interface and it still ends with the @end keyword. We can define any properties or methods that we want. We can then say that a class implements the protocol similar to this:
Lastly, blocks are the Objective-C alternative to closures in Swift. They are actually a late addition to Objective-C so their syntax is somewhat complex:
Note that the type id signifies any Objective-C object and even though it doesn't have an asterisk, it is a reference type. The usage above looks exactly like a standalone block usage. However, the syntax looks somewhat different in a method:
Here we use the keyword __weak (that has two underscores) to indicate that the weakBall variable should only have a weak reference to ball. We can then safely reference the weakBall variable within the block and not create a circular reference.
by looking again at our contact class from Chapter 3, One Piece at a Time – Types, Scopes, and Projects and what it looks like in Objective-C:
class Contact {
var firstName: String = "First"
var lastName: String = "Last"
}
@interface Contact : NSObject {
NSString *firstName;
NSString *lastName;
}
@end
@implementation Contact
@endAlready Objective-C is taking a lot more lines of code. First, we have the interface declaration. This begins with the @interface keyword and ends with the @end keyword. Within the square brackets is a list of attributes. These are essentially the same as the attributes of a structure, except that you can include Objective-C objects in the attributes. These attributes are not commonly written like this because using the properties will create these automatically, as we will see later.
You will also notice that our class is inheriting from a class called NSObject, as indicated by : NSObject. This is because every class in Objective-C must inherit from NSObject, which makes NSObject the most basic form of class. However, don't let the term "basic" fool you; NSObject provides a lot of functionality. We won't really get into that here, but you should at least be aware of it.
The other part of the class is the implementation. It starts with the @implementation keyword followed by the name of the class we are implementing and then ends again with the @end keyword. Here, we have not actually added any extra functionality to our contact class. However, you may notice that our class is missing something that the Swift version has.
Objective-C does not allow specifying default values for any attributes or properties. This means that we have to implement an initializer that sets the default values:
In Objective-C, initializers are the exact same as a method, except that by convention they start with the name init. This is actually just a convention but it is important, as it will cause problems down the line with memory management and interacting with the code from Swift.
The Objective-C version of the contact class still isn't exactly like the Swift version because the firstName and lastName attributes are not accessible from outside the class. To make them accessible we need to define them as public properties and we can drop them from being explicit attributes:
Alternatively, you can just set the values using self:
Also, just as you can define weak references in Swift, you can do so in Objective-C:
In addition to weak or strong, you can also specify that a property is readonly or readwrite:
Each property attribute should be written inside the parentheses separated by a comma. As the readonly name implies, this makes it so that the property can be read but not written to. Every property is read-write by default, so normally it is not necessary to include it.
We have already seen an example of a method in the form of an initializer, but let's take a look at some methods that take parameters:
Just as all of our classes so far have inherited from NSObject, any class can inherit from any other class just like in Swift and all the same rules apply. Methods and properties are inherited from their superclass and you can choose to override methods in subclasses. However, the compiler enforces the rules much less. The compiler does not force you to specify that you intend your method to override another. The compiler does not enforce any rules around initializers and whom they call. However, all the conventions exist because those conventions were the inspiration for the Swift requirements.
Categories in Objective-C are just like Swift extensions. They allow you to add new methods to existing classes. They look very similar to plain classes:
These types of properties are very similar to calculated properties. If you need to allow reading from a property, you must implement a method with the exact same name that takes no parameters and returns the same type. If you want to be able to write to the property you will have to implement a method that starts with set, followed by the same property name with a capital first letter, that takes the property type as a parameter and returns nothing. This allows outside classes to interact with the property as if it were an attribute, when in fact it is just another set of methods. Again, this is possible within a class or a category.
Like Swift, Objective-C has the idea of protocols. Their definition looks similar to this:
Here, we are using the @protocol keyword instead of @interface and it still ends with the @end keyword. We can define any properties or methods that we want. We can then say that a class implements the protocol similar to this:
Lastly, blocks are the Objective-C alternative to closures in Swift. They are actually a late addition to Objective-C so their syntax is somewhat complex:
Note that the type id signifies any Objective-C object and even though it doesn't have an asterisk, it is a reference type. The usage above looks exactly like a standalone block usage. However, the syntax looks somewhat different in a method:
Here we use the keyword __weak (that has two underscores) to indicate that the weakBall variable should only have a weak reference to ball. We can then safely reference the weakBall variable within the block and not create a circular reference.
Swift, Objective-C has the idea of protocols. Their definition looks similar to this:
Here, we are using the @protocol keyword instead of @interface and it still ends with the @end keyword. We can define any properties or methods that we want. We can then say that a class implements the protocol similar to this:
Lastly, blocks are the Objective-C alternative to closures in Swift. They are actually a late addition to Objective-C so their syntax is somewhat complex:
Note that the type id signifies any Objective-C object and even though it doesn't have an asterisk, it is a reference type. The usage above looks exactly like a standalone block usage. However, the syntax looks somewhat different in a method:
Here we use the keyword __weak (that has two underscores) to indicate that the weakBall variable should only have a weak reference to ball. We can then safely reference the weakBall variable within the block and not create a circular reference.
Now that we have a pretty good understanding of Objective-C, let's discuss what Objective-C code looks like in a project. Unlike the Swift code, Objective-C is written in two different types of files. One of the types is called a header file and ends in the extension h. The other type is called an implementation file and ends in the extension m.
Before we can really discuss what the difference is between the two, we first have to discuss code exposure. In Swift, all the code you write is accessible to all other code in your project. This is not true with Objective-C. In Objective-C, you must explicitly indicate that you want to have access to the code in another file.
The header files are the types of files that can be included by other files. This means that header files should only contain the interfaces of types. In fact, this is why the separation exists between class interfaces and implementations. Any file can import a header file and that essentially inserts all the code of one file into the file that is importing it:
A lot of the time it isn't actually necessary for one header file to include another because all it needs to know about is the existence of the class. If it doesn't need to know any actual details about the class, it can simply indicate that the class exists using the @class keyword:
As you might have guessed, implementation files are generally for the implementation of your types. These files are not imported into others; they simply fulfill the promises of what the interface files have defined. This means that header and implementation files generally exist in pairs. If you are defining a steering wheel class, you will most likely create a SteeringWheel.h header and a SteeringWheel.m implementation file. Any other code that needs to interact with the details of the steering wheel class will import the header and at compile time, the compiler will make all of the implementations available to the running program.
@interface SteeringWheel () @property NSString *somePrivateProperty; - (void)somePrivateMethod; @end
This brings up another point, that only methods that you intend to use from outside files should be declared in the header. You should always consider a header to be the public interface of your class and it should be as minimal as possible. It is always written from the perspective of outside files. This is the way that Objective-C implements access control. It isn't formally built into the language but the compiler will warn you if you try to interact with code that has not been imported. It is actually still possible to interact with these private interfaces, especially if you duplicate the interface declaration somewhere else, but it is considered best practice to not do that and Apple will actually reject your apps during review if you try to interact with private parts of their API.
Other than the obvious difference, the Objective-C projects will have two different types of files. They are organized in the exact same way as Swift files. It is still considered to be a good practice to create folders to group related files together. Most of the time you will want to keep header file and implementation file pairs together, as people will be switching between the two types of files a lot. However, people can also use the keyboard shortcuts Control/Command up arrow or Control/Command down arrow to quickly swap between a header file and its implementation file.
The last and possibly the most critical component of understanding Objective-C for our purpose is to be able to call Objective-C code from Swift. This is actually pretty straightforward in most circumstances. We will not take any time to discuss calling Swift code from Objective-C because this book assumes that you are only writing Swift code.
The most important part of being able to call Objective-C code from Swift is how to make the code visible to Swift. As we now know, Objective-C code needs to be imported to be visible to other code. This still holds true with Swift, but Swift has no mechanism to import individual files. Instead, when you add your first Objective-C code to a Swift project, Xcode is going to ask you if you want to add what is called a bridging header:

You should select Yes and then Xcode will automatically create a header file named after the project ending in Bridging-Header.h. This is the file where you need to import any Objective-C headers that you want to expose to Swift. It will just be a file with a list of imports. You still do not need to import any of the implementation files.
most important part of being able to call Objective-C code from Swift is how to make the code visible to Swift. As we now know, Objective-C code needs to be imported to be visible to other code. This still holds true with Swift, but Swift has no mechanism to import individual files. Instead, when you add your first Objective-C code to a Swift project, Xcode is going to ask you if you want to add what is called a bridging header:
You should select Yes and then Xcode will automatically create a header file named after the project ending in Bridging-Header.h. This is the file where you need to import any Objective-C headers that you want to expose to Swift. It will just be a file with a list of imports. You still do not need to import any of the implementation files.
After you have exposed the headers to Swift, it is very simple to call functions. You can simply call the functions directly as if they didn't have parameter names:
You can use types the same way you use functions. Once the proper header files are imported in the bridging header, you can just use the type as if it were a Swift type:
Again, from Swift's point of view, there is absolutely no difference between how we write the code that uses our Objective-C class and how we would write it if the class were implemented in Objective-C. We were even able to call the addToInviteeList:includeLastName: method with the same parameter names. This makes it even more clear that Swift was designed with backwards compatibility in mind.
You may have also noticed that the NSString and NSArray types seem to translate transparently to String and Array classes in the preceding code. This is another wonderful feature of the bridge between Swift and Objective-C. These types, as well as dictionaries, translate almost perfectly. The only difference is that since Objective-C does require an element type when defining a container, they are translated into Swift as containing objects of type AnyObject. If you want to treat them as a more specific type, you will have to cast them:
You will note that this acts as a pattern when Objective-C types are translated to Swift. Any reference type is going to be translated, by default, to an implicitly unwrapped optional because of the nature of Objective-C reference types. The compiler can't automatically know if the value returned could be nil or not, so it doesn't know if it should be translated as a regular optional or a non-optional. However, Objective-C developers can add annotations to let the compiler know if a value can be nil or not.
The first thing Objective-C developers can add annotations for is whether a specific variable can be null or not:
note that this acts as a pattern when Objective-C types are translated to Swift. Any reference type is going to be translated, by default, to an implicitly unwrapped optional because of the nature of Objective-C reference types. The compiler can't automatically know if the value returned could be nil or not, so it doesn't know if it should be translated as a regular optional or a non-optional. However, Objective-C developers can add annotations to let the compiler know if a value can be nil or not.
The first thing Objective-C developers can add annotations for is whether a specific variable can be null or not:
There is some debate in the Apple developer community about how relevant Objective-C will be moving forward. There are people that have jumped into Swift development full time and there are others that are waiting for Swift to mature even more before they commit energy to truly learning it. However, there is little debate over the fact that Objective-C knowledge is still going to be relevant for a while, most notably because of the vast resources that exist and the fact that all existing Apple APIs are written in Objective-C. We will put those APIs to use in our next chapter: Chapter 11, A Whole New World – Developing an App, when we will finally dive into some real app development.
Before we even open up Xcode, we should have a good sense of what we plan to develop. We want to know the basics of what kind of data we are going to need to represent and what the user interface is going to be like. We don't yet need pixel perfect designs for every screen, but we should have a good idea of the flow of the app and what features we want to include in our first version.
As we already discussed, we are going to develop a basic camera app. This leaves us with a very clear list of features, which we would want in a first version:
Now that we have a list of features, we can come up with the basic flow of the app, otherwise referred to as a wireframe. The first screen of our app will be a gallery of any picture the user has already taken. There will be a button on the screen, which will allow them to take a new picture. It will also have the ability to activate the editing mode where they can delete photos or change their label:

This interface will allow us to take advantage of the built-in picture-taking interface that we will look at in more detail later. This interface will also allow us to make it flexible to work on all the different phone and tablet screens. It may seem simple, but there are many components that have to fit together to make this application work. On the other hand, once you have a good understanding of the different components, it will start to seem simple again.
Now that we know roughly how the app needs to work for the user, we can come up with at least a high-level concept of how the data should be stored. In this case, we simply have a flat list of images with different labels. The easiest way for us to store these files is in the local file system, with each image named after the user chosen label. The only thing to keep in mind with this system is that we will have to find a way to allow two different images with the same exact label. We will solve that problem in more detail when we get around to implementing it.
Now that we have finished conceptualizing our app, we are ready to start coding. In Chapter 3, One Piece at a Time – Types, Scopes, and Projects, we created a command-line project. This time, we are going to create an iOS Application. Once again, in Xcode, navigate to File | New | Project…. When a window appears, select the Single View Application from the iOS | Application menu:
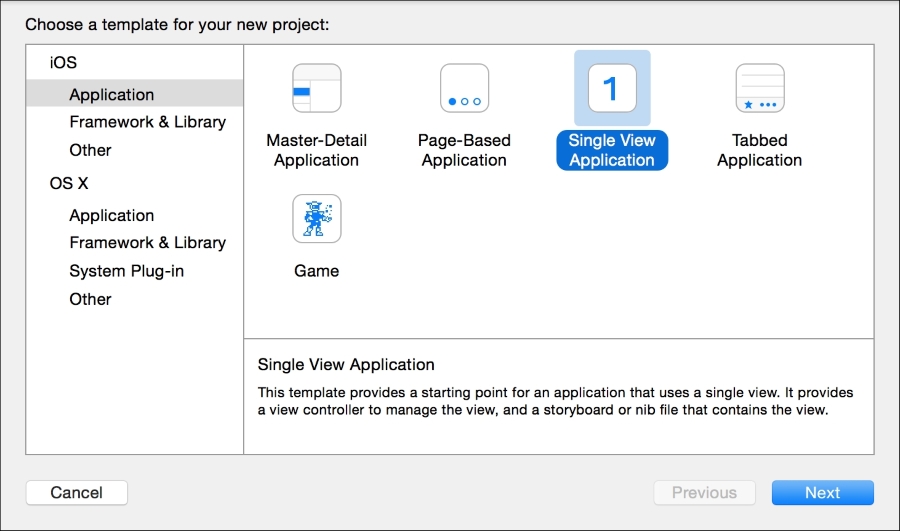
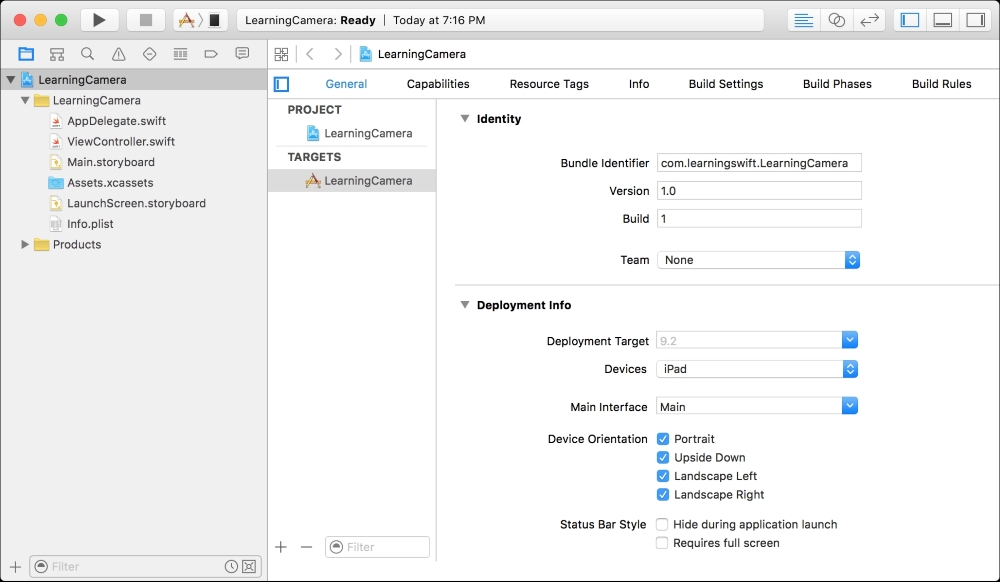
This default screen allows us to configure various attributes of the app including the version number, target devices, and much more. For our purposes, all of the defaults are fine. When you decide to submit an app to the app store, this screen will become much more important.
The fourth file is Assets.xcassets. This is a container for all of the images that we would want to display in our app. Almost every app you make will have at least one image so this is a very important file too.
Now that we have our bearings within the project, let's jump into configuring the user interface of our app. As we discussed earlier, this is done within the Main.storyboard file. When we select that file, we are presented with a graphical editing tool, generally referred to as
Interface Builder:
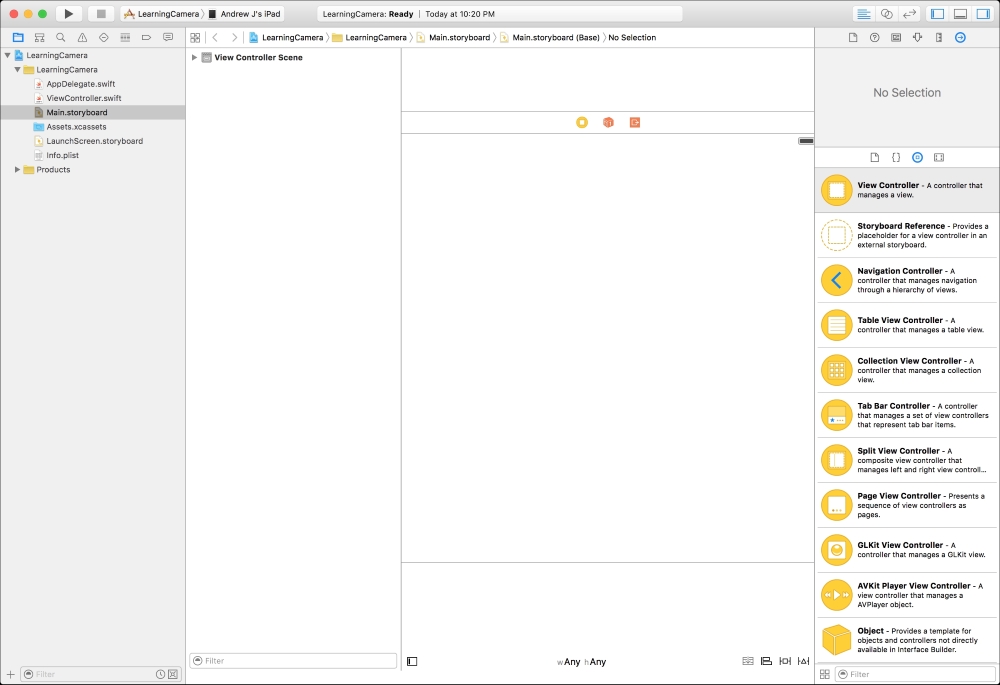
The first thing we want to do is add the bar along the top that is in our wireframes. This bar is called a navigation bar and we can add it directly, as it is one of the elements in our library. However, the frameworks will handle many complications for us if we use a Navigation Controller instead. A Navigation Controller is a view controller that contains other view controllers. Specifically, it adds a navigation bar to the top and allows us to push child view controllers onto it in the future. This controller creates the animation of a view being pushed on from the right in many applications. For example, when you select an e-mail in the Mail app, it animates in the contents of the e-mail; this uses a navigation controller. We will not have to push any view controllers on in this app, but it is good to be set up for the future and this is a superior way of getting a navigation bar at the top.
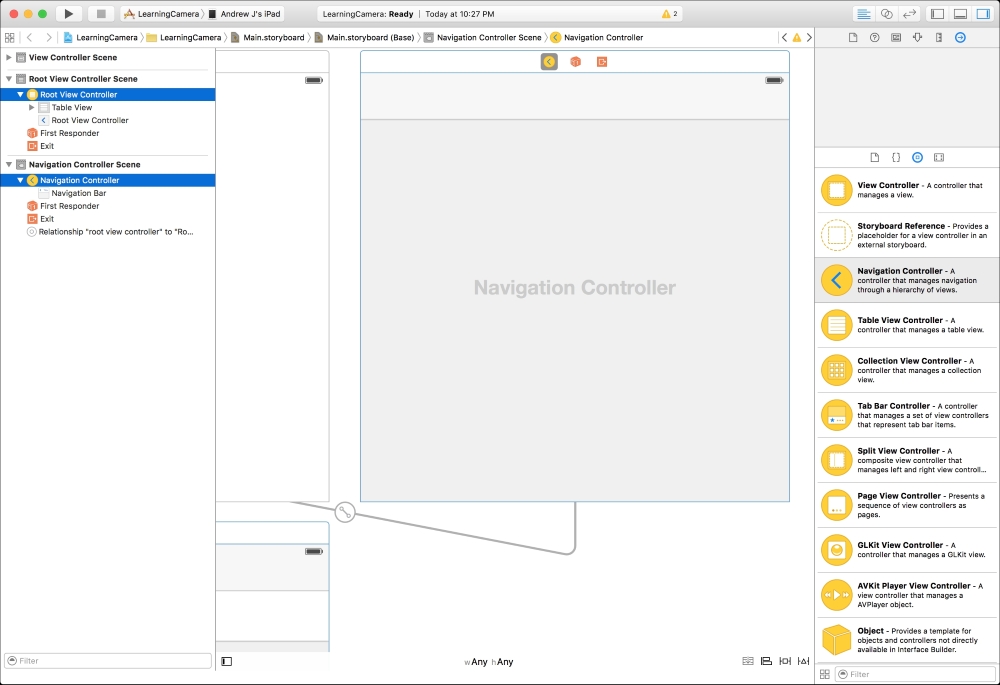
We don't want the new Root View Controller, only the View Controller Scene so let's delete it. To do this, click on the Root View Controller with the yellow icon and press the Delete key. Next, we want to make the View Controller Scene the root view controller. The root view controller is the first controller to be shown within the Navigation Controller. To do this, right-click on the Navigation Controller with the yellow icon and drag it to the View Controller with the yellow icon below. The View Controller will be highlighted blue:
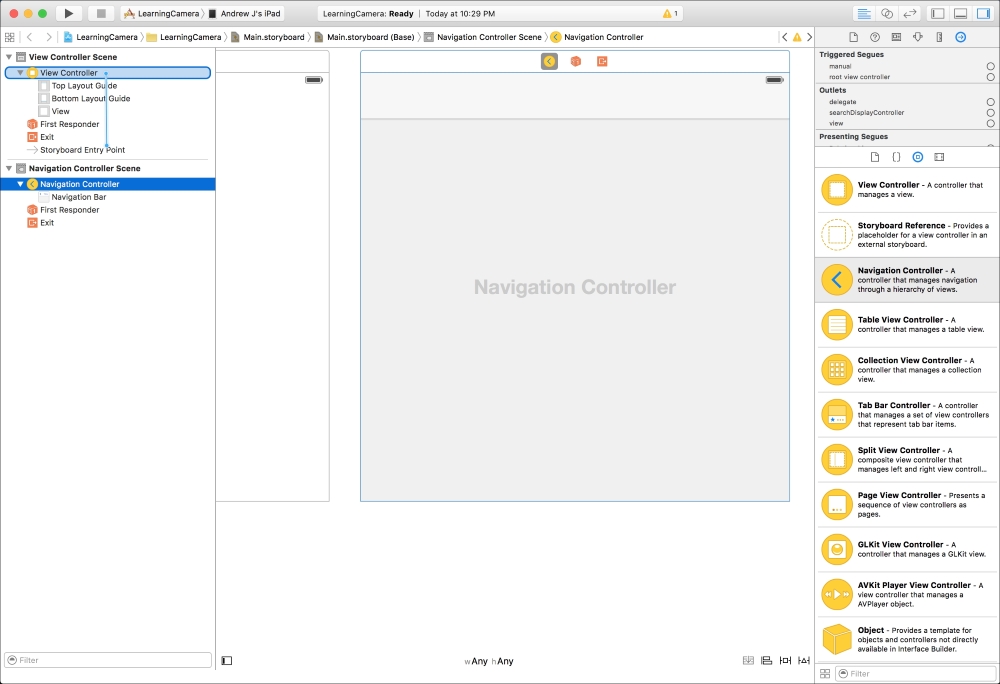
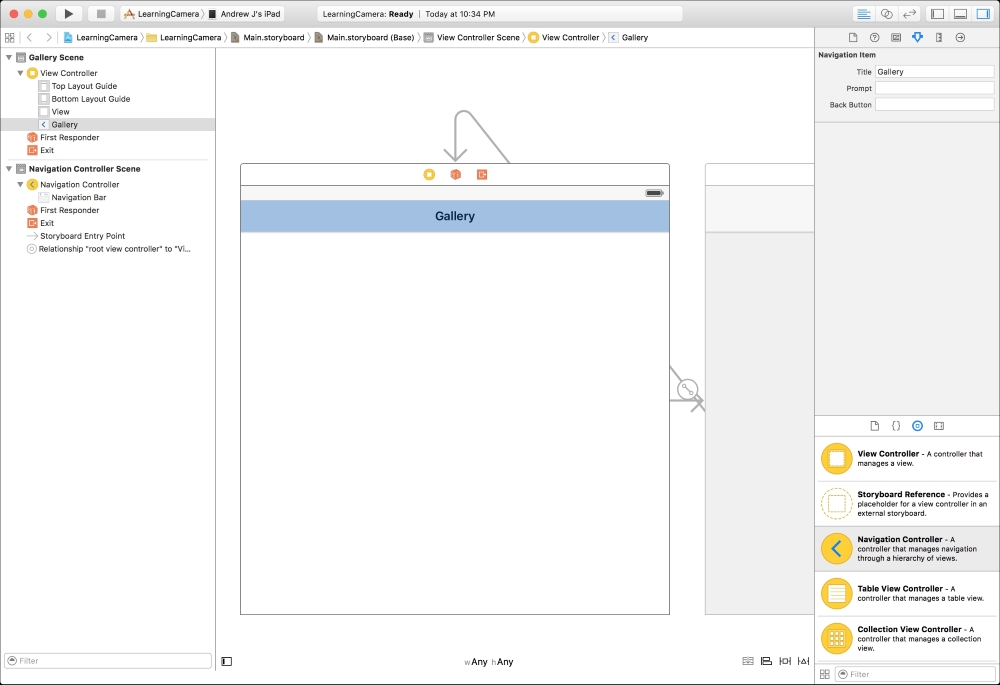
Next, we want to add the "Take a Picture" button to our navigation bar. All buttons in toolbars are called bar button items. Find them in the library and then drag it to the right side of the toolbar (the place where you can drop it will turn blue when you get close to it). By default, the button will say Item, but we want it to be an add button instead. One option would be to change the text to an addition symbol, but there is a better option. After adding the button, you should be able to see it appear in the hierarchy that is to the left of the main view. In there, you will see the navigation bar with the new button item nested inside the Gallery title. If you select that item in the hierarchy, you will see some options we can configure about the item along the right-hand side of the screen. We want to change the System Item to Add:
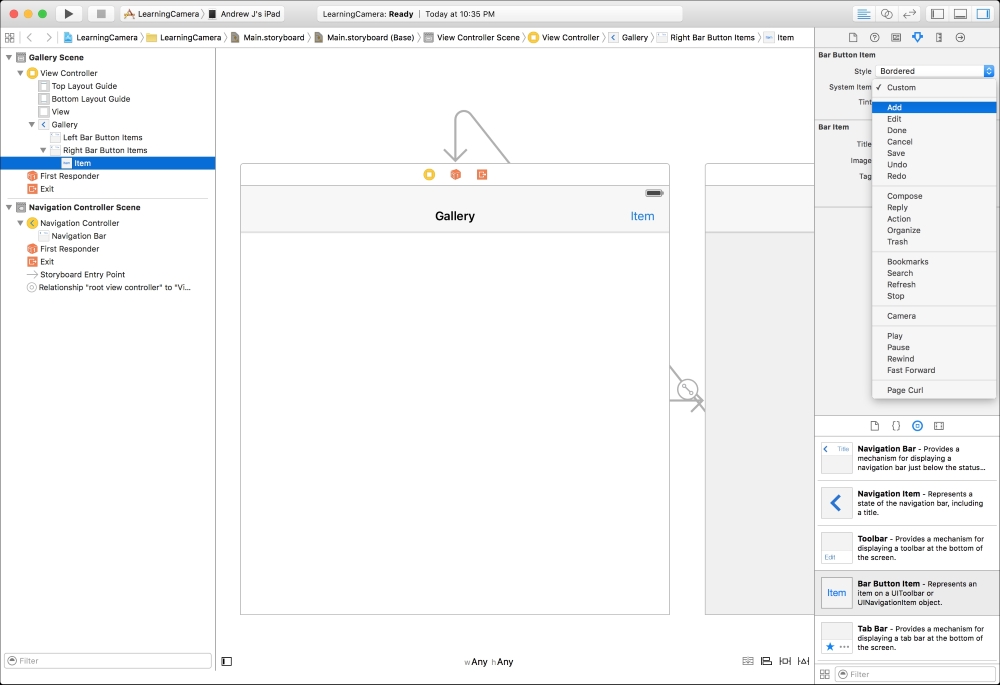
Now, you can do the same thing for the left-hand side of the navigation bar with the Edit identifier.
First, we need to define the rules for the sizing of the collection view. This will allow the interface to adapt well to each different screen size. The tool we use to do this is called Auto Layout. Click on the collection view and then select the Pin icon in the lower right of the screen:

Configure this window to match the preceding screenshot. Click on each of the four struts so that they are highlighted red, uncheck Constrain to margins, and change each of the measurements to zero. After everything is configured, click on Add 4 Constraints. This will cause some yellow lines to appear that indicate that the view's placement is not consistent with the rules we just created. We can resize the views ourselves to make it match or we can let Xcode do it for us: there will be a yellow icon next to the Gallery Scene on the left-hand side of the screen. Click on that and you will get a list of misplaced views. In there, you can click on the yellow triangle and click on Fix Misplacement. We also want to make the background white instead of black. Select the collection view and then change its Background to white in the Attributes Inspector.
The last thing we need to configure on this screen is the
collection view cell. This is the box in the upper-left corner of the collection view. We need to change the size and add both an image and a label; let's start by changing the size. Click on the Collection View if it isn't already selected and navigate to View | Utilities | Show Size Inspector from the main menu. Change the Cell Size to be 110 points wide and 150 points tall.
Now, we can drag in our image. In the library, this is called an Image View. Drag it into the cell and then change the height and width in the
Size Inspector to 110 and x and y to 0. Next, we want to drag a Label below the image view. Once it is placed, we want to configure the placement rules within the cell.
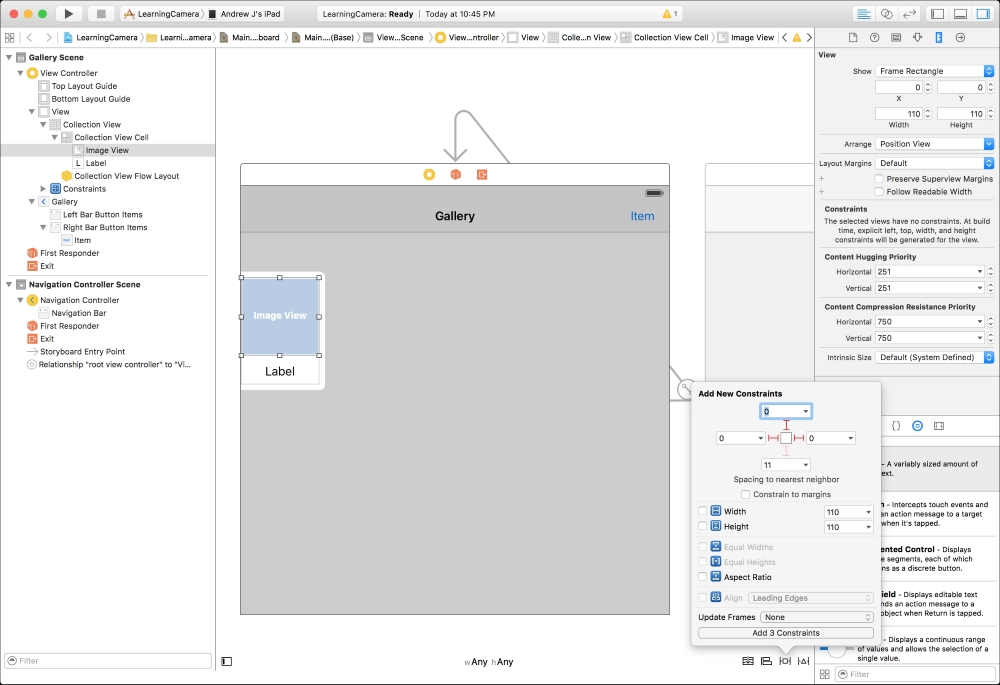
It is pinned to the left, top, and right without constraining to margins and values of zero for all three measurements. Click on Add 3 Constraints and we are ready to define the rules for the label. We want the label to be full width and vertically centered. A label is going to automatically center the text, so we want the label to be tall enough to have a reasonable margin above and below the text. Click on the label and configure it as follows:
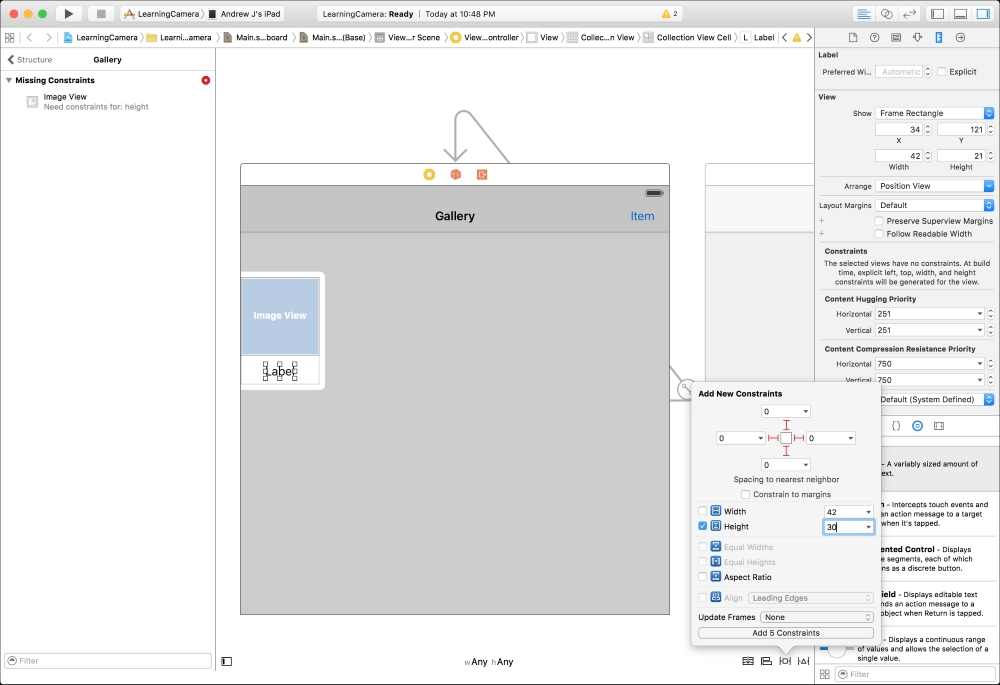
It is pinned in every direction without constraining to the margins and has zero for all measurements. It is also constrained to be 30 points tall by checking the Height checkbox. Click Add 5 Constraints and then have Xcode resize it for you again from the menu on the left. Also, make sure to select the center alignment in the Attributes Inspector and reduce the font size to 12.
Now we have most of our interface configured without writing a single piece of code. We can run the app to see what it looks like. To do this, first select the simulator you want to run it on from the menu in the top bar. Then you can click on the run button, which is the one with the black triangle. This will open up a new simulator window running your app:
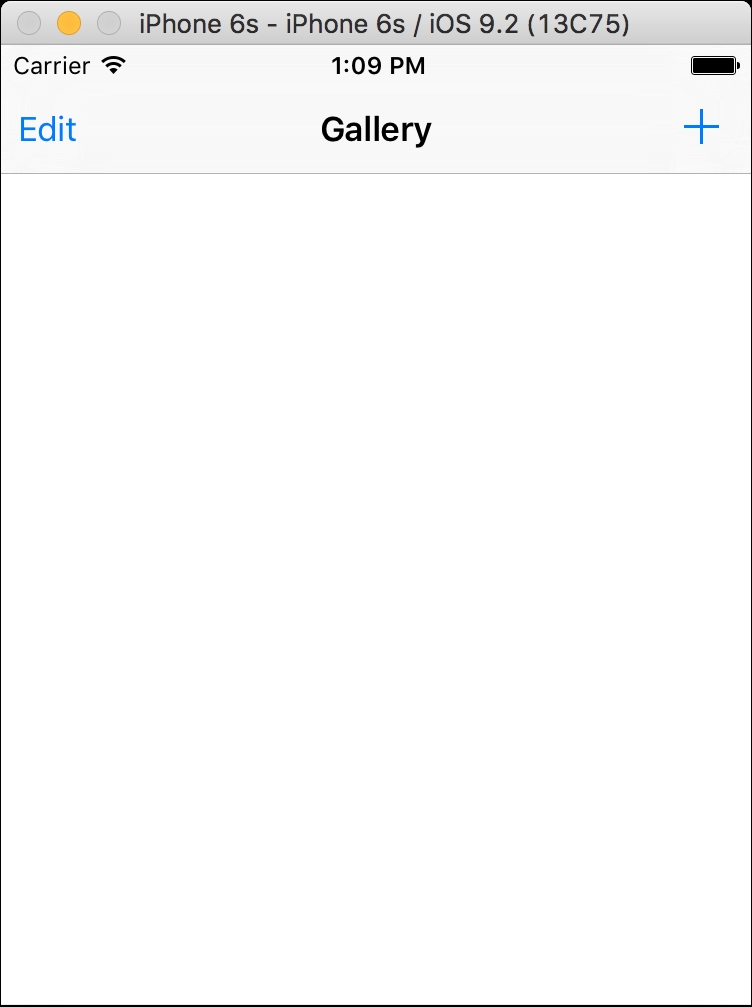
You can rotate the virtual device from the Hardware menu to see what happens when you rotate it and you can try running it on various different simulators. We have configured our view so far to adapt to any screen size.
Now we are ready to move onto the programming. The first thing we need to allow the user to do is to take a new picture. In order to do that, we are going to need some code to run every time the user taps on the add button. We achieve this by connecting the trigger action of the add button to a method on our view controller. Normally we make a connection by right-click dragging from the button to the code; however, we can't do this if we can't see the interface and the code at the same time. The easiest way to do this is to show the Assistant Editor. You can do this by navigating to View | Assistant Editor | Show Assistant Editor. Also, make sure it is configured to be automatic by clicking on the bar at the top of the editor:
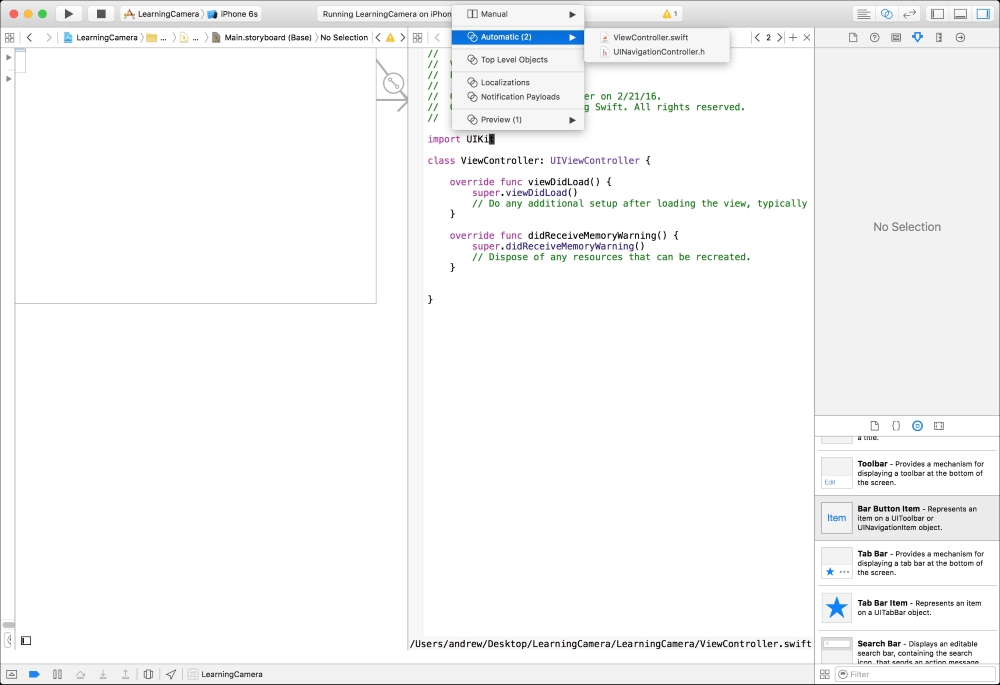
This mode causes the second view to automatically change to the most appropriate file according to what you have selected on the left. In this case, because we are working with the interface of our view controller, it shows the code for the view controller.
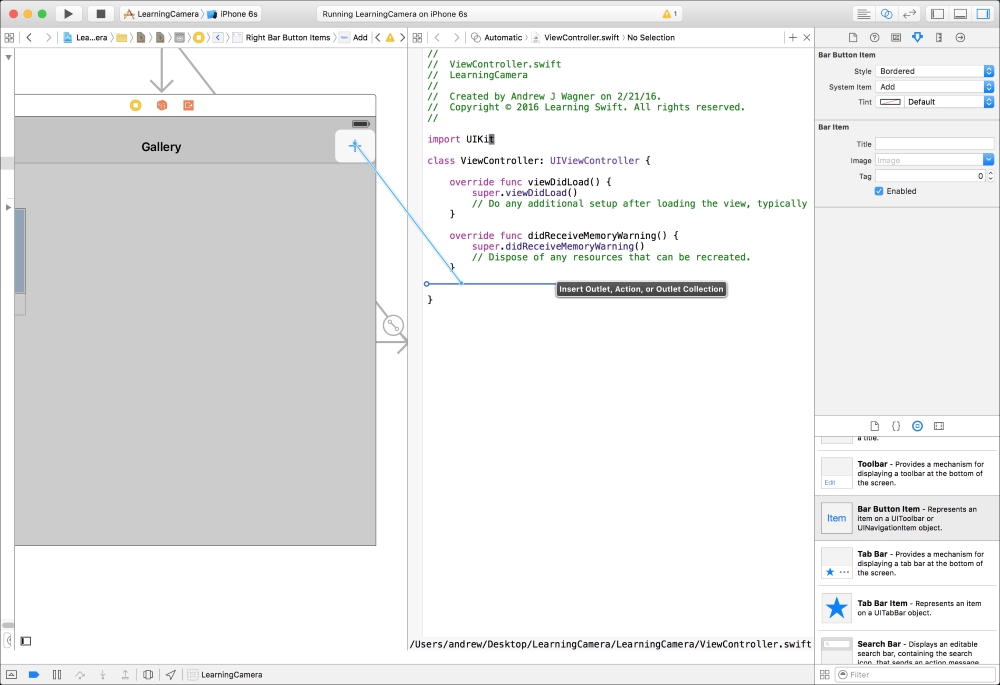
When you release the right mouse button, a little window will appear. There you should select Action from the Connection menu and enter didTapTakePhotoButton. When you click on Connect, Xcode will create a new method for you and connect it to the button. You know it is connected because there is a filled in gray circle to the left of the method. Now, every time the user taps the button, this method will be executed. Note that this method has @IBAction at the beginning of it. This is needed for any method that is connected to an interface element.
Lets break this code down. On the first line, we are creating our image picker. On the second line, we are checking if the current device has a camera by using the isSourceTypeAvailable: class method of UIImagePickerController. If the camera source is available, we set that as the source type for the image picker on line three. Otherwise, by default, an image picker lets the user pick an image from their photo library. Since the simulator doesn't support taking a picture, you are going to be presented with an image picker instead of a camera when simulating the app. Finally, the last line asks our view controller to present our image picker by animating it on the screen. presentViewController:animated:completion: is a method implemented within the UIViewController class, the superclass of our ViewController, to make it easy for us to present new view controllers. If you run the app and click on the add button, you will be asked for permission to access the photos and then it will display the photo picker. You can tap the Cancel button in the upper right and the image picker controller will be dismissed. However, if you select a photo, nothing will happen.
Our implementation for the UINavigationControllerDelegate delegate is empty but we have a simple implementation for the imagePickerController:picker:didFinishPickingImage:editingInfo: method. This is where we are going to add our handling code, but for now, we are just dismissing the presented view controller to return the user to the previous screen. This method does not force us to specify the view controller we are dismissing because the view controller already knows which one it is presenting. Now, if you run the app and select a photo, you will return to the previous screen but nothing else will happen. In order to make something meaningful happen with the photo, we are going to have to put a lot of other code in place. We have to both save the picture and implement our view controller to display the picture inside our collection view.
To start, we are only going to concern ourselves with temporarily storing our pictures in memory. To do this, we can add an image array as a property of our view controller:
You should define your photo structure in that file:
Lets break down this code, as it is somewhat complex. To start, we are using the trailing closure syntax for the dismissViewControllerAnimated:completion: method. This closure is called once the view controller has finished animating off the screen.
Now that we are maintaining a list of photos, we need to display it in our collection view. A collection view is populated by providing it with a data source that implements its UICollectionViewDataSource protocol. Probably the most common thing to do is to have the view controller be the data source. We can do this by opening the Main.storyboard back up and control dragging from the collection view to the view controller:
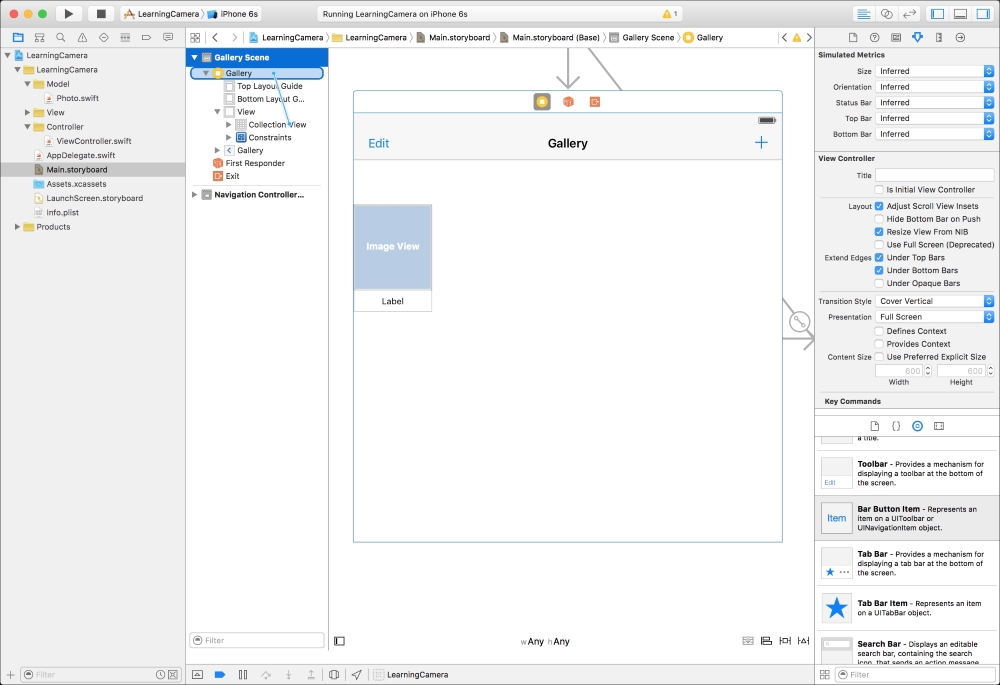
When you let go, select dataSource from the menu. After that, all we need to do is implement the data source protocol. The two methods we need to implement are collectionView:numberOfItemsInSection: and collectionView:cellForItemAtIndexPath:. The former allows us to specify how many cells should be displayed and the latter allows us to customize each cell for a specific index into our list. It is easy for us to return the number of cells that we want:
All we have to do is return the number of elements in our photos property.
Configuring the cell is going to take a little bit more preparation. First, we need to create our own cell subclass that can reference the image and label we created in the storyboard. All collection view cells must subclass UICollectionViewCell. Let's call ours PhotoCollectionViewCell and create a new file for it in the View group. Like we needed a connection from the storyboard to our code for tapping the add button, we need a connection for both the image and the label. However, this is a different type of connection. Instead of an action, this type of connection is called an outlet, which adds the object as a property to the view controller. We could use the same click and drag technique we used for the action, but this time we will set up the code in advance ourselves:

Once you let go, the connection will be made. Do the same thing with the label connection to the label we created before. We also need to set a reuse identifier for our cell so that we can reference this template in code. You can do this by returning to the Attributes Inspector and entering DefaultCell into the Identifier text field:

We are also going to need a reference to the collection view from within our view controller. This is because we will need to ask the collection view to add a cell each time a photo is saved. You can add this by writing the code first or by right clicking and dragging from the collection view to the code. Either way, you should end up with a property like this on the view controller:
Then we are ready to implement the remaining data source method:
The first line of this implementation asks the collection view for a cell with our DefaultCell identifier. To understand this fully, we have to understand a little bit more about how a collection view works. A collection view is designed to handle virtually any number of cells. We could want to display thousands of cells at once but it would not be possible to have thousands of cells in memory at one time. Instead, the collection view will automatically reuse cells that have been scrolled off the screen to save on memory. We have no way of knowing whether the cell we get back from this call is new or reused, so we must always assume it is being reused. This means that anything we configure on a cell in this method, must always be reset on each call, otherwise, some old configurations may still exist from its previous configuration. We end that call by casting the result to our PhotoCollectionViewCell class so that we can configure our subviews properly.
Only the last two lines of this are new. First, we create an index path for where we want to insert our new item. An index path consists of both an item and a section. All of our items exist in a single section, so we can always set that to zero. We want the item to be one less than the total count of photos because we just added it to the end of the list. The last line is simply making the call to the insert items method that takes an array of index paths.
Now you can run your app and all saved photos will be displayed in the collection view.
We have already made some good progress on the core functionality of our app. However, before we move any further, we should reflect on the code we have written. Ultimately, we haven't actually written that many lines of code, but it can definitely be improved. The biggest shortcoming of our code is that we have put a lot of business logic inside our view controller. This is not a good separation of our different model, view, and controller layers. Let's take this opportunity to refactor this code into a separate type.
First, we will move the photo's property to the photo store class:
We could simply move the code from our view controller to this class, but we do not want our model to deal directly with our view layer. The current implementation creates and configures our collection view cell. Lets allow the view controller to still handle that by providing our own callback for when we need a cell for a given photo. To do that, we will first need to add a callback property:
The second thing we need to add to this class is the ability to save a photo. Let's add a method to take a new image and label that returns the index path that should be added:
This method looks almost identical to our old collectionView:cellForItemAtIndexPath: implementation; the only difference is that we already have a reference to the correct photo.
Lastly, we just have to update the save action to use the photo store:
Our app works pretty well for saving pictures, but as soon as the app quits, all of the photos are lost. We need to add a way to save the photos permanently. Our refactoring of the code allows us to work primarily within the model layer now.
This will ensure that the proper path slash is added, if it is not already there. Now we need to make sure that this directory exists before we try to save a file to it. This is done using a method on NSFileManager:
Here we used string interpolation to add a .jpg extension to the file name.
Finally, we need to save that data to the file path we created:
Lets combine all of this logic into a method on our photo structure that we can use later to save it to disk, which throws an error in case of an error:
If the saving to directory fails, we will skip the rest of the method so we won't add it to our photos list. That means we need to update the view controller code that calls it to handle the error. First, let's add a method to make it easy to display an error with a given title and message:
We expect either the built-in error type of NSError that will come from Apple's APIs or the error type we defined in our photo type. The localized description property of Apple's errors just creates a description in the locale the device is currently configured for. We also handle any other error scenarios by just reporting it as an unknown error.
That leaves us with just needing to update the imagePickerController:didFinishPickingImage:editingInfo: method to use our new save action creating method:
Lastly, we need to have the image store enumerate through the files in the documents directory calling this initializer for each one. To enumerate through a directory, NSFileManager has an enumeratorAtFilePath: method. It returns an enumerator instance that has a nextObject method. Each time it is called, it returns the next file or directory inside the original directory. Note that this will enumerate all children of each subdirectory it finds. This is a great example of the iterator pattern we saw in Chapter 9, Writing Code the Swift Way – Design Patterns and Techniques. We can determine if the current object is a file using the fileAttributes property. All of that lets us write a loadPhotos method like this:
func loadPhotos() throws {
self.photos.removeAll(keepCapacity: true)
let fileManager = NSFileManager.defaultManager()
let saveDirectory = try self.getSaveDirectory()
let enumerator = fileManager.enumeratorAtPath(
saveDirectory.relativePath!
)
while let file = enumerator?.nextObject() as? String {
let fileType = enumerator!.fileAttributes![NSFileType]
as! String
if fileType == NSFileTypeRegular {
let fullPath = saveDirectory
.URLByAppendingPathComponent(file)
if let photo = Photo(filePath: fullPath) {
self.photos.append(photo)
}
}
}
}Apple puts a lot of time and effort into maintaining its documentation. This documentation can often be a very valuable tool to determine how you are expected to interact with their frameworks.
Xcode actually integrates with the documentation quite well. One of the main ways you can look at the documentation is within the Quick Help inspector. You can display it by navigating to View | Utilities | Show Quick Help Inspector from the main menu. This inspector shows you the documentation of whatever piece of code you currently have your cursor on. If that particular class, method, or function is a part of Apple's frameworks, you will get some quick help with regards to it, as shown in the following screenshot:
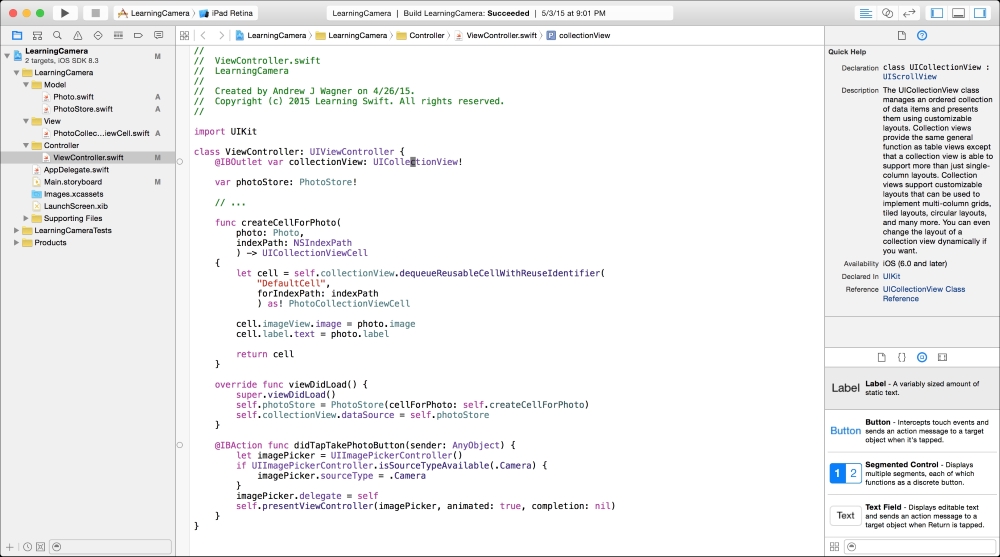

This documentation is particularly useful when you already have a sense of what parts of the framework you need to use for a particular task. You can then use this documentation to figure out the specifics of how to properly use that part of the framework. As you get better acquainted with Apple's frameworks, this will become more useful, because it is relatively easy to remember what parts of the framework you use for all of the common tasks, but it is far more difficult and often impractical to remember exactly how they work. However, sometimes the documentation is not enough. The next place you should look for answers is online.
Whenever you have a problem or question while programming, odds are almost guaranteed that someone else has already run into it and the odds are also very good that someone has already written about it somewhere. Before you jump right to asking a question on a forum, I strongly recommend that you do your own searching. First of all, you want to save the valuable time of the community members. If they are constantly answering the same questions over and over again, they are dedicating a lot less time to truly new questions. Second, you will often find that you discover the answer for yourself in the process of formulating your thoughts, on how to search for it. Lastly, you will become much better at searching for programming related problems as you practice it more. Forums are usually going to be very slow compared to finding your own answer and obviously time is money.
Similar to books, blog posts are fantastic for larger, higher-level considerations. You may search for something, such as: "ways to permanently store information," and you will probably find many blog posts talking about the different ways you can do that. Blog posts are generally better for this because they can discuss the nuances of different solutions and they aren't restricted to target a small problem.
Forms are incredible at giving you very quick solutions to very specific problems. The most common forums are probably http://stackoverflow.com/ and forums.developer.apple.com. On sites like these, there are very dedicated communities of people answering and asking questions. The Apple developer forum even has Apple employees answering questions. Asking good questions is just as important as answering questions well. These sites act not only as a way to get an answer to a new question but as living documentation for people searching for an answer in the future. A well-framed question is going to be more easily answered and more easily found by a search engine.
The last point is the most important one. You want to phrase your questions to allow someone with more knowledge than you to hone in on the exact problem instead of wasting time on things you could figure out on your own. This will often mean describing all of the things you have tried already and what roadblocks you hit. The clearer you make it that you have put real effort into solving the problem yourself, the better reception you will get from the community and also better answers. I cannot even count all the times that I have figured out the solution to a problem while I was writing up a question on a forum. This type of solution is going to be far more memorable and long lasting than a solution that someone else gives you.
incredible at giving you very quick solutions to very specific problems. The most common forums are probably http://stackoverflow.com/ and forums.developer.apple.com. On sites like these, there are very dedicated communities of people answering and asking questions. The Apple developer forum even has Apple employees answering questions. Asking good questions is just as important as answering questions well. These sites act not only as a way to get an answer to a new question but as living documentation for people searching for an answer in the future. A well-framed question is going to be more easily answered and more easily found by a search engine.
The last point is the most important one. You want to phrase your questions to allow someone with more knowledge than you to hone in on the exact problem instead of wasting time on things you could figure out on your own. This will often mean describing all of the things you have tried already and what roadblocks you hit. The clearer you make it that you have put real effort into solving the problem yourself, the better reception you will get from the community and also better answers. I cannot even count all the times that I have figured out the solution to a problem while I was writing up a question on a forum. This type of solution is going to be far more memorable and long lasting than a solution that someone else gives you.
The more experienced you get at programming with a specific language and/or framework, the more likely you are to get stuck in a pattern of solving problems the same ways over and over again. Odds are that other people have figured out better ways to solve the same problem and someone, somewhere, is talking about it. You have to at least observe the community, even if you are not participating in it yourself.
One of the best ways to follow the community is to follow the prominent figures in it. For example, for Swift, it is a great idea to follow Chris Lattner, the original creator of Swift. While numerous people now develop Swift, he spent more than a year as the sole developer and continues to run the Developer Tools department at Apple. You can follow him on Twitter @clattner_llvm and it can also be useful to follow his activity on Apple's Developer forums at https://devforums.apple.com/people/ChrisLattner. You can click on the Email Updates button to get emails about his activity.
Other than Chris Lattner, there are many other valuable people to pay attention to but only you can decide who is valuable to you. Pay attention to the names you are seeing a lot within the community and find out if they have blogs, podcasts, or any other places you can keep up with what they are saying.
If you are not familiar with podcasts, they are an incredibly valuable way of keeping up with virtually any topic in a relatively passive manner. They are essentially on-demand radio shows that you can subscribe to. You can listen to them whenever you want like when driving, doing housework, or working out. That is why they are particularly valuable: they can turn relatively dull situations into fantastic learning opportunities.
It is hard to recommend specific podcasts because most development podcasts do not last particularly long. It takes a lot of time and energy to produce a podcast, so many people do it for a while and take long breaks or decide to stop after a while. However, because of the on-demand nature of podcasts, it can still be very valuable to go back and listen to old episodes of podcasts. Three podcasts that are great to get you started are:
- Core intuition: Great podcast from prominent developers Daniel Jalkut and Manton Reece about general development topics.
- Accidental tech podcast: General, Apple oriented tech discussion from big names in the industry including Marco Arment: a very inspirational developer for me.
- Under the radar: A nice and concise podcast that is always 30 minutes or less but often contains valuable nuggets of information centered around independent Apple development. It is hosted by Marco Arment and David Smith, another inspirational developer.