Download code from GitHub
Spring 5.0 is the latest Spring Framework release that highlights Functional Web Framework and Reactive Programming. In this version, all the codes comply with the latest Java 1.8 syntax but the whole framework is designed to support the Java 1.9 Java Development Kit (JDK) in the near future. On the enterprise platform, the framework is supposed to use servlet 3.1 and 4.0 specifications and utilize HTTP/2 to run its applications.
This book will start with how to set up and configure the development environment given the necessary tools and plugins to run Spring 5.0 applications.
In this chapter, you will learn about the following:
- Installing Java Development Kit 1.8
- Installing Tomcat 9 and configuring HTTP/2
- Installing STS Eclipse 3.8 IDE
- Creating Eclipse projects using Maven
- Creating Spring STS Eclipse projects using Gradle
- Deploying Spring projects using Maven
- Deploying Spring projects using Gradle
- Installing the MySQL 5.7 database server
- Installing the MongoDB 3.2 database server
The book will be using JDK 1.8, which has the support to run Spring 5.0. This version of Java supports @FunctionalInterface and lambda expressions, which are necessary concepts being showcased in this framework. A @FunctionalInterface is an interface with exactly one abstract method that may lead to its instantiation through lambda expressions. Lambda expressions are used to implement anonymous inner classes, avoiding too much bulk in the codes.
Moreover, JDK 1.8 has java.util.stream APIs that can work with collections and NIO 2.0, using stream operations such as filter, map, and reduce. These stream APIs work in sequential and parallel executions. In the area of concurrency, this JDK provides some very essential enhancements on ConcurrentHashMap for its forEach, forEachEntry, forEachKey, forEachValue, compute, merge, reduce, and search methods. Also some changes were done on the object creation of CompletableFuture and Executors.
All Java JDK installers are downloaded from Oracle's site at http://www.oracle.com/technetwork/java/javase/downloads/index.html.
To download JDK 1.8, perform the following steps:
- Visit the preceding Oracle's page for downloads.
- On that page, click the
JDK Downloadlink. After the click, you will see the content page for JDK 1.8 installers as shown in the following image:

- Select
Accept License Agreementby clicking its radio button. - Start downloading the JDK depending on the operating system and architecture of your development machine. In the case of this book, we will be choosing the option
jdk-8u112-windows-x64since the operating system used by this book will be 64-bit. - After saving the installer into the filesystem, run the installer and proceed with a series of installation wizards for JDK configuration with the inclusion of some JRE installation to your system.
- This is optional but it is recommended you create an environment variable
JAVA_HOMEfor your newly installed JDK 1.8.112. On Windows operating systems:- Open the
Systemsection of theControl Panel. - Select the
Advanced System Settingslink. Windows 10 will prompt you with aUser Account Controldialog box if you are not an administrator. - Create a system variable
JAVA_HOMEand assign the location of the JDK directory to it. - Look for the path system variable and append the following line:
%JAVA_HOME\%bin.
- Open the
- Verify if all
classpathsettings are created correctly. On Windows, open a new command terminal and run thejavac -versioncommand. This command must be recognized as a valid command; otherwise, check your configuration details again.
The installed JDK will be the core language interpreter of Spring 5.0 projects, whether or not they are deployed to a Tomcat 9.x application server through Maven or Gradle. To read more about JDK 1.8, the reference http://www.oracle.com/technetwork/java/javase/8-whats-new-2157071.html will provide you with some information about its highlights and will explain why it is popular nowadays in functional and reactive programming. More detailed concepts on functional programming will be discussed in Chapter 6, Functional Programming.
Since the focus of request and response connections in Spring 5.0 will be HTTP/2, this book will feature the use of HTTP/2 as the protocol for web communications. In HTTP1.1, each request sent to a server resource corresponds to only one response. If the server resources generated a longer processing time, then all other incoming requests are blocked. Unlike in HTTP/2, a single request-response transaction can contain multiple concurrently open streams to avoid starvation or deadlocks. On the other hand, HTTP/2 has superb performance when it comes to web browsing experience, notwithstanding the security it provides to the simple web applications and complex portals using SSL certificates. But what is appreciated in HTTP/2 is its backwards compatibility with HTTP/1.1, thus HTTP methods, status codes, and header fields can still be managed by HttpServletRequest and HttpServletResponse without any changes.
Visit the download page of Apache Tomcat application server https://tomcat.apache.org/download-native.cgi and click the Tomcat 9 link that will lead you to the download page.
The book will utilize Tomcat 9, which is the only Tomcat distribution that fully supports HTTP/2 without installing lots of third-party tools and modules. The following are the step-by-step details in setting up HTTP/2 in Tomcat 9:
- Check if you have installed JDK 1.8 in your system. Tomcat 9 only runs with the latest JDK 1.8 without error logs.
- If you have downloaded the zipped version, unzip the folder to the filesystem of the development machine. If you have the EXE or MSI version, double-click the installer and follow the installation wizards. The following details must be taken into consideration:
- You can retain the default server startup port (
8005), HTTP connector port (8080), and AJP port (8009) or configure according to your own settings. - Provide the
manager-guiwith the username aspacktand its password aspackt.
- You can retain the default server startup port (
- After the installation process, start the server and check whether the main page is loaded using the URL
http://localhost:8080/. - If Tomcat 9 is running without errors, it is now time to configure HTTP/2 protocol. Since HTTP/2 uses clear-text type request transactions, it is required that we configure Transport Layer Security (TLS) to use HTTP/2 since many browsers such as Firefox and Chrome do not support clear text. For TLS to work, we need a certificate from OpenSSL. For Windows machines, you can get it from https://slproweb.com/products/Win32OpenSSL.html.
- Install the OpenSSL (for example,
Win64OpenSSL-1_1_0c.exe) by following the installation wizards. This will be used to generate our certificate signing request (CSR), SSL certificates, and private keys. - Create an environment variable
OPENSSL_HOMEfor your operating system. Register it into the$PATHthe%OPENSSL_HOME%/bin. - Generate your private key and SSL certificate by running the following command:
openssl req -newkey rsa:2048 -nodes -keyout spring5packt.key -x509 -days 3650 -out spring5packt.crt. - In our setup, the file
spring5packt.keyis the private key and must be strictly unreachable to clients, but by the server only. The other file,spring5packt.crt, is the SSL certificate that we will be registering both in the server keystore and JRE keystore. This certificate is only valid for 10 years (3,650 days).
- In Step 8, you will be asked to enter CSR information such as:
Country name (two-letter code) [AU]:PH
State or province name (full name) [Some-State]: Metro Manila
Locality name (for example, city):Makati City
Organization name (for example, company) [Internet Widgits
Pty Ltd]:Packt Publishing
Organizational unit name (for example, section): Spring 5.0 Cookbook
Common name (for example, server FQDN or your name):
Alibata Business Solutions and Training Services
E-mail address: sherwin.tragura@alibatabusiness.com- Generate a keystore that will be validated, both by your applications and server. JDK 1.8.112 provides
keytool.exethat will be run to create keystores. Using the files in Step 8, run the following command:
keytool -import -alias spring5server -file spring5packt.crt -keystore spring5server.keystore
- If this is your first time, you will be asked to create a password of no less than six letters. Otherwise, you will be asked to enter your password. You will be asked if you want to trust the certificate. The message
Certificate reply was installed in keystoremeans you have successfully done the process. - Java JRE must know the certificate in order to allow all the execution of your deployed Spring 5 applications. To register the created certificate into the JRE
cacerts, run the following command:
keytool -import -alias spring5server -file spring5packt.crt -keystore "<Java1.8_folder>\Java1.8.112\jre\lib\security\cacerts" -storepass changeit
- The default password is
changeit. You will be asked to confirm if the certificate is trusted and you just type Y oryes. The messageCertificate reply was installed in keystoremeans you have successfully finished the process. - Copy the three files, namely
spring5packt.crt,spring5packt.key, andspring5server.keystoreto Tomcat'sconffolder and JRE'ssecurityfolder (<installation_folder>\Java1.8.112\jre\lib\security). - Open Tomcat's
conf\server.xmland uncomment the<Connector>with port8443. Its final configuration must be:
<Connector port="8443"
protocol="org.apache.coyote.http11.Http11AprProtocol"
maxThreads="150" SSLEnabled="true">
    <UpgradeProtocol
    className="org.apache.coyote.http2.Http2Protocol"/>
    <SSLHostConfig honorCipherOrder="false">
        <Certificate certificateKeyFile="conf/spring5packt.key"
        certificateFile="conf/spring5packt.crt"
        keyAlias="spring5server" type="RSA" />
    </SSLHostConfig>
</Connector> - Save the
server.xml.
- Open
C:\Windows\System32\drivers\etc\hostsfile and add the following line at the end:
127.0.0.1 spring5server
- Restart the server. Validate the setup through running
https://localhost:8443. At first your browser must fire a message;Your connection is not secure. Just clickAdvancedand accept the certificate:

- You will now be running HTTP/2.
Java 1.8 and Java 1.9 together with Spring 5.0 support HTTP/2 for the advancement of the JEE servlet container. This improvement is part of their JSR 369 specification which highlights the Servlet 4.0 specification. This Spring version is after Java 1.8's advance concurrency and stream support to run its functional and reactive modules. And since the core platform of Spring 5 is reactive, non-blocking and asynchronous, it needs NIO 2.0 threads of Tomcat 9.x's HTTP/2 for its project execution.
Since enabling HTTP/2 requires configuring TLS, browsers such as Firefox and Chrome will be restricted a bit by this TLS when it comes to running applications. These client browsers do not support clear text TCP; thus there is a need for secured HTTP (or HTTPS) which is the only way these browsers can utilize HTTP/2. And since TLS is enabled, there is a need for a keystore certificate that must be recognized by the application servers and accepted by the browsers in order to execute the request URLs.
OpenSSL for Windows is chosen as our certificate generator in creating TLS certificates. The book will use a self-signed certificate only, which is the easiest and most appropriate method so far in order to secure Apache Tomcat 9. This method no longer needs the certificate to be signed by a Certificate Authority (CA).
After generating the certificate, the certificate must be registered to both the keystore of the JRE and the custom keystore (for example, spring5keystore.keystore) of the application server. Keystores are used in the context of setting up the SSL connection in Java applications between client and server. They provide credentials, store private keys and certificates corresponding to the public keys of the applications and browsers. They are also required to access the secured server which usually triggers client authentication. The installed Java has its own keystore, which is <installation_folder>\Java1.8.112\jre\lib\security\cacerts. Always provide the official passwords in adding your certificates to these keystores. JRE has a default changeit password for its keystore.
The advantage of the TLS-enabled Tomcat 9 server is its support to JSR-369, which is the implementation of the Servlet 4.0 container. Moreover, the virtual hosting and multiple certificates are supported for a single connector, with each virtual host able to support multiple certificates. When the request-response transaction happens with HTTP/2, a session with multiple streams or threads of connections is created, as shown in the following code:
MetaData.Request metaData = new MetaData.Request("GET", HttpScheme.HTTP, new HostPortHttpField("spring5server: 8443" + server.getLocalport()), "/", HttpVersion.HTTP_2, new HttpFields());
HeadersFrame headersFrame = new HeadersFrame(1, metaData, null,
true);
session.newStream(headersFrame, new Promise.Adapter<Stream>(), new PrintingFramesHandler());
session.newStream(headersFrame, new Promise.Adapter<Stream>(), new PrintingFramesHandler());
session.newStream(headersFrame, new Promise.Adapter<Stream>(), new PrintingFramesHandler());
The whole concept of HTTP/2 transporting requests from client to server and responding back to its clients is depicted with the conceptual model as follows:

All the recipes will be implemented using Spring Tool Suite (STS) Eclipse 3.8 which has the latest features that support JDK 1.8.
Visit the site https://spring.io/tools/sts/all and download the STS 3.8 release for Windows, Linux, or macOS. In our case, we will be opting for the Windows version. It is also available in 32-bit or 64-bit operating systems.
To get STS Eclipse 3.8, perform the following steps:
- After the download, unzip the file using WinZip or 7ZIP to your filesystem.
- Update its VM usage to enhance performance through making the heap grow to a larger amount by adding the
-vmargscommand to theeclipse.inifile inside the installation folder, or by appending to the Eclipse shortcut's target property. Following the command are the following Java heap memory configurations:
-Xms512m
-Xmx1024m- Go to the installation folder
<installation_folder>\sts-bundle\sts-3.8.3.RELEASEand runSTS.exe. - Running
STS.exewill result in launching your workspace launcher. Create an Eclipse workspace as shown as follows:

- Then, you are now ready to create code snippets.
STS Eclipse 3.8 is a customized all-in-one Eclipse-based distribution that provides support for Spring technologies such as Pivotal Cloud Foundry, Gradle, and Pivotal Server. Moreover, it is plugin-ready and contains language support, framework support, and runtime support for Java JDK 1.8 and Java EE 7.
The IDE has the following parts: views, perspectives, and the option menus. The view is the IDE's way of projecting its metadata or components graphically. Some views are console, debug, and task list, and data management views. The styling and the presence of the needed views depend on the type of perspective required for a particular project. A perspective is the logical arrangement of all these views. In our case, we have to choose a JEE perspective from the Window|Perspective | Open Perspective menu option to proceed with our programming.
But before we create our first project, always set the Java Runtime Environment to JDK's JRE. The JRE setting is located at Windows | Preferences and you need to Add... and choose the JDK's JRE as shown as follows:

You are now ready to create your Maven and Gradle project for our recipes in the next chapters.
One option for creating our Spring 5.0 projects is through Maven. The STS Eclipse 3.8 has built-in Maven plugins that will create Maven-ready Eclipse projects easily.
Before creating the first Maven project, check first the JRE workspace configuration of your IDE. As noted in the previous recipe, the JRE of your Eclipse must be set to the JDK's JRE. Moreover, check the embedded version of Maven installed in STS Eclipse 3.8 through the Windows | Preferences panel. STS 3.8 will be using its embedded Maven 3.0 for the deployment operations. The list of Maven versions is available at https://maven.apache.org/.
Follow the steps to create Maven Projects for our succeeding code snippets as follows:
- There are two ways that we can create a Maven project from scratch in STS. One option is to right-click the
Project Explorerof the IDE in order to chooseNew|Other...from the pop-up window (or Ctrl-N). The other option is to click theFilemenuNew|Other.... Both of these operations will lead us to ourNewproject wizard as shown as follows:

- On the menu wizard, click the
MavenModuleMaven Projectoption. TheNew Maven projectwizard will pop-up anew. Just clickCreate Simple Project (skip archetype selection)to create a clean project from scratch:

- Afterwards, the next wizard will require you to fill out the necessary
Group IdandArtifact Idfor your project. In the following example, theGroup IDisorg.packt.recipe.coreand theArtifact Idis, let us say,ch01. The next important field that needs to be filled isPackagingand it must be set towarin our case:

- Click
Finish. Look for the filepom.xmland insert below it the following lines to correct some Maven bugs:
<build>
  <finalName>ch01-spring5-cookbook</finalName>
  <plugins>
    <plugin>
      <artifactId>maven-war-plugin</artifactId>
      <version>2.3</version>
      <configuration>
        <failOnMissingWebXml>false</failOnMissingWebXml>
      </configuration>
    </plugin>
  </plugins>
</build> - Finally, you must have the directory structure as follows in your own project explorer:

Apache Maven is already a built-in plugin in Eclipse and helps developers manage projects and use some build tools to clean, install, and deploy Eclipse projects. It has the main configuration file which is called the Project Object Model (POM) file.
POM is the fundamental unit of work in Maven that contains information and configuration details about the project. Some core information in POM is <modelVersion>, which currently must be set to 4.0.0, <groupId>, that identifies the project uniquely together with <projectId> and <versionId> across all projects in the Maven repository, <artifactId>, which is the name of the WAR file without the version, and <packaging>, which is WAR.
Later in this book, we will be adding <properties> and <dependencies> and <plugins> for our Spring 5.0 code recipes in our pom.xml file.
Another option in building Spring 5.0 projects is through the use of Gradle. STS Eclipse includes Gradle as one of its tooling and project management tools. In our case, we will be installing an STS Eclipse module extension in the easiest way in order to fully use Gradle.
Install the Gradle module extension in our STS Eclipse 3.8 in order to clean, build, and deploy projects in Gradle. Perform the following steps:
- Click the
Dashboardtoolbar option of your Eclipse. After clicking, you will be opening the main dashboard of the IDE:

- On the dashboard, look for
IDE EXTENSIONSand click that button. A new window showing all the available Eclipse STS extensions will pop up. Click onGradle (STS Legacy) Supportand install it:

- The next steps will just be similar to installing new Eclipse plugins. Just click the
Installbutton and follow the installation wizard. Eclipse needs to be restarted after a successful installation.
- If you want to change the Gradle distribution, you can replace the Eclipse embedded Gradle installation with some new version at https://gradle.org/gradle-download/. Or you can shift to Eclipse Buildship with Gradle Plugin if some of the files are not supported by the installed Gradle plugin:

After installing the Gradle STS extension, perform the following steps to install the Spring Gradle project:
- After installing, you are ready to create a Gradle project for Spring development. Go to the
New project wizard(Ctrl-N) of STS Eclipse and create a Gradle project.
- On the
Gradle ProjectwizardJava Quickstartfor theSample projectoption. ClickFinishand it will take a while to create, build, clean, and install your Gradle STS project. - Delete unnecessary project files. Right-click on the project and click on
Gradle (STS) |Refresh all.
- Open the
build.gradleand overwrite the existing configuration with this:
apply plugin: 'eclipse'
apply plugin: "war"

sourceCompatibility = 1.8
version = '1.0'

war {
    baseName = 'ch02-gradle'
    version = '1.0'
}

sourceCompatibility = 1.8

repositories {
    mavenCentral()
    jcenter()
}- Right-click on the project and click
Gradle (STS)|Tasks Quick Launcherto run theGradle Task Launcher. Using the launcher,cleanandbuildthe project for the first time:
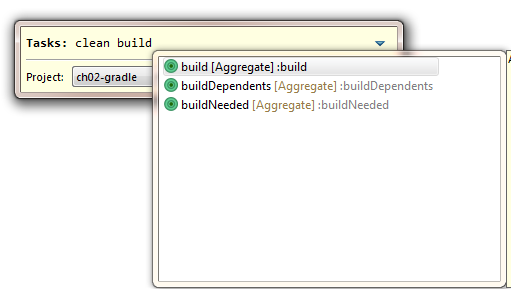
- Finally, at this point, you have created your Spring Gradle project which will look like this:

The most important configuration file in a Gradle project is the build.gradle. First, we have to add apply plugin: 'java' to tell Gradle that Java is the core language in building the scripts, testing the codes, executing compiled objects, creating Javadoc, and deploying JAR or WAR files. Since all project management and tooling depends on STS Eclipse, there is a need to add apply plugin: 'eclipse' in order to tell Gradle that all descriptors are Eclipse-specific and can be integrated and executed with Eclipse core and extension plugins. A by-product of its project installation and execution are the Eclipse folders such as .project, and .classpath. And since this is a web development project, we need to apply plugin: 'war' to indicate that the deployment is at WAR mode. Later on we will be adding some plugins needed in the development of our recipes.
In the properties section, the configuration must tell Gradle the version of the JDK through the sourceCompatibility property. Another property is the version of the WAR or project deployment, which is at first set to 1.0. Since the mode of deployment is the web, Java must know the name and the version of the WAR file to be generated.
On the repositories section, the configuration must define where to find the dependencies, which are at JCenter and MavenCentral.
Our application server is Tomcat 9 and we will be using HTTP/2 to execute all Spring 5.0 projects at port 8443 with some certificates stored in the server's keystore.
At this point, the Tomcat 9 server must be running at https://localhost:8843/ in all browsers. Using OpenSSL, certificates are already installed in JRE's keystore and our server's keystore. Moreover, you have already successfully created your STS Maven project in order for us to configure your POM file.
Open the POM file of your Maven project and add the following details:
- There is no available working Maven plugin for Tomcat 9 so we need to use the latest stable version, which is
tomcat7-maven-plugin. Add the following Maven plugin details for Tomcat 7 deployment under the<plugins>section of the<build>:
<plugin>
  <groupId>org.apache.tomcat.maven</groupId>
  <artifactId>tomcat7-maven-plugin</artifactId>
  <version>2.2</version>
  <configuration>
    <url>https://spring5server:8443/manager/text</url>
    <path>/ch01</path>
    <keystoreFile>C:MyFilesDevelopmentServersTomcat9.0
    confspring5server.keystore</keystoreFile>
    <keystorePass>packt@@</keystorePass>
    <update>true</update>
    <username>packt</username>
    <password>packt</password>
  </configuration>
</plugin>- Right-click on the project and click on
Run As|Maven Build...and execute the following goal:clean install tomcat7:deploy

- Everything is successful if the console outputs this Maven log:

The configuration detail starts with the <url> that sets Tomcat's plain-text-based administration interface used by Maven to invoke commands of the server. Maven needs to access the administration panel to allow the copy of the WAR file to the webapps. Since we will be using the TLS-enabled connector, we will be using the secured-HTTP together with the registered hostname in the keystore which is spring5server.
The tag <path> sets the context root of the project and must have a forward slash while the <username> and <password> refer to the credentials of the administrator having the roles manager-gui and manager-script.
The most important configuration details are <keystoreFile> and <keystorePass>. <keystoreFile> makes reference to the keystore of Tomcat that contains the TLS certificate. <keystorePass> provides the password used by <keystoreFile> in registering certificates. Together with these credentials, we have to be sure that the certificate has been added to the JRE's keystore which is <installation_folder>\Java1.8.112\jre\lib\security\cacerts.
<update> is required to undeploy all existing WAR files that already exist in the webapps. Sometimes the deployment does not work without this forced update.
If the project is written in Gradle, there will be some modification to be done in our gradle.build configuration details.
Validate that your Tomcat with TLS-enabled connection is working by running https://localhost:8080/ on any browser. Also, check if your STS Gradle project is clean and updated.
- Open the
gradle.buildfile and add thebuildScript()function that accepts a closure containing all libraries needed to be referenced inclasspath. At this step, we need to importgradle-tomcat-pluginunder the groupcom.bmuschko:
buildscript {
    repositories {
        jcenter()
    }
    dependencies {
        classpath 'com.bmuschko:gradle-tomcat-plugin:2.0'
    }
} - Add the following libraries to the
classpath:
apply plugin: 'com.bmuschko.tomcat'
apply plugin: 'com.bmuschko.tomcat-base'
- (Optional) Add the following Tomcat 9.0 libraries that enable Gradle to run embedded Tomcat through the
tomcatRun()andtomatRunWar()functions:
dependencies {
    def tomcatVersion = '9.0.0.M9'
    tomcat "org.apache.tomcat.embed:tomcat-embed
    core:${tomcatVersion}",
    "org.apache.tomcat.embed:tomcat-embed-logging-
    juli:${tomcatVersion}"
    tomcat("org.apache.tomcat.embed:tomcat-embed-
    jasper:${tomcatVersion}") {
        exclude group: 'org.eclipse.jdt.core.compiler',
             module: 'ecj'
    }
} - (Optional) Configure Tomcat 9 details through the
tomcat()function:
tomcat {
    httpsPort = 8443
    enableSSL = true
    users {
        user {
            username = 'packt'
            password = 'packt'
            roles = ['manager-gui', 'manager-script']
        }
    }
} - To deploy the project into the installed Tomcat 9, create a Gradle task
deploythat copies the WAR file to the/webappfolder:
task deploy (dependsOn: war){
    copy {
        from "build/libs"
        into
        "C:\MyFiles\Development\Servers\Tomcat9.0\webapps"
        include "*.war"
    }
} - You can now run
deployin the Gradle Task Launcher.

When it comes to building projects with conflicting versions of libraries, Gradle is one of those build tools that can satisfy any structure and state of project deployment and management. Since it is not written in XML, Gradle can provide logic in building classpath and project dependencies.
Gradle is efficient when it comes to incremental builds where the current and previous changes in deployment files are monitored. And when it comes to different repositories, Gradle can monitor changes of artifacts through effective repository-aware caches. In general, Gradle is advanced when it comes to repository management and project deployment than Maven.
Gradle is written in Groovy; thus, the build scripts are declarative, readable, and straightforward and can provide developers with easier conventions and philosophy of deployment.
First, Gradle must build the needed classpath libraries that are the main dependencies to the deployment, which happen to be com.bmuschko:gradle-tomcat-plugin:2.0. After building the external library, import the following plugins: com.bmuschko.tomcat and com.bmuschko.tomcat-base. Inject a closure to the tomcat() function that details all the needed configuration before the deployment. The custom Gradle task deploy takes all the configuration loaded by the tomcat() and war() functions. Running deploy in Gradle (STS) | Gradle Task Launcher will copy the WAR file found in build/libs to the Tomcat instance.
The book will be covering some concepts on how Spring 5.0 handles data persistence involving relational database management systems. MySQL 5.7 will be the database server that will be used to create, store, update, and delete records of data.
Visit the site http://dev.mysql.com/downloads/mysql/ to download the preferred community server for your projects. MySQL server is available in any operating system platform.
- On the download page, choose the
General Available (GA) Releasestab. - Choose the desired platform through the
Select Platformdropdown. The book will be using the MySQL server for Windows. - Once the Windows platform is chosen, there are other options available for download under the
Other Downloadslink. Choose theWindows (x86, 32-bit) Windows MSI installerfor easy installation. - Afterwards, just click
No thanks, just start my downloads!to download the installer immediately. - After downloading the installer (for example,
mysql-installer-community-5.7.17.0.msi), click the file and start the following wizards. - Choose
Developer Defaultas our server type. - Install all the connectors.
- Use port
3306and set the password topackt. - After installing the MySQL server, proceed with installing the
Samples and Examples scripts. - After finishing the installation, create
MySQL_HOMEin yourclasspathand expose<installation_folder>MySQLMySQL Server 5.7bincommands. - At this point, you are now ready to install the server for database transactions.

Spring 5.0 has the capability to perform data transactions with NoSQL databases where schema design is not fixed and the data involved is so complex wherein its read-write operations are defined by graph theory. The MongoDB 3.2 server will highlight some NoSQL and document-based data transactions with Spring 5.0 using the raw implementation and its Spring Data module.
Visit the site https://www.mongodb.com/download-center#community to download MongoDB under different operating system platforms. It also comes with SSL and no-SSL support.
- After downloading the installer (for example,
mongodb-win32-x86_64-2008plus-ssl-3.2.0-signed.msi), follow the installation wizards:

- After the installation, create the
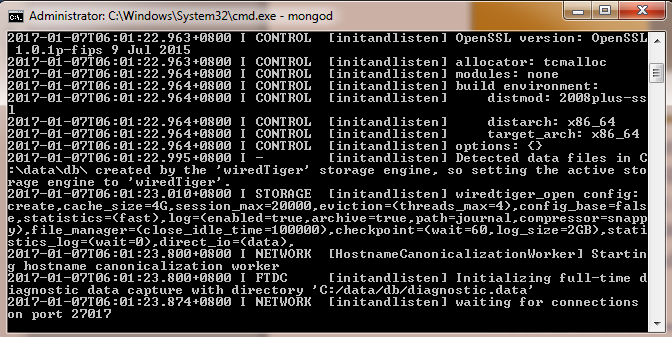
MONGODB_HOMEsystem variable in yourclasspathand expose the<installation_folder>MongoDbServer3.2bincommands. - Since MongoDB requires a data directory to store all data, create a default data directory path,
/data/db, at the root level (for example,C:datadb). - You are now ready to start the MongoDb server.