


Welcome to this book on how to create REST services with Scala. In this book, I'll introduce a couple of different Scala-based frameworks and show you how to create a RESTful service with them. Each of these frameworks has its own specific way of creating REST services; some are more functional, while others provide a rich domain-specific language (DSL). After reading this book and working through the examples, you'll be able to choose the approach that best suits you and your specific problem.
In this book, the following Scala frameworks will be discussed:
Akka HTTP / DSL: Akka HTTP is a new REST framework built on top of Akka Streams. It provides a DSL-based approach based on Spray. Spray is one of the best-known REST frameworks in the Scala world, and the newest version will run on top of Akka HTTP. We'll explore the features of this DSL and show you how it can be used to create a REST service.
Unfiltered: Unfiltered is a little REST framework which provides a very structured approach of creating REST services. This framework provides direct access to all parts of the HTTP request, and doesn't make assumptions on how you want to process REST services. This gives you complete control of how the request is processed and the response is produced.
Play 2: Play 2 is one of the most popular Scala frameworks, which provides functionality to create complete web applications. Play 2 also provides great support for creating standard REST services. We'll focus on the REST-specific features of Play 2.
Finagle and Finch: Finagle and Finch both come from the people at Twitter. With Finagle and Finch, it is possible to create REST services using a clean, functional programming approach.
Scalatra: The last framework we'll discuss is the Scalatra framework. Scalatra is a lightweight framework, based on the better-known Sinatra framework, with which it is very easy to create REST services.
Besides these frameworks, in the last chapter of this book we'll also provide some guidelines on how to work with advanced topics such as HATEOAS, linking, and JSON processing.
In this first chapter, we are not going to explore a framework, but we'll use this chapter to introduce some concepts and set up some tools:
We'll first have to make sure you can run all the examples provided with this book, so we'll show you how to get the code and setup SBT and an IDE
We'll also do a short introduction into what RESTful services are
And finally, we'll have a look at the API of the service that we'll implement using the different Scala frameworks
There are many different definitions of REST, so before we look into the technical details, let's first look at the definition of REST we'll use in this book.
In this book, when we talk about REST, we talk about REST as described in the dissertation of Roy Fielding (https://www.ics.uci.edu/~fielding/pubs/dissertation/top.htm). Basically, REST is a software architecture style, which, when following the guidelines, can be used to create performant, reliable, and maintainable services. To better understand what REST is, it is a good idea to start with the constraints a service must follow to be RESTful. In his dissertation, Roy Fielding defines the following set of constraints:
Client-server: This constraint means that clients and servers are separated from each other through a standardized interface. The advantage of this approach is that clients don't need to worry about persistency, databases, messaging, scalability, and other server-side concepts; instead, they can focus on user-oriented functionality. Another advantage is that clients and servers can be developed independently since the only dependency between them is the standardized contract. Note that if you require a very strict contract between the client and the server, a WSDL/SOAP-based service might be a better option than going for a RESTful approach.
Stateless: Besides having a separate client and server, communication between these two components will have to be stateless. This means that each request the client sends should contain all the information necessary for the server. Note that for authentication, the server can temporarily store some session/user information in a persistent store, but all the real application state should be stored at the client. The big advantage of this approach is that this way it is very easy to scale out the servers horizontally by just adding more instances.
Cacheable: In a RESTful architecture, clients are allowed to cache responses. It is up to the server side to indicate which responses might be cached and for how long. The goal of this constraint is to minimize interactions between the client and the server by avoiding sending requests, whose response will stay the same. This, of course, improves performance at the client side and reduces bandwidth.
Layered system: This constraint describes that in a RESTful architecture, it is possible to create a layered system, where each layer has its own specific functionality. For instance, in between the client and the server, there might be a firewall, a load balancer, a reverse proxy, and so on. The client, however, doesn't notice these different layers.
Uniform interface: From all the constraints, this is perhaps the most interesting one. This constraint defines what a uniform interface (the contract between the client and the server) should look similar to. This constraint itself consists of the following four sections:
Identification of resources: In requests, each resource should be uniquely identified. Most often, this is done through a form of URI. Note that the technical representation of a resource doesn't matter. A resource, identified through a URI, can be represented in JSON, CSV, XML, and PDF while still remaining the same resource.
Manipulation of resources through these representations: When a client has a representation of a resource (for example, a JSON message), the client can modify this resource by updating the representation and sending it to the server.
Self-descriptive messages: Each message sent between the client and the server should be self-descriptive. The client need not know anything else to be able to parse and process the message. It should be able to learn from the message exactly what it can do with the resource.
Hypermedia as the engine of application state: This constraint, also called HATEOAS, implies that a user of an API doesn't need to know beforehand what it can do with a specific resource. Through the use of links in the resource and the definition of media-types, a client can explore and learn the actions it can take on a resource.
Code on demand: Code on demand is the only constraint that is optional. When comparing this constraint with the others, it is also one that is a bit different than the others. The idea behind this constraint is that servers could temporarily extend the functionality of clients by transferring executable code. In practice, this constraint is not seen that often though; most RESTful services deal with sending static responses, not executable code.
It's important to note that these constraints don't say anything about an implementation technology.
Tip
Often, when talking about REST, people immediately focus on HTTP and JSON. A RESTful architecture doesn't force you to adopt these technologies. On the other hand, most often, RESTful architectures are implemented on top of HTTP and currently use JSON as the message format. In this book, we will also focus on using HTTP and JSON to implement RESTful services.
The constraints mentioned here give an overview of how a service should act to be considered RESTful. However, when creating a service, it is often very hard to comply with all these constraints, and in some cases, not all the constraints might be that useful, or might be very hard to implement. Many people noticed this, and a couple of years ago, a more pragmatic view on REST was presented by Richardson's Maturity Model (http://martinfowler.com/articles/richardsonMaturityModel.html).
In Richardson's Maturity Model, you don't have to follow all the constraints to be considered RESTful; instead, a number of levels of maturity are defined that indicate how RESTful your service is. The higher the level, the more mature your service is, which will result in a more maintainable, more scalable, and easier-to-use service. This model defines the following levels:

The levels are described like this:
Level 0 describes the situation where you just send XML or JSON objects to a single HTTP endpoint. Basically, you're not doing REST, but you're doing RPC over HTTP.
Level 1 tackles the question of handling complexity by using divide and conquer, breaking a large service endpoint down into multiple resources
Level 2 introduces a standard set of verbs so that we can handle similar situations in the same way, removing unnecessary variation
Level 3 introduces discoverability, providing a way of making a protocol more self-documenting
In this book, we'll mostly focus on supporting REST at Level 2. So, we'll work with well-defined resources and use the appropriate HTTP verbs to indicate what we want to do with a resource.
In Chapter 7, JSON, HATEOAS, and Documentation, of this book, we'll address HATEOAS, which can help us reach maturity Level 3.
Now that we've got the theory out of the way, let's get the code, set up your favorite IDE, and define the API for the REST service we'll implement.
There are a couple of different ways of getting the code for this book. We provide a download link at the book's website (https://www.packtpub.com/books/content/support/23321) from where you can download a ZIP file with the latest sources from GitHub (https://github.com/josdirksen/rest-with-scala/archive/master.zip), or even better, just use Git to clone the source repository.
If you've downloaded the ZIP file, just unzip it to a directory of your choice:
Joss-MacBook-Pro:Downloads jos$ unzip rest-with-scala-master.zip
Cloning the repository is also very easy if you've already got Git installed. If you haven't got Git installed, follow the instructions at https://git-scm.com/book/en/v2/Getting-Started-Installing-Git.
Once Git is installed, just run the following command:
Joss-MacBook-Pro:git jos$ git clone https://github.com/josdirksen/rest-with-scala
Cloning into 'rest-with-scala'...
remote: Counting objects: 4, done.
remote: Compressing objects: 100% (3/3), done.
remote: Total 4 (delta 0), reused 0 (delta 0), pack-reused 0
Unpacking objects: 100% (4/4), done.
Checking connectivity... done.
At this point, you've got the sources in a directory of your choice. Next, we need to make sure we can download all the frameworks' dependencies and run the samples. For this, we'll use SBT (more information can be found at http://www.scala-sbt.org/), which is the most common build tool for Scala-based projects.
To run the examples provided in this book, we need to install Scala and SBT. Depending on your operating system, different steps need to be taken.
Before we can install SBT and Scala, we first need to install Java. Scala requires at least a Java Runtime version of 1.6 or higher. If you haven't installed Java on your system yet, follow the instructions at http://www.oracle.com/technetwork/java/javase/downloads/jdk8-downloads-2133151.html.
Once you have Java installed, installing Scala and SBT is just as easy. To install Scala, just go to http://www.scala-lang.org/download/ and download the binaries for your system. To install SBT, you can follow the instructions at http://www.scala-sbt.org/download.html.
To check whether everything is installed, run the following commands in a terminal:
Joss-MacBook-Pro:~ jos$ java -version
java version "1.8.0_40"
Java(TM) SE Runtime Environment (build 1.8.0_40-b27)
Java HotSpot(TM) 64-Bit Server VM (build 25.40-b25, mixed mode)
Joss-MacBook-Pro:~ jos$ scala -version
Scala code runner version 2.11.6 -- Copyright 2002-2013, LAMP/EPFL
Joss-MacBook-Pro:~ jos$ sbt -v
[process_args] java_version = '1.8.0_40'
# Executing command line:
java
-Xms1024m
-Xmx1024m
-XX:ReservedCodeCacheSize=128m
-XX:MaxMetaspaceSize=256m
-jar
/usr/local/Cellar/sbt/0.13.8/libexec/sbt-launch.jar

[info] Set current project to jos (in build file:/Users/jos/)
To exit SBT, hit Ctrl + C.
Now that you've got Java, Scala, and SBT installed, we can run the examples. You can, of course, run the examples from your IDE (see the next section on how to set up IntelliJ IDEA and Eclipse), but often, using SBT directly is just as easy. To run the examples, take the following steps:
Open a terminal and go to the directory where you've extracted the source ZIP file or cloned the repository.
To test the configuration, we've created a simple
HelloWorldexample. From the console, executesbt runCH01-HelloWorld:Joss-MacBook-Pro:rest-with-scala jos$ sbt runCH01-HelloWorld [info] Loading project definition from /Users/jos/dev/git/rest-with-scala/project [info] Set current project to rest-with-scala (in build file:/Users/jos/dev/git/rest-with-scala/) [info] Compiling 2 Scala sources to /Users/jos/dev/git/rest-with-scala/chapter-01/target/scala-2.11/classes... [info] Running org.restwithscala.chapter1.HelloWorld SBT successfully ran HelloWorld, configuration seems ok! Press <enter> to exit. [success] Total time: 18 s, completed Jun 13, 2015 2:34:41 PM Joss-MacBook-Pro:rest-with-scala jos$
You might see a lot of output when the various dependencies are loaded, but after a while, you should see the message,
SBT successfully ran HelloWorld, configuration seems ok!.All the examples in this book wait for user input to terminate. So, once you're done playing around with the example, just hit Enter to terminate the running program.
In each chapter, we'll see the sbt command we need to execute. If you want to know all the examples you can run, you can also run the sbt alias command, which generates the following output:
Joss-MacBook-Pro:rest-with-scala jos$ sbt alias
[info] Loading project definition from /Users/jos/dev/git/rest-with-scala/project
[info] Set current project to rest-with-scala (in build file:/Users/jos/dev/git/rest-with-scala/)
        runCH01-HelloWorld = ; chapter01/runCH01HelloWorld
        runCH01-EchoServer = ; chapter01/runCH01EchoServer
Besides running the examples directly from the command line, it is also possible to run them from an IDE. In the following section, we'll see how to import the examples in IntelliJ IDEA and Eclipse.
With SBT and Scala installed, you have everything you need to run the examples. Sometimes, however, it is easier to play around and experiment with the examples directly from an IDE. The two most popular IDEs for working with Scala are IntelliJ IDEA and Eclipse. Both have great Scala plugins and excellent support for SBT.
IntelliJ provides a community and a commercial version of its IDE, both of which can be used to run and play around with the examples in this book. The following steps are shown for the community edition, but can be applied in the same manner for the commercial variant:
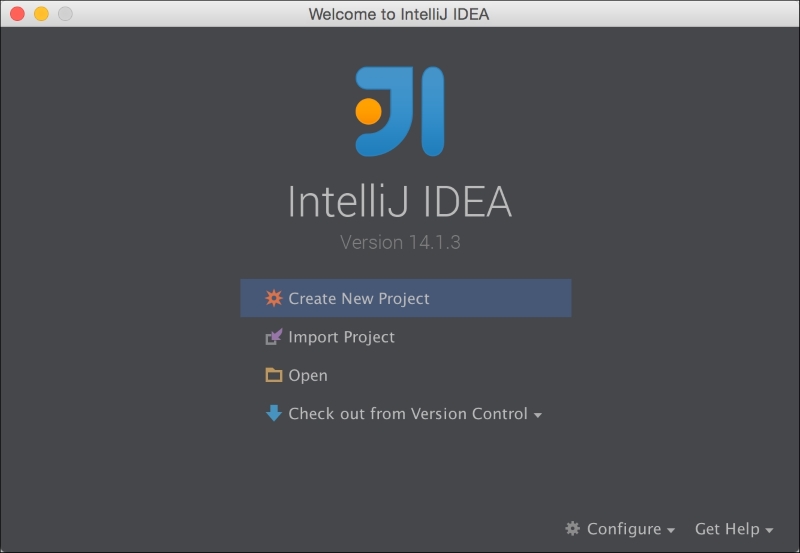
The first thing to do is download the IDE. You can download a version for your OS from https://www.jetbrains.com/idea/download/. Once downloaded, run the installer and start the IDE. When you run IntelliJ for the first time, you're asked whether you want to install the featured plugins. Scala is one of them:

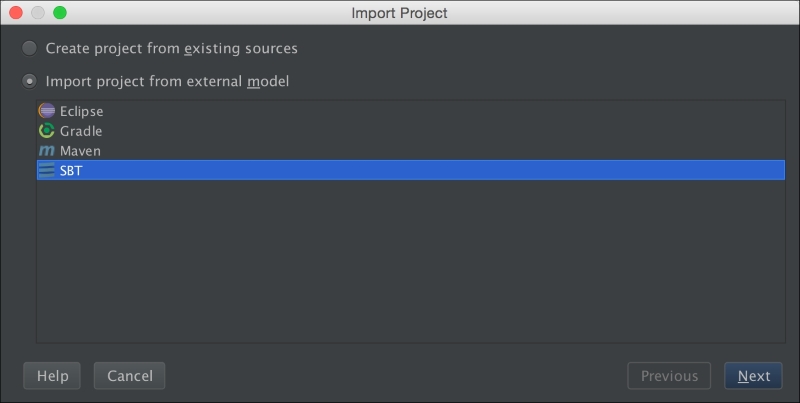
From here, click on Install below the Scala column to install Scala support in IntelliJ. After installing, click on Start using IntelliJ IDEA. After IntelliJ is started, you're shown a screen where you can import an existing project:
From here, select Import Project, and on the screen that opens, navigate to the directory where we extracted the downloaded sources, select that directory, and click on OK. On the screen that opens, select the Import Project from external model radio button and next, select SBT.
Now click on Next and fill in the screen that opens:
Check the Download sources and docs checkbox.
For Project SDK, click on New, select JDK, and navigate to the directory where you installed the JDK 1.8.
And finally, click on Finish.
IntelliJ will now import all the projects and download all the required dependencies. Once done, you're shown a screen like this, where you see all the projects and can run the examples directly from the IDE:

An alternative to using IntelliJ IDEA with great Scala support is Eclipse.
The Scala community provides a packaged version of Eclipse that contains everything you need for developing Scala.
To install this version of Eclipse, first download the version for your OS from their download site at http://scala-ide.org/download/sdk.html.
Once downloaded, extract the archive to a directory of your choice, start Eclipse, and select a location to store your file. Once started, you'll see an empty editor:

Before we can import the project, we must first create the required Eclipse project configuration. To do this, open a terminal and navigate to the directory where you extracted or cloned the sources. From that directory, run
sbt eclipse:Joss-MacBook-Pro:rest-with-scala jos$ sbt eclipse [info] Loading project definition from /Users/jos/dev/git/rest-with-scala/project [info] Updating {file:/Users/jos/dev/git/rest-with-scala/project/}rest-with-scala-build... [info] Resolving org.fusesource.jansi#jansi;1.4 ... [info] Done updating. [info] Set current project to rest-with-scala (in build file:/Users/jos/dev/git/rest-with-scala/) [info] About to create Eclipse project files for your project(s). [info] Successfully created Eclipse project files for project(s): [info] chapter-01
Now we can import the project. Go to File | Import from the menu and choose to import Existing projects into Workspace. On the next screen, select the directory with the sources as the root directory, and Eclipse should show you all the projects:
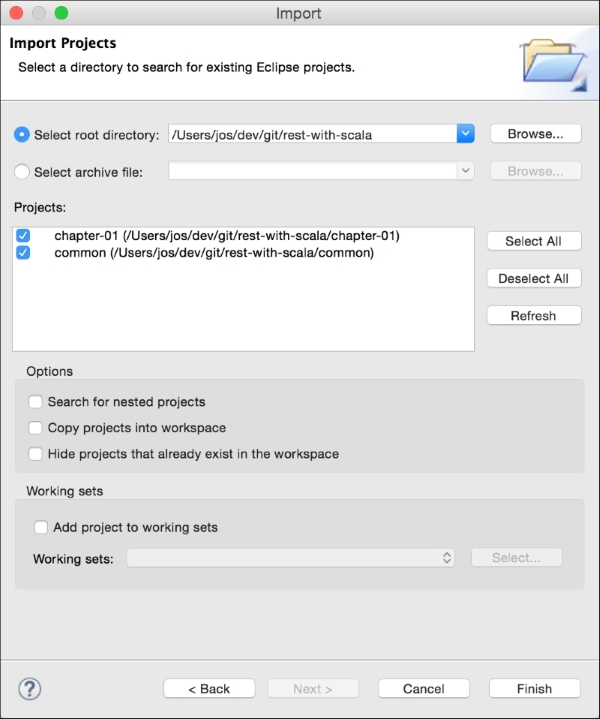
Now click on Finish, and the projects will be imported. Now you can edit and run the samples directly from Eclipse.

Before we look at the API of the service we're going to create, we'll have a quick look at how to test your REST API. We can, of course, create a REST client in Scala and use that, but since a big advantage of REST services is that they can be read and understood by humans, we'll use a simple browser-based (Chrome in this case) REST client called Postman. Note that you can, of course, also use different REST clients. The reason we chose Postman is that with Postman, it is easy to create different kinds of request; it has HATEOAS support and also allows us to share requests, so you don't have to make them by hand.
Postman runs as a Chrome plugin, so to use this REST client, you need to use Chrome. Once you've started Chrome, open the URL, https://chrome.google.com/webstore/detail/postman-rest-client/fdmmgilgnpjigdojojpjoooidkmcomcm?hl=en in your browser (or just search on Google for Chrome Postman).
Tip
Note that there are two versions of Postman: a simple Chrome plugin, which, at the time of writing, is version 0.8.4.14, and a Chrome app, which currently is at version 3.0.0.6. For this book, we'll use the simpler Chrome plugin, so make sure you install 0.8.4.14 in your browser.
Once installed, open up this app by going to chrome://apps and selecting the application or clicking on the newly added button at the top-right of your screen. When you open this plugin, you should see the following window:

One interesting aspect of Postman is that you can very easily share REST queries. In the sources for this chapter, you can find a directory called common.
In this directory, there are a number of files which contain the requests for each individual chapter. For instance, for this chapter, these are contained in the file, ch01_requests.json. Each file contains a number of requests that you can use to test the REST frameworks in this book. To import all these requests, take the following steps:
On the left-hand side of the screen, click on the Collections tab.
To the right of this tab, two icons pop up. Click on the right icon, which is called import collection.
On the screen that pops up, click on choose files, navigate to the
commondirectory, and select all thech0#_requests.jsonfiles and open them.
Now, you'll have a number of collections, one for each chapter, where you can find sample requests for the different chapters.

To run a request, just click on a collection. This will show all the requests for that chapter. Click on a request. Now clicking on the Send button will send the request to the server. In the upcoming chapters, we will see which request you can use to test the functionality of a specific Scala REST framework.
At this point, we've got Scala and SBT installed, and can use Postman as the REST client. The final step is to see whether everything is working correctly. For this, we'll start a very simple HTTP service, which echoes back a specific request parameter.
Tip
For this example, we've used HTTP4S. This is a basic HTTP server that allows you to quickly create HTTP services. If you're interested, you can find more information about this library at http://http4s.org/. The source code for our simple echo service can be found in the chapter-01/src/main/scala directory.
To run this example, we need to take a couple of steps:
First, open a console window and go to the directory where you downloaded and extracted the sources or cloned the Git repository.
From that directory, run the
sbt runCH01-EchoServercommand. This will start up the echo service:Joss-MacBook-Pro:rest-with-scala jos$ sbt runCH01-EchoServer [info] Loading project definition from /Users/jos/dev/git/rest-with-scala/project [info] Set current project to rest-with-scala (in build file:/Users/jos/dev/git/rest-with-scala/) [info] Running org.restwithscala.chapter1.EchoService 11:31:24.624 [run-main-0] DEBUG o.http4s.blaze.channel.ServerChannel - Starting server loop on new thread Server available on port 8080
Tip
Downloading the example code
You can download the example code files from your account at http://www.packtpub.com for all the Packt Publishing books you have purchased. If you purchased this book elsewhere, you can visit http://www.packtpub.com/support and register to have the files e-mailed directly to you.
Now that we've got a server running, open up your Chrome browser, and from there, open Postman (remember, either use the added button or the
chrome://appsURL). In the list of collections, click on the request labeled Echo 'hello'. This will open the request. You can now run this request by clicking on the Send button. The result, if everything is configured correctly, will be something like this:
By changing the value of the
msg requestparameter, you can test that the server is really echoing the user's input.There are a couple of other requests in this collection that show some features of our current server. You can check what happens when the request parameter is omitted and when a call is made to an unknown URL.
At this point, the only thing left to do in this chapter is to look at the API we'll create using the different frameworks outlined in the upcoming chapters.
To show the features of the various frameworks in this book and how they solve problems in a different manner, we'll define a simple API, which we'll implement with the REST frameworks. For this book, we'll implement a simple to-do list API.
We want to create a RESTful API, so the most important part is to start with the description of the resources that can be managed through this API. For this API, we define the following resources:
|
Entity |
Description |
|---|---|
|
Task |
A task is something that needs to be done. The JSON for a task looks similar to this: {
"id": long,
"title": string,
"content": string,
"notes": [noteList],
"status": Status,
"assignedTo": Person,
} |
|
Project |
A project will allow us to group tasks together, and by assigning persons to a project, we can determine who can work on a specific task: {
"id": string,
"title": string,
"tasks": [task],
"members": [person],
"updated": datetime
} |
|
Person |
A person is someone who can work on a task and when done, close the task. A person can only work on those tasks to which he is assigned, or when he is part of the project to which a task belongs: {
"id": string,
"name": string
} |
|
Note |
Notes can be added to tasks to provide additional information on how the task should be performed: {
"id": string,
"text": string,
} |
Without going into too much detail here, we want to support approximately the following functionality in our API:
CRUD functionality: We want to support some basic CRUD operations. It should be possible to perform the following actions:
Advanced functions: Besides the standard CRUD-like functionality, we also want to provide some more advanced features:
Assign a task to a specific project
Assign a person to a task
Assign a person to a project
Move a task from one project to another
Note that we won't implement all the functionality for each framework. We'll mainly use this API to explain how we can use the various REST frameworks.
That's it for the first chapter. In this chapter, we introduced what REST is, and which level of the Robertsons Maturity Model we'll be aiming at (Level 2). We'll explain HATEOAS in the final chapter. At this point, you should have Scala and SBT installed, and should be able to run all the examples in this book using SBT and test them using the supplied requests in Postman. We also saw how to use IDEs to play around with the code. And finally, we introduced the high-level API that we'll implement in the upcoming chapters.
In the next chapter, we'll dive into the first of the Scala frameworks we'll explore. The first one is Finch, which is a REST library on top of the networking library, Finagle. Both of these were initially created by Twitter.
