Getting Started with Unreal
In the first chapter of this book, you will learn about what Unreal Engine is, what it is used for, and how you can start working with it. You will then learn how to set up an account with Epic Games and download Unreal Engine, before using the same account details to download Bridge, which is the application needed to start creating MetaHuman characters.
Overall, you will become proficient in installing and setting up these applications on a Windows machine.
So, we will cover the following topics:
- What is Unreal Engine?
- What are MetaHumans?
- Setting up Unreal Engine and the MetaHuman Creator
Technical requirements
Before we get started, I must remind you that this book is about extremely high-quality 3D characters so it’s important you understand this before setting up Unreal and risk being disappointed because of technical issues. This is because Unreal Engine, like any 3D graphics tool, requires a powerful machine; much of this power comes from the graphics cards.
As a result, if you want to enjoy the real-time experience of working in Unreal, you’ll need a computer that can handle the best settings and display a MetaHuman character in real time. Otherwise, you’ll experience a very sluggish machine with a tendency to crash a lot, and nobody wants this. To complete this chapter, you will need an internet connection and the minimum hardware specifications that Epic Games recommends:
- Windows 10 64-bit
- 64 GB RAM
- 256 GB SSD (OS drive)
- 2 TB SSD (data drive)
- NVIDIA GeForce GTX 970
- 10-Core Xeon E5-2643 @ 3.4 GHz
The screen grabs you will see in the pages of this book are from my own machine, which is configured as follows:
- Windows 10 64-bit
- 256 GB RAM
- 1 TB GB SSD (OS drive)
- 4 TB SSD (data drive)
- NVIDIA GeForce RTX 3090
- 20-Core i9 10-900k @ 3.7 GHz
If you’re a devoted Mac user, you’re just not going to have as good an experience as you would have compared to a Windows user. Much of this is to do with Epic Games putting more time into developing the engine for use on Windows. This isn’t to say it’s not available on Mac but many of the features, particularly rendering features to achieve photorealism, are not available on Mac machines, most notably Direct X 12 and Ray Tracing Cores on the NVIDIA RTX series of GPU cards.
I’d also like to point out that there are solutions out there that will allow you to test on powerful machines. For the most part, they will get you through all the chapters of this book, except for live facial motion capture and any live body motion capture that may be featured. Therefore, if you’re on a budget, I suggest you look at some cloud computing solutions such as the following: paperspace.com.
Note
On a cloud machine, you still won’t be able to do any live motion capture, as this requires a direct interface or shared network with your machine. However, you could take advantage of the higher specification of the cloud machine for experimenting with render and lighting settings.
At this point, you may be getting needlessly worried. However, I personally tried using the tools mentioned in this book on a lower-spec machine and for the most part, I was able to work through it using very low render settings. However, I was just not able to do any live motion capture at all. Instead, I was only able to rely on library motion capture – so if you plan to learn now and invest in a newer, faster machine later, this book is certainly still for you.
What is Unreal?
Put simply, Unreal Engine is a game engine. There are many other game engines out there, but Unreal Engine is one of two that are the leading ones in the field of game development, the other being Unity. Had the people of Unity come up with MetaHumans, this book would have a slightly different title!
Unreal Engine is an incredibly powerful tool used for displaying graphics in real time. It was originally built for a PC-based first-person shooter game called Unreal and developed by Epic Games in the mid to late 1990s. In its earlier years, Unreal Engine was capable of rendering frames at rates as high as 60 fps on the CPU, giving the user a real-time experience.
However, there were many limitations, such as the frame size, limits on how many triangles could be displayed at any given time, and the complexity of the math behind the lighting. The end results were graphics that were not photorealistic but were a significant improvement on other game engines.
As GPUs improved over time, so did Unreal, as it was able to migrate a lot of its mathematical computations over to the GPU. As a result, the engine was able to rely on hardware that was specifically designed to calculate 3D rendering faster, and many features were developed to introduce photorealistic lighting solutions that were previously only available on traditional CPU path-traced solutions found in film and TV.
Path-traced or ray-traced rendering solutions involved very complex mathematics that would trace photons from the pixel of the final render through the CGI camera and around the scene. This tracing was incredibly time-consuming and required a lot of processing power just to deliver a single image. Therefore, conveying a sense of motion or real time was impossible for photorealism.
Because of very recent innovations, Unreal Engine is now being used to generate photorealistic renders in real time and we can see the result of that in Disney’s The Mandalorian. The company behind the real-time environments, StageCraft Industrial and Light & Magic, worked together to create LED backgrounds that displayed the output of scenes within Unreal Engine. In addition to supplying a photorealistic background, the LED backgrounds would also light the real actors, adding even more realism.
I expect that if you are a complete newbie to all of this, you may be scratching your head thinking: What does a game engine like Unreal do? More generally, it is a software application designed for building games that render graphics in real time. For games, Unreal is used for the creation of the following:
- User functions
- Game logic
- Environment design
- Animation
- Real-time rendering of what the user sees
Be it input from a mouse click, an Xbox controller button, or an Oculus headset, this user input affects how and when characters move and what is being displayed at any given time.
Ultimately, this book is about getting you up and running with your own characters and animating them how you want them to be animated even if you don’t have an art background or character animation background. Exciting stuff? I think so.
Next, let’s think a little more about how we are going to create those characters.
What are MetaHumans?
MetaHumans are very complex characters that have the capability of looking photorealistic and moving realistically. They are templates to be edited by users and artists. The editing of the character templates takes place on a web browser and allows the user to see their character design being displayed in extreme realism.
A lot of the development of MetaHuman Creator is around real-time rendering. Typically, the shading of skin for CGI characters involves a substantial amount of CPU processing, particularly for high-detail areas, such as subtle reflections, pores, and tiny hairs or fuzz. The MetaHuman skin shaders are designed to work in real time within Unreal Engine by harnessing recent technological hardware advances, such as real-time ray-tracing in NVIDIA RTX cards.
In addition to photorealistic skin shaders, MetaHumans have a network of bones and blend shapes that allow for incredibly intricate and powerful facial puppeteering, as well as the ability to be combined with facial and body motion capture, all in real time within Unreal.
Now that you have a good understanding of Unreal Engine and MetaHumans, we will get the software up and running on your system so you can start using Unreal in the next chapter.
Setting up Unreal and the MetaHuman Creator
Before we can start using Unreal Engine and MetaHumans, we need to do some setup. In upcoming sections, we will do the following:
- Create an Unreal account
- Download and install Unreal Engine 5
- Launch Unreal Engine 5
- Install Quixel Bridge
- Boot up MetaHuman Creator
So, let’s get started.
Creating an Epic account
To get started with Unreal, the first thing you need to do is create an Epic account. To do this, follow these instructions:
- First navigate to the Epic Games website: https://www.epicgames.com/.
Note
Depending on your region, don’t be surprised if the URL changes to something like the following: https://www.epicgames.com/store/en-US/ (you’re still in the right place).
- Once on the Epic Games website, you can navigate to the Unreal Engine link. Alternatively, just use the following URL: https://www.unrealengine.com/.
- In the right-hand corner, click Sign In (even though you don’t have sign-in credentials, you must still click on this).
- You’ll see a list of ways you can sign in, including using your email account with a bespoke password or just simply linking other social media or gaming credentials to Epic Games. Assuming this is your first account and you’re not signed in, select Don’t have an Epic Games account? Sign Up:

Figure 1.1: Different sign-in methods
- On the next page, you will be asked for your name, surname, username, and email, and to designate a password for your email. You can opt to receive additional emails, but you will need to read the terms and conditions and tick that you have done so.
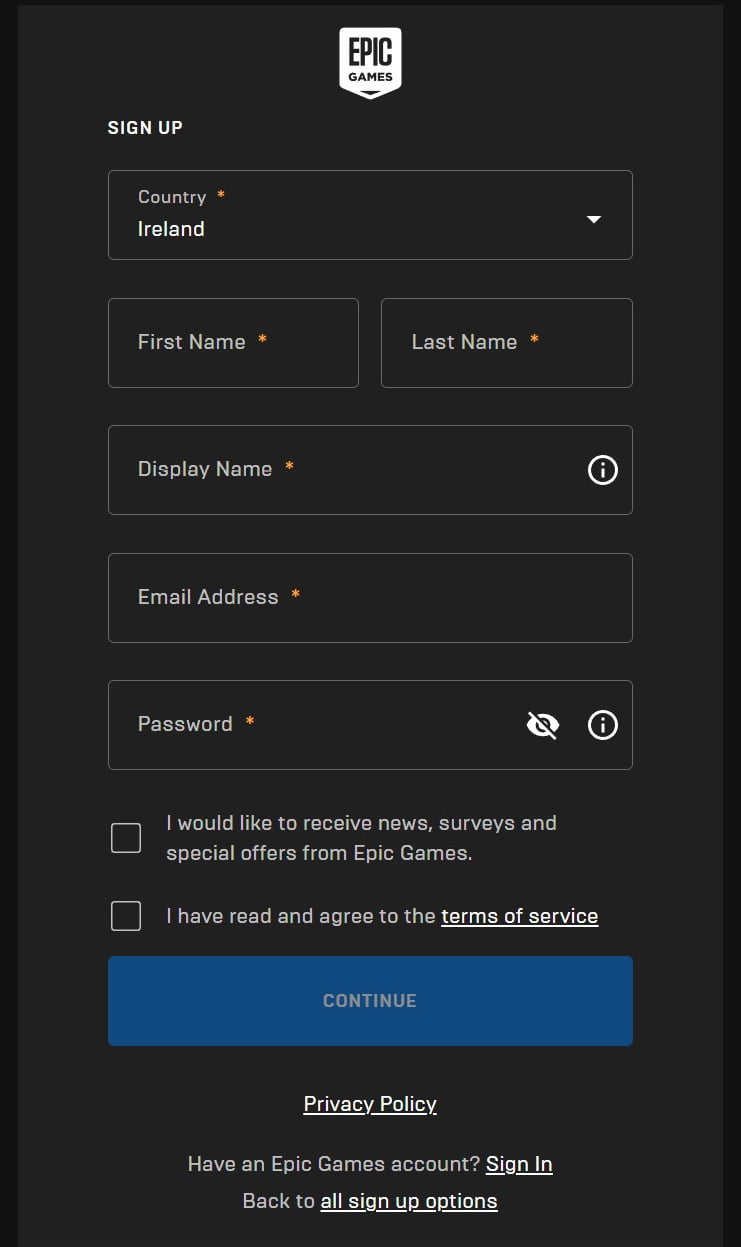
Figure 1.2: Signing up for Epic
- Once you have done this, a link will be sent to your designated email for verification. When you click on this link, you’ll have successfully created an account. You’ll need to be logged in whenever you plan to use the engine.
Next, we need to download and install Unreal Engine 5.
Downloading and installing Unreal Engine 5
Using your Unreal account, we need to download and install Unreal Engine 5. The application you are about to install is the Epic Games Launcher. This is where you install the engine and gain access to other features related to the engine, such as updates, plug-ins, scripts, models, and a host of many other assets. To do this, follow these steps:
- Once you have successfully signed in to Epic, you’ll see a page like this (the page may vary, as the screenshot is the latest marketing material from Epic at the time of print):
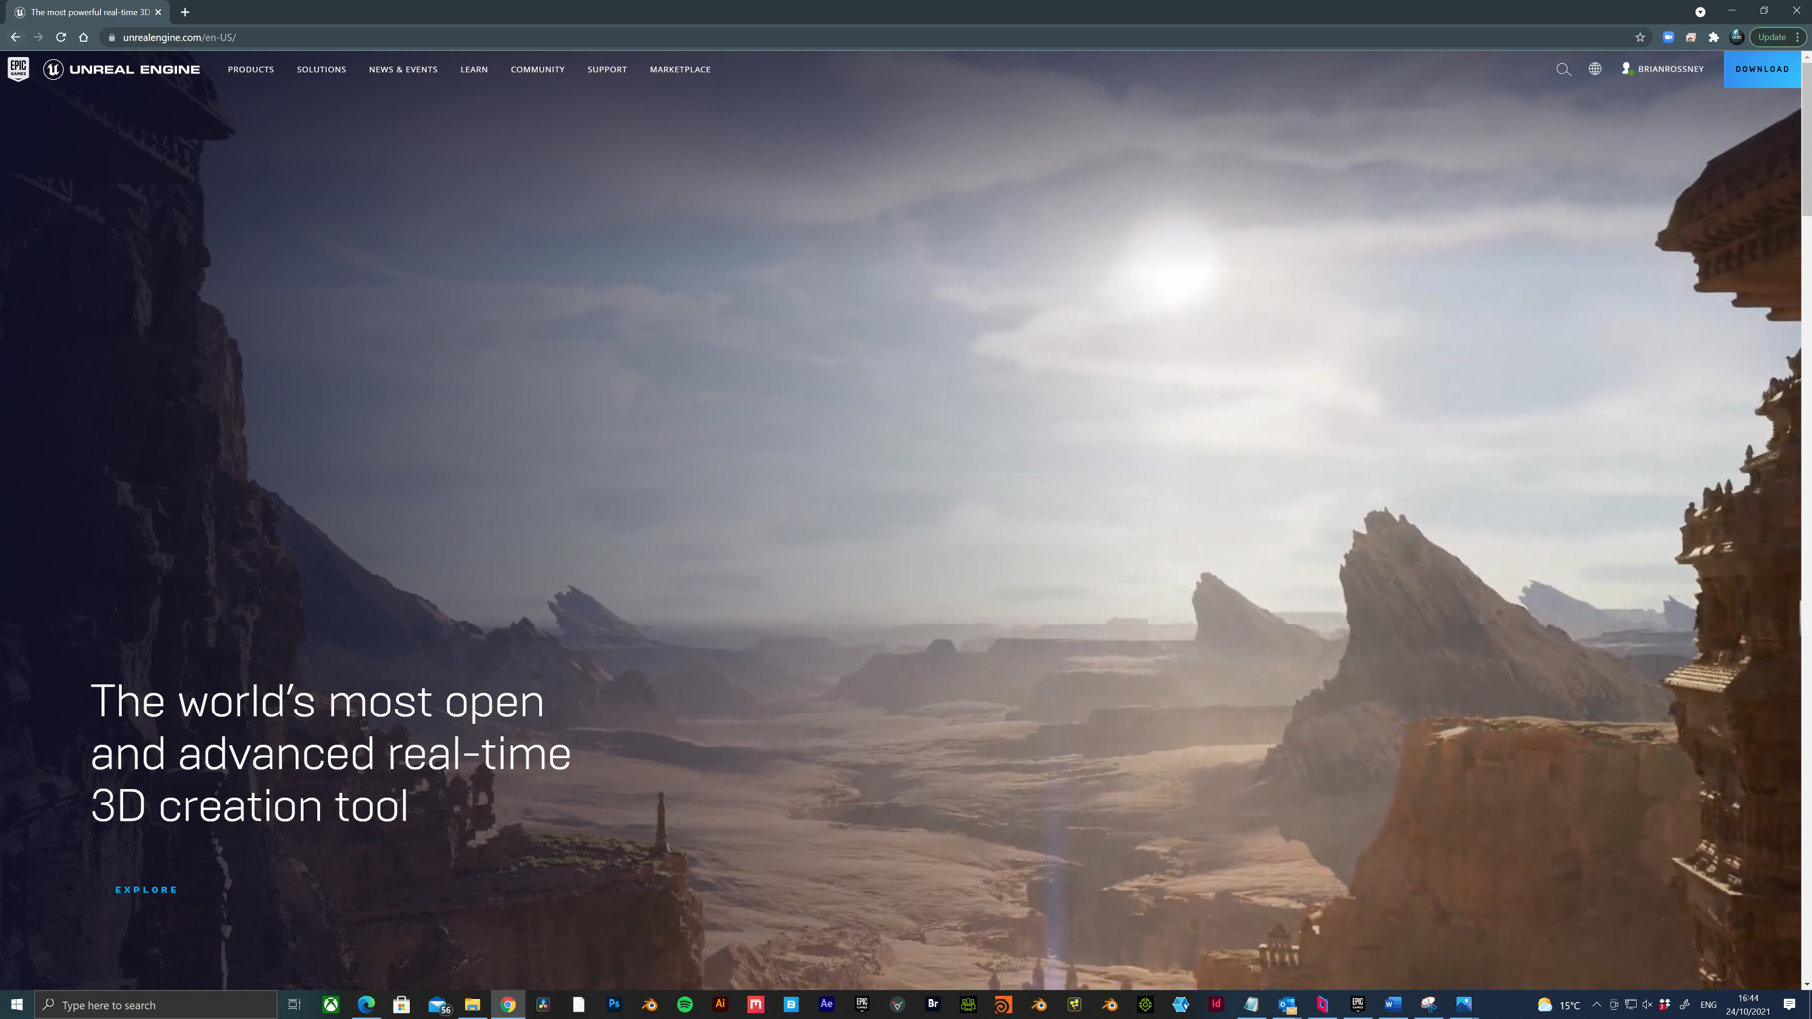
Figure 1.3: Epic splash screen
In the top right corner, you will see your name, as well as the Download button. Click this to take you to the following page:
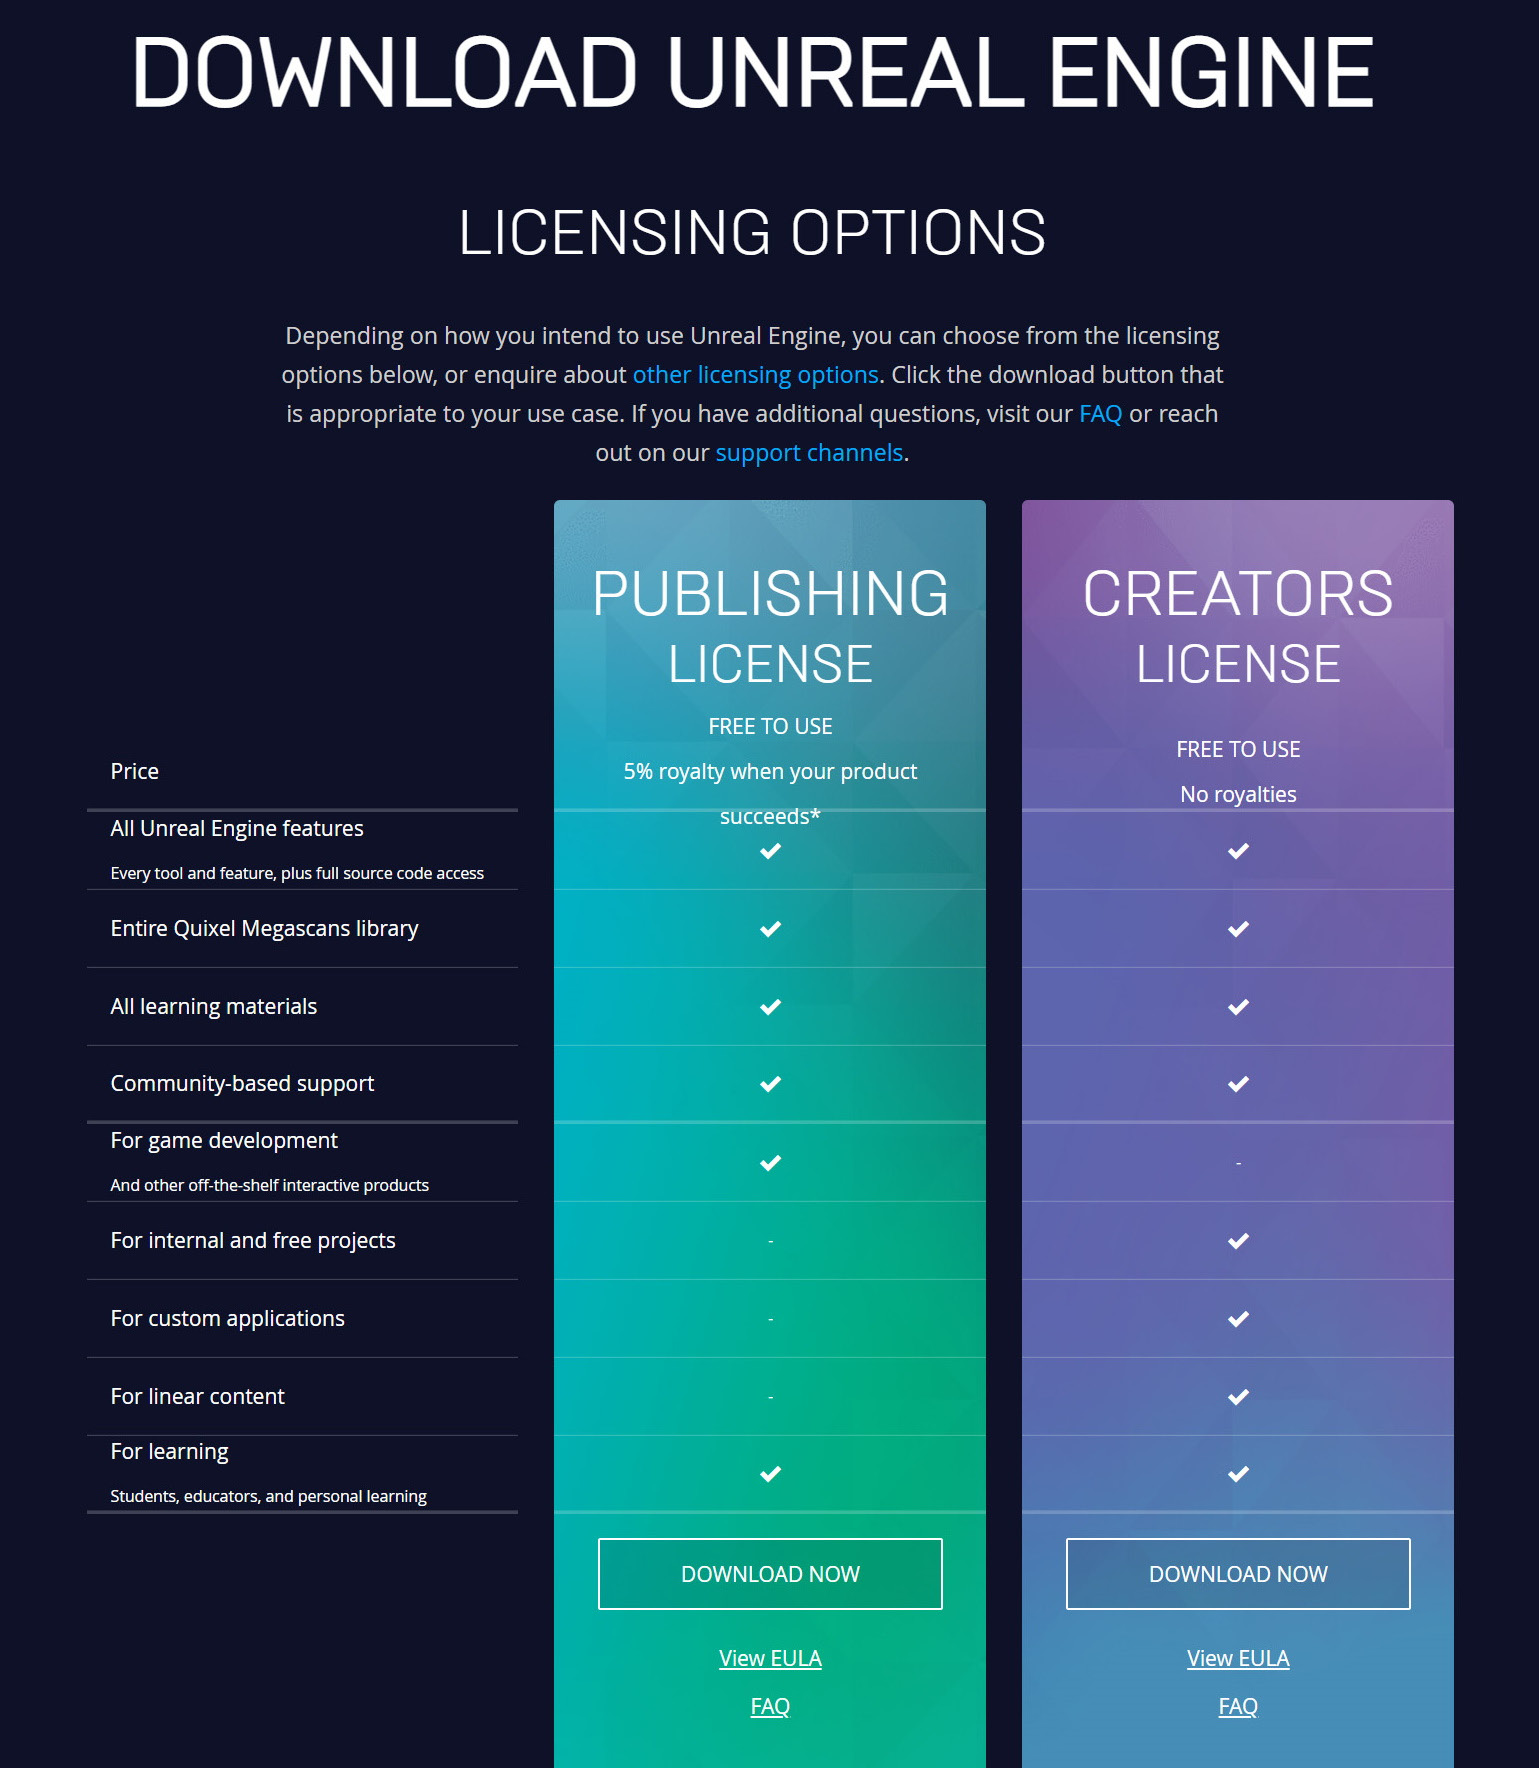
Figure 1.4: Licensing options
For the purpose of this book, we’ll assume you’re in the film and animation business and not the game development business. The column on the left is a Publishing License agreement for game developers where a percentage of sales profits go to Epic Games. You just need to concern yourself with the column on the right: Creators License. In most cases, the readers of this book will fall under Students, educators, and personal learning. However, professionals delivering linear content, such as film and animation, fall under the Creators License option.
- When you’ve read through the details and have had a look at the EULA license agreement, hit the DOWNLOAD NOW button under Creators License.
- Now, choose where you want to download the installer, which will be called something similar to
EpicInstaller013.0.0.enterprise.msi. It’s a Windows installer package and can be saved anywhere on your machine. You only need this file for the installation process.
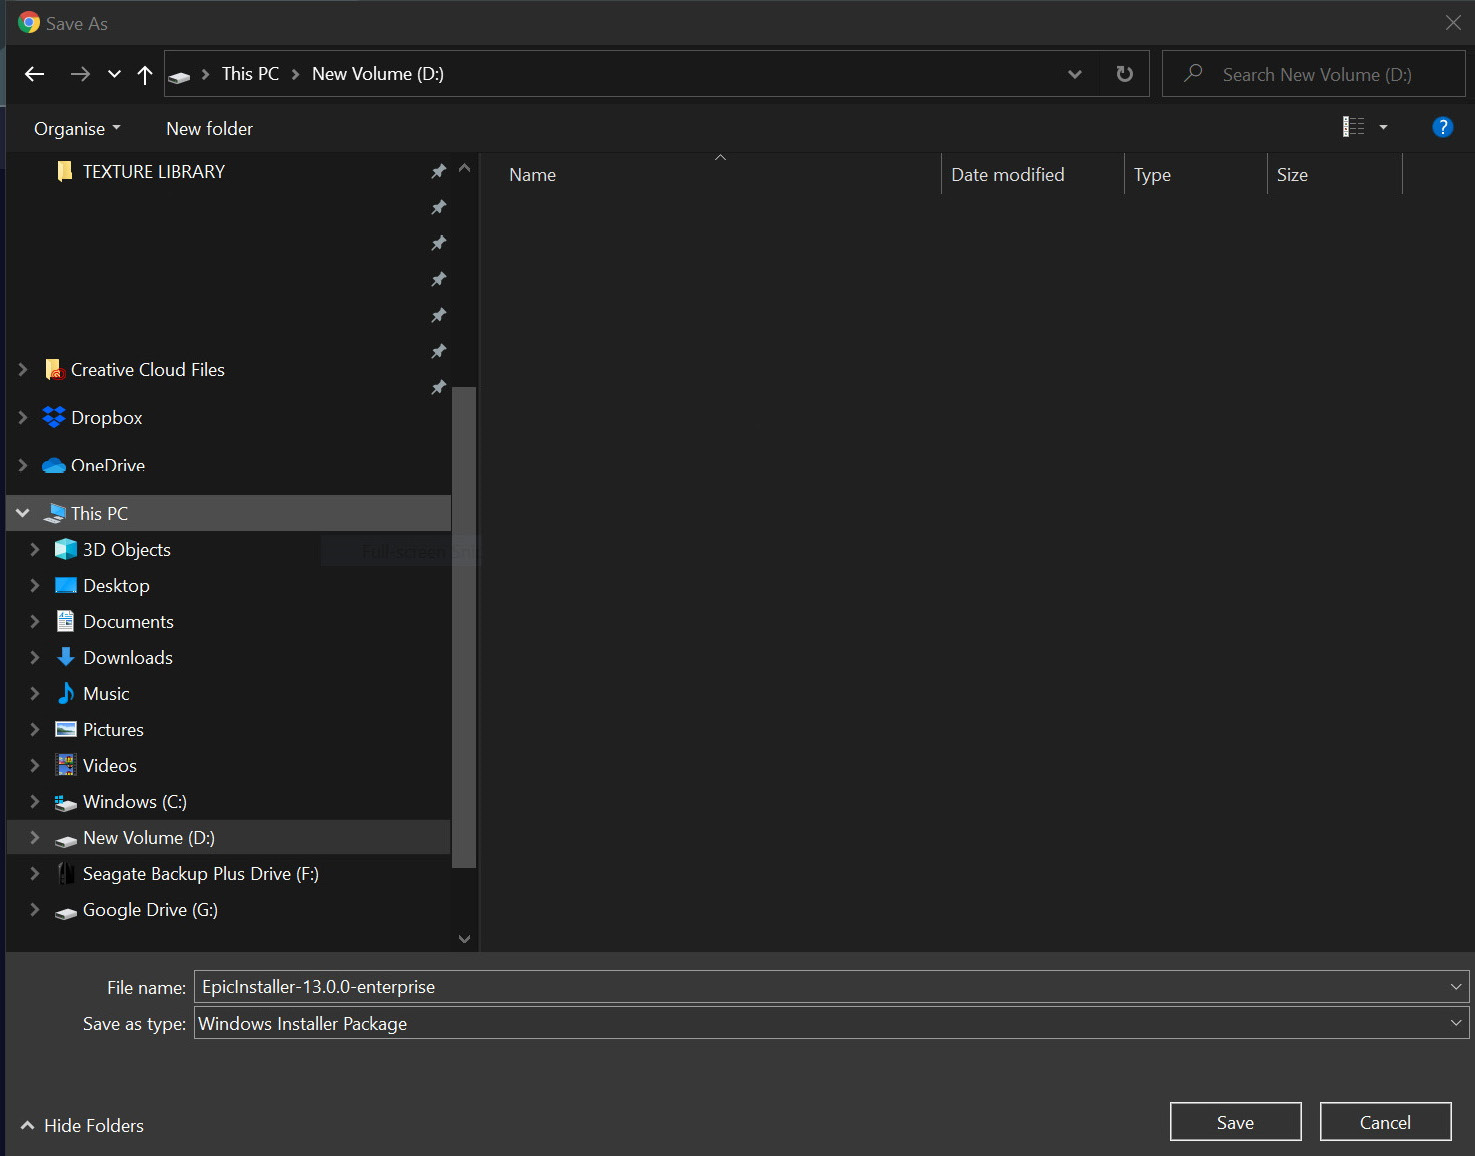
Figure 1.5: Downloading the installer
When you have found a suitable place, hit Save.
- Once downloaded, double-click the file and it will run:
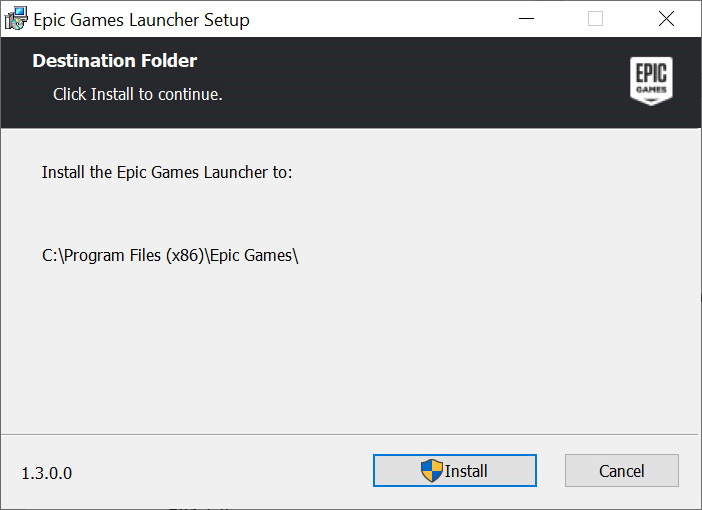
Figure 1.6: The Epic Games Launcher
- Now, you can click Install.
When the installer has finished, you’ll see an icon titled Epic Games Launcher on your desktop. Clicking on this will open the Launcher (note that it could take a few minutes to open the first time). Typically, it doesn’t open fullscreen but when it does, it looks something like this:
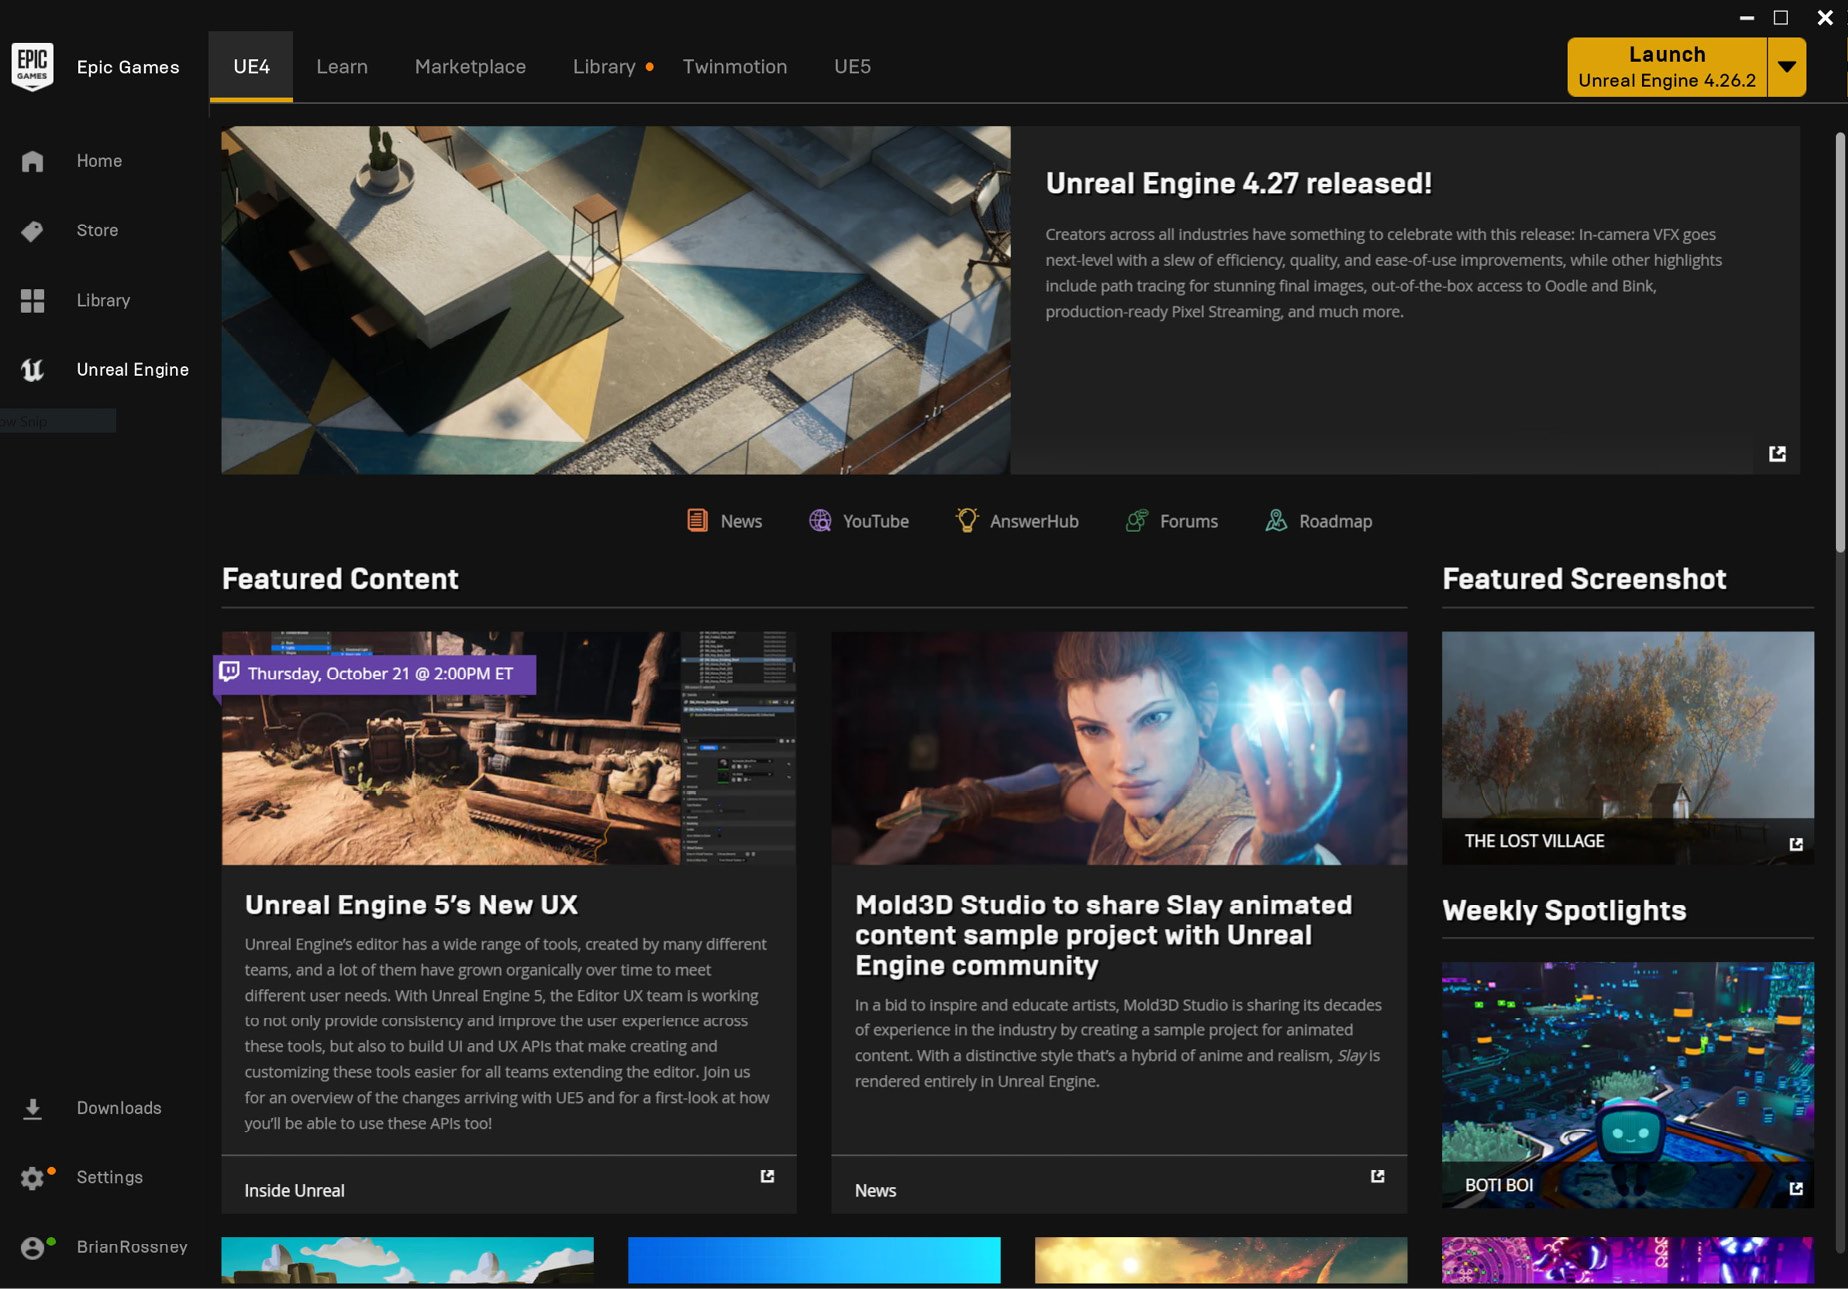
Figure 1.7: The Epic Games Launcher application
From here, you’ll see a few tabs running along the top to the right of the Epic Games icon. Most notably, we have the following:
- UE4: For blogs, UE4 version updates, and general news
- Learn: Opens the learning center, where you can watch tutorials and download sample projects
- Marketplace: Where you can buy models, environments, and characters designed to work in Unreal Engine
- Library: Used to find content that you have saved, purchased, or installed
- Twinmotion: An architectural pre-visualization application, with assets and presets designed specifically for architectural real-time pre-visualization
- UE5: Where you will install UE5 from
From UE5, click Download UE5, and the installer starts installing immediately. You will see this happening either in the UE5 tab or it may flip over to the Library tab and show you the progress of this download.
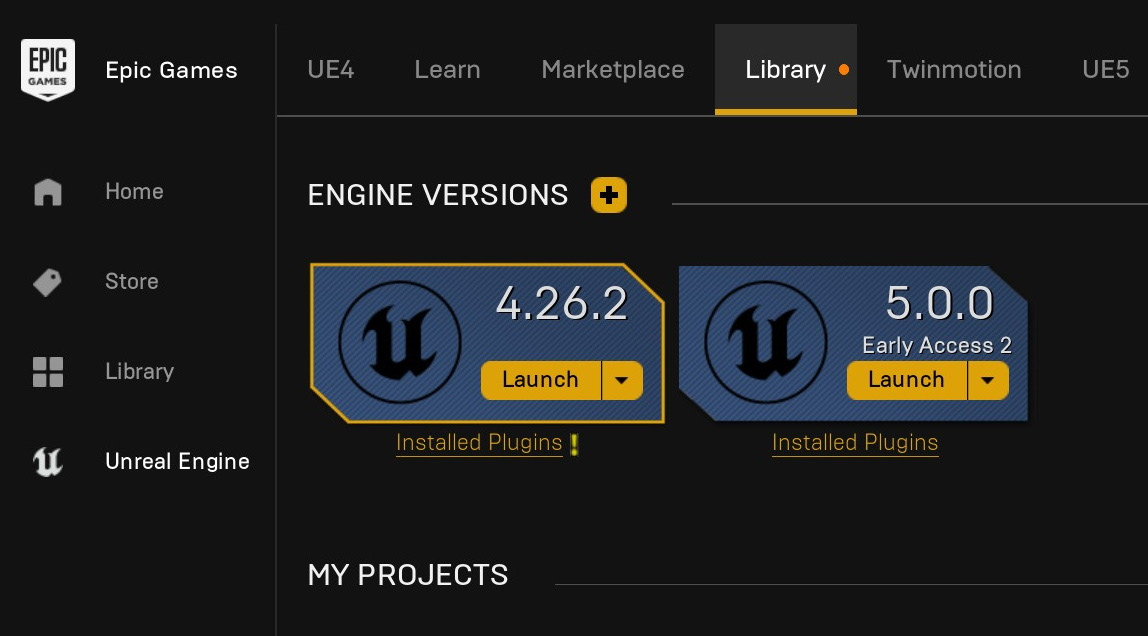
Figure 1.8: Engine versions
The installation does take a while, so you may want to come back to this.
Note
At the time of writing, UE5 is only under Early Access. This means that it’s not technically supported for any production and the new features exclusive to this release are deemed experimental.
In the next section, we will launch UE5!
Launching UE5
After you have followed all of the previous instructions and the installer has finished installing, you will see Launch appear; this indicates that Unreal Engine is ready to go.
When you have clicked Launch (making sure you have selected UE 5.0), you may receive pop-up dialog boxes such as the following: The Megascans Plugin was designed for build 4.27.0. Attempt to load it anyway? Messages such as this are precautionary because not everything has been tested to work with UE5 at the time of writing. However, as I have tested them with the Early Access edition, I know they are safe and stable, so it is okay to select Yes.
Next, you’ll see a small splash screen as Unreal Engine initializes. This could take a few minutes the first time it runs. Eventually, it will lead to the following interface:
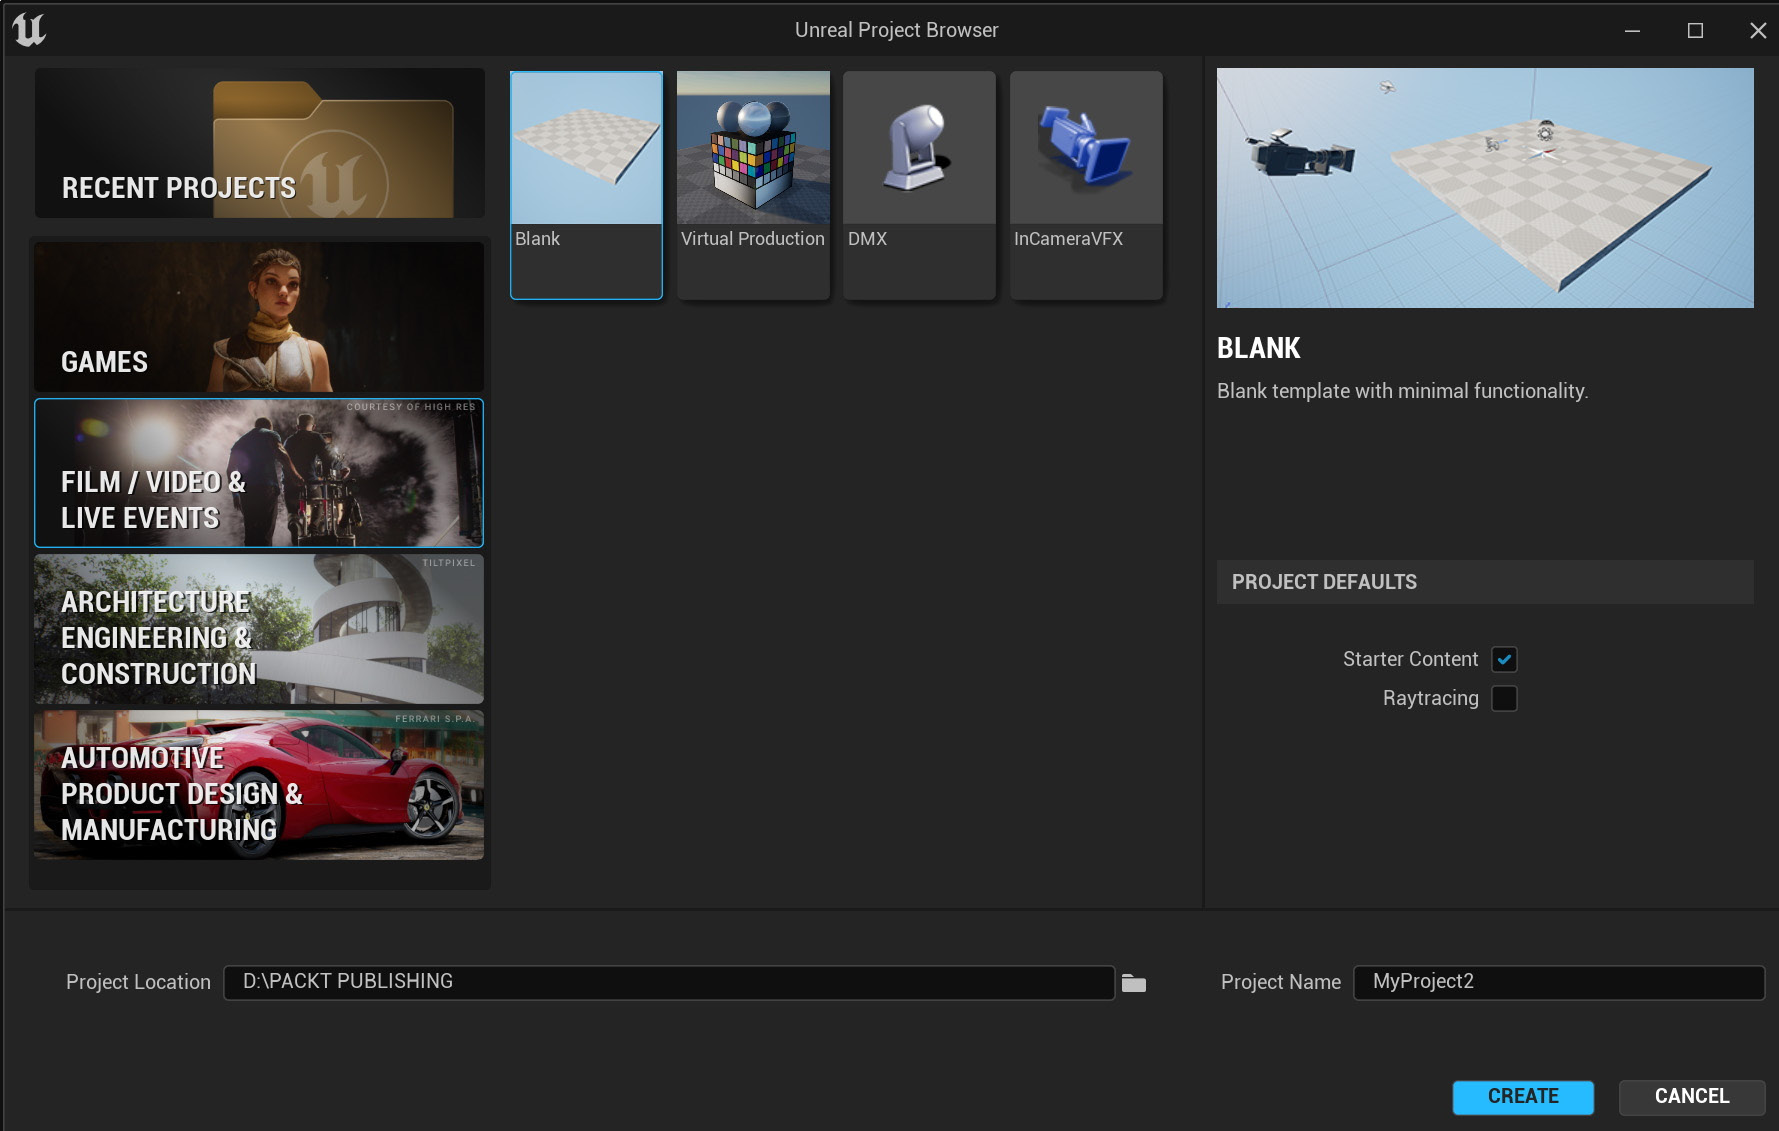
Figure 1.9: Unreal Project Browser
On the left-hand side, you’ll see a column listing the following:
- RECENT PROJECTS
- GAMES
- FILM / VIDEO & LIVE EVENTS
- ARCHITECTURE ENGINEERING & CONSTRUCTION
- AUTOMOTIVE PRODUCT DESIGN & MANUFACTURING
Each one of the listings gives you templates to choose from. Each template will automatically load certain settings and enable various preinstalled plugins required for that nature of work.
Because we are just interested in FILM / VIDEO & LIVE EVENTS, when we click on that, we get to choose from a small number of templates related to that type of work:
- Blank
- Virtual Production
- DMX
- InCameraVFX
This is what the screen will look like:
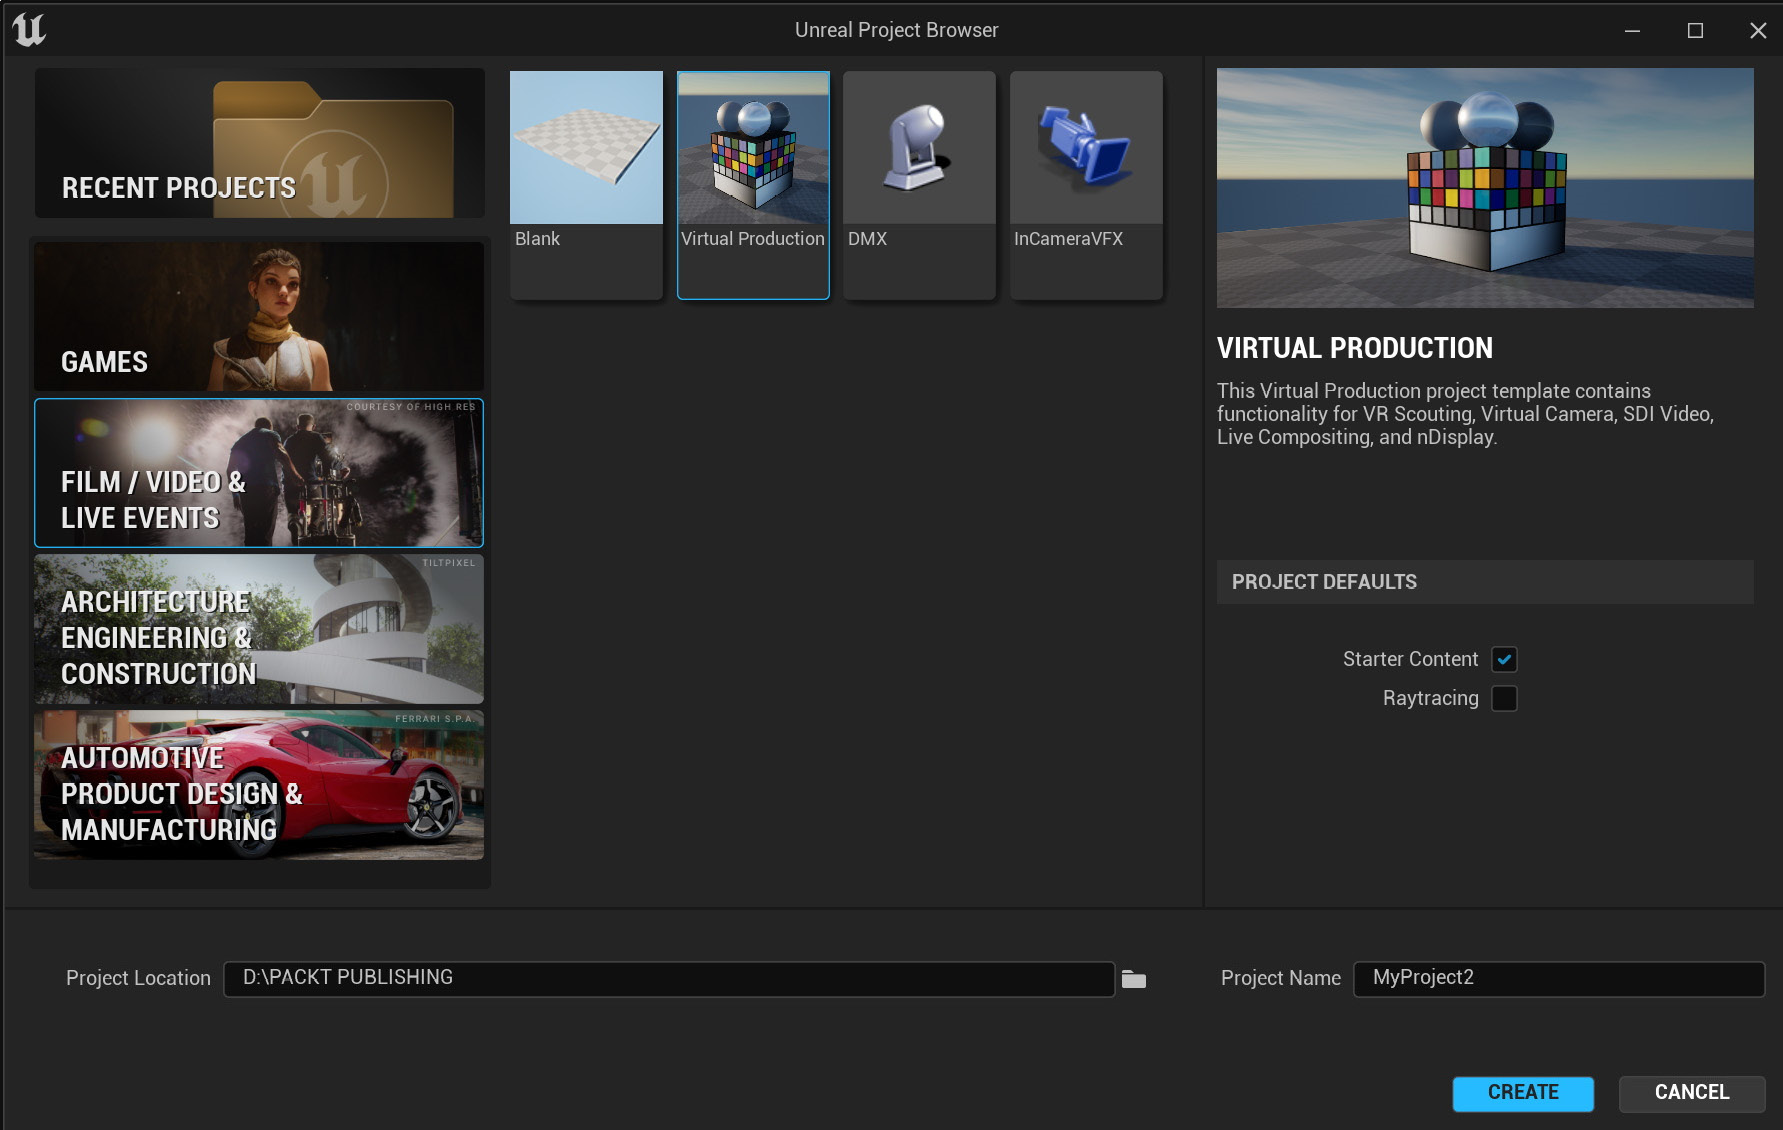
Figure 1.10: Virtual Production template
Note
If you happen to have a lower specification machine that doesn’t support raytracing, it’s wise to keep Raytracing to the default off mode. You can always enable it again in Project Settings at a later stage.
From this list, we’re just going to focus on the Virtual Production subtemplate. Then, we need to choose our new project location and create a project title. For my project, I’m going to create a folder titled Lost Girl and it will be in the D drive. The project folder will be Lost_Girl_SC_01. You can name your project file whatever you like.
Feel free to save your files to whatever directory you wish but be advised that it is best practice to avoid the C drive where your operating system is stored.
You’ll see a splash screen again and you will be prompted that the project is loading. This will take a minute or two depending on your machine’s specifications. After this, you may get a number of popups:
- You may also get a dialog box just as earlier warning you that a plugin isn’t designed to work in UE5 and asking whether you still want to proceed. Choose Yes if that happens again.
- You also may get asked whether you want to update the project. Choose Yes. This will just take a second or two to update.
- Finally, it will ask whether you want to manage plugins. You can choose Yes and then close down the plugin window if that happens. You can also choose No and enable the plugins later as you import your character into the engine, but I do recommend selecting Yes at this point.
That’s it! We now have the engine up and running.
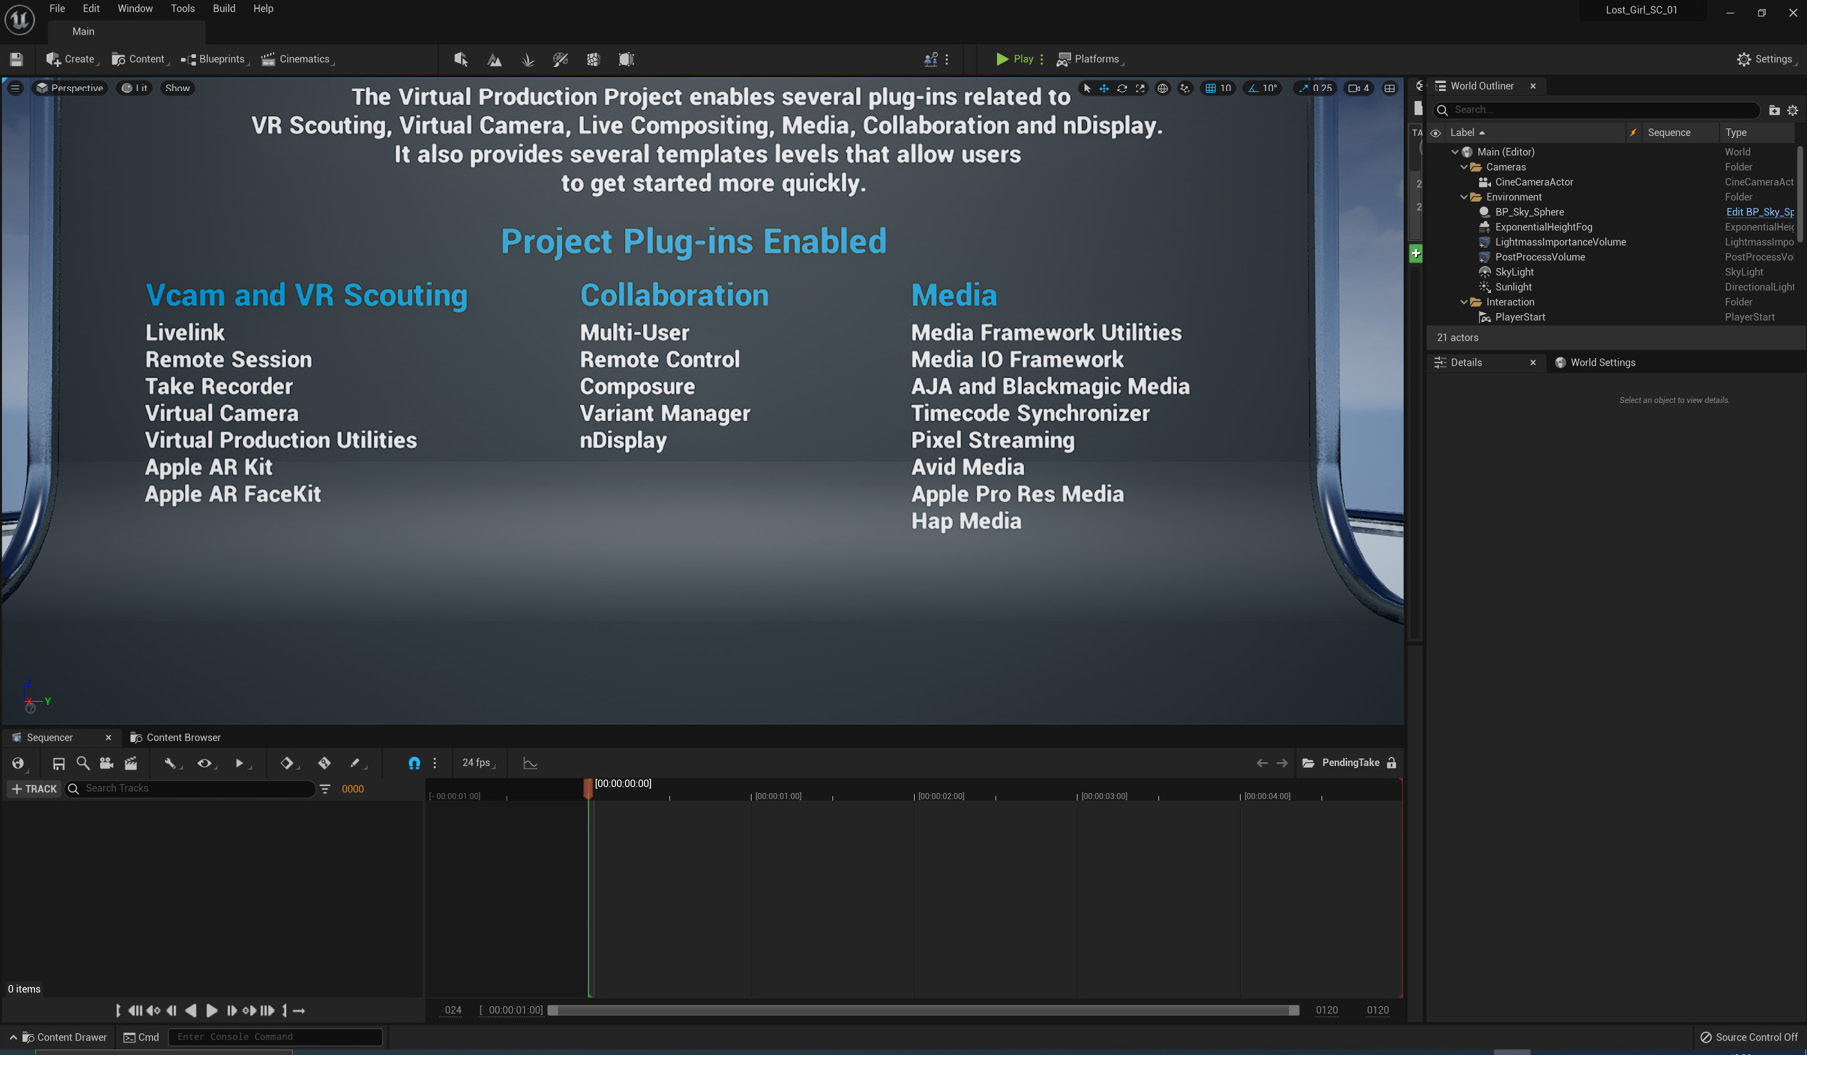
Figure 1.11: The Unreal Engine interface
Next, it’s time to install Quixel Bridge.
Installing Quixel Bridge
MetaHuman Creator is an online application from Quixel. To get that up and running, first, we need to go to their website and download the application called Bridge that allows us to launch the MetaHuman Creator online application.
This sounds a little complicated, but the Bridge application works like an asset management tool with your account details. For example, it will fire up your personal MetaHumans projects and allow you to download many other assets, such as Megascans Trees, grass, buildings, and so on while keeping tabs on everything you’ve created or downloaded in the past.
This can come in incredibly handy because MetaHumans take up a lot of hard drive space, so you get to store your creations in the cloud, which allows you to download them wherever you are. In addition, once installed, Bridge also works as a plugin within Unreal Engine, making asset management even easier.
So, to get started, complete the following steps:
- First, go to the Quixel website: www.quixel.com.
- Next, click on the DOWNLOAD BRIDGE button (we don’t even need to log in at this stage):
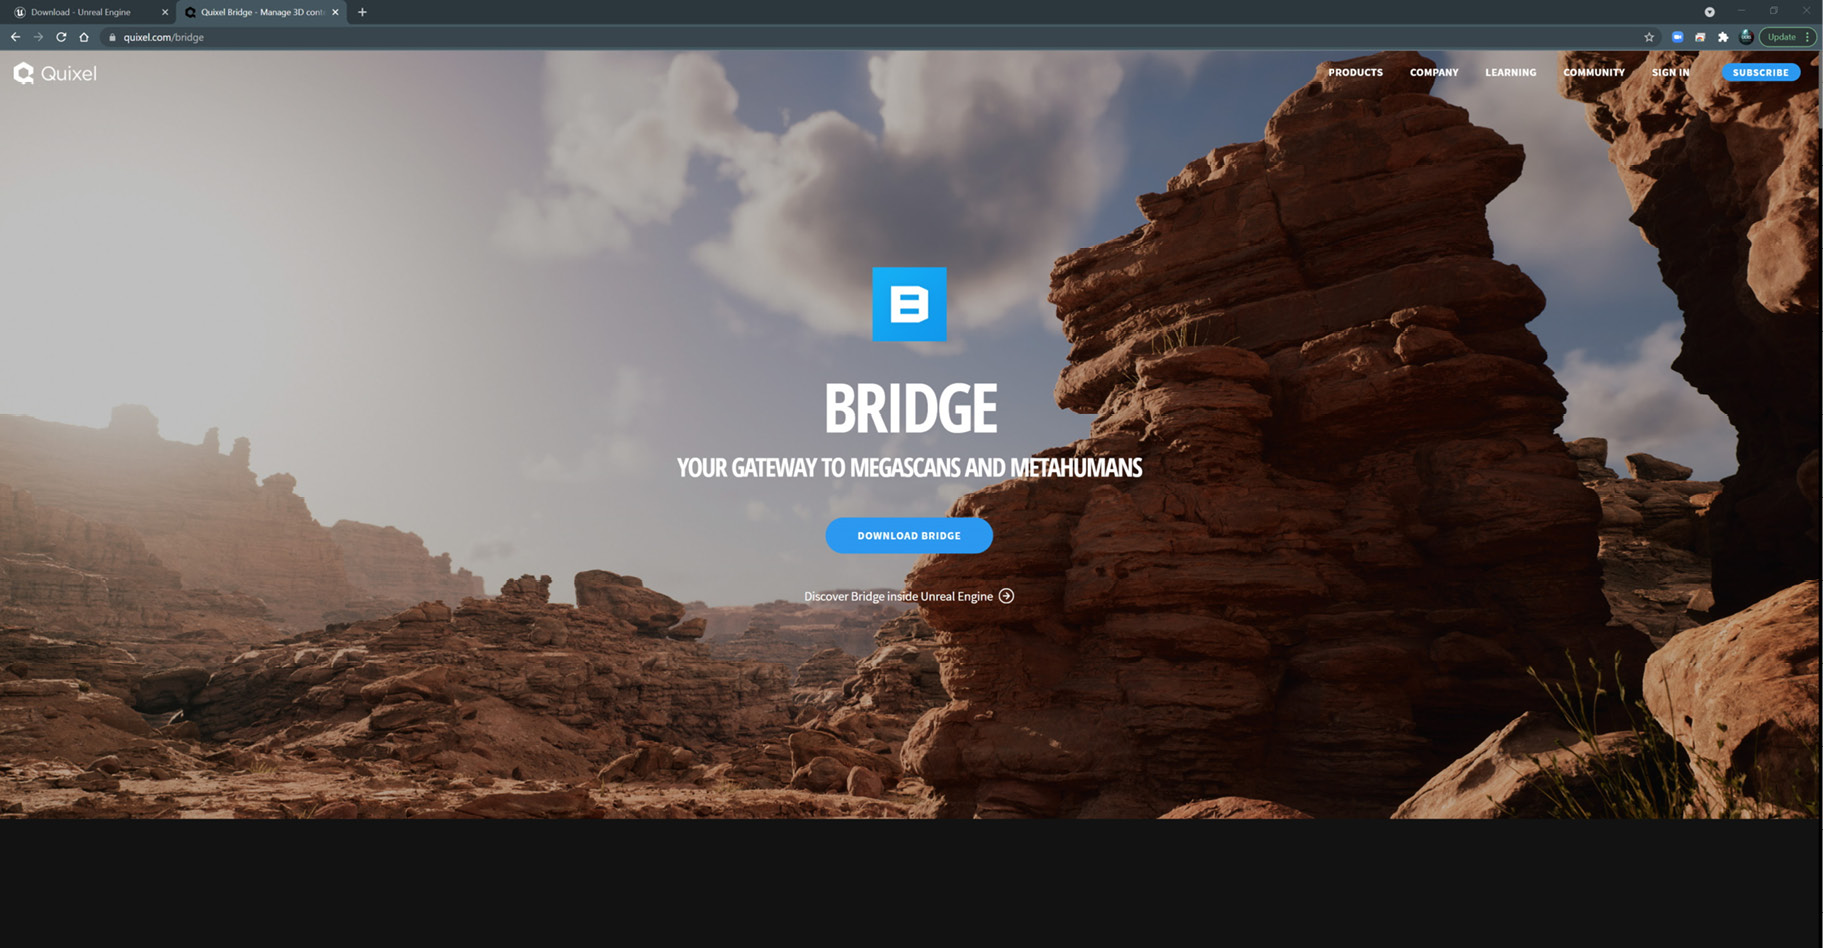
Figure 1.12: Downloading Quixel Bridge
This will install and open Bridge automatically and should pop up as a small window like so:
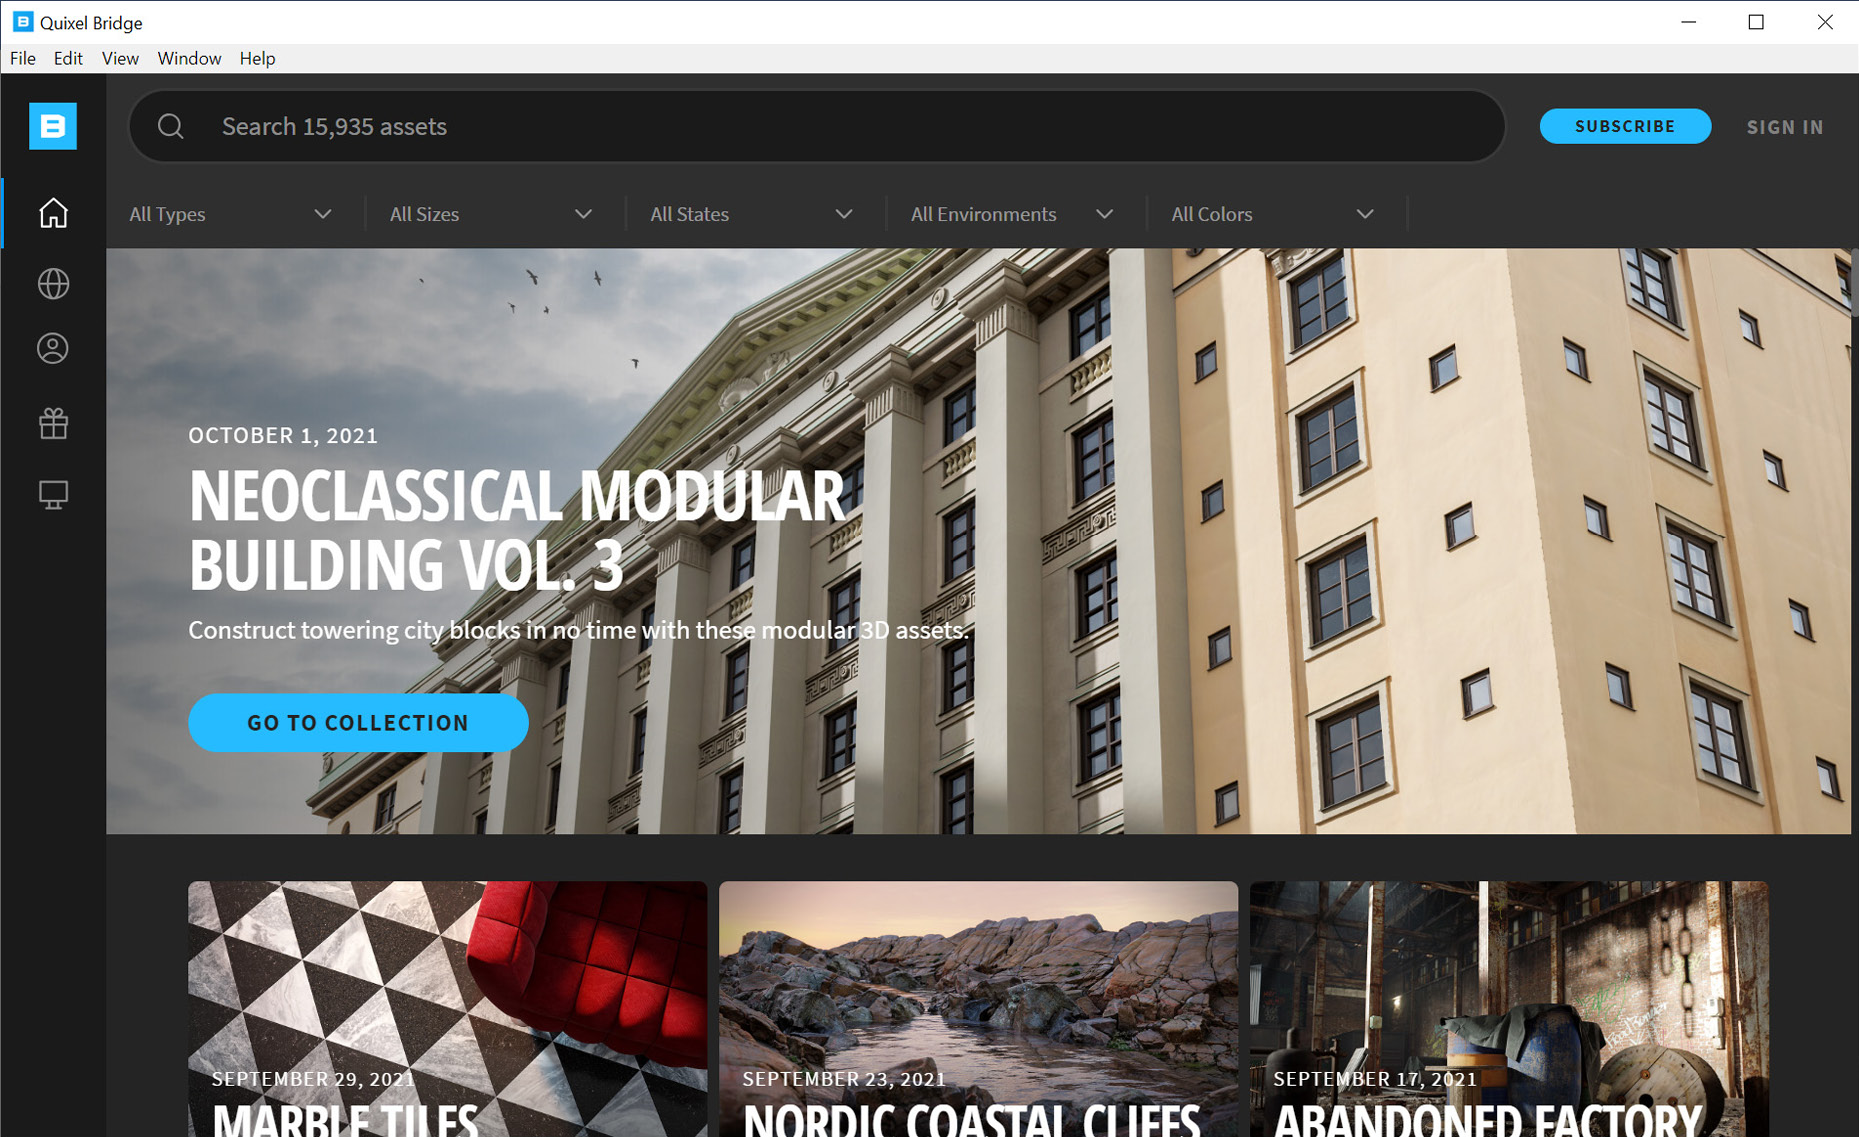
Figure 1.13: Quixel Bridge pop-up application
- Click on the SIGN IN button in the top-right corner of the page.
- This will lead to another dialog box where we can choose SIGN IN WITH EPIC GAMES.
SIGN IN at the top right will change to a person icon, indicating that you have successfully signed in:

Figure 1.14: Successfully signed in
We’re nearly all set up. Now, let’s finally set up MetaHuman Creator.
Booting up MetaHuman Creator
Now that you’ve downloaded Bridge onto your computer and signed in using the same login credentials you used for the Epic Games Launcher, you are now ready to boot up MetaHuman Creator. The difficult part is over, and this is where the fun begins.
It is worth noting at this point that Quixel’s Bridge has more features than just MetaHumans. Bridge gives you access to an enormous library of 3D assets, such as Megascans, and 2D assets, such as textures and materials. Unlike most 3D asset libraries, Bridge provides scanned models. In other words, these models are based on data taken from real objects, which is why they look so realistic but come with a hefty file size.
To get straight into MetaHumans, look for the person icon in a circle on the left-hand side of the screen:
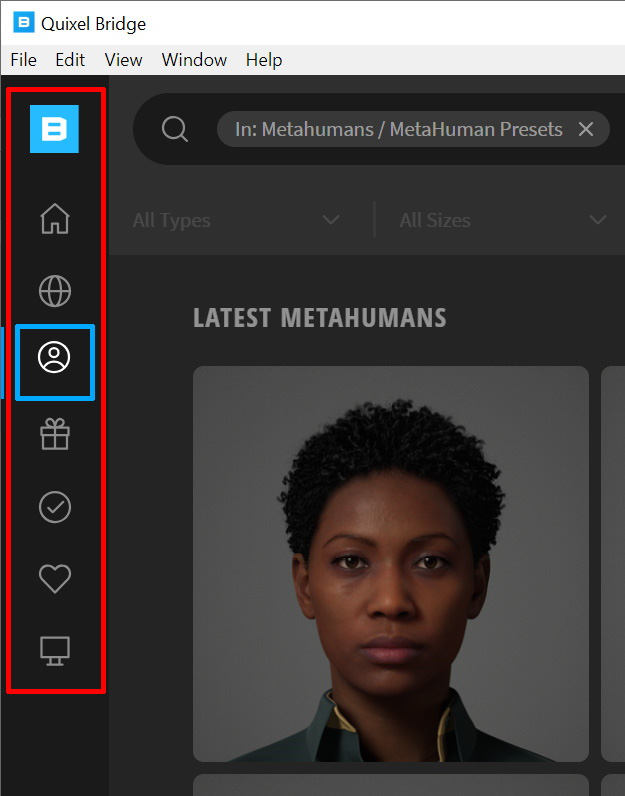
Figure 1.15: The MetaHumans icon
You will see numerous thumbnails of MetaHuman templates. By clicking on any one of these thumbnails, you will see a new option related to that character you’ve clicked, and you’ll see a blue button titled START MHC (this stands for MetaHuman Creator):
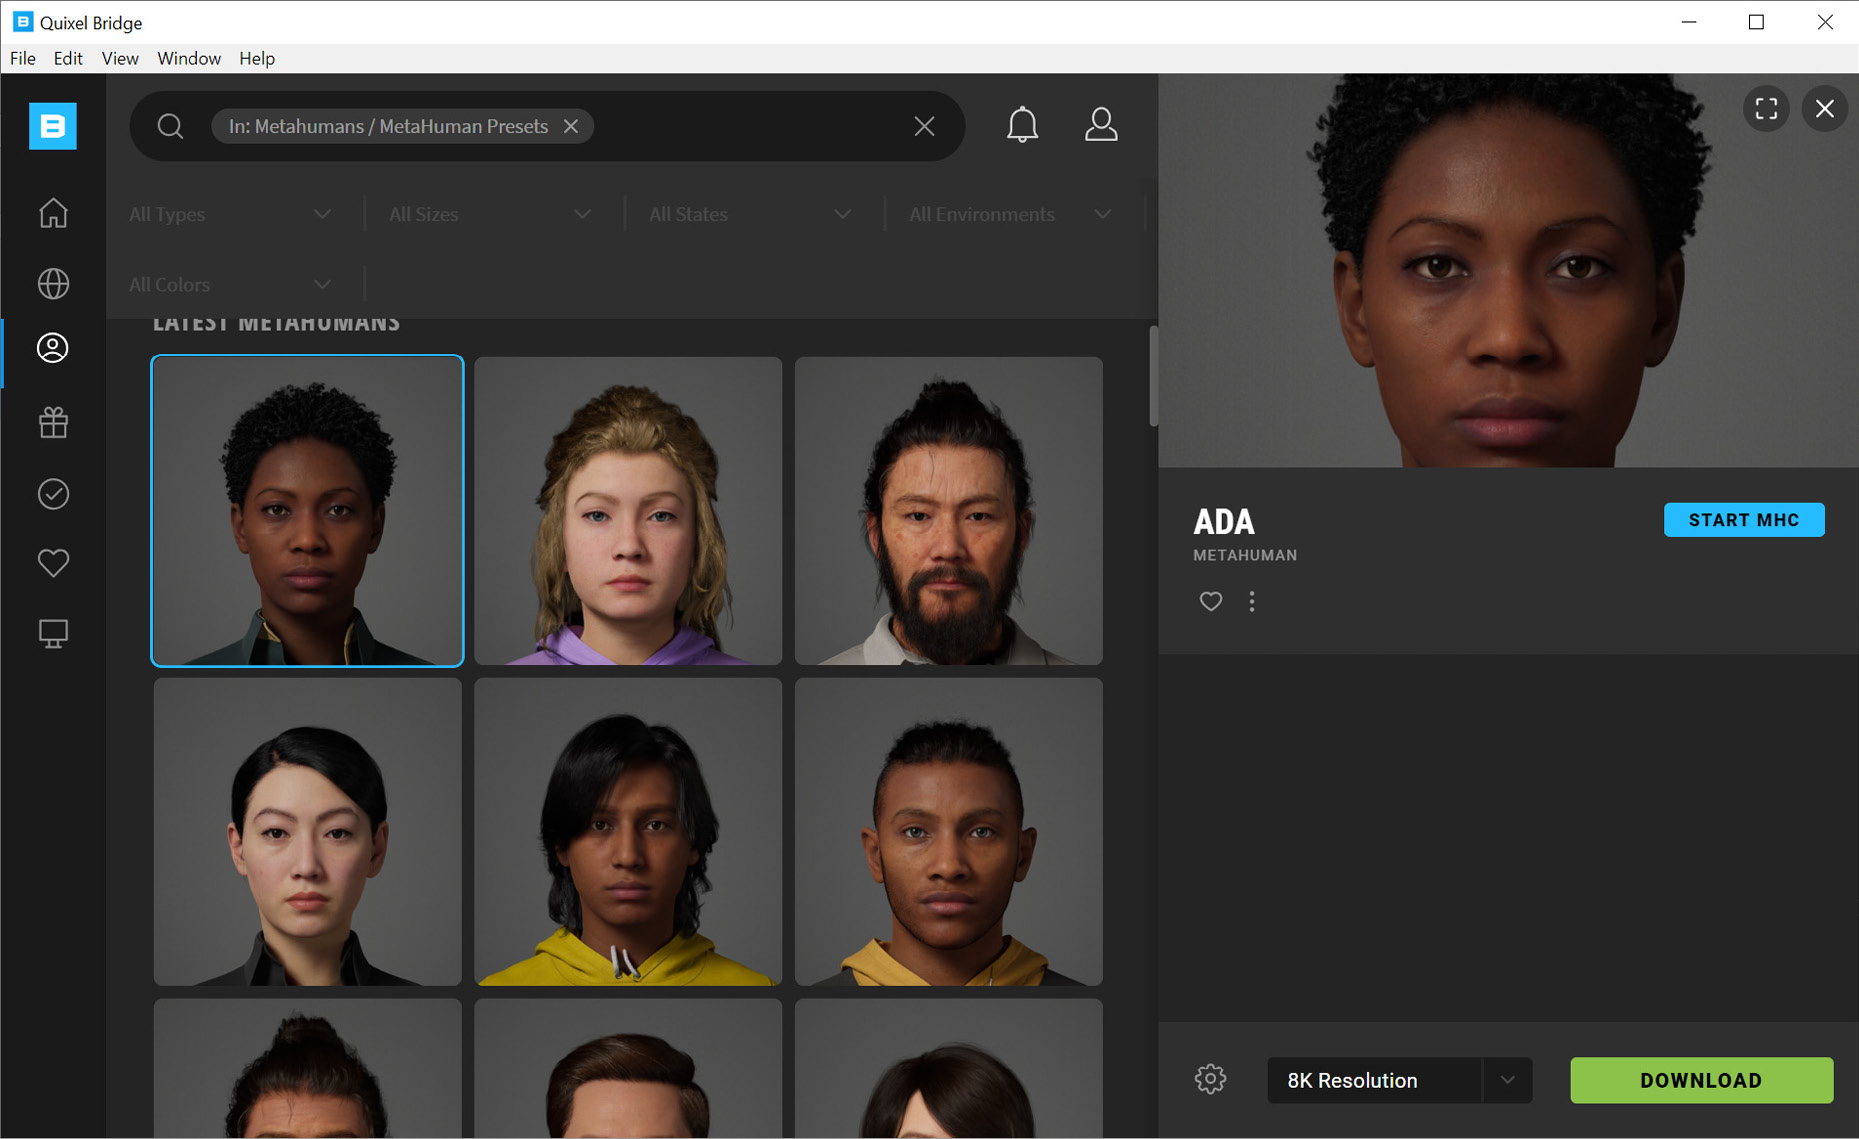
Figure 1.16: Starting MHC
And that’s it. Once you click the blue button, you will start your MHC session. This will take a few moments to boot up and you’ll get a page looking something like this:
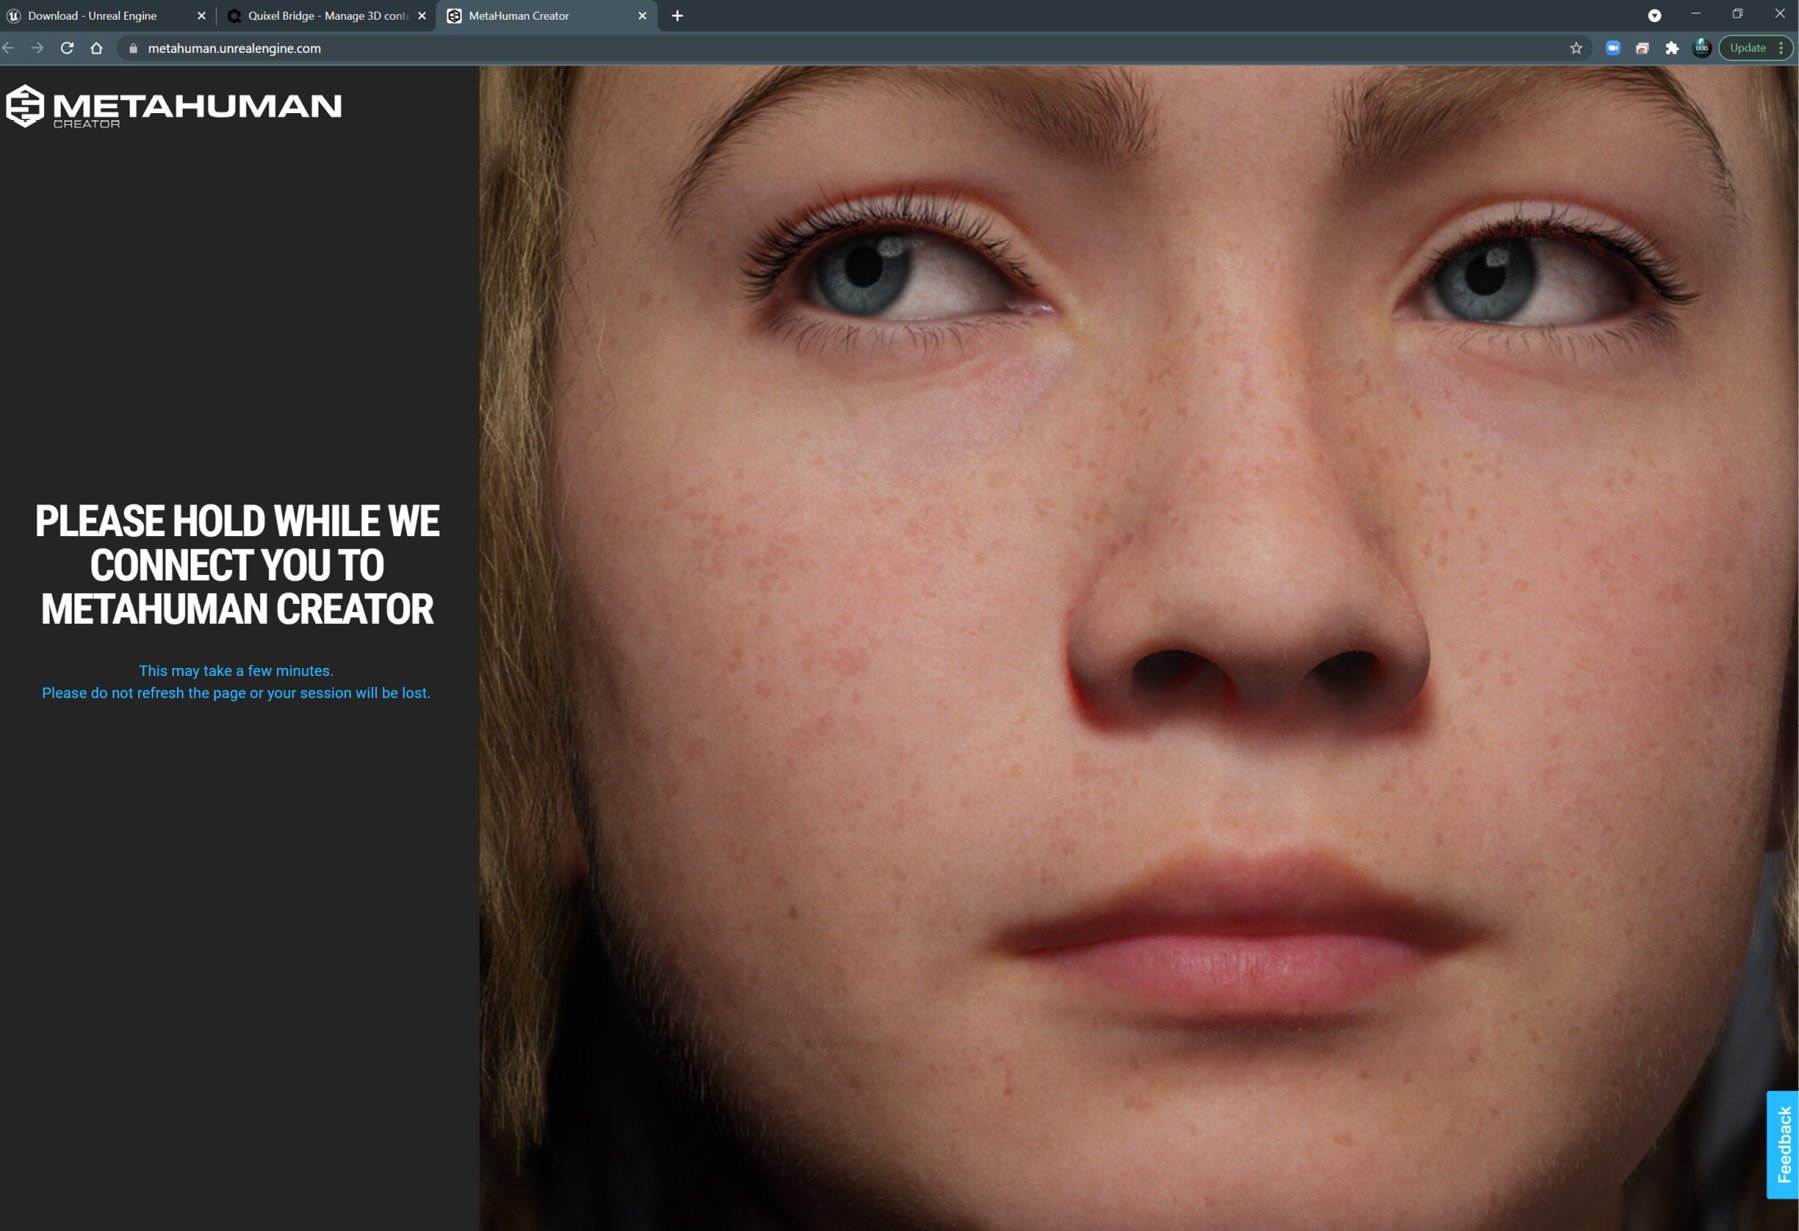
Figure 1.17: Connecting to the MetaHuman Creator online session
As mentioned earlier in this chapter, be sure to have a reliable internet connection to speed up the process of MHC.
Summary
In this chapter, you’ve learned what Unreal is, what MetaHumans are, and what software applications you need to create MetaHumans.
The next chapter is entirely about the MetaHuman Creator online session. While there are a lot of features, you will find that the application is very intuitive and, in many ways, what you have learned in this chapter is much more complicated than what’s to come. In fact, you’re going to find the next chapter quite enjoyable!