


In the mid-2000s, some of the staff at the University of Cambridge noticed that there were fewer students applying to study computer science each year, and that they didn't have very much experience. Something had to be done about this situation. The answer was the Raspberry Pi: a small, inexpensive computer which makes programming as accessible and as fun as possible. The idea is that students can play with the Raspberry Pi in their spare time, and in the process, learn valuable core computer science skills. Since its creation, many other groups have discovered how useful the Raspberry Pi can be, including schools, adults who want to brush up on their skills with technology, and electronics hobbyists.
This chapter describes how to get a Raspberry Pi computer up and running. Once this is done, the Pi behaves just like any other ordinary computer, and is capable of standard tasks, such as browsing the web and playing games. We will learn in later chapters that the Raspberry Pi is also capable of some things which ordinary computers can't easily do.
The following image shows an example of the Raspberry Pi that we will be using in the rest of the book:

Any model of the Raspberry Pi will work for the projects used in this book. The preceding image shows a Raspberry Pi Model B+, with four USB ports and a network connection. The Model A+ (with one USB port and no network connection) will also work, but a USB hub (which is described later) will be needed to allow both a keyboard and mouse to be used at the same time.
The Models A+ and B+ replace the older Models A and B, and have the same capabilities, but neater designs. You can identify the Plus models by looking at the mounting holes surrounded by metal. The Plus (+) models have four mounting holes in a rectangle, whereas the previous models have two or zero mounting holes. In the preceding image, two mounting holes are in the corners at the left end of the board, and the other two mounting holes are on the mid-right of the board.
The Raspberry Pi 2 looks almost the same as Model B+, but has a faster processor. This is not important for the projects in this book. Along with a Raspberry Pi computer, you will need other peripherals. In order to keep costs down, the Raspberry Pi was designed to work with devices that people already owned; you may find many of these components around your house already. Just make sure they're not in use before you take them!
Tip
http://elinux.org/RPi_VerifiedPeripherals is a useful website to check whether a particular device will work with the Raspberry Pi.
The Raspberry Pi requires a micro-USB connection, which is capable of supplying at least 700 mA (or 0.7A) at 5V. Power supplies, which can give 1000 mA or more are available (and will be more reliable), but it must supply exactly 5 V. Most standard mobile phone chargers are suitable for this purpose, and have their capabilities written on them, so you can check. Do not attempt to power your Pi from the USB port of another computer or hub; they are often incapable of supplying the required current.

The operating system and files of Raspbian are stored on an SD card, which is similar to what you may find in a digital camera. The Raspberry Pi models A and B use a standard-sized SD card, while the A+, B+ and Pi 2 models use smaller microSD cards. You will need at least 4 GB of space (preferably 8 GB or more). The Raspberry Pi Foundation sells very affordable 8 GB SD cards with the operating system pre-installed, and these can be found at http://swag.raspberrypi.org/.
If you start with a blank SD card, you will also need a way of writing to it from another computer. Many computers have SD writers built in, but it is possible to buy USB dongles which do the job too.


We will use a monitor or a television with HDMI or DVI input, and a video cable connected from the Pi's HDMI port to the screen's input, as shown in the following figures. It is possible to connect to an older VGA or composite screen, but this is more complicated. Take a look at this website more information http://elinux.org/RPi_VerifiedPeripherals.
The following images show the display monitor and cables that you might use to connect the Pi to your monitor:

Monitor

DVI connector

HDMI connector
An Internet connection is not essential, but is very useful as it allows you to do more work directly on the Pi. The easiest approach is to use a wired Ethernet connection.
The following image shows an Ethernet connector that is used to connect the Pi to the Internet:

RJ-45 Ethernet Connector
It is also possible to use a USB Wi-Fi dongle—you will need a powered USB hub to provide additional USB ports, and you should check whether the dongle is compatible with a Linux operating system. The following image shows an USB hub (unpowered):

USB multi-port hub
You may also like to put your Raspberry Pi in a case to protect it, though this is certainly not necessary. There are many different companies which make different styles of cases, so choose one that suits you, or you could even make your own from Lego or cards!
The first thing we need to do is put an operating system on the SD card using another computer. You can buy SD cards with software preinstalled, but doing it yourself guarantees to get you the latest updates, and is also a useful learning experience. These instructions assume that you are using a computer running Microsoft Windows or Mac OS X. If you are using another operating system, or if you are having difficulties in setting up the SD card, detailed instructions are available online at http://www.raspberrypi.org/downloads.
There is a Troubleshooting section at the end of the chapter if you get stuck.
The following steps show how you can install the OS on your Raspberry Pi:
Download the SD association's formatting tool, SD Formatter, from: http://www.sdcard.org/downloads/formatter_4/.
Download the latest version of the NOOBS (the offline installation) operating system collection from http://www.raspberrypi.org/downloads.
Insert the SD card into the SD card writer, as shown:
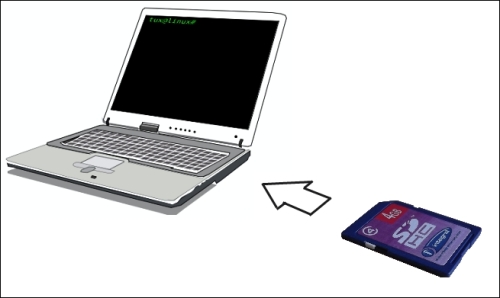
If the SD card writer is separate from your computer, plug it in.
Install and run SD Formatter. Select the SD card you just inserted, click on Option, then set FORMAT SIZE ADJUSTMENT to ON and click on OK. In this example, the SD card is shown as the G drive, but this will vary from computer to computer. Finally, click on Format.
Note
Make absolutely sure that you have the right SD card selected. If it isn't, all the data will be lost from the formatted card.
The following screenshot shows the SD Formatter software:

Extract the contents of the
NOOBS zipfile to the SD card. How this is done will vary depending on the software you have installed, but will typically involve double-clicking onNOOBS.zip, clicking on Extract or Extract to..., and selecting the SD card as the destination. There is a lot to extract, so this will take a few minutes to complete.On your taskbar (close to the clock) click on Safely remove/Eject the SD card and take it out of the SD writer, as shown here:

Now, we can prepare the Raspberry Pi to start for the first time. Place it securely on a desk or in a case. Make sure it is not in danger of falling on the floor, and do not rest it on top of the bag in which it comes. We can start up the Raspberry Pi by performing these steps:
Plug the SD card, screen, keyboard, and mouse into the Raspberry Pi. Also, plug in the Ethernet cable, if you have one, as shown here:

Plug the power cable into the Raspberry Pi. The red power light should come on, and the green activity light should flash occasionally.
If necessary, adjust the screen settings to display the images from the Raspberry Pi's input.
You should see a selection of operating systems for you to install (shown in the following screenshot), each with a short description. This book relies on you having Raspbian installed, so select Raspbian and click on Install. You can always come back and select a different operating system later; I will explain how you can do this in the next section.

Wait! Operating systems are quite large, so installation will take a few minutes. You can sit back and read some of the tips shown to you, or read the next few steps in this book.
The following screen shows the Raspbian installation process, along with the tips shown while its being installed:

When the installation has finished, you should see a blue screen with a final list of options (shown in the following screenshot). This is the Raspberry Pi Software Configuration Tool. Most things should be set up the way we want them, but there are two useful settings to change. Select Enable Boot to Desktop/Scratch using the arrow keys and press Enter. Select the Desktop Log in option, and press Enter. You should now be back at the main menu. Next, select Internationalisation Options, and choose your preferred language and keyboard layout. Use the right arrow key to get to Finish and press Enter. You can return to this menu at any time by typing
sudo raspi-configin a command line (refer to the next section for details):
After a minute or so, the Raspberry Pi should finish rebooting, and you should see the Raspberry Pi desktop, as shown in the following screenshot. This might look familiar to you: you can double-click on the icons to start programs, or select them from a menu. We will mainly be using Scratch, Python and Sonic Pi in this book, but take a minute to explore what's available to you. In particular, there are several Python Games: these are the sort of things that are possible to develop after a little programming practice:

Now that your Raspberry Pi is up and running, you'll want to know how to keep it working properly, and how to customize it to your needs.
Most of the time, it will be possible to do what you want to do using the mouse, by clicking on different parts of the screen, but at some point, you might find yourself needing to use the command line, as shown in the following screenshot:

The command line is a completely text-based way to control a computer, and can be used to do just about anything which can be done by clicking and more. It is available on almost all computers, but is usually hidden away. Some computer users prefer using the command line because they can type faster than they can click the mouse!
Here is a very quick overview of some common commands. Open a command line by double-clicking on the LXTerminal icon on the desktop, and try these out. You will need to press Enter to tell the Raspberry Pi that your command has finished. A longer introduction, including information on how to watch a movie in the command line, can be found online at http://www.techradar.com/news/computing/pc/1161712.
The following are few of the most important commands that are used in LXterminal:
ls(list): This command lists directory contents (directory is Linux's word for a folder.) This will show you all of the files and directories available to you in the current directory.cd <folderdirectory name>(change directory). This command allows you to move into another directory so you can see its contents, in the same way that double-clicking on a directory icon moves you into that directory. You can move through multiple levels of directories in one go by separating the folder directory names with a "/", and you can go up to the parent directory (the directory that contains the current directory) using the special..directory name.man <program name>(open manual): This command will bring up lots of information about a particular program, including what it does and how to use it. Very useful if you forget how to use something! Tryman lsto see some advanced information on thelsprogram we tried earlier, and press Q on the keyboard to quit. You can scroll through this information using the arrow keys or the Space Bar.<program name>(extra information): This is used to start the program, and optionally pass it some extra information. Try typing inscratchto start the Scratch program (we'll cover this in more detail in the next chapter), or if you are connected to the Internet, go toepiphany www.raspberrypi.orgto open the Epiphany web browser and then go straight to the Raspberry Pi home page.Note
The Tab key can be used to automatically complete a word. Even if you have not completely finished typing in the name of a program or file or folder, try pressing Tab. If there is only one option available, which begins with the letters you have typed so far, the whole word will be completed for you. If there are multiple options (or none), nothing will change; you can press Tab again to show you a list of possibilities.
If you want to install a program on your Raspberry Pi, you either need to download a version which is specifically for the Raspberry Pi, or use Raspbian's package system.
A package is a program or a part of a program, and many versions of Linux (including Raspbian) maintain a list of all the compatible packages, making it easy to keep all your software up to date. You can update to the latest version of this list if you have an Internet connection, by typing the following command in a command line:
sudo apt-get update
Note
Be very careful when using the sudo command. It forces the Raspberry Pi to do exactly what you tell it to do, without checking to make sure that the command is sensible. The command is useful in situations like this, where we want to make changes to the installed programs, but it also allows you to delete essential files. Double-check your spelling before continuing.
You can search for available packages with keywords using the following command:
apt-cache search <keywords>
Try the following command, for example, to see a list of available free games. You could even try installing one (xbubble is good, for example):
apt-cache search game
The name of the package is the first word of the line, and you can install a package using the following command:
sudo apt-get install <package name>
To update all the installed packages to the latest available version, type the following command:
sudo apt-get upgrade
Although the Raspberry Pi was designed to get people interested in computing, its cost and power mean that it is also popular for other reasons. Since the Raspberry Pi is a general-purpose computer, it is capable of everything a traditional computer can do, just perhaps a little slower. There is a web browser (Epiphany), and word processors and web servers are available in the Pi that helps you with the basic computing needs . A common use for Raspberry Pi is as a media center, to watch films and view pictures.
There are many different operating systems included with the NOOBS package: if you have NOOBS installed, you can see them if you press Shift when the Raspberry Pi first starts to boot; you will get a screen similar to this:

This will take you back to the list of operating systems you saw earlier when you started your Raspberry Pi for the first time. Each operating system comes with a short description: there are a couple of different flavors of Linux, the very fast RISC OS, and two different media centers, OpenELEC and RaspBMC.
If you want to try out one of these operating systems, make sure you first back up all your data, as it will be erased when the new operating system is installed.
One of the main strengths of the Raspberry Pi is its fantastic community. If you ever have any difficulties, consider stopping by the Raspberry Pi forums, which can be found at http://www.raspberrypi.org/forum/. Your question may have already been asked, and if not, there are thousands of enthusiastic Pi owners on hand to help. Some of the most common issues are covered here:
My Raspberry Pi doesn't boot (only the red power light comes on): this suggests that the SD card was not written correctly. Try following the instructions again to copy an OS image onto your SD card, and if this fails, try a new SD card.
My Raspberry Pi randomly restarts by itself: this is usually because the Pi is not receiving enough power. Double-check that your power supply is capable of supplying at least 700 mA (0.7A) at 5V. This should be written on the supply somewhere. Perhaps, try upgrading to a 1000 mA (1.0A) supply if you continue to have problems.
Also make sure that you do not have particularly power-hungry peripherals plugged into your Raspberry Pi. Some Wi-Fi dongles and keyboards with extremely bright LEDs can cause problems, for example.
I can't enter my password on the login screen: nothing is shown when the password is entered (not even stars) to minimize the information that others can gain from seeing the screen. It is likely that the keys are still being recognized: try typing in the whole password blindly and pressing Enter.
The display does not fill my screen or extends beyond the edges: this is because of the overscan settings. Many old televisions had cabinets which overlapped part of the screen, so images were given black borders to ensure that none of the picture was lost. Many modern monitors do not have this problem, however, so the black bars are just a nuisance. First, try enabling or disabling overscan by typing
sudo raspi-configin a command line and selecting the appropriate option. If this still does not work, search the Internet for Raspberry Pi overscan troubleshooting for detailed guides.I can't see anything at all on the screen: if the Pi is definitely on, and the OK/ACT light is lit or flashing, try pressing 1, 2, 3, or 4 on your keyboard to select different video modes.
My keyboard is behaving strangely: some wireless keyboards occasionally do not work as expected, for example, by registering double key presses or not noticing a key press at all. This should be fixed in the future by software updates, or you can always try another keyboard if you have one.
In this chapter, we learned how to connect a Raspberry Pi computer, write its operating system to an SD card, and initiate all its components. We learned that the Raspberry Pi is capable of everything a normal computer can do (and more), and that it is targeted at programming.
In the next chapter, we will use one of the provided programming languages, such as Scratch, to create our own animations.