


Food-recipe websites have been in existence since the advent of the Internet. Food.com, thefoodnetwork.com, and bbcgoodfood.com are some of most visited sites. Food is also one of the most popular searched categories on the Internet. Most of these websites have experts writing content for them. In this project, we will develop a website where amateur users can upload their recipes and those recipes can be viewed and shared by others and generated by several users. The recipes can be shared over various social networking sites by the readers.
Our goal is to create a very basic social website where users can sign up and create recipes they know the best. Other users can filter these recipes based on their interests, tastes, and food preferences and share it on Facebook, Twitter, or other social networking sites of their choice. At the end of this project, we should be able to perform the following tasks:
Create an application
Know what's the best way for creating an application
Make use of some of the new features available for creating the application
User stories are a very important part of the entire project. They can make or break project schedules and have a drastic effect on the product in the long run. Once defined, our use cases will have steps on how a user interacts with the application and the validations required for it to pass. It will be much easier for us to keep this as a reference while coding. A good specification, both visual and technical, goes a long way in helping developers save time.
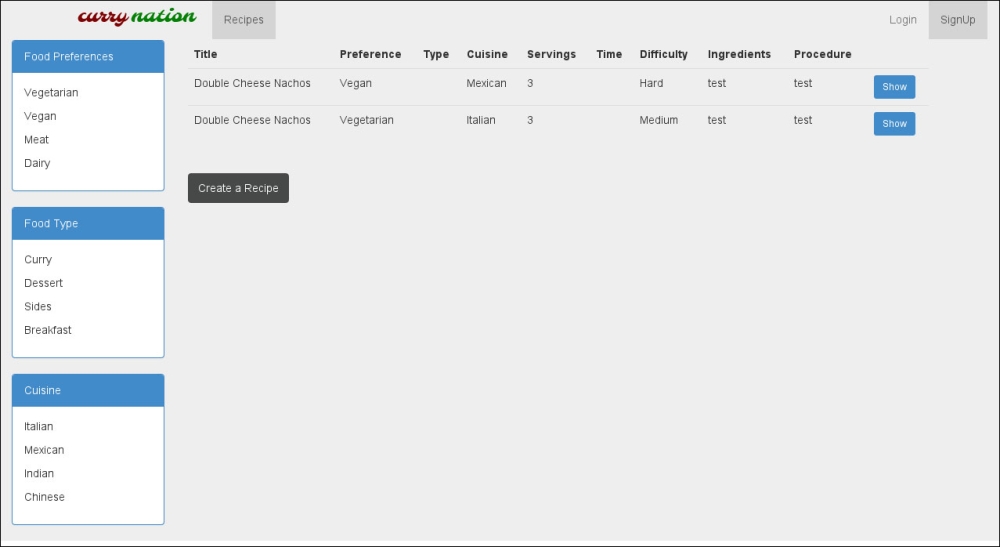
The home page will contain feed of the entire system—users who have newly joined the system, created new recipes, and edited new recipes. The screenshot of the home page of the final system is as follows:
Everyone loves food, and some of us like to cook food too. The simplest and the most interesting way to build momentum for development is with a simple project. We will use this project to lay the foundation of Rails 4 comprehensively and build a base for the upcoming projects. Developers who have been using earlier versions of Rails will get a chance to work with new features in Version 4.0.0. Also, this will set the tone for the rest of the book, in terms of the process we will follow or we should follow while building our applications. We are following a test-driven development approach in the context of Rails 4. So, we will get a fair amount of exposure to the minitest framework, which has been newly introduced, and we will follow it up with some basics of ActiveRecord. While running through this, we will also work with Bootstrap 3.0 to style our views.
Before we actually start developing the application, we will build two types of specifications: visual specifications called mockups and technical specifications called user stories. Visual imagination needs a fair bit of creativity and is best left to the designers; however, for our reference here, we will see how to create mockups in case you are working on an end-to-end process.
There are several mockup tools available online and are free to download and install. Balsamiq (https://www.mybalsamiq.com), MockFlow (http://mockflow.com), and mockingbird (https://gomockingbird.com/) are some of the tools that I have explored and are fairly useful. We will use MockFlow for our projects. Sign up and create a free account with MockFlow.
For creating mockups, we will perform the following steps:
Setting up a project in MockFlow is pretty straightforward. As soon as we log in to the account, we will be able to see an Add Project button. Once we click on it, the following screen shows up with various options for setting up different kinds of projects. We are going to select From Scratch and build our Wireframes using the given set of tools.

We will select the From Scratch option present under the Wireframe Project screen, name it, and proceed with the setup of the pages we want in our application.
The tool to the right contains two tabs:
pages: With this option, you can Create, Sort, Duplicate, and Delete pages in your application
components: With this option, the textboxes, text areas, scrollbars, logos, images, and different elements of the page can be simply dragged-and-dropped from the component panel to the canvas on the center of the page to create a Wireframe

Let's start building our first mockup. Drag-and-drop the Layout Builder icon located in the components panel, and using your mouse, create and resize it so it fits on the page.
This layout suits our application needs because our aim is to build an application with a filter bar to the left that would allow users to filter categories with ease. The central portion will display the content and will contain the list of various recipes. The portion to the left will contain the list of various categories.
The header will contain the logo, login details, and dashboard links, whereas the footer will contain copyright information and company information links.

After resizing the layout builder, we will add the logo and images to the header. In order to do so, we will first drag-and-drop the Image component from the components panel and double-click on it. We will be presented with a modal box to manage and upload images. Browse and upload images using this tool. Once an image is selected, just drag and move it to the position where you want to see the logo placed.

The next step would logically be to build the inner page. This page will have some text on it. We will drag the title and text from the components bar and drop it to the central part of the layout.

Add checkboxes and the remaining elements to the mockup.

We will finally add some checkboxes to the left bar for filters. This includes food type, food preferences, and cuisines in order to properly categorize our recipes.
We can now figure out other elements of the page, for example, in order to create links such as Login/Signup, and About Us, we can use the Label component from the components panel.
As seen in the previous steps, we added various page elements, including text areas, a title, and checkboxes to our page. We can use these page elements to create mockups for all the pages. Mockups for the home page and recipe page are shown in the following two screenshots:
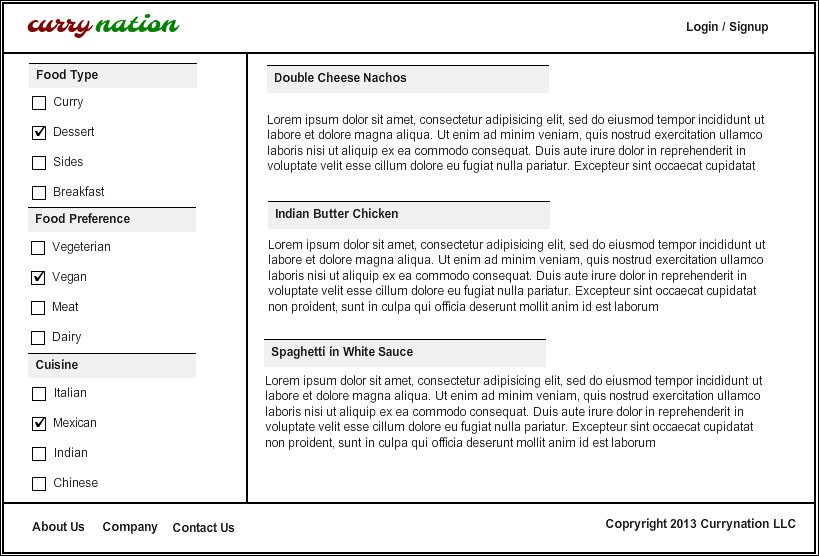
The home page now looks complete with different links and information in the footer shown as follows:

Rails does a lot of work for us by providing us with generators, right from a blank application to different parts of the application. The trick lies in using it only when required. Our first application will consider a very simple use case of generators, but we will scarcely use them in subsequent projects. In this task, we will generate our application and write tests before we write the code.
As MySQL and PostgreSQL are the most common RDBMS around, we're going to use either of them for building most of our applications. The default database in the development mode with Rails is SQLite. Make sure you have one of these databases working on your system and also make sure that the connection with Rails is working. We will use MySQL for most of our projects including this one.
The steps for creating a new application and setting up the database (db) are as follows:
Let us first create a blank application with a MySQL database as the default database using the following command:
:~/$ rails new curry-nation -d mysqlNow we can go ahead and set up the application's
database.ymlfile underconfigto connect to the system's database. You would need to make this file suit the database that you are using. We are using MySQL; likewise, you can edit the file for the database of your choice.config/database.yml development adapter: mysql2 encoding: utf8 database: curry-nation_development pool: 5 username: root password: socket: /var/run/mysqld/mysqld.sock test: adapter: mysql2 encoding: utf8 database: curry-nation_test pool: 5 username: root password: socket: /var/run/mysqld/mysqld.sock production: adapter: mysql2 encoding: utf8 database: curry-nation_production pool: 5 username: root password: socket: /var/run/mysqld/mysqld.sock
Once the database is set up, we need to create the database using the following commands:
:~/curry-nation$ rake db:create
:~/curry-nation$ rake db:migrate
We will first prepare our fixtures. Fixtures contain test data that loads into the test database. These are placed in the
fixturesfolder undertestwith the filenamerecipes.yml:test/fixtures/recipes.yml curry: title: Curry food_preference_id: 1 food_type: 1 cuisine_id: 1 servings: 1 cooking_time: 1 level_of_difficulty: Easy ingredients: Onions Tomatoes Salt Oil procedure: Heat Oil Chop Onions, tomatoes and Salt to it.
Once the fixtures are ready, we can populate the db with fixtures. However, we have not yet created the models and tables. Hence, we will load the fixtures' data once we create our models.
We can now go ahead and write integration tests. We will now add an integration test and create it line by line:
~/test/integration$ recipe_test.rbWe will load the test helper that will load the test database and other dependencies for the test:
require 'test_helper'
Load the test record and navigate to the new recipe page:
test/integration/recipe_test.rb
    curry = recipes(:curry)
    get "/recipes/new"
Post the data to the
newmethod and assert for a success response. At this point, it even checks for validations if they are defined. Depending on this, it would be redirected to the index page:test/integration/recipe_test.rb assert_response :success post_via_redirect "/recipes/new", title: recipes(:curry).titleWe can now prepare the database and run the test:
:~/curry-nation/test/integration$ rake db:create RAILS_ENV="test"
(in /curry-nation)
r:~/curry-nation/test/integration$ rake test recipe_test.rb 10 tests, 10 assertions, 10 failures, 0 success, 0 skips
The final integration test looks like this:
test/integration/recipe_test.rb
class RecipeFlowsTest < ActionDispatch::IntegrationTest
  fixtures :recipes
  test "create recipes" do
    https!
    curry = recipes(:curry)
    get "/recipes/new"
    assert_response :success
    post_via_redirect "/recipes/new", title: recipes(:curry).title
    assert_equal '/recipes', path
    assert_equal 'Create Recipe', flash[:notice]
    https!(false)
    get "/recipes"
    assert_response :success
    assert assigns(:recipes)
  end
end
Our integration tests look at the way the pages and routes work with each other. Controller tests look at how data is passed between these calls, and the methods call themselves.
Set up a
recipevariable and get theindexmethod:test/integration/recipe_test.rb class RecipesControllerTest < ActionController::TestCase setup do @recipe = recipes(:one) end test "should get index" do get :index assert_response :success assert_not_nil assigns(:recipes) endWe will use
assertto get a new page in our controller test:test/controllers/recipes_controller_test.rb test "should get new" do get :new assert_response :success endWe will also perform a test for creating a recipe:
test/controllers/recipes_controller_test.rb
  test "should create recipe" do
    assert_difference('Recipe.count') do
      post :create, recipe: { cooking_time: @recipe.cooking_time, cuisine_id: @recipe.cuisine_id, food_preference_id: @recipe.food_preference_id, food_type: @recipe.food_type, ingredients: @recipe.ingredients, level_of_difficulty: @recipe.level_of_difficulty, procedure: @recipe.procedure, servings: @recipe.servings, title: @recipe.title }
    end

    assert_redirected_to recipe_path(assigns(:recipe))
  end
Add a test for showing a recipe using the following code:
test/controllers/recipes_controller_test.rb
  test "should show recipe" do
    get :show, id: @recipe
    assert_response :success
  end
We will test the
editandupdatemethods:test/controllers/recipes_controller_test.rb test "should get edit" do get :edit, id: @recipe assert_response :success end test "should update recipe" do patch :update, id: @recipe, recipe: { cooking_time: @recipe.cooking_time, cuisine_id: @recipe.cuisine_id, food_preference_id: @recipe.food_preference_id, food_type: @recipe.food_type, ingredients: @recipe.ingredients, level_of_difficulty: @recipe.level_of_difficulty, procedure: @recipe.procedure, servings: @recipe.servings, title: @recipe.title } assert_redirected_to recipe_path(assigns(:recipe)) endLastly, we will check for deletions:
test/controllers/recipes_controller_test.rb
  test "should destroy recipe" do
    assert_difference('Recipe.count', -1) do
      delete :destroy, id: @recipe
    end

    assert_redirected_to recipes_path
  end
end
Tip
Downloading the example code
You can download the example code files for all Packt books you have purchased from your account at http://www.packtpub.com. If you purchased this book elsewhere, you can visit http://www.packtpub.com/support and register to have the files e-mailed directly to you.
As we saw in the previous task, the structure of the default testing framework in Rails 4 includes the respective style folder structure, which is much cleaner and nicely abstracted compared to the earlier versions. This is how it looks:
:~/curry-nation/test$ ls
controllers  fixtures  helpers  integration  mailers  models  test_helper.rb
The test folder is self-descriptive in terms of the folder structure and clearly denotes which test belongs to which part of the system.
Here, we have prepared the test data and written tests that match the specifications. This will help us emulate our functionality. We are now ready to write some code in order to run our tests. The tests in this case failed because there is no code for the tests to run.
To make the content of the website easily browsable, it makes sense to categorize it in different ways according to the diversity of choice a user has regarding food recipes. In this task, we will build navigation bars that would be visible on the left-hand side. Actually, it goes much deeper than just being the navigation bar. This is because it has to be built in a way that allows us to effectively search for data in future. So, for us, categories are a way to arrange data and make it more accessible, and in this task, we will see how to create categories.
Categories in our application are divided into three parts:
Food preferences: Food preferences include the value system of users. They might like dairy free, vegan, vegetarian, meat, and so on. Recipes are categorized on the basis of this.
Food types: Food types denote whether the food is a main course, a curry, a side dish, or a dessert.
Cuisines: The final categorization is on the basis of cuisine.
The steps for adding categories are as follows:
We first need to create models that can be associated with the recipes:
:~/curry-nation$ rails g model food_type name:string
      invoke  active_record
      create db/migrate/20130803103254_create_food_types.rb
      create    app/models/food_type.rb
      invoke    test_unit
      create      test/models/food_type_test.rb
      create      test/fixtures/food_types.yml
We can't leave the categories blank, and they need some default data. We do not have an interface to load categories so we will use the seeds' data by adding default data using seed scripts.
This generates a food type model, fixtures, blank tests, and table migrations. These values have to be available in the database in order to be used with the recipes. We will load them using
seeds.rb.db/seeds.rb food_types = ["Curry", "Dessert", "Sides","Breakfast"] food_types.each{|d| FoodType.where(:name => d).create}Once done, we'll run the following code:
rake db:migrate
rake db:seed
The following steps will help us to modify seeds:
The default seeds, if simply defined, can create duplicate records in the database and might fail validations. This is because every time we run
rake db:seeds, it runs all the queries again. In order to avoid this, we can addfirst_or_createafter the data, which checks for the record in the database before adding it to the database:db/seeds.rb food_types.each{|d| FoodType.where(:name => d).first_or_create}Likewise, we can create other models related to categories in the same way:
:~/curry-nation$ rails g model food_preference name:string
    invoke  active_record
    create    db/migrate/20130803110704_create_food_preferences.rb
    create    app/models/food_preference.rb
    invoke    test_unit
    create      test/models/food_preference_test.rb
    create      test/fixtures/food_preferences.yml
:~/curry-nation$ rake db:migrate
==  CreateFoodPreferences: migrating ==========================================
-- create_table(:food_preferences)
   -> 0.1313s
==  CreateFoodPreferences: migrated (0.1315s) =================================

:~/curry-nation$ rails g model cuisine name:string
    invoke  active_record
    create    db/migrate/20130803111845_create_cuisines.rb
    create    app/models/cuisine.rb
    invoke    test_unit
    create      test/models/cuisine_test.rb
    create      test/fixtures/cuisines.yml
:~/curry-nation$ rake db:migrate
==  CreateCuisines: migrating ==========================================
-- create_table(:cuisines)
   -> 0.1107s
==  CreateCuisines: migrated (0.1109s) ===================================
Load them into the database as follows:
db/seeds.rb
food_preferences = ["Vegetarian", "Vegan", "Meat","Dairy"]
food_preferences.each{|d| FoodPreference.where(:name => d).first_or_create}

cuisines = ["Italian", "Mexican", "Indian","Chinese"]
cuisines.each{|d| Cuisine.where(:name => d).first_or_create}
:~/curry-nation$ rake db:seed
For accessing the console and checking the entered data, we can load the Rails console and check whether all the values are present in the database or not:
:~/curry-nation$ rails c
Loading development environment (Rails 4.0.0)
1.9.3-p327 :002 > FoodType.all
  FoodType Load (0.9ms)  SELECT `food_types`.* FROM `food_types`
 => #<ActiveRecord::Relation [#<FoodType id: 1, name: "Curry", created_at: "2013-08-03 10:57:37", updated_at: "2013-08-03 10:57:37">, #<FoodType id: 2, name: "Dessert", created_at: "2013-08-03 10:57:37", updated_at: "2013-08-03 10:57:37">, #<FoodType id: 3, name: "Sides", created_at: "2013-08-03 10:57:37", updated_at: "2013-08-03 10:57:37">, #<FoodType id: 4, name: "Breakfast", created_at: "2013-08-03 10:57:37", updated_at: "2013-08-03 10:57:37">]>
1.9.3-p327 :003 > FoodPreference.all
  FoodPreference Load (0.7ms)  SELECT `food_preferences`.* FROM `food_preferences`
 => #<ActiveRecord::Relation [#<FoodPreference id: 1, name: "Vegetarian", created_at: "2013-08-03 11:15:56", updated_at: "2013-08-03 11:15:56">, #<FoodPreference id: 2, name: "Vegan", created_at: "2013-08-03 11:15:56", updated_at: "2013-08-03 11:15:56">, #<FoodPreference id: 3, name: "Meat", created_at: "2013-08-03 11:15:56", updated_at: "2013-08-03 11:15:56">, #<FoodPreference id: 4, name: "Dairy", created_at: "2013-08-03 11:15:56", updated_at: "2013-08-03 11:15:56">]>
1.9.3-p327 :004 > Cuisine.all
  Cuisine Load (0.6ms)  SELECT `cuisines`.* FROM `cuisines`
 => #<ActiveRecord::Relation [#<Cuisine id: 1, name: "Italian", created_at: "2013-08-03 11:28:54", updated_at: "2013-08-03 11:28:54">, #<Cuisine id: 2, name: "Mexican", created_at: "2013-08-03 11:28:54", updated_at: "2013-08-03 11:28:54">, #<Cuisine id: 3, name: "Indian", created_at: "2013-08-03 11:28:54", updated_at: "2013-08-03 11:28:54">, #<Cuisine id: 4, name: "Chinese", created_at: "2013-08-03 11:28:54", updated_at: "2013-08-03 11:28:54">]>
We have successfully created category-related models and loaded values to them using seeds. We also saw the best practice for creating seeds so that we can avoid loading duplicate data in the database.
Seeds should be defined for all kinds of default data in the system. Also, the process of adding seeds should be incremental and ongoing. Some might argue that it is very close to fixtures; however, fixtures belong to the test bed, whereas seeds are generic data that should be loaded by default in the system.
Scaffolding is the easiest way to start, but as the word itself suggests, it's just scaffolding. Rails goes much beyond that. Also, whether to use it or not in practical projects is a huge debate. However, I feel that we can use it to start but it's important that we build our functionalities in it. This will provide us with a template that adheres to best practices to start with, and then builds our code upon it.
After successfully writing our tests, we will write our code to make sure our tests run.
We will first understand our use case:
User story; that is, to create a recipe
User enters the title
Users selects food preferences, food type, cuisine, and the level of difficulty
User enters servings, cooking time, ingredients, and procedure
User saves the recipe
We will start with generating a scaffold. The general format is to write the command followed by the name of model, fields, and datatype of each field shown as follows:
:~/curry-nation$ rails g scaffold recipe title:string cooking_time:string difficulty_level:string food_type_id:integer food_preference_id:integer cuisine_id:integer ingredients:text procedure:textThis will create files that include model, controller, basic views, and skeleton tests.
We can now see what we have already created. In order to see what we have created so far, let's fire up our server and see what we just created by navigating to
localhost:3000.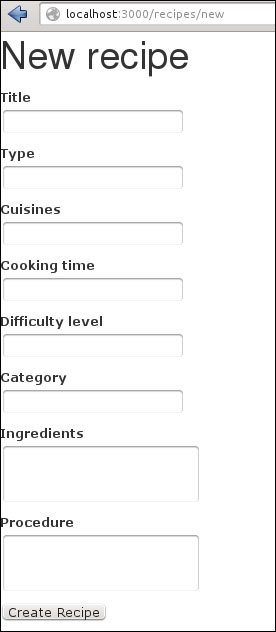
Now, as we can see, the category values that we added previously are blank textboxes in our form. We would need to create dropdowns for each one of them so that they are selected and sent to the db.
    <div class="form-group">
      <%= f.label :food_preference %><br>
      <%= f.select(:food_preference_id, options_from_collection_for_select(FoodPreference.all, :id, :name), {:prompt => 'Please Choose'}, :class => "form-control")  %>
    </div>

<div class="form-group">
      <%= f.label :food_type %><br>
      <%= f.select(:food_type_id, options_from_collection_for_select(FoodType.all, :id, :name), {:prompt => 'Please Choose'}, :class => "form-control")  %>
    </div>

    <div class="form-group">
      <%= f.label :cuisine %><br>
      <%= f.select(:cuisine_id, options_from_collection_for_select(Cuisine.all, :id, :name), {:prompt => 'Please Choose'}, :class => "form-control")  %>
    </div>
As you can see in the preceding code, we are able to populate the values in the select box from our database tables and pass the IDs to the recipe table of the database.
We will define an array in the recipe model and access it in the view. There is also another dropdown required for "level of difficulty" to be defined inside the recipe model. We can create a simple array with the names of difficulty levels as follows:
app/models/recipe.rb
DIFFICULTY=%w(Easy Medium Hard)
We can now call the level of difficulties directly inside our views and access the array values by calling it on the model name using
Recipe::DIFFICULTY, shown as follows:app/views/recipes/_form.html.erb <div class="form-group"> <%= f.label :difficulty_level %><br> <%=f.select :difficulty_level, Recipe::DIFFICULTY,{} , :class => "form-control"%> </div>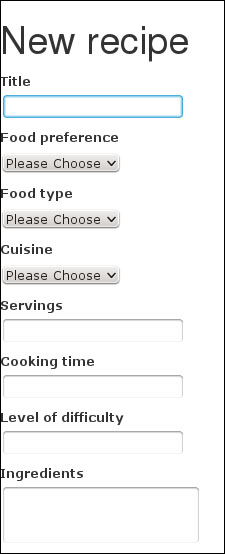
At the end of this task, we will be able to create a recipe and add them to categories. However, we have not yet created a real association between them as we discussed earlier. We also saw that we can define arrays and call them directly from our model class like we did in the case of food type, food preferences, and cuisines.
Associations are important in order to pass and access data between the models. ActiveRecord adds one of the major productivity boosts by avoiding writing SQL by hand. In this task, we will define relationships between different models and tell them how they should behave with each other.
We will discuss creating an association between the recipe and category models in this section.
According to our use case, each food type can have multiple recipes associated to it. This is because logically speaking, a category will have many recipes associated to it.
app/models/food_type.rb
class FoodType < ActiveRecord::Base
  has_many :recipes
end
Also, each recipe belongs to a particular food type, which we can define by adding a
belongs_torule to the recipe model.app/models/recipe.rb class Recipe < ActiveRecord::Base belongs_to :food_type end
In the same way, we can associate other categories to the recipe model too, shown as follows:
app/models/food_preference.rb
class FoodPreference < ActiveRecord::Base
  has_many :recipes
end
app/models/cuisine.rb
class Cuisine < ActiveRecord::Base
 has_many :recipes
end
We can now display these values in our views in the following ways:
app/views/recipes/index.html.erb
 <td><%= recipe.food_preference.name %></td>
 <td><%= recipe.food_type.name %></td>
  <td><%= recipe.cuisine.name %></td>
We have successfully set up associations between the models, and they can now be accessed seamlessly between controllers and views.
Right associations are not only important for properly passing data between controllers and models, but also for critical tasks such as searching.
We want legitimate people to post on our website and avoid spam. In order to do so, authentication is a must. In this task, we will see how to use devise to add authentication to the application. The choice of devise is quite obvious because it is a very complete authentication engine in every sense. It is also very easily extensible and hence the best choice for this.
Devise is the most popular and up-to-date solution of authentication with Rails. We will use it to add user authentication to our website.
Let's have a look at how can we use devise to add user authentication to our website.
The use case for devise is as follows:
User story; that is, user sign-up
User clicks on sign-up
User fills in the e-mail
User enters and confirms the password
If validations are passed, the user gets a valid account
We can add devise and generate the basic authentication by adding the following code to the
Gemfileand running the bundle:gem 'devise', github: 'plataformatec/devise'We can install devise using the following command line. We can then go ahead and perform the installation of basic configuration files of devise:
:~/curry-nation$rails g devise:installThis will create two files for us:
initializers/devise.rbandlocales/devise.en.yml. We can now generate our user model::~/curry-nation$rails g devise userThe following command line will mount the Devise application routes on the
routes.rbfile:config/routes.rb devise_for :users
We will now protect selected methods. Devise comes with a set of methods that can be readily used with user-related resources in our application. We will first proceed with the protection of our specific methods inside our recipe model:
app/controllers/recipes_controller.rb
 before_filter :authenticate_user!, only: [:new, :edit, :create, :update, :destroy]
This will allow us to protect the
new,edit,create,update, anddestroymethods using user authentication. Thecurrent_usermethod allows access to the logged-in user in the session. We can display the e-mail of the user using this method.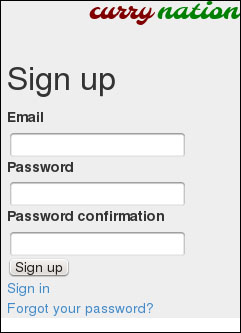
Let's write a "create user login" user story as follows:
User story; that is, user login
User clicks on the login link
User fills in the username and password
Validations are applied to check whether both the username and password are present in the database
We can also protect specific methods in views. The
if user_signed_in?method is a conditional method provided by Devise. We can use it to check whether the user session is in progress or not. If it is, then we can display the e-mail of the user and the logout link; if not, then display the login and sign-up links:app/views/layouts/application.html.erb <ul class="nav navbar-nav pull-right"> <% if user_signed_in? %> <li><%=link_to "#{current_user.email}" %></li> <li class="active"><%= link_to "Logout", destroy_user_session_path%></li> <%else%> <li><%= link_to "Login", new_user_session_path %></li> <li class="active"><%= link_to "SignUp", new_user_registration_path%></li> <%end%> </ul>We can make the methods visible only to the logged-in users. Also, though we have already protected our
newandeditmethods using authentication, we can hide them altogether from the views, again by using theif user_signed_in?method:app/views/recipes/index.html.erb <% if user_signed_in? %> <td><%= link_to 'Edit', edit_recipe_path(recipe), :class=>"btn btn-success btn-small"%></td> <td><%= link_to 'Delete', recipe, method: :delete, data: { confirm: 'Are you sure?' }, :class=>"btn btn-danger btn-small" %></td> <%end%>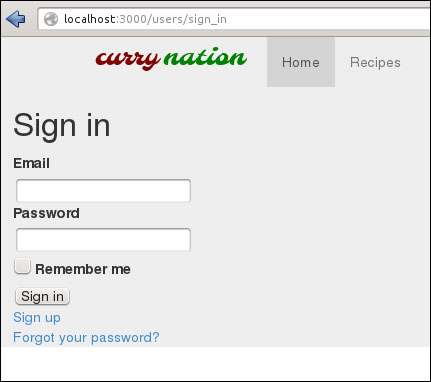
At the end of this task, our application has devise-based authentication for login and sign-up functionalities. We also protected certain methods and made them accessible only after we completed the login process. Lastly, we looked at various methods to pass user data to session objects such as current_user.
Devise also supports OpenLDAP and API methods for extending authentication for our apps on the mobile platform.
Proper styling is equally important as it can make or break your website despite writing all of the code correctly. With a myriad of websites at a user's disposal and so many new user experiences, the user interface takes on a huge role.
We will use Twitter's Bootstrap framework not only for our convenience, but also to ensure good quality code for the markup. The main advantages Bootstrap has to offer are as follows:
Clean and high performing markup
Responsiveness
HTML4 and HTML5 doctype standards compliant
Easily customizable
Uses the latest design practices
Read Bootstrap's Getting started task at http://getbootstrap.com/getting-started/ and get started with Version 3.
In this task, we will see some of the styling classes of Bootstrap and use it to style our application:
Add Bootstrap to the asset pipeline.
We will use the
bootstrap-railsgem in order to add Bootstrap to our asset pipeline. Add the following line to theGemfileandbundle install:gem 'anjlab-bootstrap-rails', :require => 'bootstrap-rails'
Make CSS and JavaScript available to the asset pipeline. Then add the following line to
application.css. This is for informing the asset pipeline to access Bootstrap files from this folder:app/assets/application.css *= require twitter/bootstrap
Add the required directive to the
application.jsfile to make all the Bootstrap JavaScripts available to the Rails application:app/assets/application.js //= require twitter/bootstrap
Then add the necessary style to the layouts.
Once we've added these, all the CSS and
.jsfiles in Bootstrap are ready to be used in our application. This is how our code looks at the moment. There is practically no styling and only the default methods ofscaffold.cssare being used:app/views/layouts/application.html.erb <body> <ul> <li><%= link_to "Recipes", recipes_path %></li> </ul> <ul> <% if user_signed_in? %> <li><%=link_to "#{current_user.email}" %></li> <li><%= link_to "Logout", destroy_user_session_path%></li> <%else%> <li><%= link_to "Login", new_user_session_path %></li> <li><%= link_to "SignUp", new_user_registration_path%></li> <%end%> </ul> <%= yield %> </body>Create a layout that consists of two columns.
According to our mockup, we intend to make a two-column layout for our application. The left bar contains various categories, and the central portion is present for rendering the content.
Bootstrap does this by creating rows and then dividing them into columns of different sizes. All these classes are inherited from a class called
container, which has all body-related classes:app/views/layouts/application.html.erb <div class="container"> <div class="row"> <div class="col-lg-2"> </div> <div class="col-lg-9"> </div> </div> </div>The
col-lg-2class will create adivtag with a width of 16.6667 percent, andcol-lg-9will create adivtag with a width of 75 percent.Then you can style the navigation. The top-level class for creating a navigation bar is
navbar, and the specific class to create a menu that sticks to the top isnavbar-static-top. Thenavbar-brandclass is the logo class:app/views/layouts/application.html.erb <!-- Static navbar --> <div class="navbar navbar-static-top"> <div class="container"> <button type="button" class="navbar-toggle" data-toggle="collapse" data-target=".nav-collapse"> <span class="icon-bar"></span> <span class="icon-bar"></span> <span class="icon-bar"></span> </button> <a class="navbar-brand" href="#"><%= image_tag "currynation.png"%></a> <div class="nav-collapse collapse"> <ul class="nav navbar-nav"> <li class="active"><%= link_to "Recipes", recipes_path %></li> </ul> <ul class="nav navbar-nav pull-right"> <% if user_signed_in? %> <li><%=link_to "#{current_user.email}" %></li> <li class="active"><%= link_to "Logout", destroy_user_session_path%></li> <%else%> <li><%= link_to "Login", new_user_session_path %></li> <li class="active"><%= link_to "SignUp", new_user_registration_path%></li> <%end%> </ul> </div><!--/.nav-collapse --> </div>Add styles to individual pages and the customizing buttons.
We will also style our index page by inheriting the
tableclass:<table class="table">
We can also customize the links in our app so they look like buttons by adding a class called
btn, following thebtn-primaryclass, which defines the color and size of the button. So, for example, we will apply the color blue to the button and assign a small size to it using thebtn-smallclass:app/views/recipes/index.html.erb <td><%= link_to 'Show', recipe, :class=>"btn btn-primary btn-small"%></td> <% if user_signed_in? %> <td><%= link_to 'Edit', edit_recipe_path(recipe), :class=>"btn btn-success btn-small"%></td> <td><%= link_to 'Delete', recipe, method: :delete, data: { confirm: 'Are you sure?' }, :class=>"btn btn-danger btn-small" %></td> <%end%>Now we'll look at how to style sublinks and wrap them into Rails' loops:
Our left bar for displaying categories can be displayed as a panel with several sublinks. These are generated in loop using the Rails'
eachloop. We will first define the values for the sidebar in ourapplication_controller.rbfile:app/controllers/application.rb helper_method :sidebar_values def sidebar_values @food_preferences = FoodPreference.all @food_types = FoodType.all @cuisines = Cuisine.all endIn
app/views/layouts/application.html.erb, we must define the sidebar as rows :app/views/layouts/application.html.erb <div class="row"> <div class="col-lg-2"> <div class="panel panel-primary" id="panels"> <div class="panel-heading">Food Preferences </div> <% @food_preferences.each do |fp| %> <p><%= fp.name%></p> <%end%> </div> <div class="panel panel-primary" id="panels"> <div class="panel-heading">Food Type </div> <% @food_types.each do |ft| %> <p><%= ft.name%></p> <%end%> </div> <div class="panel panel-primary" id="panels"> <div class="panel-heading">Cuisine </div> <% @cuisines.each do |c| %> <p><%= c.name%></p> <%end%> </div> </div> <div class="col-lg-9"> <%= yield %> </div> </div>
We have our completely styled page at the end of this iteration with the help of Bootstrap 3. We will use Bootstrap throughout our book and see many facets of it in the coming applications. However, this is a good start, as the first step in styling always belongs to HTML elements.
Bootstrap 3 uses a flat UI design, which is the latest trend in web designing. Also, it is not backward compatible with earlier versions.
Now that we have seen how to create a simple, social recipe-sharing application, it is time to try out some challenges on our own:
Filter recipes by clicking on food preferences, food type, cuisine, and display the results.
Write an
ActiveRecordquery for recipe finders.Create another filter based on the level of difficulty, cuisine, food type, and food preferences. Also, create a radio-button field for each level of difficulty.
Use Bootstrap to style the radio-button fields.
