


When designing a mobile app, the first thing you need to decide is if this app will be a native app, a web app, or a hybrid app. Each uses different technologies to build, and it is important to consider the pros and cons of each before deciding on what your project will use.
Native apps work by leveraging the built-in system frameworks present on the device. The apps are written in languages that are compiled for quick execution, such as Objective C for iOS development or Java for Android development. Since these apps run native code (that is, code compiled directly for the platform, often down to assembly language or some other bytecode), they are very fast. As they use the built-in frameworks, they get a lot of features (including look and feel) nearly for free. The problem with native frameworks, however, is that they aren't cross-platform. For example, the code you write for iOS will not work on Android. If your app needs a wide variety of platform support, this can mean considerable development time as the app needs to be rewritten for each platform it supports. If you're the only developer, this means you need to learn each native framework and language in order to write your apps—often a lengthy endeavor.
Web apps, on the other hand, solve some of these difficulties by being inherently cross-platform (as long as web standards are adhered to). Furthermore, any HTML, CSS, and JavaScript knowledge you might have can be leveraged, so there may be less to learn at the outset. However, web apps have serious problems as well: they have very limited access to the capabilities of the device, and they are slower than native apps (given that they run inside a browser using an interpreted language, JavaScript). Furthermore, web apps don't inherit the native look and feel of the app. Although distribution and updates are easy (all you need is a web server), no app store will list your app, and so discovery by your users is difficult.
Hybrid apps try to be the best of both worlds. Since hybrid apps use some native code, the app has access to the native features of the device. It also means that app stores will allow the app in their stores, allowing easy discovery. Because hybrid apps use web technology, your code is largely cross-platform (assuming you follow the Web standards), and easy to port to other platforms. Of course, there are still downsides: the web portion of a hybrid app will likely still run slower than a native app. However, there is an upside: if you need that extra performance, hybrid apps allow you to write native code when needed.
Apache Cordova is a framework that allows you to write hybrid apps. These apps can be published to the app store of your choice, and they permit cross-platform development. Should you need access to the native features of the device, there are core native plugins that can be added, which permit access to the camera, accelerometer, microphone, and so on. There is a large community that has written several additional plugins that provide a wide-ranging set of features. If that isn't enough, you can always write your own plugin to accomplish what you need.
Apache Cordova didn't start as an Apache project. Initially, the project was named PhoneGap and was owned by Nitobi Software. In the early stages, it was distributed as project templates that could be used in Xcode or Eclipse to create hybrid apps. While it was easy to develop single-platform apps, it was more difficult to set up multi-platform apps (one had to create copies of the web portion and keep them in sync across projects). Even so, many production apps were developed and hosted on app stores.
In 2011, Adobe purchased Nitobi Software. As part of the acquisition, the PhoneGap code was contributed to Apache as open source, and was renamed to Apache Callback and then to Apache Cordova (when the prior name was considered too generic). Adobe kept the PhoneGap name, and maintained a fork of Apache Cordova's code. The version was upped to 2.x. Most of the time, the two were largely identical (with only minor variations). Because the project templates of the prior era were often problematic, project creation transitioned to a command-line interface. Multi-platform development was somewhat easier, though not ideal.
Apache Cordova 3.x was released in July 2013. It provided a new command-line interface that dramatically simplified multi-platform development while also making plugin installation easier and less problematic than before. It also split out all the core features (beyond the native packaging) and distributed them as core plugins. This allows users to pick and choose what plugins they need rather than taking them out later (which was often difficult). This means that apps written with 3.x only ask for the permissions they actually use, whereas under 2.x, an app would often ask for permissions it never needed.
At the very beginning, the only way to use PhoneGap was to compile your project on your own development machine. This meant that you needed a machine capable of supporting the specific development environment for the platforms you supported. Setting up and maintaining this environment can be time consuming and difficult, and so PhoneGap Build was released as a cloud-based development method.
PhoneGap Build allows developers to write their apps on their machines, and then upload those apps to the cloud for compilation and packaging. This means that there is no need to set up and maintain a fully developed environment, a text editor is sufficient. There are some platforms that require additional steps before the results can be tested or deployed (Apple requires various certificates and provisioning), but for the first time, it made it possible for less-technical web designers to begin making hybrid apps that could be sold on the App Store.
Whether you use Apache Cordova or Adobe PhoneGap is up to you; we'll use Apache Cordova 3.x. It provides a set of APIs that permit your project to access the native features of the mobile device, such as the accelerometer and the camera, and much more. Using these APIs, it is possible to create an app that runs on mobile devices that has native functionality, along with HTML, CSS, and JavaScript. Where necessary, Cordova also provides the necessary expansion to create additional plugins to support features that the core API doesn't support, which means the possibilities are truly endless.
Adobe PhoneGap 3.x is a distribution of Apache Cordova 3.x. Generally, these can be thought of as the same thing, but PhoneGap integrates closely with Adobe's PhoneGap Build offering, which allows developers to compile their apps without having a complete platform SDK on their computer. It's quite possible that Adobe will bring other enhancements to this distribution that aren't part of Cordova.
Adobe PhoneGap 3.x is a distribution of Apache Cordova 3.x. Generally, these can be thought of as the same thing, but PhoneGap integrates closely with Adobe's PhoneGap Build offering, which allows developers to compile their apps without having a complete platform SDK on their computer. It's quite possible that Adobe will bring other enhancements to this distribution that aren't part of Cordova.
Which one you use is up to you; we'll go over the installation instructions for both, how to use each (generally, the commands are the same), and where they differ. For the rest of the book, we'll be using the Apache Cordova distribution, but you are welcome to use the Adobe PhoneGap distribution as well.
In this project, we'll go through the steps necessary to install a Cordova/PhoneGap distribution, and we'll then create your very first project.
Cordova/PhoneGap 3.x has grown up; it's a mature tool with a suggested workflow that is largely command-line based. While PhoneGap 1.x is largely focused on providing templates that could be used within each platform's IDE, it was quickly becoming apparent that this didn't provide a great experience when building cross-platform apps. (One usually ended up having multiple copies of their code in various places.) PhoneGap 2.x introduced a new way of creating these projects using the command line, but it was still largely platform-specific, and each project created was initialized with all the available core plugins. This sometimes created difficulty when releasing to app stores since these plugins required permissions the app may never have used. In 3.x, the command-line method has been greatly refined and provides a simpler method for cross-platform management. What once was a template created from within Xcode or Eclipse is now a cross-platform tool that can create and compile the entire project without ever entering the IDE while also creating lightweight projects that only use the plugins and permissions they need.
The project we create in this chapter is nothing amazing; consider it your Hello World app. However, it will ensure that you've got everything set up in a way that will enable you to create cross-platform apps.
Once you've created this first project, you'll be able to continue with the projects in this book as well as create your own projects. You'll know that your development machine is properly configured, and you'll be able to compile and test your projects.
One thing the old 1.x versions had going for them is that they were nearly painless to install. You just had to download the template and create a project from within the IDE and you were ready to go. But for cross-platform development, it was far from simple, and when the time came to upgrade from one version to the next, it was even worse.
The new command-line method requires a little more work to set up and install, but in the long run, it's worth it. I promise!
Here's what we'll do:
Install node.js and configure SDKs
Install Cordova/PhoneGap
Create your first project
Manage your project's platforms
Manage your project's plugins
Build your project
Deploy your project to the simulator/device
Before you continue, it's worth noting that iOS app development (and Windows Phone app development) will not work on just any OS. For iOS, you'll need a Mac with a recent version of Mac OS X 10.8.4 or higher (and Xcode 5 or higher), and for Windows Phone development, you'll need a Windows PC with Windows 8 (and the Visual Studio IDE). Android development is largely platform agnostic—that is, it can be done on Mac, Windows, and Linux.
If you use PhoneGap Build, some of the hardships can be avoided since you don't have to rely on your local development environment to build the app. But a Mac is required to generate the certificates necessary for iOS app signing (even with PhoneGap Build) and is definitely required for deployment to the App Store. The same is true for Windows; you need to deploy to the App Store from Windows only.
This book will focus solely on those platforms that use WebKit (and related browsers) to power their built-in web views. This includes iOS and Android (and though it isn't supported, it should extend to BlackBerry 10). This does not include Windows Phone (the web view is based on Trident), nor does it include the Firefox mobile OS (which is based on Gecko). Most of the code will translate easily, but not all of it (especially where vendor prefixes are used or where the event mechanisms are different). If you want to build apps for those platforms, you will need to feel free to adapt the code as necessary, but that isn't the focus of this book.
You'll need to ensure that you have installed the following before you continue:
The platform SDK for each platform you want to support, as follows:
For iOS:Xcode 5 or higher on OS X 10.8.4 or higher; for OS X 9, Ant 1.8 or higher on Mac OS X
For Android: Eclipse or Android Studio on Mac OS X / Windows / Linux, the Android SDK, and Ant (if not already installed)
For Windows Phone: Visual Studio Express on Windows 8
A fantastic code editor that understands HTML, JavaScript, and CSS. You might want to consider one of the following:
Sublime Text Editor (commercial)
JetBrains WebStorm (commercial)
Eclipse or Android Studio
Pico/Vim/Emacs
Cordova/PhoneGap depend upon node.js to be installed, and therefore, you need to install it first on your system. This is true whether or not you intend on using PhoneGap Build.
Navigate to http://www.nodejs.org in your preferred browser. You'll be greeted with a page that looks somewhat like this:
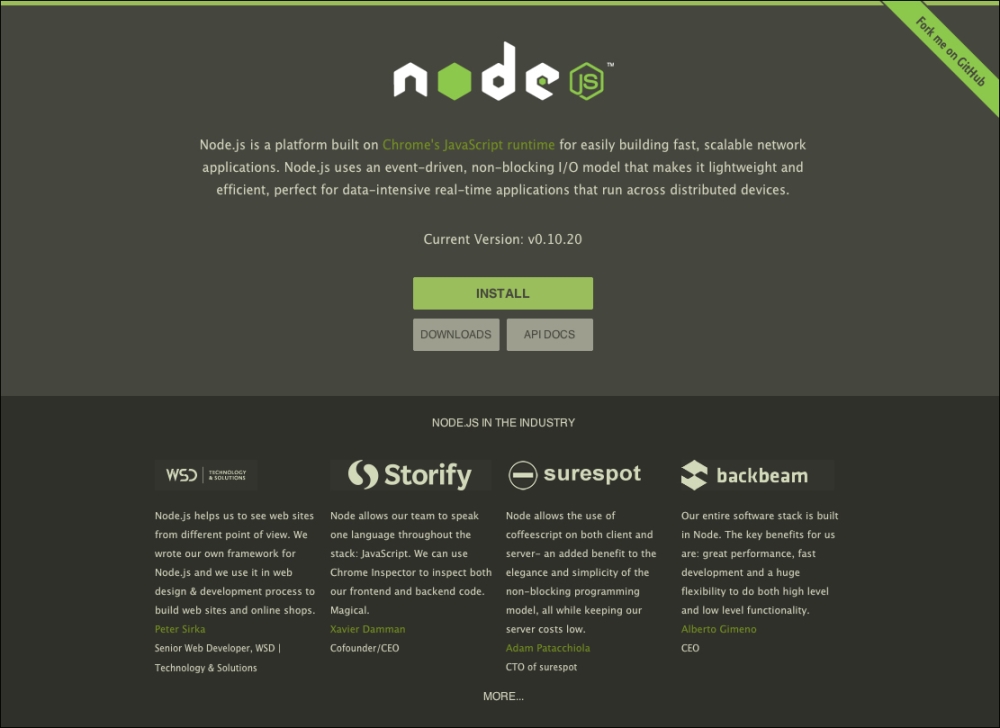
Assuming the site has correctly detected your OS, click on Install, and a download of the correct installation package should begin. If the site doesn't correctly detect your OS, or if you would like to see the other options available, click on Download and then proceed with the file of your choice.
Tip
Note to Mac Users
If you have homebrew installed, you can use that to install node.js instead by typing brew install node in your Terminal app. If you don't have it installed and want to learn more, visit http://brew.sh.
Once the package has been downloaded, find it in your download manager or file browser and execute it to start the installation package. Depending on what OS you are running on, the process will be slightly different, but the instructions on each screen are standard and self-explanatory. The installer will notify you about where it is installing node and npm; make note of this path because you'll need it in the next step.
For example, the following series of screens results from installing node.js on a Mac:
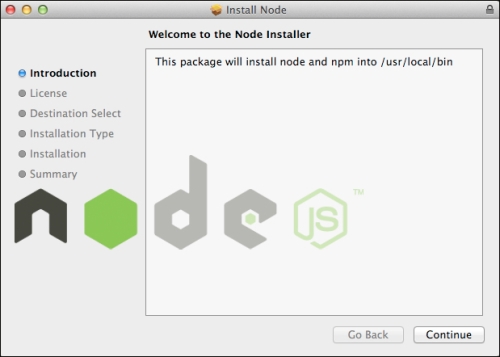
After clicking on Continue, your screen should look similar to what is shown in the following screenshot:
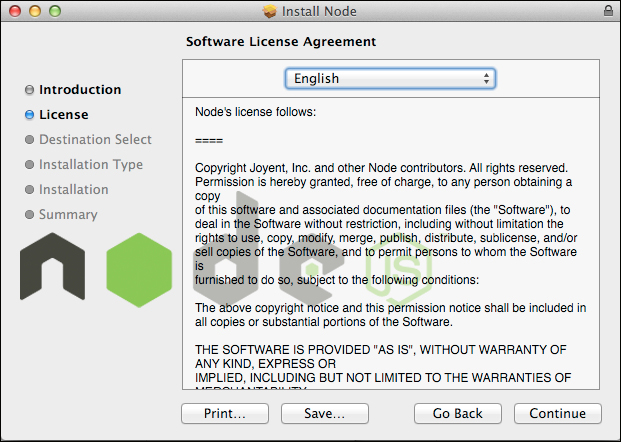
Now we are greeted with the license agreement. After clicking on Continue, the following screen appears:
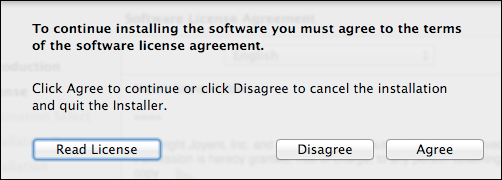
Upon clicking on Agree, we're notified about how much space the application will take:

Once we click on Install, we're asked for our administrative password, and then the installation process kicks off. When it is complete, the following screen is presented:

At this point, make note of the path requirement. This will be different for each platform, but for Mac, we will need to add /usr/local/bin to our path. Once you've made a note of the directory, you can close the installer.
Unfortunately, configuring your path is platform specific. For Linux and Mac, the process will be nearly identical, but for Windows, it is done completely differently.
Although you can perform these steps using the GUI, it's easiest to do so with the command line.
First, determine if your path is already set up. Open a terminal and type the following:
echo $PATH
If you see the directory specified in the installation steps, stop! You're all set and you can go to the next section. If not, then continue with the following steps:
Navigate to your home directory:
cd ~Next, determine your profile:
ls .*profile*Tip
It's entirely possible that you don't have a profile, and if so, you won't see any files listed. In that case, you'll have to go with the defaults. For Mac OS X, this is typically
.profileor.bash_profile, and for Linux (assuming you use the Bash shell), it's typically.bash_profile. Consult your shell'smanpage if you are unsure.Once you determine your profile, you'll want to edit it:
pico .profileNow that you've got an open file, navigate to the bottom (assuming there is anything in it) and add the following lines:
# for NODE
PATH="${PATH}:/usr/local/bin"
export PATH
When done, save the file (Pico uses Ctrl + O) and exit the editor (Pico uses Ctrl + X).
To be sure the changes have taken, you can either close the terminal and log back in or source your profile:
. .profileIf you get errors, go back and edit the profile and make sure you've done everything correctly. Once you are error free, check to make sure that the directory is in your path by typing the following command:
echo $PATH
You should see the directory path in the output. If not, stop and go over the instructions again. Do not continue until your path is correct.
First, verify that your path is already set up by opening a command prompt and typing the following command:
echo %PATH%
If the directory specified by node.js is displayed, you're good; stop and go to the next step. If not, continue with the following steps:
Close the command window you just opened and open the Control Panel. Open the search panel from the charms and type
Path. Select Edit the system environment variables. A window should appear with Path in the list. Click on that row and click on Edit.Navigate to the end of the field and add (replace "path-specified-by-installer" with the actual path):
;path-specified-by-installerClick on OK and then on OK again. Open up another command prompt and verify that the path is correct by typing the following command:
echo %PATH%
If the path is not correct, stop and review the installation instructions, fixing any mistakes. Do not continue until your path is correct.
As part of the installation process, Cordova/PhoneGap will check to ensure that your platform SDKs are correctly configured. In order to avoid error messages, it's best to take care of that now.
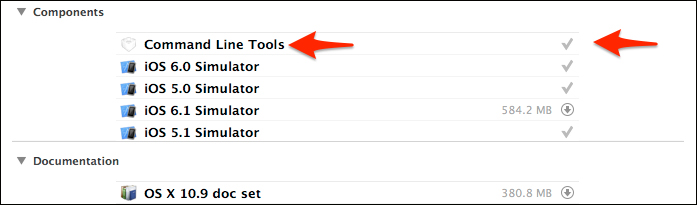
First, make sure you've got Xcode 5 installed. Once that's taken care of, start it up, and then open the Xcode menu and click on Preferences…. Click on the Downloads tab and find the Command Line Tools option. If it's not installed, click on the icon to the right of Command Line Tools to download it. Now, go get a cup of coffee; this takes a little while.
Tip
You may receive an error indicating that you need to add an account to Xcode 5 prior to downloading the command-line tools. Just click on Open Accounts… in the error message. Then, click on the + icon in the lower-left corner of the window and click on Add Apple ID…. Enter your developer credentials and then click on Add (or if you aren't signed up yet, click on Join Program…). Once done, try to download the tools again.
When finished, your display should look like this:
Tip
OS X 10.9 / Xcode 5.0.1
Apple decided to make things just a little more difficult for us. There's no UI to install the command-line tools anymore, so just type xcode-select --install at the command prompt instead. You'll be asked to accept the license, and then it will go and download everything for you.
Next, open a terminal and type the following command:
sudo xcodebuild -license accept
When prompted, enter your password.
Keep in mind that whenever Xcode is updated, you may need to rerun this command. If you get funny errors from Xcode, try running this first, just in case.
Make sure you've installed the Android SDK. If you haven't already, grab it from http://developer.android.com/sdk/index.html. If you already have the SDK installed, make sure you have a recent version, or things are apt to go awry.
If you don't have Java installed yet, install Java 6 or better. Make sure you install a JDK, not a JRE, otherwise things won't work. Once installed, you'll need to configure your JAVA_HOME environment variable. This is different for each OS.
For Mac, open your profile (the same file used in the prior section), and add the following to the bottom (be sure to type a backtick instead of a quote):
# for JAVA_HOME
export JAVA_HOME=`/usr/libexec/java_home`
For Linux, the process is much the same, but you will need to first locate where Java was installed. Then add this to the bottom of your profile:
# for JAVA_HOME
export JAVA_HOME='path-to-your-java-install'
For Windows, the process is much the same as adding to your system path. Open the search panel from the charms, and type Path. Select Edit the system environment variables. A window should appear with Path in the list. Now click New, and enter the variable name as JAVA_HOME. Enter the path in the next box. Click OK and OK again. Re-open any open command prompts to reload the environment settings.
Next, make sure you have the Android tools in your path. For Mac/Linux, add the following snippet to your profile:
# for Android
PATH="${PATH}:/Path-To-Android-SDK/tools:/Path-To-Android-SDK/platform-tools"
export PATH
For Windows 8, follow the same instructions for adding node.js to the path, adding the Android SDK directories to the path instead.
It's also critically important to install Ant. Some Mac OS X versions (10.8.x or lower) come with it preinstalled, but later versions do not. Windows does not have it installed by default.
For Mac OS X, the easiest method to install it is to use homebrew. First, you need to install it (learn more by visiting http://brew.sh) using the following command:
ruby -e "$(curl -fsSL https://raw.github.com/mxcl/homebrew/go)"
Then, run brew doctor as follows:
brew doctor
Then, you can install Ant as follows:
brew install ant
For Windows, download Ant from Apache's website (http://ant.apache.org/bindownload.cgi) and follow the installation instructions at http://ant.apache.org/manual/install.html.
So far, all we've done is get your machine ready for development. You've downloaded and installed node.js, which is required for Cordova/PhoneGap. You've downloaded your development SDKs and configured them appropriately unless you're going to use PhoneGap Build. At this point, we're actually ready to install Cordova/PhoneGap.
Keep in mind that if you're going to do iOS development, you'll need a Mac and the latest version of Xcode, whether or not you intend on using PhoneGap Build. At a minimum, Xcode is required to submit the app to the App Store and a Mac is required in order to generate the certificates necessary to sign the app.
Now that the prerequisites have been taken care of, we can install Cordova/PhoneGap. You can install one or the other, or both, on your system. To help you make that decision, let's go over some of the differences.
It's possible to do mobile app development using only the Cordova command-line interface (CLI). This requires the platform SDKs to be installed and properly configured.
Adding the PhoneGap CLI enables the use of Adobe's remote building capabilities, which means you don't need to have the platform SDKs installed in order to build your app. (There are caveats here; it is best to refer to the PhoneGap Build website at http://build.phonegap.com for more information.)
Installing the PhoneGap CLI will also install the Cordova CLI since it relies on this for most of its functionality. The PhoneGap CLI does not understand the same commands, but since it works with the Cordova CLI, it's possible to use the Cordova CLI when the PhoneGap CLI doesn't offer to do all the same functionality things.
If you intend to do all your development locally, you only need to worry about the Cordova CLI. If you need the flexibility to do remote builds without having platform SDKs installed on your machine, install the PhoneGap CLI.
It is important to note that the installation process requires that your computer be connected to the Internet as we will use npm to download the required packages.
Based on your earlier decision as to which command line to install, refer to the appropriate section, shown as follows to install Cordova / PhoneGap.
Tip
Downloading the example code
You can download the example code files for all Packt books you have purchased from your account at http://www.packtpub.com. If you purchased this book elsewhere, you can visit http://www.packtpub.com/support and register to have the files e-mailed directly to you.
To begin, open up your terminal or command prompt.
If you're running Mac OS X or Linux, type the following command:
sudo npm install -g cordova
If you're running Windows, make sure you're running as an administrative account and type this:
npm install -g cordova
If prompted, enter your password.
You should see output that looks similar to the following. It won't be exactly the same, but the important thing is that you shouldn't see any errors.
npm http GET https://registry.npmjs.org/cordova
npm http 200 https://registry.npmjs.org/cordova
npm http GET https://registry.npmjs.org/cordova/-/cordova-3.1.0-0.1.0.tgz
npm http 200 https://registry.npmjs.org/cordova/-/cordova-3.1.0-0.1.0.tgz
...
/usr/local/bin/cordova -> /usr/local/lib/node_modules/cordova/bin/cordova
cordova@3.1.0-0.1.0 /usr/local/lib/node_modules/cordova
├── ncallbacks@1.0.0
└── plugman@0.13.0 (ncallbacks@1.1.0, osenv@0.0.3,bplist-parser@0.0.4, semver@2.0.11, underscore@1.4.4,xcode@0.6.1, nopt@1.0.10, dep-graph@1.1.0, rc@0.3.0,tar.gz@0.1.1, npm@1.3.4)
To make sure that you can correctly access Cordova from the command line, type this:
cordova --version
You should see output similar to this:
3.1.0-0.1.0
Open your terminal or command prompt. If you're running Mac OS X or Linux, type this:
sudo npm install -g phonegap
If you're running Windows (as an administrative user), type this:
npm install -g phonegap
If prompted for your password, enter it.
You should see output that looks like this:
npm http GET https://registry.npmjs.org/phonegap
npm http 200 https://registry.npmjs.org/phonegap
npm http GET https://registry.npmjs.org/phonegap/-/phonegap-3.1.0-0.15.0.tgz
npm http 200 https://registry.npmjs.org/phonegap/-/phonegap-3.1.0-0.15.0.tgz
npm http GET https://registry.npmjs.org/node-static/0.7.0
npm http GET https://registry.npmjs.org/phonegap-build/0.8.4
...
/usr/local/bin/phonegap -> /usr/local/lib/node_modules/phonegap/bin/phonegap.js
phonegap@3.1.0-0.15.0 /usr/local/lib/node_modules/phonegap
├── pluralize@0.0.4
└── cordova@3.1.0-0.1.0 (ncallbacks@1.0.0, colors@0.6.2,open@0.0.3, mime@1.2.11, follow-redirects@0.0.3,shelljs@0.1.2, glob@3.2.6, xcode@0.5.1, elementtree@0.1.5,tar@0.1.18, prompt@0.2.7, request@2.22.0, express@3.0.0,ripple-emulator@0.9.18, npm@1.3.11, plist@0.4.3, plugman@0.13.0)
When complete, test whether you can access PhoneGap by typing this:
phonegap --version
You should see output similar to this:
3.1.0-0.15.0
In this section, we successfully installed the Cordova CLI and, if you chose to, the PhoneGap CLI on your machine. Your machine is now ready for Cordova/PhoneGap development.
It's possible that you'll see various errors or notices in the output of the install process. Generally, WARN and 304 notifications aren't cause for alarm, but if you see anything more serious, you may need to retry the install or address the underlying cause.
It's also possible that if your platform SDK is improperly set up, you'll get errors during the installation process. These should indicate the platform SDK in question.
A project contains your code, other platform-specific code, and other assets required to generate an app ready for you to run on a simulator or device. All of this information is stored within a project directory. When you create a project, the command-line interface generates this directory structure for you and generates a basic app, which allows you to verify that you can get a Hello World style app built.
It is important to note that the installation process requires that your computer be connected to the Internet as the project creation step may need to download information.
Creating a project is really simple regardless of which command-line interface is being used. Let's create a project first with the Cordova command line.
First, open your terminal or command prompt and navigate to wherever you want to store your project.
Tip
I highly suggest that you create your projects in a directory where there are no spaces in the path. For example, storing all your projects in /users/yourname/my projects/ would be a bad idea since the CLIs tend to have problems handling paths with spaces in them.
Then, type the following command:
cordova create ./HelloWorld com.phonegaphotshot.helloworld HelloWorld
The first parameter indicates to Cordova that it should create a project in specific directory specified by the second parameter. The third parameter is the project's ID ; these should always be unique and specified in reverse domain name order. The final parameter is the name of the project.
This command may take a few seconds to complete if anything needs to be downloaded, but when done, you should see something like this:
Creating a new cordova project with name "HelloWorld" and id "com.phonegaphotshot.helloworld" at location "/Users/You/HelloWorld".
Once done, though, you should have a new project in the HelloWorld directory and you should have several new folders and files in that directory. While each is important, we will only really focus on the merges and www directories in this book.
To create a project with the PhoneGap CLI, open your command prompt or terminal, navigate to the location you want your project to be stored, and type this:
phonegap create ./PGHelloWorld com.phonegaphotshot.pghelloworld PGHelloWorld
As with the Cordova CLI, the first parameter indicates that a project should be created in a directory specified by the second parameter. The third parameter is the project ID, which must be unique and should be specified in reverse domain-name order. The final parameter is the name of the project.
Tip
I highly suggest that you create your projects in a directory where there are no spaces in the path. For example, storing all your projects in /users/yourname/my projects/ would be a bad idea since the CLIs tend to have problems handling paths with spaces in them.
The PhoneGap CLI is a little more verbose than the Cordova CLI, and so you should see output similar to the following:
[phonegap] missing library phonegap/www/3.1.0
[phonegap] downloading https://github.com/phonegap/phonegap-app-hello-world/archive/3.1.0.tar.gz...
[phonegap] created project at /Users/You/…/PGHelloWorld
If you compare the two structures, you'll find that they are very similar. Because they share the same structure, it's fully possible to use the Cordova CLI within this book's project.
In this step, we created two projects, one using the Cordova CLI and the other using the PhoneGap CLI. We compared the structures created by both and found them similar.
We've created our first projects, but we haven't specified the platforms that the projects support. We'll add the iOS and Android platforms in this step and also show you how to manage the available platforms in your project.
It's important for your computer to be connected to the Internet as, while adding platforms, you may need to download platform-specific code.
After creating your project, the next step usually involves adding the platforms the project will support. However, it's important to remember that you can also manage these platforms at any time. You can remove platforms, update platforms (in the case of an update to Cordova), and list out the supported platforms.
To add the iOS and Android platforms (regardless of which CLI you used to create your project), open your terminal or command prompt, navigate to your project's directory, and type this:
cordova platform add ios android
Tip
Windows / Linux Users
You won't be able to add the ios platform, so just use cordova platform add android.
There may be a delay since each Cordova platform may need to download various platform files from the Internet. If you want to add other platforms, you can follow this pattern:
cordova platform add platform-name
Here, platform-name is any of the supported platforms, including the following:
ios: The iOS platformandroid: The Android platformblackberry10: The BlackBerry 10 OS platformfirefoxos: The Firefox OS platformwp7: The Windows Phone 7 platformwp8: The Windows Phone 8 platformwindows8: The Windows 8 platform
Tip
In order to build or deploy a project for a given platform, you need to have the appropriate platform SDK installed and properly configured. If not, you may receive errors.
Lots of new files have been added in the merges, platforms, and plugins folders. These are the platform-specific portions of your project.
At some point in the future, you may want to ask Cordova which platforms your project is configured to support. To find out, just type the following command:
cordova platform ls
You'll see output similar to this:
Installed platforms: android, ios
Available platforms: blackberry10, firefoxos
To remove a platform, just type this:
cordova platform remove platform-name
This will remove the appropriate directories and files from your project.
Plugins are the mechanism Cordova uses to provide native functionality to your app. There is a set of core plugins that used to be provided to each app by default in the 2.x days. Now they have been unbundled and need to be installed separately if you want to use them. While a little more labor intensive, it also solves the problem of apps requesting more permissions than they actually need.
Plugins can be installed from several different sources, and the CLIs provide mechanisms that make it easy to add plugins from your local machine, from a Git repository, or from the plugin repository at http://plugins.cordova.io. If the plugin you need is available in the plugin repository, this is probably the easiest way since you just need to know the plugin's identifier rather than a long path or URL. All the plugins in this book should be available via Git or the plugin repository.
To simplify the addition of plugins, there is a plugin registry that allows you to specify plugins by name in reverse-domain notation.
Tip
Advanced Readers
Plugins must conform to a specification in order to be added to your projects. If you're interested in how this works, see http://cordova.apache.org/docs/en/edge/guide_hybrid_plugins_index.md.html#Plugin%20Development%20Guide.
You'll need to be connected to the Internet in order to install plugins from the plugin registry since their content needs to be downloaded before it can be installed in your project.
Plugins can be managed using either the Cordova CLI or the PhoneGap CLI (which ends up using the Cordova CLI in the background). The important detail to remember when you use the PhoneGap CLI is that plugins must be installed locally (not remotely).
First, open your command prompt or terminal and navigate to your project directory. From here, you can install plugins, remove plugins, and list the available plugins in your project.
To install a plugin, use a command with the following pattern:
cordova plugin add plugin-name
If the plugin is local, use the path to the plugin instead of the plugin name. If the plugin is hosted on a Git repository, use the URL to the Git repository. Otherwise, just use the plugin ID from the registry.
To install all of the core plugins, you can use the following command (as of 3.1.x):
cordova plugin add org.apache.cordova.deviceorg.apache.cordova.network-information org.apache.cordova.battery-status org.apache.cordova.device-motion org.apache.cordova.device-orientation org.apache.cordova.geolocation org.apache.cordova.camera org.apache.cordova.media org.apache.cordova.media-capture org.apache.cordova.file org.apache.cordova.file-transfer org.apache.cordova.dialogs org.apache.cordova.vibration org.apache.cordova.contacts org.apache.cordova.globalization org.apache.cordova.splashscreen org.apache.cordova.inappbrowser org.apache.cordova.console
Note
You won't normally want to install each core plugin, as this means your app will need far more permissions on the device than necessary.
Tip
If you want to know what each plugin does, see http://cordova.apache.org/docs/en/edge/cordova_plugins_pluginapis.md.html#Plugin%20APIsZ
Give the command a few seconds to complete; it will need to download the plugins from the registry, and after a few seconds, you should be returned to the prompt.
To check whether the plugins were indeed added, you can use a simple command:
cordova plugin list
You should see the following output, assuming you added all the core plugins:
[ 'org.apache.cordova.battery-status',
  'org.apache.cordova.camera',
  'org.apache.cordova.console',
  'org.apache.cordova.contacts',
  'org.apache.cordova.device',
  'org.apache.cordova.device-motion',
  'org.apache.cordova.device-orientation',
  'org.apache.cordova.dialogs',
  'org.apache.cordova.file',
  'org.apache.cordova.file-transfer',
  'org.apache.cordova.geolocation',
  'org.apache.cordova.globalization',
  'org.apache.cordova.inappbrowser',
  'org.apache.cordova.media',
  'org.apache.cordova.media-capture',
  'org.apache.cordova.network-information',
  'org.apache.cordova.splashscreen',
  'org.apache.cordova.vibration' ]
You can remove any plugin you want by following this pattern:
cordova plugin remove plugin-name
For example, let's remove the globalization and contacts plugins:
cordova plugin remove org.apache.cordova.globalization org.apache.cordova.contacts
Now, if you list the plugins, you should see this:
[ 'org.apache.cordova.battery-status',
  'org.apache.cordova.camera',
  'org.apache.cordova.console',
  'org.apache.cordova.device',
  'org.apache.cordova.device-motion',
  'org.apache.cordova.device-orientation',
  'org.apache.cordova.dialogs',
  'org.apache.cordova.file',
  'org.apache.cordova.file-transfer',
  'org.apache.cordova.geolocation',
  'org.apache.cordova.inappbrowser',
  'org.apache.cordova.media',
  'org.apache.cordova.media-capture',
  'org.apache.cordova.network-information',
  'org.apache.cordova.splashscreen',
  'org.apache.cordova.vibration' ]
The PhoneGap CLI requires that you install plugins locally, and as such, it uses a slightly different syntax. With that said, the same operations are available as with the Cordova CLI.
To install a plugin, you use a command with the following pattern:
phonegap local plugin add plugin-name
If the plugin is a local plugin, use the path to the plugin instead of plugin-name. If the plugin is hosted on a Git repository, use the URL to the Git repository. Otherwise, just use the plugin ID from the registry.
To install all of the core plugins, you can use the following commands (as of 3.1.x):
phonegap local plugin add org.apache.cordova.devicephonegap local plugin add org.apache.cordova.network-informationphonegap local plugin add org.apache.cordova.battery-statusphonegap local plugin add org.apache.cordova.device-motionphonegap local plugin add org.apache.cordova.device-orientationphonegap local plugin add org.apache.cordova.geolocationphonegap local plugin add org.apache.cordova.cameraphonegap local plugin add org.apache.cordova.mediaphonegap local plugin add org.apache.cordova.media-capturephonegap local plugin add org.apache.cordova.filephonegap local plugin add org.apache.cordova.file-transferphonegap local plugin add org.apache.cordova.dialogsphonegap local plugin add org.apache.cordova.vibrationphonegap local plugin add org.apache.cordova.contactsphonegap local plugin add org.apache.cordova.globalizationphonegap local plugin add org.apache.cordova.splashscreenphonegap local plugin add org.apache.cordova.inappbrowserphonegap local plugin add org.apache.cordova.console
Note
You won't normally want to install each core plugin, as this means your app will need far more permissions on the device than necessary. If you want to know what each plugin does, see http://cordova.apache.org/docs/en/edge/cordova_plugins_pluginapis.md.html#Plugin%20APIsZ
You'll see the following output from each command:
[phonegap] adding the plugin: org.apache.cordova.device
[phonegap] successfully added the plugin
To check whether the plugins were indeed added, you can use a simple command:
phonegap local plugin list
You should see the following output, assuming you added all the core plugins:
[phonegap] org.apache.cordova.battery-status
[phonegap] org.apache.cordova.camera
[phonegap] org.apache.cordova.console
[phonegap] org.apache.cordova.contacts
[phonegap] org.apache.cordova.device
[phonegap] org.apache.cordova.device-motion
[phonegap] org.apache.cordova.device-orientation
[phonegap] org.apache.cordova.dialogs
[phonegap] org.apache.cordova.file
[phonegap] org.apache.cordova.file-transfer
[phonegap] org.apache.cordova.geolocation
[phonegap] org.apache.cordova.globalization
[phonegap] org.apache.cordova.inappbrowser
[phonegap] org.apache.cordova.media
[phonegap] org.apache.cordova.media-capture
[phonegap] org.apache.cordova.network-information
[phonegap] org.apache.cordova.splashscreen
[phonegap] org.apache.cordova.vibration
You can remove any plugin you want by following this pattern:
phonegap local plugin remove plugin-name
For example, let's remove the globalization and contacts plugins:
phonegap local plugin remove org.apache.cordova.globalization
phonegap local plugin remove org.apache.cordova.contacts
You should see a notice like this:
[phonegap] removing the plugin: org.apache.cordova.globalization
[phonegap] successfully removed the plugin
Now, if you list the plugins, you should see the following output:
[phonegap] org.apache.cordova.battery-status
[phonegap] org.apache.cordova.camera
[phonegap] org.apache.cordova.console
[phonegap] org.apache.cordova.device
[phonegap] org.apache.cordova.device-motion
[phonegap] org.apache.cordova.device-orientation
[phonegap] org.apache.cordova.dialogs
[phonegap] org.apache.cordova.file
[phonegap] org.apache.cordova.file-transfer
[phonegap] org.apache.cordova.geolocation
[phonegap] org.apache.cordova.inappbrowser
[phonegap] org.apache.cordova.media
[phonegap] org.apache.cordova.media-capture
[phonegap] org.apache.cordova.network-information
[phonegap] org.apache.cordova.splashscreen
[phonegap] org.apache.cordova.vibration
The plugin registry will typically be your first stop when you look for new plugins. Most plugin developers will use this, but there may always be a few out there that are hosted only on Git repositories. If you create your own plugin, it may be hosted solely on your machine. The process for adding these plugins will be the same; point to the path or URL instead of using the plugin name. Once added, you can remove them using the reverse-domain notation.
While the core plugins generally support each platform, there are always exceptions. It's a good idea to look closely at the documentation for each plugin in order to determine whether it supports all the platforms you need in your project (or whether you need to add additional plugins to cover any gaps).
All we've done so far is created a project, added some platforms to it, and added several of the core plugins. We've not actually attempted to build a project.
Building involves compiling all the native code using the platform SDKs on your machine and then packaging your HTML, JavaScript, and CSS (and any assets) with this code so that it can be deployed to a simulator or device.
There are many steps involved when you actually build your project, but thankfully, the CLIs make it very easy to get something that can go on your device.
If you intend on using PhoneGap Build to build your project, you'll need to be connected to the Internet, and you'll need a PhoneGap Build account. You can get one at http://build.phonegap.com. You'll also need to set up your signing and provisioning certificates, which is beyond the scope of this book.
Building your project can be done with either of the CLIs, and the PhoneGap CLI also provides remote building (which doesn't require your machine to have a platform SDK installed). As such, the syntax is a little different for each CLI, but both accomplish the same thing.
To build your project for all platforms, you can just open a command prompt or terminal, navigate to your project directory, and type this:
cordova build
Give the command some time to complete, as the project must be compiled for each platform, and ideally, you should have no output. If you do receive errors, it may indicate a problem with your platform SDK configuration or a problem with some native code (which shouldn't happen yet, since we've not changed or written any).
If you just want to build for one particular platform (or multiple but not all), just use the following command:
cordova build platform
To solely build for iOS, for example, you could use the following command:
cordova build ios
To build your project for a specific platform, you can open your command prompt or terminal, navigate to your project directory, and type the following command:
phonegap local build platform-name
You can only build one platform at a time; if you need to build multiple platforms, you'll need to specify each one. For Android, you'd type this:
phonegap local build android
For iOS, you'd type this:
phonegap local build ios
You should get output similar to this:
[phonegap] compiling iOS...
[phonegap] successfully compiled iOS app
Give this some time to complete, as the compilation steps do quite a bit of work underneath the hood. If you get errors, chances are good that you've got an error in your native code (which shouldn't happen at this point as we haven't changed any native code), or there's a problem in the configuration of your platform SDK.
To build your project remotely using PhoneGap Build, it's just about as easy, but you do need to have an account on PhoneGap Build and have all the necessary certificates and provisioning files set up.
To build a platform remotely, type this:
phonegap remote build platform-name
If you haven't previously logged in to PhoneGap Build from your command line, you'll probably be asked for your username and password.
Your project will then be uploaded to the cloud, where it will be compiled. This may take a few moments depending on your bandwidth.
You should see output similar to this:
[phonegap] PhoneGap/Build Login
[phonegap] Sign up at build.phonegap.com
 [warning] GitHub accounts are unsupported
  [prompt] enter username: username
  [prompt] enter password: password
[phonegap] logged in as username
[phonegap] compressing the app...
[phonegap] uploading the app...
[phonegap] building the app...
[phonegap] Android build complete
At this point, you'll need to actually navigate to http://build.phonegap.com in order to see the results.
Note
If you receive an error message during this process, ensure that there is a config.xml file in the www directory. If you are using the code package for this book, the config.xml file lives above the www directory. Also, if you'll want to add any plugins your project uses (if any) to the config.xml file, as noted at http://docs.build.phonegap.com/en_US/configuring_plugins.md.html#Plugins.
In this section, we successfully built the project for each platform using the Cordova CLI and local and remote PhoneGap CLIs.
Building remotely using PhoneGap Build is a little different from building locally since you may not see the results of the build instantly; the service will build the code as soon as it has a chance. The only way to verify that things went as expected is to log on to your account at http://build.phonegap.com and verify the results.
Once you've built a project, the next logical step is to actually test it. To do this, you can deploy the code to a simulator (which is handy for debugging on your machine) or deploy the code to a device (which is a must to get a feel for how the app performs on a real device). You can do both using either CLIs, depending upon what the platform SDK supports. (For example, some platform SDKs may only support deploying to a simulator.)
If you need to deploy to the iOS simulator, you may need to install programs called ios-sim and ios-deploy.
To install both, just use the following commands from your command-line or terminal (wait for the first to complete before attempting the second):
sudo npm install -g ios-sim
sudo npm install -g ios-deploy
Both CLIs can deploy your code to a device or simulator. If you need to test on iOS, keep in mind that iOS only permits deploying to the simulator as of Cordova 3.1. If you need to test on Android, it will normally depend on whether or not you have a device plugged in with USB debugging enabled and whether you are deploying the app to the simulator or a device.
The simplest method is to use the following pattern:
cordova emulate platform
To test on the Android simulator, you can type this:
cordova emulate android
To test on the iOS simulator, you can type this:
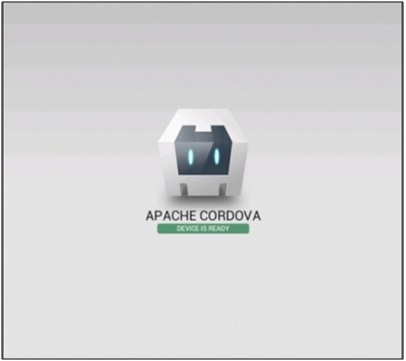
cordova emulate ios
Both options should launch the respective simulators and then launch the app. If you need to launch in a specific simulator, it's best to open the simulator manually and then deploy to the simulator.
You'll know things are working properly when you can see the app in the simulator. It should look something like this:
If you want to deploy to your Android device, plug it in first and then type the following command:
cordova run android
Wait a few moments and your device should begin running the app.
To deploy using the PhoneGap CLI, it's important to remember that this only works for local builds. If you built remotely, you need to navigate to http://build.phonegap.com and install from there.
To deploy to the iOS simulator, type this:
phonegap local install ios
To deploy to your Android device (be sure to plug it in) or simulator, type this:
phonegap local install android
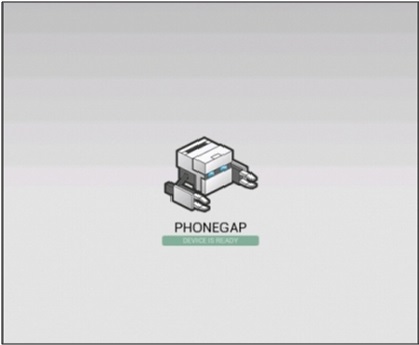
You should see output similar to the following:
[phonegap] trying to install app onto device
[phonegap] no device was found
[phonegap] trying to install app onto emulator
[phonegap] successfully installed onto emulator
If everything goes as it should, you should see the following image:
It's taken a bit of work, but you were successfully able to install node.js, configure your platform SDKs, install the Cordova and/or PhoneGap CLIs, and optionally install ios-sim and ios-deploy. You created your first project using either one of the CLIs, added platforms to it, added the core plugins, and then built it and deployed it to your simulator or device.
We will be focusing heavily on Android and iOS mobile application development. However, you might want to deploy to another platform. Try your hand at adding another platform, say BlackBerry 10 or Firefox OS or Windows Phone 8, to your project, and see if you can build and deploy it to the simulator or device.