Search icon CANCEL
Subscription
0
Cart icon
Your Cart (0 item)
Close icon
You have no products in your basket yet
Arrow left icon
Explore Products
Best Sellers
New Releases
Books
Events
Videos
Audiobooks
Packt Hub
Free Learning
Arrow right icon
timer SALE ENDS IN
0 Days
:
00 Hours
:
00 Minutes
:
00 Seconds
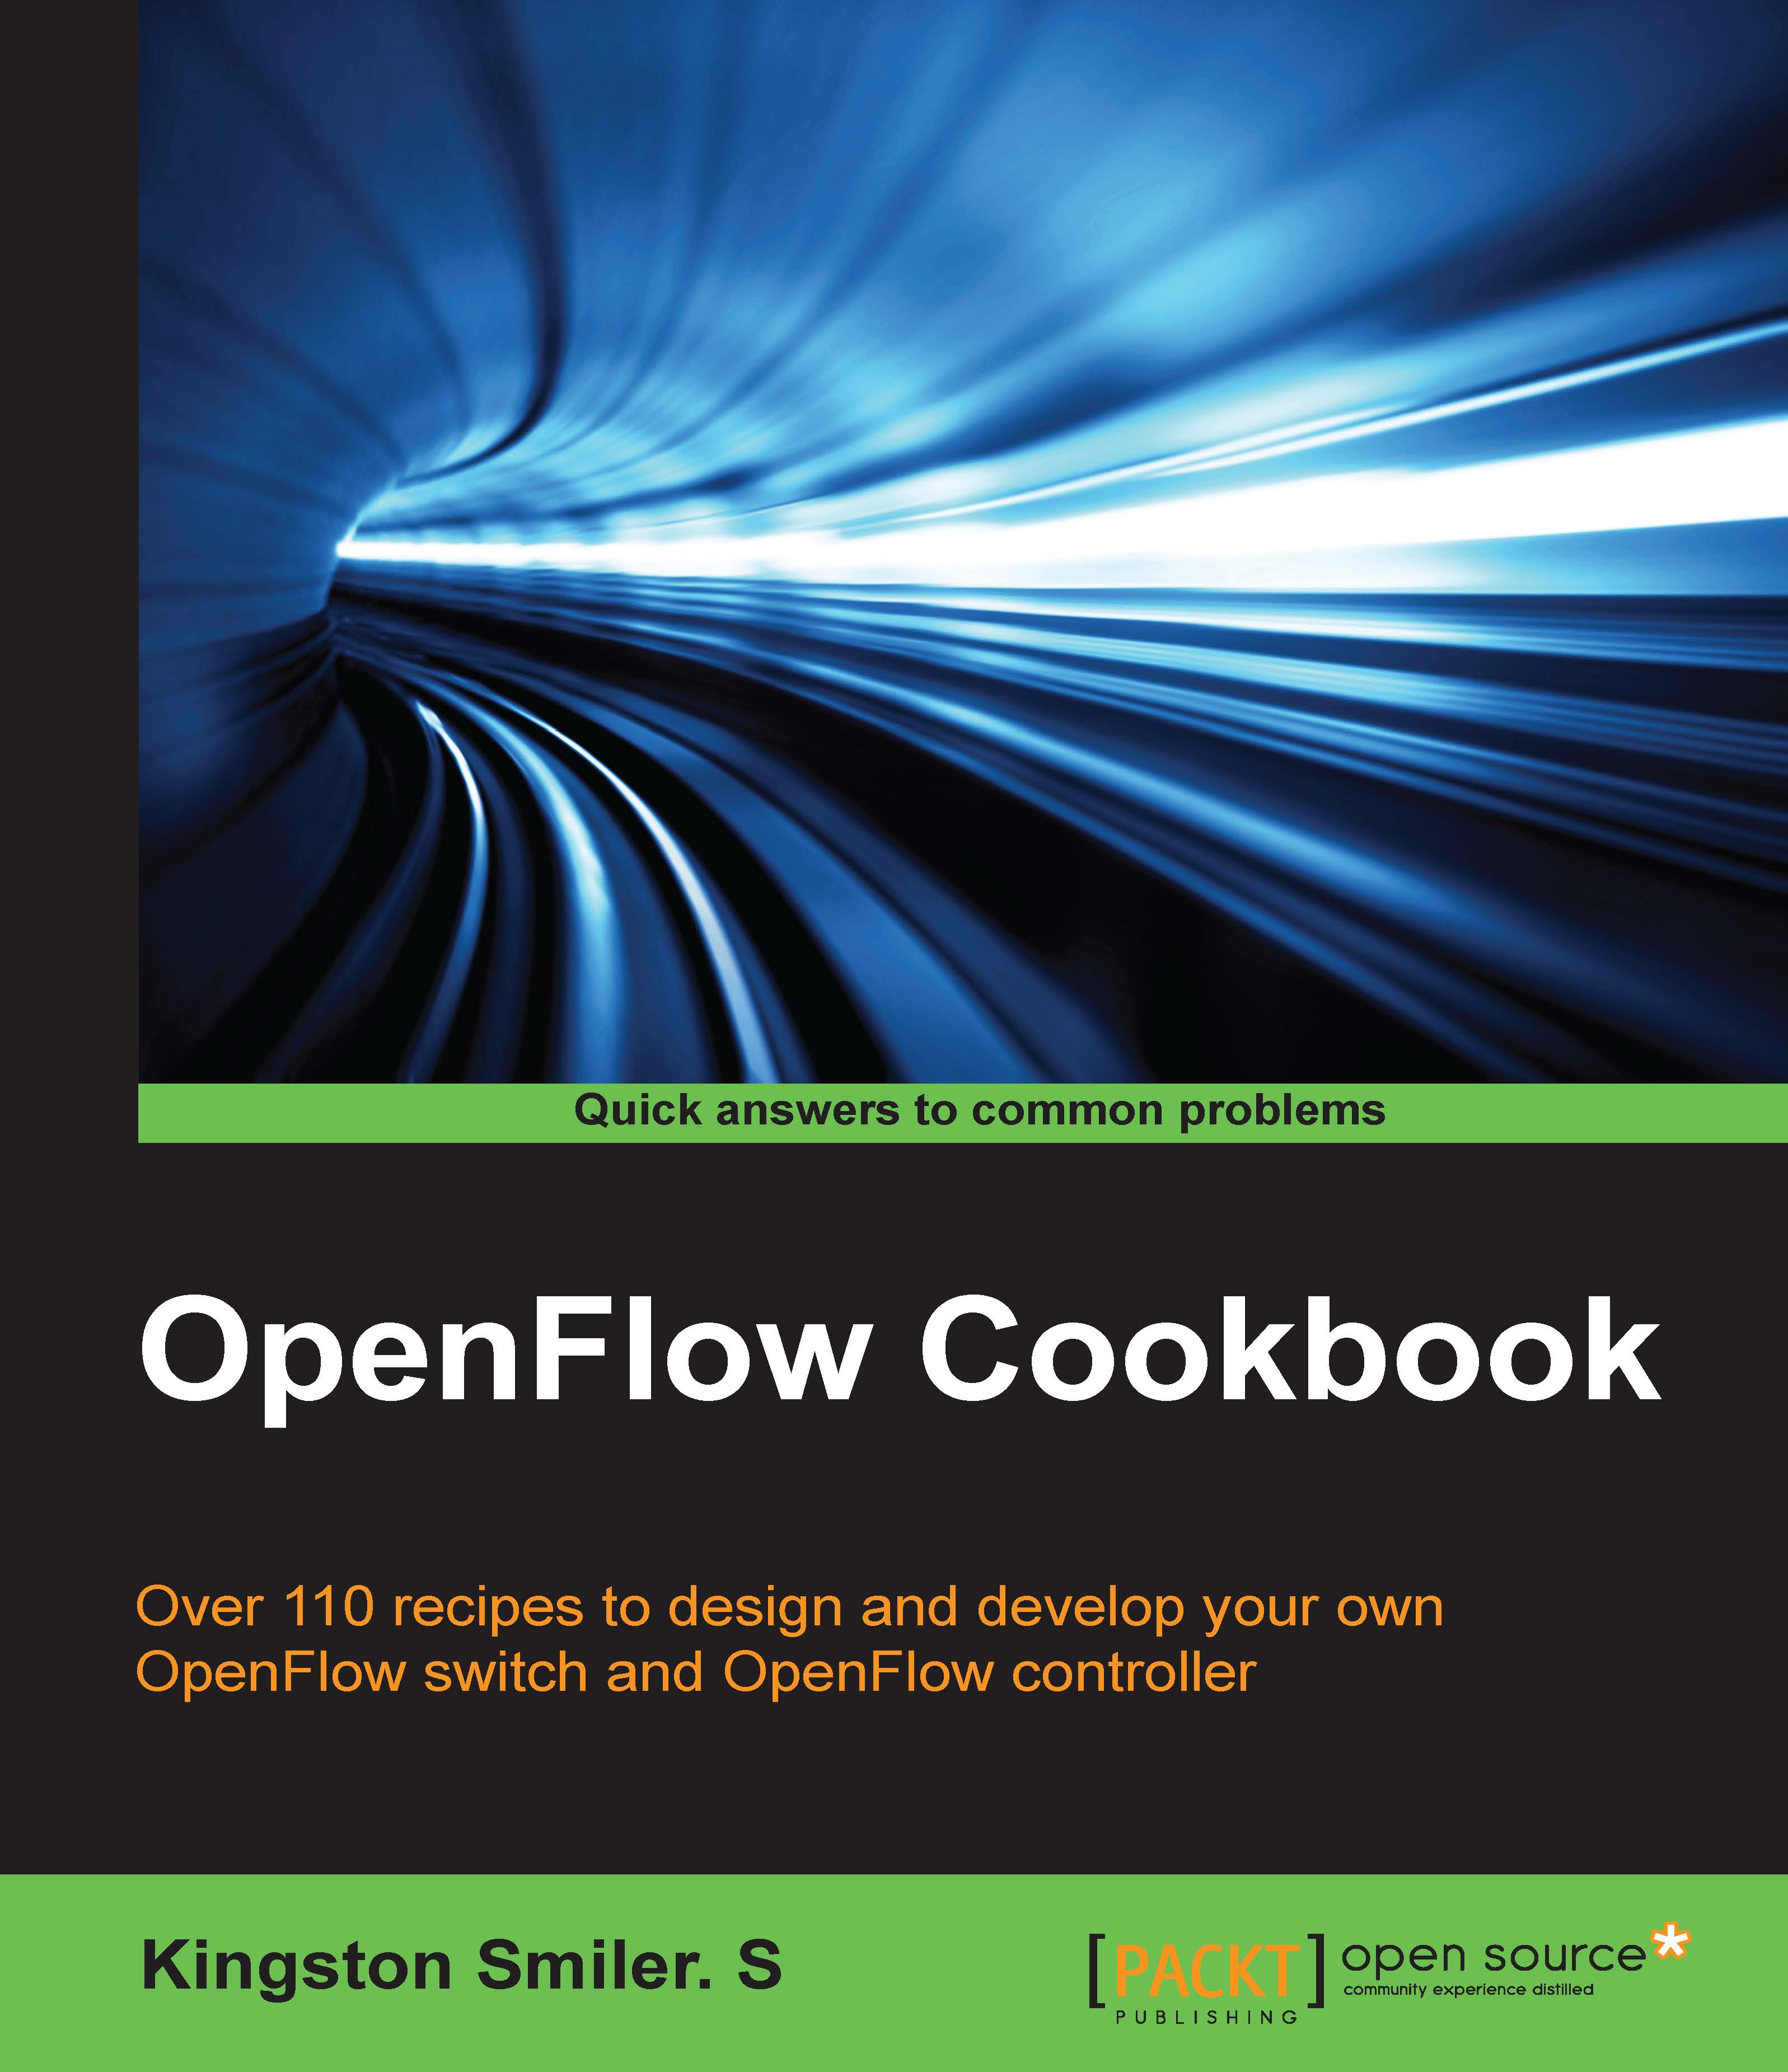
OpenFlow Cookbook
OpenFlow Cookbook

OpenFlow Cookbook: Over 110 recipes to design and develop your own OpenFlow switch and OpenFlow controller

Arrow left icon
Profile Icon Kingston Smiler. S
Arrow right icon
$57.99
Full star icon Full star icon Full star icon Full star icon Half star icon 4.5 (4 Ratings)
Paperback Apr 2015 292 pages 1st Edition
eBook
$41.39 $45.99
Paperback
$57.99
Arrow left icon
Profile Icon Kingston Smiler. S
Arrow right icon
$57.99
Full star icon Full star icon Full star icon Full star icon Half star icon 4.5 (4 Ratings)
Paperback Apr 2015 292 pages 1st Edition
eBook
$41.39 $45.99
Paperback
$57.99
eBook
$41.39 $45.99
Paperback
$57.99

What do you get with Print?

Product feature icon Instant access to your digital copy whilst your Print order is Shipped
Product feature icon Paperback book shipped to your preferred address
Product feature icon Redeem a companion digital copy on all Print orders
Product feature icon Access this title in our online reader with advanced features
Product feature icon DRM FREE - Read whenever, wherever and however you want
Modal Close icon
Payment Processing...
tick Completed

Shipping Address

Billing Address

Shipping Methods
Table of content icon View table of contents Preview book icon Preview Book

OpenFlow Cookbook

Chapter 1. OpenFlow Channel Connection Establishment (Part 1)

In this chapter we will cover the following topics:

  • Connection setup on TCP & TLS
  • Connection setup with multiple controllers
  • Setting the role of a communication channel towards a controller
  • Establishing an auxiliary connection to a controller
  • Handling handshake message from a controller
  • Handling switch configuration messages from a controller
  • Connection interruption procedures

Introduction

OpenFlow channel is a communication medium that is used to send and receive OpenFlow messages between the switch and controller. The switch must create an OpenFlow channel by initiating a connection to the controller. An OpenFlow switch can establish multiple connections to the same or different controllers in parallel, among which one of the controller's connections acts as master and the other controller's connections acts either as slave / equal. For detailed information regarding the controller roles, refer to the recipe, Setting the role of a controller's communication channel in Chapter 1, OpenFlow Channel Connection Establishment (Part 2).

This chapter describes the steps and mechanisms involved in establishing an OpenFlow channel from switch to controller along with the handling of different messages related to OpenFlow channels and controller roles.

Connection setup on TCP and TLS

The switch must be able to establish communication with a controller at a configurable IP address, using either a user-specified transport port or a default transport port. The communication protocol can either be TCP or TLS and the default port for both of these protocols is 6653. The previous versions of OpenFlow used the default port of either 6633 or 976. However IANA has allocated port number 6653 to Open networking foundation (ONF) for OpenFlow protocol.

Note

The connection from switch to controller is identified by the switch Datapath ID and an auxiliary ID. The Auxiliary ID of the main connection is always 0.

Getting started

To establish a communication channel with the controller, the user should configure the IP address, port number (optional) and the transport protocol (TCP/TLS) of the controller.The switch should provide a mechanism to configure these parameters via a standard Command-line Interface (CLI) or use a configuration file or other mechanism.

How to do it...

Based on the configured transport path protocol the switch should follow either the TCP procedure or the TLS procedure explained in this section for establishing connectivity to the controller.

TCP Procedure

Standard TCP/IP socket procedure should be used to establish the OpenFlow communication channel between the switch and controller. The switch should create a TCP socket and try to connect to the configured IP address and port number of the controller using the connect system call provided by the underlying operating system. The procedure in C on Unix-based operating systems is as follows.

struct sockaddr_in controller_address;
memset(&controller_address, '0', sizeof(controller_address));
controller_address.sin_family = AF_INET;
controller_address.sin_addr.s_addr = inet_addr("10.0.0.10");
controller_address.port = htons(6653);
if (socket (AF_INET, SOCK_STREAM, 0) < 0)
    {
        printf("\n Error : Could not create socket \n");
        return 1;
    }
if ((connect (s, (struct sockaddr*)&controller_address, sizeof(controller_address)) < 0))
    {
       printf("\n Error : Connect Failed \n");
       return 1;
    }

Tip

Downloading the example code

You can download the example code files from your account at http://www.packtpub.com for all the Packt Publishing books you have purchased. If you purchased this book elsewhere, you can visit http://www.packtpub.com/support and register to have the files e-mailed directly to you.

TLS Procedure

In order to establish a TLS connection, the switch and controller should authenticate each other mutually, by exchanging certificates which are signed using a private key. The switch must be configured with two certificates, one for authenticating the controller (for example, the controller certificate) and the other for authenticating the controller from the switch (for example, the switch certificate).

For establishing secure a communication channel across the controller and switch using TLS, OpenSSL library can be used. OpenSSL is an open-source implementation of basic cryptographic functions and utilities written in the C programming language and provides complete implementation of the SSL and TLS protocols.

As OpenSSL requires a TCP connection between the client and server, the first step is to create the TCP sockets as mentioned in the TCP procedure section of this recipe. Once the TCP connection is established, the procedure in C on Unix-based operating systems for establishing a secure communication channel using OpenSSL is as follows:

  //Register the error strings libssl SSL_load_error_strings ();
   // Register the available ciphers and digests SSL_library_init ();
  // New context with mode as client and version as SSL 2 or 3sslContext = SSL_CTX_new (SSLv23_client_method ());
  if (sslContext == NULL)
    {
      printf("\n Error: Could not create SSL context\n");
        return 1;
    }

  // Create a new SSL struct sslHandle = SSL_new (sslContext);
    if (sslHandle == NULL)
      {
        printf("\n Error: Could not create SSL handle\n");
          return 1;
      }
  // Bind the SSL struct to the TCP connection if (!SSL_set_fd (sslHandle, socket))
      {
        printf("\n Error: Could not set socket \n");
          return 1;
      }
  // Initiate SSL handshake
    if (SSL_connect (sslHandle) != 1)
      {
        printf("\n Error: Could not connect using SSL\n");
          return 1;
      }

There's more…

When the connection between the switch and controller is first established, either side of the connection must immediately send the hello message. The procedure to send and receive the hello message is explained in detail in Sending and processing hello message recipe of Chapter 2, Symmetric Messages and Asynchronous Messages.

The OpenFlow specification doesn't mandate any failure handling while establishing the communication channel. However it is recommended for the switch to re-initiate the connection periodically until the connection is successful. If the switch is unable to establish a connection with any of the configured controllers and the switch is a hybrid switch, thenthe switch can operate in non-openflow mode until the connection to any one of the controllers is successful.

See also

  • For more information regarding the procedure to send and receive the OFPT_HELLO message, refer to the Sending and processing hello message recipe of Chapter 2, Symmetric Messages and Asynchronous Messages

Connection setup with multiple controllers

When a switch is configured to connect to more than one controller, then the switch should establish a communication channel with all the configured controllers. A switch may connect to multiple controllers for the following reasons:

  • To improve the reliability of the system
  • To provide load balancing across controllers depending on the role

When a switch is connected to more than one controller then the controller can take either the master role, slave role or the equal role. For more information regarding the controller role, refer to the recipe, Multiple controllers managing switch with different roles in Chapter 1, OpenFlow Channel Connection Establishment (Part 2).

The switch maintains the role of the controller with respect to the controller's connection, as the switch identifies the controller with the channel ID, which is the combination of the Datapath ID and the Auxiliary ID.

Tip

A switch should be connected to only one controller in its master state. However it may be connected to multiple controllers in an equal state or in the slave state.

How to do it...

During the initialization of the OpenFlow switch, it should initiate a connection to all the configured controllers and should maintain the connectivity to all the controllers concurrently. The procedure to establish an OpenFlow communication channel to multiple controllers is similar to that of establishing a connection to a single controller as was explained in the Connection setup on TCP & TLS recipe. However, as the switch has to process requests concurrently from multiple controllers, the switch could employ mechanisms to read and process the message from multiple channels. This can be done, either by having different threads or different processes, each handling requests from multiple controllers, or should use some of the constructs provided by the operating system such as the select() system call.

How it works...

In a steady state, the switch should be able to send asynchronous message to all controllers through the channels associated with the controller. Similarly, the switch should be able to process the OpenFlow request message from any of the connected controllers. When a switch receives the OpenFlow request message from any one of the controllers, the switch should send the response only to the channel which is associated with that controller.

There's more…

The OpenFlow specification doesn't mandate any failure handling while establishing the communication channel. However, it is recommended for the switch to try to re-initiate the connection periodically until the connection is successful.

See also

  • For more information about establishing the connection to a controller, refer to the previous recipe in this chapter. The next recipe describes how to set the role of the controller in detail

Setting the role of the communication channel towards a controller

Role-request messages are sent from the controller to set the role of its OpenFlow channel, or query that role. The controller's role in the switch is constantly changed as a result of a request from the controller. The switch cannot change the role of a controller channel on its own.

Tip

The controller may send the role request message to communicate its channel role at any time and the switch must remember the role of each controller connection

Refer to the Setting the role of a controller's communication channel recipe in Chapter 1, OpenFlow Channel Connection Establishment (Part 2) for more information on when and why the controller sends the role request message to the switch.

How to do it...

The message format used by the controller to send OFPT_ROLE_REQUEST messages is defined in the Setting the role of a controller's communication channel recipe in Chapter 1, OpenFlow Channel Connection Establishment (Part 2). The switch should use the same message format for sending the reply message back to the controller.

If the role requested from the controller is master or slave, then the switch must validate the generation_id to check for stale messages. This is required because, if the stale messages are processed by the switch, then there is a possibility of one or more controllers and the switch might be out of sync with respect to the role.

Once the switch receives a role request message, it must return an OFPT_ROLE_REPLY message, if there is no error encountered while processing this role request message. The structure of this reply message is exactly same as the OFPT_ROLE_REQUEST message.

The field role should be set with the current role of the controller.

The field generation_id should be set to the current generation_id (the generation_id associated with the last successful role request). If the current generation_id was never set, the generation_id in the reply must be set to the maximum field value (the unsigned equivalent of -1).

If the validation of generation_id fails, the switch must discard the role request message and return an error message with type OFPET_ROLE_REQUEST_FAILED and the code as OFPRRFC_STALE.

The procedure to handle a role request message from the controller is as follows:

handle_role_request_message (struct ofp_role_request role_request) {
  struct ofp_role_request role_reply;
  /* pseudo-code to validate the generation_id. Here the
   * generation_is_defined and cached_generation_id are global
   * variables */
  if (generation_is_defined && (int64_t)
     (role_request.generation_id - cached_generation_id) < 0)
  {
     send_error_message(OFPET_ROLE_REQUEST_FAILED, OFPRRFC_STALE);
  }
  else
  {
     cached_generation_id = role_request.generation_id;
     generation_is_defined = true;
    /* Here connection is the connection data structure which is
   * maintained by the switch */
     connection.role = role_request.role;
     role_reply.role = role_request.role;
     role_reply.generation_id = cached_generation_id;
     send_openflow_message (connection, role_reply);
  }
}

The procedure to send error messages is explained in the Setting the role of a controller's communication channel recipe in Chapter 1, OpenFlow Channel Connection Establishment (Part 2).

There's more…

If the requested role is OFPCR_ROLE_MASTER, then the switch should change the role of the existing master controller to OFPCR_ROLE_EQUAL.

If the requested role is OFPCR_ROLE_SLAVE and after successfully setting the role of this communication channel as a slave in the switch, the switch:

  • Should not send asynchronous messages.
  • Should not execute the controller-switch command. For example OFPT_PACKET_OUT, OFPT_FLOW_MOD, OFPT_GROUP_MOD, OFPT_PORT_MOD, OFPT_TABLE_MOD requests, and OFPMP_TABLE_FEATURES multipart requests with a non-empty body must be rejected.
  • If it receives any controller-switch command then the switch must send the OFPT_ERROR message of the type field and code as OFPET_BAD_REQUEST and OFPBRC_IS_SLAVE respectively. The procedure to send error messages is explained in the recipe, Setting the role of a controller's communication channel recipe in Chapter 1, OpenFlow Channel Connection Establishment (Part 2).

See also

  • For more information about sending the role request message from the controller, refer to the Setting the role of a controller's communication channel recipe in Chapter 1, OpenFlow Channel Connection Establishment (Part 2)

Establishing an auxiliary connection to the controller

Apart from the main connection, a switch can initiate one or more connections towards the controller to improve its processing performance and exploit the parallelism of most switch implementations. These connections are termed auxiliary connections. For auxiliary connections, the switch should assign the auxiliary ID value as a non-zero value and the Datapath ID the same as that of the main connection towards that controller.

Tip

The switch must not initiate an auxiliary connection to a controller until the main connection has been successfully established.

Getting started

To establish an auxiliary connection to the controller, the main connection between the switch and controller should have been successfully established.

How to do it...

The procedure to establish an auxiliary connection to a controller is similar to that of establishing a main connection to the controller which was explained in the first recipe of this chapter. The IP address of the controller used by the switch to establish an auxiliary connection should be the same as that of the main connection. However auxiliary connections are not restricted to use the same transport protocols as those of the main connection. Depending on the configuration, the switch can use TCP, TLS, UDP or DTLS to establish auxiliary connections. When a switch detects that the main connection to a controller is closed or broken, it must close all its auxiliary connections to that controller immediately.

There's more…

The switch must accept any OpenFlow message types and sub-types on any connections. The main connection or an auxiliary connection cannot be restricted to a specific message type or sub-type. However, the processing performance of different connections may be different. The switch may choose to process the different auxiliary connections with different priorities; for example, one auxiliary connection may be dedicated to high priority requests and another may be dedicated to lower priority requests.

The OpenFlow specification provides some guidelines for sending and receiving messages in main and auxiliary connections, as follows:

  • All OpenFlow messages which are not Packet in should be sent over the main connection.
  • A Mechanism should be provided in the switch to keep track of the packet of the same flow mapped to the same connection, when there are multiple auxiliary connections between the switch and controller.
  • An OpenFlow switch which uses an unreliable auxiliary connection should follow recommendations specified in RFC 5405 wherever it is required. RFC 5405 provides guidelines on the usage of UDP protocol such as congestion control, message sizes, reliability, checksums, and middle box traversal, etc.
  • If the auxiliary connection from the switch is established in unreliable transport protocols like UDP and DTLS, then only the following message type should be supported to send /receive in an auxiliary connection:
    OFPT_HELLO
    OFPT_ERROR
    OFPT_ECHO_REQUEST
    OFPT_ECHO_REPLY
    OFPT_FEATURES_REQUEST
    OFPT_FEATURES_REPLY
    OFPT_PACKET_IN
    OFPT_PACKET_OUT
    OFPT_EXPERIMENTER

    Support to send and receive other message types should not be provided

  • After establishing the auxiliary connection over unreliable transport protocols, if the switch receives a first message other than OFPT_HELLO then the switch should either:
    • Assume the connection is set up properly and use the version number from that message or it must return an error message of the OFPET_BAD_REQUEST type with the code as OFPBRC_BAD_VERSION.
  • If the OpenFlow switch receives an error message with the error type OFPET_BAD_REQUEST and the code OFPBRC_BAD_VERSION on an unreliable auxiliary connection, then it must either send a new Hello message or terminate the unreliable auxiliary connection.
  • If the switch doesn't receive any message on an auxiliary connection after a chosen amount of time lower than 5 seconds, the switch must either send a new Hello message or terminate the unreliable auxiliary connection.

See also

  • For more information about establishing the main connection to the controller, refer to the Connection setup on TCP and TLS recipe of Chapter 1, OpenFlow Channel Connection Establishment (Part 2)

Handling a handshake message from the controller

The handshake messages (OFPT_FEATURES_REQUEST / OFPT_FEATURES_REPLY) are used by the controller to fetch the basic capabilities and features supported by the switch. The switch should respond with supported features via an OFPT_FEATURES_REPLY message.

Tip

The OFPT_FEATURES_REQUEST message should be sent from the controller once the connection setup is completed.

Getting started

To get the features supported by switch, the communication channel between the switch and controller should have been successfully established.

How to do it...

On reception of OFPT_FEATURES_REQUEST, the switch should prepare an OFPT_FEATURES_REPLY message and send the reply message to the controller.

The OFPT_FEATURES_REQUEST message sent from the controller doesn't contain any body other than the OpenFlow header which is defined in the OpenFlow Header section of the Appendix.

The format of OFPT_FEATURES_REPLY is as follows:

/* Switch features. */
struct ofp_switch_features {
struct ofp_header header;
uint64_t datapath_id; /* Datapath unique ID. The lower 48-bits are for a MAC address, while the upper 16-bits are implementer-defined. */
uint32_t n_buffers;  /* Max packets buffered at once. */
uint8_t n_tables;    /* Number of tables supported by datapath. */
uint8_t auxiliary_id;/* Identify auxiliary connections */
uint8_t pad[2];      /* Align to 64-bits. */
        /* Features. */
uint32_t capabilities; /* Bitmap of support "ofp_capabilities". */
uint32_t reserved;
};
How to do it...

Let's see the brief description of the image:

  • datapath_id: This field should be filled with datapath_id of the connection on which the switch receives this request message. Typically the datapath_id is a 64 bit variable wherein the lower 48 bits are assigned from the switch MAC address, while the top 16 bits are assigned based on the implementer's logic.
  • n_buffers: This field should be set with the maximum number of packets that can be buffered by the switch while sending packets to the controller using packet-in messages.
  • n_tables: This field should be set with the number of tables supported by the switch, each of which can have a different set of supported match fields, actions and number of entries.
  • auxiliary_id: This should be set to the auxiliary ID of the connection. For the main connection, this field value is zero, while the auxiliary connection has this field value as a non-zero value.

Based on the capability of the switch, it should set the bitmap with the following flag values:

/* Capabilities supported by the datapath. */
enum ofp_capabilities {
OFPC_FLOW_STATS = 1 << 0,    /* Value 1. Flow statistics. */
OFPC_TABLE_STATS = 1 << 1,   /* Value 2. Table statistics. */
OFPC_PORT_STATS = 1 << 2,    /* Value 4. Port statistics. */
OFPC_GROUP_STATS = 1 << 3,   /* Value 8. Group statistics. */
OFPC_IP_REASM = 1 << 5,      /* Value 16. Can reassemble IP fragments. */
OFPC_QUEUE_STATS = 1 << 6,   /* Value 32. Queue statistics. */
OFPC_PORT_BLOCKED = 1 << 8   /* Value 64. Switch will block looping ports. */
};

The procedure to handle the feature request message is as follows:

handle_features_request_message (struct ofp_header features_request)
{
  struct ofp_switch_features features_reply;
  features_reply.datapath_id = htonnl(datapath_id);
  features_reply.n_buffers = htonl(buffer_size);
  features_reply.n_tables = supported_no_of_flow_tables;
  features_reply.capabilities = htonl (OFPC_FLOW_STATS | OFPC_TABLE_STATS);
  features_reply.auxiliary_id = 0; /* Assuming main connection */
  send_openflow_message (connection, features_reply);
  /* The send_openflow_message function adds the OF header */
}

See also

  • For more information about sending the feature request message from the controller, refer to the Sending a handshake message to the switch recipe in Chapter 1, OpenFlow Channel Connection Establishment (Part 2)

Handling a switch configuration message from the controller

Switch configuration messages are used by the controller to set and get switch configuration parameters.

The Switch should be able to handle OFPT_SET_CONFIG and OFPT_GET_CONFIG messages from the controller and should reply back with OFPT_GET_CONFIG_REPLY messages to the controller.

Tip

OFPT_SET_CONFIG and OFPT_GET_CONFIG messages are sent from the controller to the switch whereas the OFPT_GET_CONFIG message is sent from the switch to the controller.

How to do it...

On reception of an OFPT_GET_CONFIG_REQUEST message, the switch should prepare an OFPT_GET_CONFIG_REPLY message and send it to the controller.

The OFPT_GET_CONFIG_REQUEST message doesn't contain a body other than an OpenFlow header which is defined in the OpenFlow Header section of the Appendix.

The OFPT_GET_CONFIG_REPLY message uses the following message format:

/* Switch configuration. */
struct ofp_switch_config {
struct ofp_header header;
uint16_t flags;           /* Bitmap of OFPC_* flags. */
uint16_t miss_send_len;   /* Max bytes of packet that datapath
                             should send to the controller.*/
};
How to do it...

The flags take the value as:

enum ofp_config_flags {
/* Handling of IP fragments. */
OFPC_FRAG_NORMAL = 0,     /* No special handling for fragments. */
OFPC_FRAG_DROP = 1 << 0,  /* Drop fragments. */
OFPC_FRAG_REASM = 1 << 1, /* Reassemble (only if OFPC_IP_REASM set). */
OFPC_FRAG_MASK = 3,
};

The value in miss_send_len should be set to the switch's current maximum bytes of data that will be sent to the controller while sending buffered packets. By default this value is 128 bits.

The flag value should be set to the configured value of the IP fragment detail.

On reception of OFPT_SET_CONFIG, which has the same message format as that of OFPT_GET_CONFIG_REPLY, the switch should set the value of miss_send_len and IP fragment related details.

Tip

The switch need not send a reply message to the OFPT_SET_CONFIG message.

The procedure to handle OFPT_GET_CONFIG_REQUEST is as follows;

handle_get_config_message (struct ofp_header get_config_request)
{
  struct ofp_switch_config config_reply;
  features_reply.flags = htons(supported_flags);
  features_reply.miss_send_len = 128; /* default value */
  send_openflow_message (connection, config_reply);
  /* The send_openflow_message function adds the OF header */
}

See also

  • For more information about sending the switch configuration message from the controller, refer to the Sending a switch configuration message to the switch recipe of Chapter 1, OpenFlow Channel Connection Establishment (Part 2)

Connection interruption procedures

The OpenFlow switch should maintain the connectivity to all controllers.If for any reason the switch loses the connection to all configured controllers, then the switch should follow the procedure defined in this section.

How to do it...

If a switch loses its connection with all the connected or configured controllers, then the switch should immediately enter either fail secure mode or fail standalone mode depending upon the switch configuration or implementation. The connection loss can be identified by either OpenFlow echo request timeouts or TLS session timeouts or other disconnection procedures such as TCP socket close, etc.

How it works...

When the switch is in fail secure mode, the switch should drop all the packets and messages destined to controllers. However, all the flow entries programmed by the controller should persist in the switch and expire based on the configured timeout value in fail secure mode.

The fail standalone mode is usually possible only on Hybrid switches. When a switch is in fail standalone mode, the switch should act as a legacy Ethernet switch or router and should process all the packets.

There's more…

Upon connecting to a controller again, the existing flow entries remain intact. The controller can delete all the existing flow entries, if desired. The switch can be configured to start up with the operational mode either as fail secure mode or fail standalone mode until it successfully connects to a controller.

Left arrow icon Right arrow icon
Download code icon Download Code

Description

This book is intended for network protocol developers, SDN controller application developers, and academics who would like to understand and develop their own OpenFlow switch or OpenFlow controller in any programming language. With basic understanding of OpenFlow and its components, you will be able to follow the recipes in this book.

Who is this book for?

This book is intended for network protocol developers, SDN controller application developers, and academics who would like to understand and develop their own OpenFlow switch or OpenFlow controller in any programming language. With basic understanding of OpenFlow and its components, you will be able to follow the recipes in this book.

What you will learn

  • Create, maintain, and close an OpenFlow communication channel between the switch and controller
  • Manage multiple switches from a single controller and vice versa: manage a single switch from multiple controllers with different controller roles
  • Configure an OpenFlow switch using standard OpenFlow controller and switch procedures
  • Explore tables present in OpenFlow switches such as flow tables, group tables, and meter tables
  • Using controller and switch procedures, program tables within the switch, such as flow tables, group tables, and meter tables
Estimated delivery fee Deliver to United States

Economy delivery 10 - 13 business days

Free $6.95

Premium delivery 6 - 9 business days

$21.95
(Includes tracking information)

Product Details

Country selected
Publication date, Length, Edition, Language, ISBN-13
Publication date : Apr 30, 2015
Length: 292 pages
Edition : 1st
Language : English
ISBN-13 : 9781783987948

What do you get with Print?

Product feature icon Instant access to your digital copy whilst your Print order is Shipped
Product feature icon Paperback book shipped to your preferred address
Product feature icon Redeem a companion digital copy on all Print orders
Product feature icon Access this title in our online reader with advanced features
Product feature icon DRM FREE - Read whenever, wherever and however you want
Modal Close icon
Payment Processing...
tick Completed

Shipping Address

Billing Address

Shipping Methods
Estimated delivery fee Deliver to United States

Economy delivery 10 - 13 business days

Free $6.95

Premium delivery 6 - 9 business days

$21.95
(Includes tracking information)

Product Details

Publication date : Apr 30, 2015
Length: 292 pages
Edition : 1st
Language : English
ISBN-13 : 9781783987948

Packt Subscriptions

See our plans and pricing
Modal Close icon
$19.99 billed monthly
Feature tick icon Unlimited access to Packt's library of 7,000+ practical books and videos
Feature tick icon Constantly refreshed with 50+ new titles a month
Feature tick icon Exclusive Early access to books as they're written
Feature tick icon Solve problems while you work with advanced search and reference features
Feature tick icon Offline reading on the mobile app
Feature tick icon Simple pricing, no contract
$199.99 billed annually
Feature tick icon Unlimited access to Packt's library of 7,000+ practical books and videos
Feature tick icon Constantly refreshed with 50+ new titles a month
Feature tick icon Exclusive Early access to books as they're written
Feature tick icon Solve problems while you work with advanced search and reference features
Feature tick icon Offline reading on the mobile app
Feature tick icon Choose a DRM-free eBook or Video every month to keep
Feature tick icon PLUS own as many other DRM-free eBooks or Videos as you like for just $5 each
Feature tick icon Exclusive print discounts
$279.99 billed in 18 months
Feature tick icon Unlimited access to Packt's library of 7,000+ practical books and videos
Feature tick icon Constantly refreshed with 50+ new titles a month
Feature tick icon Exclusive Early access to books as they're written
Feature tick icon Solve problems while you work with advanced search and reference features
Feature tick icon Offline reading on the mobile app
Feature tick icon Choose a DRM-free eBook or Video every month to keep
Feature tick icon PLUS own as many other DRM-free eBooks or Videos as you like for just $5 each
Feature tick icon Exclusive print discounts

Frequently bought together


Stars icon
Total $ 150.97
Learning Docker
$57.99
OpenStack Essentials
$34.99
OpenFlow Cookbook
$57.99
Total $ 150.97 Stars icon

Table of Contents

16 Chapters
1. OpenFlow Channel Connection Establishment (Part 1) Chevron down icon Chevron up icon
1. OpenFlow Channel Connection Establishment (Part 2) Chevron down icon Chevron up icon
2. Symmetric Messages and Asynchronous Messages (Part 1) Chevron down icon Chevron up icon
2. Symmetric Messages and Asynchronous Messages (Part 2) Chevron down icon Chevron up icon
3. Flow Table and Flow Entry Modification Messages (Part 1) Chevron down icon Chevron up icon
3. Flow Table and Flow Entry Modification Messages (Part 2) Chevron down icon Chevron up icon
4. Group Table and Meter Table Modification Messages (Part 1) Chevron down icon Chevron up icon
4. Group Table and Meter Table Modification Messages (Part 2) Chevron down icon Chevron up icon
5. Handling Multipart Statistics Messages (Part 1) Chevron down icon Chevron up icon
5. Handling Multipart Statistics Messages (Part 2) Chevron down icon Chevron up icon
6. Handling Multipart State Information Messages (Part 1) Chevron down icon Chevron up icon
6. Handling Multipart State Information Messages (Part 2) Chevron down icon Chevron up icon
7. Handling Bundle Messages (Part 1) Chevron down icon Chevron up icon
7. Handling Bundle Messages (Part 2) Chevron down icon Chevron up icon
A. Common OpenFlow Headers, Structures, and Error Code Chevron down icon Chevron up icon
Index Chevron down icon Chevron up icon

Customer reviews

Rating distribution
Full star icon Full star icon Full star icon Full star icon Half star icon 4.5
(4 Ratings)
5 star 50%
4 star 50%
3 star 0%
2 star 0%
1 star 0%
CS Jul 03, 2015
Full star icon Full star icon Full star icon Full star icon Full star icon 5
Wonderful recepies, easy to implement. Would highly recommend.
Amazon Verified review Amazon
Broken watch May 28, 2015
Full star icon Full star icon Full star icon Full star icon Full star icon 5
This is a very useful reference to have to hand when working with Openflow on merchant silicon switches. It also very usefully complements the introductory book by Azodolmolky - Software Defined Networking with OpenFlow.
Amazon Verified review Amazon
Szymon Jul 14, 2015
Full star icon Full star icon Full star icon Full star icon Empty star icon 4
At first, I was hoping that this book will act as a easier to read version of OpenFlow documentation. I hoped that it will present some examples by analogy to many of OF features. When I read first few chapters I had a moment of lack of faith. This book did not meet my expectations nor my needs at all. But (thankfully) since I have spent some money on it, I have decided to read on.After further reading I can say that if you want to have an overall knowledge on OpenFlow - read the official documentation ... but if you are planning on implementing some OpenFlow logic to a switch or a southbound plugin to a controller - grab this book. It may help.Each chapter of this book is written with use of the same template. This is extremely boring to read, but thanks to this, even if you will jump in into a chapter in the middle of the book, you will know where to look for information you need.In overall, this is not a book that I expected to be, but I can say that I am happy that I have read it.
Amazon Verified review Amazon
Chris Everett Jul 03, 2015
Full star icon Full star icon Full star icon Full star icon Empty star icon 4
Great recipies that helps one develop in OpenFlow switch and OpenFlow controller. Manage multiple switches from a single controller and a single switch from multiple controllers with different controller roles. Would recommend it to network protocol developers & SDN controller application developers.
Amazon Verified review Amazon
Get free access to Packt library with over 7500+ books and video courses for 7 days!
Start Free Trial

FAQs

What is the digital copy I get with my Print order? Chevron down icon Chevron up icon

When you buy any Print edition of our Books, you can redeem (for free) the eBook edition of the Print Book you’ve purchased. This gives you instant access to your book when you make an order via PDF, EPUB or our online Reader experience.

What is the delivery time and cost of print book? Chevron down icon Chevron up icon

Shipping Details

USA:

'

Economy: Delivery to most addresses in the US within 10-15 business days

Premium: Trackable Delivery to most addresses in the US within 3-8 business days

UK:

Economy: Delivery to most addresses in the U.K. within 7-9 business days.
Shipments are not trackable

Premium: Trackable delivery to most addresses in the U.K. within 3-4 business days!
Add one extra business day for deliveries to Northern Ireland and Scottish Highlands and islands

EU:

Premium: Trackable delivery to most EU destinations within 4-9 business days.

Australia:

Economy: Can deliver to P. O. Boxes and private residences.
Trackable service with delivery to addresses in Australia only.
Delivery time ranges from 7-9 business days for VIC and 8-10 business days for Interstate metro
Delivery time is up to 15 business days for remote areas of WA, NT & QLD.

Premium: Delivery to addresses in Australia only
Trackable delivery to most P. O. Boxes and private residences in Australia within 4-5 days based on the distance to a destination following dispatch.

India:

Premium: Delivery to most Indian addresses within 5-6 business days

Rest of the World:

Premium: Countries in the American continent: Trackable delivery to most countries within 4-7 business days

Asia:

Premium: Delivery to most Asian addresses within 5-9 business days

Disclaimer:
All orders received before 5 PM U.K time would start printing from the next business day. So the estimated delivery times start from the next day as well. Orders received after 5 PM U.K time (in our internal systems) on a business day or anytime on the weekend will begin printing the second to next business day. For example, an order placed at 11 AM today will begin printing tomorrow, whereas an order placed at 9 PM tonight will begin printing the day after tomorrow.


Unfortunately, due to several restrictions, we are unable to ship to the following countries:

  1. Afghanistan
  2. American Samoa
  3. Belarus
  4. Brunei Darussalam
  5. Central African Republic
  6. The Democratic Republic of Congo
  7. Eritrea
  8. Guinea-bissau
  9. Iran
  10. Lebanon
  11. Libiya Arab Jamahriya
  12. Somalia
  13. Sudan
  14. Russian Federation
  15. Syrian Arab Republic
  16. Ukraine
  17. Venezuela
What is custom duty/charge? Chevron down icon Chevron up icon

Customs duty are charges levied on goods when they cross international borders. It is a tax that is imposed on imported goods. These duties are charged by special authorities and bodies created by local governments and are meant to protect local industries, economies, and businesses.

Do I have to pay customs charges for the print book order? Chevron down icon Chevron up icon

The orders shipped to the countries that are listed under EU27 will not bear custom charges. They are paid by Packt as part of the order.

List of EU27 countries: www.gov.uk/eu-eea:

A custom duty or localized taxes may be applicable on the shipment and would be charged by the recipient country outside of the EU27 which should be paid by the customer and these duties are not included in the shipping charges been charged on the order.

How do I know my custom duty charges? Chevron down icon Chevron up icon

The amount of duty payable varies greatly depending on the imported goods, the country of origin and several other factors like the total invoice amount or dimensions like weight, and other such criteria applicable in your country.

For example:

  • If you live in Mexico, and the declared value of your ordered items is over $ 50, for you to receive a package, you will have to pay additional import tax of 19% which will be $ 9.50 to the courier service.
  • Whereas if you live in Turkey, and the declared value of your ordered items is over € 22, for you to receive a package, you will have to pay additional import tax of 18% which will be € 3.96 to the courier service.
How can I cancel my order? Chevron down icon Chevron up icon

Cancellation Policy for Published Printed Books:

You can cancel any order within 1 hour of placing the order. Simply contact customercare@packt.com with your order details or payment transaction id. If your order has already started the shipment process, we will do our best to stop it. However, if it is already on the way to you then when you receive it, you can contact us at customercare@packt.com using the returns and refund process.

Please understand that Packt Publishing cannot provide refunds or cancel any order except for the cases described in our Return Policy (i.e. Packt Publishing agrees to replace your printed book because it arrives damaged or material defect in book), Packt Publishing will not accept returns.

What is your returns and refunds policy? Chevron down icon Chevron up icon

Return Policy:

We want you to be happy with your purchase from Packtpub.com. We will not hassle you with returning print books to us. If the print book you receive from us is incorrect, damaged, doesn't work or is unacceptably late, please contact Customer Relations Team on customercare@packt.com with the order number and issue details as explained below:

  1. If you ordered (eBook, Video or Print Book) incorrectly or accidentally, please contact Customer Relations Team on customercare@packt.com within one hour of placing the order and we will replace/refund you the item cost.
  2. Sadly, if your eBook or Video file is faulty or a fault occurs during the eBook or Video being made available to you, i.e. during download then you should contact Customer Relations Team within 14 days of purchase on customercare@packt.com who will be able to resolve this issue for you.
  3. You will have a choice of replacement or refund of the problem items.(damaged, defective or incorrect)
  4. Once Customer Care Team confirms that you will be refunded, you should receive the refund within 10 to 12 working days.
  5. If you are only requesting a refund of one book from a multiple order, then we will refund you the appropriate single item.
  6. Where the items were shipped under a free shipping offer, there will be no shipping costs to refund.

On the off chance your printed book arrives damaged, with book material defect, contact our Customer Relation Team on customercare@packt.com within 14 days of receipt of the book with appropriate evidence of damage and we will work with you to secure a replacement copy, if necessary. Please note that each printed book you order from us is individually made by Packt's professional book-printing partner which is on a print-on-demand basis.

What tax is charged? Chevron down icon Chevron up icon

Currently, no tax is charged on the purchase of any print book (subject to change based on the laws and regulations). A localized VAT fee is charged only to our European and UK customers on eBooks, Video and subscriptions that they buy. GST is charged to Indian customers for eBooks and video purchases.

What payment methods can I use? Chevron down icon Chevron up icon

You can pay with the following card types:

  1. Visa Debit
  2. Visa Credit
  3. MasterCard
  4. PayPal
What is the delivery time and cost of print books? Chevron down icon Chevron up icon

Shipping Details

USA:

'

Economy: Delivery to most addresses in the US within 10-15 business days

Premium: Trackable Delivery to most addresses in the US within 3-8 business days

UK:

Economy: Delivery to most addresses in the U.K. within 7-9 business days.
Shipments are not trackable

Premium: Trackable delivery to most addresses in the U.K. within 3-4 business days!
Add one extra business day for deliveries to Northern Ireland and Scottish Highlands and islands

EU:

Premium: Trackable delivery to most EU destinations within 4-9 business days.

Australia:

Economy: Can deliver to P. O. Boxes and private residences.
Trackable service with delivery to addresses in Australia only.
Delivery time ranges from 7-9 business days for VIC and 8-10 business days for Interstate metro
Delivery time is up to 15 business days for remote areas of WA, NT & QLD.

Premium: Delivery to addresses in Australia only
Trackable delivery to most P. O. Boxes and private residences in Australia within 4-5 days based on the distance to a destination following dispatch.

India:

Premium: Delivery to most Indian addresses within 5-6 business days

Rest of the World:

Premium: Countries in the American continent: Trackable delivery to most countries within 4-7 business days

Asia:

Premium: Delivery to most Asian addresses within 5-9 business days

Disclaimer:
All orders received before 5 PM U.K time would start printing from the next business day. So the estimated delivery times start from the next day as well. Orders received after 5 PM U.K time (in our internal systems) on a business day or anytime on the weekend will begin printing the second to next business day. For example, an order placed at 11 AM today will begin printing tomorrow, whereas an order placed at 9 PM tonight will begin printing the day after tomorrow.


Unfortunately, due to several restrictions, we are unable to ship to the following countries:

  1. Afghanistan
  2. American Samoa
  3. Belarus
  4. Brunei Darussalam
  5. Central African Republic
  6. The Democratic Republic of Congo
  7. Eritrea
  8. Guinea-bissau
  9. Iran
  10. Lebanon
  11. Libiya Arab Jamahriya
  12. Somalia
  13. Sudan
  14. Russian Federation
  15. Syrian Arab Republic
  16. Ukraine
  17. Venezuela
Modal Close icon
Modal Close icon