


 Download code from GitHub
Chapter 2: Setting Up Photoshop Elements from Scratch
If you are new to Photoshop Elements, then this is the chapter for you. Here, we'll be looking at how to set up your camera, computer, monitor, data storage, and media backup—all of which are vitally important steps toward developing the perfect editing workflow. Getting your setup correct from the outset will enable you to plunge straight into the learning process without having to waste time renaming files or folders, go looking for lost images, or worse, losing materials because it never occurred to you to back up your original files in a timely fashion.
This chapter also discusses how to import your media, how to back it up safely, plus how to start sorting through the thousands of images in your collection using a terrific range of organizational tools, such as keyword Tags, Star ratings, Events, People, and Places (GPS).
And even if you are not new to Elements, take some time here to check that your camera settings, screen calibration, photo import, and backup workflow are optimized. You never know, this might save you a lot of grief later on.
What you'll learn in this chapter:
- Setting up a photo editing computer
- Importing media into the Organizer
- Reviewing Media
- Media Backup
- Star rating your photos
- Search for pictures using metadata
- Organizing your work: Keyword tags
- Organizing your work: Places
- Organizing your work: Events
- Organizing your work: People
- File formats: JPEG and RAW
- File format characteristics
- Managing Catalogs
- Color spaces
- Color management
- Screen and printer calibration
Setting up a photo editing computer
Although we take the multiuse characteristic of computers for granted these days, using such a machine to store, process, and edit high-resolution stills and video data requires a totally different set of features compared to a machine that's only used for web browsing, social media, emailing, or downloading music.
Although the compatibility of Windows and Mac computers used to be very minimal, their operating systems are now far more user-friendly, both in the way third-party hardware interacts (such as external drives) and in that most software is now shared between the two systems.
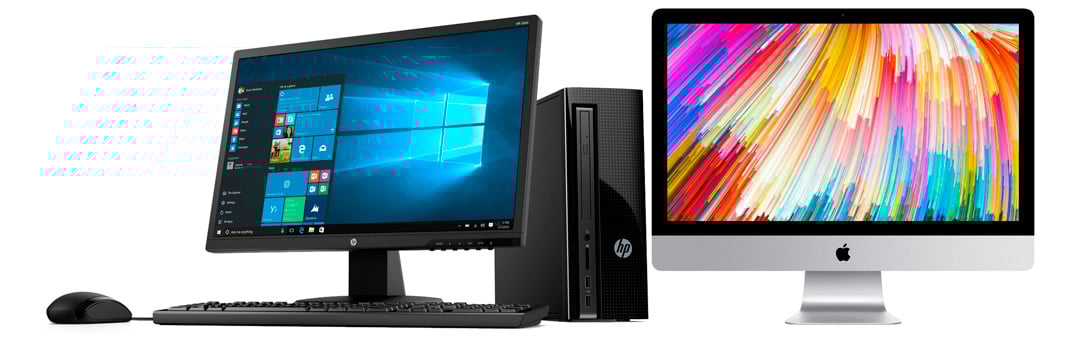
Operating system wars: Is there really a difference between running Elements on a Windows or Mac computer? The answer to this question can get you into a lot of hot water, depending on the technical leaning of the person being asked. I have used Windows and Mac desktops and laptops for a long time and find that, when editing images, there's really no big difference in performance between the two operating systems. In the early years, Elements was a different application on a Mac because Adobe was in contention with Apple over iPhoto (being the default image browser), but that's all sorted now. Macs are certainly beautifully designed, but provided that you have the same processing power, RAM chips, graphics card, and screen resolution set, you'd be hard-pushed to pick out any real performance difference. However, you will experience a significant cost difference between the two platforms. Macs have always sold at a premium compared to Windows gear.
An imaging computer needs to have a very fast processor (the central processing unit (CPU)). This is the bit that does all the calculations. A computer with one of the latest CPU chips installed will certainly future-proof your investment for several years to come. That said, I don't advise you to purchase the very latest technology, simply because you'll pay an absolute premium for it without necessarily gaining a commensurate speed advantage. Such is the downside of being an early adopter.
It's better to buy something that is just about to be replaced—which means it might only be five months old—and spend the cash saved on installing additional memory (also called random access memory or RAM). The more memory installed, the more images, video clips, and applications you can have running at the same time without the computer visibly struggling. I'd recommend at least 16 GB of RAM to start with, and more if you can afford it.
Currently, screen resolutions are impressively high, with 4K (3,840 x 2,160 pixels) and now 5K (5,120 x 2,880 pixels) curved and flat screens becoming the norm. A flat screen is best for your imaging needs. Curved screens certainly appear tempting but, because of their shape, will never give accurate feedback when trying to adjust characteristics such as proportion and perspective. The size of the screen you have is also partially dictated by the capability of the computer's graphics card. That said, most preinstalled graphics cards are powerful and easily capable of running a very high-resolution 4K or 5K screen, and in many models, even two screens at the same time.

Monitor quality: The best image editing computer monitors are made by Eizo—these have superb edge-to-edge brightness, are easily (color-) calibrated, come with a hood, and produce reliable, accurate color. They are expensive, so are only practical if you plan on running a business. If you want to save some money, look at buying a monitor from Dell, BenQ, or even LG, three companies that produce pretty good display products that are considerably more affordable.
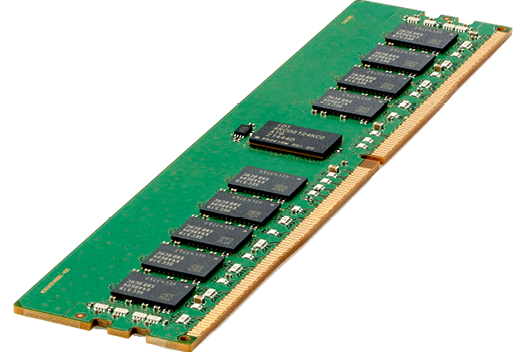
Most computers sold off the shelf contain the minimum amount of RAM to keep the cost down. For maximum performance, it pays to top up the RAM, either at the point of purchase, or later, where you might save money buying it from a local computer shop or online. Increasing the amount of RAM significantly improves computer performance—even in an old computer it can be hugely beneficial—almost giving it a new lease of life (note that not all Mac models can be upgraded so check with a professional first).
If it's an entry-level video card not suited to a high-resolution output, you might encounter a lot of onscreen flickering, which can be quite disturbing. Check carefully before you buy.
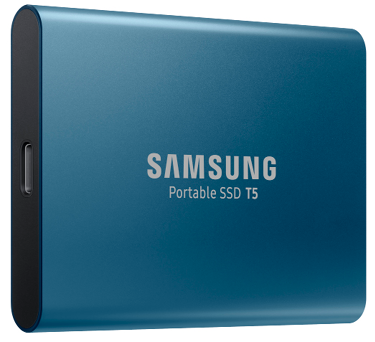
Small but sweet—SSDs: For absolute speed freaks, solid state drives (SSDs) are the best option—both as an internal drive in your Windows or Mac and also as an external option. Expensive and not as high in capacity as their older SATA drive companions, SSDs are small and light, require no additional power, and are incredibly fast.
Then there is the very real problem of storage. Most photographers are prolific shooters and, with consumer camera resolutions generally passing the 25 megapixel mark at present, it won't take long to fill the computer's hard drive with media.
My advice is always to use a desktop computer, Windows or Mac, because, though large and bulky, they are significantly cheaper than laptops.
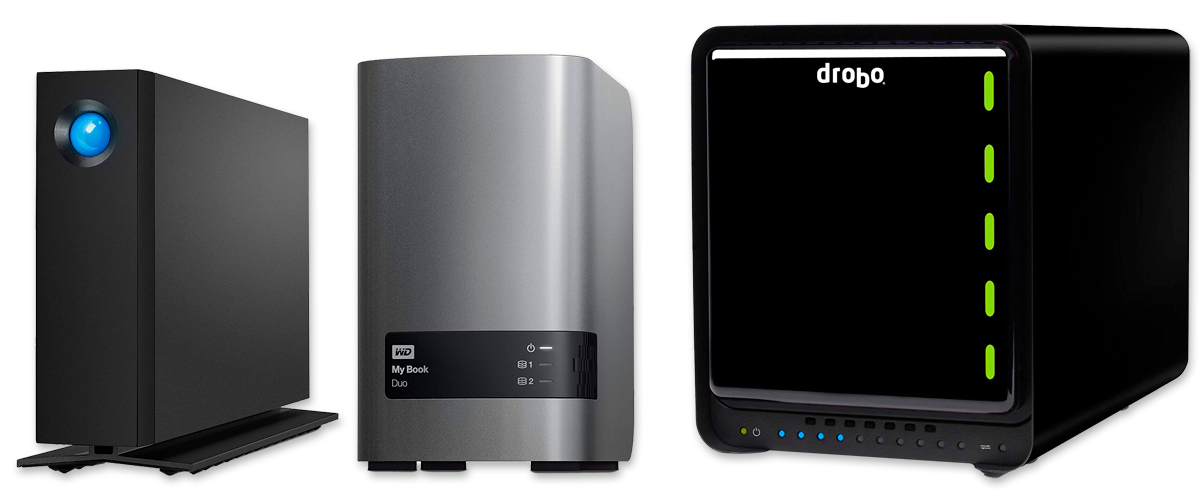
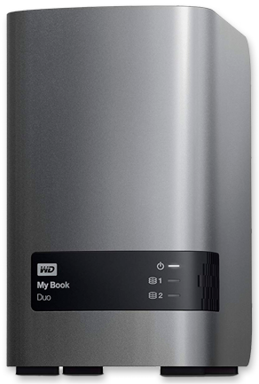
Removable desktop hard drives: The device on the left is a single hard drive unit from LaCie (the company has a unique Porsche-style design for its products). A single drive, such as this 6 TB model, would suit most beginners. The Western Digital My Book Duo, shown in the middle, is a RAID drive containing two hard drive units in the one box. This offers a mirroring feature, where it backs up two copies of everything, or it can be programmed for extreme speed if this is needed. The unit on the right is by a company called Drobo—this is another RAID storage-style drive suited for heavy users. Drobo claim its drives are significantly smarter than standard RAID drives (RAID technology has been around for more than two decades), providing sophisticated backup for professional image makers and small businesses. The idea behind this type of system is that it is integral to your workflow and can grow with your requirements. A device such as this is a must if you are starting your own imaging business.
Apart from that, their size (notably for Windows PCs) permits the addition of further internal hard drives when more storage is needed and even the upgrading of internal components, such as video cards and motherboards for improved performance. Mac desktop computers are a little harder to upgrade internally, partly because of their design, and partly because, if you do, you might void your warranty.
Desktop hard drives are the perfect way to keep up to date with backups—they are relatively inexpensive for the capacity offered, and if one fills up, it's easy enough to buy another. There are a number of excellent devices currently available from Seagate, LaCie, and Western Digital, to name a few.
Best practice is to install just your operating system and software applications onto the computer's hard drive. Everything else—photos, music, and video—is saved to an external hard drive, or drives. That way, your computer can run at its optimum level, while accessing your photo library on an external drive. Once that external drive is full, it's simple enough to carry on with a second, or even a third, external hard drive.
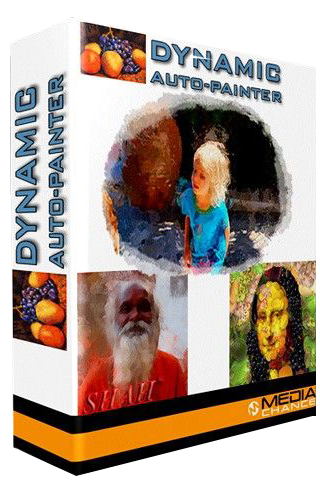
Other software: I appreciate suggesting "other" photo editing software is not a favorable thing to do in a book written about Photoshop Elements. But in fact there are many other software apps on the market that can do certain things, such as HDR (high dynamic range) image making, far, far better than Elements. To give you an idea, three products come to mind that will extend your image making capabilities significantly:
HDR: Aurora HDR Professional (by Skylum)
Painterly effects: Dynamic Auto Painter (by MediaChance)
Best plugin range: JixiPix
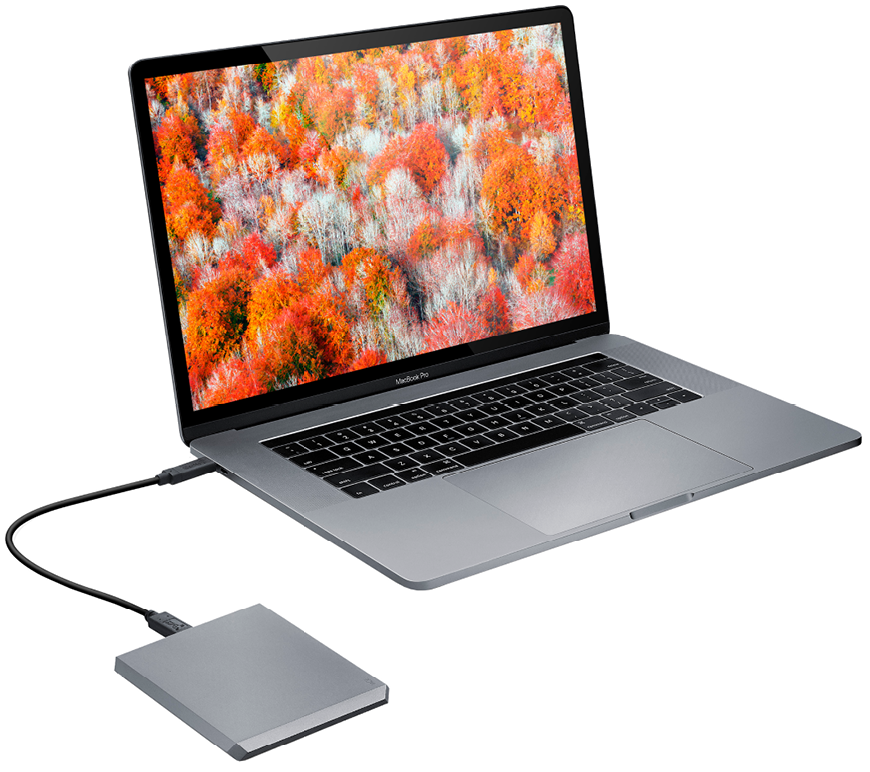
Laptop issues: If you absolutely have to use a laptop (and a lot of photographers are entirely mobile these days), this is also a good option, although its storage space, computing power (CPU), and screen size will all be compromised unless you spend a lot of money. One answer is to buy several external storage drives and a large desktop screen that can be hooked up to the laptop when you are working locally in the home office.
Laptops are designed to be lightweight and compact, so there's never much storage space in them for all your files. Typically, we would buy a portable USB-powered hard drive for backups while traveling. Once home, it might make better sense to transfer all your work from the USB-powered hard drive to a physically larger desktop drive—these are usually cheaper, have a far greater data capacity, and are (mostly) more reliable.
Importing media into the Elements Organizer
As mentioned in Chapter 1, Photoshop Elements Features Overview, when images are imported into the Elements Organizer, they are not physically copied into the application; they are just linked from the place where they are stored (typically, this is the Pictures folder) in the Organizer. Should Elements or your computer develop a technical issue and you have to delete and reinstall the application, you just need to reinstate the catalog from the backup version, and it automatically re-links all files. Sometimes, it's necessary to actually point the program to the hard drive where the images are stored, but as often as not, Elements will search and find every image that was previously linked in the catalog. It's a clever program.
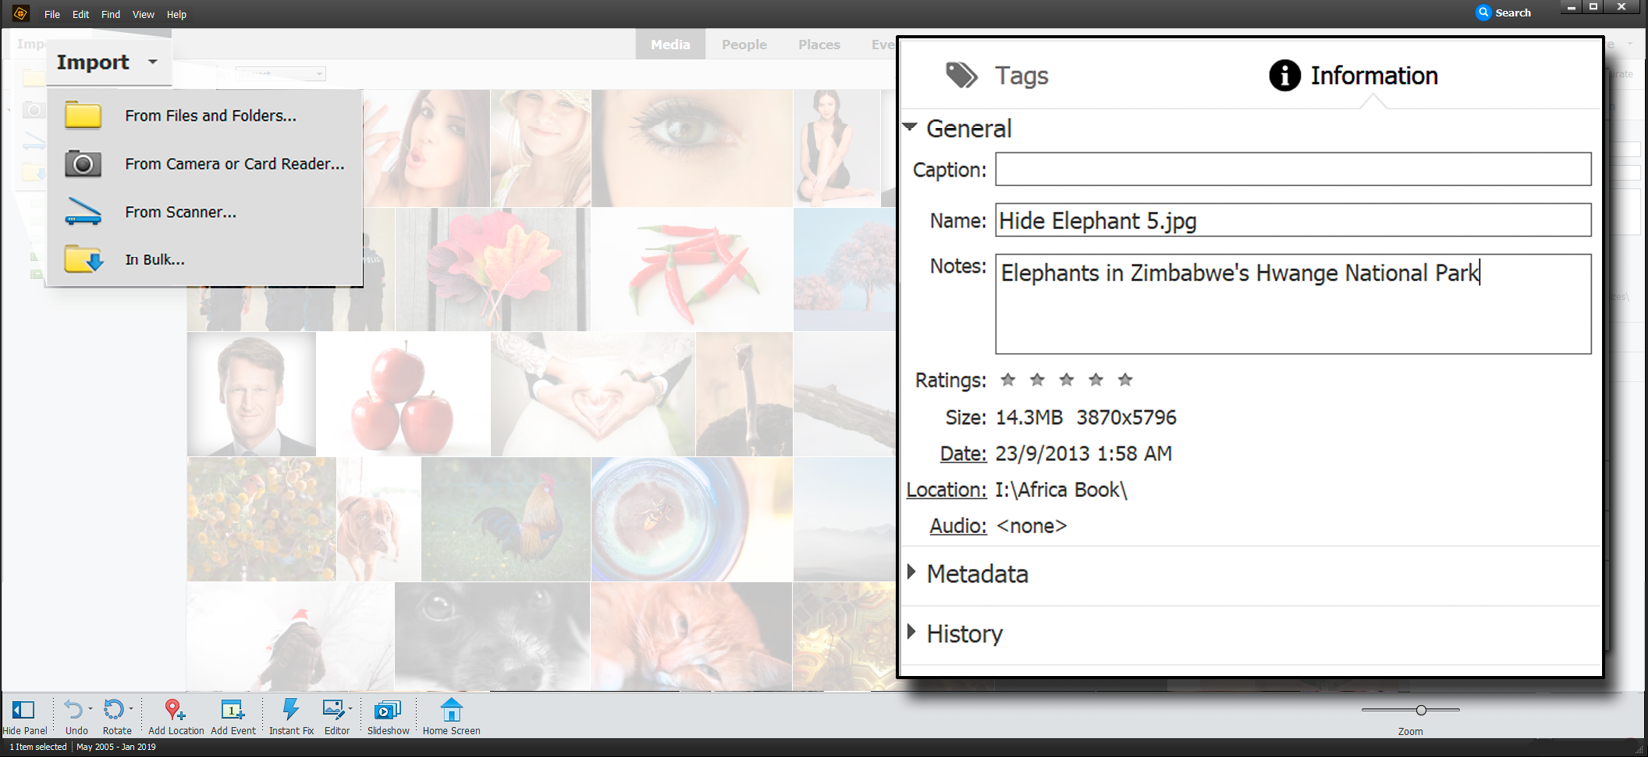
Import: Using the Import button (in the top left-hand corner in the Organizer), you can bring images, audio, or video clips into the Elements Organizer directly using the From Files and Folders... option. These files can physically reside anywhere—locally, on the computer, or externally on a drive. There are also options to import files directly from a camera or a card reader, or in bulk from pre-organized folders. The panel on the right-hand side of the main window holds both keyword and metadata information about each file. Click the small Keyword/Info button in the lower right-hand corner of the main screen to open/close this panel.
Because of this linking process, it's not advisable to rename or move files that have already been imported into Elements. If files are moved or renamed using the Windows Explorer or Mac's Finder, the next time Elements starts, it will prompt you that the file is missing and immediately start a search for the file. This is fine if the name remains the same, but if it has a new name, it will have to be re-imported. You can leave Elements to complete the search, or do it yourself, if you know where the file was moved to. How long Elements takes to locate a moved file depends on how big your photo collection is.
The import process is fast because Elements only copies thumbnails and the metadata (essentially text) when it forms a link to the original files. So, to avoid wasting time searching for files that have been renamed or moved after they were imported into the Organizer, it makes sense to sort out the storage hierarchy on the computer or external drives before importing to the application.
We all have different ways with which to organize our busy photographic lives. Some prefer to store files by date, while others prefer to name everything according to events in their lives. There's no right or wrong way to do this. The best method is the one that you are going to remember.
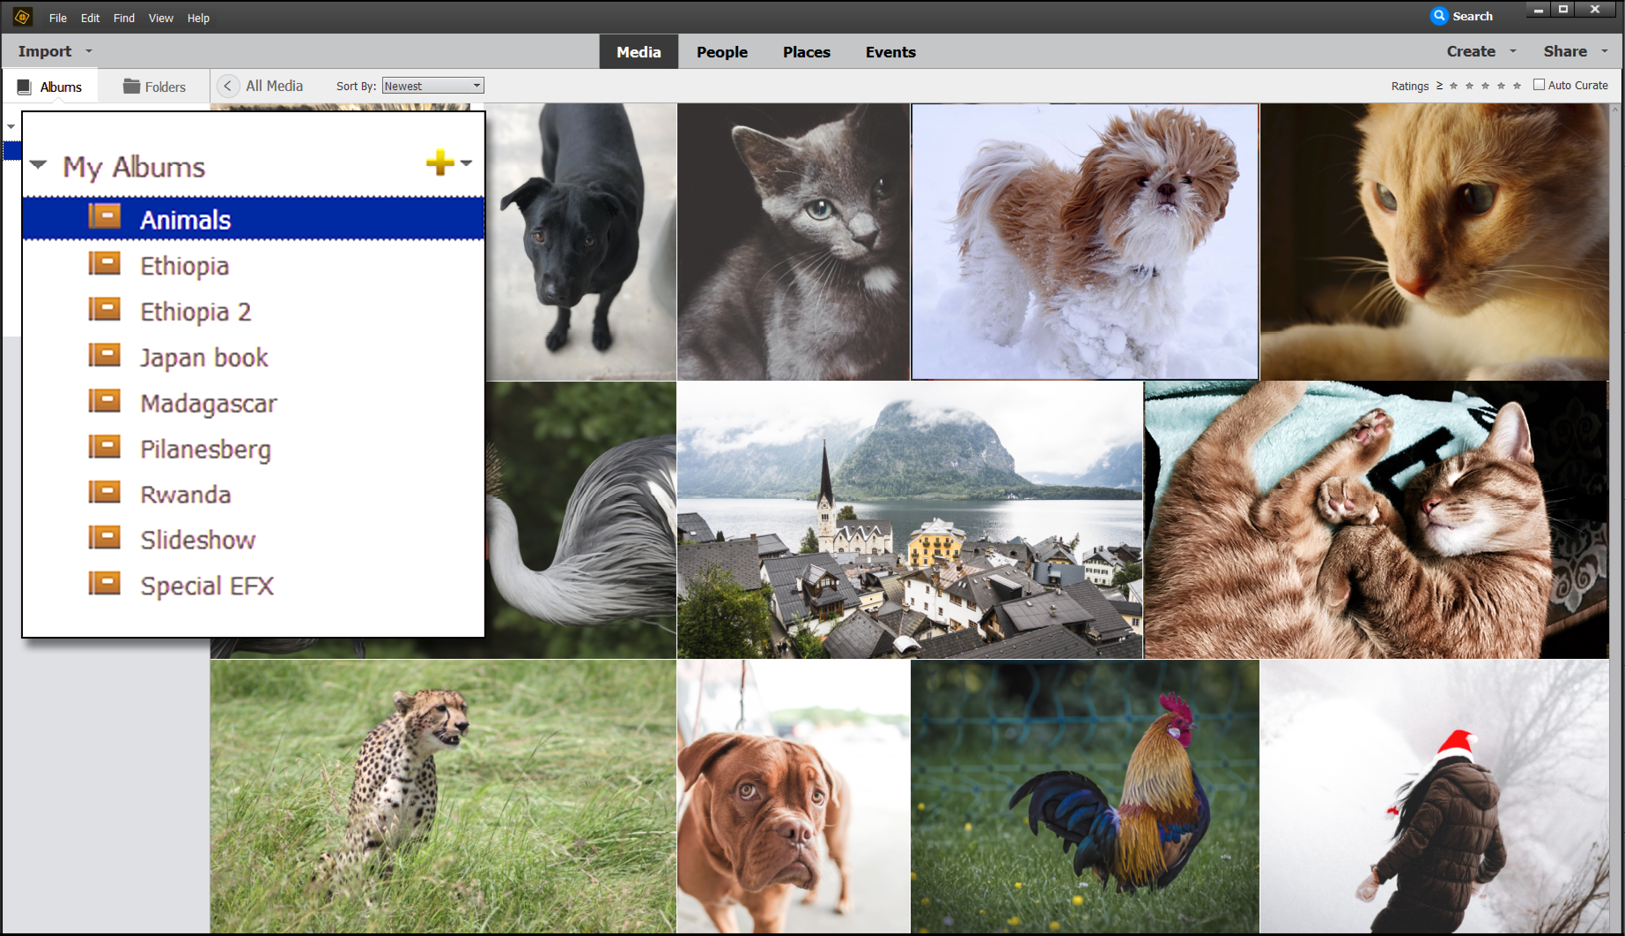
Making albums: In this screenshot, I have created an album called Animals. Selecting the album on the left-hand side of the window will display the contents of that album in the main window. As with most features in Elements, an album can be renamed at any time. The huge advantage of creating albums, apart from enabling you to easily compartmentalize your work into smaller, more practical collections, is that you can have the same image or images in multiple albums without increasing the space taken up on the storage drive.
Tip:
Before you import a second batch of images, it makes sense to sort out the first batch, because if you continue to import folder after folder of images, before long, you'll have thousands displayed in the main screen, and that can get very confusing. Once imported into the Organizer, you can see exactly where on your hard drives those imported files reside through the Folders menu in the left-hand bin.
That said, there are basic rules I can suggest that will make the editing process flow better:
- Download and organize your files into pre-made folders as often as you can. If you download on a regular basis, it will help you keep abreast of the Elements imports and will also ensure that you don't accidentally overwrite files on a camera memory card.
- Always add keyword tags to freshly imported files. The longer you leave organizing your work, the more confusing it gets.
- Divide your images into events—these might be "work," "trips," "family," "weekends away," and so on. Create an album for each big trip, an album for a conference, an album for the kids' birthdays, and so on. These are essentially virtual folders that are used for compartmentalizing image files inside Photoshop Elements. Dragging image thumbnails to populate these albums doesn't alter the location of the originals.
- Use keywords, tags, and star ratings to help you sort images into a sense of order that you can work with (I particularly like ranking images according to keywords and the star attribute hierarchy because they are easy to do).
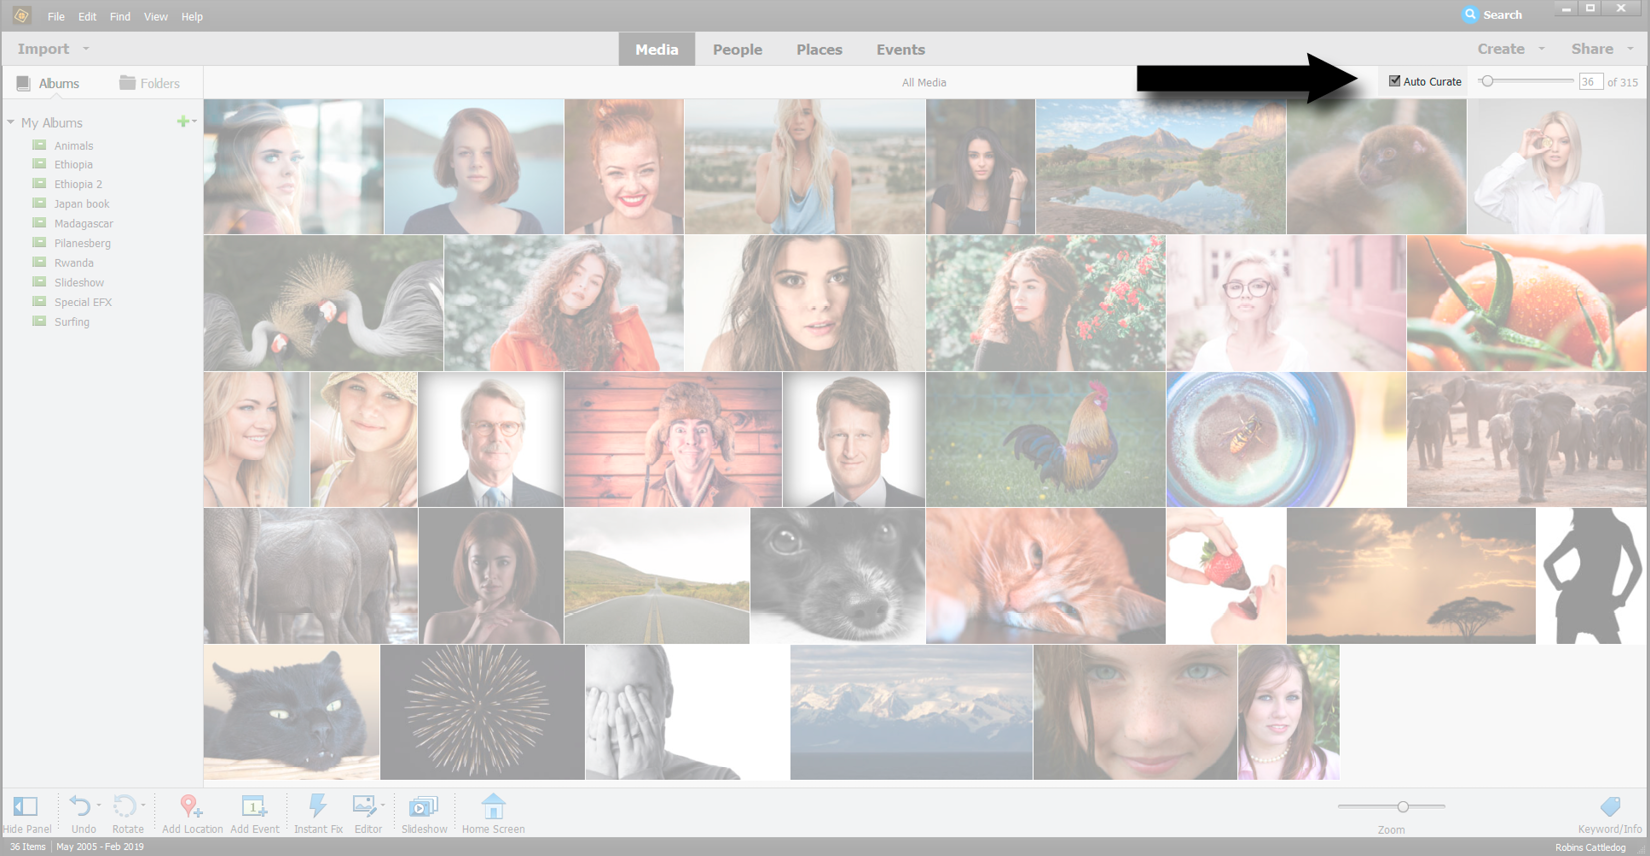
Auto Curate: Photoshop Elements has a number of quite powerful but often overlooked features—including this one, called Auto Curate, arrowed, top right of screen, which picks the top 500 images from the Organizer. The results might surprise you. With your media displayed in the main window, check the Auto Curate box and watch as Elements finds 50 of the best images from anything up to 20,000 images (according to Adobe). As I think most of the images in my test media are good anyway, it's a mystery how it finds 50 (or any number you choose) of the best. Nonetheless, this is worth a look for a quick, frustration-free selection.
- Give everything a proper name once it is edited
- As new images appear in the Organizer, they show up in the main window as thumbnails. Make the thumbnails bigger/smaller using the zoom slider at the bottom right-hand side of the screen. Use the edge-of-screen sliders to scroll down the page to see more thumbnails, or just use the up/down keyboard arrows.
- All the details of this filing system (albums, tags, keywords, thumbnails, original files, and so on) are part of the Elements catalog, which is something that needs backing up to a location different to where the original files are stored.
Some photographers prefer to divide image collections into multiple catalogs. For example, wedding photographers might have a separate catalog for each client. For most of us, one catalog is enough because you can only open one catalog at a time anyway.
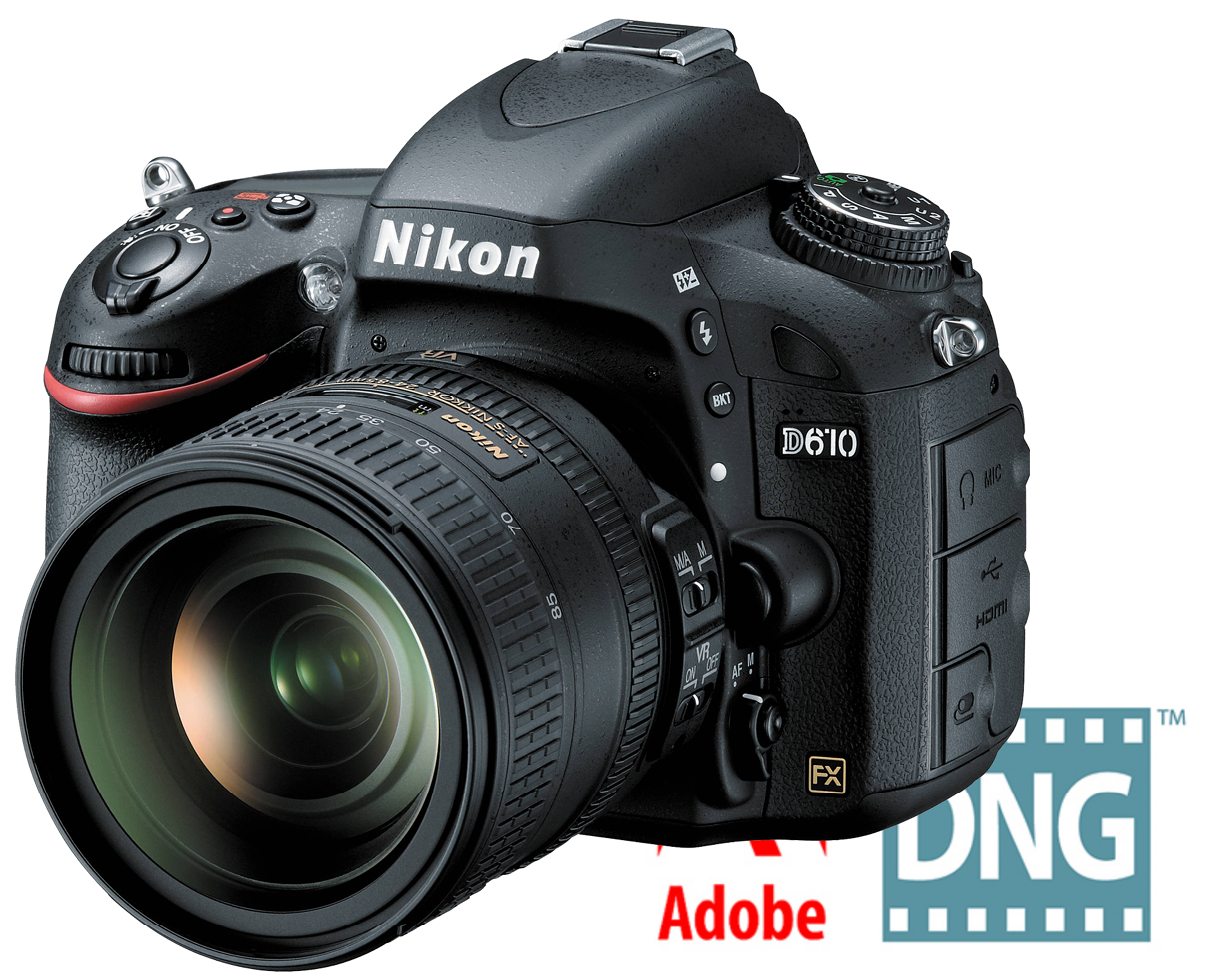
Nearly all DSLRs and mirrorless cameras use the JPEG and RAW file formats. Most of the cheaper point-and-shoot type cameras only use JPEGs. That said, JPEGs can be opened and read by a very wide range of applications—photo software and even Microsoft Word and PowerPoint. RAW files are far less universal and require specific software to work. In Elements, this is called Camera RAW. As each new camera model produces an entirely new type of RAW file, Elements has to be updated reasonably regularly so it can keep up to date with all the new stuff coming on to the market. If you have just bought a new camera, don't be surprised if Elements cannot read its RAW files. You might have to wait till the next Adobe Camera RAW update before the application can open them. In the interim, you can always use the software that came with the camera to open RAW files or download the free Adobe DNG file format converter, convert your RAW files to the DNG format, and edit from them till the new software is ready.
Reviewing the media
Looking at your media in the Organizer couldn't be easier. The main window displays all media files in a mode called Grid View—these are adjustable-size thumbnails. But note that if you create and populate albums, the main window will only display the contents of each album.
Compartmentalizing a photo collection into multiple albums, therefore, is an effective way to break up what would otherwise be a confusing mass of files populating (or flooding) the main screen into smaller, more visually digestible quantities.

Adjustable thumbnail size: One tip for anyone wanting to sort through a lot of images is to maximize the thumbnail size (using the slider—arrowed) so the screen effectively only displays one image at a time, as seen in this coastal seascape, then use the up/down arrows on the keyboard to scroll through the latest import while examining each file full size. Every time you find an image that you want to keep or think needs editing, you can classify it simply using the number keys to add one, two, three, four, or five stars (see the Organizing your work – ratings section later in this chapter). Use these keys to sort and search for images. (Pressing the number zero on the keypad removes all star attributes.) You can also see that once expanded to fullscreen, you can type in a caption for the displayed image and play any associated sound (that is, if it's a movie clip). Even better, there are no restrictions as to how many albums you can create and, since they are essentially virtual folders, they don't take up much storage space.
Media backup
As we expand our image and media collection, we'll not only need large capacity hard drives, but also data backups. It's important to perform backups in case the original drive corrupts, or suffers a mechanical failure. Nothing is forever and even though the drive might be a premium brand, things can still go wrong, usually when you least expect it.
There's no point in backing up images, or your Elements Catalog, to the place where the originals are also stored—typically your computer's hard drive. If it becomes corrupted, everything is lost. Consider a large-capacity hard drive that is used only for backing up your data: images, music, Elements' Catalog, and so on. Most PCs have room for additional internal drives. If you use a Mac, you'd be better off buying an external hard drive.
If you are using a Mac, backing up your data is easy using a pre-installed Apple application called Time Machine. Windows users also have it easy because most quality external drives (such as Seagate and Western Digital) come with automated backup software included.

This software takes only a few moments to set up. Once done, you can forget it, because it automatically backs all your new material up every hour, day, or week (depending on how you initially set up its preferences). Another viable option is to back up to the cloud. In many ways this is the most secure option as those companies spend an awful lot more on data security than any individual photographer! Some cloud storage companies worth a look include Dropbox, Backblaze, Google Drive, Apple, Box, and Microsoft OneDrive.

Above: This is a standard desktop hard drive with a massive 8 TB storage capacity, of the type easily purchased online or from most good computer stores. This is the perfect solution for data backup. Devices are not expensive and come in a wide range of storage capacities—and if that fills up, it's easy enough to buy more to add to the library.
Left: Auto Backups. The two screenshots here show Western Digital's free auto backup software (available for Mac and Windows) at the top, and under that Apple's excellent Time Machine, an auto backup feature that comes preloaded on every Mac.
Star rating photos
Some of you might be familiar with the Windows operating system's star ratings. This is a feature that allows you to award a file one to five stars, depending on their merit. You can then search for files (in this context, images) that are displaying X number of stars.
You might give your best images five stars, and those that need editing three stars—that kind of thing. Ratings appear in a wide range of photo editing applications, including Adobe Bridge, Lightroom, and Camera Bits' Photo Mechanic image browser, for good reason—it's a system that's easy to implement and effective in its organizational potential. Here's how to get this happening:
Step one: Right-click an image in the Organizer.
Step two: From Ratings in the contextual menu, slide over the number of stars you'd like to award that image (from one to five). Or select one or more images in the main window, and hit any number key between 1 and 5 (use the top of the keyboard not the number keypad) to add a rating.
Step three: To search for an already-rated image, click the appropriate star symbol in the Ratings search field (top of the screen just under the Create tab), and everything in the main screen with that star rating remains. Everything else is hidden until you click the same star rating again to clear the search.
Note that this search can be refined by clicking the tiny symbol to the right of the word Ratings to set Greater than, or equal to, Less than, or equal to, or Rating is equal to. It can make a big difference to your search results. This is an exceptionally intuitive system that's easy to set up, easy to modify, and very efficient in its search results—just use that pop-out menu to lower, raise, or delete the rating if required.
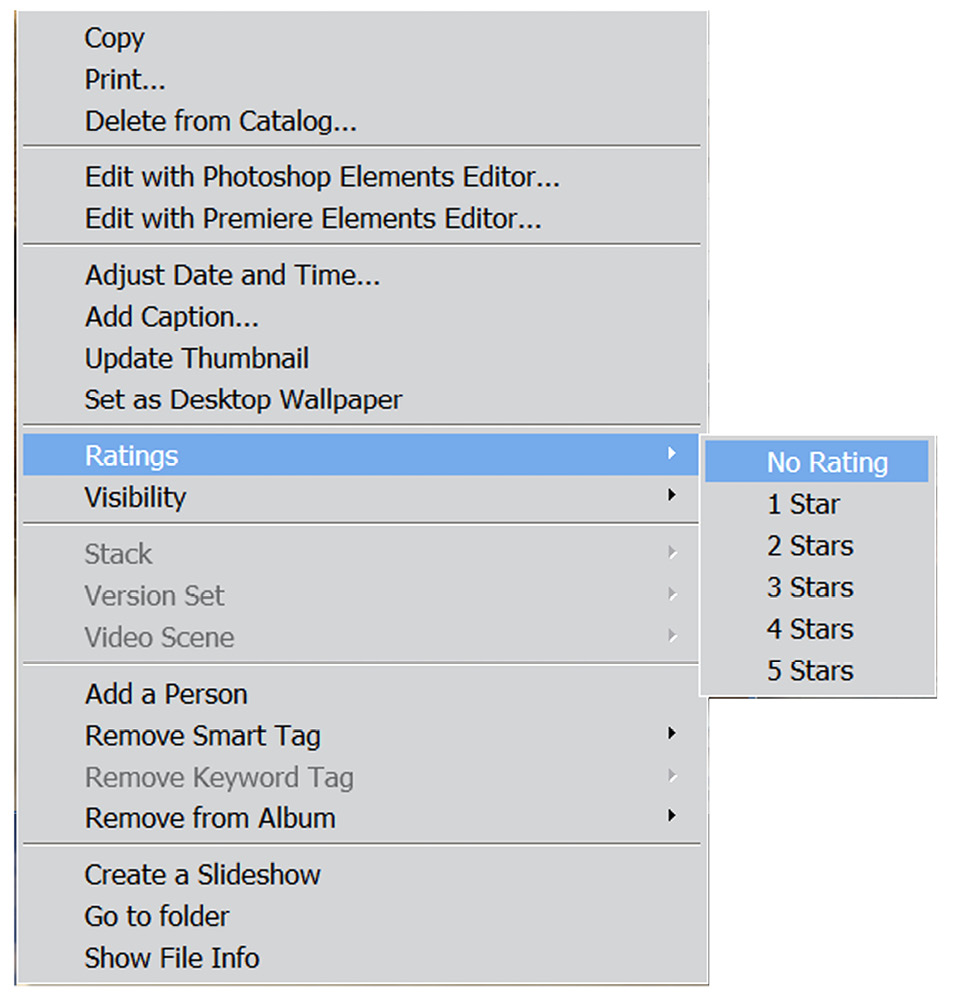
Contextual menu help: While sorting through recently imported images, get into the habit of right-clicking a thumbnail. This reveals a contextual menu that offers many options, but in particular reference to sorting images, you can choose from any of the following: Delete from Catalog..., Edit with Photoshop Elements Editor..., Edit with Premiere Elements Editor..., Adjust Date and Time... (good for when you cross different time zones), Add Caption..., Ratings (1-5 stars), Add a Person (identified in the image for later searches), Create a Slideshow (when more than one image thumbnail is selected), and Show File Info (that is, view the file's metadata). All good stuff.
Searching for pictures using Metadata
Metadata is little more than a small text file that records all your camera details at the time a photo is taken. We rarely read the metadata unless we specifically look for it or, in this context, use it to search for images. Metadata records camera and lens details, date, time, size, resolution, filename, and, if your camera has the feature, a set of GPS coordinates.
The advantage of metadata is that the information already exists, so we can use Organizer to search our image database using any of those pre-recorded metadata details for a fast result.
You might think that the Find by Details (Metadata) search field looks a bit confusing because it offers so many ways to search for images. You can also use this dialog box to save frequently used searches—a real time-saver. It can also be used to search for images by the date and time captured (this is especially useful if you holiday in different time zones).
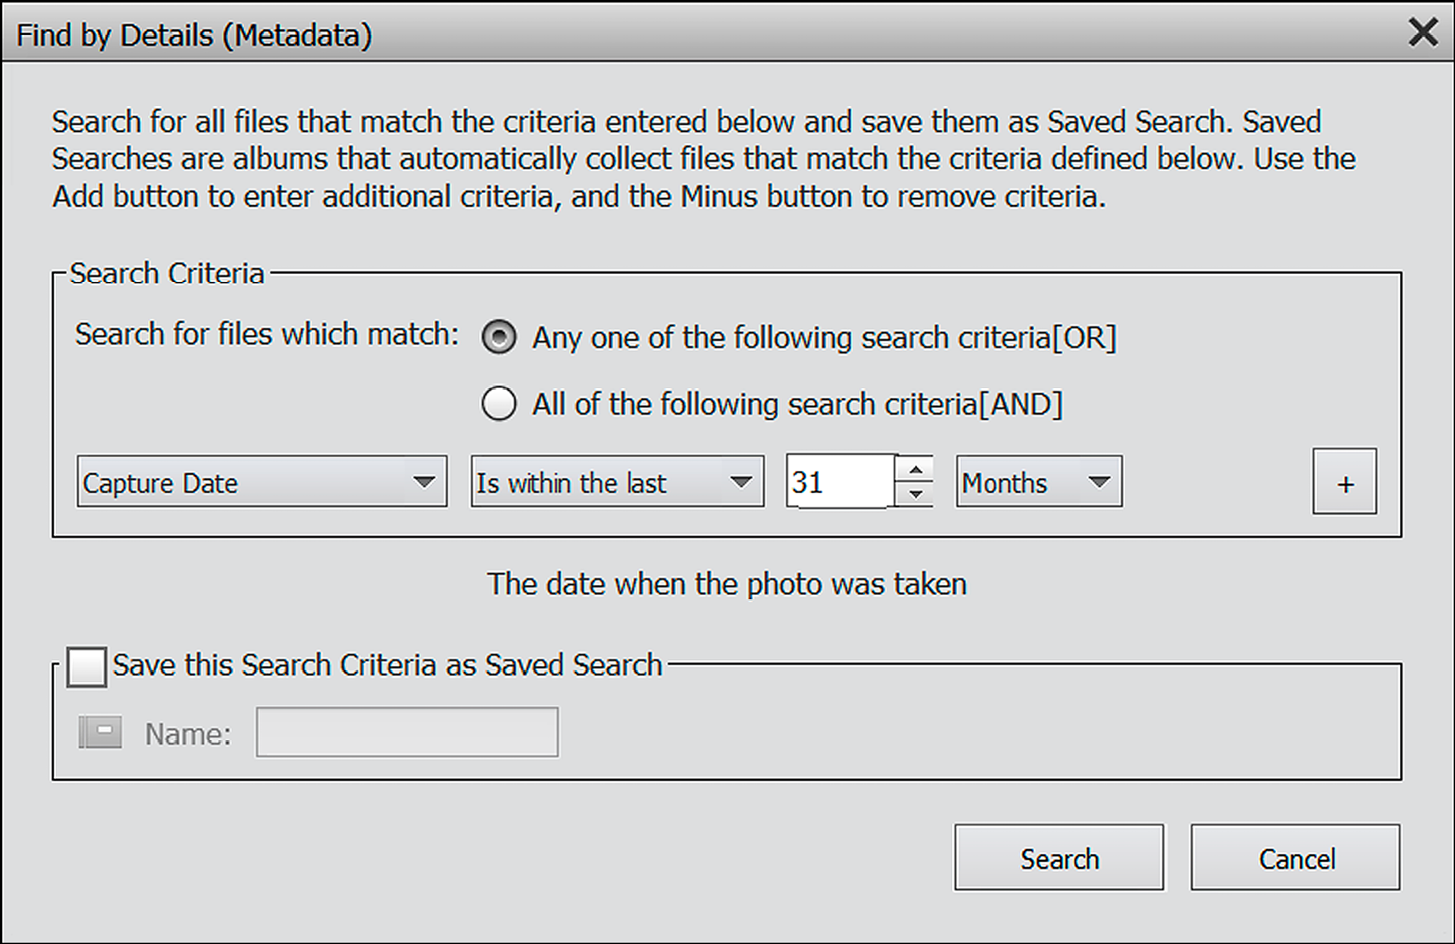
Metadata search: By selecting Find>By Details (Metadata), you see this screen. By default it opens with Search for files which match any of the following search criteria (by capture date—which you choose using the drop-down menu). This is a very wide type of search but as you'll discover, you can click that left-hand menu to see 36 other search options. As I write a lot about camera technique, I often search for specific things such as aperture (f-stop), ISO setting, focal length, and White Balance, which makes the task of trawling through hundreds of potential image files a breeze.
Another criterion I use a lot is to search for camera type, or the date taken—but if you are more interested in searching for people, for example, you can also access all of Elements' other methods of search, including People tags, Event tags, and, of course, keywords. If what you find in the menu is not specific enough, add a second or a third "search rule" by clicking the + button that sits to the right of the Search Criteria window.
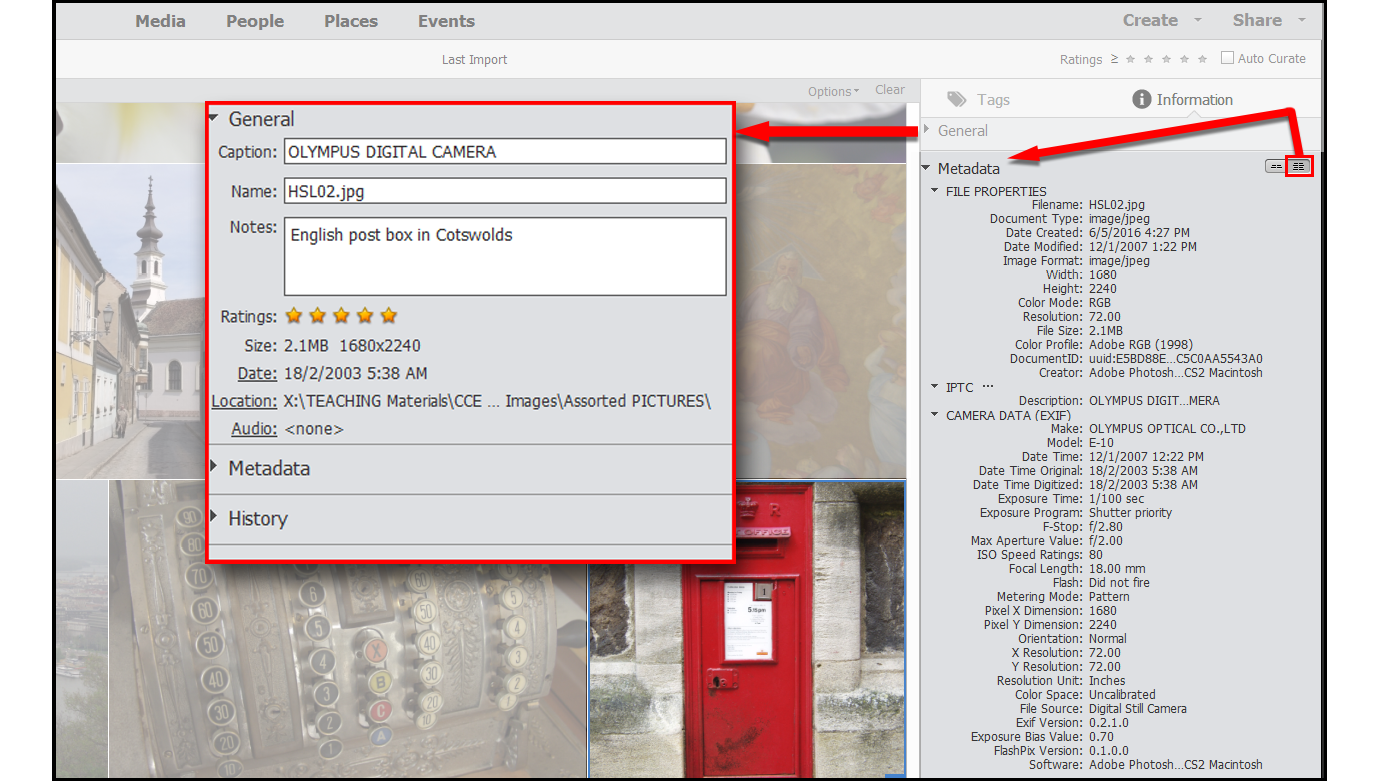
Quick information: The Information panel shown here shares space in the right-hand panel with Tags, and is quite comprehensive—there's a compact version and an extended version (the latter seen here, currently occupying the entire right-hand panel).
Above that is the General menu (for the purposes of this illustration, it's floating over the thumbnail picture grid, to the left of the extended Information panel). This displays a few snippets of that file's metadata, as well as the star rating and where it physically resides on your hard drives. Interestingly, the information displayed here is somewhat truncated when compared to the full search capabilities displayed through the Find menu—but nevertheless, it's a good place to start your search.
Tip:
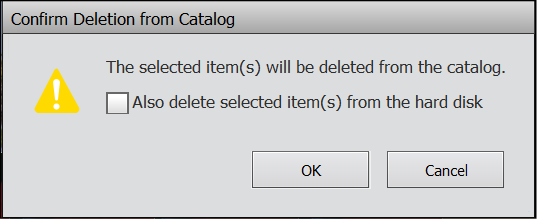
Right-clicking any thumbnail and choosing Delete from Catalog brings up a dialog window asking whether you also want to physically delete the original file from wherever it might be stored. This is handy if you think it really needs to go!
Tip:
You can take your keywording as far as you have the time and patience for by being increasingly specific. For example, I could also keyword my holiday pictures with the words beaches, restaurants, funny signs, people, markets, night life, sunsets, palm trees, and cocktails.
If you add multiple keywords, separate them with a comma (,) to avoid confusing the search engine. Limit keywords to five or six per image. Too many keywords can be counter-productive.
Organizing your work – Keyword Tags
One of the best features in Elements is its ability to sort out hundreds, thousands, or even tens of thousands of images using the tested method of keyword tags.
While viewing a newly imported batch of pictures, select a file by clicking it once and, in the bottom right-hand corner of the screen, type in a keyword.

Keyword tagging: You can see that, in the pink highlighted area, I have added the words 'Surfing' and 'Australia'. If I import and add keywords to hundreds of surfing images in the Organizer, all I need to do is click on the Surfing/Australia tags (both highlighted in blue here) to find those images—they can then be placed in an album called Surfing.
I think keywording is one of the most important setup features in this program. Get into the habit of adding a keyword, or keywords, to everything you import into the Organizer and you will be able to search, and find, almost any image weeks, months, and even years later. It's an incredibly efficient and effective system of image retrieval.
Let's say you have got back home after a vacation. Select all the images from the vacation and type the name of the place you visited. If you went to Australia, for example, all images could be keyworded as 'Australia'. But if half that time was spent in the mountains around the town of Katoomba, re-select those images of Katoomba alone and add 'Katoomba' as the keyword. If three days in Australia were spent surfing, select those images only, and add the keyword 'surfing'. This takes only a few minutes and, with a little forethought, you'll quickly be able to keyword all the important events in this album (named Holiday in Australia) so that, months or years later, you can search for Australia, surfing, or cocktails, for example, and Elements will locate those images (almost) instantly.

Searching in practice: In the Search field (the blue magnifying glass icon, top right-hand corner of the Organizer screen), type in a location and maybe an event using whatever keywords are appropriate (such as Surfing or Australia), and the Organizer will find those images within seconds. It's fast because it only has to sort through its database (which is essentially a text record), not through gigabytes of high-resolution RAW files.

Personalizing Tags: In this screenshot, I right-clicked my Surfing keyword tag in the right-hand bin and chose Edit from the contextual menu. This brings up the Edit Keyword Tag window (above, on the left). You can edit the name of the tag and add comments. Clicking the Edit Icon tab brings up another, larger window, into which you can load a surfing picture to make that group instantly recognizable. It's a cute feature, but it won't really improve your workflow.
Keywording is an easy process, but the real magic only really begins when you try to search for specific images shot on that trip.
Keyword tags are written into the file so that, for example, if I sent a bunch of my (tagged) images to a third party, they would be able to sort them using my attached tags. Elements' tags can be read by a range of other image editing software programs. An album, on the other hand, is a purely Elements-only feature.
If you create a new tag in the right-hand tag bin, you can apply it to any image simply by dragging that tag onto the photo thumbnail. Easy. If you have a hundred images that need the same tag, select all of them first, drag the newly made tag onto any one of the selected thumbnails, and it will automatically apply that tag to all selected images. Very smart!

Tag management: In this screenshot, I have enlarged the pop-out Tags menu to show its various options. There's everything here that you need to fully label everything you bring into Elements. Pay attention to the tagging process and you'll never lose an image again.
Note also that a green + symbol, in the Tags bin, or elsewhere in this application, always points to the ability to create a new feature. In the example here, use it to create a new keyword tag, new category, or new subcategory, or to import tags from a file, to save tags to file, or to expand and collapse the tag hierarchy.
Organizing your work – Places
The Organizer has a huge range of features designed to help photographers keep track of, and search for, their images. I think there are too many search features—but that's just my opinion.
The Places feature has been in Elements for many years. Its principal use is to automatically put any image that contains GPS data onto an internet-driven world map so that users can identify pictures simply by seeing the locations where they were actually shot.
In earlier versions of this program (several years ago), few cameras had GPS capabilities, so the only option open to you if you needed this kind of display was to drag images from the grid on the left-hand side of the screen onto the map to 'pin' them in place instead. You can still do this.
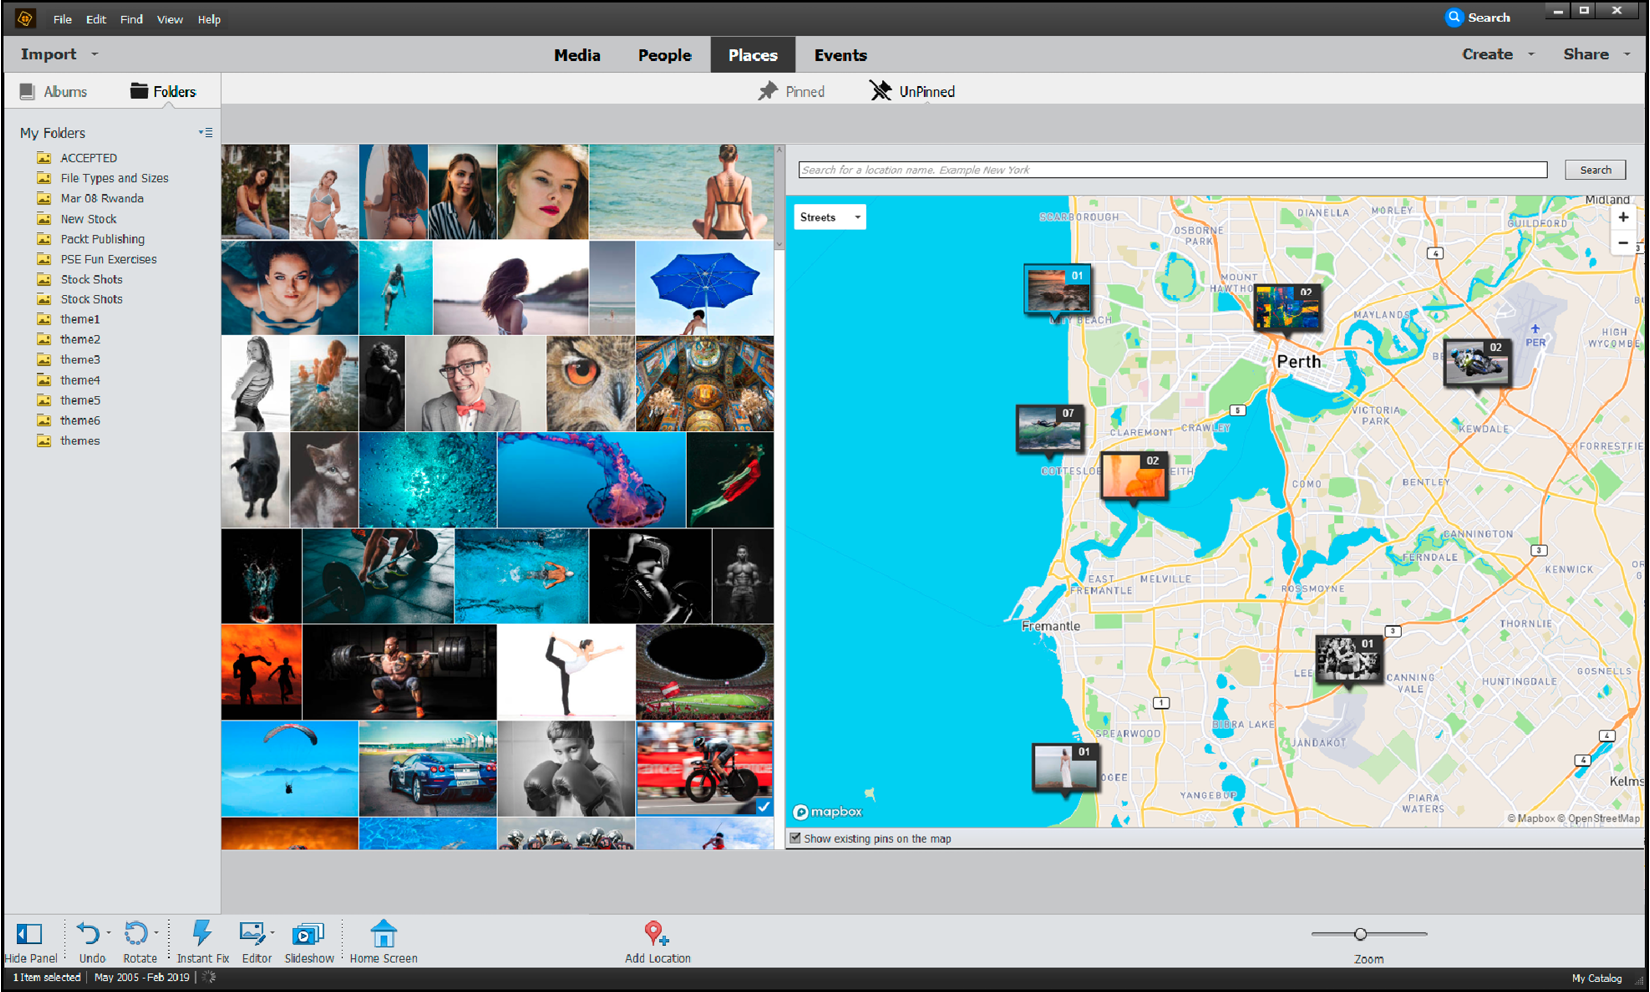
The feature has two view modes: Pinned and UnPinned. In the latter mode, you can select single or multiple images and drag them to the location where they were shot—which pins them to the map. Once pinned, they automatically appear under the Pinned tab. If you get the location wrong, simply drag the pinned image(s) to a new location. Double-clicking the pinned image thumbnails opens them in Grid view. Double-click again and they open in fullscreen. On paper, Places appears to be a nice feature, but it's still not widely used, I suspect because not many cameras save GPS information.
Note: Since 2018, Places stopped working in old versions of Elements due, I suspect, to a dispute between Adobe and the map service provider (it's never been clear exactly why). But that's all sorted now, so you'll find Places fully functional in Elements 2022.
Organizing your work – Events
The Events category is, I think, more useful to everyday photographers. Why? Because Events starts off by using dates as a way to categorize images. We might take a bunch of shots over a family weekend or on our 12-day trip to Bali. Using the Events feature, these images can be grouped into either events dictated solely by the data or read from the metadata, or they can be grouped and renamed into something more memorable, such as Family Weekend, 2019, or simply Bali Vacation.
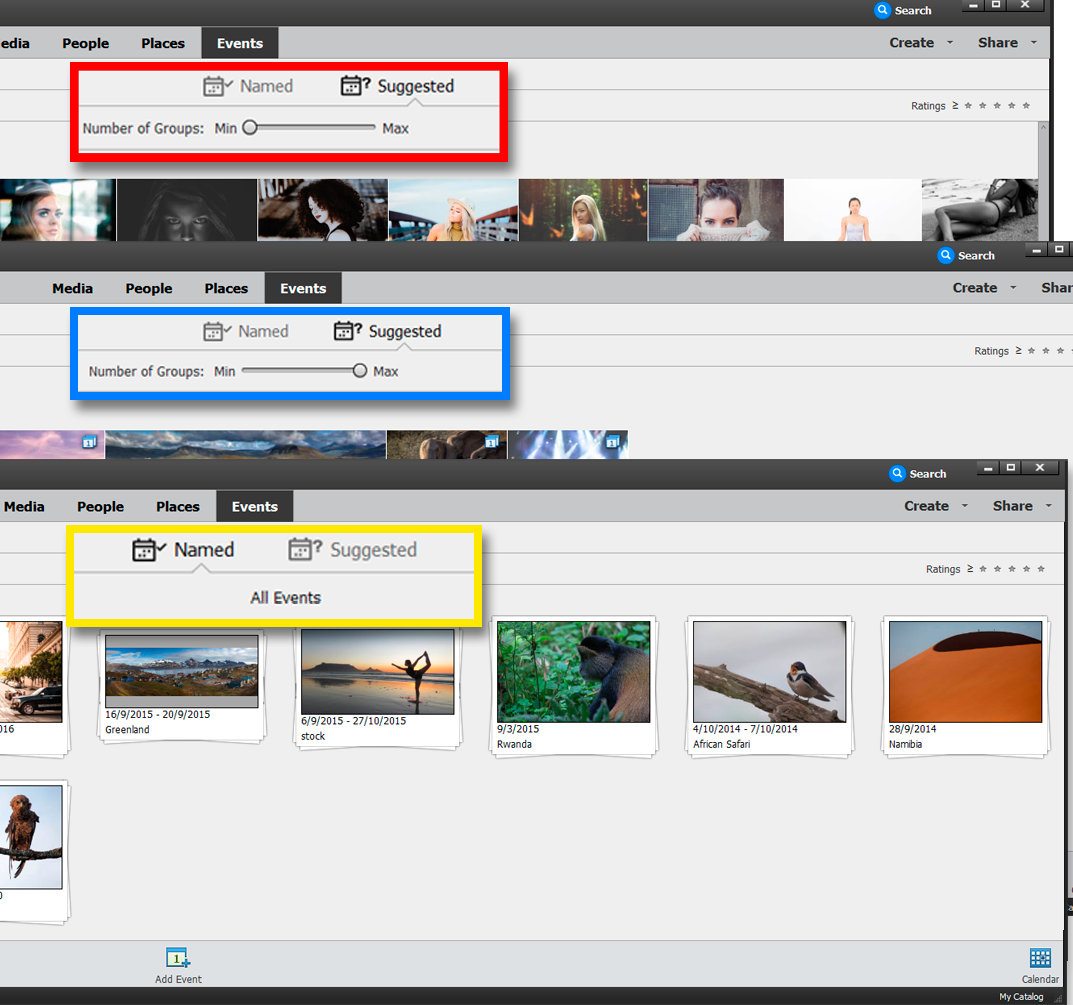
Events at work: This screenshot illustrates the power of sorting by date. The bottom window shows Events, with the Number of Groups slider positioned to the left-hand side (highlighted in red). Everything is pushed against everything else because the search engine is effectively compressing time. The middle window (highlighted in blue) shows how, if the slider is pushed to the right, images are displayed on an almost day-by-day basis, making it easier to find photos from a day shoot, or some other short-running function. The front window illustrates what the named events look like in the Named tab (highlighted in orange). Events can be modified.
Events has two view modes: Named and Suggested. I normally dislike anything that suggests things to me (such as predictive text), but in this case, it presents all your images grouped by date. This is quite useful because it instantly orders everything in the main window, whether from an album, folder, or all media. That's a good start.
To delete an Event, right-click and choose Remove this Event. This pop-out menu also allows you to edit the event (that is, to add/subtract images from the event), to use Set as Cover, which makes the displayed image the default front page, and to use Create a Slideshow, which takes all the files in that specific event stack and puts them into a slideshow that can be saved for further editing in the Organizer, or directly uploaded to social media via the Share menu (top right-hand corner of the Organizer).
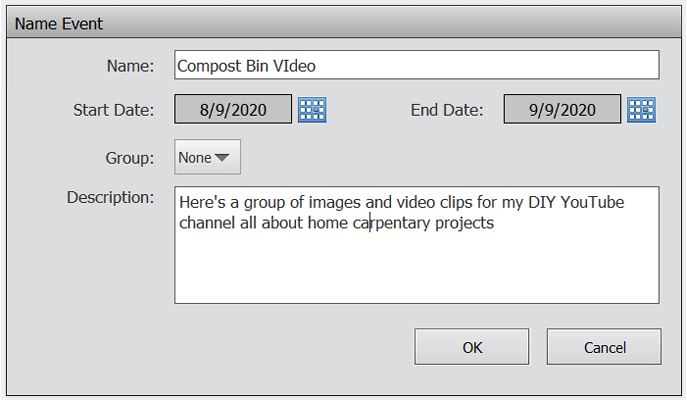
Name that event:
Once selected, click the Add Event button at the base of the page and, in the dialog box that opens, give the event a proper name, check the dates to ensure you have grabbed the right sequence, select a Group if that's needed, and add a description if required, and click OK.
It's a good idea to award albums and folders real names, rather than going on just the dates—the same can be done using Places. Shift the Number of Groups slider so the setting that displays your event does so in one group of images (that is, selecting just the weekend, or just that week). Physically select all those images (do this by holding the Shift key down, and clicking the first and then the last image in the group). They are now all selected. If the images you need are in more than one group, it's easy to select multiple groups by drawing a marquee around those groups.
But what happens to the proper names this group of pictures was just awarded? Click the Named tab at the top of the screen and you'll see all the images that were custom-grouped and named now appear as stacked thumbnails. Sliding the cursor over a group displays its contents. Double-clicking an event stack reveals the individual images it contains. Clicking the Back button in the same screen moves those spread-out images back into a stack format.
Tips:
When drawing a marquee, click and drag the cursor so it draws a rectangle over all the images you need. Blue check marks appear in all those that are selected. If you accidentally miss one image, add it by holding the Ctrl/Command key down while you click the mouse once (Windows/Mac).
By the same process, if you select too many by accident, you can hold Ctrl/Cmd and click the file to deselect it.
As your image collection grows, you can further refine a search, or just what's displayed in the main window, by selecting different dates from the calendar that's posted on the right-hand side of the screen. You can also create a new event in the media window. Click the Add Event tab at the bottom of the page, then drag those images you'd like into the new event to the right-hand side bin. Give it a proper name, check the date, and click OK.
Organizing your work – People
Elements' People mode is really all about using face recognition, an algorithm that analyzes images in the background as they are imported into the Organizer for the first time.
If it detects a face in an image, it presents it as a circular thumbnail in the main People window. If it thinks that there are several of the same person in the import, they will be automatically stacked like a deck of cards. You can view the results in the UnNamed panel. Every image will appear with the label Add Name underneath the thumbnail to begin with.
If you recognize the person depicted, click in the Add Name field and type in the name. As soon as you click the check symbol to the right of the field to lock it in, the thumbnail stack disappears.
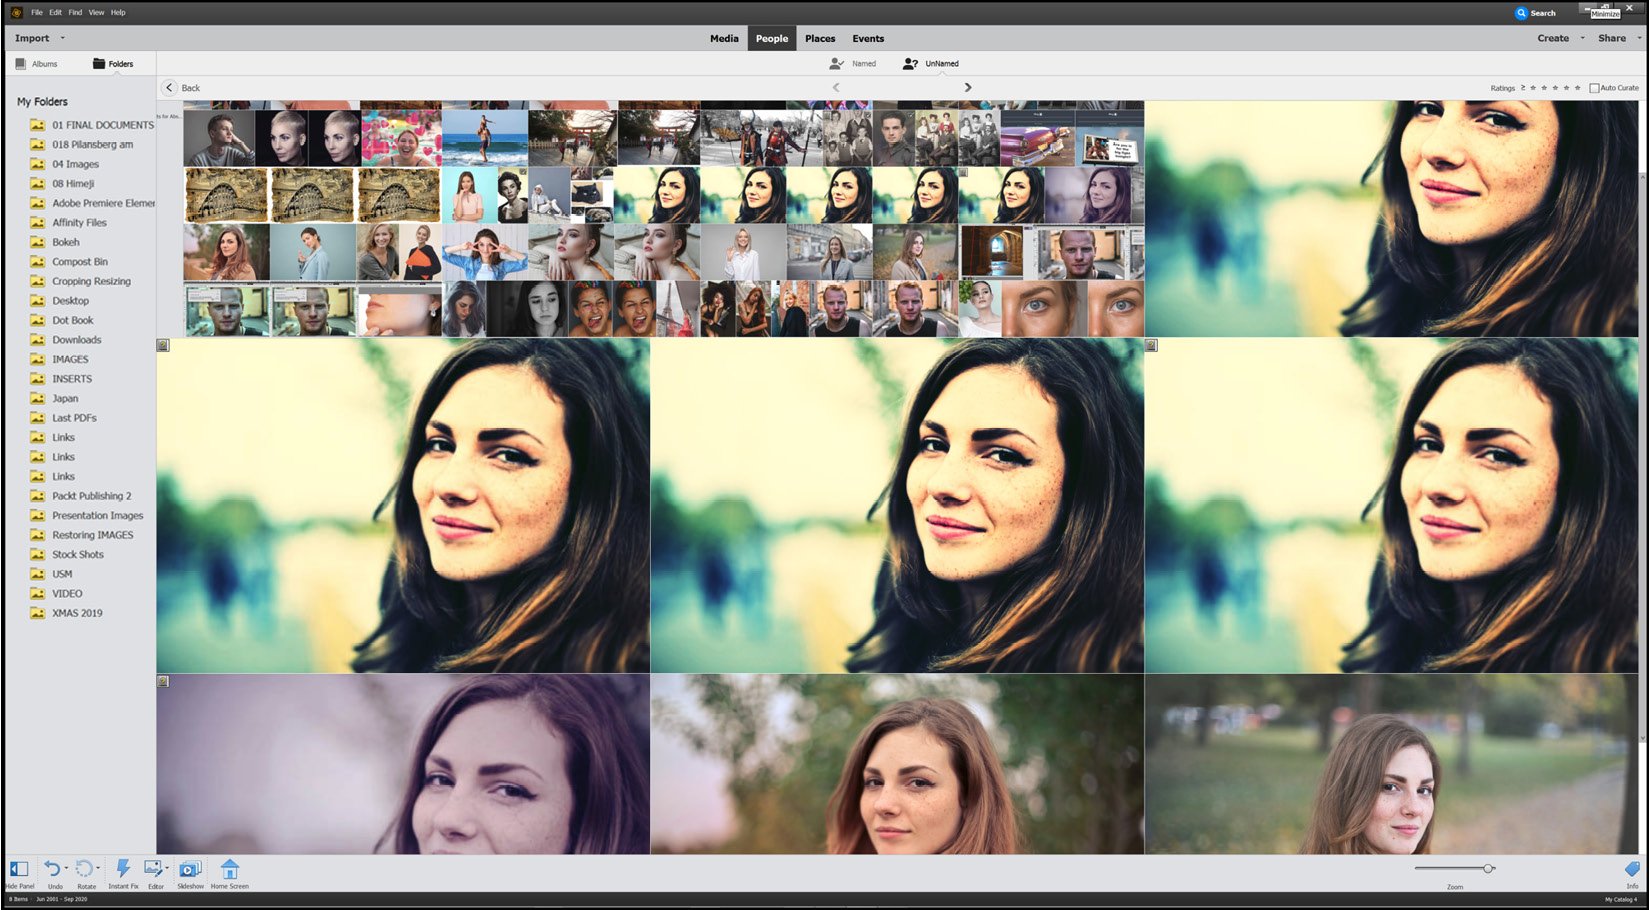
This is the People window—you can let Elements run through your image collection to identify images with people in them automatically. It works really well—but it will also make mistakes, so some curation is usually necessary to get it looking perfect.
Where's it gone? Click into the Named window and there you'll see the newly named stack. Hover the cursor over the stack and you'll see the words Faces or Photos appear. Click Photos to reveal the full image in which the face was detected, or click Faces to reveal just the face or faces in that group.
Elements' People window will find images of your friends—but it also finds every image that looks like a face, including pictures in posters and abstract backgrounds. These can easily be discounted by right-clicking the icon and choosing Don't show Again. As soon as an image gets a proper name, it's automatically moved into the Named tab and stacks with similarly named images. For those of us that prefer to identify our images based on the content, and specifically on the people depicted in the files, you'll find the People feature very handy.
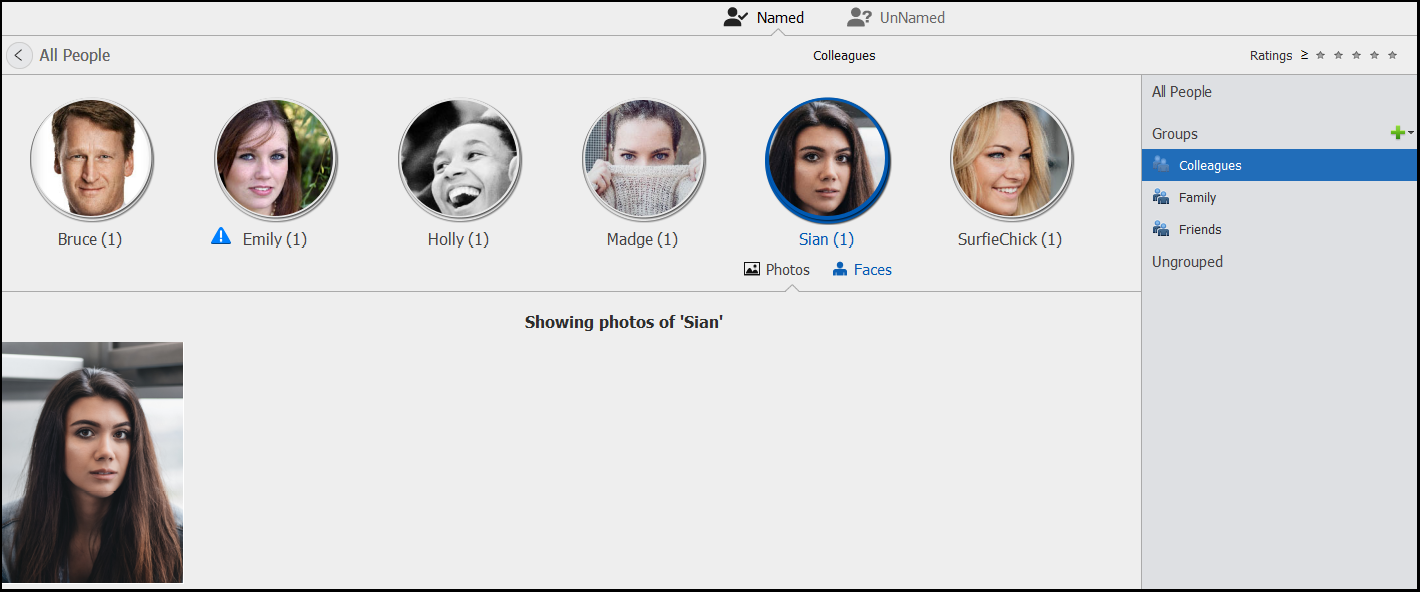
Organizing your people: Like the keywords feature, the People feature, shown in this screenshot, allows you to subdivide your found faces into smaller categories, or groups, as seen on the right-hand side of the screen. Elements starts you off with Colleagues, Family, and Friends but, of course, clicking the green plus (+) symbol allows you to add new group categories when needed.
Like most organizational tools in Elements, you can choose to work simply by adopting just keywords, or maybe the ratings, or you can use a combination of everything covered in this section to create a sophisticated and deep searchable database. The best advice is to make up your mind regarding which way is best for you before you start; that way, you can streamline your workload from day one rather than having to go back over everything that's been imported into the Organizer because you changed your mind about how to organize your images.
Preplanning will save you a lot of time and effort.
Tips:
You can merge one stack into another simply by click-dragging one file over another. You can further refine the sort process by adding stacks to groups—such as Family. Click the Groups tab on the bottom right-hand side of the main window, and either use one of the default groups, or make a new one by clicking the green + symbol. As with most Elements features, there's no limit to the number of groups you can have.
If you discover an "inappropriate" face in the stack, right-click the Faces icon, and choose Not..., or just rename it, it places it out of that stack into its own, new stack. You can also use this pop-out menu to assign that image as a profile photo (this is the default top of the stack). Finally, there's the Don't Show Again command, which hides that image from ever appearing in the people view again.
File formats: JPEG and RAW
Nearly all digital cameras these days can shoot and record two types of image file: JPEG and RAW files. Some newer models can also record digital negative RAW files. We'll look at them later in this chapter.
The difference between JPEG and RAW files is simple: JPEG files are 8-bit picture files. These are processed in-camera and then compressed (squashed) to maximize storage space, before being saved to the memory card.
RAW files are usually 10-bit files that have little or no processing applied in camera, and they are not compressed before being saved to the memory card. The result is a file that is several times larger than a JPEG, but one that can be edited to a far higher degree of accuracy than the humble JPEG.

Though shooting in the RAW format is recommended, you'll find that your camera's files are quite different from RAW files from other camera models. Sony RAW files use the suffix .ARN; Olympus = .ORF, and Nikon = .NEF.
Here's a view of a (Canon) RAW file displayed in a browser window. It has the .CR2 suffix common to all Canon cameras.
Although each camera manufacturer shares the same three-letter suffix across all of its camera range, RAW files produced by different models are quite different from each other, that is, RAW files from the Nikon D7000 are different from the Nikon D7200, D800, and D850 RAW files. This is why it takes companies such as Adobe several months to provide an update for the different RAW file types designed for each new camera make and model. If you are an early adopter, waiting for Adobe to catch up and release a compatibility update can be a source of frustration.
RAW files have to be edited in a specific RAW edit window, called Camera RAW, which is separate from the regular Quick, Guided, or Expert mode windows. Once edited in this space, a RAW file must be either closed (there's no saving with RAW files – it automatically records all the edits applied to it), or it can be saved in a more universally acceptable file format for storage, backup, or later distribution.
Such formats include JPEGs, TIFF files, digital negative files, or even Photoshop files. But what's the difference between these formats and when would be the best situation to use them?
File format characteristics
Choosing the right format to save your edited work in is an important decision because it can have direct ramifications on both final image quality and your backup and archiving practices.
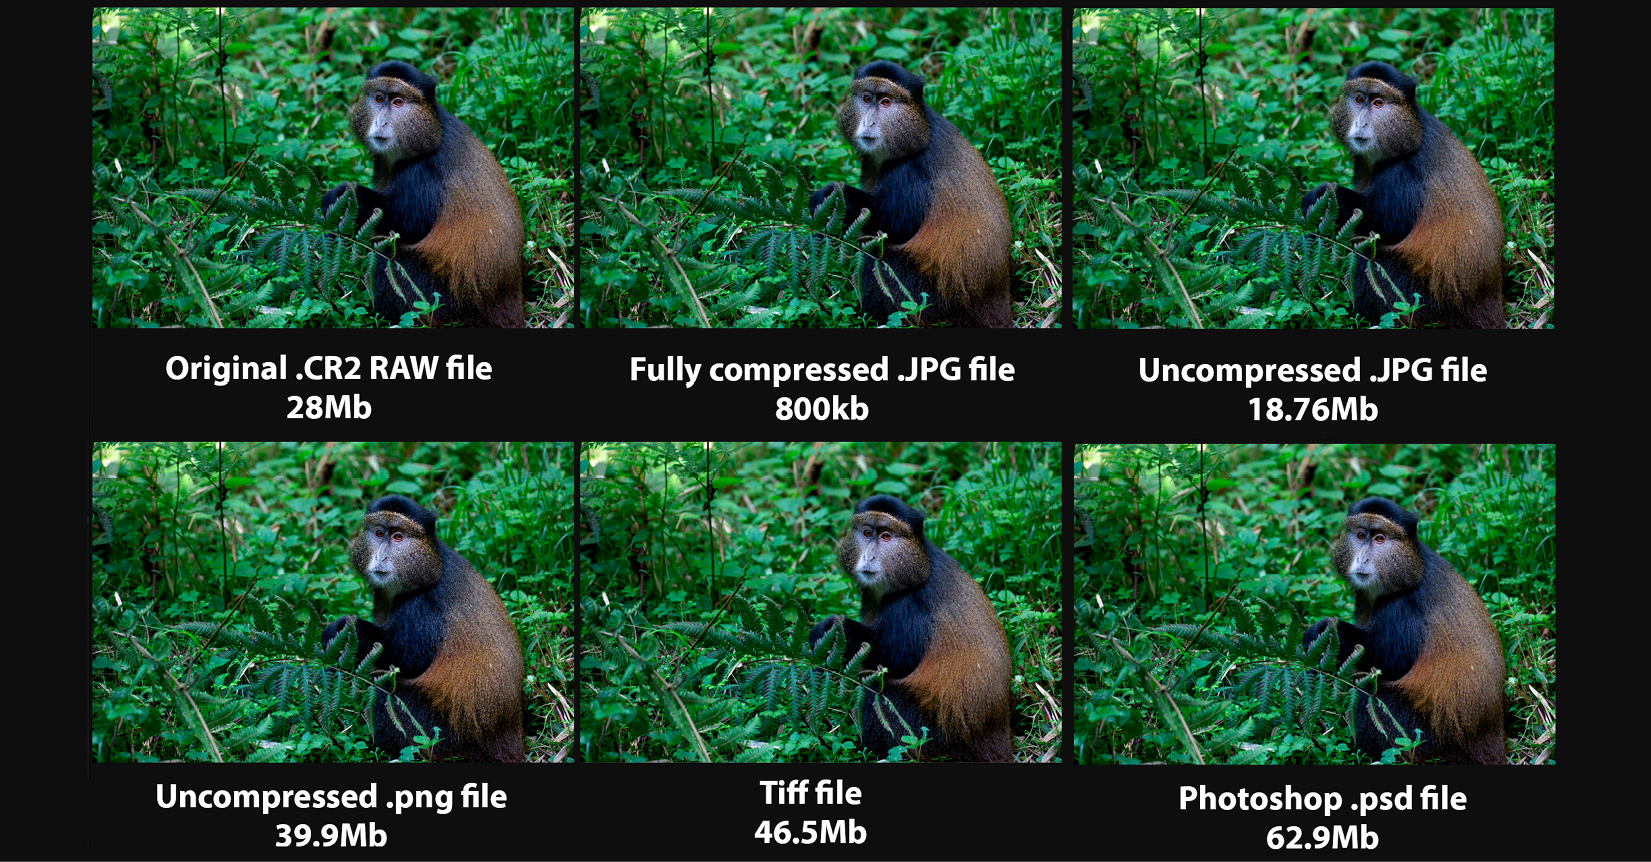
Physical file sizes: To illustrate the different properties of image files, I saved the same photo in six different file formats. Because JPEGs are compressible, their saved state is considerably smaller than everything else, hence their popularity in social media, the web, and emailing. Compressed to the maximum (the smallest saved file size) reduces them to only 800 KB—less than one megabyte—but that compression level would seriously damage the quality. Despite my original Canon .CR2 RAW file being 28.99 MB, the .png file is larger (39.9 MB), followed by the slightly compressed (though lossless) TIFF file (46.5 MB), the Photoshop file (62.9 MB), and the uncompressed TIFF file (63.3 MB).
- JPEG (
.jpg): This is a compressed lossy format (lossy means it loses quality when saved and compressed) that's ideal for emailing, photo books, web, social media, and photo lab printing (note: most photo book companies only accept JPEG and PNG files). - RAW: RAW files are untouched data straight from the camera. They contain four times more picture data than a JPEG, are good for shooting in any light, plus they take any amount of editing without loss of quality.
- DNG (
.dng): A digital negative file is like a universal RAW file, retaining all of the benefits of regular RAW files while retaining a higher degree of application than a regular RAW file. Adobe Lightroom, for example, is a program optimized to work best with DNG files. - PSD (
.psd): These have no compression and can store extra (Photoshop) data within the file itself, such as layers, paths, and selections, thus retaining a high degree of editability. This is good for preserving the best quality for complex editing and commercial print projects. - TIFF: Similar to
.psdfiles, TIFF files can be compressed by up to 25% with no loss of quality. TIFF files preserve features such as selections and layers. Good for preserving best quality, editing, and commercial printing. TIFF files can end up being larger than the same file saved in the.psdformat. - PNG: Portable Network Graphics files are used primarily for website design and in photo books where background transparency is a requirement.

The curious term Bit depth relates to the amount of color information held in an image file.
The higher the bit depth in a file, the more color information it contains; and more information produces significantly smoother tonal gradation, which in turn produces a nicer-looking and more realistic image.
Single-bit color is made up of two colors only—black and white - rarely used in photography other than in the creation of masks. 8-bit color produces 256 tones, which was considered an acceptable number for the photograph—until, that is, 24-bit color came along and produced 16.7 million tones. No need to count them; they just look good. Top-of-the-range cameras can now record 10-bit and 12-bit files.
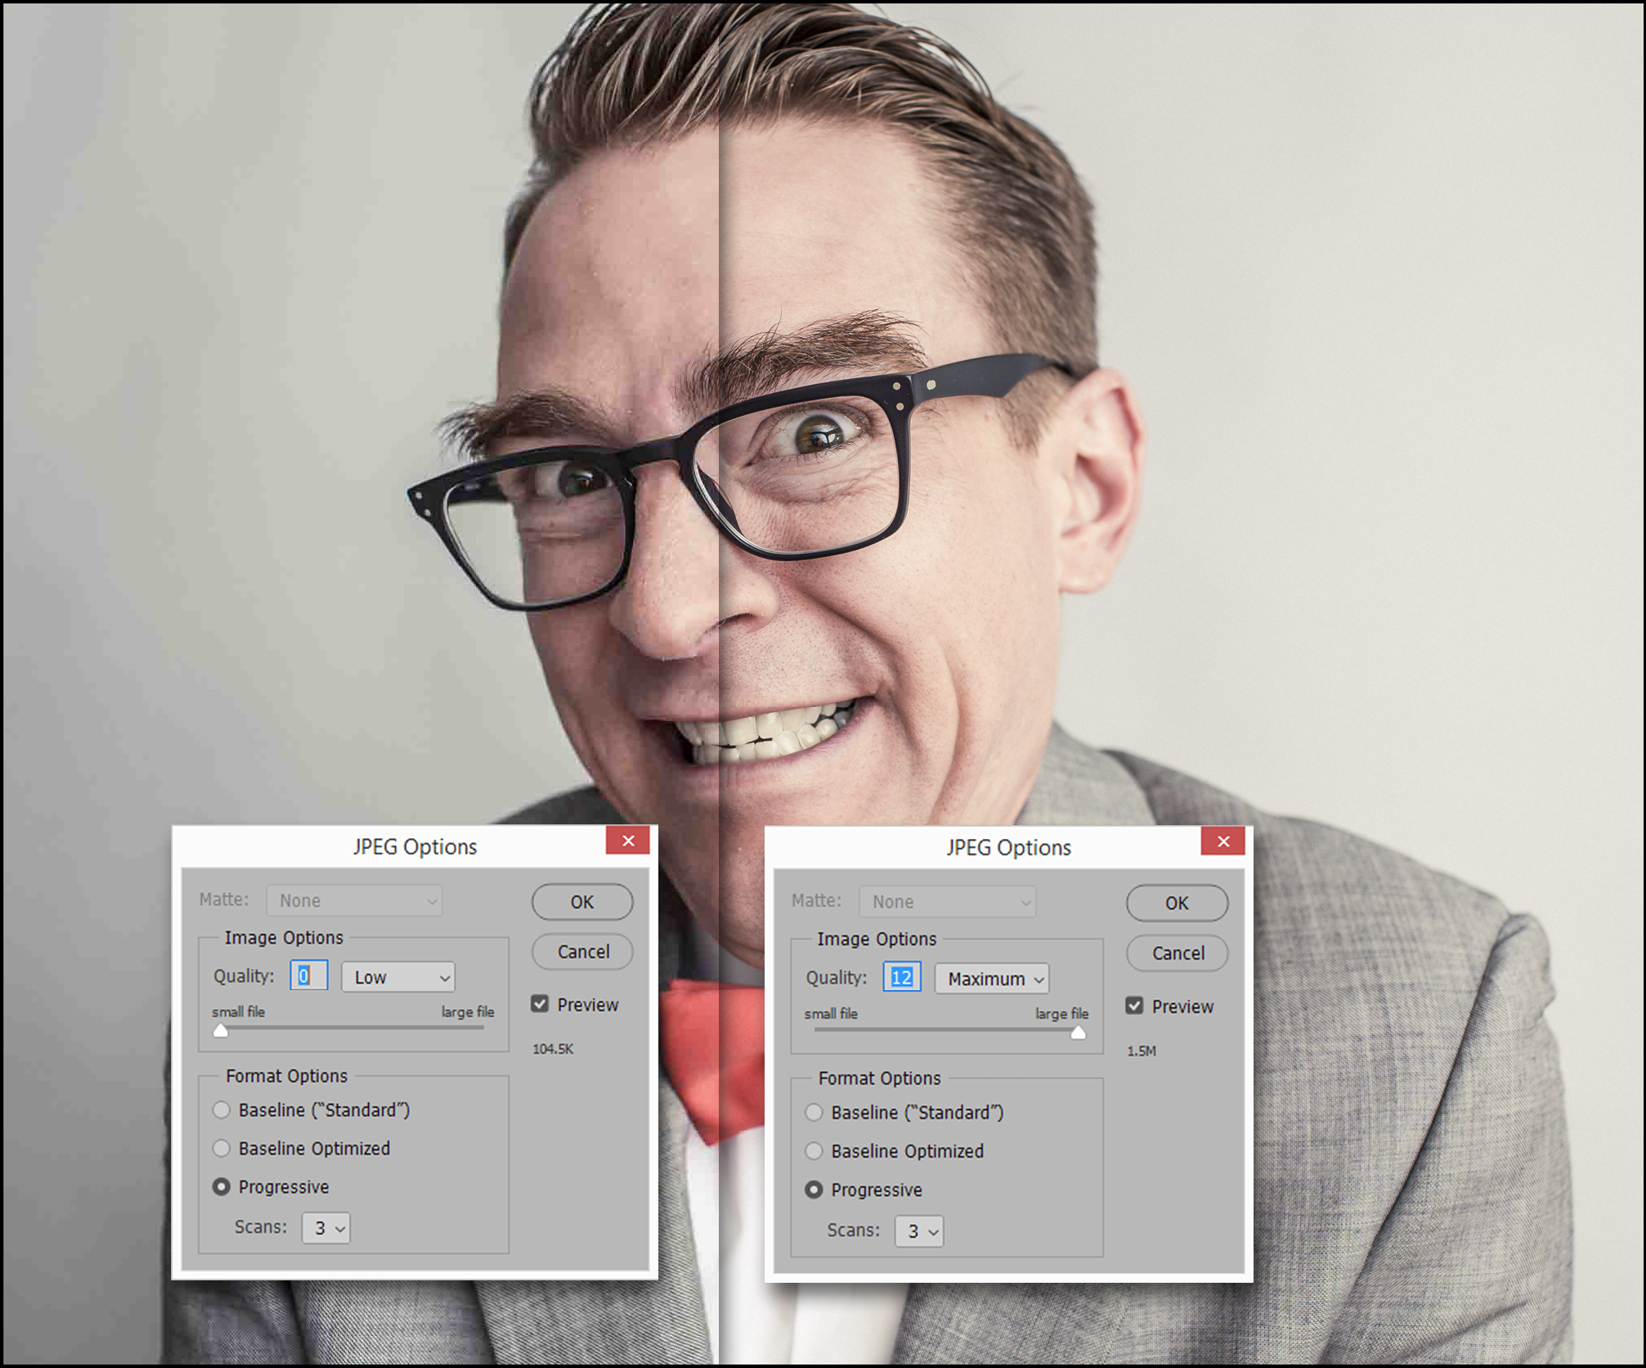
Too much compression? Of all the file formats available in Elements, the one that's perhaps the most useful is JPEG. The close-up of this bespectacled gentleman displays the problems over-compressing JPEG files, on the left, will create. Don't get me wrong—JPEG files are great because they can be compressed. However, if they are squashed too much (that is, set to level 7 or lower in the JPEG Options dialog), you'll see a significant deterioration in image clarity and color (the left half of this composite image was set to Quality: 0, producing a tiny file).
Too much compression, or repeated saving (and therefore repeated compression), will generate ugly image artifacts, for example, in the form of posterization (banding) seen mostly in the smoother tones. Over-compression will also create inaccurate color, and might even introduce blocky-looking pixels when compared to the minimal compression level 12 setting, as seen on the right of the illustration above, producing a larger saved file but with smoother, more accurate tones.
Managing catalogs
The Catalog Manager (Organizer>File>Manage Catalogs) is used for several tasks. These include the following:
- Create new catalogs.
- Rename existing catalogs.
- Convert a previous, older version of an Elements catalog to the new version of the software.
- Optimize a catalog—this helps reduce its size, making it more efficient.
While a software-driven data backup is a good procedure to set up for all users, it might not back up your Photoshop Elements catalog. And even if it did, it wouldn't be in a format that Elements can recognize, should you need to restore it after a software mishap.
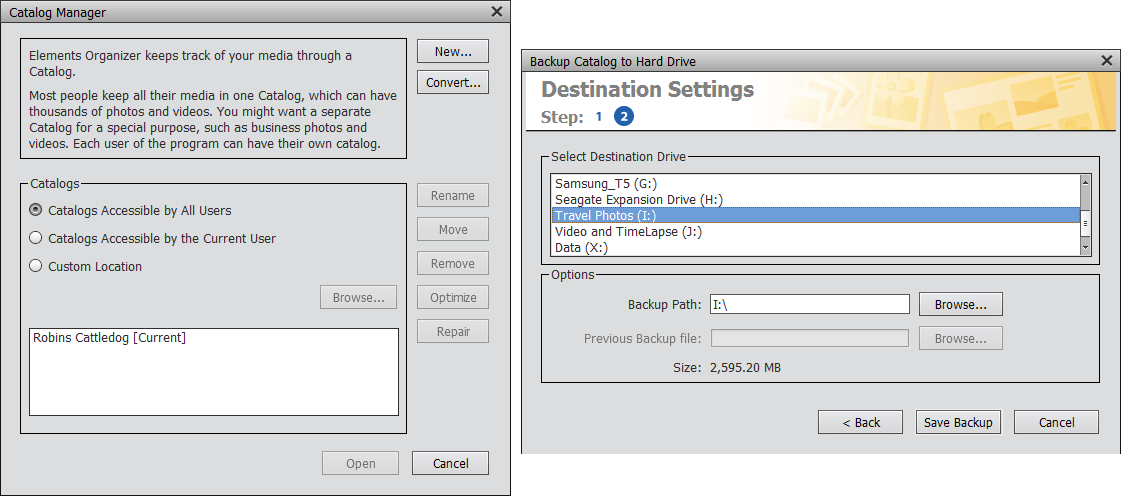
Back up the catalog: It's important to ensure that your backed-up catalog is saved to a location different to where the default catalog is stored. For most, this means saving it to a different drive – in the screenshot above, there are five different drives available for backup.
Tip:
If you purchase a RAID drive (multiple hard drives in one box), you can program it to back up once to each drive, essentially giving you two complete backups in one operation, so if one drive fails, you still have a second copy to use. Another use of the RAID drive is to split the backups 50/50. This greatly enhances the read/write speeds of the device but, in this mode, if one drive goes down, you lose everything because the process actually splits files rather than putting one file on disk A, then the next file on disk B, and so on. Nothing in digital imaging can be 100% safe, but if you use a reliable RAID system it should still give you years of good service.
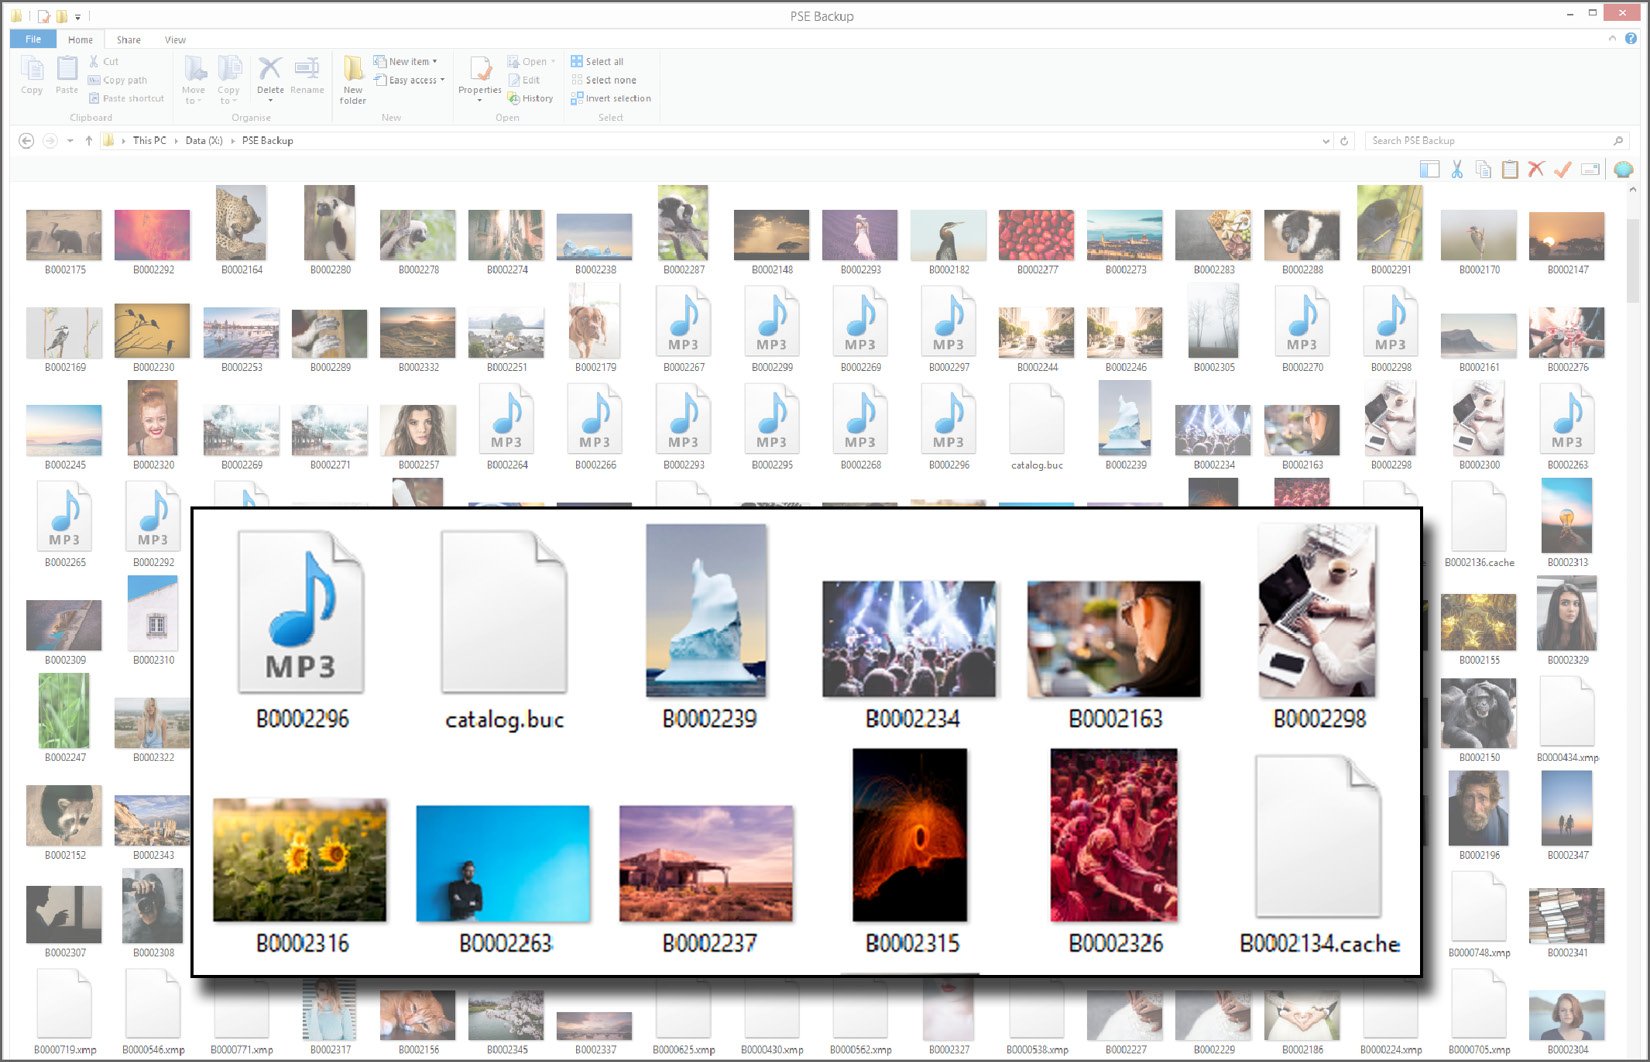
What's actually inside the catalog? Although Elements' backup process can be a lifesaver, it's not the same as a regular Windows or Mac operating system backup. With Elements, the backed up files are referenced in a completely different way to those that are copied to a different hard drive—which is why if you open the Elements backup file, everything appears scrambled, as you see here. However, if you reinstate the catalog via the correct process, everything reappears in perfect order.
The catalog is where all your hard work is stored: tags, keywords, albums, captions, places, maps, and events; as well as your images, as RAW, JPEG, TIFF, PNG, or PSD files; plus a lot of other stuff that helps Elements be as efficient as possible.
The files' proper names are reinstated once a Catalog Restore function is completed. Generally, we only access an Elements backup if the original has been compromised and we need to restore the entire catalog's contents.
In an emergency, you can still open the Backup folder and pull out images, if need be. If you have issues with the current catalog, it's easy enough to choose File>Restore Catalog from the Organizer and reload the entire catalog from its backup location.
The logical way to perform a catalog backup is to choose File>Backup Catalog in the Organizer and follow the prompts. Make sure that the location of the backup is not on the local drive—put it on an external drive. Elements insists on a full backup to begin with, then a partial backup if you are just updating work as you go.
Color spaces
Cameras, all monitors, and most printers can display only a limited range of colors—this is called the color space. The industry standard space is called sRGB color (Standard, Red, Green, and Blue), but there are many other spaces, such as Adobe RGB (1998) and ProPhoto RGB, to name just two.
Most color spaces correctly claim to encompass a broader range of color than sRGB. While this is certainly true, actually being able to see an increase in the range of colors with one of these wider-ranging spaces, on both a computer screen and in print, is a characteristic that's hard to evaluate because most screens and printers cannot recreate the number of colors captured by the camera regardless of what color space it was recorded in.
Most consumer cameras can only function in the sRGB or Adobe RGB (1998) color spaces.
I think the best practice for amateur photographers is to choose sRGB. This matches the range of colors that most monitors can display. Plus it matches the gamut, or range, of most consumer photo inkjet printers. That said, some commercial lithographic print businesses now require files to be Adobe RGB (1998) in order to match the high-end print machines they use. If you are considering a move to commercial photography, then Adobe RGB (1998) is the best color space setting. That said, a good color prepress business should also be able to make these space conversions for you, for a fee.

Adobe RGB 1998 versus sRGB color space: Camera menus tend to be somewhat different from each other—refer to the camera manual to find the option of color space in the menu setup.
In the illustration above, compare the color range difference between Adobe RGB and the narrower sRGB space. For many, the fact that sRGB has a smaller range of colors makes no difference—it's only when asked to reproduce very specific colors (for example, in a catalog) that you need to consider spaces such as Adobe RGB 1998.

Keep it current: Elements is fully compatible with most RAW file formats, provided that your software is up to date. To ensure this is the case, go to the Help menu at the top of the Organizer, or any of the edit screens, and choose Help>Updates. This normally works perfectly but occasionally it doesn't load the latest software update. You'll notice this when trying to open a RAW file from a new camera. Elements will state that it does not recognize that format. Try updating the software through the Help menu. If that fails, go to the Adobe site and follow the prompts to download the update and install it manually.
Color management options
It's a sad fact that all image editing is virtually worthless if the monitor on which you make all your creative decisions doesn't actually represent the correct color, brightness, and contrast accurately.

Color management—the process of making sure that what you see onscreen is both accurate to life and will be correctly reproduced online and in print—is, I think, an unnecessarily complex operation. Although Elements' calibration is not nearly as controllable as that found in Photoshop CC, it's presented in a reasonably easy format that should work well in most situations. And if you are sending your work into a commercial print environment, you can always let them handle the finer complexities of color reproduction, which allows you to pay more attention to the editing process.
What you'll find in the program's Color Settings dialog box are four simple options:
- No Color Management
- Always Optimize Colors for Computer Screens
- Always Optimize for Printing
- Allow Me to Choose
Essentially, this means that if you choose to ignore any color management, Elements will discard existing color space settings, but if you choose to optimize colors, the color range will be kept within the existing sRGB color range.
If you go for the printing option, it would be best to set Adobe RGB (1998) in your camera. The Allow Me to Choose option permits the user to make a choice between sRGB and Adobe RGB (1998).
Screen and printer calibration
Another important technique for ensuring that what you see onscreen is accurate is to calibrate your monitor with a hardware calibration device.
These third-party sensors plug into the USB outlet on the computer and hang over the screen. Run the associated software and the sensor will determine whether the RGB colors displayed onscreen really are 100% red, green, blue, white, gray, and black. If the screen is different from the known values for these colors, the software adjusts the brightness and color to make it display correctly. This is a far more accurate method of color management than using the human eye to gauge the settings. As a general rule, screens need calibrating every six months or so, especially if they are used a lot.

Screen calibration: Attaching a USB-powered hardware calibrator to the laptop or desktop screen is easy. Pictured is the (reasonably inexpensive) ColorVision Spyder5 device. This process needs to be done (probably) once every six months or so, to ensure that what you see onscreen is a realistic representation of the original image. It does not ensure print accuracy—that's the job of another device (see below).

Printer calibration: Making what comes out in print look exactly the same as what's seen onscreen is a slightly trickier and more expensive operation.
For this you need another scanner that can read both screens and test prints. It takes longer to print and scan the resulting chequerboard of colors, but once done, the accuracy of screen-to-printed paper is exceptional.
Organizer keyboard shortcuts
I always provide my students with a list of 10-20 keyboard shortcuts. I can usually see that most are not happy with having yet more stuff to remember. But if you train yourself to use some of these, instead of relying on the mouse all the time, you'll not only reduce the risk of RSI, but you'll also find many repetitive tasks so much safer and faster to execute. Two hands are always better than one.
Operations and their respective Windows/Mac shortcuts are as follows
- Undo last operation: Ctrl/Cmd + Z
- Redo last operation: Ctrl/Cmd + Y
- Copy: Ctrl/Cmd + C
- Paste: Ctrl/Cmd + P
- Select all: Ctrl/Cmd + A
- Deselect: Ctrl/Cmd + Shift + D
- Rotate image 90 degrees left: Ctrl/Cmd + Left Arrow
- Rotate image 90 degrees right: Ctrl/Cmd + Right Arrow
- Adjust date and time: Ctrl/Cmd + J
- Edit in Expert Edit Mode: Ctrl/Cmd + I
- Edit in Premiere Elements Editor: Ctrl/Cmd + M
- Zoom in: Ctrl/Cmd + +
- Zoom out: Ctrl/Cmd + -
- OK: Enter
- Cancel: Esc
- Display metadata properties: Alt + Enter
- Add caption: Ctrl/Cmd + Shift + T
- Update thumbnails: Ctrl/Cmd + Shift + U
- Set photo as desktop wallpaper: Ctrl/Cmd + W
- Open Color Settings dialog box: Ctrl/Cmd + Alt + G
Summary
It's always been something of a dry subject, but setting up a computer for quality photo editing tasks is not as simple a task as many might imagine—and of course, it's far more demanding on your equipment than simply doing a few emails and surfing the internet!
This chapter explained the basics of setting up a computer: adding memory, choosing hard drives, considering backup drive options, as well as learning about color spaces, and calibrating the monitor so that what we see onscreen is an accurate depiction of what we photographed. It's a big topic but once understood, it will send you out into the editing universe well prepared.
We also took note of the many tools found in Elements Organizer that are designed to help us keep track of our ever-increasing photo and video media collections. And again, although this is often seen as being as exciting as cleaning the bathroom or filling out a tax return, once done, you'll find yourself on top of the image cataloging process, thus making future expansions to your image collections significantly less problematic.
And we haven't even edited an image yet! Coming up in the next chapter, you'll find a heap of great information about adding a range of basic and easy edits to images—all of which can produce brilliant results: dealing with RAW files, saving files, cropping, straightening, lightening, darkening, and a great deal more. It doesn't take long to produce truly impressive results with this editing application.
