Download code from GitHub
Magento is a highly customizable e-commerce platform and content management system. Magento is one of the most used e-commerce systems to create online stores around the world by providing management of inventory, orders, customers, payments, and much more. It has a powerful scalable architecture.
Are you ready to start on the world of Magento development?
First of all, we will need to set up our environment. In this book, we will cover how to set up a local environment. It is very important to have this local ecosystem development to work smoothly and in an agile way.
In every chapter of this book, we will work with a mini project. It's kind of a sprint to learn the path. In this chapter, our mission is to create a work environment and understand the basic concepts of Magento (http://magento.com/).
After setting up the environment, you'll study the Magento folder structure and work on a basic Model View Controller (MVC) software architecture pattern and Magento basic setup.
Basically, we will work on this chapter with the following topics:
- XAMPP PHP development environment
- Magento e-commerce system
- Magento system structure
- Magento basic setup
Are you ready for fun some? Let's go!
The XAMPP is a complete web development environment. On its install package, we can find Apache, MySQL, PHP, and Perl. This is everything that you will want to develop your solutions!
At this time, you can imagine the meaning of XAMPP, but the X before the AMPP has the meaning of cross or cross-platform. So, we have XAMMP: (X) Cross-platform, Apache, Maria DB, PHP, and Perl.
The goal of XAMPP is to build an easy-to-install distribution for developers to get into the world of Apache. XAMPP is a project of Apache Friends (Apache Friends is a non-profit project to promote the Apache web server).
Why we are working with this software? Let's find out:
- Apache (http://httpd.apache.org/): This has been the most popular web server on the Internet since April 1995 providing secure, efficient, and extensible HTTP services in sync with the current HTTP standards
- MariaDB (https://mariadb.org/): This strives to be the logical choice for database professionals looking for a robust, scalable, and reliable SQL server
- PHP (http://php.net/): This is a popular general-purpose scripting language that is especially suited to web development; and, most importantly, it is the main language of Magento
- Perl (https://www.perl.org/): This is a highly capable, feature-rich programming language with over 27 years of development
So far so good, but how about doing some action?
First of all, let's access the XAMPP website on https://www.apachefriends.org/.
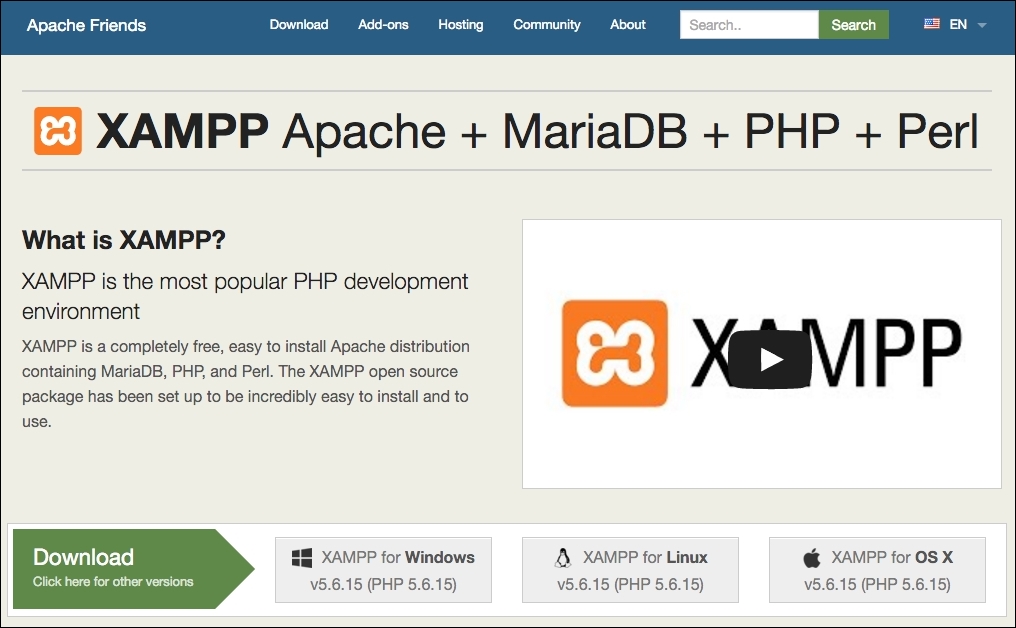
XAMPP has three distinct versions for different operating systems (OS): Windows, Linux, and OS X. Choose your preferred version to download, and start the installation process.
XAMPP for Windows has three different kinds of installation files:
The (.exe) installer is the most popular process to install. Download it and execute to start the installation process, shown as follows:

- You can skip FileZilla FTP Server, Mercury Mail Server, and Tomcat for our installation purposes but feel free to consult Apache Friends Support Forum for further information at https://community.apachefriends.org.
- On XAMPP, we have the option to use Bitnami (https://bitnami.com/xampp), but for learning purposes, we will install Magento in a classic way.
- Complete the installation by pressing the Finish button.

- In order to start XAMPP for Windows, you can execute
xampp-control.exeand start the Apache web server. - To test if everything is working, type
http://localhosturlin your favorite web browser. You will see the XAMPP start page:
XAMPP for Linux has two main versions of installation files:
- 32-bit version
- 64-bit version
Choose the file according to your architecture and follow these steps:
- Change the permissions to the installer:
chmod 755 xampp-linux-*-installer.run
- Run the installer:
sudo ./xampp-linux-*-installer.runXAMPP is now installed below the
/opt/lamppdirectory. - To start XAMPP, execute this command on terminal:
sudo /opt/lampp/lampp start - To test if everything is working, type the
http://localhostURL in your favorite web browser. You will see the XAMPP start page:
To install XAMPP for OS X, you simply need to follow these steps:
- Download the DMG image file.
- Open the image file to start the installation process.
- The steps are pretty much the same as Windows installation.
- To test if everything is working, type the
http://localhostURL in your favorite web browser. You will see the XAMPP start page:
The XAMPP htdocs folder is the docroot folder of your server. Everything that you save on htdocs can be accessed via any browser. For example, if you save index.php inside the htdocs root, you can access this script by entering http://localhost/index.php. If you save your file in the packt folder, you can access it by http://localhost/packt/index.php. Piece of cake!
XAMPP for Windows installation
XAMPP for Windows has three different kinds of installation files:
The (.exe) installer is the most popular process to install. Download it and execute to start the installation process, shown as follows:
- You can skip FileZilla FTP Server, Mercury Mail Server, and Tomcat for our installation purposes but feel free to consult Apache Friends Support Forum for further information at https://community.apachefriends.org.
- On XAMPP, we have the option to use Bitnami (https://bitnami.com/xampp), but for learning purposes, we will install Magento in a classic way.
- Complete the installation by pressing the Finish button.
- In order to start XAMPP for Windows, you can execute
xampp-control.exeand start the Apache web server. - To test if everything is working, type
http://localhosturlin your favorite web browser. You will see the XAMPP start page:
XAMPP for Linux has two main versions of installation files:
- 32-bit version
- 64-bit version
Choose the file according to your architecture and follow these steps:
- Change the permissions to the installer:
chmod 755 xampp-linux-*-installer.run
- Run the installer:
sudo ./xampp-linux-*-installer.runXAMPP is now installed below the
/opt/lamppdirectory. - To start XAMPP, execute this command on terminal:
sudo /opt/lampp/lampp start - To test if everything is working, type the
http://localhostURL in your favorite web browser. You will see the XAMPP start page:
To install XAMPP for OS X, you simply need to follow these steps:
- Download the DMG image file.
- Open the image file to start the installation process.
- The steps are pretty much the same as Windows installation.
- To test if everything is working, type the
http://localhostURL in your favorite web browser. You will see the XAMPP start page:
The XAMPP htdocs folder is the docroot folder of your server. Everything that you save on htdocs can be accessed via any browser. For example, if you save index.php inside the htdocs root, you can access this script by entering http://localhost/index.php. If you save your file in the packt folder, you can access it by http://localhost/packt/index.php. Piece of cake!
XAMPP for Linux installation
XAMPP for Linux has two main versions of installation files:
- 32-bit version
- 64-bit version
Choose the file according to your architecture and follow these steps:
- Change the permissions to the installer:
chmod 755 xampp-linux-*-installer.run
- Run the installer:
sudo ./xampp-linux-*-installer.runXAMPP is now installed below the
/opt/lamppdirectory. - To start XAMPP, execute this command on terminal:
sudo /opt/lampp/lampp start - To test if everything is working, type the
http://localhostURL in your favorite web browser. You will see the XAMPP start page:
To install XAMPP for OS X, you simply need to follow these steps:
- Download the DMG image file.
- Open the image file to start the installation process.
- The steps are pretty much the same as Windows installation.
- To test if everything is working, type the
http://localhostURL in your favorite web browser. You will see the XAMPP start page:
The XAMPP htdocs folder is the docroot folder of your server. Everything that you save on htdocs can be accessed via any browser. For example, if you save index.php inside the htdocs root, you can access this script by entering http://localhost/index.php. If you save your file in the packt folder, you can access it by http://localhost/packt/index.php. Piece of cake!
XAMPP for OS X installation
To install XAMPP for OS X, you simply need to follow these steps:
- Download the DMG image file.
- Open the image file to start the installation process.
- The steps are pretty much the same as Windows installation.
- To test if everything is working, type the
http://localhostURL in your favorite web browser. You will see the XAMPP start page:
The XAMPP htdocs folder is the docroot folder of your server. Everything that you save on htdocs can be accessed via any browser. For example, if you save index.php inside the htdocs root, you can access this script by entering http://localhost/index.php. If you save your file in the packt folder, you can access it by http://localhost/packt/index.php. Piece of cake!
Magento is an open source content management system for e-commerce websites. It's one of the most important e-commerce systems, which has grown fast since its launch in 2008.
Basically, Magento works with two different types of Magento: Community Edition (CE) and Enterprise Edition (EE). In this book, we will cover CE.
On a study provided by aheadWorks (https://aheadworks.com/) in October 2014, Magento CE has taken the leading position among examined e-commerce platforms.

Now, we have solid concepts about "where we are going". It's very important to have solids concepts about every aspect that you are working on in this moment. Globally, e-commerce shows a remarkable potential market and Magento professionals are welcome.
First of all, we need to create a user account on the Magento website (http://www.magento.com) to download Magento CE. Click on the top-menu link My Account and after clicking the button labeled Register, fill out the form and confirm your registration.
Once registered, you gain access to download Magento CE. You can access the Products | Open Source/CE and VIEW AVAILABLE DOWNLOADS menus.
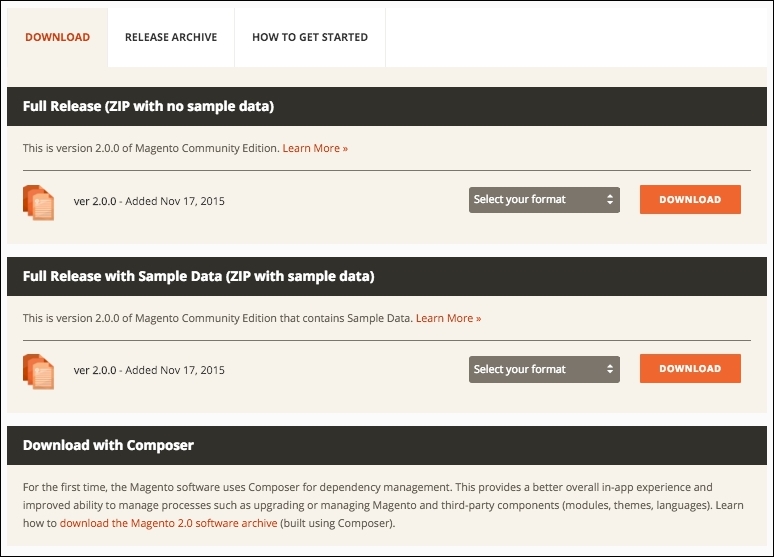
On this page, we have three important options:
- Full Release (ZIP with no sample data): This is a complete download of the last and stable Magento version
- Full Release with Sample Data (ZIP with sample data): This is important to create example products to our store for testing.
- Download with Composer: This is the dependency management installation tool
Choose the
Full Release with Sample Data (ZIP with sample data) option for downloading Magento. Extract the compressed files in the XAMPP htdocsfolder and rename the folder to packt.
Before starting the Magento installation, we'll need to create a new MySQL database instance to store the Magento data. phpMyAdmin is a MySQL web app to manage your database and can be accessed at http://localhost/phpmyadmin/.
Click on the Databases menu and the Create database option to create the packt database.

Now, let's start our Magento installation. On your browser, access http://localhost/packt/setup.
By now, you will see this installation page on your browser:
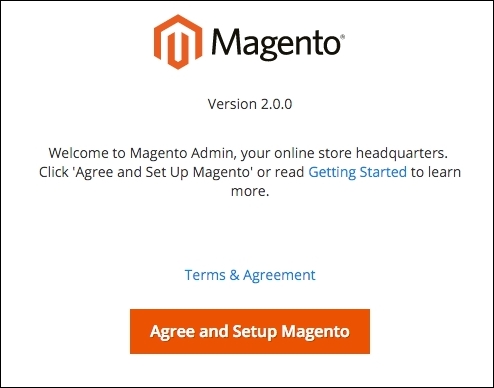
Let's start the Magento installation by following these steps:
- Readiness Check: Check the environment for the correct PHP version, PHP extensions, file permissions, and compatibility.
- Add a Database: Fill the database form with your connection information. By default, you can follow the suggestions given here:

- Web Configuration: Enter you store address and admin address here:

- Customize Your Store: In this step you provide the time zone, currency, and language information:

- Create an Admin Account: Enter with personal login information and set the admin address to
packt-admin.
After all these steps, we are done! Congratulations! We have our first Magento installation!
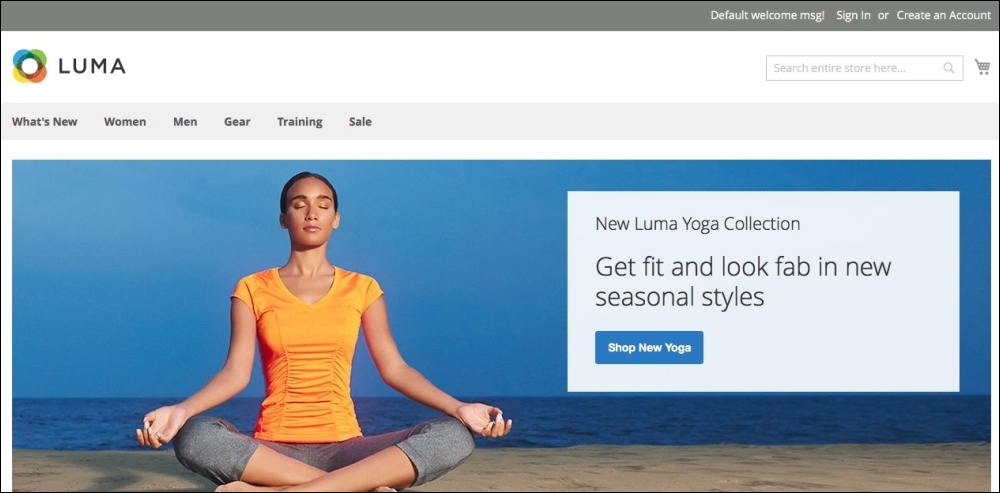
You can access your new site by accessing the URL at http://localhost/packt:
And you can access the admin area by accessing the URL at http://localhost/packt/admin-packt:
For more information about Magento installation, access http://devdocs.magento.com/guides/v2.0/install-gde/bk-install-guide.html.
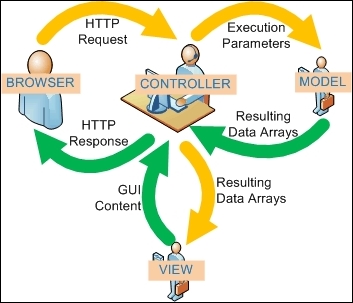
MVC is an architectural software pattern that works with three different but interconnected parts. Its principal mission is to abstract the development work into interdependent layers providing the best practices to documentation and organization of software projects.
The Magento e-commerce solution is written with the PHP Zend framework, which is one of the most powerful PHP frameworks. For more information, access http://framework.zend.com/.
Magento is a configuration-based MVC System. For example, when you develop a module (we will check this in the next chapters), besides creating new files and classes to your module, you need to also create a config.xml file. This file contains all the configuration data for Magento module. These practices abstract some important information that you can easily edit to set the module as you need.
In this book, we will cover only the very basic Magento software architecture concepts, but it's highly recommended that you to study more software design patterns, especially in our case MVC software architecture needs to be understood well to best experience the field of software development.
Magento installation
First of all, we need to create a user account on the Magento website (http://www.magento.com) to download Magento CE. Click on the top-menu link My Account and after clicking the button labeled Register, fill out the form and confirm your registration.
Once registered, you gain access to download Magento CE. You can access the Products | Open Source/CE and VIEW AVAILABLE DOWNLOADS menus.
On this page, we have three important options:
- Full Release (ZIP with no sample data): This is a complete download of the last and stable Magento version
- Full Release with Sample Data (ZIP with sample data): This is important to create example products to our store for testing.
- Download with Composer: This is the dependency management installation tool
Choose the
Full Release with Sample Data (ZIP with sample data) option for downloading Magento. Extract the compressed files in the XAMPP htdocsfolder and rename the folder to packt.
Before starting the Magento installation, we'll need to create a new MySQL database instance to store the Magento data. phpMyAdmin is a MySQL web app to manage your database and can be accessed at http://localhost/phpmyadmin/.
Click on the Databases menu and the Create database option to create the packt database.
Now, let's start our Magento installation. On your browser, access http://localhost/packt/setup.
By now, you will see this installation page on your browser:
Let's start the Magento installation by following these steps:
- Readiness Check: Check the environment for the correct PHP version, PHP extensions, file permissions, and compatibility.
- Add a Database: Fill the database form with your connection information. By default, you can follow the suggestions given here:
- Web Configuration: Enter you store address and admin address here:
- Customize Your Store: In this step you provide the time zone, currency, and language information:
- Create an Admin Account: Enter with personal login information and set the admin address to
packt-admin.
After all these steps, we are done! Congratulations! We have our first Magento installation!
You can access your new site by accessing the URL at http://localhost/packt:
And you can access the admin area by accessing the URL at http://localhost/packt/admin-packt:
For more information about Magento installation, access http://devdocs.magento.com/guides/v2.0/install-gde/bk-install-guide.html.
MVC is an architectural software pattern that works with three different but interconnected parts. Its principal mission is to abstract the development work into interdependent layers providing the best practices to documentation and organization of software projects.
The Magento e-commerce solution is written with the PHP Zend framework, which is one of the most powerful PHP frameworks. For more information, access http://framework.zend.com/.
Magento is a configuration-based MVC System. For example, when you develop a module (we will check this in the next chapters), besides creating new files and classes to your module, you need to also create a config.xml file. This file contains all the configuration data for Magento module. These practices abstract some important information that you can easily edit to set the module as you need.
In this book, we will cover only the very basic Magento software architecture concepts, but it's highly recommended that you to study more software design patterns, especially in our case MVC software architecture needs to be understood well to best experience the field of software development.
Magento MVC architecture
MVC is an architectural software pattern that works with three different but interconnected parts. Its principal mission is to abstract the development work into interdependent layers providing the best practices to documentation and organization of software projects.
The Magento e-commerce solution is written with the PHP Zend framework, which is one of the most powerful PHP frameworks. For more information, access http://framework.zend.com/.
Magento is a configuration-based MVC System. For example, when you develop a module (we will check this in the next chapters), besides creating new files and classes to your module, you need to also create a config.xml file. This file contains all the configuration data for Magento module. These practices abstract some important information that you can easily edit to set the module as you need.
In this book, we will cover only the very basic Magento software architecture concepts, but it's highly recommended that you to study more software design patterns, especially in our case MVC software architecture needs to be understood well to best experience the field of software development.
You've now seen what Magento can do; you have installed Magento too. You started to understand the basic concepts of Magento, and certainly, you'll get more experience in developing your own Magento solutions by working in the projects of this book.
In the next chapter, we'll work with some Magento Sell System features.
Magento has many features to provide a great experience to the users and developers. Understanding what Magento can provide is the key to success in the development of Magento. All Magento developers seek for improvements in this area.
On the Magento Connect site (https://www.magentocommerce.com/magento-connect/), you can search for uncountable extensions to improve your Magento solution: Checkout, Cart, Order Management, Gifting, Pricing, and Promotion, and a lot more. At this point, it is crucial to understand that Magento has a native solution and how its features can help you think of some great solutions for development.
In the previous chapter, you learned the fundamentals to create a basic local Magento environment to work with book projects. In this chapter, you will learn how Magento manages and improves system sell processes.
The following topics will be covered in this chapter:
- Magento features
- Magento architecture
- Magento order management
- Magento command-line utility configurations
Have fun!
Magento Commerce has promoted important changes between its 1.x and 2.0 versions. Some usual problems of the Magento 1.x version were fixed in this new version. The following processes/modules have received improvements in Magento 2.0:
- Performance
- Payment method
- Checkout
- Catalog
- CMS
- Web API
- Framework
- Setup
All good software or systems pass through incremental improvements for evolving according to its production environment; it couldn't be different with a commerce platform that powers over 250,000 online stores worldwide.
Magento 2.0 CE has a flexible architecture and a modular code base; it has a modern theming and an extensive Application Programming Interface (API). To get a better performance, Magento 2.0 compresses JavaScript files and images and gives support to Apache Varnish integration on the server side to enable faster performance.
Security is another subject treated in the Magento 2.0 system. According to its official documentation (http://goo.gl/E7sPm3), Magento 2.0 has had substantial enhancements in its security layer:
- Enhanced password management
- An improved prevention of cross-site scripting (XSS)
- Restricted permissions for file access
- An improved prevention of click jacking exploits
- The use of non-default admin URL
Extensibility and modularity allow Magento to be highly customizable. As an objected-oriented solution, Magento follows good architectural principles and coding standards that provide high cohesion and loose coupling.
The following diagram illustrates Magento's architecture and how the components are integrated:
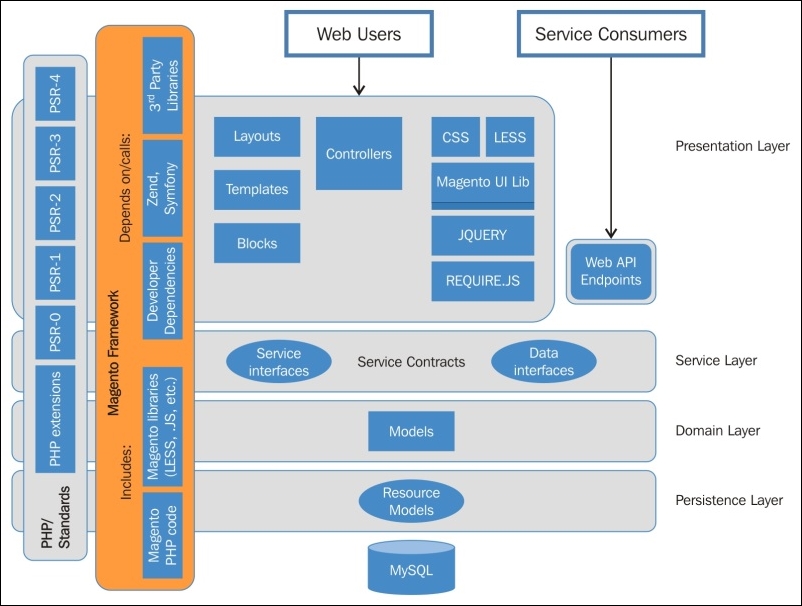
Magento works with PHP Standards Recommendations (PSR). The PSR establishes the following good programming practices:
- PHP extensions: This allows Magento to work with some PHP extension solutions that are required by Magento, for example, PDO and Memcache.
- PSR-0—Autoloading Standard: This enables class autoloading on the PHP code. It's highly recommended to use PSR-4 instead of PSR-0, but the PSR-0 standard illustrates only the Magento architecture standards.
- PSR-1—Basic Coding Standard: These are some good practices to write the PHP code.
- PSR-2—Coding Style Guide: This extends PSR-1, adding the layout code presentation.
- PSR-3—Logger Interface: This exposes eight methods to write logs to the eight RFC 5424 levels (
debug,info,notice,warning,error,critical,alert, andemergency). - PSR-4—Autoloading Standard: This describes a specification for autoloading classes from file paths.
On Magento Framework, we have some libraries and dependencies of this architecture. Zend Framework (ZF) is a very important layer of this architecture; once Magento was written in ZF; as we saw earlier.
Finally, we have Web Users (frontend/backend), Service Consumers (API and endpoints), Service Layers (interfaces/contracts), and Models (resources and database).
On the Web Users layer, we can define Magento's main processes as:

- Products: This manages the configuration of products in Magento, such as catalogs, inventory, categories, and attributes
- Marketing: This manages promotions, communications, and SEO
- Content: This manages the pages content
- Customers: This manages and gets information about customers
- Sales: This manages cart process, checkout, orders, shipping, and payments
- Reports: This generates reports and statics of e-commerce
We will discuss these topics in the coming chapters, but now, I'd like to introduce to you one of the most important processes of any kind of e-commerce: the Sales layer or Magento Order Management. This is one of the most important things to understand the Magento development core.

On the e-commerce systems, the sell process is one of the most important features of every online business, providing a good e-commerce life cycle.
Some processes will be triggered when a customer confirms his order. Magento collects all the customer data and processes the request turning it into an order. This book will only cover the basic concepts of this process, but it's very important to understand them to develop consistent Magento extension solutions (we will see about this in Chapter 6, Write Magento 2.0 Extensions – a Great Place to Go).
Let's take a look at the Magento sales operations basics.
Let's play with the Magento admin area. In your favorite browser, enter the URL http://localhost/packt/admin-packt. Now, enter with your login credentials to access the admin area:

In Magento 2.0, you can manage sales operations by accessing the Sales menu in the admin area. Magento gives you the possibility to configure the following Sales options:

These options give you the power to manage your sales system as you want. Though it's, it's important to explore some Magento tools, extensions, and techniques to take full advantage and make improvements on your sales system to gather techniques to develop your own solution:
We have many options to make improvements on sales operations. You can configure up-sells and cross-sells features, for example, to give your customer more ways to order on your store. To do so, take advantage of a search engine optimization, work with a multilingual store, a geo-targeting, responsive design, and a simplified checkout process.
In this section, we'll see how to implement a simplified checkout process on our store.
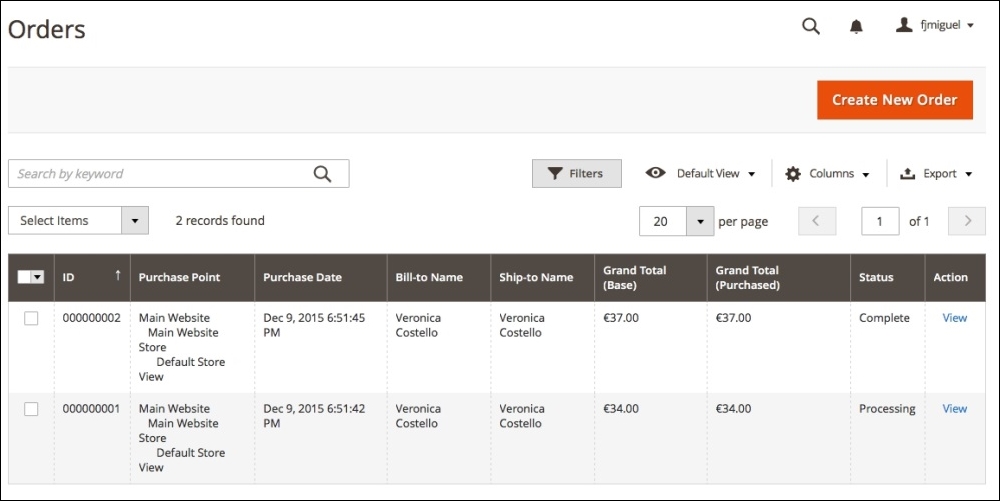
As a system administrator, you can access the admin area (http://localhost/mymagento/admin) to get all the customer order information, generate the product tracking code, invoices, and send a message to your customer. Magento stores all the order data on the admin area | Sales | Orders.
As an admin, Magento gives you the option to order products directly for your customer. On Magento, we have a persistent cart, print invoices, credit memo, and transactions.
You have a few options of payment methods in Magento. Magento has a native support to Google Checkout and PayPal. They both are payment gateways that provide the entire sell transaction environment to your store.
Basically, you choose your payment method and choose how you will pay for your product: credit card or deposit.
With the products prices defined, you can set up promotions in advance. Promotion systems are very useful to establish a solid relationship with the customer.
In Magento, it is possible to define catalog price rules and shopping cart rules. Basically, you can define price behavior according to your promotions and customer defined rules, such as postal code, and certain value of discount.
You can provide coupon codes for your customers to raise Magento sells.
Sales operations
Let's play with the Magento admin area. In your favorite browser, enter the URL http://localhost/packt/admin-packt. Now, enter with your login credentials to access the admin area:
In Magento 2.0, you can manage sales operations by accessing the Sales menu in the admin area. Magento gives you the possibility to configure the following Sales options:
These options give you the power to manage your sales system as you want. Though it's, it's important to explore some Magento tools, extensions, and techniques to take full advantage and make improvements on your sales system to gather techniques to develop your own solution:
We have many options to make improvements on sales operations. You can configure up-sells and cross-sells features, for example, to give your customer more ways to order on your store. To do so, take advantage of a search engine optimization, work with a multilingual store, a geo-targeting, responsive design, and a simplified checkout process.
In this section, we'll see how to implement a simplified checkout process on our store.
As a system administrator, you can access the admin area (http://localhost/mymagento/admin) to get all the customer order information, generate the product tracking code, invoices, and send a message to your customer. Magento stores all the order data on the admin area | Sales | Orders.
As an admin, Magento gives you the option to order products directly for your customer. On Magento, we have a persistent cart, print invoices, credit memo, and transactions.
You have a few options of payment methods in Magento. Magento has a native support to Google Checkout and PayPal. They both are payment gateways that provide the entire sell transaction environment to your store.
Basically, you choose your payment method and choose how you will pay for your product: credit card or deposit.
With the products prices defined, you can set up promotions in advance. Promotion systems are very useful to establish a solid relationship with the customer.
In Magento, it is possible to define catalog price rules and shopping cart rules. Basically, you can define price behavior according to your promotions and customer defined rules, such as postal code, and certain value of discount.
You can provide coupon codes for your customers to raise Magento sells.
A simplified checkout process
In this section, we'll see how to implement a simplified checkout process on our store.
As a system administrator, you can access the admin area (http://localhost/mymagento/admin) to get all the customer order information, generate the product tracking code, invoices, and send a message to your customer. Magento stores all the order data on the admin area | Sales | Orders.
As an admin, Magento gives you the option to order products directly for your customer. On Magento, we have a persistent cart, print invoices, credit memo, and transactions.
You have a few options of payment methods in Magento. Magento has a native support to Google Checkout and PayPal. They both are payment gateways that provide the entire sell transaction environment to your store.
Basically, you choose your payment method and choose how you will pay for your product: credit card or deposit.
With the products prices defined, you can set up promotions in advance. Promotion systems are very useful to establish a solid relationship with the customer.
In Magento, it is possible to define catalog price rules and shopping cart rules. Basically, you can define price behavior according to your promotions and customer defined rules, such as postal code, and certain value of discount.
You can provide coupon codes for your customers to raise Magento sells.
Orders
As a system administrator, you can access the admin area (http://localhost/mymagento/admin) to get all the customer order information, generate the product tracking code, invoices, and send a message to your customer. Magento stores all the order data on the admin area | Sales | Orders.
As an admin, Magento gives you the option to order products directly for your customer. On Magento, we have a persistent cart, print invoices, credit memo, and transactions.
You have a few options of payment methods in Magento. Magento has a native support to Google Checkout and PayPal. They both are payment gateways that provide the entire sell transaction environment to your store.
Basically, you choose your payment method and choose how you will pay for your product: credit card or deposit.
With the products prices defined, you can set up promotions in advance. Promotion systems are very useful to establish a solid relationship with the customer.
In Magento, it is possible to define catalog price rules and shopping cart rules. Basically, you can define price behavior according to your promotions and customer defined rules, such as postal code, and certain value of discount.
You can provide coupon codes for your customers to raise Magento sells.
Payments
You have a few options of payment methods in Magento. Magento has a native support to Google Checkout and PayPal. They both are payment gateways that provide the entire sell transaction environment to your store.
Basically, you choose your payment method and choose how you will pay for your product: credit card or deposit.
With the products prices defined, you can set up promotions in advance. Promotion systems are very useful to establish a solid relationship with the customer.
In Magento, it is possible to define catalog price rules and shopping cart rules. Basically, you can define price behavior according to your promotions and customer defined rules, such as postal code, and certain value of discount.
You can provide coupon codes for your customers to raise Magento sells.
Promotions
With the products prices defined, you can set up promotions in advance. Promotion systems are very useful to establish a solid relationship with the customer.
In Magento, it is possible to define catalog price rules and shopping cart rules. Basically, you can define price behavior according to your promotions and customer defined rules, such as postal code, and certain value of discount.
You can provide coupon codes for your customers to raise Magento sells.
Once you have installed Magento 2.0 CE, you will need to configure some options and manage the system life cycle according to your specific needs. You can start your Magento configuration and administration using the command-line utility.
Let's see how this feature works.
Magento 2.0 has a command-line utility to help developers manage installation and configuration tasks. The new command-line interface can do the following:
- Install Magento
- Manage the cache
- Manage indexers
- Configure and run cron
- Compile code
- Set the Magento mode
- Set the URN highlighter
- Create dependency reports
- Translate dictionaries and language packages
- Deploy static view files
- Create symlinks to LESS files
- Run unit tests
- Convert layout into XML files
- Generate data for performance testing
- Create CSS from LESS (CSS real-time compilation)
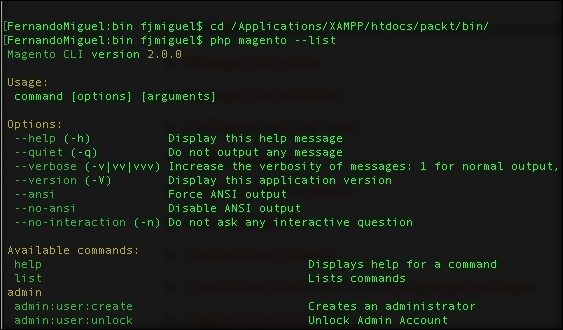
To work with this tool, you will need to open a terminal (Linux, OS X) or command prompt (Windows) and access the <your Magento install dir>/bin directory. Then, enter with the php magento command to see all the available commands of the command-line utility:
Note
Remember to configure the PHP path to the system environment variable to execute the command. For further information, access http://php.net/manual/en/faq.installation.php.
Let's play a little bit with the utility by disabling your Magento system cache:
- Run the
php magento cache:statuscommand. The cache will probably be enabled. - Run the
php magento cache:disablecommand to disable any cache system.
Now let's try to manage Magento indexing. Magento indexing transforms the data to improve the performance of your system by executing the following commands. Indexing technique optimizes the price calculations process, for example, and it has an important role to play in the Magento performance:
- Run the
php magento indexer:infocommand to view the lists of indexers - Run the
php magento indexer:statuscommand to view the real-time status - Run the
php magento indexer:reindexcommand to rebuild the indexation
Magento indexing was successfully rebuilt, thanks to the command-line utility actions!
You can build cron jobs in a remote server to automate some Magento actions. For example, create an automation routine to re-index Magento periodically.
I strongly advise you to play more with the command-line utility. You can consult the online documentation available at http://goo.gl/iVnQSn.
We started this chapter to get the real bases of Magento power. It's important to get solid concepts, before you eagerly jump and begin developing Magento solutions. Take a moment to understand the scope of your project. This will make Magento development a much more rewarding experience.
Magento has a solid structure to develop your own solutions. You can automate some tasks using the Magento command-line utility and optimize Magento resources to get better results.
In the next chapter, we will work with Magento search engine optimization.
Search Engine Optimization (SEO) is a technique to build your site following good practices established by W3C Consortium and search engines, such as Google, to increase your site's visitation and ranking. On Magento, we need to configure the system properly to take advantage of this feature. Nowadays, SEO is a prerequisite on every website on the Internet.
Magento has a great variety of tools to configure the store of SEO and allows SEO adjustment for products, categories and CMS page titles, metainformation, and headings.
SEO application is a constant job; it never ends. Basically, you need to know how Magento SEO works and what options you have to optimize its working. Magento is a search engine-friendly e-commerce platform, and you will discover its main concepts in this chapter.
In this book, you will learn some good techniques and apply them by configuring the default installation.
The following topics will be covered in this chapter:
- Magento SEO management
- SEO catalog configuration
- XML sitemap manager
- Google Analytics tracking code
- Optimizing Magento pages, products, and categories
SEO is the technique of developing a site according to the high standards defined by the World Wide Web Consortium and search engine companies, such as Google, in order to provide good content visualization to the users and rank the site in organic searches.
Magento provides the user with some significant tools for SEO. Let's take a look at some of these techniques and tools.
By default, Magento's basic installation has the title Magento Commerce on the header settings. It is very important to choose a strong main title to get the right amount of traffic on your site. For example, if you are working on the SEO of a sports store, you can set the main title as My Sports Store to increase the traffic through the title. When people search for something, they always notice the earlier words first.
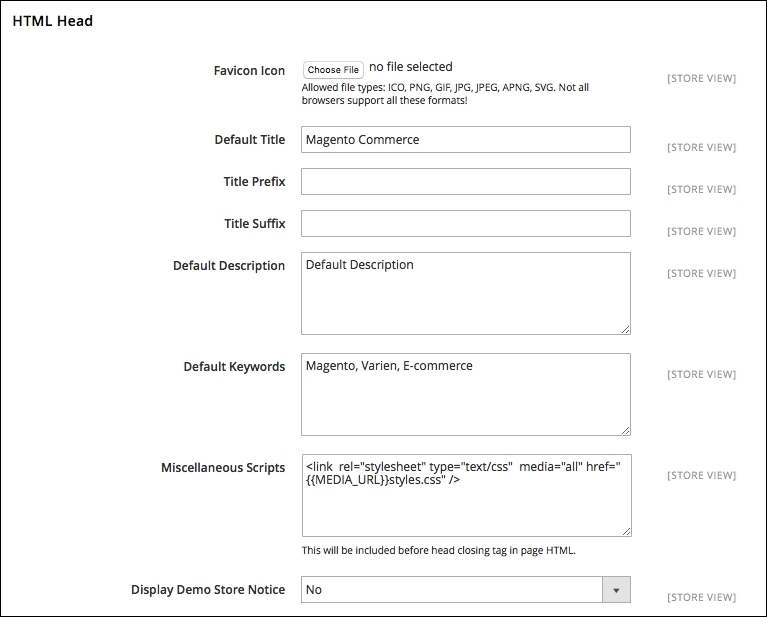
To adjust your store settings, you need to navigate to Stores | Configuration | Design | HTML Head in the Magento admin area (http://localhost/packt/admin-packt).
Choose a good descriptive title for your Magento commerce. It is possible and recommended to name all your page titles, including categories and products, by entering the site title in the Title Suffix field. To give density to the content for SEO engines by configuring the SEO on CMS pages and products, keep Default Description and Default Keywords empty.
For a local and nonproduction environment, prevent the indexing of the site by setting Default Robots to NOINDEX, NOFOLLOW. Otherwise, it is recommended to set it to INDEX, FOLLOW.
By working on this configuration, you will find that the main SEO parameters of the <head> tag are automatically fulfilled to be run on Magento commerce.
Magento has a specific SEO configuration panel for multiple sections. To access the main Magento SEO configuration, enter in the Magento admin area (http://localhost/packt/admin-packt), and you will find the panel by clicking on the menu at Marketing | SEO & Search:

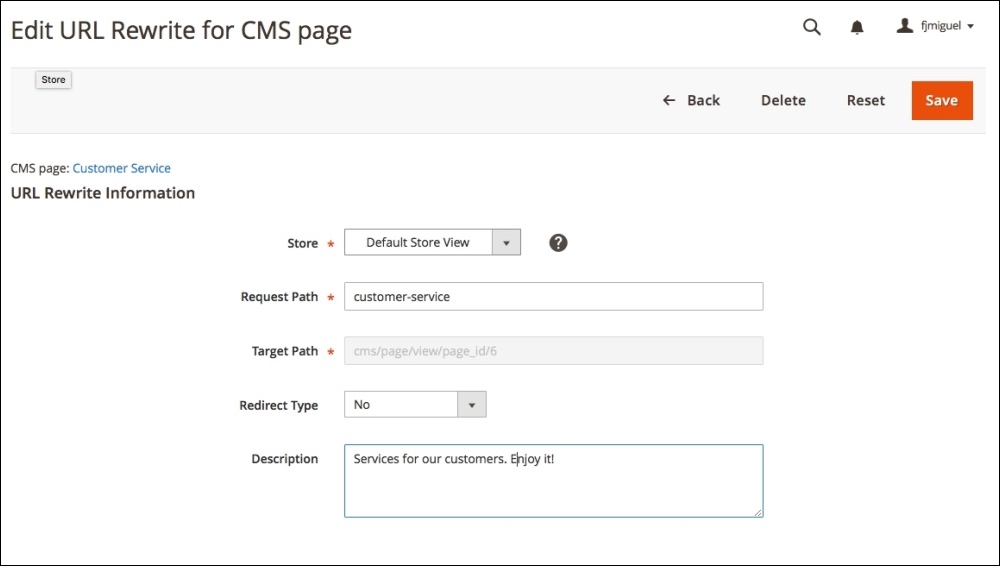
Magento 2.0 changed some functionality in comparison with its previous version. For example, in the URL Rewrites menu, you can manage and define all the URL addresses of Magento in order to increase the SEO's friendly URLs.

Here, you can simply choose Request Path to edit and enter a description for each of them, as shown in the following screenshot:
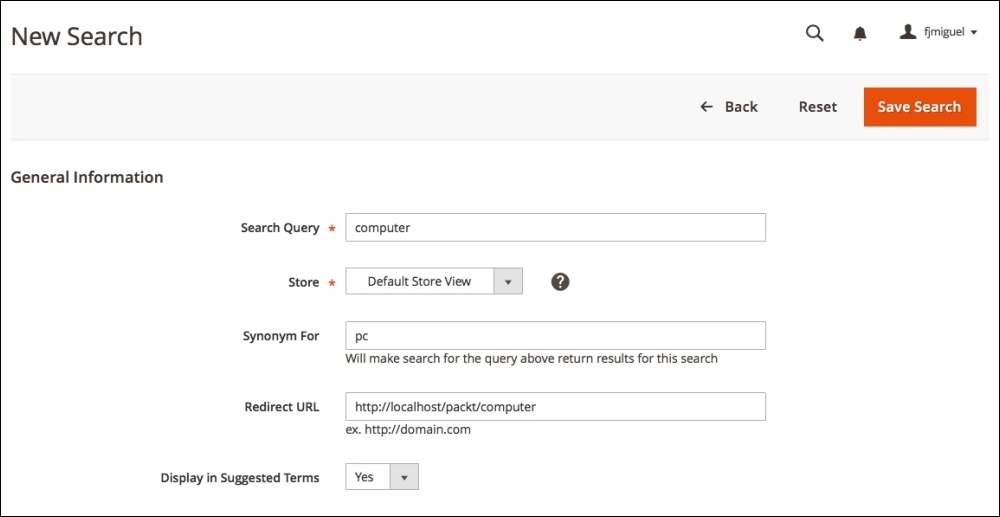
In Search Terms, you can define and redirect the URL according to the search made by the user by adding a new search term:
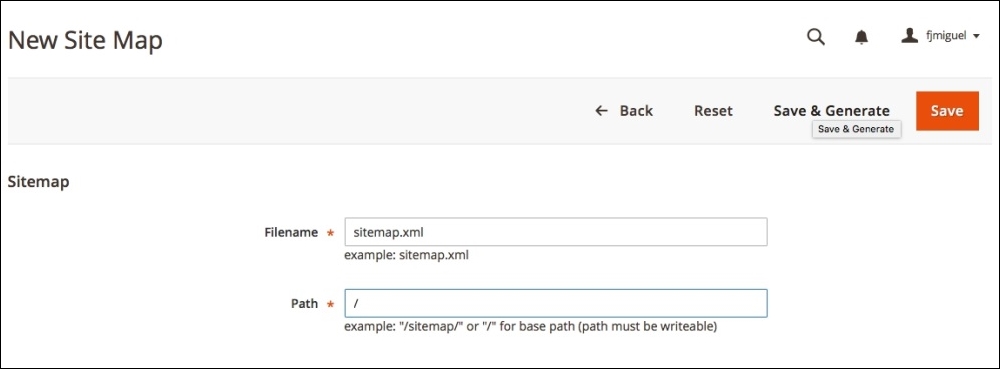
Finally, in the New Site Map section, you can generate Sitemap of your Magento installation as shown in the following screenshot:
Magento has a special panel to take care of the catalog categories of SEO. To access this panel, navigate to Stores | Configuration | Catalog | Search Engine Optimization, as follows:
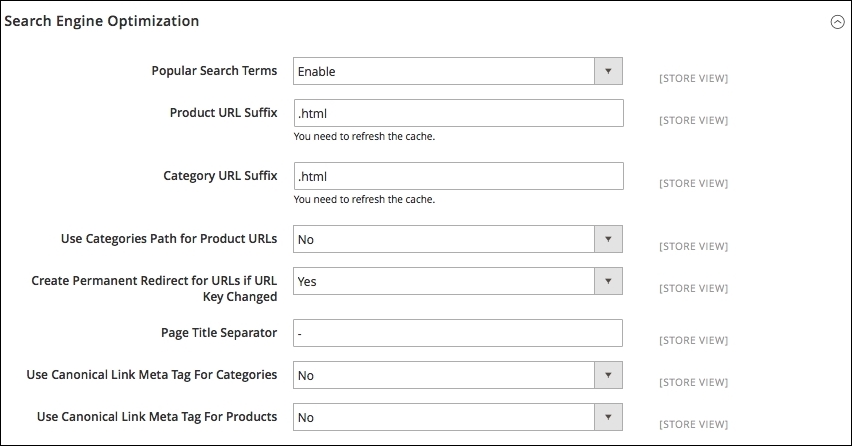
This panel has the following options:
- Popular Search Terms: This allows pages to display your most popular search phrases. Set this to Yes.
- Product URL Suffix: This is the suffix that is added to the end of your product URLs.
- Category URL Suffix: This is the suffix that is added to the end of your category URLs.
- Use Categories Path for Product URLs: This includes the category URL in your URL string.
- Create Permanent Redirect for URLs if URL Key Changed: This automatically creates a redirect via the URL Rewrites' module in Magento if the URL key is changed in any page on your website.
- Page Title Separator: This separates the page titles on the frontend of your store.
- Use Canonical Link Meta Tag For Categories: This displays the main version of the category page. This is picked up by search engines to avoid duplicate content.
- Use Canonical Link Meta Tag For Products: This has the same functionality as the previous item, but it works on the products layer.
With these options, you can choose the best strategy for SEO on catalog's default options. Magenta gives the administrator the opportunity to tune these options on catalog pages. We will work this out later in this chapter.
Magento automatically generates an XML sitemap for your store and also keeps it up to date. In order to enable this, navigate to Stores | Configuration | Catalog | XML Sitemap. Magento has the following options for this section:
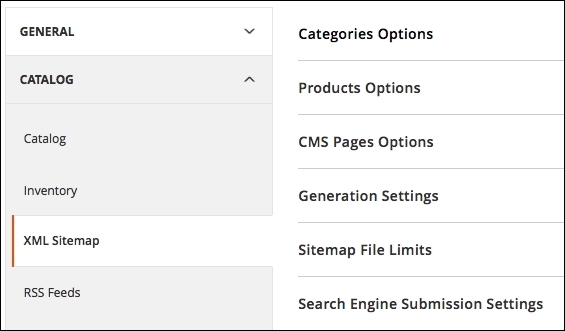
Basically, with these options, it is possible to choose the frequency and priority of updates. You may set additional options, such as Start Time and Error Notifications, only in the GENERAL settings tab. It's important to configure the cron job functionality in your web server to enable this feature.
XML sitemap manager
Magento automatically generates an XML sitemap for your store and also keeps it up to date. In order to enable this, navigate to Stores | Configuration | Catalog | XML Sitemap. Magento has the following options for this section:
Basically, with these options, it is possible to choose the frequency and priority of updates. You may set additional options, such as Start Time and Error Notifications, only in the GENERAL settings tab. It's important to configure the cron job functionality in your web server to enable this feature.
Google Analytics helps track all the statistics for your site. To add Google Analytics on Magento, generate a tracking code on your Google Analytics account (http://analytics.google.com) first of all. After this, navigate to System | Configuration | Google API.
This option works only on hosted Magento sites (that is, the remote server). Take note of this for when you work on a remote production Magento site. For the purposes of this book, it isn't necessary, but you need to keep this option in mind when you start to work on remote projects.
Once you make Magento SEO system configurations, it's time to set specific options directly on Magento pages. This Magento SEO flow gives the user the flexibility to focus on content and page ranking.
The Magento Content Management System (CMS) manager is a very simple but powerful tool that provides us with control over each aspect of the Magento page. To access Magento CMS pages configuration in the admin area, go to Content | Pages, as shown in the following screenshot:
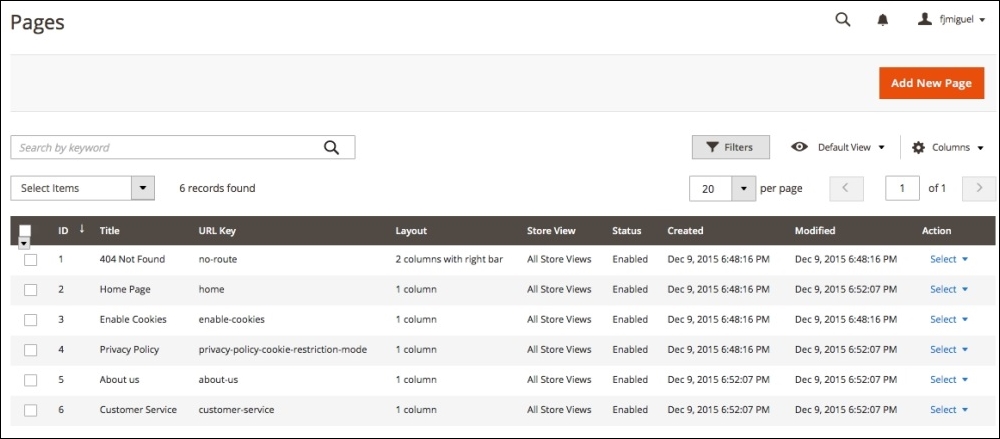
Magento's default installation provides some demo content to test CMS pages. Check the Home Page content by selecting the Edit option.
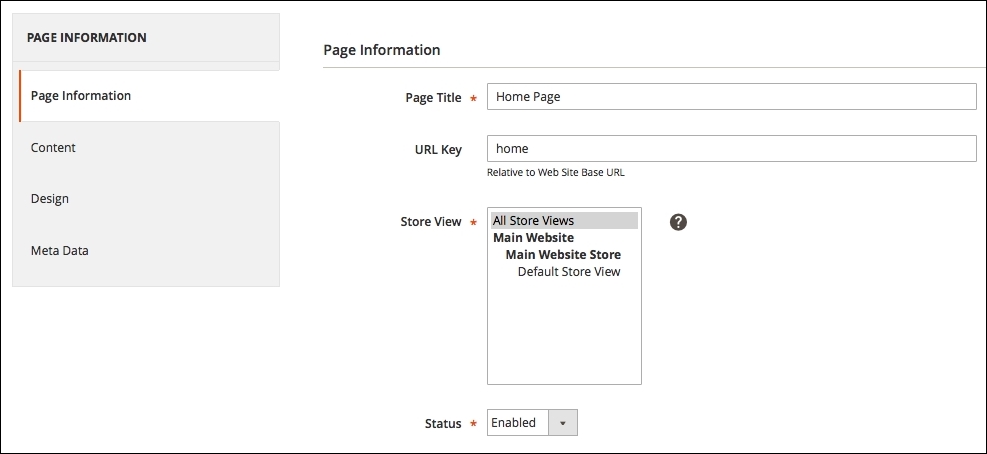
For the purpose of SEO, Magento's CMS page administration has two main SEO side menus: Page Information and Meta Data.
In Page Information, you can set the following options:
In Meta Data, you can set the following options:
- Keywords: Here, enter the keywords that correspond to your site's scope.
- Description: Make sure to use this field the right way. A good description means a good chance of increasing access and sales.
The content of your page must be aligned with the metadata for a good SEO implementation.
This is the most important layer in a Magento store. Besides providing a lot of options to configure the product to be sold, this also makes it possible to tune the SEO configuration to increase sales through the search engine page ranking system. In order to access Product options, navigate to Products | Catalog, as shown in the following screenshot:

Click on the first product of the list to take a look at the SEO options. For the purpose of SEO, Product Details has the following options:
Search Engine Optimization has the following options:
- URL Key: This is the URL that the product will be visible on. If the product has a version number or some specific detail, try to put this on the URL.
- Meta Information: Choose the best Meta Title, Meta Keywords, and Meta Description input for your product.

Every single product gives the administrator these options to tune SEO on a Magento website.
Magento category pages have great SEO options. As you can note, all the content pages on Magento give us administration options to manage SEO. Every aspect on Magento configuration is integrated to provide the user with the best experience.
To access the Categories configuration, navigate to Products | Categories on the admin dashboard, as shown in the following screenshot:

This will provide an option to create a new category, and in the side menu, it is possible to check all the categories registered on Magento. For the purpose of SEO, Magento has the following options in this section:
- Name: This is the category name.
- Description: This is the description of the category. Focus on using keywords strategically for SEO.
- Page Title: This refers to the metatitle. Enter your keyword with a few words to describe the page.
- Meta Keywords: Here, enter the keywords separated by commas.
- Meta Description: This is a very important option, so make sure that your description covers the products that you're selling and reinforces your brand.
Make sure to follow a pattern in your content referring to SEO.
CMS pages
The Magento Content Management System (CMS) manager is a very simple but powerful tool that provides us with control over each aspect of the Magento page. To access Magento CMS pages configuration in the admin area, go to Content | Pages, as shown in the following screenshot:
Magento's default installation provides some demo content to test CMS pages. Check the Home Page content by selecting the Edit option.
For the purpose of SEO, Magento's CMS page administration has two main SEO side menus: Page Information and Meta Data.
In Page Information, you can set the following options:
In Meta Data, you can set the following options:
- Keywords: Here, enter the keywords that correspond to your site's scope.
- Description: Make sure to use this field the right way. A good description means a good chance of increasing access and sales.
The content of your page must be aligned with the metadata for a good SEO implementation.
This is the most important layer in a Magento store. Besides providing a lot of options to configure the product to be sold, this also makes it possible to tune the SEO configuration to increase sales through the search engine page ranking system. In order to access Product options, navigate to Products | Catalog, as shown in the following screenshot:
Click on the first product of the list to take a look at the SEO options. For the purpose of SEO, Product Details has the following options:
Search Engine Optimization has the following options:
- URL Key: This is the URL that the product will be visible on. If the product has a version number or some specific detail, try to put this on the URL.
- Meta Information: Choose the best Meta Title, Meta Keywords, and Meta Description input for your product.
Every single product gives the administrator these options to tune SEO on a Magento website.
Magento category pages have great SEO options. As you can note, all the content pages on Magento give us administration options to manage SEO. Every aspect on Magento configuration is integrated to provide the user with the best experience.
To access the Categories configuration, navigate to Products | Categories on the admin dashboard, as shown in the following screenshot:
This will provide an option to create a new category, and in the side menu, it is possible to check all the categories registered on Magento. For the purpose of SEO, Magento has the following options in this section:
- Name: This is the category name.
- Description: This is the description of the category. Focus on using keywords strategically for SEO.
- Page Title: This refers to the metatitle. Enter your keyword with a few words to describe the page.
- Meta Keywords: Here, enter the keywords separated by commas.
- Meta Description: This is a very important option, so make sure that your description covers the products that you're selling and reinforces your brand.
Make sure to follow a pattern in your content referring to SEO.
Product pages
This is the most important layer in a Magento store. Besides providing a lot of options to configure the product to be sold, this also makes it possible to tune the SEO configuration to increase sales through the search engine page ranking system. In order to access Product options, navigate to Products | Catalog, as shown in the following screenshot:
Click on the first product of the list to take a look at the SEO options. For the purpose of SEO, Product Details has the following options:
Search Engine Optimization has the following options:
- URL Key: This is the URL that the product will be visible on. If the product has a version number or some specific detail, try to put this on the URL.
- Meta Information: Choose the best Meta Title, Meta Keywords, and Meta Description input for your product.
Every single product gives the administrator these options to tune SEO on a Magento website.
Magento category pages have great SEO options. As you can note, all the content pages on Magento give us administration options to manage SEO. Every aspect on Magento configuration is integrated to provide the user with the best experience.
To access the Categories configuration, navigate to Products | Categories on the admin dashboard, as shown in the following screenshot:
This will provide an option to create a new category, and in the side menu, it is possible to check all the categories registered on Magento. For the purpose of SEO, Magento has the following options in this section:
- Name: This is the category name.
- Description: This is the description of the category. Focus on using keywords strategically for SEO.
- Page Title: This refers to the metatitle. Enter your keyword with a few words to describe the page.
- Meta Keywords: Here, enter the keywords separated by commas.
- Meta Description: This is a very important option, so make sure that your description covers the products that you're selling and reinforces your brand.
Make sure to follow a pattern in your content referring to SEO.
Category pages
Magento category pages have great SEO options. As you can note, all the content pages on Magento give us administration options to manage SEO. Every aspect on Magento configuration is integrated to provide the user with the best experience.
To access the Categories configuration, navigate to Products | Categories on the admin dashboard, as shown in the following screenshot:
This will provide an option to create a new category, and in the side menu, it is possible to check all the categories registered on Magento. For the purpose of SEO, Magento has the following options in this section:
- Name: This is the category name.
- Description: This is the description of the category. Focus on using keywords strategically for SEO.
- Page Title: This refers to the metatitle. Enter your keyword with a few words to describe the page.
- Meta Keywords: Here, enter the keywords separated by commas.
- Meta Description: This is a very important option, so make sure that your description covers the products that you're selling and reinforces your brand.
Make sure to follow a pattern in your content referring to SEO.
Magento SEO is a powerful tool to increase sales. As a developer, it is very important to keep these options and techniques in mind to create mechanisms that would get better results for Magento users through new extensions and customizations.
In this chapter, we discussed the following:
- Magento SEO management
- SEO catalog configuration
- XML sitemap manager
- Google Analytics tracking code
- Optimizing Magento pages, products, and categories
In the next chapter, we will cover Magento theme development and customization. We have a lot of work coming up!
Magento 2.0 has a complex control of its themes. It works with multiple directories to generate the final result for the user on its frontend.
In this chapter we will consolidate the basic concepts that you need to create your very first example of Magento theme and activate it.
At the end of this chapter, you will be able to create the basic structure of your own theme. The following topics are covered in this chapter:
- The basic concepts of Magento themes
- Magento 2.0 theme structure
- The Magento Luma theme
- Magento theme inheritance
- CMS blocks and pages
- Custom variables
- Creating a basic Magento 2.0 theme
According to the official documentation available at http://goo.gl/D4oxO1, a Magento theme is a component that provides the visual design for an entire application area using a combination of custom templates, layouts, styles, or images. Themes are implemented by different vendors (frontend developers) and intended to be distributed as additional packages for Magento systems similar to other components.
Magento has its own particularities because it is based on Zend Framework and consequently adopts the MVC architecture as a software design pattern. When the Magento theme process flow becomes a subject, you have some concerns to worry about when you plan to create your own theme. Let's focus on these concepts to create our own theme by the end of this chapter.
Magento 2.0 has a new approach toward managing its themes. Generally, the Magento 2.0 themes are located in the app/design/frontend/<Vendor>/ directory. This location differs according to the built-in themes, such as the
Luma theme, which is located in vendor/magento/theme-frontend-luma.
The different themes are stored in separate directories, as in the following screenshot:
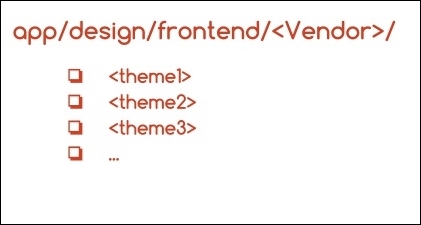
Each vendor can have one or more themes attached to it. So, you can develop different themes inside the same vendor.
The theme structure of Magento 2.0 is illustrated as follows:

How the Magento theme structure works is quite simple to understand: each <Vendor>_<Module> directory corresponds to a specific module or functionality of your theme. For example, Magento_Customer has specific .css and .html files to handle the Customer module of the Magento vendor. Magento handles a significant number of modules. So, I strongly suggest that you navigate to the vendor/magento/theme-frontend-luma folder to take a look at the available modules for the default theme.
In the Magento 2.0 structure, we have three main files that manage the theme behavior, which are as follows:
composer.json: This file describes the dependencies and meta informationregistration.php: This file registers your theme in the systemtheme.xml: This file declares the theme in system and is used by the Magento system to recognize the theme
All the theme files inside the structure explained previously can be divided into static view files and dynamic view files. The static view files have no processing by the server (images, fonts, and .js files), and the dynamic view files are processed by the server before delivering the content to the user (template and layout files).
Static files are generally published in the following folders:
/pub/static/frontend/<Vendor>/<theme>/<language><theme_dir>/media/<theme_dir>/webNote
For further information, please access the official Magento theme structure documentation at http://goo.gl/ov3IUJ.
The Magento CE 2.0 version comes with a new theme named Luma that implements Responsive Web Design (RWD) practices.
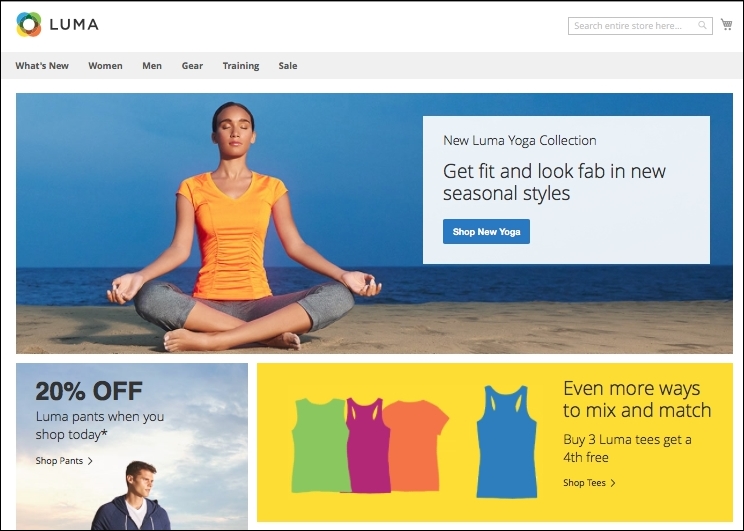
The Luma theme style is based on the Magento user interface (UI) library and uses CSS3 media queries to work with screen width, adapting the layout according to device access.
The Magento UI is a great toolbox for theme development in Magento 2.0 and provides the following components to customize and reuse user interface elements:
- The actions toolbar
- Breadcrumbs
- Buttons
- Drop-down menus
- Forms
- Icons
- Layout
- Loaders
- Messages
- Pagination
- Popups
- Ratings
- Sections
- Tabs and accordions
- Tables
- Tooltips
- Typography
- A list of theme variables
The Luma theme uses some of the
blank theme features to be functional. The Magento 2.0 blank theme, available in the vendor/magento/theme-frontend-blank folder, is the basic Magento theme and is declared as the parent theme of Luma. How is this possible? Logically, Magento has distinct folders for every theme, but Magento is too smart to reuse code; it takes advantage of theme inheritance. Let's take a look at how this works.
The frontend of Magento allows designers to create new themes based on the basic blank theme, reusing the main code without changing its structure. The fallback system is a theme's inheritance mechanism and allows developers to create only the files that are necessary for customization.
The Luma theme, for example, uses the fallback system by inheriting the blank theme basic structure. The Luma theme parent is declared in its theme.xml file as follows:
<theme xmlns:xsi="http://www.w3.org/2001/XMLSchema-instance" xsi:noNamespaceSchemaLocation="urn:magento:framework:Config/etc/theme.xsd">
    <title>Magento Luma</title>
    <parent>Magento/blank</parent>
    <media>
        <preview_image>media/preview.jpg</preview_image>
    </media>
</theme>
Inheritance works similar to an override system. You can create new themes using the existent ones (parents) and by replacing (that is, overriding) an existing file with the same name but in your specific theme folder (child).
For example, if you create a new theme in the app/design/frontend/<Vendor>/<theme>/ folder and declare Magento/blank as a parent theme, the theme.xml file and registration.php, you have the entire blank theme structure ready to work in your new theme, including RWD layouts and styles.
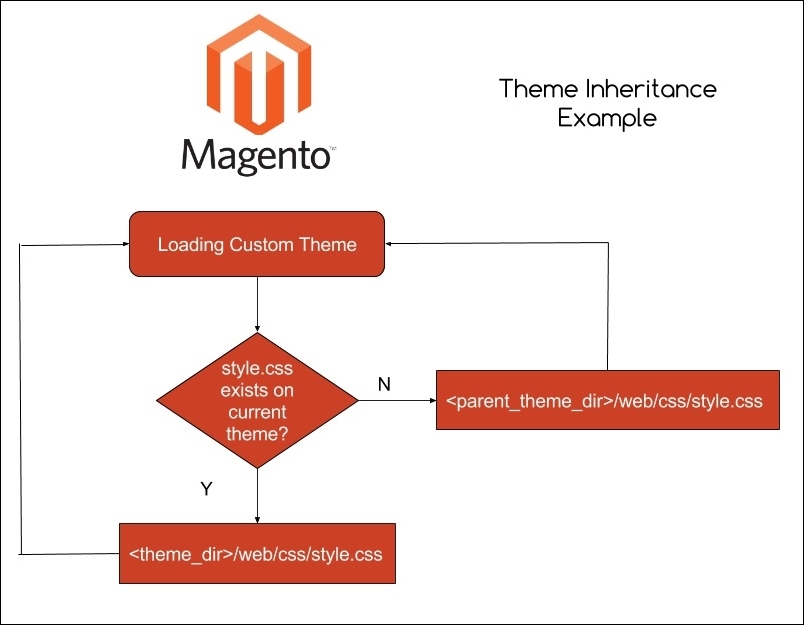
Let's say that you have a specific .css file available in the <theme_dir>/web/css folder. If you delete this file, the fallback system will search the file in the <parent_theme_dir>/web/css folder, as shown in the following figure:
Magento has a flexible theme system. Beyond Magento code customization, the admin can create blocks and content on the Magento admin panel, such as Home Page, About us, or any static page that you want to create. CMS pages and blocks on Magento give you the power to embed HTML code in your page.
You can create or edit pages and blocks by accessing the Admin area (http://localhost/packt/admin_packt) by navigating to Content | Pages.

Custom variables are pieces of HTML code that contain specific values as programming variables. By creating a custom variable, you can apply it to multiple areas on your site. An example of the custom variable structure is shown here:
{{config path="web/unsecure/base_url"}}This variable shows the URL of the store.
Now, let's create a custom variable to see how it works. Perform the following steps:
- Open your favorite browser and access the admin area through
http://localhost/packt/admin_packt. - Navigate to System | Custom Variables
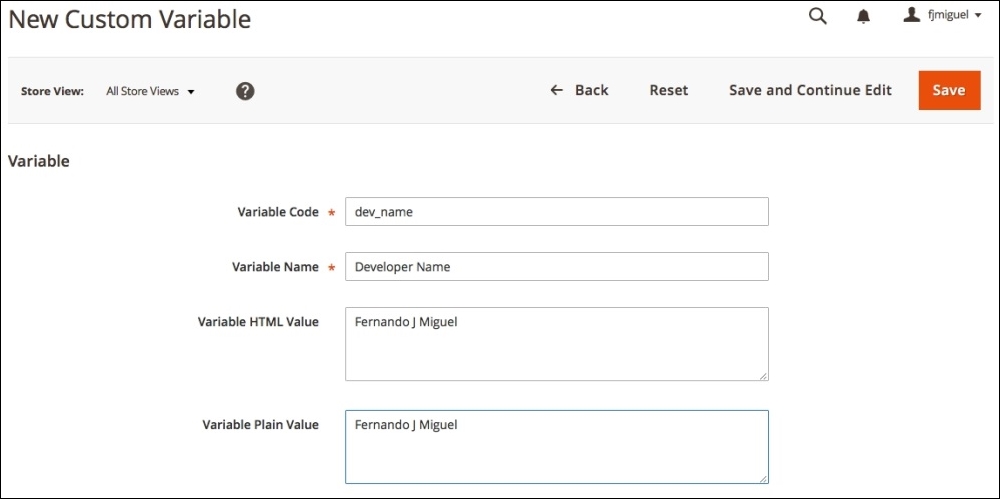
- Then, click on the Add New Variable button.
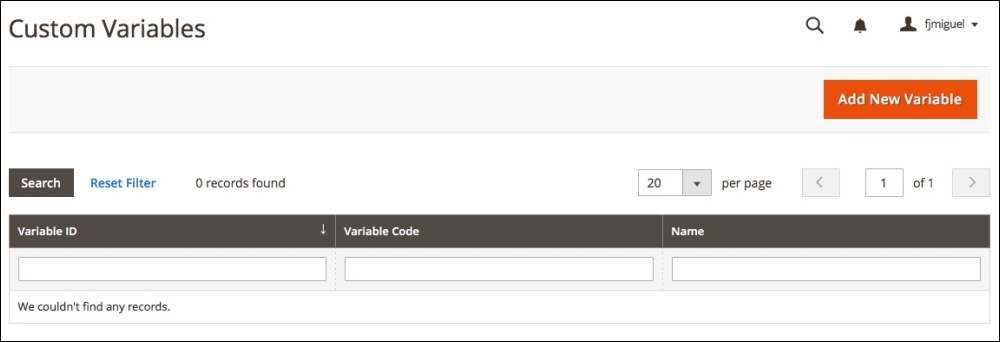
- In the Variable Code field, enter the variable in lowercase with no spaces—for example,
dev_name. - Enter the variable name, which explains the variable purpose.
- Enter the HTML and plain text values of the custom variable in the Variable HTML Value and Variable Plain Value fields and save it.
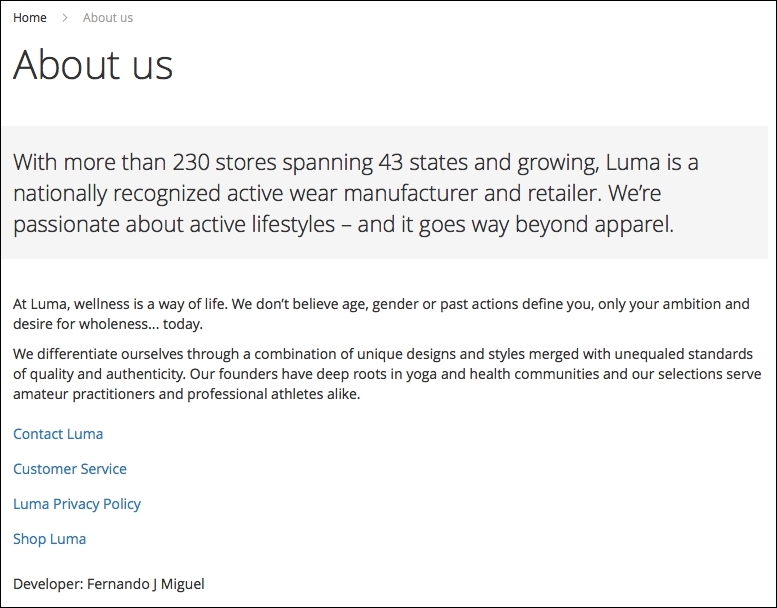
Now, we have a custom variable that stores the developer's name. Let's use this variable inside the CMS About Us page via the following steps:
- In the Admin area, navigate to Content | Pages.
- Click to edit the About Us item.
- Then, click on the Content side menu.
- Click on the Show / Hide Editor button to hide the HTML editor.
- Put the following code at the end of the content:
{{CustomVar code="dev_name"}} - Finally, save the content.

Let's take a look at the result in the following screenshot:
After understanding the basic Magento 2.0 theme structure, you have the right credentials to go to the next level: creating your own theme. In this chapter, we will develop a simple theme and activate it on the Magento Admin panel. The basic idea is to give you the right directions to Magento theme development and provide you with the tools to let your imagination fly around the creation of various Magento themes!
Before starting the creation, let's disable Magento cache management. It is important when you work with Magento development to get updates in real time. You learned about cache management in Chapter 2, Magento 2.0 Features:
- Open the terminal (Linux, OS X) or command prompt (Windows) and access the
<your Magento install dir>/bindirectory. - Then, run the
php magento cache:disablecommand to disable all the cache systems.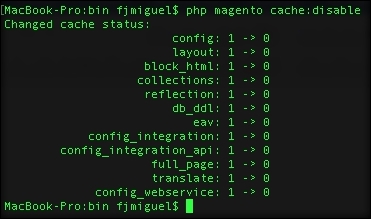
To create a basic theme structure, follow these steps:
The next step is to declare the theme information for Magento to recognize it as a new theme. Perform the following:
- Open your preferred code editor (Sublime Text2, TextMate, Atom.io).
- Create a new file named
theme.xmlunder your theme directory (app/design/frontend/Packt/basic/theme.xml). - Use the following code in the
theme.xmlfile and save the file:<theme xmlns:xsi="http://www.w3.org/2001/XMLSchema-instance" xsi:noNamespaceSchemaLocation="urn:magento:framework:Config/etc/theme.xsd"> <title>Basic theme</title> <parent>Magento/blank</parent> <!-- <media> <preview_image>media/preview.jpg</preview_image> </media>--> </theme>
This is a basic declaration for the Magento system to recognize our theme as an official theme. This code configures the theme name, parent, and preview image. The preview image is a preview for basic visualization purposes. We don't have a preview image right now, which is the why the code is commented; avoid unnecessary errors.
Once we have the basic configurations, we need to register the theme in the Magento system:
- Open your preferred code editor (Sublime Text2, TextMate, or Atom.io).
- Create new file named
registration.phpunder your theme directory (app/design/frontend/Packt/basic/registration.php). - Use the following code in registration.php and save the file:
<?php
/**
 * Copyright © 2016 Magento. All rights reserved.
 * See COPYING.txt for license details.
 */
\Magento\Framework\Component\ComponentRegistrar::register(
    \Magento\Framework\Component\ComponentRegistrar::THEME,
    'frontend/Packt/basic',
    __DIR__
);
This code simply registers our theme in the Magento system by passing a parameter of your new theme's structure directory.
In your theme, you can configure the image properties of the products in the Magento Catalog module by creating the view.xml file. You can control this specific configuration using the id attribute of every product's HTML5 element:
- Open your preferred code editor (Sublime Text2, TextMate, or Atom.io).
- Create a new directory named
etcunder your theme directory (app/design/frontend/Packt/basic/etc). - Create a new file named
view.xmlunder youretcdirectory (app/design/frontend/Packt/basic/etc/view.xml). - Then, use the following code in
view.xmland save the file:<image id="category_page_grid" type="small_image"> <width>250</width> <height>250</height> </image>
In the view.xml file, we declared the values of the width and height of the product image. The id and type attributes specified the kind of image that this rule will be applied to.
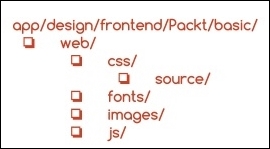
The static files (images, .js files, .css files, and fonts) will be stored in the web directory. Inside the web directory, we will organize our static files according to its scope. Create a new directory named web under your directory app/design/frontend/Packt/basic/web theme and create the following directory structure:
With this simple structure, you can manage all the static files of your custom theme.
By default in Magento 2.0, the theme logo is always recognized by the system by the name logo.svg. Magento 2.0 also recognizes the logo's default directory as <theme_dir>/web/images/logo.svg. So, if you have a logo.svg file, you can simply put the file in the right directory.
However, if you want to work with a different logo's name with a different format, you have to declare it in the Magento system. We will make a declaration with this new logo in the Magento_Theme directory because the new logo is a customization of the Magento_Theme module. We will override this module by taking advantage of the fallback system. As you may note, Magento has a specific pattern of declaring elements. This is the way in which Magento organizes its life cycle.
Let's declare a new theme logo by performing the following steps:
- Choose one logo for the example and save the file as
logo.pngin theapp/design/frontend/Packt/basic/Magento_Theme/web/imagesdirectory. - Open your preferred code editor (Sublime Text2, TextMate, or Atom.io).
- Create new file named
default.xmlunder yourlayoutdirectory (app/design/frontend/Packt/basic/Magento_Theme/layout). - Use the following code in
default.xmland save the file:<page xmlns:xsi="http://www.w3.org/2001/XMLSchema-instance" xsi:noNamespaceSchemaLocation="urn:magento:framework:View/Layout/etc/page_configuration.xsd"> <body> <referenceBlock name="logo"> <arguments> <argument name="logo_file" xsi:type="string"> Magento_Theme/images/logo.png </argument> <argument name="logo_img_width" xsi:type="number"> your_logo_width </argument> <argument name="logo_img_height" xsi:type="number"> your_logo_height </argument> </arguments> </referenceBlock> </body> </page>
This declaration has three different arguments to manage three attributes of your new logo: filename, width, and height. Don't forget to replace the your_logo_width and your_logo_height attributes with the correct size of the logo that you choose.
The logo_file argument seems to be wrong because we created our image in the Magento_Theme/web/images directory; however, thank God this is not true. I'll explain: when we activate the new theme, Magento processes the static files and copies them to the pub/static directory. This occurs because static files can be cached by Magento, and the correct directory for this is pub. So, we need to create the web directory for Magento to recognize the files as static files.
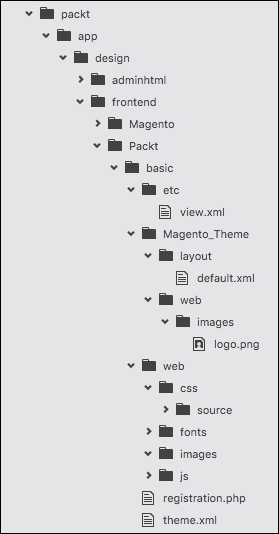
The final theme directory structure is illustrated as follows:
Once we have the theme ready to launch, we need to activate it in the Magento admin dashboard:
- First, access the Magento admin area URL (
http://localhost/packt/admin_packt) in your favorite browser. - Navigate to Stores | Configuration | Design.
- Then, select the Basic theme option as your Design Theme value and save the configuration.

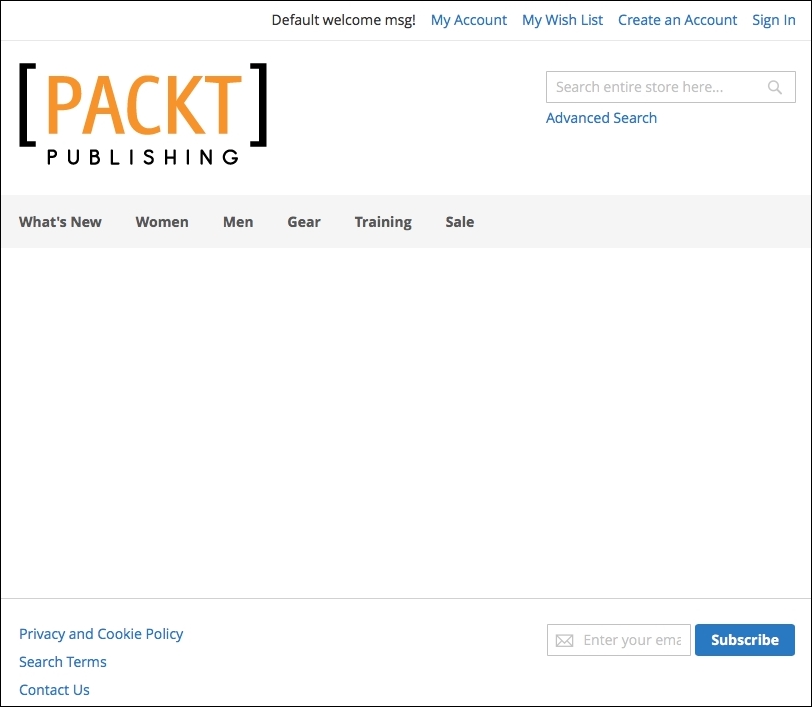
Navigate to the home page of your site by accessing the http://localhost/packt URL to see the final result:
Creating and declaring a theme
To create a basic theme structure, follow these steps:
The next step is to declare the theme information for Magento to recognize it as a new theme. Perform the following:
- Open your preferred code editor (Sublime Text2, TextMate, Atom.io).
- Create a new file named
theme.xmlunder your theme directory (app/design/frontend/Packt/basic/theme.xml). - Use the following code in the
theme.xmlfile and save the file:<theme xmlns:xsi="http://www.w3.org/2001/XMLSchema-instance" xsi:noNamespaceSchemaLocation="urn:magento:framework:Config/etc/theme.xsd"> <title>Basic theme</title> <parent>Magento/blank</parent> <!-- <media> <preview_image>media/preview.jpg</preview_image> </media>--> </theme>
This is a basic declaration for the Magento system to recognize our theme as an official theme. This code configures the theme name, parent, and preview image. The preview image is a preview for basic visualization purposes. We don't have a preview image right now, which is the why the code is commented; avoid unnecessary errors.
Once we have the basic configurations, we need to register the theme in the Magento system:
- Open your preferred code editor (Sublime Text2, TextMate, or Atom.io).
- Create new file named
registration.phpunder your theme directory (app/design/frontend/Packt/basic/registration.php). - Use the following code in registration.php and save the file:
<?php
/**
 * Copyright © 2016 Magento. All rights reserved.
 * See COPYING.txt for license details.
 */
\Magento\Framework\Component\ComponentRegistrar::register(
    \Magento\Framework\Component\ComponentRegistrar::THEME,
    'frontend/Packt/basic',
    __DIR__
);
This code simply registers our theme in the Magento system by passing a parameter of your new theme's structure directory.
In your theme, you can configure the image properties of the products in the Magento Catalog module by creating the view.xml file. You can control this specific configuration using the id attribute of every product's HTML5 element:
- Open your preferred code editor (Sublime Text2, TextMate, or Atom.io).
- Create a new directory named
etcunder your theme directory (app/design/frontend/Packt/basic/etc). - Create a new file named
view.xmlunder youretcdirectory (app/design/frontend/Packt/basic/etc/view.xml). - Then, use the following code in
view.xmland save the file:<image id="category_page_grid" type="small_image"> <width>250</width> <height>250</height> </image>
In the view.xml file, we declared the values of the width and height of the product image. The id and type attributes specified the kind of image that this rule will be applied to.
The static files (images, .js files, .css files, and fonts) will be stored in the web directory. Inside the web directory, we will organize our static files according to its scope. Create a new directory named web under your directory app/design/frontend/Packt/basic/web theme and create the following directory structure:
With this simple structure, you can manage all the static files of your custom theme.
By default in Magento 2.0, the theme logo is always recognized by the system by the name logo.svg. Magento 2.0 also recognizes the logo's default directory as <theme_dir>/web/images/logo.svg. So, if you have a logo.svg file, you can simply put the file in the right directory.
However, if you want to work with a different logo's name with a different format, you have to declare it in the Magento system. We will make a declaration with this new logo in the Magento_Theme directory because the new logo is a customization of the Magento_Theme module. We will override this module by taking advantage of the fallback system. As you may note, Magento has a specific pattern of declaring elements. This is the way in which Magento organizes its life cycle.
Let's declare a new theme logo by performing the following steps:
- Choose one logo for the example and save the file as
logo.pngin theapp/design/frontend/Packt/basic/Magento_Theme/web/imagesdirectory. - Open your preferred code editor (Sublime Text2, TextMate, or Atom.io).
- Create new file named
default.xmlunder yourlayoutdirectory (app/design/frontend/Packt/basic/Magento_Theme/layout). - Use the following code in
default.xmland save the file:<page xmlns:xsi="http://www.w3.org/2001/XMLSchema-instance" xsi:noNamespaceSchemaLocation="urn:magento:framework:View/Layout/etc/page_configuration.xsd"> <body> <referenceBlock name="logo"> <arguments> <argument name="logo_file" xsi:type="string"> Magento_Theme/images/logo.png </argument> <argument name="logo_img_width" xsi:type="number"> your_logo_width </argument> <argument name="logo_img_height" xsi:type="number"> your_logo_height </argument> </arguments> </referenceBlock> </body> </page>
This declaration has three different arguments to manage three attributes of your new logo: filename, width, and height. Don't forget to replace the your_logo_width and your_logo_height attributes with the correct size of the logo that you choose.
The logo_file argument seems to be wrong because we created our image in the Magento_Theme/web/images directory; however, thank God this is not true. I'll explain: when we activate the new theme, Magento processes the static files and copies them to the pub/static directory. This occurs because static files can be cached by Magento, and the correct directory for this is pub. So, we need to create the web directory for Magento to recognize the files as static files.
The final theme directory structure is illustrated as follows:
Once we have the theme ready to launch, we need to activate it in the Magento admin dashboard:
- First, access the Magento admin area URL (
http://localhost/packt/admin_packt) in your favorite browser. - Navigate to Stores | Configuration | Design.
- Then, select the Basic theme option as your Design Theme value and save the configuration.
Navigate to the home page of your site by accessing the http://localhost/packt URL to see the final result:
Simple product image configuration
In your theme, you can configure the image properties of the products in the Magento Catalog module by creating the view.xml file. You can control this specific configuration using the id attribute of every product's HTML5 element:
- Open your preferred code editor (Sublime Text2, TextMate, or Atom.io).
- Create a new directory named
etcunder your theme directory (app/design/frontend/Packt/basic/etc). - Create a new file named
view.xmlunder youretcdirectory (app/design/frontend/Packt/basic/etc/view.xml). - Then, use the following code in
view.xmland save the file:<image id="category_page_grid" type="small_image"> <width>250</width> <height>250</height> </image>
In the view.xml file, we declared the values of the width and height of the product image. The id and type attributes specified the kind of image that this rule will be applied to.
The static files (images, .js files, .css files, and fonts) will be stored in the web directory. Inside the web directory, we will organize our static files according to its scope. Create a new directory named web under your directory app/design/frontend/Packt/basic/web theme and create the following directory structure:
With this simple structure, you can manage all the static files of your custom theme.
By default in Magento 2.0, the theme logo is always recognized by the system by the name logo.svg. Magento 2.0 also recognizes the logo's default directory as <theme_dir>/web/images/logo.svg. So, if you have a logo.svg file, you can simply put the file in the right directory.
However, if you want to work with a different logo's name with a different format, you have to declare it in the Magento system. We will make a declaration with this new logo in the Magento_Theme directory because the new logo is a customization of the Magento_Theme module. We will override this module by taking advantage of the fallback system. As you may note, Magento has a specific pattern of declaring elements. This is the way in which Magento organizes its life cycle.
Let's declare a new theme logo by performing the following steps:
- Choose one logo for the example and save the file as
logo.pngin theapp/design/frontend/Packt/basic/Magento_Theme/web/imagesdirectory. - Open your preferred code editor (Sublime Text2, TextMate, or Atom.io).
- Create new file named
default.xmlunder yourlayoutdirectory (app/design/frontend/Packt/basic/Magento_Theme/layout). - Use the following code in
default.xmland save the file:<page xmlns:xsi="http://www.w3.org/2001/XMLSchema-instance" xsi:noNamespaceSchemaLocation="urn:magento:framework:View/Layout/etc/page_configuration.xsd"> <body> <referenceBlock name="logo"> <arguments> <argument name="logo_file" xsi:type="string"> Magento_Theme/images/logo.png </argument> <argument name="logo_img_width" xsi:type="number"> your_logo_width </argument> <argument name="logo_img_height" xsi:type="number"> your_logo_height </argument> </arguments> </referenceBlock> </body> </page>
This declaration has three different arguments to manage three attributes of your new logo: filename, width, and height. Don't forget to replace the your_logo_width and your_logo_height attributes with the correct size of the logo that you choose.
The logo_file argument seems to be wrong because we created our image in the Magento_Theme/web/images directory; however, thank God this is not true. I'll explain: when we activate the new theme, Magento processes the static files and copies them to the pub/static directory. This occurs because static files can be cached by Magento, and the correct directory for this is pub. So, we need to create the web directory for Magento to recognize the files as static files.
The final theme directory structure is illustrated as follows:
Once we have the theme ready to launch, we need to activate it in the Magento admin dashboard:
- First, access the Magento admin area URL (
http://localhost/packt/admin_packt) in your favorite browser. - Navigate to Stores | Configuration | Design.
- Then, select the Basic theme option as your Design Theme value and save the configuration.
Navigate to the home page of your site by accessing the http://localhost/packt URL to see the final result:
Creating static files' directories
The static files (images, .js files, .css files, and fonts) will be stored in the web directory. Inside the web directory, we will organize our static files according to its scope. Create a new directory named web under your directory app/design/frontend/Packt/basic/web theme and create the following directory structure:
With this simple structure, you can manage all the static files of your custom theme.
By default in Magento 2.0, the theme logo is always recognized by the system by the name logo.svg. Magento 2.0 also recognizes the logo's default directory as <theme_dir>/web/images/logo.svg. So, if you have a logo.svg file, you can simply put the file in the right directory.
However, if you want to work with a different logo's name with a different format, you have to declare it in the Magento system. We will make a declaration with this new logo in the Magento_Theme directory because the new logo is a customization of the Magento_Theme module. We will override this module by taking advantage of the fallback system. As you may note, Magento has a specific pattern of declaring elements. This is the way in which Magento organizes its life cycle.
Let's declare a new theme logo by performing the following steps:
- Choose one logo for the example and save the file as
logo.pngin theapp/design/frontend/Packt/basic/Magento_Theme/web/imagesdirectory. - Open your preferred code editor (Sublime Text2, TextMate, or Atom.io).
- Create new file named
default.xmlunder yourlayoutdirectory (app/design/frontend/Packt/basic/Magento_Theme/layout). - Use the following code in
default.xmland save the file:<page xmlns:xsi="http://www.w3.org/2001/XMLSchema-instance" xsi:noNamespaceSchemaLocation="urn:magento:framework:View/Layout/etc/page_configuration.xsd"> <body> <referenceBlock name="logo"> <arguments> <argument name="logo_file" xsi:type="string"> Magento_Theme/images/logo.png </argument> <argument name="logo_img_width" xsi:type="number"> your_logo_width </argument> <argument name="logo_img_height" xsi:type="number"> your_logo_height </argument> </arguments> </referenceBlock> </body> </page>
This declaration has three different arguments to manage three attributes of your new logo: filename, width, and height. Don't forget to replace the your_logo_width and your_logo_height attributes with the correct size of the logo that you choose.
The logo_file argument seems to be wrong because we created our image in the Magento_Theme/web/images directory; however, thank God this is not true. I'll explain: when we activate the new theme, Magento processes the static files and copies them to the pub/static directory. This occurs because static files can be cached by Magento, and the correct directory for this is pub. So, we need to create the web directory for Magento to recognize the files as static files.
The final theme directory structure is illustrated as follows:
Once we have the theme ready to launch, we need to activate it in the Magento admin dashboard:
- First, access the Magento admin area URL (
http://localhost/packt/admin_packt) in your favorite browser. - Navigate to Stores | Configuration | Design.
- Then, select the Basic theme option as your Design Theme value and save the configuration.
Navigate to the home page of your site by accessing the http://localhost/packt URL to see the final result:
Creating a theme logo
By default in Magento 2.0, the theme logo is always recognized by the system by the name logo.svg. Magento 2.0 also recognizes the logo's default directory as <theme_dir>/web/images/logo.svg. So, if you have a logo.svg file, you can simply put the file in the right directory.
However, if you want to work with a different logo's name with a different format, you have to declare it in the Magento system. We will make a declaration with this new logo in the Magento_Theme directory because the new logo is a customization of the Magento_Theme module. We will override this module by taking advantage of the fallback system. As you may note, Magento has a specific pattern of declaring elements. This is the way in which Magento organizes its life cycle.
Let's declare a new theme logo by performing the following steps:
- Choose one logo for the example and save the file as
logo.pngin theapp/design/frontend/Packt/basic/Magento_Theme/web/imagesdirectory. - Open your preferred code editor (Sublime Text2, TextMate, or Atom.io).
- Create new file named
default.xmlunder yourlayoutdirectory (app/design/frontend/Packt/basic/Magento_Theme/layout). - Use the following code in
default.xmland save the file:<page xmlns:xsi="http://www.w3.org/2001/XMLSchema-instance" xsi:noNamespaceSchemaLocation="urn:magento:framework:View/Layout/etc/page_configuration.xsd"> <body> <referenceBlock name="logo"> <arguments> <argument name="logo_file" xsi:type="string"> Magento_Theme/images/logo.png </argument> <argument name="logo_img_width" xsi:type="number"> your_logo_width </argument> <argument name="logo_img_height" xsi:type="number"> your_logo_height </argument> </arguments> </referenceBlock> </body> </page>
This declaration has three different arguments to manage three attributes of your new logo: filename, width, and height. Don't forget to replace the your_logo_width and your_logo_height attributes with the correct size of the logo that you choose.
The logo_file argument seems to be wrong because we created our image in the Magento_Theme/web/images directory; however, thank God this is not true. I'll explain: when we activate the new theme, Magento processes the static files and copies them to the pub/static directory. This occurs because static files can be cached by Magento, and the correct directory for this is pub. So, we need to create the web directory for Magento to recognize the files as static files.
The final theme directory structure is illustrated as follows:
Once we have the theme ready to launch, we need to activate it in the Magento admin dashboard:
- First, access the Magento admin area URL (
http://localhost/packt/admin_packt) in your favorite browser. - Navigate to Stores | Configuration | Design.
- Then, select the Basic theme option as your Design Theme value and save the configuration.
Navigate to the home page of your site by accessing the http://localhost/packt URL to see the final result:
Applying the theme
Once we have the theme ready to launch, we need to activate it in the Magento admin dashboard:
- First, access the Magento admin area URL (
http://localhost/packt/admin_packt) in your favorite browser. - Navigate to Stores | Configuration | Design.
- Then, select the Basic theme option as your Design Theme value and save the configuration.
Navigate to the home page of your site by accessing the http://localhost/packt URL to see the final result:
Now, you have all the basic concepts to create a custom theme for Magento and all the information to think in terms of the Magento structure when an idea for your new design comes to mind.
In this chapter, you learned the basic concepts of Magento 2.0 themes, how theme inheritance (that is, the fallback system) works, and which directories Magento uses to create its themes according to the admin area configurations. Finally, you created your own basic theme with these examples.
However, what about creating a quality theme? Is it possible with the knowledge acquired in this chapter? Of course! We will go to the next level in the next chapter and create a responsive theme by example.
In the previous chapter, you learned the fundamentals of creating a custom Magento 2.0 theme, and we created the basic structure by example. In this chapter, we will create our own theme project called the CompStore theme.
The following topics will be covered in this chapter:
- Developing the CompStore theme
- Introduction to Composer Dependency Manager
- CSS preprocessing with LESS
- Creating new content for the CompStore theme
- Developing a custom CompStore theme using CSS
- Creating a custom template
The CompStore theme project is the new Magento 2.0 theme that you will develop for a hypothetical computer store client or for a theme marketplace such as http://themeforest.net/. I strongly suggest you to take a look at the Become an author page at http://themeforest.net/become_an_author in order to explore the options to monetize your Magento theme development expertise. Logically, you have to work harder before publishing and selling your own theme solution, but it will be worth it!
Magento 2.0 themes and modules work with the
Composer (https://getcomposer.org/) dependency manager for PHP to generate a reliable deployment of Magento components. This is a great evolution in the Magento universe because this management can provide a powerful environment for the deployment of modules and themes. So, we will create a composer file for our new theme solution.
Before we start the theme development, let's take a look at Composer.
Inspired by
npm (https://www.npmjs.com/) and
bundler (http://bundler.io/), Composer (https://getcomposer.org/) manages the dependencies of your project and installs packages in predetermined directories (for example, vendor) using the composer.json file in the Magento module or theme. This kind of management is very useful once each library has your specific dependency. Composer doesn't let you waste your time by connecting the dependencies to every deployment that you want to do.

In the next chapters, we will use Composer to install components on Magento. However, first, we will start the development of our theme; it is necessary to declare our composer.json file. For now, let's install Composer on the operating system.
To install Composer on Unix-like systems (such as Unix, Linux, and OS X), you simply need to run these two commands in the terminal:
$ curl -s https://getcomposer.org/installer | php
$ sudo mv composer.phar /usr/local/bin/composer
The first command downloads the composer.phar installation file. The second command moves the file to the bin directory to install Composer globally on your computer.
Run the following command to check whether Composer was successfully installed:
$ composer
The $ composer command lists all the available Composer commands and their descriptions:
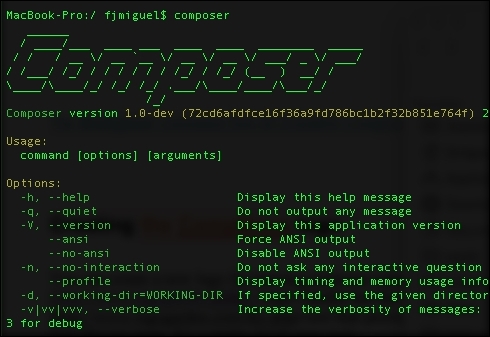
To install Composer on Windows, you simply have to download and execute Composer-Setup.exe, which is available on https://getcomposer.org/Composer-Setup.exe.
This executable file will install the latest Composer version and set up your path to use the composer command in the command prompt window. Open the command prompt window and run command composer to get the list of available commands of Composer.
Installing Composer on Unix-like operating systems
To install Composer on Unix-like systems (such as Unix, Linux, and OS X), you simply need to run these two commands in the terminal:
$ curl -s https://getcomposer.org/installer | php
$ sudo mv composer.phar /usr/local/bin/composer
The first command downloads the composer.phar installation file. The second command moves the file to the bin directory to install Composer globally on your computer.
Run the following command to check whether Composer was successfully installed:
$ composer
The $ composer command lists all the available Composer commands and their descriptions:
To install Composer on Windows, you simply have to download and execute Composer-Setup.exe, which is available on https://getcomposer.org/Composer-Setup.exe.
This executable file will install the latest Composer version and set up your path to use the composer command in the command prompt window. Open the command prompt window and run command composer to get the list of available commands of Composer.
Installing Composer on Windows
To install Composer on Windows, you simply have to download and execute Composer-Setup.exe, which is available on https://getcomposer.org/Composer-Setup.exe.
This executable file will install the latest Composer version and set up your path to use the composer command in the command prompt window. Open the command prompt window and run command composer to get the list of available commands of Composer.
As you noted in the previous chapter, Magento can store different themes inside the same vendor scope. The proposal project called CompStore will be a template of the Packt vendor. This is the same vendor created in the previous chapter.
First of all, it is important to build the theme directory in the Packt vendor directory (<Magento root directory>/app/design/frontend/Packt/compstore). Create this folder as the following image suggests:
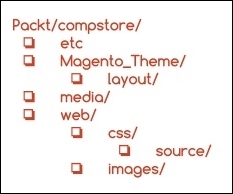
The etc directory usually handles the XML configuration of some components. The Magento_Theme directory will override the native Magento_Theme module by adding new functionalities. The media directory will store the preview image of the CompStore theme. Meanwhile, the web directory would have store CSS and image files by now.
The Compstore theme will have Luma as the parent theme. This example shows you the power of the abstraction used in Magento theme projects. Create the theme.xml file in the Packt/compstore directory with the following code:
<theme xmlns:xsi="http://www.w3.org/2001/XMLSchema-instance" xsi:noNamespaceSchemaLocation="urn:magento:framework:Config/etc/theme.xsd">
    <title>CompStore Electronics</title>
    <parent>Magento/luma</parent>
    <media>
        <preview_image>media/preview.jpg</preview_image>
    </media>
</theme>
The theme.xml file declares the title and parent of the CompStore theme. Create a simple preview.jpg image with a size of 800 x 800 and save it in the Packt/compstore/media directory. For example, the Magento logo is centered at the image size of 800 x 800.
This image shows the preview of the new theme, but as you don't have a preview yet, you can create a placeholder for now.
The next step is creating the registration.php file in the Packt/compstore directory with the following code:
<?php

\Magento\Framework\Component\ComponentRegistrar::register(
    \Magento\Framework\Component\ComponentRegistrar::THEME,
    'frontend/Packt/compstore',
    __DIR__
);
In the registration.php file, the CompStore theme of the Packt vendor registers the new theme of the Magento system.
The theme.xml and registration.php files were created earlier. By now, I think you are very comfortable with the structure of these files because you worked with them in the basic theme and now in the CompStore theme. This point forward, you will be introduced to some new concepts of theme development in Magento 2.0, starting with the creation of the composer.json file. Create the composer.json file in the Packt/compstore directory with the following code:
{
    "name": "packt/compstore",
    "description": "CompStore electronics theme",
    "require": {
        "php": "~5.5.0|~5.6.0|~7.0.0",
        "magento/theme-frontend-luma": "~100.0",
        "magento/framework": "~100.0"
    },
    "type": "magento2-theme",
    "version": "1.0.0",
    "license": [
        "OSL-3.0",
        "AFL-3.0"
    ],
    "autoload": {
        "files": [ "registration.php" ]
    }
}
This file has the .json (http://www.json.org/) format and handles important information of the project and its dependencies. As we discussed earlier, this kind of control is crucial because it generates more organization for your project. Let's navigate to the principal parameters of the composer.json file:
- Name: This refers to the name of the component
- Description: This provides the description of the component
- Require: These are the dependencies of the project (the PHP version and the Magento libraries)
- Type: This describes the type of component (the theme or module)
- Version: This describes the version of the component
- License: This parameter describes the licenses applied on a component (Open Source License or Academic Free License)
- Autoload: This parameter defines the files and classes that will be autoloaded upon component activation.
Before applying CSS in the CompStore Magento theme, it is important to study CSS behavior in the Magento system. The stylesheets in Magento 2.0 are preprocessed and compiled to CSS using the LESS technology. LESS (http://lesscss.org/) is a CSS preprocessor that extends the CSS traditional features by including variables and functions to generate a powerful CSS code and saves the time in maintaining the code.
All the .less files that you will save in your theme are compiled by the LESS engine but you will always declare .css in the Magento theme frontend. Here are a couple of examples:
- Frontend declaration: <
css src="css/styles.css" /> - Root source file:
<Magento _theme_dir>/web/css/styles.less
For further information, access the Magento 2.0 official documentation at http://goo.gl/XLkOcQ.
A CompStore theme inherits the Luma theme, which in turn inherits a blank theme, as shown here:

Once you have to make changes in CompStore in order to customize the new theme, you can think about the functionalities already available in the other themes to apply your changes.
The vendor directory under the Magento 2.0 root directory handles all the native Magento modules and themes. The Magento blank and Luma themes, which you have been working on until now, are available in vendor/magento/theme-frontend-blank and vendor/magento/theme-frontend-luma, respectively. So, the CompStore theme "receives" all the features of the themes under these folders. It's important to fix these basic concepts to understand the context that you inserted when you developed a Magento theme solution.
Once you have a solid concept about the behavior, let's create a custom .css file for the CompStore theme:
- Copy the
packt/vendor/magento/theme-frontend-blank/web/css/_styles.lessfile to thepackt/app/design/frontend/Packt/compstore/web/csslocation - Open the copied file and insert an
importcommand as the following example:@import 'source/lib/_lib.less'; @import 'source/_sources.less'; @import 'source/_components.less'; @import 'source/compstore.less';
- Save the file.
- Now, open your favorite code editor and create the
compstore.lessfile under thepackt/app/design/frontend/compstore/web/css/sourcedirectory and type this code:@color-compstore: #F6F6F6; body{ background: @color-compstore; } - Using override, let's change the product page color schema by creating the
_theme.lessfile under thepackt/app/design/frontend/compstore/web/css/sourcedirectory. Execute the following://Change color of elements in Product Page @color-catalog: #4A96AD; @page__background-color: @color-catalog; @sidebar__background-color: @color-gray40; @primary__color: @color-gray80; @border-color__base: @color-gray76; @link__color: @color-gray56; @link__hover__color: @color-gray60; @button__color: @color-gray20; @button__background: @color-gray80; @button__border: 1px solid @border-color__base; @button-primary__background: @color-orange-red1; @button-primary__border: 1px solid @color-orange-red2; @button-primary__color: @color-white; @button-primary__hover__background: darken(@color-orange-red1, 5%); @button-primary__hover__border: 1px solid @color-orange-red2; @button-primary__hover__color: @color-white; @navigation-level0-item__color: @color-gray80; @submenu-item__color: @color-gray80; @navigation__background: @color-gray40; @navigation-desktop-level0-item__color: @color-gray80; @navigation-desktop-level0-item__hover__color: @color-gray34; @navigation-desktop-level0-item__active__color: @navigation-desktop-level0-item__color; @tab-control__background-color: @page__background-color; @form-element-input__background: @color-gray89; @form-element-input-placeholder__color: @color-gray60; @header-icons-color: @color-gray89; @header-icons-color-hover: @color-gray60;
With the compstore.less and _theme.less files, the background and product page colors will change according to the new proposal of the CompStore theme.
You can create a new logo for learning purposes using the Logomakr free online service (http://logomakr.com/). It's a pretty easy tool.
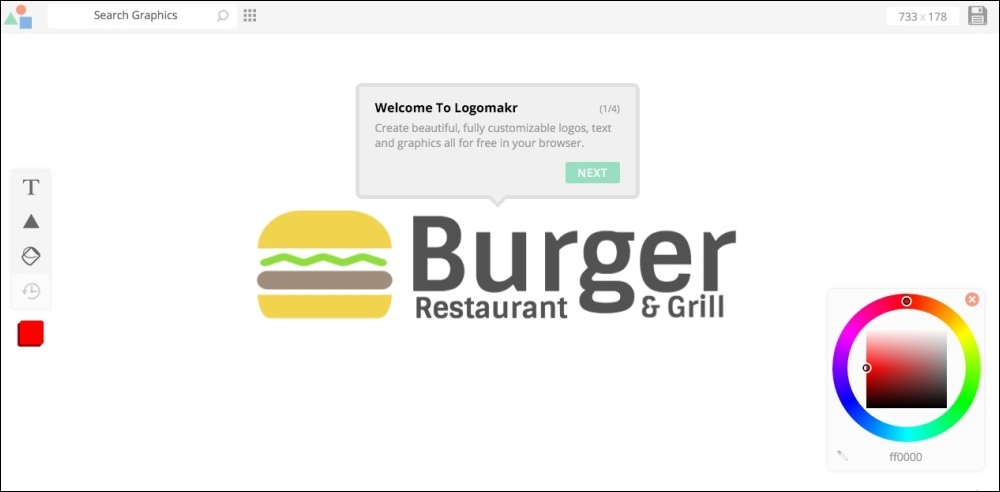
I created this logo for the CompStore theme using Logomakr:

My CompStore proposal of the logo was made in Logomakr, which is a solution developed by Webalys (http://www.streamlineicons.com) and FlatIcon (http://www.flaticon.com) and licensed under Creative Commons by 3.0 (http://creativecommons.org/licenses/by/3.0). If you use this solution for other projects, don't forget to give the due credit to Logomakr.
After finishing the logo, save it under the app/design/frontend/Packt/compstore/Magento_Theme/web/images/logo.png path.
You can feel free to use your own solution for logo instead of using Logomakr.
As you learned in the previous chapter, it's time to activate the new theme. Activate the CompStore Electronics theme in the Admin area (http://localhost/packt/admin_packt) to see the following result:
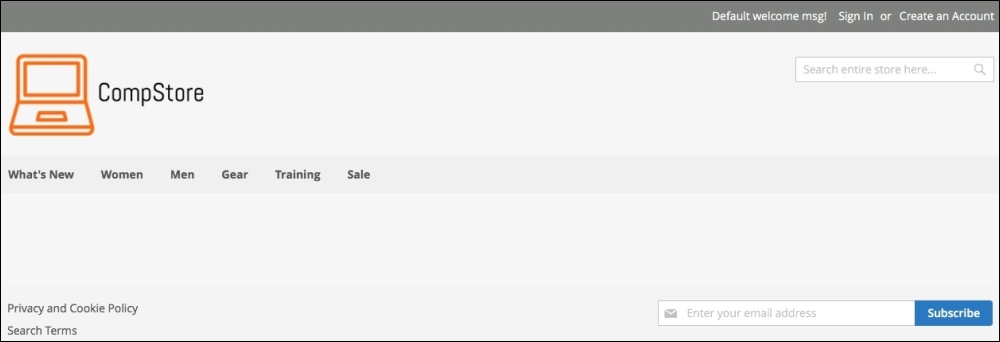
Sometimes, when you update in the Magento structure or activate a new theme, you need to deploy the theme and module changes. If you want to deploy your changes, follow these steps:
- Open the terminal or command prompt.
- Delete the
packt/pub/static/frontend/<Vendor>/<theme>/<locale>directory. - Delete the
var/cachedirectory. - Delete the
var/view_preprocesseddirectory. - Then, access the
packt/bindirectory. - Run the php
magento setup:static-content:deploycommand. - In some cases, it is necessary to give
writepermissions again to the directories.
Once the new theme is activated, it's time to handle the content by creating some options and configuring the products and categories.
To create new categories, you will need access the Admin area (http://localhost/packt/admin_packt) and follow this recipe:
- Navigate to the Products | Categories menu.
- Delete all the subcategories of Default Category by clicking on them and pressing the Delete Category button.
- Create three new subcategories of Default Category named Notebook, Desktops, and Peripherals. Be sure to set to Yes the Include in Navigation Menu option for each category.
In the Add Category option, you have option to fill the Description, Page Title, and Meta Information areas for SEO purposes, as shown in the following screenshot:
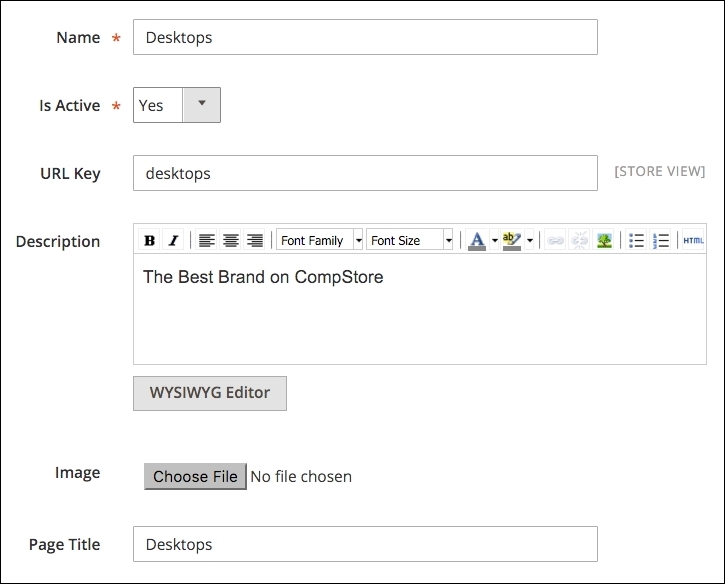
To create new products, you will need access to the Admin area (http://localhost/packt/admin_packt) and follow this recipe:
- Access the Admin area (
http://localhost/packt/admin_packt) and navigate to Products | Catalog. - Click on the Add Product button.
- In the New Product page, enter all the required Product Information input.
- Set the values of Price and Quantity categories.
- Choose an image to upload.
- Choose In Stock for the Stock Availability field.
- Choose Main Website in the Websites tab.
- Save your new product.
- You can add three to nine products for testing purposes.

Magento has a widget management system that allows the flexibility of the content. The widget helps create a specific list of new products in the home page. To create a new widget, follow these steps:
- Navigate to Content | Widgets
- Click on the Add Widget button
- Then, in the StoreFront properties, perform the following:
- For the Display on field, select the Specified Page option
- In the Page field, select the CMS Home Page option
- In the Container field, select the Main Content Area option
- The Template field should be CMS Static Block Default Template

- In Widget Options, perform the following:
- Select Home Page Block.
- Then, click on the Save button.
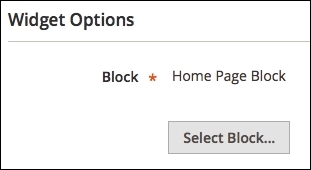

The default block configuration contains the images and products of the Luma theme. Let's change it via the following steps:
- Navigate to Content | Blocks.
- Click to edit Home Page Block
- In the Content field, enter the following HTML code:
<div class="blocks-promo"> <a class="block-promo home-main" href="{{store url=""}}notebook.html"> <img src="{{media url="wysiwyg/home-main.jpg"}}" alt="" /> <span class="content bg-white"><span class="info">New Desktop available!</span> <strong class="title">New Brands</strong> <span class="action more button">Shop New Desktop</span> </span> </a> </div> <div class="content-heading"> <h2 class="title">New Products</h2> <p class="info">Here is what`s trending on CompStore now</p> - Position the cursor under the last line of the HTML code and click on the Insert Widget icon, as shown in the following screenshot:

- Select Catalog Products List as Widget Type.
- Select all the categories created earlier in the Conditions field.

- Click on the Insert Widget button.
- If you prefer, you can change the image of the block.
- Finally, click on the Save Block button.
Go to the Home page to see the final result:
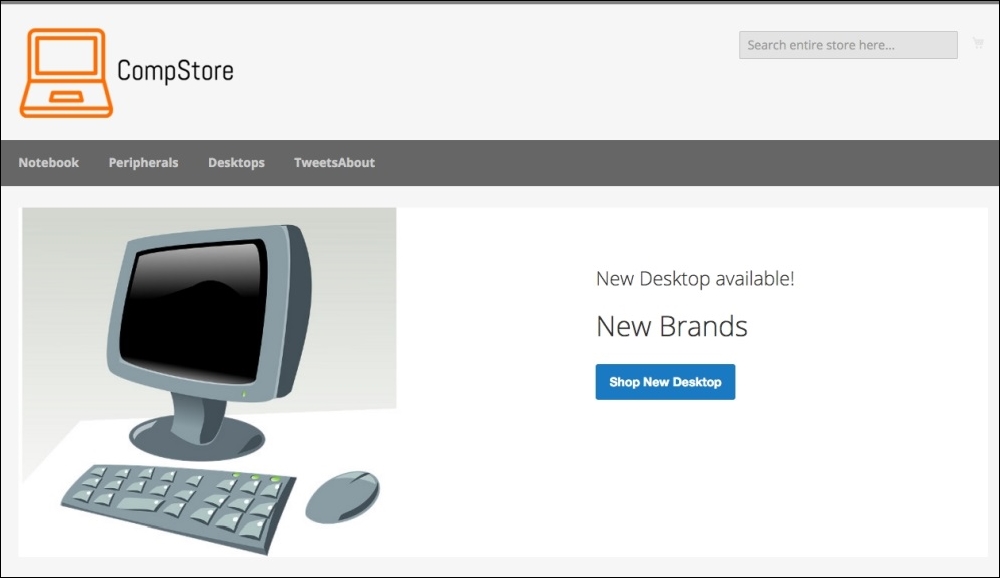
Magento works with .phtml template files to generate the view layer for the users. The modules and themes in Magento have its specific group of .phtml files to show data to the users. Let's create a custom template example in the CompStore theme to see how it works:
- Create the
Magento_Catalogdirectory under thecompstoretheme directory. - Copy the contents of
vendor/magento/module_catalog/view/frontend/templatestoapp/design/frontend/Packt/compstore/Magento_Catalog/templates. - Then, open the
app/design/frontend/Packt/compstore/Magento_Catalog/templates/product/view/addto.phtmlfile in your favorite code editor. - Go to Line 17 and enter the following code:
<div><h2>Buy in CompStore!!!</h2></div>
- Save the file.
- Delete the
var/view_preprocessed/andpub/static/frontend/Packt/compstore/directories. - Deploy static content files by running the
php magento setup:static-content:deploycommand. - If necessary, give
writepermission to thepubdirectory.
Navigate to the product page to see the result, as in the following screenshot:
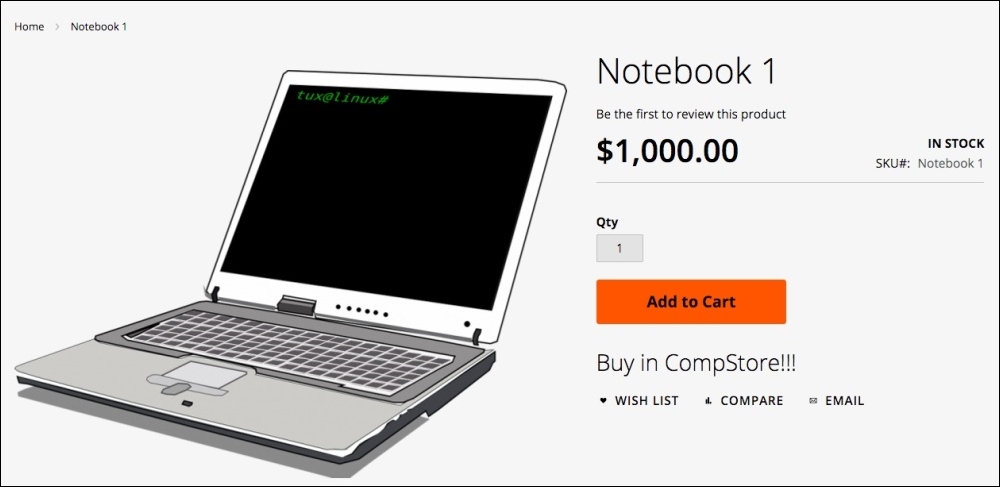
With the content learned in this chapter, you can now develop your own themes and customize solutions. The modern developer creates tools that can maximize the quality and minimize the effort to develop.
As a suggestion, try to read Chapter 4, Magento 2.0 Theme Development – the Developers' Holy Grail, again to create specific Magento pages and layout rules for the CompStore theme. You have uncountable possibilities to develop quality themes for Magento e-commerce and a great solid path to specialize more and more.
Now that you have all the tools to develop a theme for Magento, we will start discovering how to write Magento extensions by programming specific solutions in the next chapter.
In the previous chapter, we created a custom Magento 2.0 theme called CompStore. However, what do you think about extending our Magento expertise by creating our own extension? In this chapter, we will create a new extension called TweetsAbout, add a brand new functionality in our theme, learn the main concepts of Magento extension development, and take a look at how the extension packaging process works.
The following topics will be covered in this chapter:
- Magento development overview
- The Zend framework basics
- The Magento 2.0 extension structure
- The Twitter REST API
- Twitter OAuth
- Magento extension project – TweetsAbout
Magento is an MVC-based application divided into modules. Each module has a specific job inside Magento, following a mature software pattern. For example, Magento has a specific module to control product shipping. This kind of approach is very important to create new functionalities and have the flexibility and modularity to extend its power.
According to Zend Framework Case Study available at https://www.zend.com/topics/Magento-CS.pdf, the Magento project chose to go with industry-standard PHP and the Zend framework because of the extremely simple, object-oriented, and flexible solution that encapsulates best practices and agile testing methodologies and that would result in a very rapid development of enterprise-grade web applications.
Using the Zend framework as the main pillar in the Magento project definitely includes the following advantages:
- Magento contributors around the world know the Zend framework
- There is great web services support to integrate Magento with different software solutions in order to share data
- The MVC design pattern helps organize project development
With the Zend framework, Magento has great flexibility in creating and customizing modules, developing new features for the system, and maintaining the core code.
A basic understanding of Zend components could be interesting for developers to take advantage of this great MVC framework.
You can learn more about Zend framework at http://framework.zend.com/.
Magento 2.0 is a modular system as you can see. That is why it is important to maintain all the code organized, and it couldn't be different with Magento extensions. In previous chapters you saw all the directory structure of Magento, but now let's give special attention to the basic Magento module file structure:

In order to create a new extension according to the preceding image, we must create the same directory structure. However, how will they interact with the Magento system?
Some of these directories have an important role to play in the Magento system. They are directories that are responsible for providing basic functionalities and coupling between modules and the Magento system:
Block: Blocks are View classes that are responsible for providing visualization layers between the logical and frontend layer.Controller: These control all the actions of the Magento. Web servers process the requests and Controller redirects them to specific modules according to the URL.etc: This stores all the module XML configuration files.Helper: This stores auxiliary classes that provide forms, validators, and formatters, which are commonly used in business logic.Model: This stores all business logic and the access layer to the data.Setup: Setup classes are classes that control installation and upgrading functionalities.
The other directories support additional configurations and implementations of the module; these are as follows:
The files presented in the root directory are files on which you worked before. The LICENSES and README files are those available for extension distribution purposes.
Now, you have a general concept of creating a new extension for Magento. As a scenario to our development, we will create a simple extension called TweetsAbout to communicate with Twitter via the API and get the latest tweets with the #magento, #packtpub, and #php hashtags.
We will have two simple pages; the first will show a link to the results, and the second will show the tweets.
Let's get to work!
Representational State Transfer (REST) is an architecture created to provide a simple communication channel between different applications over the Internet using mainly the HTTP protocol. It is the hottest data technology nowadays. Facebook, Google, Twitter, and a lot of huge companies have adopted REST applications. With REST APIs, you can read, post, and delete data.
Twitter has a specific format to spread its data on the Web in order to create great integration with different kinds of applications that consume its service. According to Twitter Developers Documentation available at https://dev.twitter.com/rest/public, Twitter REST APIs provide programmatic access to read and write Twitter data. You can author a new Tweet, read an author profile or follower data, and more. The REST API identifies Twitter applications and users using Oauth, and the responses are available in JSON.
Before beginning to code the Magento extension, let's create an account on Twitter Developer to authenticate our new application on the Twitter platform.
Create a new account in Twitter (https://twitter.com/) if you don't have one and access the Twitter Developer page (https://dev.twitter.com/), as in the following screenshot:

We have a lot of options on the developer's website, such as gathering real-time data, crashlytics, and mopub. I strongly suggest that you take a good look at these tools later.
So, let's create a new application to consume Twitter services. Access the URL https://apps.twitter.com/ to create a new Twitter application. In order to use Twitter's public API services, you need to identify your application by generating a token and a secret key.
You can create a new application by clicking on the Create New App button and filling in the form with the following required fields:
- Name: Choose a unique name for your app
- Description: Describe your app
- Website: Provide a personal website/URL
Accept the Developer Agreement to finish your app registration and click on the Create your Twitter Application button.
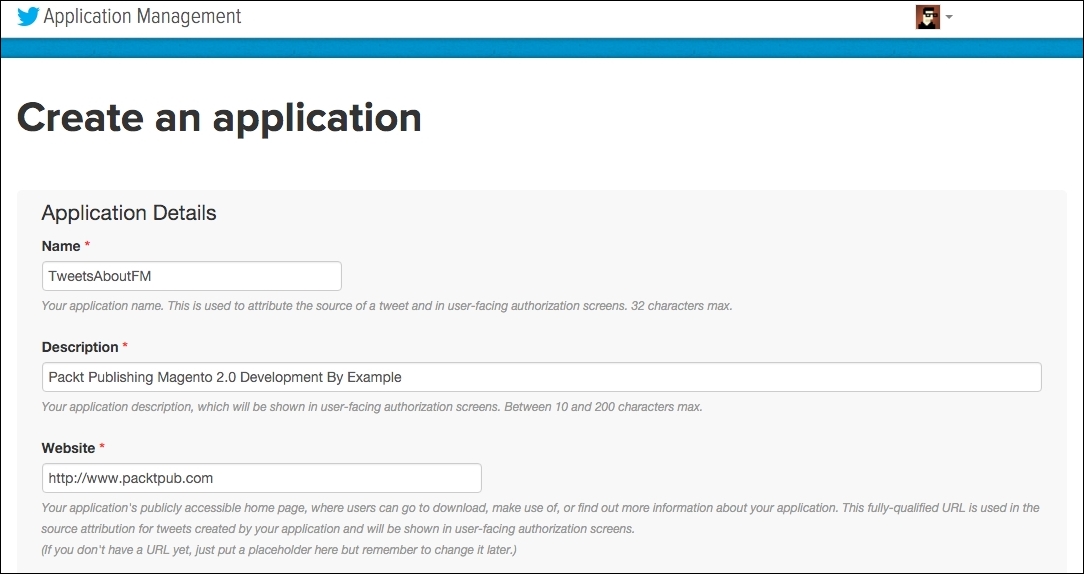
You can access your application's configurations by clicking on the name of your application. Later on in this chapter, we will discuss how to get the right credentials to integrate our application with Twitter.
Now, we can finally start our Magento 2.0 extension solution.

The TwitterOAuth (https://twitteroauth.com/) library provides communication with Twitter via an API. In the TweetsAbout project, this kind of communication is essential for the final proposal of our extension solution. TwitterOAuth is the most popular PHP library to use with the TwitterOAuth REST API.
This project is also available on GitHub (https://github.com/abraham/twitteroauth), as shown in the following screenshot:
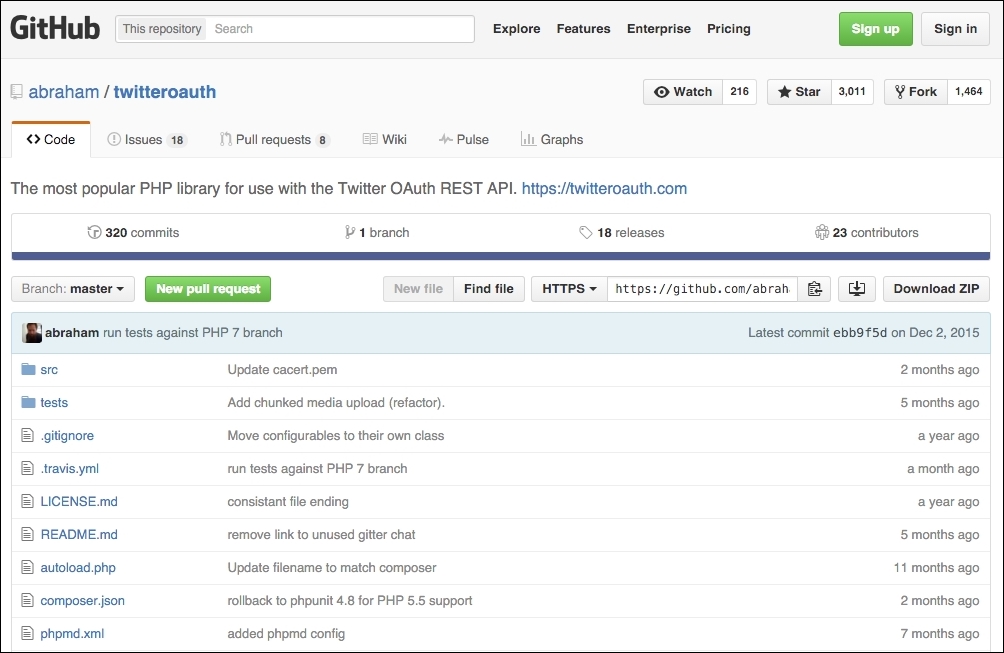
To install TwitterOAuth on the TweetsAbout extension, follow this recipe:
- Open the terminal or command prompt.
- Under the
packt/app/code/Packt/TweetsAbout/Apidirectory, run thecomposer require abraham/twitteroauthcommand. - Access https://apps.twitter.com/, click on your application, and click on the Keys and Access Tokens tab to get the following:
- Consumer Key (API Key)
- Consumer Secret (API Secret)
- Access Token
- Access Token Secret
We'll need these credentials to use on our extension later.
To start the module development, we will declare the basic module configurations. Open your favorite code editor, create a new file called module.xml, and save the file in app/code/Packt/TweetsAbout/etc. Enter this code in the file:
<?xml version="1.0"?>
<config xmlns:xsi="http://www.w3.org/2001/XMLSchema-instance" xsi:noNamespaceSchemaLocation="urn:magento:framework:Module/etc/module.xsd">
<module name="Packt_TweetsAbout" setup_version="2.0.0"/>
</config>Magento 2.0 works with Uniform Resource Names (URN) schema validation to reference XML declarations, as you can observe in the <config> tag. The module.xsd file works by validating whether your module declaration follows the module declaration schema.
The <module> tag contains the vendor and module name. Always follow this example of module name declaration: Vendor_Module.
Under app/code/Packt/TweetsAbout/etc/frontend, create two new files, as follows:
routes.xmlevents.xml
The routes.xml file contains the following code:
<?xml version="1.0"?>
<config xmlns:xsi="http://www.w3.org/2001/XMLSchema-instance" xsi:noNamespaceSchemaLocation="urn:magento:framework:App/etc/routes.xsd">
<router id="standard">
<route id="tweetsabout" frontName="tweetsabout">
<module name="Packt_TweetsAbout" />
</route>
</router>
</config>The routes.xml file tells Magento where to look for the controllers (TweetsAbout/Controller) when the URL http://localhost/packt/tweetsabout is accessed (MVC).
The events.xml file contains the following code:
<?xml version="1.0"?>
<config xmlns:xsi="http://www.w3.org/2001/XMLSchema-instance" xsi:noNamespaceSchemaLocation="urn:magento:framework:Event/etc/events.xsd">
<event name="page_block_html_topmenu_gethtml_before">
<observer name="Packt_TweetsAbout_observer" instance="Packt\TweetsAbout\Observer\Topmenu" />
</event>
</config>The events.xml file declares an Observer event handler in the module, and this file has the mission of configuring a new TweetsAbout top menu link to access the module in the frontend. Observer listens to events triggered by the user or system. The <event> tag gets basic information of the top menu Block to be handled later in the PHP code, and the <observer> tag declares the Topmenu observer class. In this chapter, we will take a look at how the Topmenu class works. For now, it's important to declare this option.
For further information about Observer, access the Magento official documentation at http://goo.gl/0CTzmn.
Now, it is time to create the registration.php file under the root directory of TweetsAbout. Run the following code:
<?php
\Magento\Framework\Component\ComponentRegistrar::register(
\Magento\Framework\Component\ComponentRegistrar::MODULE,
'Packt_TweetsAbout',
__DIR__
);The registration.php file has the same role as that of theme registration in Magento System.
Create the composer.json file under the root directory of TweetsAbout via the following code:
{
"name": "packt/tweets-about",
"description": "Example of Magento Module - Packt Publishing",
"type": "magento2-module",
"version": "1.0.0",
"license": [
"OSL-3.0",
"AFL-3.0"
],
"require": {
"php": "~5.5.0|~5.6.0|~7.0.0",
"magento/framework": "~100.0",
"abraham/twitteroauth": "^0.6.2"
},
"autoload": {
"files": [ "registration.php" ],
"psr-4": {
"Packt\\TweetsAbout\\": ""
}
},
"extra": {
"installer-paths": {
"app/code/Packt/TweetsAbout/Api": ["abraham/twitteroauth"]
}
}
}You can observe in the composer.json file the declaration of the TwitterOAuth project as a required package to our extension. Also, the file defines the installation directory.
You can copy the LICENSE.txt and LICENSE_AFL.txt files from the Magento root directory to your Packt/TweetsAbout directory. The README.md file is responsible for storing information about the module's scope and some considerations for the purposes of publishing on GitHub (http://github.com/). You can feel free to create the README.md file as you wish.
For now, we have the module declaration and registration files. It's time to create the controllers to start giving some life to the TweetsAbout module.
First, let's create a new file named Index.php. This file will control the access to the initial page of the module. Save it under app/code/Packt/TweetsAbout/Controller/Index/ with the following code:
<?php
namespace Packt\TweetsAbout\Controller\Index;
class Index extends \Magento\Framework\App\Action\Action{
protected $resultPageFactory;
public function __construct(
\Magento\Framework\App\Action\Context $context,
\Magento\Framework\View\Result\PageFactory $resultPageFactory
) {
$this->resultPageFactory = $resultPageFactory;
parent::__construct($context);
}
public function execute(){
return $this->resultPageFactory->create();
}
}Create another file named Index.php under app/code/Packt/TweetsAbout/Controller/Magento/. This file will control the access to the Magento Tweets page of the module. Save it with the following code:
<?php
namespace Packt\TweetsAbout\Controller\Magento;
class Index extends \Magento\Framework\App\Action\Action{
protected $resultPageFactory;
public function __construct(
\Magento\Framework\App\Action\Context $context,
\Magento\Framework\View\Result\PageFactory $resultPageFactory
) {
$this->resultPageFactory = $resultPageFactory;
parent::__construct($context);
}
public function execute(){
return $this->resultPageFactory->create();
}
}Create another file named Index.php under app/code/Packt/TweetsAbout/Controller/Packt/. This file will control the access to the Packt tweets page of the module. Save it with the following code:
<?php
namespace Packt\TweetsAbout\Controller\Packt;
class Index extends \Magento\Framework\App\Action\Action{
protected $resultPageFactory;
public function __construct(
\Magento\Framework\App\Action\Context $context,
\Magento\Framework\View\Result\PageFactory $resultPageFactory
) {
$this->resultPageFactory = $resultPageFactory;
parent::__construct($context);
}
public function execute(){
return $this->resultPageFactory->create();
}
}Create another file named Index.php under app/code/Packt/TweetsAbout/Controller/Php/. This file will control the access to the PHP tweets page of the module. Save it with the following code:
<?php
namespace Packt\TweetsAbout\Controller\Php;
class Index extends \Magento\Framework\App\Action\Action{
protected $resultPageFactory;
public function __construct(
\Magento\Framework\App\Action\Context $context,
\Magento\Framework\View\Result\PageFactory $resultPageFactory
) {
$this->resultPageFactory = $resultPageFactory;
parent::__construct($context);
}
public function execute()
{
return $this->resultPageFactory->create();
}
}Magento 2.0 uses namespaces as a PHP standard recommendation (http://www.php-fig.org/psr/) to avoid name collisions between classes and to improve the readability of the code. So, in the namespace instruction, we will declare the class path to follow the PSR-4 pattern (http://www.php-fig.org/psr/psr-4/).
The extends functionality (inheritance) of \Magento\Framework\App\Action\Action provides a functionality to handle actions triggered by the URL access. For example, when the user enters the URL http://<magento_url>/tweetsabout, the routes.xml file redirects to the Index/Index.php controller to treat the user request made by accessing the URL.
The dependency injection of the __construct() method—\Magento\Framework\App\Action\Context $context and \Magento\Framework\View\Result\PageFactory $resultPageFactory—declares the initial construct of the Action class and the view layer to work with the template file.
Note
For further information about the dependency injection, access the Magento official documentation at http://goo.gl/jHFPTr.
Finally, the execute() method renders the layout. We will declare the layout files later on.
At this point, it's important to be familiar with PHP object-oriented programming (http://php.net/manual/en/language.oop5.php). I strongly suggest that you study the main concepts to increase the understanding of the book.
Blocks in Magento 2.0 provide presentation logic for your view templates. In the TweetsAbout project, we will use two blocks to process the view template files.
Under the app/code/Packt/TweetsAbout/Block directory, create a file named Index.php with the following code:
<?php
namespace Packt\TweetsAbout\Block;
class Index extends \Magento\Framework\View\Element\Template{
public function getMagentoUrl(){
return $this->getData('urlMagento');
}
public function getPHPUrl(){
return $this->getData('urlPHP');
}
public function getPacktUrl(){
return $this->getData('urlPackt');
}
}The three methods, getMagentoUrl(), getPHPUrl(), and getPacktUrl(), get data from layout declaration files to define a URL for each kind of controller and give it to the initial layout of the module.
Now, under the app/code/Packt/TweetsAbout/Block directory, create a file named Tweets.php with the following code:
<?php
namespace Packt\TweetsAbout\Block;
require $_SERVER['DOCUMENT_ROOT'] . "/packt/app/code/Packt/TweetsAbout/Api/vendor/autoload.php";
use Abraham\TwitterOAuth\TwitterOAuth;
class Tweets extends \Magento\Framework\View\Element\Template{
private $consumerKey;
private $consumerSecret;
private $accessToken;
private $accessTokenSecret;
public function searchTweets(){
$connection = $this->twitterDevAuth();
$result = $connection->get("search/tweets", array("q" =>$this->getData('hashtag'), "result_type"=>"recent", "count" => 10));
return $result->statuses;
}
private function twitterDevAuth(){
$this->consumerKey = YOUR_CONSUMER_KEY;
$this->consumerSecret = YOUR_CONSUMER_SECRET;
$this->accessToken = YOUR_ACCESS_TOKEN;
$this->accessTokenSecret = YOUR_ACCESS_TOKEN_SECRET;
return new TwitterOAuth($this->consumerKey, $this->consumerSecret, $this->accessToken, $this->accessTokenSecret);
}
}Here are some things to consider about the Tweets.php code:
- The required instruction is to call the autoload, and the use is to append the namespace of the
TwitterOAuthlibrary to work on our extension - In the
twitterDevAuth()method, you must enter the Twitter API credentials - In the
searchTweets()method, the$connection->get("search/tweets", array("q" =>$this->getData('hashtag'), "result_type"=>"recent", "count" => 10))instruction works with the Twitter search API, getting the last 10 results of Twitter posts
Under the app/code/Packt/TweetsAbout/Observer directory, create the Topmenu.php file with the following code:
<?php
namespace Packt\TweetsAbout\Observer;
use Magento\Framework\Event\Observer as EventObserver;
use Magento\Framework\Data\Tree\Node;
use Magento\Framework\Event\ObserverInterface;
class Topmenu implements ObserverInterface{
/**
* @param EventObserver $observer
* @return $this
*/
public function execute(EventObserver $observer)
{
$urlInterface = \Magento\Framework\App\ObjectManager::getInstance()->get('Magento\Framework\UrlInterface');
$active = strpos($urlInterface->getCurrentUrl(), "tweetsabout");
/** @var \Magento\Framework\Data\Tree\Node $menu */
$menu = $observer->getMenu();
$tree = $menu->getTree();
$data = [
'name' => __("TweetsAbout"),
'id' => 'tweetsmenu',
'url' => $urlInterface->getBaseUrl() . 'tweetsabout',
'is_active' => $active
];
$node = new Node($data, 'id', $tree, $menu);
$menu->addChild($node);
return $this;
}
}The Topmenu.php file dynamically creates a new top menu item for the TweetsAbout module by adding a node in the top menu link schema. The \Magento\Framework\App\ObjectManager::getInstance()->get('Magento\Framework\UrlInterface') instruction gets the base URL and the current URL to create a specific link to the TweetsAbout module. The Topmenu observer works with the Document Object Model (DOM) concept of nodes and trees dynamically.
It's time to handle the presentation layer of the project. First, we will create the layout files (.xml) to handle template behavior and to pass arguments to the template via blocks. Every layout file is assigned by following this pattern: <module_name>_<controller>_<controller_file>.xml. This pattern allows the Magento system to assign the correct files according to its controller automatically.
Under the app/code/Packt/TweetsAbout/view/frontend/layout path, create the tweetsabout_index_index.xml file with the following code:
<?xml version="1.0"?>
<page xmlns:xsi="http://www.w3.org/2001/XMLSchema-instance" layout="1column" xsi:noNamespaceSchemaLocation="urn:magento:framework:View/Layout/etc/page_configuration.xsd">
<head>
<title>
TweetsAbout Module
</title>
</head>
<body>
<referenceContainer name="content">
<block class="Packt\TweetsAbout\Block\Index" template="Packt_TweetsAbout::index.phtml">
<arguments>
<argument name="urlMagento" xsi:type="url" path="tweetsabout/magento" />
<argument name="urlPHP" xsi:type="url" path="tweetsabout/php" />
<argument name="urlPackt" xsi:type="url" path="tweetsabout/packt" />
</arguments>
</block>
</referenceContainer>
</body>
</page>The <block> tag binds the Index.php Block to the index.phtml template, and the <arguments> tag transports three URL parameters to the Block. These parameters will be used in the index.phtml file.
Under the app/code/Packt/TweetsAbout/view/frontend/layout path, create the tweetsabout_magento_index.xml file with the following code:
<?xml version="1.0"?>
<page xmlns:xsi="http://www.w3.org/2001/XMLSchema-instance" layout="1column" xsi:noNamespaceSchemaLocation="urn:magento:framework:View/Layout/etc/page_configuration.xsd">
<head>
<title>
TweetsAbout #Magento
</title>
<css src="Packt_TweetsAbout::css/source/module.css"/>
</head>
<body>
<referenceContainer name="content">
<block class="Packt\TweetsAbout\Block\Tweets" template="Packt_TweetsAbout::tweets.phtml">
<arguments>
<argument name="hashtag" xsi:type="string">#magento</argument>
</arguments>
</block>
</referenceContainer>
</body>
</page>Under the app/code/Packt/TweetsAbout/view/frontend/layout path, create the tweetsabout_packt_index.xml file with the following code:
<?xml version="1.0"?>
<page xmlns:xsi="http://www.w3.org/2001/XMLSchema-instance" layout="1column" xsi:noNamespaceSchemaLocation="urn:magento:framework:View/Layout/etc/page_configuration.xsd">
<head>
<title>
TweetsAbout #Packtpub
</title>
<css src="Packt_TweetsAbout::css/source/module.css"/>
</head>
<body>
<referenceContainer name="content">
<block class="Packt\TweetsAbout\Block\Tweets" template="Packt_TweetsAbout::tweets.phtml">
<arguments>
<argument name="hashtag" xsi:type="string">#packtpub</argument>
</arguments>
</block>
</referenceContainer>
</body>
</page>Under the app/code/Packt/TweetsAbout/view/frontend/layout path, create the tweetsabout_php_index.xml file with the following code:
<?xml version="1.0"?>
<page xmlns:xsi="http://www.w3.org/2001/XMLSchema-instance" layout="1column" xsi:noNamespaceSchemaLocation="urn:magento:framework:View/Layout/etc/page_configuration.xsd">
<head>
<title>
TweetsAbout #PHP
</title>
<css src="Packt_TweetsAbout::css/source/module.css"/>
</head>
<body>
<referenceContainer name="content">
<block class="Packt\TweetsAbout\Block\Tweets" template="Packt_TweetsAbout::tweets.phtml">
<arguments>
<argument name="hashtag" xsi:type="string">#php</argument>
</arguments>
</block>
</referenceContainer>
</body>
</page>The <css> tag loads the CSS rules of the template. The <block> tag binds the Tweets.php Block to the tweets.phtml file. The <argument name="hashtag"> tag transports the hashtag parameter to the Tweets.php Block to search the latest mentions of the specific hashtag in the Twitter database.
Now, let's create the template files.
Under the app/code/Packt/TweetsAbout/view/frontend/templates path, create the index.phtml file with the following code:
<h2>Recent TweetsAbout: </h2>
<ul>
<li>
<a href="<?php echo $block->escapeHtml($block->getMagentoUrl()) ?>">
<span><?php echo __('Magento')?></span>
</a>
</li>
<li>
<a href="<?php echo $block->escapeHtml($block->getPacktUrl()) ?>">
<span><?php echo __('Packtpub')?></span>
</a>
</li>
<li>
<a href="<?php echo $block->escapeHtml($block->getPHPUrl()) ?>">
<span><?php echo __('PHP')?></span>
</a>
</li>
</ul>The $block object has access to the methods of Block/Index.php, and the URL of the pages build dynamically.
Under the app/code/Packt/TweetsAbout/view/frontend/templates path, create the tweets.phtml file with the following code:
<?php
$tweets = $block->searchTweets();
?>
<?php foreach ($tweets as $tweet){ ?>
<p class="tweet">
<a href="<?php echo $tweet->user->url; ?>">
<img src="<?php echo $tweet->user->profile_image_url; ?>" alt="profile">
</a>
<b>Created: </b><?php echo $tweet->created_at; ?>
<br />
<br />
<a href="<?php echo isset($tweet->entities->urls[0]->url) ? $tweet->entities->urls[0]->url : "#"; ?>" target="_blank"><?php echo $tweet->text;?></a>
</p>
<hr />
<?php } ?>The searchTweets() method loads tweets according to the URL accessed, and PHP processes the data to show the results to the user.
Under the app/code/Packt/TweetsAbout/view/frontend/web/css/source path, create the module.less file with the following code:
.tweet {background-color: #878787; padding:15px; border:1px dotted}
.tweet a {color: #ffffff}
.tweet a:hover {text-decoration: underline;}To deploy the module, follow this recipe:
- Open the terminal or command prompt.
- Access the
packt/bindirectory. - Then, run the
php magento module:enable --clear-static-content Packt_TweetsAboutcommand. - Run the
php magento setup:upgradecommand. - Next, run the
php magento setup:static-content:deploycommand. - In some cases, it is necessary to give
writepermissions again to the directories.
If everything goes alright, when you access the URL http://localhost/packt, you will see one link for the TweetsAbout extension in the topmost menu. Just click on it to see how the extension works. Take a look at the following screenshot:
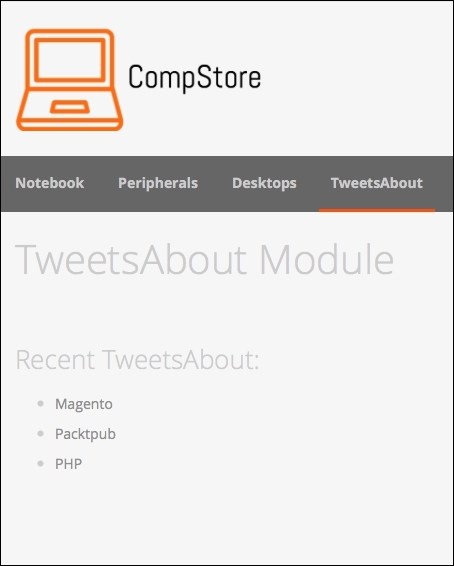
You can navigate to the links to see how the pages work, as in the following screenshot:
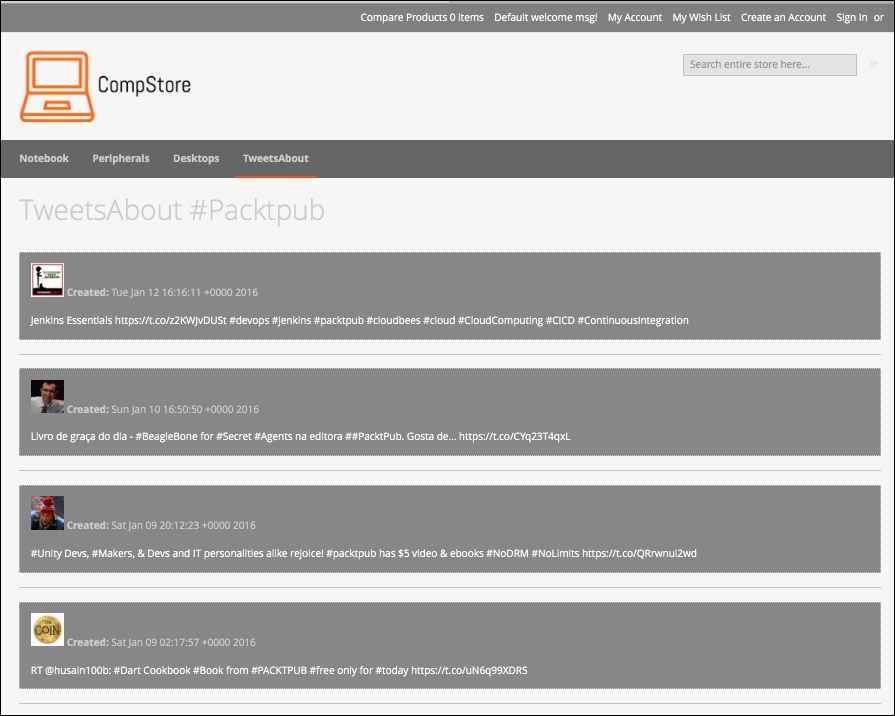
The extension gets the ten last tweets in real time with the date, picture, and post. It's really awesome to watch our work running!
For sure, this extension can get a lot better, but it is only a starting point for big achievements.
Once you have your extension ready to work, you can publish it in the Magento Connect service (http://www.magentocommerce.com/magento-connect). Magento Connect is a service in which Magento members can share their open source or commercial extensions with Magento Community. The main contributions are generally based on the following:
- Modules
- Language packs
- Design interfaces
- Themes
Once you have the composer.json file configured, you can package your module by compacting it as a .zip file in the vendor-name_package-name-1.0.0.zip format.
Upload the module in your personal account in GitHub, and Magento can retrieve it to publish.
For further information, it's strongly recommended that you to access the official documentation available on the Magento Developers official site at http://devdocs.magento.com/guides/v2.0/extension-dev-guide/package_module.html.
Controllers
First, let's create a new file named Index.php. This file will control the access to the initial page of the module. Save it under app/code/Packt/TweetsAbout/Controller/Index/ with the following code:
<?php
namespace Packt\TweetsAbout\Controller\Index;
class Index extends \Magento\Framework\App\Action\Action{
protected $resultPageFactory;
public function __construct(
\Magento\Framework\App\Action\Context $context,
\Magento\Framework\View\Result\PageFactory $resultPageFactory
) {
$this->resultPageFactory = $resultPageFactory;
parent::__construct($context);
}
public function execute(){
return $this->resultPageFactory->create();
}
}Create another file named Index.php under app/code/Packt/TweetsAbout/Controller/Magento/. This file will control the access to the Magento Tweets page of the module. Save it with the following code:
<?php
namespace Packt\TweetsAbout\Controller\Magento;
class Index extends \Magento\Framework\App\Action\Action{
protected $resultPageFactory;
public function __construct(
\Magento\Framework\App\Action\Context $context,
\Magento\Framework\View\Result\PageFactory $resultPageFactory
) {
$this->resultPageFactory = $resultPageFactory;
parent::__construct($context);
}
public function execute(){
return $this->resultPageFactory->create();
}
}Create another file named Index.php under app/code/Packt/TweetsAbout/Controller/Packt/. This file will control the access to the Packt tweets page of the module. Save it with the following code:
<?php
namespace Packt\TweetsAbout\Controller\Packt;
class Index extends \Magento\Framework\App\Action\Action{
protected $resultPageFactory;
public function __construct(
\Magento\Framework\App\Action\Context $context,
\Magento\Framework\View\Result\PageFactory $resultPageFactory
) {
$this->resultPageFactory = $resultPageFactory;
parent::__construct($context);
}
public function execute(){
return $this->resultPageFactory->create();
}
}Create another file named Index.php under app/code/Packt/TweetsAbout/Controller/Php/. This file will control the access to the PHP tweets page of the module. Save it with the following code:
<?php
namespace Packt\TweetsAbout\Controller\Php;
class Index extends \Magento\Framework\App\Action\Action{
protected $resultPageFactory;
public function __construct(
\Magento\Framework\App\Action\Context $context,
\Magento\Framework\View\Result\PageFactory $resultPageFactory
) {
$this->resultPageFactory = $resultPageFactory;
parent::__construct($context);
}
public function execute()
{
return $this->resultPageFactory->create();
}
}Magento 2.0 uses namespaces as a PHP standard recommendation (http://www.php-fig.org/psr/) to avoid name collisions between classes and to improve the readability of the code. So, in the namespace instruction, we will declare the class path to follow the PSR-4 pattern (http://www.php-fig.org/psr/psr-4/).
The extends functionality (inheritance) of \Magento\Framework\App\Action\Action provides a functionality to handle actions triggered by the URL access. For example, when the user enters the URL http://<magento_url>/tweetsabout, the routes.xml file redirects to the Index/Index.php controller to treat the user request made by accessing the URL.
The dependency injection of the __construct() method—\Magento\Framework\App\Action\Context $context and \Magento\Framework\View\Result\PageFactory $resultPageFactory—declares the initial construct of the Action class and the view layer to work with the template file.
Note
For further information about the dependency injection, access the Magento official documentation at http://goo.gl/jHFPTr.
Finally, the execute() method renders the layout. We will declare the layout files later on.
At this point, it's important to be familiar with PHP object-oriented programming (http://php.net/manual/en/language.oop5.php). I strongly suggest that you study the main concepts to increase the understanding of the book.
Blocks in Magento 2.0 provide presentation logic for your view templates. In the TweetsAbout project, we will use two blocks to process the view template files.
Under the app/code/Packt/TweetsAbout/Block directory, create a file named Index.php with the following code:
<?php
namespace Packt\TweetsAbout\Block;
class Index extends \Magento\Framework\View\Element\Template{
public function getMagentoUrl(){
return $this->getData('urlMagento');
}
public function getPHPUrl(){
return $this->getData('urlPHP');
}
public function getPacktUrl(){
return $this->getData('urlPackt');
}
}The three methods, getMagentoUrl(), getPHPUrl(), and getPacktUrl(), get data from layout declaration files to define a URL for each kind of controller and give it to the initial layout of the module.
Now, under the app/code/Packt/TweetsAbout/Block directory, create a file named Tweets.php with the following code:
<?php
namespace Packt\TweetsAbout\Block;
require $_SERVER['DOCUMENT_ROOT'] . "/packt/app/code/Packt/TweetsAbout/Api/vendor/autoload.php";
use Abraham\TwitterOAuth\TwitterOAuth;
class Tweets extends \Magento\Framework\View\Element\Template{
private $consumerKey;
private $consumerSecret;
private $accessToken;
private $accessTokenSecret;
public function searchTweets(){
$connection = $this->twitterDevAuth();
$result = $connection->get("search/tweets", array("q" =>$this->getData('hashtag'), "result_type"=>"recent", "count" => 10));
return $result->statuses;
}
private function twitterDevAuth(){
$this->consumerKey = YOUR_CONSUMER_KEY;
$this->consumerSecret = YOUR_CONSUMER_SECRET;
$this->accessToken = YOUR_ACCESS_TOKEN;
$this->accessTokenSecret = YOUR_ACCESS_TOKEN_SECRET;
return new TwitterOAuth($this->consumerKey, $this->consumerSecret, $this->accessToken, $this->accessTokenSecret);
}
}Here are some things to consider about the Tweets.php code:
- The required instruction is to call the autoload, and the use is to append the namespace of the
TwitterOAuthlibrary to work on our extension - In the
twitterDevAuth()method, you must enter the Twitter API credentials - In the
searchTweets()method, the$connection->get("search/tweets", array("q" =>$this->getData('hashtag'), "result_type"=>"recent", "count" => 10))instruction works with the Twitter search API, getting the last 10 results of Twitter posts
Under the app/code/Packt/TweetsAbout/Observer directory, create the Topmenu.php file with the following code:
<?php
namespace Packt\TweetsAbout\Observer;
use Magento\Framework\Event\Observer as EventObserver;
use Magento\Framework\Data\Tree\Node;
use Magento\Framework\Event\ObserverInterface;
class Topmenu implements ObserverInterface{
/**
* @param EventObserver $observer
* @return $this
*/
public function execute(EventObserver $observer)
{
$urlInterface = \Magento\Framework\App\ObjectManager::getInstance()->get('Magento\Framework\UrlInterface');
$active = strpos($urlInterface->getCurrentUrl(), "tweetsabout");
/** @var \Magento\Framework\Data\Tree\Node $menu */
$menu = $observer->getMenu();
$tree = $menu->getTree();
$data = [
'name' => __("TweetsAbout"),
'id' => 'tweetsmenu',
'url' => $urlInterface->getBaseUrl() . 'tweetsabout',
'is_active' => $active
];
$node = new Node($data, 'id', $tree, $menu);
$menu->addChild($node);
return $this;
}
}The Topmenu.php file dynamically creates a new top menu item for the TweetsAbout module by adding a node in the top menu link schema. The \Magento\Framework\App\ObjectManager::getInstance()->get('Magento\Framework\UrlInterface') instruction gets the base URL and the current URL to create a specific link to the TweetsAbout module. The Topmenu observer works with the Document Object Model (DOM) concept of nodes and trees dynamically.
It's time to handle the presentation layer of the project. First, we will create the layout files (.xml) to handle template behavior and to pass arguments to the template via blocks. Every layout file is assigned by following this pattern: <module_name>_<controller>_<controller_file>.xml. This pattern allows the Magento system to assign the correct files according to its controller automatically.
Under the app/code/Packt/TweetsAbout/view/frontend/layout path, create the tweetsabout_index_index.xml file with the following code:
<?xml version="1.0"?>
<page xmlns:xsi="http://www.w3.org/2001/XMLSchema-instance" layout="1column" xsi:noNamespaceSchemaLocation="urn:magento:framework:View/Layout/etc/page_configuration.xsd">
<head>
<title>
TweetsAbout Module
</title>
</head>
<body>
<referenceContainer name="content">
<block class="Packt\TweetsAbout\Block\Index" template="Packt_TweetsAbout::index.phtml">
<arguments>
<argument name="urlMagento" xsi:type="url" path="tweetsabout/magento" />
<argument name="urlPHP" xsi:type="url" path="tweetsabout/php" />
<argument name="urlPackt" xsi:type="url" path="tweetsabout/packt" />
</arguments>
</block>
</referenceContainer>
</body>
</page>The <block> tag binds the Index.php Block to the index.phtml template, and the <arguments> tag transports three URL parameters to the Block. These parameters will be used in the index.phtml file.
Under the app/code/Packt/TweetsAbout/view/frontend/layout path, create the tweetsabout_magento_index.xml file with the following code:
<?xml version="1.0"?>
<page xmlns:xsi="http://www.w3.org/2001/XMLSchema-instance" layout="1column" xsi:noNamespaceSchemaLocation="urn:magento:framework:View/Layout/etc/page_configuration.xsd">
<head>
<title>
TweetsAbout #Magento
</title>
<css src="Packt_TweetsAbout::css/source/module.css"/>
</head>
<body>
<referenceContainer name="content">
<block class="Packt\TweetsAbout\Block\Tweets" template="Packt_TweetsAbout::tweets.phtml">
<arguments>
<argument name="hashtag" xsi:type="string">#magento</argument>
</arguments>
</block>
</referenceContainer>
</body>
</page>Under the app/code/Packt/TweetsAbout/view/frontend/layout path, create the tweetsabout_packt_index.xml file with the following code:
<?xml version="1.0"?>
<page xmlns:xsi="http://www.w3.org/2001/XMLSchema-instance" layout="1column" xsi:noNamespaceSchemaLocation="urn:magento:framework:View/Layout/etc/page_configuration.xsd">
<head>
<title>
TweetsAbout #Packtpub
</title>
<css src="Packt_TweetsAbout::css/source/module.css"/>
</head>
<body>
<referenceContainer name="content">
<block class="Packt\TweetsAbout\Block\Tweets" template="Packt_TweetsAbout::tweets.phtml">
<arguments>
<argument name="hashtag" xsi:type="string">#packtpub</argument>
</arguments>
</block>
</referenceContainer>
</body>
</page>Under the app/code/Packt/TweetsAbout/view/frontend/layout path, create the tweetsabout_php_index.xml file with the following code:
<?xml version="1.0"?>
<page xmlns:xsi="http://www.w3.org/2001/XMLSchema-instance" layout="1column" xsi:noNamespaceSchemaLocation="urn:magento:framework:View/Layout/etc/page_configuration.xsd">
<head>
<title>
TweetsAbout #PHP
</title>
<css src="Packt_TweetsAbout::css/source/module.css"/>
</head>
<body>
<referenceContainer name="content">
<block class="Packt\TweetsAbout\Block\Tweets" template="Packt_TweetsAbout::tweets.phtml">
<arguments>
<argument name="hashtag" xsi:type="string">#php</argument>
</arguments>
</block>
</referenceContainer>
</body>
</page>The <css> tag loads the CSS rules of the template. The <block> tag binds the Tweets.php Block to the tweets.phtml file. The <argument name="hashtag"> tag transports the hashtag parameter to the Tweets.php Block to search the latest mentions of the specific hashtag in the Twitter database.
Now, let's create the template files.
Under the app/code/Packt/TweetsAbout/view/frontend/templates path, create the index.phtml file with the following code:
<h2>Recent TweetsAbout: </h2>
<ul>
<li>
<a href="<?php echo $block->escapeHtml($block->getMagentoUrl()) ?>">
<span><?php echo __('Magento')?></span>
</a>
</li>
<li>
<a href="<?php echo $block->escapeHtml($block->getPacktUrl()) ?>">
<span><?php echo __('Packtpub')?></span>
</a>
</li>
<li>
<a href="<?php echo $block->escapeHtml($block->getPHPUrl()) ?>">
<span><?php echo __('PHP')?></span>
</a>
</li>
</ul>The $block object has access to the methods of Block/Index.php, and the URL of the pages build dynamically.
Under the app/code/Packt/TweetsAbout/view/frontend/templates path, create the tweets.phtml file with the following code:
<?php
$tweets = $block->searchTweets();
?>
<?php foreach ($tweets as $tweet){ ?>
<p class="tweet">
<a href="<?php echo $tweet->user->url; ?>">
<img src="<?php echo $tweet->user->profile_image_url; ?>" alt="profile">
</a>
<b>Created: </b><?php echo $tweet->created_at; ?>
<br />
<br />
<a href="<?php echo isset($tweet->entities->urls[0]->url) ? $tweet->entities->urls[0]->url : "#"; ?>" target="_blank"><?php echo $tweet->text;?></a>
</p>
<hr />
<?php } ?>The searchTweets() method loads tweets according to the URL accessed, and PHP processes the data to show the results to the user.
Under the app/code/Packt/TweetsAbout/view/frontend/web/css/source path, create the module.less file with the following code:
.tweet {background-color: #878787; padding:15px; border:1px dotted}
.tweet a {color: #ffffff}
.tweet a:hover {text-decoration: underline;}To deploy the module, follow this recipe:
- Open the terminal or command prompt.
- Access the
packt/bindirectory. - Then, run the
php magento module:enable --clear-static-content Packt_TweetsAboutcommand. - Run the
php magento setup:upgradecommand. - Next, run the
php magento setup:static-content:deploycommand. - In some cases, it is necessary to give
writepermissions again to the directories.
If everything goes alright, when you access the URL http://localhost/packt, you will see one link for the TweetsAbout extension in the topmost menu. Just click on it to see how the extension works. Take a look at the following screenshot:
You can navigate to the links to see how the pages work, as in the following screenshot:
The extension gets the ten last tweets in real time with the date, picture, and post. It's really awesome to watch our work running!
For sure, this extension can get a lot better, but it is only a starting point for big achievements.
Once you have your extension ready to work, you can publish it in the Magento Connect service (http://www.magentocommerce.com/magento-connect). Magento Connect is a service in which Magento members can share their open source or commercial extensions with Magento Community. The main contributions are generally based on the following:
- Modules
- Language packs
- Design interfaces
- Themes
Once you have the composer.json file configured, you can package your module by compacting it as a .zip file in the vendor-name_package-name-1.0.0.zip format.
Upload the module in your personal account in GitHub, and Magento can retrieve it to publish.
For further information, it's strongly recommended that you to access the official documentation available on the Magento Developers official site at http://devdocs.magento.com/guides/v2.0/extension-dev-guide/package_module.html.
Blocks
Blocks in Magento 2.0 provide presentation logic for your view templates. In the TweetsAbout project, we will use two blocks to process the view template files.
Under the app/code/Packt/TweetsAbout/Block directory, create a file named Index.php with the following code:
<?php
namespace Packt\TweetsAbout\Block;
class Index extends \Magento\Framework\View\Element\Template{
public function getMagentoUrl(){
return $this->getData('urlMagento');
}
public function getPHPUrl(){
return $this->getData('urlPHP');
}
public function getPacktUrl(){
return $this->getData('urlPackt');
}
}The three methods, getMagentoUrl(), getPHPUrl(), and getPacktUrl(), get data from layout declaration files to define a URL for each kind of controller and give it to the initial layout of the module.
Now, under the app/code/Packt/TweetsAbout/Block directory, create a file named Tweets.php with the following code:
<?php
namespace Packt\TweetsAbout\Block;
require $_SERVER['DOCUMENT_ROOT'] . "/packt/app/code/Packt/TweetsAbout/Api/vendor/autoload.php";
use Abraham\TwitterOAuth\TwitterOAuth;
class Tweets extends \Magento\Framework\View\Element\Template{
private $consumerKey;
private $consumerSecret;
private $accessToken;
private $accessTokenSecret;
public function searchTweets(){
$connection = $this->twitterDevAuth();
$result = $connection->get("search/tweets", array("q" =>$this->getData('hashtag'), "result_type"=>"recent", "count" => 10));
return $result->statuses;
}
private function twitterDevAuth(){
$this->consumerKey = YOUR_CONSUMER_KEY;
$this->consumerSecret = YOUR_CONSUMER_SECRET;
$this->accessToken = YOUR_ACCESS_TOKEN;
$this->accessTokenSecret = YOUR_ACCESS_TOKEN_SECRET;
return new TwitterOAuth($this->consumerKey, $this->consumerSecret, $this->accessToken, $this->accessTokenSecret);
}
}Here are some things to consider about the Tweets.php code:
- The required instruction is to call the autoload, and the use is to append the namespace of the
TwitterOAuthlibrary to work on our extension - In the
twitterDevAuth()method, you must enter the Twitter API credentials - In the
searchTweets()method, the$connection->get("search/tweets", array("q" =>$this->getData('hashtag'), "result_type"=>"recent", "count" => 10))instruction works with the Twitter search API, getting the last 10 results of Twitter posts
Under the app/code/Packt/TweetsAbout/Observer directory, create the Topmenu.php file with the following code:
<?php
namespace Packt\TweetsAbout\Observer;
use Magento\Framework\Event\Observer as EventObserver;
use Magento\Framework\Data\Tree\Node;
use Magento\Framework\Event\ObserverInterface;
class Topmenu implements ObserverInterface{
/**
* @param EventObserver $observer
* @return $this
*/
public function execute(EventObserver $observer)
{
$urlInterface = \Magento\Framework\App\ObjectManager::getInstance()->get('Magento\Framework\UrlInterface');
$active = strpos($urlInterface->getCurrentUrl(), "tweetsabout");
/** @var \Magento\Framework\Data\Tree\Node $menu */
$menu = $observer->getMenu();
$tree = $menu->getTree();
$data = [
'name' => __("TweetsAbout"),
'id' => 'tweetsmenu',
'url' => $urlInterface->getBaseUrl() . 'tweetsabout',
'is_active' => $active
];
$node = new Node($data, 'id', $tree, $menu);
$menu->addChild($node);
return $this;
}
}The Topmenu.php file dynamically creates a new top menu item for the TweetsAbout module by adding a node in the top menu link schema. The \Magento\Framework\App\ObjectManager::getInstance()->get('Magento\Framework\UrlInterface') instruction gets the base URL and the current URL to create a specific link to the TweetsAbout module. The Topmenu observer works with the Document Object Model (DOM) concept of nodes and trees dynamically.
It's time to handle the presentation layer of the project. First, we will create the layout files (.xml) to handle template behavior and to pass arguments to the template via blocks. Every layout file is assigned by following this pattern: <module_name>_<controller>_<controller_file>.xml. This pattern allows the Magento system to assign the correct files according to its controller automatically.
Under the app/code/Packt/TweetsAbout/view/frontend/layout path, create the tweetsabout_index_index.xml file with the following code:
<?xml version="1.0"?>
<page xmlns:xsi="http://www.w3.org/2001/XMLSchema-instance" layout="1column" xsi:noNamespaceSchemaLocation="urn:magento:framework:View/Layout/etc/page_configuration.xsd">
<head>
<title>
TweetsAbout Module
</title>
</head>
<body>
<referenceContainer name="content">
<block class="Packt\TweetsAbout\Block\Index" template="Packt_TweetsAbout::index.phtml">
<arguments>
<argument name="urlMagento" xsi:type="url" path="tweetsabout/magento" />
<argument name="urlPHP" xsi:type="url" path="tweetsabout/php" />
<argument name="urlPackt" xsi:type="url" path="tweetsabout/packt" />
</arguments>
</block>
</referenceContainer>
</body>
</page>The <block> tag binds the Index.php Block to the index.phtml template, and the <arguments> tag transports three URL parameters to the Block. These parameters will be used in the index.phtml file.
Under the app/code/Packt/TweetsAbout/view/frontend/layout path, create the tweetsabout_magento_index.xml file with the following code:
<?xml version="1.0"?>
<page xmlns:xsi="http://www.w3.org/2001/XMLSchema-instance" layout="1column" xsi:noNamespaceSchemaLocation="urn:magento:framework:View/Layout/etc/page_configuration.xsd">
<head>
<title>
TweetsAbout #Magento
</title>
<css src="Packt_TweetsAbout::css/source/module.css"/>
</head>
<body>
<referenceContainer name="content">
<block class="Packt\TweetsAbout\Block\Tweets" template="Packt_TweetsAbout::tweets.phtml">
<arguments>
<argument name="hashtag" xsi:type="string">#magento</argument>
</arguments>
</block>
</referenceContainer>
</body>
</page>Under the app/code/Packt/TweetsAbout/view/frontend/layout path, create the tweetsabout_packt_index.xml file with the following code:
<?xml version="1.0"?>
<page xmlns:xsi="http://www.w3.org/2001/XMLSchema-instance" layout="1column" xsi:noNamespaceSchemaLocation="urn:magento:framework:View/Layout/etc/page_configuration.xsd">
<head>
<title>
TweetsAbout #Packtpub
</title>
<css src="Packt_TweetsAbout::css/source/module.css"/>
</head>
<body>
<referenceContainer name="content">
<block class="Packt\TweetsAbout\Block\Tweets" template="Packt_TweetsAbout::tweets.phtml">
<arguments>
<argument name="hashtag" xsi:type="string">#packtpub</argument>
</arguments>
</block>
</referenceContainer>
</body>
</page>Under the app/code/Packt/TweetsAbout/view/frontend/layout path, create the tweetsabout_php_index.xml file with the following code:
<?xml version="1.0"?>
<page xmlns:xsi="http://www.w3.org/2001/XMLSchema-instance" layout="1column" xsi:noNamespaceSchemaLocation="urn:magento:framework:View/Layout/etc/page_configuration.xsd">
<head>
<title>
TweetsAbout #PHP
</title>
<css src="Packt_TweetsAbout::css/source/module.css"/>
</head>
<body>
<referenceContainer name="content">
<block class="Packt\TweetsAbout\Block\Tweets" template="Packt_TweetsAbout::tweets.phtml">
<arguments>
<argument name="hashtag" xsi:type="string">#php</argument>
</arguments>
</block>
</referenceContainer>
</body>
</page>The <css> tag loads the CSS rules of the template. The <block> tag binds the Tweets.php Block to the tweets.phtml file. The <argument name="hashtag"> tag transports the hashtag parameter to the Tweets.php Block to search the latest mentions of the specific hashtag in the Twitter database.
Now, let's create the template files.
Under the app/code/Packt/TweetsAbout/view/frontend/templates path, create the index.phtml file with the following code:
<h2>Recent TweetsAbout: </h2>
<ul>
<li>
<a href="<?php echo $block->escapeHtml($block->getMagentoUrl()) ?>">
<span><?php echo __('Magento')?></span>
</a>
</li>
<li>
<a href="<?php echo $block->escapeHtml($block->getPacktUrl()) ?>">
<span><?php echo __('Packtpub')?></span>
</a>
</li>
<li>
<a href="<?php echo $block->escapeHtml($block->getPHPUrl()) ?>">
<span><?php echo __('PHP')?></span>
</a>
</li>
</ul>The $block object has access to the methods of Block/Index.php, and the URL of the pages build dynamically.
Under the app/code/Packt/TweetsAbout/view/frontend/templates path, create the tweets.phtml file with the following code:
<?php
$tweets = $block->searchTweets();
?>
<?php foreach ($tweets as $tweet){ ?>
<p class="tweet">
<a href="<?php echo $tweet->user->url; ?>">
<img src="<?php echo $tweet->user->profile_image_url; ?>" alt="profile">
</a>
<b>Created: </b><?php echo $tweet->created_at; ?>
<br />
<br />
<a href="<?php echo isset($tweet->entities->urls[0]->url) ? $tweet->entities->urls[0]->url : "#"; ?>" target="_blank"><?php echo $tweet->text;?></a>
</p>
<hr />
<?php } ?>The searchTweets() method loads tweets according to the URL accessed, and PHP processes the data to show the results to the user.
Under the app/code/Packt/TweetsAbout/view/frontend/web/css/source path, create the module.less file with the following code:
.tweet {background-color: #878787; padding:15px; border:1px dotted}
.tweet a {color: #ffffff}
.tweet a:hover {text-decoration: underline;}To deploy the module, follow this recipe:
- Open the terminal or command prompt.
- Access the
packt/bindirectory. - Then, run the
php magento module:enable --clear-static-content Packt_TweetsAboutcommand. - Run the
php magento setup:upgradecommand. - Next, run the
php magento setup:static-content:deploycommand. - In some cases, it is necessary to give
writepermissions again to the directories.
If everything goes alright, when you access the URL http://localhost/packt, you will see one link for the TweetsAbout extension in the topmost menu. Just click on it to see how the extension works. Take a look at the following screenshot:
You can navigate to the links to see how the pages work, as in the following screenshot:
The extension gets the ten last tweets in real time with the date, picture, and post. It's really awesome to watch our work running!
For sure, this extension can get a lot better, but it is only a starting point for big achievements.
Once you have your extension ready to work, you can publish it in the Magento Connect service (http://www.magentocommerce.com/magento-connect). Magento Connect is a service in which Magento members can share their open source or commercial extensions with Magento Community. The main contributions are generally based on the following:
- Modules
- Language packs
- Design interfaces
- Themes
Once you have the composer.json file configured, you can package your module by compacting it as a .zip file in the vendor-name_package-name-1.0.0.zip format.
Upload the module in your personal account in GitHub, and Magento can retrieve it to publish.
For further information, it's strongly recommended that you to access the official documentation available on the Magento Developers official site at http://devdocs.magento.com/guides/v2.0/extension-dev-guide/package_module.html.
Observer
Under the app/code/Packt/TweetsAbout/Observer directory, create the Topmenu.php file with the following code:
<?php
namespace Packt\TweetsAbout\Observer;
use Magento\Framework\Event\Observer as EventObserver;
use Magento\Framework\Data\Tree\Node;
use Magento\Framework\Event\ObserverInterface;
class Topmenu implements ObserverInterface{
/**
* @param EventObserver $observer
* @return $this
*/
public function execute(EventObserver $observer)
{
$urlInterface = \Magento\Framework\App\ObjectManager::getInstance()->get('Magento\Framework\UrlInterface');
$active = strpos($urlInterface->getCurrentUrl(), "tweetsabout");
/** @var \Magento\Framework\Data\Tree\Node $menu */
$menu = $observer->getMenu();
$tree = $menu->getTree();
$data = [
'name' => __("TweetsAbout"),
'id' => 'tweetsmenu',
'url' => $urlInterface->getBaseUrl() . 'tweetsabout',
'is_active' => $active
];
$node = new Node($data, 'id', $tree, $menu);
$menu->addChild($node);
return $this;
}
}The Topmenu.php file dynamically creates a new top menu item for the TweetsAbout module by adding a node in the top menu link schema. The \Magento\Framework\App\ObjectManager::getInstance()->get('Magento\Framework\UrlInterface') instruction gets the base URL and the current URL to create a specific link to the TweetsAbout module. The Topmenu observer works with the Document Object Model (DOM) concept of nodes and trees dynamically.
It's time to handle the presentation layer of the project. First, we will create the layout files (.xml) to handle template behavior and to pass arguments to the template via blocks. Every layout file is assigned by following this pattern: <module_name>_<controller>_<controller_file>.xml. This pattern allows the Magento system to assign the correct files according to its controller automatically.
Under the app/code/Packt/TweetsAbout/view/frontend/layout path, create the tweetsabout_index_index.xml file with the following code:
<?xml version="1.0"?>
<page xmlns:xsi="http://www.w3.org/2001/XMLSchema-instance" layout="1column" xsi:noNamespaceSchemaLocation="urn:magento:framework:View/Layout/etc/page_configuration.xsd">
<head>
<title>
TweetsAbout Module
</title>
</head>
<body>
<referenceContainer name="content">
<block class="Packt\TweetsAbout\Block\Index" template="Packt_TweetsAbout::index.phtml">
<arguments>
<argument name="urlMagento" xsi:type="url" path="tweetsabout/magento" />
<argument name="urlPHP" xsi:type="url" path="tweetsabout/php" />
<argument name="urlPackt" xsi:type="url" path="tweetsabout/packt" />
</arguments>
</block>
</referenceContainer>
</body>
</page>The <block> tag binds the Index.php Block to the index.phtml template, and the <arguments> tag transports three URL parameters to the Block. These parameters will be used in the index.phtml file.
Under the app/code/Packt/TweetsAbout/view/frontend/layout path, create the tweetsabout_magento_index.xml file with the following code:
<?xml version="1.0"?>
<page xmlns:xsi="http://www.w3.org/2001/XMLSchema-instance" layout="1column" xsi:noNamespaceSchemaLocation="urn:magento:framework:View/Layout/etc/page_configuration.xsd">
<head>
<title>
TweetsAbout #Magento
</title>
<css src="Packt_TweetsAbout::css/source/module.css"/>
</head>
<body>
<referenceContainer name="content">
<block class="Packt\TweetsAbout\Block\Tweets" template="Packt_TweetsAbout::tweets.phtml">
<arguments>
<argument name="hashtag" xsi:type="string">#magento</argument>
</arguments>
</block>
</referenceContainer>
</body>
</page>Under the app/code/Packt/TweetsAbout/view/frontend/layout path, create the tweetsabout_packt_index.xml file with the following code:
<?xml version="1.0"?>
<page xmlns:xsi="http://www.w3.org/2001/XMLSchema-instance" layout="1column" xsi:noNamespaceSchemaLocation="urn:magento:framework:View/Layout/etc/page_configuration.xsd">
<head>
<title>
TweetsAbout #Packtpub
</title>
<css src="Packt_TweetsAbout::css/source/module.css"/>
</head>
<body>
<referenceContainer name="content">
<block class="Packt\TweetsAbout\Block\Tweets" template="Packt_TweetsAbout::tweets.phtml">
<arguments>
<argument name="hashtag" xsi:type="string">#packtpub</argument>
</arguments>
</block>
</referenceContainer>
</body>
</page>Under the app/code/Packt/TweetsAbout/view/frontend/layout path, create the tweetsabout_php_index.xml file with the following code:
<?xml version="1.0"?>
<page xmlns:xsi="http://www.w3.org/2001/XMLSchema-instance" layout="1column" xsi:noNamespaceSchemaLocation="urn:magento:framework:View/Layout/etc/page_configuration.xsd">
<head>
<title>
TweetsAbout #PHP
</title>
<css src="Packt_TweetsAbout::css/source/module.css"/>
</head>
<body>
<referenceContainer name="content">
<block class="Packt\TweetsAbout\Block\Tweets" template="Packt_TweetsAbout::tweets.phtml">
<arguments>
<argument name="hashtag" xsi:type="string">#php</argument>
</arguments>
</block>
</referenceContainer>
</body>
</page>The <css> tag loads the CSS rules of the template. The <block> tag binds the Tweets.php Block to the tweets.phtml file. The <argument name="hashtag"> tag transports the hashtag parameter to the Tweets.php Block to search the latest mentions of the specific hashtag in the Twitter database.
Now, let's create the template files.
Under the app/code/Packt/TweetsAbout/view/frontend/templates path, create the index.phtml file with the following code:
<h2>Recent TweetsAbout: </h2>
<ul>
<li>
<a href="<?php echo $block->escapeHtml($block->getMagentoUrl()) ?>">
<span><?php echo __('Magento')?></span>
</a>
</li>
<li>
<a href="<?php echo $block->escapeHtml($block->getPacktUrl()) ?>">
<span><?php echo __('Packtpub')?></span>
</a>
</li>
<li>
<a href="<?php echo $block->escapeHtml($block->getPHPUrl()) ?>">
<span><?php echo __('PHP')?></span>
</a>
</li>
</ul>The $block object has access to the methods of Block/Index.php, and the URL of the pages build dynamically.
Under the app/code/Packt/TweetsAbout/view/frontend/templates path, create the tweets.phtml file with the following code:
<?php
$tweets = $block->searchTweets();
?>
<?php foreach ($tweets as $tweet){ ?>
<p class="tweet">
<a href="<?php echo $tweet->user->url; ?>">
<img src="<?php echo $tweet->user->profile_image_url; ?>" alt="profile">
</a>
<b>Created: </b><?php echo $tweet->created_at; ?>
<br />
<br />
<a href="<?php echo isset($tweet->entities->urls[0]->url) ? $tweet->entities->urls[0]->url : "#"; ?>" target="_blank"><?php echo $tweet->text;?></a>
</p>
<hr />
<?php } ?>The searchTweets() method loads tweets according to the URL accessed, and PHP processes the data to show the results to the user.
Under the app/code/Packt/TweetsAbout/view/frontend/web/css/source path, create the module.less file with the following code:
.tweet {background-color: #878787; padding:15px; border:1px dotted}
.tweet a {color: #ffffff}
.tweet a:hover {text-decoration: underline;}To deploy the module, follow this recipe:
- Open the terminal or command prompt.
- Access the
packt/bindirectory. - Then, run the
php magento module:enable --clear-static-content Packt_TweetsAboutcommand. - Run the
php magento setup:upgradecommand. - Next, run the
php magento setup:static-content:deploycommand. - In some cases, it is necessary to give
writepermissions again to the directories.
If everything goes alright, when you access the URL http://localhost/packt, you will see one link for the TweetsAbout extension in the topmost menu. Just click on it to see how the extension works. Take a look at the following screenshot:
You can navigate to the links to see how the pages work, as in the following screenshot:
The extension gets the ten last tweets in real time with the date, picture, and post. It's really awesome to watch our work running!
For sure, this extension can get a lot better, but it is only a starting point for big achievements.
Once you have your extension ready to work, you can publish it in the Magento Connect service (http://www.magentocommerce.com/magento-connect). Magento Connect is a service in which Magento members can share their open source or commercial extensions with Magento Community. The main contributions are generally based on the following:
- Modules
- Language packs
- Design interfaces
- Themes
Once you have the composer.json file configured, you can package your module by compacting it as a .zip file in the vendor-name_package-name-1.0.0.zip format.
Upload the module in your personal account in GitHub, and Magento can retrieve it to publish.
For further information, it's strongly recommended that you to access the official documentation available on the Magento Developers official site at http://devdocs.magento.com/guides/v2.0/extension-dev-guide/package_module.html.
Views
It's time to handle the presentation layer of the project. First, we will create the layout files (.xml) to handle template behavior and to pass arguments to the template via blocks. Every layout file is assigned by following this pattern: <module_name>_<controller>_<controller_file>.xml. This pattern allows the Magento system to assign the correct files according to its controller automatically.
Under the app/code/Packt/TweetsAbout/view/frontend/layout path, create the tweetsabout_index_index.xml file with the following code:
<?xml version="1.0"?>
<page xmlns:xsi="http://www.w3.org/2001/XMLSchema-instance" layout="1column" xsi:noNamespaceSchemaLocation="urn:magento:framework:View/Layout/etc/page_configuration.xsd">
<head>
<title>
TweetsAbout Module
</title>
</head>
<body>
<referenceContainer name="content">
<block class="Packt\TweetsAbout\Block\Index" template="Packt_TweetsAbout::index.phtml">
<arguments>
<argument name="urlMagento" xsi:type="url" path="tweetsabout/magento" />
<argument name="urlPHP" xsi:type="url" path="tweetsabout/php" />
<argument name="urlPackt" xsi:type="url" path="tweetsabout/packt" />
</arguments>
</block>
</referenceContainer>
</body>
</page>The <block> tag binds the Index.php Block to the index.phtml template, and the <arguments> tag transports three URL parameters to the Block. These parameters will be used in the index.phtml file.
Under the app/code/Packt/TweetsAbout/view/frontend/layout path, create the tweetsabout_magento_index.xml file with the following code:
<?xml version="1.0"?>
<page xmlns:xsi="http://www.w3.org/2001/XMLSchema-instance" layout="1column" xsi:noNamespaceSchemaLocation="urn:magento:framework:View/Layout/etc/page_configuration.xsd">
<head>
<title>
TweetsAbout #Magento
</title>
<css src="Packt_TweetsAbout::css/source/module.css"/>
</head>
<body>
<referenceContainer name="content">
<block class="Packt\TweetsAbout\Block\Tweets" template="Packt_TweetsAbout::tweets.phtml">
<arguments>
<argument name="hashtag" xsi:type="string">#magento</argument>
</arguments>
</block>
</referenceContainer>
</body>
</page>Under the app/code/Packt/TweetsAbout/view/frontend/layout path, create the tweetsabout_packt_index.xml file with the following code:
<?xml version="1.0"?>
<page xmlns:xsi="http://www.w3.org/2001/XMLSchema-instance" layout="1column" xsi:noNamespaceSchemaLocation="urn:magento:framework:View/Layout/etc/page_configuration.xsd">
<head>
<title>
TweetsAbout #Packtpub
</title>
<css src="Packt_TweetsAbout::css/source/module.css"/>
</head>
<body>
<referenceContainer name="content">
<block class="Packt\TweetsAbout\Block\Tweets" template="Packt_TweetsAbout::tweets.phtml">
<arguments>
<argument name="hashtag" xsi:type="string">#packtpub</argument>
</arguments>
</block>
</referenceContainer>
</body>
</page>Under the app/code/Packt/TweetsAbout/view/frontend/layout path, create the tweetsabout_php_index.xml file with the following code:
<?xml version="1.0"?>
<page xmlns:xsi="http://www.w3.org/2001/XMLSchema-instance" layout="1column" xsi:noNamespaceSchemaLocation="urn:magento:framework:View/Layout/etc/page_configuration.xsd">
<head>
<title>
TweetsAbout #PHP
</title>
<css src="Packt_TweetsAbout::css/source/module.css"/>
</head>
<body>
<referenceContainer name="content">
<block class="Packt\TweetsAbout\Block\Tweets" template="Packt_TweetsAbout::tweets.phtml">
<arguments>
<argument name="hashtag" xsi:type="string">#php</argument>
</arguments>
</block>
</referenceContainer>
</body>
</page>The <css> tag loads the CSS rules of the template. The <block> tag binds the Tweets.php Block to the tweets.phtml file. The <argument name="hashtag"> tag transports the hashtag parameter to the Tweets.php Block to search the latest mentions of the specific hashtag in the Twitter database.
Now, let's create the template files.
Under the app/code/Packt/TweetsAbout/view/frontend/templates path, create the index.phtml file with the following code:
<h2>Recent TweetsAbout: </h2>
<ul>
<li>
<a href="<?php echo $block->escapeHtml($block->getMagentoUrl()) ?>">
<span><?php echo __('Magento')?></span>
</a>
</li>
<li>
<a href="<?php echo $block->escapeHtml($block->getPacktUrl()) ?>">
<span><?php echo __('Packtpub')?></span>
</a>
</li>
<li>
<a href="<?php echo $block->escapeHtml($block->getPHPUrl()) ?>">
<span><?php echo __('PHP')?></span>
</a>
</li>
</ul>The $block object has access to the methods of Block/Index.php, and the URL of the pages build dynamically.
Under the app/code/Packt/TweetsAbout/view/frontend/templates path, create the tweets.phtml file with the following code:
<?php
$tweets = $block->searchTweets();
?>
<?php foreach ($tweets as $tweet){ ?>
<p class="tweet">
<a href="<?php echo $tweet->user->url; ?>">
<img src="<?php echo $tweet->user->profile_image_url; ?>" alt="profile">
</a>
<b>Created: </b><?php echo $tweet->created_at; ?>
<br />
<br />
<a href="<?php echo isset($tweet->entities->urls[0]->url) ? $tweet->entities->urls[0]->url : "#"; ?>" target="_blank"><?php echo $tweet->text;?></a>
</p>
<hr />
<?php } ?>The searchTweets() method loads tweets according to the URL accessed, and PHP processes the data to show the results to the user.
Under the app/code/Packt/TweetsAbout/view/frontend/web/css/source path, create the module.less file with the following code:
.tweet {background-color: #878787; padding:15px; border:1px dotted}
.tweet a {color: #ffffff}
.tweet a:hover {text-decoration: underline;}To deploy the module, follow this recipe:
- Open the terminal or command prompt.
- Access the
packt/bindirectory. - Then, run the
php magento module:enable --clear-static-content Packt_TweetsAboutcommand. - Run the
php magento setup:upgradecommand. - Next, run the
php magento setup:static-content:deploycommand. - In some cases, it is necessary to give
writepermissions again to the directories.
If everything goes alright, when you access the URL http://localhost/packt, you will see one link for the TweetsAbout extension in the topmost menu. Just click on it to see how the extension works. Take a look at the following screenshot:
You can navigate to the links to see how the pages work, as in the following screenshot:
The extension gets the ten last tweets in real time with the date, picture, and post. It's really awesome to watch our work running!
For sure, this extension can get a lot better, but it is only a starting point for big achievements.
Once you have your extension ready to work, you can publish it in the Magento Connect service (http://www.magentocommerce.com/magento-connect). Magento Connect is a service in which Magento members can share their open source or commercial extensions with Magento Community. The main contributions are generally based on the following:
- Modules
- Language packs
- Design interfaces
- Themes
Once you have the composer.json file configured, you can package your module by compacting it as a .zip file in the vendor-name_package-name-1.0.0.zip format.
Upload the module in your personal account in GitHub, and Magento can retrieve it to publish.
For further information, it's strongly recommended that you to access the official documentation available on the Magento Developers official site at http://devdocs.magento.com/guides/v2.0/extension-dev-guide/package_module.html.
CSS
Under the app/code/Packt/TweetsAbout/view/frontend/web/css/source path, create the module.less file with the following code:
.tweet {background-color: #878787; padding:15px; border:1px dotted}
.tweet a {color: #ffffff}
.tweet a:hover {text-decoration: underline;}To deploy the module, follow this recipe:
- Open the terminal or command prompt.
- Access the
packt/bindirectory. - Then, run the
php magento module:enable --clear-static-content Packt_TweetsAboutcommand. - Run the
php magento setup:upgradecommand. - Next, run the
php magento setup:static-content:deploycommand. - In some cases, it is necessary to give
writepermissions again to the directories.
If everything goes alright, when you access the URL http://localhost/packt, you will see one link for the TweetsAbout extension in the topmost menu. Just click on it to see how the extension works. Take a look at the following screenshot:
You can navigate to the links to see how the pages work, as in the following screenshot:
The extension gets the ten last tweets in real time with the date, picture, and post. It's really awesome to watch our work running!
For sure, this extension can get a lot better, but it is only a starting point for big achievements.
Once you have your extension ready to work, you can publish it in the Magento Connect service (http://www.magentocommerce.com/magento-connect). Magento Connect is a service in which Magento members can share their open source or commercial extensions with Magento Community. The main contributions are generally based on the following:
- Modules
- Language packs
- Design interfaces
- Themes
Once you have the composer.json file configured, you can package your module by compacting it as a .zip file in the vendor-name_package-name-1.0.0.zip format.
Upload the module in your personal account in GitHub, and Magento can retrieve it to publish.
For further information, it's strongly recommended that you to access the official documentation available on the Magento Developers official site at http://devdocs.magento.com/guides/v2.0/extension-dev-guide/package_module.html.
Deploying the module
To deploy the module, follow this recipe:
- Open the terminal or command prompt.
- Access the
packt/bindirectory. - Then, run the
php magento module:enable --clear-static-content Packt_TweetsAboutcommand. - Run the
php magento setup:upgradecommand. - Next, run the
php magento setup:static-content:deploycommand. - In some cases, it is necessary to give
writepermissions again to the directories.
If everything goes alright, when you access the URL http://localhost/packt, you will see one link for the TweetsAbout extension in the topmost menu. Just click on it to see how the extension works. Take a look at the following screenshot:
You can navigate to the links to see how the pages work, as in the following screenshot:
The extension gets the ten last tweets in real time with the date, picture, and post. It's really awesome to watch our work running!
For sure, this extension can get a lot better, but it is only a starting point for big achievements.
Once you have your extension ready to work, you can publish it in the Magento Connect service (http://www.magentocommerce.com/magento-connect). Magento Connect is a service in which Magento members can share their open source or commercial extensions with Magento Community. The main contributions are generally based on the following:
- Modules
- Language packs
- Design interfaces
- Themes
Once you have the composer.json file configured, you can package your module by compacting it as a .zip file in the vendor-name_package-name-1.0.0.zip format.
Upload the module in your personal account in GitHub, and Magento can retrieve it to publish.
For further information, it's strongly recommended that you to access the official documentation available on the Magento Developers official site at http://devdocs.magento.com/guides/v2.0/extension-dev-guide/package_module.html.
Magento Connect
Once you have your extension ready to work, you can publish it in the Magento Connect service (http://www.magentocommerce.com/magento-connect). Magento Connect is a service in which Magento members can share their open source or commercial extensions with Magento Community. The main contributions are generally based on the following:
- Modules
- Language packs
- Design interfaces
- Themes
Once you have the composer.json file configured, you can package your module by compacting it as a .zip file in the vendor-name_package-name-1.0.0.zip format.
Upload the module in your personal account in GitHub, and Magento can retrieve it to publish.
For further information, it's strongly recommended that you to access the official documentation available on the Magento Developers official site at http://devdocs.magento.com/guides/v2.0/extension-dev-guide/package_module.html.
Packaging and publishing your module
Once you have the composer.json file configured, you can package your module by compacting it as a .zip file in the vendor-name_package-name-1.0.0.zip format.
Upload the module in your personal account in GitHub, and Magento can retrieve it to publish.
For further information, it's strongly recommended that you to access the official documentation available on the Magento Developers official site at http://devdocs.magento.com/guides/v2.0/extension-dev-guide/package_module.html.
You worked on a lot in this chapter! Congratulations. Now, you have solid grasp of the concept in Magento 2.0 extension development. You can note that Magento development has strict rules, but once you learn the basics, you can master Magento with hard work and study. Keep the good work going!
As a suggestion, try to read the official documentation and do projects that demand more user interaction, such as the admin panel and development of dynamic formularies. You can even increase the power of TweetsAbout. The sky is the limit!
In the next chapter, we will start to work with Magento mobile by testing and configuring some great options. See you!
Nowadays e-commerce stores must be responsive and mobile friendly to increase sales according to the huge number of people using mobile devices to buy products and services. It's very important to know the right tools to provide a mobile-friendly Magento theme for your project. Let's go mobile with Magento!
The following topics will be covered in this chapter:
- Why mobile and responsive?
- Testing the website on different devices
- The Google Chrome DevTools device mode
- Responsive web designer tester extension
- Adjusting the CompStore theme for mobile devices
- Adjusting tweets for mobile devices
According to a research called State of Mobile Commerce Growing like a weed Q1 2015 conducted by Criteo (http://www.criteo.com/), a digital marketing company, mobile accounts for 29% of e-commerce transactions in the US and 34% globally. By the end of 2015, mobile share is forecast to reach 33% in the US and 40% globally. This research is available at http://www.criteo.com/media/1894/criteo-state-of-mobile-commerce-q1-2015-ppt.pdf.
This is one of the main reasons for which all Magento developers must create responsive designs. We started this process indirectly by creating a new theme with Webcomm Magento Boilerplate. Despite its basic mobile support, we have to make some adjustments to create a completely responsive Magento theme. Let's return to work!
In order to test your website in different devices and, consequently, different screen sizes, it is recommended to use a specific software or service to simulate the screen sizes of devices. If you perform a search on the web, you may find a great number of online test tools, but these tools work only with published websites. Our Magento site works, for now, on our local development environment.
To take advantage of our local development environment, let's work with the Google Chrome DevTools Device Mode and the Responsive Web Designer Tester extensions. In this book, we'll have two options to work with mobile theme development. You choose both of them!
If you don't have Google Chrome installed, download it from the URL https://www.google.com/intl/en/chrome/browser/desktop/ to install it on your operating system.
Google Chrome DevTools is a native tool of Google Chrome that provides a bunch of tools for web developers. By working with DevTools, you can optimize your frontend code, including HTML, CSS, and JavaScript.
Before accessing the DevTools extensions, access your Magento CompStore website at the http://localhost/packt URL.
To access DevTools, in the Google Chrome browser, follow these steps:
- Click on the Google Chrome menu.
- Click on the More Tools option.
- Click on the Developer Tools option.

Now, you can see the DevTools window, as in the preceding screenshot.
To activate Device Mode, click on the smartphone icon next to the Elements menu item. Now, you can see the page rendering with different options, as in the following screenshot:

According to the Google DevTools official page available at https://developers.google.com/web/tools/chrome-devtools/iterate/device-mode/, you can use the DevTools device mode to do the following:
The DevTools extension has the following options to enhance developer experience:
To change the device preset, click on the Device options:

You can choose from among iPhone, Google Nexus, Samsung Galaxy, and Blackberry, and you can create custom devices to test the screen size.


The media queries are responsible for defining the CSS rule for each screen size. You can access all of these using DevTools. To access media queries, click on the icon in the upper-left corner:


Now, open the Google Chrome browser and navigate to the address https://chrome.google.com/webstore/category/apps to access Chrome Web Store. Conduct a search to find the Responsive Web Designer Tester extension and then add the extension to Google Chrome, as follows:
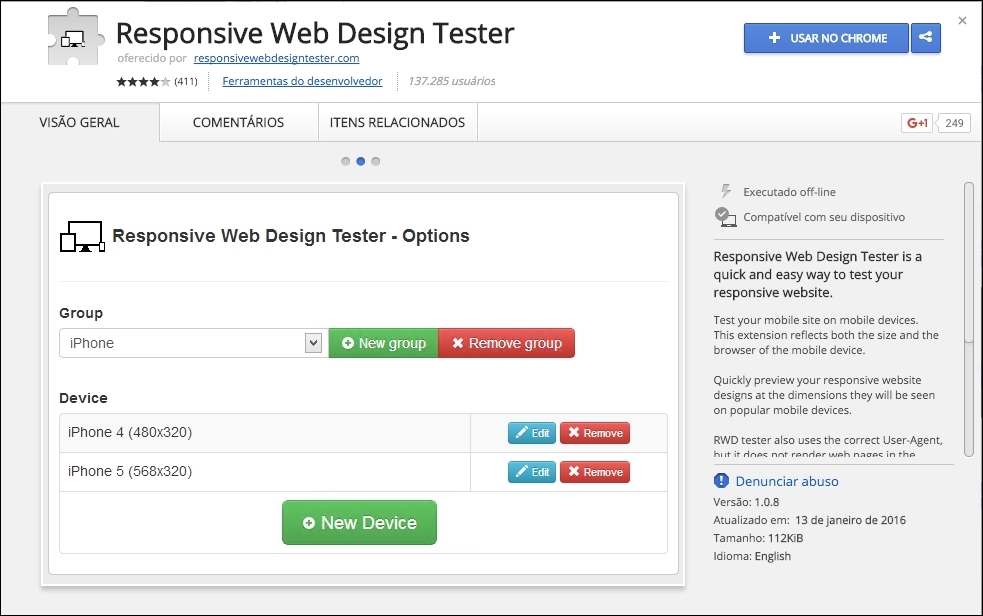
Great work! Now, let's take a look at how this extension works. On your browser, go to your Magento local site, also known as CompStore, by accessing http://localhost/packt. Remember that you have to turn on Apache Service in XAMMP to test the local website.
Click on the button of the Responsive Web Designer Tester extension shown on the right-hand side of your screen (generally near the end of the browser address bar) and select the iPhone 5—Portrait option for the first test:

After you select the device, you will see a pop-up window having the size of iPhone 5 screen. Navigating on the page, you will see also that the layout is not fully responsive. We have some issues in the home page presentation:
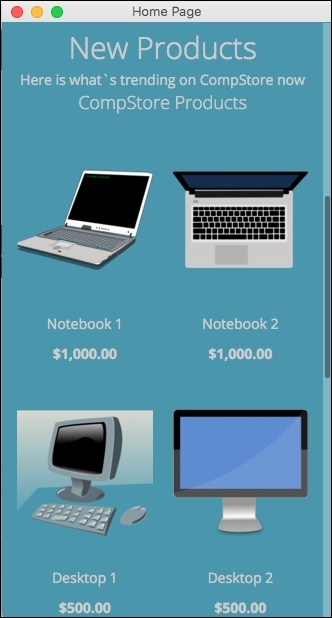
Now we have a tool to test site behavior between the different devices. It is time to make our CompStore theme 100% compatible with multiple devices!
Both the Magento 2.0 native themes, Blank and Luma, use Responsive Web Design (RWD) to provide good visualization in different devices, such as desktops, tablets, and mobiles.
In spite of the fact that the CompStore theme inherited the Luma theme, you can customize the template and CSS codes, as we discussed in Chapter 6, Write Magento 2.0 Extensions – a Great Place to Go. So, what do you think about improving the CompStore theme to make it more user friendly?
The actual mobile version of CompStore has some differences in the desktop version, including colors, elements positioning, and image size. Before creating some mobile standards for the CompStore theme, it's important to fix some CSS responsive design concepts of Magento. Let's get to work!
To handle accessibility for different devices, the Magento 2.0 native themes (Blank and Luma) work with an RWD engine, as we discussed in the Chapter 4, Magento 2.0 Theme Development – the Developers' Holy Grail, and Chapter 5, Creating a Responsive Magento 2.0 Theme. The stylesheets engine provided by the LESS preprocessor is the main utility responsible for this design approach.
The Magento 2.0 native themes were built based on the Magento UI library. The Magento UI library works with CSS 3 media queries to render a page with predefined rules according to the device, which requests the page. An example of media queries would be one that applies a specific rule for screens with a maximum width of 640 px; take a look at the following code:
@media only screen and (max-width: 640px) {
…
}With media queries, the themes apply breakpoints to handle different screen-width rules for different screen sizes of devices in a progression scale of pixels, as follows:
- 320 px (mobile)
- 480 px (mobile)
- 640 px (tablet)
- 768 px (tablet to desktop)
- 1024 px (desktop)
- 1440 px (desktop)
For further information about media queries, refer to the W3C official documentation available at https://www.w3.org/TR/css3-mediaqueries/.
The Magento 2.0 system works with the LESS CSS preprocessor to extend the features of CSS and enable the opportunity to create theme inheritance with minimal and organized effort. With this premise, to help theme developers, we have the Magento UI library in Magento 2.0.
The Magento UI library is based on LESS and provides a set of components to develop themes and frontend solutions:
- Actions toolbar
- Breadcrumbs
- Buttons
- Drop-down menus
- Forms
- Icons
- Layout
- Loaders
- Messages
- Pagination
- Popups
- Ratings
- Sections
- Tabs and accordions
- Tables
- Tooltips
- Typography
- A list of theme variables
Another important resource of the Magento UI and of LESS is the mixin capability. The mixin allows developers to group style rules to work with different devices.
For example, consider that you declared the following CSS code in one determined file:
.media-width(@extremum, @break) when (@extremum = 'max') and (@break = @screen__m) {
.example-responsive-block {
background: #ffc;
}
.example-responsive-block:before {
content: 'Mobile styles ';
font-weight: bold;
}
}Then, you executed this CSS code in a different file:
.media-width(@extremum, @break) when (@extremum = 'min') and (@break = @screen__m) {
.example-responsive-block {
background: #ccf;
}
.example-responsive-block:before {
content: 'Desktop styles ';
font-weight: bold;
}
}In spite of the two files declaring a mixin named .media-width to the .example-responsive-block class in different files, the mixin allows LESS to make a single query, grouping the rules instead of making multiple calls according to the device rule applied.
You can access the local Magento UI documentation by accessing the URL http://<magento_local_url>/pub/static/frontend/Magento/blank/en_US/css/docs/responsive.html.
Note
For further information about the Magento UI, take a look at the Magento official readme.md file available at https://github.com/magento/magento2/blob/2.0.0/lib/web/css/docs/source/README.md.
First of all, let's take a look at the current mobile version of the CompStore theme. Using Chrome DevTools or Responsive Web Designer Tester, select an Apple iPhone 5 (portrait) device to test the site. You will probably be redirected to home page:
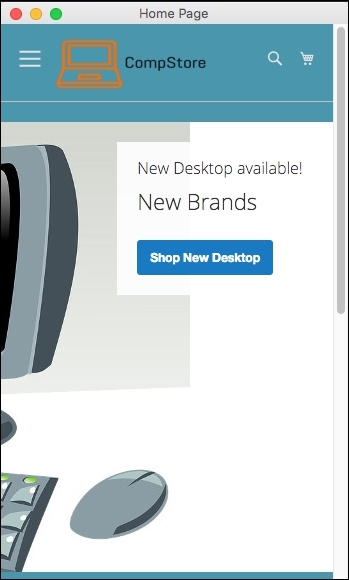
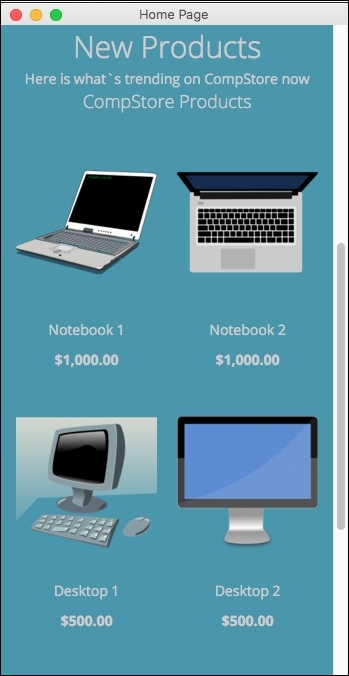
In spite of the previous adjustment in the CompStore theme, when a mobile device accesses a theme, CSS rules don't apply some important features, such as colors and the positioning of elements. As a suggestion, let's create a standard declaration of color approach and configure CSS to show only one product when the mobile device accesses the site. How can we implement these new features? Using media queries, of course!
In your favorite code editor, open the compstore.less file available under the app/design/frontend/Packt/compstore/web/css/source directory and use the following CSS 3 code:
@color-compstore: #F6F6F6;

body{
background: @color-compstore;
}
.media-width(@extremum, @break) when (@extremum = 'max') and (@break = @screen__s) {
body{
background: @color-compstore;
}
.widget .block-promo img{
height: 600px;
}
.products-grid .product-item {
width: 100%;
display: inline-block;
}
}
.media-width(@extremum, @break) when (@extremum = 'min') and (@break = @screen__s) {
body{
background: @color-compstore;
}
.widget .block-promo img{
height: 600px;
}
.products-grid .product-item {
width: 100%;
display: inline-block;
}
}The Magento UI break points predefined variables to identify the scope of media queries, which are as follows:
@screen__xxs: 320 px@screen__xs: 480 px@screen__s: 640 px@screen__m: 768 px@screen__l: 1024 px@screen__xl: 1440 px
So, in the CSS 3 new proposal, the media queries use the @screen_s variable to define the application of new rules. We will propose via mixin to change the background color, promo image size, and product size inside mobile rules for portrait and landscape purposes.
To apply the changes, follow this recipe:
- Save the file.
- Open the terminal or command prompt.
- Delete the
packt/pub/static/frontend/<Vendor>/<theme>/<locale>directory. - Delete the
var/cachedirectory. - Then, delete the
var/view_preprocesseddirectory. - Access the
packt/bindirectory. - Next, run the
php magento setup:static-content:deploycommand. - In some cases, it is necessary to give
writepermissions again to the directories.
Test the site again to get the new home page, as in the following screenshot:
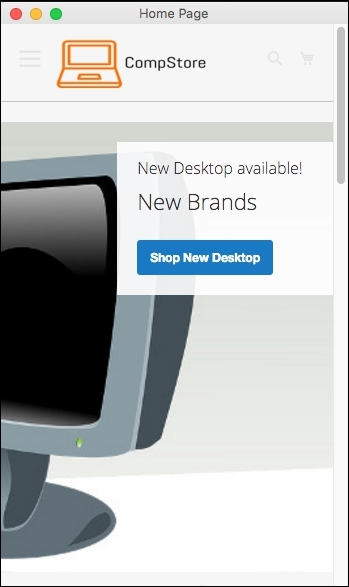
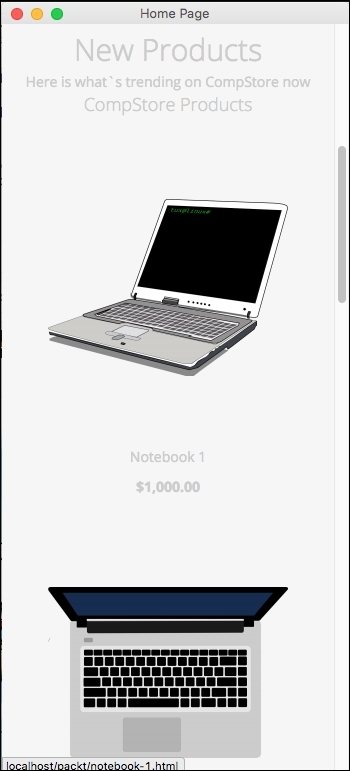
The extension that we created in Chapter 6, Write Magento 2.0 Extensions – a Great Place to Go, tweets about extension and has the following appearance:

Let's improve the CSS extension rules to turn it into a mobile-friendly one.
Using Chrome DevTools or Responsive Web Designer Tester, select an Apple iPhone 5—portrait device to test our code optimization.
Open the module.less file available under the packt/app/code/Packt/TweetsAbout/view/frontend/web/css/source directory and add the following code:
/*Tweets About Style*/

@media (min-width: 960px){
#wrapper {
width: 90%;
max-width: 1100px;
min-width: 800px;
margin: 50px auto;
  }

  #columns {
    -webkit-column-count: 3;
    -webkit-column-gap: 10px;
    -webkit-column-fill: auto;
    -moz-column-count: 3;
    -moz-column-gap: 10px;
    -moz-column-fill: auto;
    column-count: 3;
    column-gap: 15px;
    column-fill: auto;
  }
}

.tweet {
    display: inline-block;
    background: #FEFEFE;
    border: 2px solid #FAFAFA;
    box-shadow: 0 1px 2px rgba(34, 25, 25, 0.4);
    margin: 0 2px 15px;
    -webkit-column-break-inside: avoid;
    -moz-column-break-inside: avoid;
    column-break-inside: avoid;
    padding: 15px;
    padding-bottom: 5px;
    background: -webkit-linear-gradient(45deg, #FFF, #F9F9F9);
    opacity: 1;

    -webkit-transition: all .2s ease;
    -moz-transition: all .2s ease;
    -o-transition: all .2s ease;
    transition: all .2s ease;
}

.tweetimg {
    width: 15%;
    display:block;
    float:left;
    margin: 0px 5px 0px 0px;
}

.tweet p {
    font: 12px/18px Arial, sans-serif;
    color: #333;
    margin: 0;
}

#columns:hover .img:not(:hover) {
    opacity: 0.4;
}
After saving the module.less file, change the tweets.phtml code available under packt/app/code/Packt/TweetsAbout/view/frontend/templates, change the file with this new code, and save it, as follows:
<?php
  $tweets = $block->searchTweets();
?>

<div id="wrapper">
  <div id="columns">
    <?php foreach ($tweets as $tweet){ ?>
      <div class="tweet">
        <p>
          <a href="https://twitter.com/intent/user?user_id=<?php echo $tweet->user->id; ?>" target="_blank">
            <img src="<?php echo $tweets->user->profile_image_url; ?>" alt="profile">
            <?php echo $tweet->user->name; ?>
          </a>
          <br />
          Created: <?php echo $tweets->created_at; ?>
          <br /><br />
          <a href="<?php echo isset($tweet->entities->urls[0]->url) ? $tweet->entities->urls[0]->url : "#"; ?>" target="_blank"><?php echo $tweet->text;?></a>
            <?php echo $tweets->text;?>
          </a>
        </p>
      </div>
    <?php } ?>
  </div>
</div>
To deploy the module update, follow this recipe:
- Open the terminal or command prompt.
- Access the
packt/bindirectory. - Then, run the
php magento module:enable --clear-static-content Packt_TweetsAboutcommand. - Run the
php magento setup:upgradecommand. - Next, run the
php magento setup:static-content:deploycommand. - In some cases, it is necessary to give
writepermissions again to the directories (varandpub).
Now, test the tweets about extension by accessing http://localhost/packt/tweetsabout to see the new responsive look, as shown in the following screenshot:

If you activate DevTools and choose an iPhone 5 device, you will see a result similar to the following screenshot:
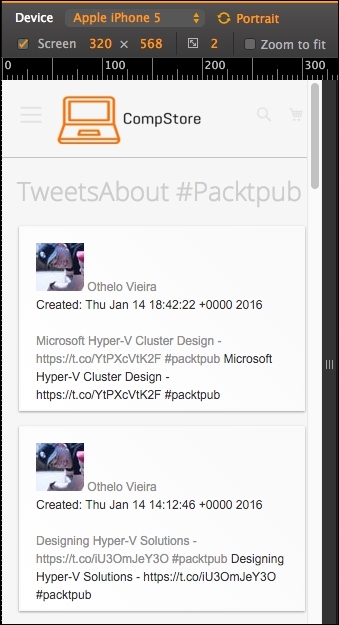
In this chapter, you learned about tools that provide you with a great environment to develop Magento frontend themes.
You also increased the power of CompStore CSS to handle access from specific mobile devices. Of course, you can modify the code constantly to have a better experience by fine-tuning in your code. However, this is only the beginning.
In the next chapter, we will start configuring our Magento software, on which we have been working until now, to improve its speed. We will installing solutions and configure the already native Magento options.
Despite the existence of a great solution such as Zend Framework for its system, Magento 2.0 needs some fine tuning to get the best performance in order to provide the users with a better shopping experience. As you noted in the previous chapters, it is very important to focus on every aspect for successful e-commerce.
The following topics will be covered in this chapter:
- Magento Entity-Attribute-Value
- Indexing and re-indexing data
- Caching
- Selecting the right Magento hosting service
- Apache web server deflation
- Enabling the
expiresheader - PHP memory configuration
- Optimizing the MySQL server
- Cleaning the database log
- Minifying scripts
- CDN for Magento
With a complex system architecture, Magento developers realized that a traditional development approach could be counterproductive for a scalable idea to implement an e-commerce solution.
Developers, therefore, decided to adopt the Entity-Attribute-Value (EAV) architecture approach.
This database structure embraces the Magento 2.0 complexity processes and variables and allows an unlimited numbers of attributes to any item, such as categories, products, costumers, addresses, and more.
The three main points of EAV can be described as follows:
- Entity: Data items are represented as entities. In the database, each entity has a record.
- Attribute: Many attributes could belong to a specific entity; for example, the customer entity has name, birth date, phone, and so on. In Magento, all the attributes are listed in a single table.
- Value: This is the value of each attribute. For example, customer is an entity that has an attribute called name with the value Fernando Miguel.

This book is a hands–on guide to Magento, but I strongly suggest you to read more about EAV in the Magento official documentation at http://devdocs.magento.com/guides/v2.0/extension-dev-guide/attributes.html.
With the increase in content, images, and script demands for a better experience in e-commerce, we have to handle network consumption in order to provide fast access to our system. Search engines measure some technical points with their algorithms, and fast access is, of course, one of the requisites validated.
Magento has a complex architecture and works with MySQL database constant queries to show specific products information, render pages, and process checkouts. This high process volume demand can slow the download speed when your Magento 2.0 solution is in a production environment.
To improve the Magento 2.0 performance, we can use two important tools: indexing and caching.
In the Magento 2.0 life cycle, at a determined point, we will have considerable megabytes of data on the MySQL database, including information regarding products, orders, customers, and payments. To improve its performance, Magento uses indexed tables to provide faster lookups.
However, as your Magento 2.0 e-commerce grows, the indexation feature starts to lose performance too.
In order to correct this issue, you can precompile database relationships using the flat table option in Magento. This technique combines EAV relationships for categories and products in one table to increase the speed of queries. To enable this feature, you can follow these instructions:
- Log in to your Magento backend (
http://localhost/packt/admin_packt). - Go to Stores | Configuration | Catalog.
- Expand the Storefront option and select Yes for both Use Flat Category and Use Flat Catalog Product.
- Next, click on Save Config.

- After the activation of the flat resource, you will probably get this Magento message:

If you make changes to your catalog, product, or some page that has a relationship with indexers, the Magento system needs to re-index the information to keep the flat table schema working. You can manage the indexers with the Magento command-line tool, as follows:

The reindex command rebuilds all the product, catalog, customer, and stock information. The index feature enables a fast return of data once the system has no need to process any basic data, such as product price, every single time that the user accesses the store.
Did you notice in the preceding system message one issue about Magento cron job? Cron job allows you to automate this task and others to improve your efficiency. Let's take a look at how cron job works.
Note
For further information about Magento indexing, take a look at the official Magento documentation at http://devdocs.magento.com/guides/v2.0/extension-dev-guide/indexing.html.
Magento has important system processes that are very important to maintain the system's working at its full potential. These processes need automated executions to handle the updates made by the user and administrator. That is the why this feature is critical to Magento.
Cron job works with UNIX systems and can schedule specific tasks to be executed in a predetermined time on the server. The following activities can be scheduled to execute on the Magento 2.0 system:
- The updating of currency rates
- Customer notifications
- The generation of Google sitemap
- Price rules
- Sending e-mails
- Re-indexing
To configure the cron job, follow this recipe.
Find the php.ini file path.
If you use XAMPP, as was suggested for a web server solution at the beginning of the book, you simply can use the XAMPP/xamppfiles/etc/php.ini path. If you use a Unix-based terminal, you can use the command to find the PHP configuration file. Perform the following steps:
- Open the terminal.
- Run the
sudo crontab -u magento_user –ecommand; here,magento_userrefers to your system's owner. - Enter with the following instructions in the text editor that will show up:
*/1 * * * * php -c <php-ini-file-path> <your Magento install dir>/bin/magento cron:run
*/1 * * * * php -c <php-ini-file-path> <your Magento install dir>/update/cron.php
*/1 * * * * php -c <php-file-path> <your Magento install dir>/bin/magento setup:cron:run
Here's an example:
*/1 * * * * php -c /Applications/XAMPP/xamppfiles/etc/php.ini /Applications/XAMPP/xamppfiles/etc/php.ini /Applications/XAMPP/htdocs/packt/bin/magento cron:run
*/1 * * * * php -c /Applications/XAMPP/xamppfiles/etc/php.ini /Applications/XAMPP/xamppfiles/etc/php.ini /Applications/XAMPP/htdocs/packt/update/cron.php
*/1 * * * * php -c /Applications/XAMPP/xamppfiles/etc/php.ini /Applications/XAMPP/htdocs/packt/bin/magento setup:cron:run
- Run the
sudo crontab -u fjmiguel –lcommand to take a look at your new cron job configuration. - Save the changes and exit the text editor.
In some cases, it is necessary to give write permissions again to the directories.
The */1 * * * * configuration specifies that the cron job will be executed every minute. The cron job will now run in the background every minute. To manually execute the cron job, you can run the php magento cron:run command on the Magento command-line tool, as shown in the following figure:
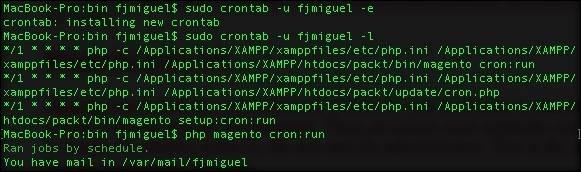
For further information about the cron job, follow the link at https://help.ubuntu.com/community/CronHowto.
For Magento cron, take a look at the official Magento documentation http://devdocs.magento.com/guides/v2.0/config-guide/cli/config-cli-subcommands-cron.html.
While the indexing technique works on database layer, the caching feature does the same for the HTML page components to increase fast access to the frontend. Caching stores this kind of data in order to provide the visitors with access to faster download.
To enable caching, you need to perform the following steps:

For further information about cache configuration, follow the link at http://devdocs.magento.com/guides/v2.0/config-guide/cli/config-cli-subcommands-cache.html.
You can work with third-party cache solutions to provide a better performance. Some of this solution has support and works very well with the Magento 2.0 solution. This book doesn't cover server configurations, but I strongly suggest you to take a look at the following:
- Redis can be found at http://devdocs.magento.com/guides/v2.0/config-guide/redis/config-redis.html
- Memcached session storage can be found at http://devdocs.magento.com/guides/v2.0/config-guide/memcache/memcache.html
- Varnish cache can be found at http://devdocs.magento.com/guides/v2.0/config-guide/varnish/config-varnish.html
Magento 2.0 has a complex structure, but it follows the good practices of software development, which gives the administrators and the developers of this fantastic e-commerce solution the real possibility to implement a scalable system to conquer a great site traffic and constantly increase the sales.
Despite this advantage, all the scalable systems need a great server infrastructure to provide fast content access through the Internet.
As a developer, you need to always think about all the stages that a successful software needs to go through in an order to aggregate the real value to its administrator and to its users. Try to always see the big picture of your project.
Let's take a look at some techniques and tips to increase your Magento server's capability.
First of all, we need to conduct a deep research on the existent solutions. We will try to gather information about clients of these solutions and test Magento's performance by accessing the Magento website as a visitor.
The Magento official project website provides you with an online tool to search for Magento. You can use this tool by accessing the URL at http://partners.magento.com/partner_locator/search.aspx.
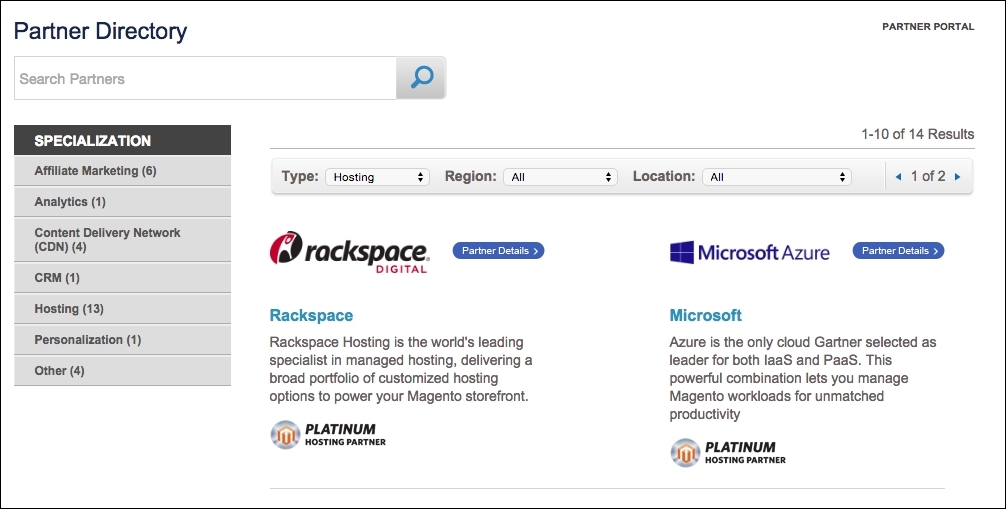
Magento hosting services generally use Apache as a web server solution. Magento is written in PHP, and Apache has a mature environment to handle PHP processes.
In order to give fast response to visitors' requests, we will use Apache's mod_deflate to speed up server response.
According to Apache's official documentation (http://httpd.apache.org/docs/2.2/mod/mod_deflate.html), this module provides the deflate output filter that allows output from your server to be compressed before being sent to the client over the network.
To enable this feature on your server, you need to create the .htaccess file and enter the following code:
<IfModule mod_deflate.c>

############################################
## enable apache served files compression
## http://developer.yahoo.com/performance/rules.html#gzip

    # Insert filter on all content
    SetOutputFilter DEFLATE
    # Insert filter on selected content types only
    AddOutputFilterByType DEFLATE text/html text/plain text/xml text/css text/javascript

    # Netscape 4.x has some problems...
    BrowserMatch ^Mozilla/4 gzip-only-text/html

    # Netscape 4.06-4.08 have some more problems
    BrowserMatch ^Mozilla/4\.0[678] no-gzip

    # MSIE masquerades as Netscape, but it is fine
    BrowserMatch \bMSIE !no-gzip !gzip-only-text/html

    # Don't compress images
    SetEnvIfNoCase Request_URI \.(?:gif|jpe?g|png)$ no-gzip dont-vary

    # Make sure proxies don't deliver the wrong content
    Header append Vary User-Agent env=!dont-vary

</IfModule>
This adjustment reduces about 70% of the amount of data delivered.
For further information about the .htaccess and mod_deflate configurations, take a look at the links at http://httpd.apache.org/docs/current/howto/htaccess.html and http://httpd.apache.org/docs/2.2/mod/mod_deflate.html.
Continuing to take advantage of the Apache web server, we will activate the mod_expires module. This module sends a message to the client machine about the document's validity, and the client can store a cache of the site until the client receives a new message from the server expiration of data. This technique increases the speed of download.
To activate this feature, you can open the .htaccess file available in the Magento root directory and enter this block of code:
<IfModule mod_expires.c>

############################################
## Add default Expires header
## http://developer.yahoo.com/performance/rules.html#expires

    ExpiresActive On
    ExpiresDefault "access plus 1 year"

</IfModule>
For further information about the .htaccess configuration, follow the link at http://httpd.apache.org/docs/2.2/mod/mod_expires.html.
Increasing PHP memory by host configuration has a direct relationship with your contracted hosting service. Some shared hosting services do not give this option to the developers. This is one of the main reasons to choose a specialized Magento hosting service.
Generally, this configuration can be done by adding the following code to the .htaccess file available in the Magento root directory:
<IfModule mod_php5.c>

############################################
## adjust memory limit

php_value memory_limit 256M
php_value max_execution_time 18000

</IfModule>
MySQL has the query cache feature to provide fast queries on a database. Once again, you need to conduct deep research on your possible hosting services before contracting any to make sure you have all the services you need for a great production environment.
Before starting the optimization, refer to the PHP and MySQL documentations of your hosting service to check the availability of these changes.
Open the php.ini hosting service file and place these configurations:
;;;;;;;;;;;;;;;;;;;
; Resource Limits ;
;;;;;;;;;;;;;;;;;;;

max_execution_time = 30     ; Maximum execution time of each script, in seconds
max_input_time = 60	; Maximum amount of time each script may spend parsing request data
memory_limit = 512M      ; Maximum amount of memory a script may consume (8MB)
query_cache_size = 64M

[MySQLi]
; Please refer to http://php.net/manual/en/mysqli.configuration.php for further information

; Maximum number of persistent links.  -1 means no limit.
mysqli.max_persistent = -1

; Allow accessing, from PHP's perspective, local files with LOAD DATA statements
;mysqli.allow_local_infile = On

; Allow or prevent persistent links.
mysqli.allow_persistent = On

; Maximum number of links.  -1 means no limit.
mysqli.max_links = -1

; If mysqlnd is used: Number of cache slots for the internal result set cache
mysqli.cache_size = 2000

; Default port number for mysqli_connect().  If unset, mysqli_connect() will use
; the $MYSQL_TCP_PORT or the mysql-tcp entry in /etc/services or the
; compile-time value defined MYSQL_PORT (in that order).  Win32 will only look
; at MYSQL_PORT.
mysqli.default_port = 3306

; Default socket name for local MySQL connects.  If empty, uses the built-in
; MySQL defaults.
mysqli.default_socket =

; Default host for mysql_connect() (doesn't apply in safe mode).
mysqli.default_host =

; Default user for mysql_connect() (doesn't apply in safe mode).
mysqli.default_user =

; Default password for mysqli_connect() (doesn't apply in safe mode).
; Note that this is generally a *bad* idea to store passwords in this file.
; *Any* user with PHP access can run 'echo get_cfg_var("mysqli.default_pw")
; and reveal this password!  And of course, any users with read access to this
; file will be able to reveal the password as well.
mysqli.default_pw =

; Allow or prevent reconnect
mysqli.reconnect = Off
Now, let's configure the query_cache_size variable directly on the MySQL database.
Open the phpMyAdmin web SQL console, and execute the SHOW VARIABLES LIKE 'query_cache_size'; query without selecting a database. The query will probably return the 0 value for the query_cache_size variable.
Execute the SET GLOBAL query_cache_size = 1048576; query and execute SHOW VARIABLES LIKE 'query_cache_size'; again.
The query will probably return the following information:
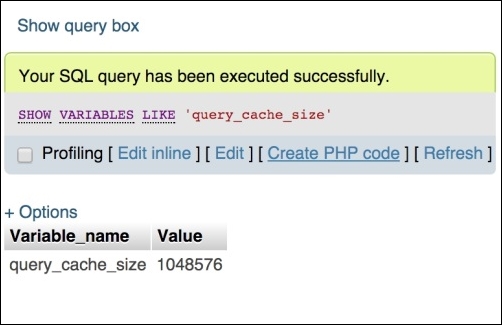
The query_cache_size variable was activated with success!
For further information about the MySQL cache size configuration, follow the link at https://dev.mysql.com/doc/refman/5.0/en/query-cache-configuration.html.
Even by testing these configurations in your localhost environment, you can feel the huge positive difference between the first access in your Magento installation and the last access after the configuration. This is really awesome!
PHP memory configuration
Increasing PHP memory by host configuration has a direct relationship with your contracted hosting service. Some shared hosting services do not give this option to the developers. This is one of the main reasons to choose a specialized Magento hosting service.
Generally, this configuration can be done by adding the following code to the .htaccess file available in the Magento root directory:
<IfModule mod_php5.c>

############################################
## adjust memory limit

php_value memory_limit 256M
php_value max_execution_time 18000

</IfModule>
MySQL has the query cache feature to provide fast queries on a database. Once again, you need to conduct deep research on your possible hosting services before contracting any to make sure you have all the services you need for a great production environment.
Before starting the optimization, refer to the PHP and MySQL documentations of your hosting service to check the availability of these changes.
Open the php.ini hosting service file and place these configurations:
;;;;;;;;;;;;;;;;;;;
; Resource Limits ;
;;;;;;;;;;;;;;;;;;;

max_execution_time = 30     ; Maximum execution time of each script, in seconds
max_input_time = 60	; Maximum amount of time each script may spend parsing request data
memory_limit = 512M      ; Maximum amount of memory a script may consume (8MB)
query_cache_size = 64M

[MySQLi]
; Please refer to http://php.net/manual/en/mysqli.configuration.php for further information

; Maximum number of persistent links.  -1 means no limit.
mysqli.max_persistent = -1

; Allow accessing, from PHP's perspective, local files with LOAD DATA statements
;mysqli.allow_local_infile = On

; Allow or prevent persistent links.
mysqli.allow_persistent = On

; Maximum number of links.  -1 means no limit.
mysqli.max_links = -1

; If mysqlnd is used: Number of cache slots for the internal result set cache
mysqli.cache_size = 2000

; Default port number for mysqli_connect().  If unset, mysqli_connect() will use
; the $MYSQL_TCP_PORT or the mysql-tcp entry in /etc/services or the
; compile-time value defined MYSQL_PORT (in that order).  Win32 will only look
; at MYSQL_PORT.
mysqli.default_port = 3306

; Default socket name for local MySQL connects.  If empty, uses the built-in
; MySQL defaults.
mysqli.default_socket =

; Default host for mysql_connect() (doesn't apply in safe mode).
mysqli.default_host =

; Default user for mysql_connect() (doesn't apply in safe mode).
mysqli.default_user =

; Default password for mysqli_connect() (doesn't apply in safe mode).
; Note that this is generally a *bad* idea to store passwords in this file.
; *Any* user with PHP access can run 'echo get_cfg_var("mysqli.default_pw")
; and reveal this password!  And of course, any users with read access to this
; file will be able to reveal the password as well.
mysqli.default_pw =

; Allow or prevent reconnect
mysqli.reconnect = Off
Now, let's configure the query_cache_size variable directly on the MySQL database.
Open the phpMyAdmin web SQL console, and execute the SHOW VARIABLES LIKE 'query_cache_size'; query without selecting a database. The query will probably return the 0 value for the query_cache_size variable.
Execute the SET GLOBAL query_cache_size = 1048576; query and execute SHOW VARIABLES LIKE 'query_cache_size'; again.
The query will probably return the following information:
The query_cache_size variable was activated with success!
For further information about the MySQL cache size configuration, follow the link at https://dev.mysql.com/doc/refman/5.0/en/query-cache-configuration.html.
Even by testing these configurations in your localhost environment, you can feel the huge positive difference between the first access in your Magento installation and the last access after the configuration. This is really awesome!
Optimizing the MySQL server
MySQL has the query cache feature to provide fast queries on a database. Once again, you need to conduct deep research on your possible hosting services before contracting any to make sure you have all the services you need for a great production environment.
Before starting the optimization, refer to the PHP and MySQL documentations of your hosting service to check the availability of these changes.
Open the php.ini hosting service file and place these configurations:
;;;;;;;;;;;;;;;;;;;
; Resource Limits ;
;;;;;;;;;;;;;;;;;;;

max_execution_time = 30     ; Maximum execution time of each script, in seconds
max_input_time = 60	; Maximum amount of time each script may spend parsing request data
memory_limit = 512M      ; Maximum amount of memory a script may consume (8MB)
query_cache_size = 64M

[MySQLi]
; Please refer to http://php.net/manual/en/mysqli.configuration.php for further information

; Maximum number of persistent links.  -1 means no limit.
mysqli.max_persistent = -1

; Allow accessing, from PHP's perspective, local files with LOAD DATA statements
;mysqli.allow_local_infile = On

; Allow or prevent persistent links.
mysqli.allow_persistent = On

; Maximum number of links.  -1 means no limit.
mysqli.max_links = -1

; If mysqlnd is used: Number of cache slots for the internal result set cache
mysqli.cache_size = 2000

; Default port number for mysqli_connect().  If unset, mysqli_connect() will use
; the $MYSQL_TCP_PORT or the mysql-tcp entry in /etc/services or the
; compile-time value defined MYSQL_PORT (in that order).  Win32 will only look
; at MYSQL_PORT.
mysqli.default_port = 3306

; Default socket name for local MySQL connects.  If empty, uses the built-in
; MySQL defaults.
mysqli.default_socket =

; Default host for mysql_connect() (doesn't apply in safe mode).
mysqli.default_host =

; Default user for mysql_connect() (doesn't apply in safe mode).
mysqli.default_user =

; Default password for mysqli_connect() (doesn't apply in safe mode).
; Note that this is generally a *bad* idea to store passwords in this file.
; *Any* user with PHP access can run 'echo get_cfg_var("mysqli.default_pw")
; and reveal this password!  And of course, any users with read access to this
; file will be able to reveal the password as well.
mysqli.default_pw =

; Allow or prevent reconnect
mysqli.reconnect = Off
Now, let's configure the query_cache_size variable directly on the MySQL database.
Open the phpMyAdmin web SQL console, and execute the SHOW VARIABLES LIKE 'query_cache_size'; query without selecting a database. The query will probably return the 0 value for the query_cache_size variable.
Execute the SET GLOBAL query_cache_size = 1048576; query and execute SHOW VARIABLES LIKE 'query_cache_size'; again.
The query will probably return the following information:
The query_cache_size variable was activated with success!
For further information about the MySQL cache size configuration, follow the link at https://dev.mysql.com/doc/refman/5.0/en/query-cache-configuration.html.
Even by testing these configurations in your localhost environment, you can feel the huge positive difference between the first access in your Magento installation and the last access after the configuration. This is really awesome!
Code minification is a technique to remove unnecessary characters from the source code. Minify your JavaScript (.js) and stylesheets (.css) files and improve the load time of your site by compressing the files.
In order to activate this process in Magento, navigate to the admin area (http://localhost/packt/admin_packt) and follow these instructions:
- First, navigate to Stores | Configuration | Advanced | Developer.
- Expand the JavaScript Settings options and select the Yes option for Merge JavaScript Files and Minify JavaScript Files.
- Expand the CSS Settings options and select the Yes option for Merge CSS Files and Minify CSS Files.
- Finally, click on the Save Config button.

Content Delivery Networks, also known as CDN, are servers of fast access for your static or non-dynamic content. JavaScript files and images are examples of files hosted on CDN servers.
The main idea behind the use of CDN is saving the process time of your Magento server using a CDN solution.
I suggest you to conduct research on hosting services that provide this integration. For example, Nexcess as a Magento partner company provides specific documentation about CDN integration on the URL https://docs.nexcess.net/article/how-to-configure-cdn-access-for-magento.html.
For JavaScript CDN, we have a free-of-charge service available on the Internet! This is thanks to Google for providing us with this amazing feature at https://developers.google.com/speed/libraries/.
CDN for Magento
Content Delivery Networks, also known as CDN, are servers of fast access for your static or non-dynamic content. JavaScript files and images are examples of files hosted on CDN servers.
The main idea behind the use of CDN is saving the process time of your Magento server using a CDN solution.
I suggest you to conduct research on hosting services that provide this integration. For example, Nexcess as a Magento partner company provides specific documentation about CDN integration on the URL https://docs.nexcess.net/article/how-to-configure-cdn-access-for-magento.html.
For JavaScript CDN, we have a free-of-charge service available on the Internet! This is thanks to Google for providing us with this amazing feature at https://developers.google.com/speed/libraries/.
In this chapter, you learned important lessons about how to improve Magento performance and pay attention to all the aspects that can make a positive difference in Magento development, including how to create a full-speed environment for Magento System.
I invite you to think in this very for now. We are progressing and walking through all the aspects of Magento: design, development, marketing, and performance. I feel comfortable to say to you, dear reader, that you have the tools to elevate your Magento professional career. Just keep continuing to study hard.
In this chapter, you learned how to:
- Increase Magento performance in different aspects and technologies
- Use the power of indexation and caching
- Develop solutions to create a better Magento user experience through fast download techniques
In the final chapter, we will explore some tools and ways to improve your Magento skills. See you!
We are at the end of the book, but this only the beginning of your walk through the Magento training. It's important to know some Magento extension options, but it is more important to build your own path in the Magento world by studying for a certification and achieving a new professional level.
The following topics will be covered in this chapter:
- Magento Connect extensions
- Installing a Magento extension
- Debugging Grunt.js styles
- Magento knowledge center
- Improving your Magento skills
The Magento 2.0 architecture allows a natural improvement of native resources and the addition of new ones. Magento 2.0 is built based on the best software development practices. Its architecture is modular, which allows the development of extensions, as we discussed in an earlier chapter.
Magento Commerce maintains a marketplace to provide Magento extensions known as Magento Connect (https://www.magentocommerce.com/magento-connect). Magento Connect includes extensions that provide new functionalities, such as modules, add-ons, language packs, design interfaces, and themes to extend the power of your store.
I strongly suggest that you visit Magento Connect to get some ideas for personal projects and follow the extension development tendency in the marketplace.
Besides the Magento Connect marketplace, to search for Magento extension solutions, you can access the extension options through your admin area. To access Magento extension options in your admin area, perform the following steps:
- Access your admin area at
http://localhost/admin_packt. - Navigate to Find Partners and Extensions | Visit Magento Marketplaces.

- Once you choose the extension to install, Magento 2.0 offers two options for extension installation:
- Installation via Composer
- Manual installation
To install the extensions via Composer, you need to configure composer.json to work with the Magento 2 Composer repository (http://packages.magento.com/) as a repository solution for Magento Core extensions. The composer already has the Packagist (https://packagist.org/) configuration. To proceed with this configuration, perform the following:
- Open the terminal or command prompt.
- Go to the root directory of your Magento installation.
- Run the
composer config repositories.magento composer http://packages.magento.comcommand.
To install a Magento extension via composer, do the following:
- Open the terminal or command prompt.
- Go to the root directory of your Magento installation.
- Run the
composer require <vendor>/<module>command. - An example of this is
composer require Packt/TweetsAbout. - Run the
composer updatecommand. - Then, run the
php bin/magento setup:upgradecommand. - In some cases, it is necessary to give write permissions again to the directories.
To install a Magento extension manually, perform the following steps:
- Download the
.zipfile of the module. - Extract it and move it under the
<magento_root_directory>/app/codedirectory. - Run the
php bin/magento setup:upgradecommand. - In some cases, it is necessary to give write permissions again to the directories (for example, the
vardirectory)
As you noted in the previous chapters, for every change that you apply in a Magento extension or theme styles, you need to clean the static files directory and deploy it to see the effect. This process takes time and unnecessary effort. So, what if you have a tool to automate this process?
Grunt.js (http://gruntjs.com/) is a task runner to automate tasks; for example, it provides productivity in Magento development by automating CSS changes. To install Grunt, follow these steps:
- Install Node.js (https://nodejs.org) in your machine.
- Open the terminal or command prompt.
- Run the
npm install -g grunt-clicommand to install the Grunt command-line interface. - Go to the
packt/Magento root directory and run thenpm install grunt --save-devcommand. - Still under the
packtdirectory, run thenpm installcommand. - Then, run the
npm updatecommand. - In your favorite code editor open, the
packt/dev/tools/grunt/configs/theme.jsfile, add the following code, and save it:'use strict'; module.exports = { blank: { area: 'frontend', name: 'Magento/blank', locale: 'en_US', files: [ 'css/styles-m', 'css/styles-l', 'css/email', 'css/email-inline' ], dsl: 'less' }, luma: { area: 'frontend', name: 'Magento/luma', locale: 'en_US', files: [ 'css/styles-m', 'css/styles-l' ], dsl: 'less' }, backend: { area: 'adminhtml', name: 'Magento/backend', locale: 'en_US', files: [ 'css/styles-old', 'css/styles' ], dsl: 'less' }, compstore: { area: 'frontend', name: 'Packt/compstore', locale: 'en_US', files: [ 'css/styles-m', 'css/styles-l', 'css/source/compstore' ], dsl: 'less' } };
Once the Grunt environment is configured, it's time to test Grunt. Perform the following steps:
- Open the terminal or command prompt.
- Run the
grunt exec:compstorecommand. - Then, run the
grunt less:compstorecommand. - Run the
grunt watchcommand.
These commands will create a direct channel with the possibility to edit your .CSS files on the fly. The grunt watch command shows you the update in real time. With "grunt watch" still active in your terminal/prompt window, try to edit and save the body's background color in the app/design/frontend/Packt/compstore/web/css/source/compstore.less file to see the result in the browser by accessing your base URL:
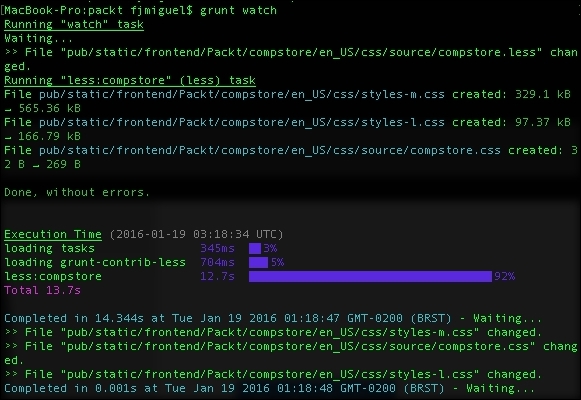
The Magento team provides great resources of documentation in order to increase the Magento developer's knowledge.
In the Magento documentation (http://magento.com/help/documentation), the user can access the USER GUIDES section for ENTERPRISE EDITION, COMMUNITY EDITION, DESIGNER'S GUIDE, and DEVELOPER DOCUMENTATION.
I strongly suggest that you, dear reader, study Magento's COMMUNITY EDITION, DESIGNER'S GUIDE, and DEVELOPER DOCUMENTATION in the first instance. These three documentations have solid concepts, and you can certainly take advantage by building your Magento concepts.

Welcome to the world of information technology! The professionals of this area need to study harder every single day. It's totally crazy how technology is always in mutation. New technologies and solutions come in a short period of time, and professionals must be prepared all the time to keep an open mind, absorbing this situation assertively.
Magento provides an official training program available at http://magento.com/training/overview. You can access information about courses, and I strongly suggest that you think about Magento certification. Certifications can boost your career.
To learn more about Magento certification, refer to http://magento.com/training/catalog/certification. You can download a free Magento study guide by visiting http://magento.com/training/free-study-guide.
You have a lot of options, such as books, articles, and blogs, to train and improve your Magento skills. Be persistent on your objectives!
Congratulations! You won one more challenge; first, you acquired this great book, and then you completed the reading with merits. It was not easy, but I'm certain it was worth it.
In this chapter, you learned how to:
- Manage Magento extensions
- Test some Magento extension options
- Build your own path to become a Magento success professional
Thank you so much. I know you can climb the highest mountains; never lose faith in yourself. Good luck!