


In this chapter we are going to demonstrate the complete lab setup needed for the practical, hands-on working experience with this book. To set up the lab we need three things: Oracle VM VirtualBox, Microsoft Windows XP SP2, and BackTrack 5 R2.
Oracle VM VirtualBox is a product of Sun Microsystems. It is a software virtualization application and is used for running multiple operating systems on a single computer. It supports many operating systems including Linux, Macintosh, Sun Solaris, BSD, and OS/2. Each virtual machine can execute its own operating system in parallel with the host operating system. It also supports Network adapters, USB devices, and Physical disk drives within a virtual machine.
Microsoft Windows XP is an operating system produced by the Microsoft Corporation. It is primarily used for personal computers and laptops.
BackTrack is a Linux-based freeware operating system. It is widely used by security professionals and penetration testers. It consists of a lot of open source tools for penetration testing and digital forensics.
Now we will install both operating systems in Oracle VM VirtualBox, and use BackTrack as an attacker machine and Windows XP as the victim machine.
The steps for installing Oracle VM VirtualBox are:
First, run the setup file to start the installation procedure and then click on Next >.

Now choose the installation directory where you want to install and click on Next >.

Select the shortcut option if you want to create a shortcut icon on the desktop or in the launch bar and then click on Next >.
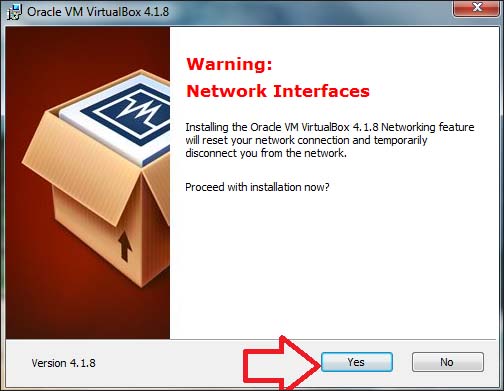
It will then reset the network connectivity and display a warning sign; click on Yes and continue the installation of the wizard.
The setup wizard is ready for the installation, click on Install to continue.

The setup has started the installation and it will take several minutes to complete.
Now it will ask to install the USB device driver, click on Install to install the driver software.

After a few minutes the installation wizard is finished and Oracle VM VirtualBox is ready for use. Click on Finish.

Now we are going to install Windows XP SP2 in VirtualBox. Just perform the following steps for successful installation:
First, launch your VirtualBox and click on New.

You will get a new window with the message Welcome to the New Virtual Machine Wizard; click on Next.
You will get a new window showing memory options, here we will need to specify the amount of base memory (RAM) for our virtual machine. Select the amount of memory and then click on Next.

After this we will get a new window with the option to create a virtual hard disk. Here we will select Create new hard disk and click on Next.

We then get a new window with the message Welcome to the Virtual disk creation wizard. Here we have some options for the hard disk file type; we select VDI (VirtualBox Disk Image). You may select another type of file, but VDI is recommended for best performance. After selecting the file type, click on Next.

We then see a new window named Virtual disk storage details. In this window we can see details of the two types of storage: Dynamically allocated and Fixed size. The details of these two types of storage are mentioned in this window. So it depends upon the user as to what kind of storage he may prefer. In this case we will select Dynamically allocated; click on Next to continue.

Now we will get a new window with options for the Location and Size of the virtual disk file. We choose the location where we want to create the file for the virtual disk. After that, select the size for your virtual disk. In this case we are specifying 10 GB space for virtual disk. Then click on Next to continue.

We then get a new window with the summary of our virtual machine settings. In this window we can check the settings we previously provided for our virtual machine, such as the file type of our hard disk, storage details, location details, and the size of our hard disk. After checking the settings we then click Create.

We get the Summary window which will show us that it is going to create our virtual machine with the following parameters: name of the virtual machine, type of operating system, base memory (RAM), and the size of the hard disk. After verifying all of the settings, click on Create to create the virtual machine.
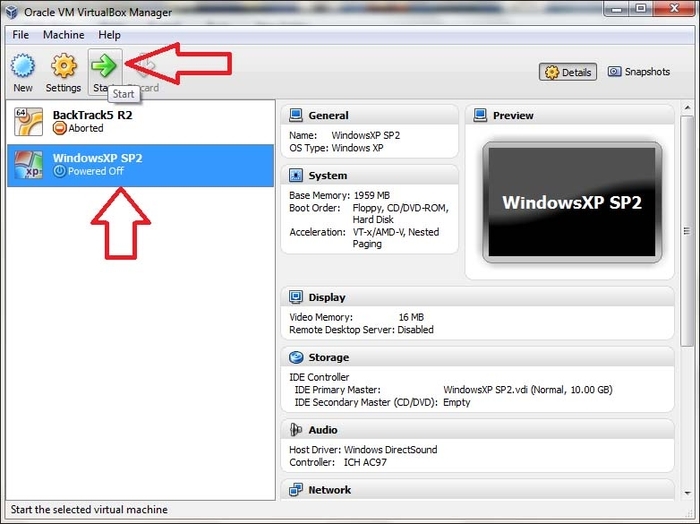
Now Oracle VM VirtualBox Manager will open, and it will show the virtual machine in the right pane. Select that virtual machine and click on Start to start the installation process for Windows XP.
A new window will appear with the message Welcome to the First Run Wizard! Click on Next to begin.

Now a new window will appear with the option of selecting the source installation media. This option allows us to select the ISO image of Windows XP or the DVD-ROM drive to install from the CD/DVD. Select the appropriate option and then click on Next.

A new Summary window will open and it will show the type of media that was selected for installation, the media source, and the type of device. Click on Start.

Windows XP installation will start and a blue screen appears with the message Windows Setup on the upper-left side.

Now we will get a new window with the message Welcome to setup. Here we can see three options, the first option is To set up Windows XP now, press ENTER.

We will then be prompted to agree to the Windows XP license; press F8 to accept.
After accepting the agreement we will see the unpartitioned space dialog. We will need to create partitions from this unpartitioned space. Select the second option To create partition in the unpartitioned space, press C.

After pressing C, the next step is to set the size of the new partition and then press Enter.

After creating the new partition, we can now see three options here; select the first option To set up Windows XP on the selected item, press ENTER to continue.

Now we have to format the selected partition before continuing the installation process. Here we see four options for formatting and select the first option which is Format the partition using the NTFS file system (Quick) and press Enter.

Now setup will format the partition.

After formatting the partition, the setup will copy the Windows files.

After copying the Windows files it will restart your virtual machine after 10 seconds, or press ENTER for immediate restart.

After restarting the virtual machine you will see the Windows XP boot screen.
The Windows installation process will start and will take approximately 40 minutes to complete.
Now a new window will appear for Regional and language Options, just click on Next >.

After that a new window will appear asking for your Name and Organization name; enter these details and click on Next >.

A new window will appear asking for the Product Key; enter the key and click on Next >.

The next wizard will ask for a Computer name and Administrator password, enter these details and click on Next >.

This will be followed by a screen to enter the date, time, and time zone settings. Select the time zone according to your country, enter the date and time, and then click on Next >.

We will see the installation screen again, with Installing Network settings.

A new window will prompt us to choose the network settings. Select Typical settings. If we want to configure our network settings manually, we can select Custom settings and then click on Next >.

The wizard will ask if we want to make the computer a member of the workgroup or domain. For our lab we select WORKGROUP and click on Next >.

We will then see the Windows XP boot screen.
After Windows XP has booted, we will see a message Welcome to Microsoft Windows. To continue, click on Next.

The wizard will ask us whether or not to turn on the automatic updates. Make the selection according to your preference and then click on Next.
The next wizard will ask about internet connectivity; we suggest you skip it by clicking on Skip.

Now the wizard will ask about online registration; we do not want to register, so we select the second option and click on Next.

Next the wizard will ask for the usernames of the people who will use this computer. Enter the names and click on Next.

Now your Windows XP installation is ready for use.

Now we are going to install BackTrack 5 R2 on Virtual Box. Perform the following steps:
First, launch your Oracle VM Virtual Box.

A new window will appear with the message Welcome to the New Virtual Machine Wizard; click on Next.
We follow the same process which we followed during our Windows XP virtual machine creation for the BackTrack virtual machine setup. Our BackTrack machine will be set up and the summary displayed as shown in the following screenshot. Click on Create:

Now Oracle VM VirtualBox Manager will open and will show the new virtual machine in the right pane. Select that virtual machine and click on Start to start the installation process of BackTrack 5.

A new window will appear with the message Welcome to the First Run Wizard!; click on Next to begin.

A new window will appear with options for selecting source installation media. Select the ISO image of BackTrack 5 or the DVD Rom drive to install from CD/DVD, and then click on Next.

A new Summary window will open, and it will show the type of media that was selected for installation, the media source, and the type of device; now click on Start.

We will see a black boot screen; just press Enter.

The BackTrack boot screen with a command-line interface will appear, showing the prompt: root@bt:~#; type
startxas the value of this command and press Enter.
Now the BackTrack GUI interface will start and we will see an icon named Install BackTrack. We will have to click on that icon to continue the installation process.

After that, the installation wizard will start. Select the language and click on Forward.

The installation wizard will automatically set the time from the network time server.
Select the Time Zone and Region, and click on Forward.

The next wizard will ask for the Keyboard layout. Select the appropriate layout according to your language and click on Forward.

The disk partition wizard will appear. Just use the default settings and click on Forward.


The setup will start copying files. It will take approximately 40 minutes to complete the installation.
After finishing the installation, just click on Restart, and now the BackTrack installation is ready for use.

