Home Web Development Learning Angular - Fourth Edition

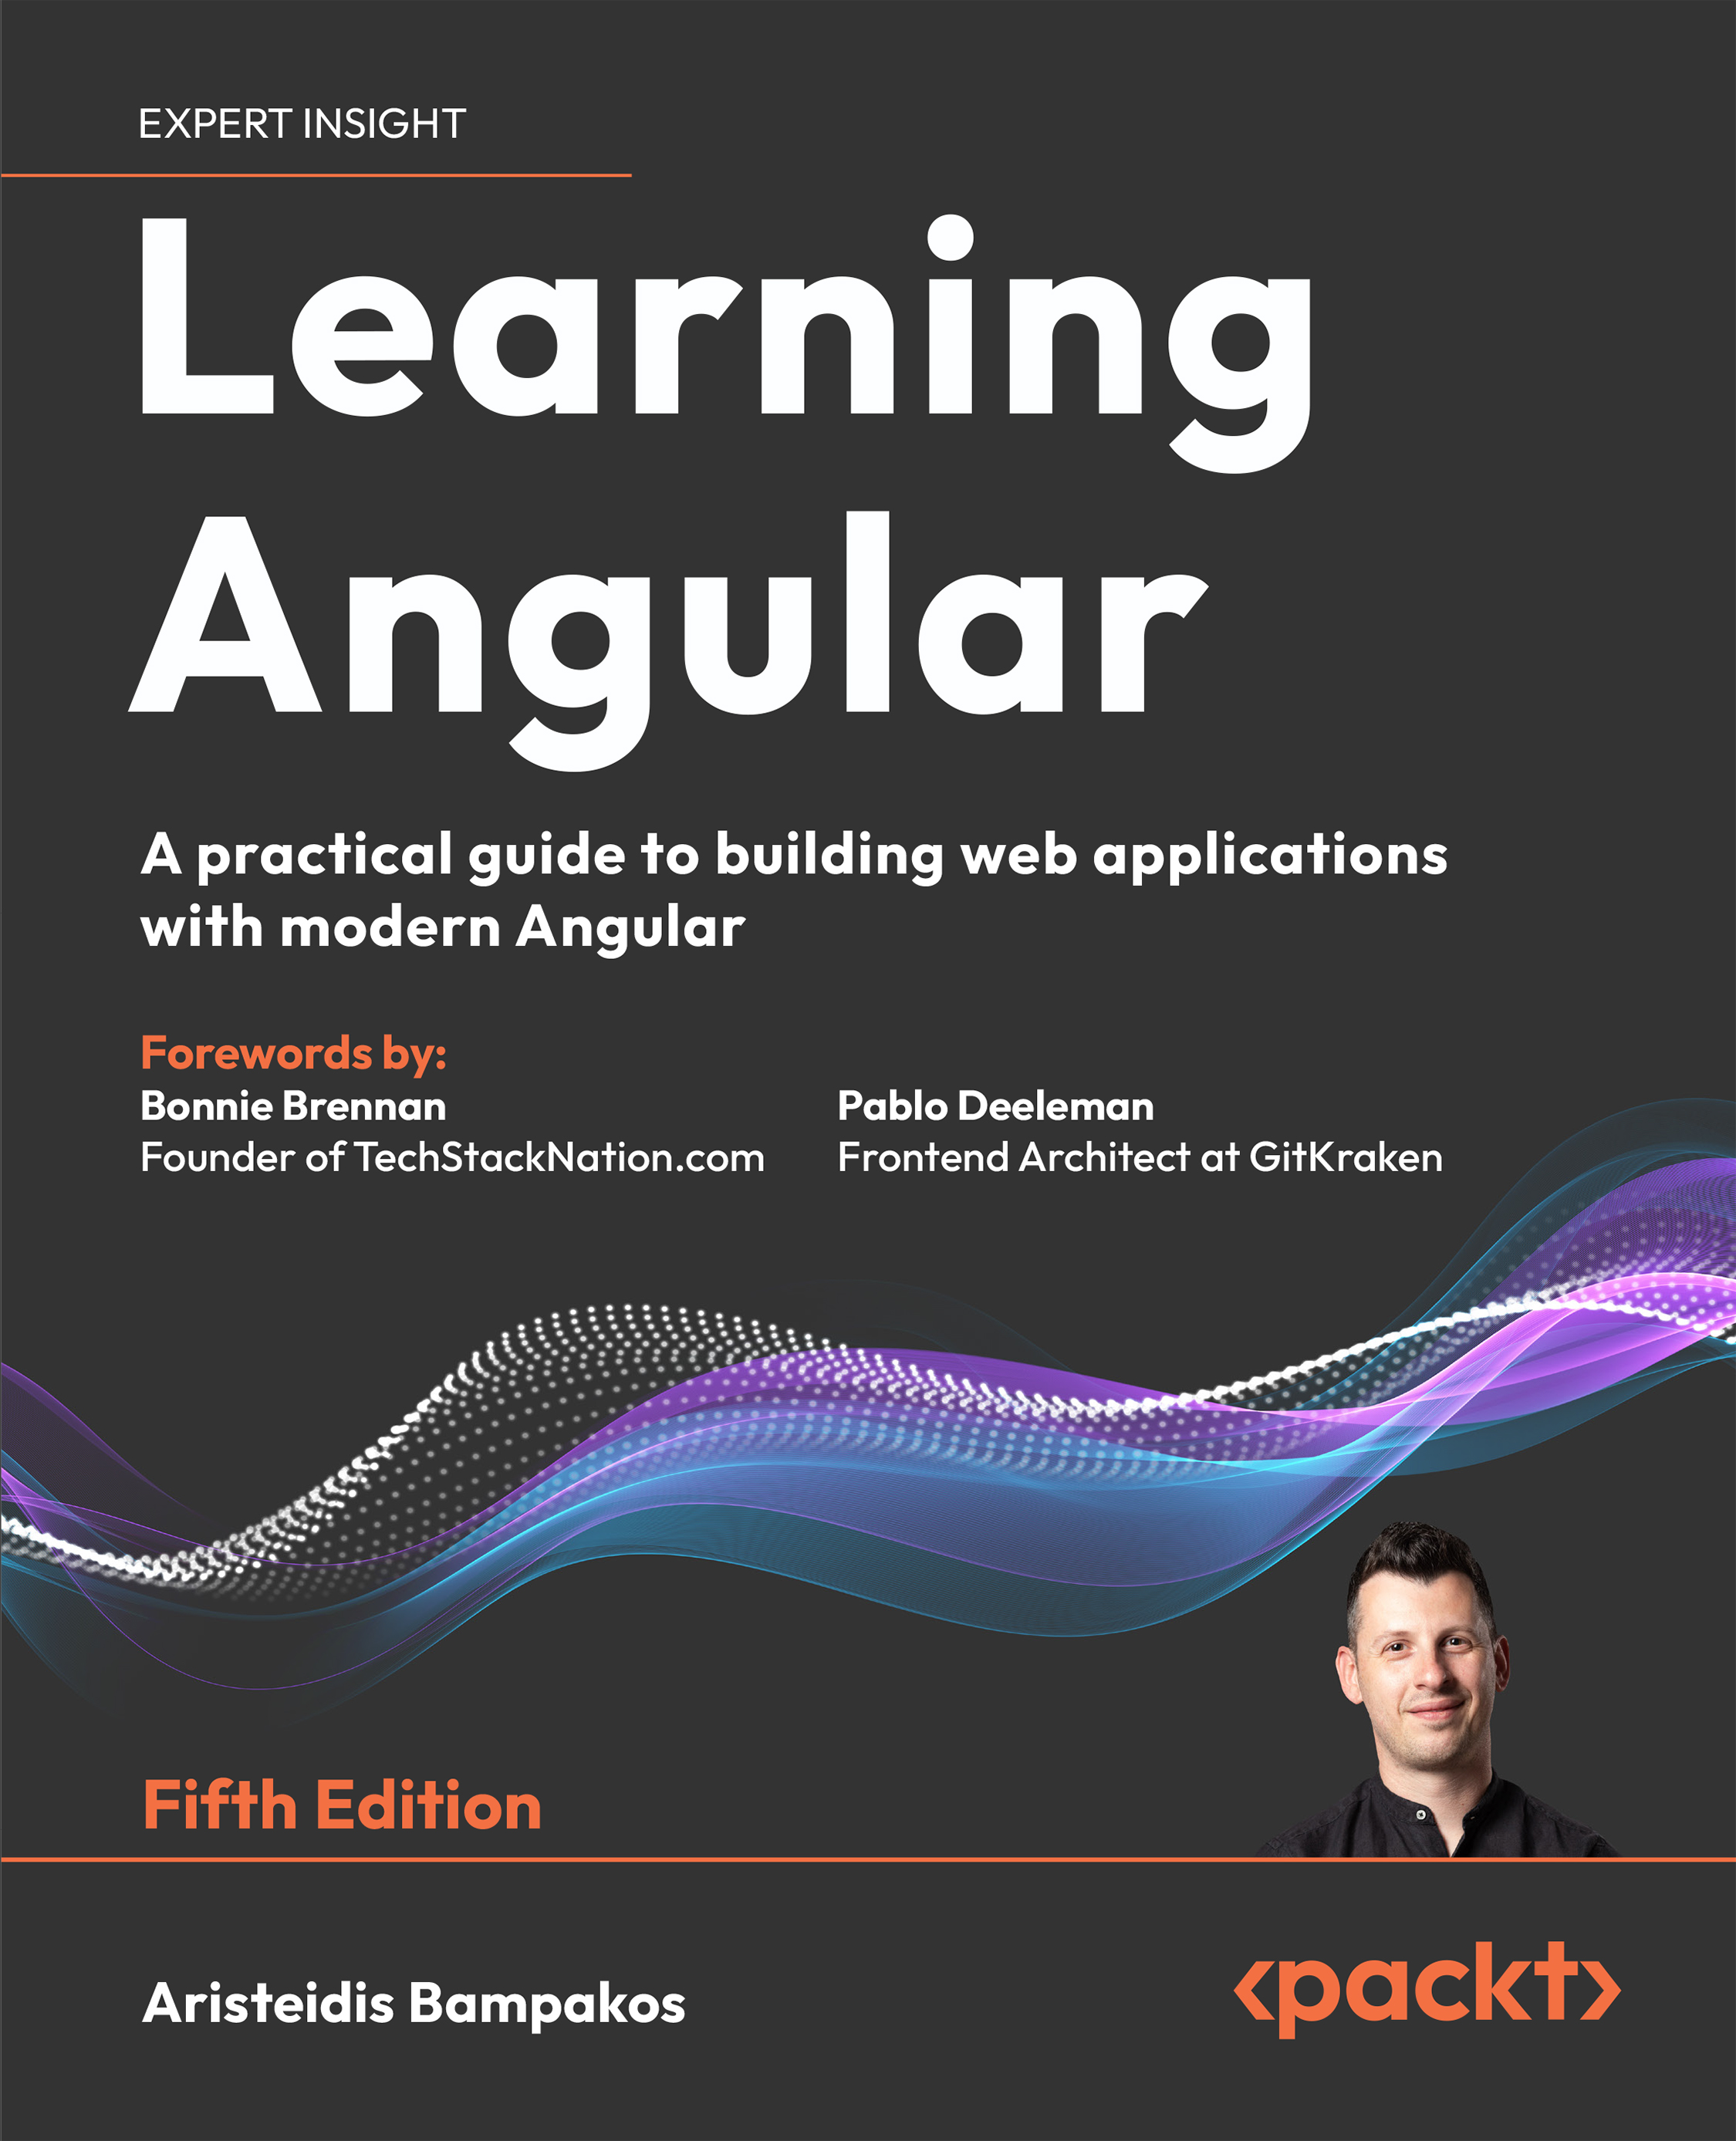
Learning Angular - Fourth Edition

By Aristeidis Bampakos , Pablo Deeleman
books-svg-icon Book
Subscription Free Trial for 7 days $12.99/m after trial
eBook + Subscription $12.99
eBook $33.99
Print + eBook $41.99
What do you get with a Packt Subscription?
This book & 6500+ ebooks & video courses on 1000+ technologies
60+ curated reading lists for various learning paths
50+ new titles added every month on new and emerging tech
Early Access to eBooks as they are being written
Personalised content suggestions
Customised display settings for better reading experience
50+ new titles added every month on new and emerging tech
Playlists, Notes and Bookmarks to easily manage your learning
Mobile App with offline access
What do you get with eBook + Subscription?
Download this book in EPUB and PDF formats
This book & 6500+ ebooks & video courses on 1000+ technologies
60+ curated reading lists for various learning paths
50+ new titles added every month on new and emerging tech
Early Access to eBooks as they are being written
Personalised content suggestions
Customised display settings for better reading experience
50+ new titles added every month on new and emerging tech
Playlists, Notes and Bookmarks to easily manage your learning
Mobile App with offline access
What do you get with a Packt Subscription?
This book & 6500+ ebooks & video courses on 1000+ technologies
60+ curated reading lists for various learning paths
50+ new titles added every month on new and emerging tech
Early Access to eBooks as they are being written
Personalised content suggestions
Customised display settings for better reading experience
50+ new titles added every month on new and emerging tech
Playlists, Notes and Bookmarks to easily manage your learning
Mobile App with offline access
What do you get with eBook?
Download this book in EPUB and PDF formats
Access this title in our online reader
DRM FREE - Read whenever, wherever and however you want
Online reader with customised display settings for better reading experience
What do you get with video?
Download this video in MP4 format
Access this title in our online reader
DRM FREE - Watch whenever, wherever and however you want
Online reader with customised display settings for better learning experience
What do you get with Audiobook?
Download a zip folder consisting of audio files (in MP3 Format) along with supplementary PDF
  1. Free Chapter
    Introduction to TypeScript
About this book
As Angular continues to reign as one of the top JavaScript frameworks, more developers are seeking out the best way to get started with this extraordinarily flexible and secure framework. Learning Angular, now in its fourth edition, will show you how you can use it to achieve cross-platform high performance with the latest web techniques, extensive integration with modern web standards, and integrated development environments (IDEs). The book is especially useful for those new to Angular and will help you to get to grips with the bare bones of the framework to start developing Angular apps. You'll learn how to develop apps by harnessing the power of the Angular command-line interface (CLI), write unit tests, style your apps by following the Material Design guidelines, and finally, deploy them to a hosting provider. Updated for Angular 15, this new edition covers lots of new features and tutorials that address the current frontend web development challenges. You’ll find a new dedicated chapter on observables and RxJS, more on error handling and debugging in Angular, and new real-life examples. By the end of this book, you’ll not only be able to create Angular applications with TypeScript from scratch, but also enhance your coding skills with best practices.
Publication date:
February 2023
Publisher
Packt
Pages
446
ISBN
9781803240602


Introduction to TypeScript

As we learned in the previous chapter, where we built our very first Angular application, the code of an Angular project is written in TypeScript. Writing in TypeScript and leveraging its static typing gives us a remarkable advantage over other scripting languages. This chapter is not a thorough overview of the TypeScript language. Instead, we’ll focus on the core elements and study them in detail on our journey through Angular. The good news is that TypeScript is not all that complex, and we will manage to cover most of its relevant parts.

In this chapter, we’re going to cover the following main topics:

  • The history of TypeScript
  • Types
  • Functions, lambdas, and execution flow
  • Common TypeScript features
  • Decorators
  • Advanced types
  • Modules

We will first investigate the background of TypeScript and the rationale behind its creation. We will also learn what tools and online resources are available to practice with TypeScript. We will emphasize the typing system, which is the main advantage of TypeScript, and learn how we can use it to create some basic types. We will expand our typing knowledge by learning how to use classes, interfaces, and advanced types in the Angular context. At the end of the chapter, we will explore how to organize the structure of an application by combining the typing system with modules.


The history of TypeScript

Transforming small web applications into thick monolithic clients was impossible due to the limitations of earlier JavaScript versions, such as the ECMAScript 5 specification. In a nutshell, large-scale JavaScript applications suffered from serious maintainability and scalability problems as soon as they grew in size and complexity. This issue became more relevant as new libraries and modules required seamless integration into our applications. The lack of proper mechanisms for interoperability led to cumbersome solutions that never seemed to fit the bill.

As a response to these concerns, ECMAScript 6 (also known as ES6 or ES2015) promised to solve these issues by introducing better module loading functionalities, an improved language architecture for better scope handling, and a wide variety of syntactic sugar to better manage types and objects. Class-based programming introduced an opportunity to embrace a more Object-Oriented Programming (OOP) approach when building large-scale applications.

Microsoft took on this challenge and spent nearly two years building a superset of the language, combining the conventions of ES6 and borrowing some proposals from the next specification version. The idea was to launch something that would help build enterprise applications with a lower error footprint using static type checking, better tooling, and code analysis. After two years of development led by Anders Hejlsberg, lead architect of C# and creator of Delphi and Turbo Pascal, TypeScript 0.8 was finally introduced in 2012 and reached version 1.0 2 years later. It was not only running ahead of ES6 but also implemented the same features and provided a stable environment for building large-scale applications. It introduced, among other features, optional static typing through type annotations, thereby ensuring type checking at compile time and catching errors early in the development process. Its support for declaration files also enabled developers to describe the interface of their modules so that other developers could better integrate them into their code workflow and tooling.

The benefits of TypeScript

As a superset of JavaScript, one of the main advantages of embracing TypeScript in your next project is the low entry barrier. If you know JavaScript, you are pretty much all set since all the additional features in TypeScript are optional. You can pick and introduce any of them to achieve your goal. Overall, there is a long list of solid arguments for advocating TypeScript in your next project, and all of them apply to Angular as well.

Here is a short rundown, to name a few:

  • Annotating your code with types ensures a consistent integration of your different code units and improves code readability and comprehension.
  • The built-in type-checker analyzes your code at compile time and helps you prevent errors before executing your code.
  • The use of types ensures consistency across your application. Combined with the previous two, the overall code error footprint gets minimized in the long run.
  • TypeScript extends classes with long-time demanded features such as class fields, private members, and enumerations.
  • Decorators allow you to extend your classes and implementations in unique ways.
  • Interfaces ensure a smooth and seamless integration of your libraries in other systems and code bases.
  • TypeScript support across different IDEs is terrific, and you can benefit from features such as highlighting code, real-time type checking, and automatic compilation at no cost.
  • The syntax is familiar to developers coming from other OOP-based backgrounds such as Java, C#, and C++.

Introducing TypeScript resources

Let’s have a look at where we can get further support to learn and test-drive our new knowledge of TypeScript.

In this book, we will be using TypeScript 4.8 as it is supported by Angular 15.

The official website

Our first stop is the official website of the language at https://www.typescriptlang.org.

It contains extensive language documentation and a playground that gives us access to a quick tutorial to get up to speed with the language in no time. It includes some ready-made code examples that cover some of the most common traits of the language. We encourage you to leverage this tool to test the code examples we cover throughout this chapter.

The official wiki documentation

The code for TypeScript is fully open-sourced at GitHub, and the Microsoft team has put reasonable effort into documenting the different facets of the code in the wiki available on the repository site. We encourage you to take a look at it any time you have a question or if you want to dive deeper into any of the language features or form aspects of its syntax. The wiki is located at https://github.com/Microsoft/TypeScript/wiki.

In the following section, we will introduce the typing system of TypeScript. We will explore the most basic types of the TypeScript language. We will also learn how to benefit from the typing system and create custom and dynamic types to enhance our applications further.


Types

Working with TypeScript or any other coding language means working with data, and such data can represent different sorts of content that are called types. Types are used to represent the fact that such data can be a text string, an integer value, or an array of these value types, among others. You may have already met types in JavaScript since we have always worked implicitly with them. This also means that any given variable could assume (or return, in the case of functions) any value. Sometimes, this leads to errors and exceptions in our code because of type collisions between what our code returned and what we expected it to return type-wise. We can enforce this flexibility using a specific type called any, as we will see later in this chapter. However, statically typing our variables gives our IDE and us a good picture of what kind of data we are supposed to find in each instance of code. It becomes an invaluable way to help debug our applications at compile time before the code is executed.

String

One of the most widely used primitive types is the string, which populates a variable with a piece of text:

var brand: string = 'Chevrolet';

Check out the type definition next to the variable name, separated by a colon. It is the way to annotate types in TypeScript.

We can use single or double quotes for the value of a string variable. Feel free to choose either and stick with it within your team. We can define multiline text strings with support for text interpolation using placeholder variables and backticks:

var brand: string = 'Chevrolet';
var message: string = `Today it's a happy day! I just bought a new ${brand} car`;

In the preceding snippet, any variables that we may use inside the multiline text must be surrounded by the curly braces of the placeholder ${}.

Declaring variables

TypeScript, as a superset of JavaScript, supports expressive declaration nouns such as let, which denotes that the scope of the variable is the nearest enclosing block (either a function, for loop, or any other enclosing statement). On the other hand, const indicates that the value of the declared variable cannot be changed once it’s set.

The let keyword

Traditionally, developers have been using the keyword var to declare objects, variables, and other artifacts, but this is discouraged when you start using ES6 or TypeScript. The reason is that ES5 only has a function scope; that is, a variable is unique within the context of a function:

function test() {
    var x;
}

There can be no other variable declared as x in this function. If you do declare one, then you effectively redefine it. However, there are cases in which scoping is not applied, such as in loops. For example, in Java, you would write the following and ensure that a variable will never leak outside of the loop:

var i = 3;
for (var i = 0; i < 10; i++) {
}

In the preceding snippet, the i variable outside the loop will not affect the i variable inside it because they have a different scope. To overcome this limitation, ES6 introduced the let keyword:

let i = 3;
for (let i = 0; i < 10; i++) {
}

So, remember, no more var; use the let keyword wherever possible.

The const keyword

The const keyword is a way to indicate that a variable should never change. As a code base grows, changes may happen by mistake, which can be costly. The const keyword can prevent these types of mistakes through compile-time support. Consider the following code snippet:

const PI = 3.14;
PI = 3;

If we try to run it with TypeScript, the compiler will throw the following error message:

Cannot assign to 'PI' because it is a constant

The preceding error will come up only at the top level. You need to be aware of this if you declare objects as constants, like so:

const obj = {
    a: 3
};
obj.a = 4; 

If we declare the obj variable as a constant, it does not prevent the entire object from being edited but rather its reference. So, the preceding code is valid. If we try to change the reference of the variable such as obj = {}, it is not allowed, and we get the same compiler error.

Prefer to use the const keyword when you are sure that the properties of an object will not change during its lifetime. It prevents the object from accidentally changing and enforces data immutability, a hot topic in Angular applications.

Number

The number type is probably the other most widespread primitive data type, along with string and boolean:

const age: number = 7;
const height: number = 5.6;

It defines a floating-point number and hexadecimal, decimal, binary, and octal literals.

Boolean

The boolean type defines a variable that can have a value of either true or false:

const isZeroGreaterThanOne: boolean = false;

The result of the variable represents the fulfillment of a boolean condition.

Array

The array type defines a list of items that contain certain types only. Handling exceptions that arise from errors such as assigning wrong member types in a list can now be easily avoided with this type.

The syntax requires the postfix [] in the type annotation, as follows:

const brands: string[] = ['Chevrolet', 'Ford', 'General Motors'];
const ages: number[] = [8, 5, 12, 3, 1];

If we try to add a new item to the ages array with a type other than a number, the runtime type-checker will complain, making sure our typed members remain consistent and that our code is error-free.

Dynamic typing with no type

Sometimes, it is hard to infer the data type from the information we have at any given point, especially when we are porting legacy code to TypeScript or integrating loosely typed third-party libraries and modules. TypeScript supplies us with a convenient type for these cases. The any type is compatible with all the other existing types, so we can type any data value with it and assign any value to it later:

let distance: any;
distance = '1000km';
distance = 1000;
const distances: any[] = ['1000km', 1000];

However, this great power comes with great responsibility. If we bypass the convenience of static type checking, we are opening the door to type errors when piping data through our modules. It is up to us to ensure type safety throughout our application.

Custom types

In TypeScript, you can come up with your own type if you need to by using the type keyword in the following way:

type Animal = 'Cheetah' | 'Lion';

It is essentially a type with a finite number of allowed values. Let’s create a variable of this type:

const animal: Animal = 'Cheetah';

The preceding code is perfectly valid as Cheetah is one of the allowed values and works as intended. The interesting part happens when we give our variable a value it does not expect:

const animal: Animal = 'Turtle';

The preceding code will result in the following compiler error:

Type '"Turtle"' is not assignable to type 'Animal'

Enum

The enum type is a set of unique numeric values that we can represent by assigning user-friendly names to each one. Its use goes beyond assigning an alias to a number. We can use it to list the variations that a specific type can assume in a convenient and recognizable way. It begins numbering members, starting at 0 unless explicit numeric values are assigned to them:

enum Brands { Chevrolet, Cadillac, Ford, Buick, Chrysler, Dodge };
const myCar: Brands = Brands.Cadillac;

In the preceding code, if we inspect the variable myCar, we will see that it returns the value 1, which is the index of Cadillac. As we mentioned already, we can also assign custom numeric values like the following:

enum BrandsReduced { Tesla = 1, GMC, Jeep };
const myTruck: BrandsReduced = BrandsReduced.GMC;

In the preceding code, if we inspect the variable myTruck, we will see that it returns the value 2 because the first enumerated value, Tesla, was set to 1 already. We can extend value assignation to all members as long as such values are integers:

enum StackingIndex {
    None = 0,
    Dropdown = 1000,
    Overlay = 2000,
    Modal = 3000
};
const mySelectBoxStacking: StackingIndex = StackingIndex.Dropdown;

One last point worth mentioning is the possibility to look up a member mapped to a given numeric value:

enum Brands { Chevrolet, Cadillac, Ford, Buick, Chrysler, Dodge };
const myCarBrandName: string = Brands[1];

In the preceding snippet, the myCarBrandName variable will be equal to Cadillac.

It should also be mentioned that from TypeScript 2.4 and onward, it is possible to assign string values to enums. It is a technique preferred in Angular projects because of its extended support in template files.

Void

The void type represents the absence of a type, and its use is constrained to annotating functions that do not return an actual value:

function test(): void {
    const a = 0;
}

In the preceding snippet, there is no return type in the function.

Type inference

Typing is optional since TypeScript is smart enough to infer the data types of variables and function return values out of context with a certain level of accuracy. If it is not possible, it will assign the dynamic any type to the loosely typed data at the cost of reducing type checking to a bare minimum.

In the following section, we will embark on a new journey through TypeScript to learn more about TypeScript functions and their execution flow.


Functions, lambdas, and execution flow

Functions are the processing machines we use to analyze input, digest information, and apply the necessary transformations to data. Data can be provided either to transform the state of our application or to return an output that will be used to shape our application’s business logic or user interactivity.

Functions in TypeScript are not that different from regular JavaScript, except that, like everything else in TypeScript, they can be annotated with static types. Thus, they improve the compiler by providing the information it expects in their signature and the data type it aims to return, if any.

Annotating types in functions

The following example showcases how a regular function is annotated in TypeScript:

function sayHello(name: string): string {
    return 'Hello, ' + name;
}

There are two main differences from the usual function syntax in regular JavaScript. First, we annotate the parameters declared in the function signature, which makes sense since the compiler will want to check whether the data provided holds the correct type. In addition to this, we also annotate the returning value by adding the string type to the function declaration.

As mentioned in the previous section, the TypeScript compiler is smart enough to infer types when no annotation is provided. In this case, the compiler looks into the arguments provided and returns statements to infer a returning type from them.

Functions in TypeScript can also be represented as expressions of anonymous functions, where we bind the function declaration to a variable:

const sayHello = function(name: string): string {
    return 'Hello, ' + name;
}  

However, there is a downside to that approach. Although typing function expressions this way is allowed, thanks to type inference, the compiler is missing the type definition of the declared variable. We might assume that the inferred type of a variable that points to a function typed as a string is a string. Well, it’s not. A variable that points to an anonymous function ought to be annotated with a function type:

const sayHello: (name: string) => string = function(name: string): string {
    return 'Hello, ' + name;
}

The function type informs us of the types expected in the payload and the type returned by the function execution, if any. This whole block, which is of the form (arguments: type) => returned type, becomes the type annotation that our compiler expects.

Function parameters in TypeScript

Due to the type checking performed by the compiler, function parameters require special attention in TypeScript.

Optional parameters

Parameters are a core part of the type checking applied by the TypeScript compiler. Parameters are defined as optional by adding the character ? after the parameter name:

function greetMe(name: string, greeting?: string): string {
    if (!greeting) {
        greeting = 'Hello';
    }
    return greeting + ', ' + name;
}

To call the previous function, we can omit the second parameter in the function call:

greetMe('John');

So, an optional parameter is not set unless you explicitly pass it a value. It is more of a construct so that you can get help deciding what parameters are mandatory and which ones are optional. To exemplify this, consider the following function signature:

function add(mandatory: string, optional?: number) {}

We can invoke the previous function in the following ways:

add('some string');
add('some string', 3.14);

Both versions are valid. Be aware that optional parameters should be placed last in a function signature. Consider the following function:

function add(optional?: number, mandatory: string) {}

Both parameters of the previous function would be considered mandatory. Suppose that we call the function like so:

add(1);

The compiler would complain that you have not provided a value for the mandatory parameter. Remember, optional arguments are great, but place them last.

Default parameters

TypeScript gives us another feature to cope with default parameters, where we can set a default value that the parameter assumes when it’s not explicitly passed upon executing the function. The syntax is pretty straightforward, as we can see when we refactor the previous example:

function greetMe(name: string, greeting: string = 'Hello'): string {
    return `${greeting}, ${name}`;
}

Like optional parameters, default parameters must be put right after the required parameters in the function signature.

Rest parameters

One of the significant advantages of JavaScript flexibility when defining functions is the ability to accept an unlimited non-declared array of parameters. TypeScript can achieve the same behavior using the rest syntax. Essentially, we can define an additional parameter at the end of the arguments list prefixed by an ellipsis () and typed as an array:

function greetPeople(greeting: string, ...names: string[]): string {
    return greeting + ', ' + names.join(' and ') + '!';
}

Rest parameters are beneficial when we don’t know how many arguments will be passed in.

Function overloading

Method and function overloading are typical in other languages, such as C#. However, implementing this functionality in TypeScript clashes with the fact that JavaScript, which TypeScript is meant to compile to, does not implement any elegant way to integrate it out of the box. So, the only workaround possible requires writing function declarations for each of the overloads and then writing a general-purpose function that wraps the actual implementation, whose list of typed arguments and return types are compatible with all the others:

function hello(names: string): string
function hello(names: string[]): string
function hello(names: any, greeting?: string): string {
    let namesArray: string[];
    if (Array.isArray(names)) {
        namesArray = names;
    } else {
        namesArray = [names];
    }
    if (!greeting) {
        greeting = 'Hello';
    }
    return greeting + ', ' + namesArray.join(' and ') + '!';
}

In the preceding example, we create three different function signatures, each of which features different type annotations. We could even define different return types by annotating the wrapping function with type any.

Arrow functions

ES6 introduced the concept of fat arrow functions (also called lambda functions in other languages such as Python, C#, Java, or C++). The purpose of the arrow function is to simplify the general function syntax and provide a bulletproof way to handle the function scope traditionally handled by the this keyword. The first thing we notice is its minimalistic syntax, where, most of the time, we see arrow functions as single-line, anonymous expressions:

const double = x => x * 2;

The preceding function computes the double of a given number x and returns the result, although we do not see any function or return statements in the expression. If the function signature contains more than one argument, we need to wrap them all between parentheses:

const add = (x, y) => x + y;

Arrow functions can also contain statements by wrapping the whole implementation in curly braces:

const addAndDouble = (x, y) => {
    const sum = x + y;
    return sum * 2;
}

Still, what does this have to do with scope handling? The value of this can point to a different context, depending on where we execute the function. When we refer to this inside a callback, we lose track of the upper context, which usually leads us to use conventions such as assigning its value to a variable named self or that. It is this variable that is used later on within the callback. Statements containing interval or timeout functions make for a perfect example of this:

function delayedGreeting(name): void {
    this.name = name;
    this.greet = function(){
        setTimeout(function() {
            console.log('Hello ' + this.name);
        }, 0);
    }
}
const greeting = new delayedGreeting('John');
greeting.greet();

If we execute the preceding script, it won’t print the name John in the browser console as expected because it modifies the scope of this when evaluating the function inside the timeout call. If we modify the code according to the following, it will do the trick:

function delayedGreeting(name): void {
    this.name = name;
    this.greet = function() {
        setTimeout(() => 
            console.log('Hello ' + this.name)
        , 0);
    }
}

Even if we break down the statement contained in the arrow function into several lines of code wrapped by curly braces, the scope of this keeps pointing to the instance itself outside the timeout call, allowing for more elegant and clean syntax.

Now that we have acquired basic knowledge of functions in TypeScript and how they are executed, we can continue our journey to the typing system and learn some of the most common TypeScript features used in Angular.


Common TypeScript features

TypeScript has some general features that don’t apply to classes, functions, or parameters but make coding more efficient and fun. The idea is that the fewer lines of code we write, the better it is. It’s not only about fewer lines but also about making things more straightforward. There are many such features in ES6 that TypeScript has also implemented. In the following sections, we’ll name a few that you will likely use in an Angular project.

Spread parameter

A spread parameter uses the same ellipsis syntax as the rest parameter but is used inside the body of a function. Let’s illustrate this with an example:

const newItem = 3;
const oldArray = [1, 2];
const newArray = [...oldArray, newItem];

In the preceding snippet, we add an item to an existing array without changing the old one. The old array still contains 1, 2, whereas the new array contains 1, 2, and 3. The current behavior is called immutability, which means not changing the old array but rather creating a new state from it. It is a principle used in functional programming as a paradigm and for performance reasons.

We can also use a spread parameter on objects:

const oldPerson = { name: 'John' };
const newPerson = { ...oldPerson, age: 20 };

In the preceding snippet, we are creating a merge between the two objects. Like in the array example, we don’t change the previous variable, oldPerson. Instead, the newPerson variable takes the information from the oldPerson variable and adds its new values to it.

Template strings

Template strings are all about making your code clearer. Consider the following:

const url = 'http://path_to_domain' +
    'path_to_resource' +
    '?param=' + parameter +
    '&param2=' + parameter2;

So, what’s wrong with the previous snippet? The answer is readability. It’s hard to imagine what the resulting string will look like but editing the code by mistake and producing an unwanted result is also easy. To overcome this, we can use template strings in the following way:

const url =
`${baseUrl}/${path_to_resource}?param=${parameter}&param2={parameter2}`;

The preceding syntax is a much more condensed expression and much easier to read.

Generics

Generics are expression indicating a general code behavior that we can employ, regardless of the data type. They are often used in collections because they have similar behavior, regardless of the type. They can, however, be used on other constructs such as methods. The idea is that generics should indicate if you are about to mix types in a way that isn’t allowed:

function method<T>(arg: T): T {
    return arg;
}
method<number>(1);

In the preceding example, the type of T is not evaluated until we use the method. As you can see, its type varies, depending on how you call it. It also ensures that you are passing the correct type of data. Suppose that the preceding method is called in this way:

method<string>(1);

We specify that T should be a string, but we insist on passing it a value as a number. The compiler clearly states that this is not correct. You can, however, be more specific on what T should be. You can make sure that it is an array type so that any value you pass must adhere to this:

function method<T>(arg: T[]): T[] {
    console.log(arg.length);
    return arg;
}
class CustomPerson extends Array {}
class Person {}
const people: Person[] = [];
const newPerson = new CustomPerson();
method<Person>(people);
method<CustomPerson>(newPerson);

In the preceding case, we decide that T should be of Person or CustomPerson type and that the parameter needs to be of the array type. If we try to pass a single object, the compiler will complain:

const person = new Person();
method<Person>(person);

Alternatively, we can define that T should adhere to an interface like this:

interface Shape {
    area(): number;
}
class Square implements Shape {
    area() { return 1; }
}
class Circle implements Shape {
    area() { return 2; }
}
function allAreas<T extends Shape>(...args: T[]): number {
    let total = 0;
    args.forEach (x => {
        total += x.area();
    });
    return total;
}
allAreas(new Square(), new Circle());

Generics are powerful to use if you have a typical behavior with many different data types. You probably won’t be writing custom generics, at least not initially, but it’s good to know what is going on.

Optional chaining

The optional chaining in TypeScript is a powerful feature that can help us with refactoring and simplifying our code. In a nutshell, it can guide our TypeScript code to ignore the execution of a statement unless a value has been provided somewhere in that statement. Let’s see optional chaining with an example:

const square = new Square();

In the preceding snippet, we create a square object using the Square class of the previous section. Later, we read the value of the area method by making sure that the object has a value set before reading it:

if (square !== undefined) {
    const area = square.area();
}

The previous snippet is a precautionary step in case our object has been modified in the meantime. If we do not check the object and it has become undefined, the compiler will throw an error. However, we can use optional chaining to make the previous statement more readable:

const area = square?.area();

The character ? after the square object ensures that the area method will be accessed only if the object has a value. The case where optional chaining shines is in more complicated scenarios with much more values to check, such as the following:

const width = square?.area()?.width;

In the preceding scenario, we assume that the area property is an optional object that contains a width property. In that case, we would need to check values for both square and area.

Although the optional chaining feature was added in an earlier version of TypeScript, it has become very popular in the latest versions of Angular with its support in component templates.

Nullish coalescing

The nullish coalescing feature in TypeScript looks similar to the optional chaining we learned about in the previous section. However, it is more related to providing a default value when a variable is not set. Consider the following example that assigns a value to the mySquare variable only if the square object exists:

const mySquare = square ? square : new Square();

The previous statement is called a ternary operator and operates like a conditional statement. If the square object is undefined or null, the mySquare variable will take the default value of a new square object. We can rewrite the previous expression using nullish coalescing:

const mySquare = square ?? new Square();

Although the nullish coalescing feature was added in an earlier version of TypeScript, it has become very popular in the latest versions of Angular with its support in component templates.


Classes, interfaces, and inheritance

We have already overviewed the most relevant bits and pieces of TypeScript, and now it’s time to see how everything falls into place with TypeScript classes. Classes are a fundamental concept in Angular development because everything in the Angular world is a TypeScript class.

Although the class is a reserved keyword in JavaScript, the language itself never had an actual implementation as in other languages such as Java or C#. JavaScript developers used to mimic this kind of functionality by leveraging the function object as a constructor type and instantiating it with the new operator. Other standard practices, such as extending function objects, were implemented by applying prototypal inheritance or using composition.

The class functionality in TypeScript is flexible and powerful enough to use in our applications. We already had the chance to tap into classes in the previous chapter. We’ll look at them in more detail now.

Anatomy of a class

Property members are declared first in a class, then a constructor, and several other methods and property accessors follow. None contain the reserved function keyword, and all the members and methods are annotated with a type, except the constructor.

The following code snippet illustrates what a class looks like:

class Car {
    private distanceRun: number = 0;
    private color: string;
    
    constructor(private isHybrid: boolean, color: string = 'red') {
        this.color = color;
    }
    
    getGasConsumption(): string {
        return this.isHybrid ? 'Very low' : 'Too high!';
    }
    
    drive(distance: number): void {
        this.distanceRun += distance;
    }
    
    static honk(): string {
        return 'HOOONK!';
    }
    
    get distance(): number {
        return this.distanceRun;
    }
}

The class statement wraps several elements that we can break down:

  • Members: Any instance of the Car class will contain three properties: color typed as a string, distanceRun typed as a number, and isHybrid as a boolean. Class members will only be accessible from within the class itself. If we instantiate this class, distanceRun, or any other member or method marked as private, won’t be publicly exposed as part of the object API.
  • Constructor: The constructor parameter is executed when we create an instance of the class. Usually, we want to initialize the class members inside it with the data provided in the constructor signature. We can also leverage the signature to declare class members, as we did with the isHybrid property.

To do so, we need to prefix the constructor parameter with an access modifier such as private or public. As we learned when analyzing functions, we can define rest, optional, or default parameters, as depicted in the previous example with the color argument, which falls back to red when it is not explicitly defined.

  • Methods: A method is a particular member representing a function and may return a typed value. It is a function that becomes part of the object API but can also be private. In this case, it can be used as a helper function within the internal scope of the class to achieve the functionalities required by other class members.
  • Static members: Members marked as static are associated with the class and not with the object instances of that class. We can consume static members directly without having to instantiate an object first. Static members are not accessible from the object instances, which means they cannot access other class members using the this keyword. These members are usually included in the class definition as helper or factory methods to provide a generic functionality unrelated to any specific object instance.
  • Property accessors: A property accessor is defined by prefixing a typed method with the name of the property we want to expose using the set (to make it writable) and get (to make it readable) keywords.

Constructor parameters with accessors

Typically, when we create a class, we give it a name, define a constructor, and create one or more fields, like so:

class Car {
    make: string;
    model: string;
    
    constructor(make: string, model: string) {
        this.make = make;
        this.model = model;
    }
}

For every field of the class, we usually need to do the following:

  1. Add an entry to the constructor
  2. Assign a value within the constructor
  3. Declare the field

TypeScript eliminates the preceding boilerplate steps by using accessors on the constructor parameters:

class Car {
    constructor(public make: string, public model: string) {}
}

TypeScript will create the respective public fields and make the assignment automatically for us. As you can see, more than half of the code disappears; this is a selling point for TypeScript as it saves you from typing quite a lot of tedious code.

Interfaces

As applications scale and more classes are created, we need to find ways to ensure consistency and rule compliance in our code. One of the best ways to address the consistency and validation of types is to create interfaces. An interface is a code contract that defines a particular schema. Any artifacts such as classes and functions that implement an interface should comply with this schema. Interfaces are beneficial when we want to enforce strict typing on classes generated by factories or when we define function signatures to ensure that a particular typed property is found in the payload.

In the following snippet, we’re defining the Vehicle interface:

interface Vehicle {
    make: string;
}

Any class that implements the preceding interface must contain a member named make, which must be typed as a string:

class Car implements Vehicle {
    make: string;
}

Interfaces are also beneficial for defining the minimum set of members any artifact must fulfill, becoming an invaluable method to ensure consistency throughout our code base.

It is important to note that interfaces are not used just to define minimum class schemas but any type out there. This way, we can harness the power of interfaces by enforcing the existence of specific fields that are used later on as function parameters, function types, types contained in specific arrays, and even variables.

An interface may contain optional members as well. The following is an example of defining an interface that contains a required message and an optional id property member:

interface Exception {
    message: string;
    id?: number;
}

In the following snippet, we define the contract for our future class with a typed array and a method, with its returning type defined as well:

interface ErrorHandler {
    exceptions: Exception[];
    logException(message: string, id?: number): void
}

We can also define interfaces for standalone object types, which is quite useful when we need to define templated constructors or method signatures:

interface ExceptionHandlerSettings {
    logAllExceptions: boolean;
}

Let’s bring them all together by creating a custom error handler class:

class CustomErrorHandler implements ErrorHandler {
    exceptions: Exception[] = [];
    logAllExceptions: boolean;
    
    constructor(settings: ExceptionHandlerSettings) {
        this.logAllExceptions = settings.logAllExceptions;
    }
    
    logException(message: string, id?: number): void {
        this.exceptions.push({message, id });
    }
}

The preceding class manages an internal array of exceptions. It also exposes the logException method to log new exceptions by saving them into an array. These two elements are defined in the ErrorHandler interface and are mandatory.

So far, we have seen interfaces as they are used in other high-level languages, but interfaces in TypeScript are stronger and more flexible; let’s exemplify that. In the following code, we’re declaring an interface, but we’re also telling the TypeScript compiler to treat the instance variable as an A interface:

interface A {
    a: number;
}
const instance = { a: 3 } as A;
instance.a = 5;

An example of demonstrating the preceding code is to create a mocking library. When writing code, we might think about interfaces before we even start thinking about concrete classes because we know what methods need, but we might not have decided what methods will contain.

Imagine that you are building an order module. You have logic in your order module, and you know that, at some point, you will need to talk to a database service. You come up with an interface for the database service, and you defer the implementation of this interface until later. At this point, a mocking library can help you create a mock instance from the interface. Your code, at this point, might look something like this:

interface DatabaseService {
    save(order: Order): void
}
class Order {}
class OrderProcessor {
    
    constructor(private databaseService: DatabaseService) {}
    
    process(order) {
        this.databaseService.save(order);
    }
}
let orderProcessor = new OrderProcessor(mockLibrary.mock<DatabaseService>());
orderProcessor.process(new Order());

Mocking at this point allows us to defer the implementation of DatabaseService until we are done writing the OrderProcessor. It also makes the testing experience a lot better. While in other languages, we need to bring in a mock library as a dependency, in TypeScript, we can utilize a built-in construct by typing the following:

const databaseServiceInstance = {} as DatabaseService;

In the preceding snippet, we create an empty object as a DatabaseService. However, be aware that you are responsible for adding a process method to your instance because it starts as an empty object. It will not raise any problems with the compiler; it is a powerful feature, but it is up to us to verify that what we create is correct. Let’s emphasize how significant this TypeScript feature is by looking at some more cases where it pays off to be able to mock things.

Let’s reiterate that the reason for mocking anything in your code is to make it easier to test. Let’s assume your code looks something like this:

class Auth {
    srv: AuthService = new AuthService();
    
    execute() {
        if (srv.isAuthenticated()) {}
        else {}
    }
}

A better way to test this is to make sure that the Auth class relies on abstractions, which means that the AuthService should be created elsewhere and that we use an interface rather than a concrete implementation. So, we should modify our code so that it looks like this:

interface AuthService {
    isAuthenticated(): boolean;
}
class Auth {
    constructor(private srv: AuthService) {}
    execute() {
        if (this.srv.isAuthenticated()) {}
        else {}
    }
}

To test the preceding class, we would typically need to create a concrete implementation of the AuthService and use that as a parameter in the Auth instance:

class MockAuthService implements AuthService {
    isAuthenticated() { return true; }
}
const srv = new MockAuthService();
const auth = new Auth(srv);

It would, however, become quite tedious to write a mock version of every dependency that you wanted to mock. Therefore, mocking frameworks exist in most languages. The idea is to give the mocking framework an interface from which it would create a concrete object. You would never have to create a mock class, as we did previously, but that would be something that would be up to the mocking framework to do internally.

Class inheritance

Just like an interface can define a class, it can also extend the members and functionality of other classes. We can make a class inherit from another by appending the extends keyword to the class name, including the name of the class we want to inherit its members from:

class Sedan extends Car {
    model: string;
    
    constructor(make: string, model: string) {
        super(make);
        this.model = model;
    }
}

In the preceding class, we extend from a parent Car class, which already exposes a member called make. We can populate the members by the parent class and execute their constructor using the super method, which points to the parent constructor. We can also override methods from the parent class by appending a method with the same name. Nevertheless, we can still execute the original parent’s class methods as it is still accessible from the super object.

Classes and interfaces are basic features of the TypeScript language. As we will see in the following section, decorators enhance the use of classes in an application by extending them with custom functionality.


Decorators

Decorators are a very cool functionality that allows us to add metadata to class declarations for further use. By creating decorators, we are defining special annotations that may impact how our classes, methods, or functions behave or simply altering the data we define in fields or parameters. They are a powerful way to augment our type’s native functionalities without creating subclasses or inheriting from other types. It is, by far, one of the most exciting features of TypeScript. It is extensively used in Angular when designing modules and components or managing dependency injection, as we will learn later in Chapter 6, Managing Complex Tasks with Services.

The @ prefix recognizes decorators in their name, which are standalone statements above the element they decorate. We can define up to four different types of decorators, depending on what element each type is meant to decorate:

  • Class decorators
  • Property decorators
  • Method decorators
  • Parameter decorators

The Angular framework defines custom decorators, which we will use during the development of an application.

We’ll look at the previous types of decorators in the following subsections.

Class decorators

Class decorators allow us to augment a class or perform operations on its members. The decorator statement is executed before the class gets instantiated. Creating a class decorator requires defining a plain function, whose signature is a pointer to the constructor belonging to the class we want to decorate. The formal declaration defines a class decorator as follows:

declare type ClassDecorator = <TFunction extends Function>(Target:TFunction) => TFunction | void;

Let’s see how we can use a class decorator through a simple example:

function Banana(target: Function): void {
    target.prototype.banana = function(): void {
        console.log('We have bananas!');
    }
}
@Banana
class FruitBasket {}
const basket = new FruitBasket();
basket.banana();

In the preceding snippet, we use the banana method, which was not initially defined in the FruitBasket class. However, we decorate it with the @Banana decorator. It is worth mentioning, though, that this won’t compile. The compiler will complain that FruitBasket does not have a banana method, and rightfully so because TypeScript is typed. So, at this point, we need to tell the compiler that this is valid. So, how do we do that? One way is that, when we create our basket instance, we give it the type any:

const basket: any = new FruitBasket();

The compiler will not complain about the method now, and the compilation of our code will complete successfully.

Extending a class decorator

Sometimes, we might need to customize how a decorator operates upon instantiating it. We can design our decorators with custom signatures and then have them return a function with the same signature we defined without parameters. The following piece of code illustrates the same functionality as the previous example, but it allows us to customize the message:

function Banana(message: string) {
    return function(target: Function) {
        target.prototype.banana = function(): void {
            console.log(message);
        }
    }
}
@Banana('Bananas are yellow!')
class FruitBasket {}
const basket: any = new FruitBasket();
basket.banana();

If we run the preceding code, the browser console will print the following message:

Bananas are yellow!

As a rule of thumb, decorators that accept parameters require a function whose signature matches the parameters we want to configure. The function also returns another function that matches the signature of the decorator.

Property decorators

Property decorators are applied to class fields and are defined by creating a function whose signature takes two parameters:

  • target: The prototype of the class we want to decorate
  • key: The name of the property we want to decorate

Possible use cases for this decorator are logging the values assigned to class fields when instantiating objects or reacting to data changes in such fields. Let’s see an actual example that showcases both behaviors:

function Jedi(target: Object, key: string) {
    let propertyValue: string = target[key];
    if (delete target[key]) {
        Object.defineProperty(target, key, {
            get: function() {
                return propertyValue;
            },
            set: function(newValue){
                propertyValue = newValue;
                console.log(`${propertyValue} is a Jedi`);
            }
        });
    }
}
class Character {
    @Jedi
    name: string;
}
const character = new Character();
character.name = 'Luke';

The preceding snippet follows the same logic as for parameterized class decorators. However, the signature of the returned function is slightly different to match that of the parameterless decorator declaration we saw earlier.

Let’s now see an example that depicts how we can log changes on a given class property using a property decorator:

function NameChanger(callbackObject: any): Function {
    return function(target: Object, key: string): void {
        let propertyValue: string = target[key];
        if (delete target[key]) {
            Object.defineProperty(target, key, {
                get: function() {
                    return propertyValue;
                },
                set: function(newValue) {
                    propertyValue = newValue;
                    callbackObject.changeName.call(this, propertyValue);
                }
            });
        }
    }
}

The NameChanger decorator can be applied in a class to be executed when the name property is modified:

class Character {
    @NameChanger ({
        changeName: function(newValue: string): void {
            console.log(`You are now known as ${newValue}`);
        }
    })
    name: string;
}
var character = new Character();
character.name = 'Anakin';

In the preceding snippet, the changeName function is triggered when the value of the property changes in the character instance.

Method decorators

A method decorator can detect, log, and intervene in how methods are executed. To do so, we need to define a function whose payload takes the following parameters:

  • target: Represents the decorated method.
  • key: The actual name of the decorated method.
  • descriptor: A property descriptor of the given method. It is a hash object containing, among other things, a property named value that references the method itself.

In the following example, we’re creating a decorator that displays how a method is called:

function Log(){
    return function(target, key: string, descriptor: PropertyDescriptor) {
        const oldMethod = descriptor.value;
        descriptor.value = function newFunc(...args:any[]){
            let result = oldMethod.apply(this, args);
            console.log(`${key} is called with ${args.join(',')} and result ${result}`);
            return result;
        }
    }
}
class Hero {
    @Log()
    attack(...args:[]) { return args.join(); }
}
const hero = new Hero();
hero.attack();

The preceding snippet also illustrates what the arguments were upon calling the method and the result of the method’s invocation.

Parameter decorator

A parameter decorator, the last one we will learn about, taps into parameters located in function signatures. It is not intended to alter the parameter information or the function behavior but to look into the parameter value and perform operations such as logging or replicating data. It accepts the following parameters:

  • target: The object prototype where the function, whose parameters are decorated, usually belongs to a class
  • key: The name of the function whose signature contains the decorated parameter
  • index: The index where this decorator has been applied in the parameter’s array

The following example shows a working example of a parameter decorator:

function Log(target: Function, key: string, index: number) {
    const functionLogged = key || target.prototype.constructor.name;
    console.log(`The parameter in position ${index} at ${functionLogged} has been decorated`);
}
class Greeter {
    greeting: string;
    
    constructor (@Log phrase: string) {
        this.greeting = phrase;
    }
}

In the preceding snippet, we declare the functionLogged variable in that way because the value of the target parameter varies depending on the function whose parameters are decorated. Therefore, decorating a constructor or a method parameter is different. The former returns a reference to the class prototype, while the latter returns a reference to the constructor function. The same applies to the key parameter, which is undefined when decorating the constructor parameters.

Parameter decorators do not modify the value of the parameters decorated or alter the behavior of the methods or constructors where these parameters live. They usually log or prepare the object created to implement additional layers of abstraction or functionality through higher-level decorators, such as a method or class decorator. Common use case scenarios for this encompass logging component behavior or managing dependency injection.


Advanced types

We have already learned about some basic types in the TypeScript language that we usually meet in other high-level languages. In this section, we’ll look at some advanced types that will help us during Angular development.

Partial

The Partial type is used when we want to create an object from an interface but include some of its properties:

interface Hero {
    name: string;
    power: number;
}
const hero: Partial<Hero> = {
    name: 'Boothstomper'
}

In the preceding snippet, we can see that the hero object does not include power in its properties.

Record

Some languages, such as C#, have a reserved type when defining a key-value pair object or dictionary, as it is known. In TypeScript, there is no such thing. If we want to define such a type, we declare it as follows:

interface Hero {
    powers: {
        [key: string]: number
    }
}

However, the preceding syntax is not clear. In a real-world scenario, interfaces have many more properties. Alternatively, we can use the Record type to define the interface:

interface Hero {
    powers: Record<string, number>
}

It defines the key as a string, which is the name of the power in this case, and the value, which is the actual power factor, as a number.

Union

We’ve already learned about generics and how they can help us when we want to mix types. A nice alternative, when we know what the possible types are, is the Union type:

interface Hero {
    name: string;
    powers: number[] | Record<string, number>;
}

In the preceding snippet, we define the powers property as an array of numbers or a key-value pair collection.

And that wraps up advanced types. As we learned, the TypeScript typing system is very flexible and allows us to combine types for more advanced scenarios.

In the following section, we will learn how to use modules with TypeScript.


Modules

As our applications scale and grow, there will be a time when we need to organize our code better and make it sustainable and reusable. Modules are a great way to accomplish these tasks, so let’s look at how they work and how we can implement them in our application.

A module works at a file level, where each file is the module itself, and the module name matches the filename without the .ts extension. Each member marked with the export keyword becomes part of the module’s public API. Consider the following module that is declared in a my-service.ts file:

export class MyService {
    getData() {}
}

To use the preceding module and its exported class, we need to import it into our application code:

import { MyService } from './my-service';

The ./my-service path is relative to the location of the file that imports the module. If the module exports more than one artifact, we place them inside the curly braces one by one, separated with a comma:

export class MyService {
    getData() {}
}
export const PI = 3.14;
import { MyService, PI } from './my-service'; 

In the preceding example, the MyService class exports the getData method and the PI variable in one go.


Summary

It was a long read, but this introduction to TypeScript was necessary to understand the logic behind many of the most brilliant parts of Angular. It gave us the chance to introduce the language syntax and explain the rationale behind its success as the syntax of choice for building the Angular framework.

We reviewed the type architecture and how we can create advanced business logic when designing functions with various alternatives for parameterized signatures. We even discovered how to bypass scope-related issues using the powerful arrow functions. We enhanced our knowledge of TypeScript by exploring some of the most common features used in Angular applications.

Probably the most relevant part of this chapter encompassed our overview of classes, methods, properties, and accessors and how we can handle inheritance and better application design through interfaces. Modules and decorators were some other significant features we explored in this chapter. As we will see very soon, having sound knowledge of these mechanisms is paramount to understanding how dependency injection works in Angular.

With all this knowledge at our disposal, we can start learning how to apply it by building Angular applications. In the next chapter, we will learn how to use Angular modules, which are not the same as JavaScript modules, to structure an Angular application. We will see in detail what Angular modules are and how we can use them to organize an Angular application in an efficient and properly structured way.


Join our community on Discord

Join our community’s Discord space for discussions with the author and other readers:

https://packt.link/LearningAngular4e

About the Authors
  • Aristeidis Bampakos

    Aristeidis Bampakos has over 20 years of experience in the software development industry. He is a Greek national who currently works in Athens as a Web Development Team Leader at Plex-Earth, specializing in the development of web applications using Angular. He studied Computer Technology at the University of Portsmouth and in 2002 he was awarded the degree of Bachelor of Engineering with Second Class Honours (Upper Division). In 2004, he completed his MSc in Telecommunications Technology at Aston University. His career started as a C# .NET developer, but he saw the potential of web development and moved toward it in early 2011. He began working with AngularJS, and Angular later on, and in 2020 he was officially recognized as a Google Developer Expert (GDE) for Angular. Aristeidis is passionate about helping the developer community learn and grow. In his book 'Learning Angular,' Aristeidis brings his knowledge of Angular gathered over the years together so that his readers can benefit from it effectively. Alongside this, he authored ‘Angular Projects’, which delves deeper into Angular web development applications. As well as this, his love for teaching has led him to become an Angular Senior Tech Instructor at Code.Hub where he nurtures aspiring Angular developers and professionals. In his spare time, he enjoys being an occasional speaker in meetups, conferences, and podcasts where he talks about Angular. He is currently leading the effort of making Angular accessible to the Greek development community by maintaining the open-source Greek translation of the official Angular documentation.

    Browse publications by this author
  • Pablo Deeleman

    With sound expertise in front-end libraries and frameworks such as Backbone.js, Knockout.js, VueJS, React, Svelte, AngularJs, and Angular, Pablo Deeleman has developed his career since 1998 as a JavaScript engineer across a broad range of successful companies such as Gameloft, Red Hat or Dynatrace, just to name a few. He currently works as Staff Software Engineer at Twilio, the global leader in customer engagement communications. Pablo Deeleman has contributed to the dev community with several books on Angular since 2016, all published by Packt Publishing.

    Browse publications by this author
Learning Angular - Fourth Edition
Unlock this book and the full library FREE for 7 days
Start now