


 Download code from GitHub
Creating a Simple Theme with WordPress
Welcome to the WordPress Themes Project book! In this book, we will build 10 WordPress themes from scratch. We will look at all of the fundamental knowledge that is needed to build great themes.
In this first chapter, we will create a very simple project. We will not really focus on creating an awesome design; the chapter is more about explaining the files that we need to create for our theme, the syntax, the dynamic snippets, and related topics.
Installing and setting up WordPress
This project will be a little different from the rest because it's going to be sort of an introductory project. We will see how to install and set up WordPress, so that you can have a fresh installation to work with. We will create a theme, but we'll be focusing more on the code and the overall look and style. We'll create files and folders, add PHP code, and related things. First, I want to get you familiarized with PHP code, and then we can add some simple style.
With respect to an environment, there are a lot of different ways you can run WordPress. You may have your own server set up; if you don't, you can use something like AMPPS, which is what I'll be using. It gives you an Apache server, PHP, and MySQL all on your local machine. You could also use XAMPP, which is very similar, or WAMP; there's also MAMP for Mac. There are lot of different choices, but if you want to use AMPPS, you can go to https://ampps.com/ and download it. It's available for Windows, Mac, and Linux, and it is pretty easy to get set up.
Now, let's see how to install WordPress. Most of you probably already know how to do this:
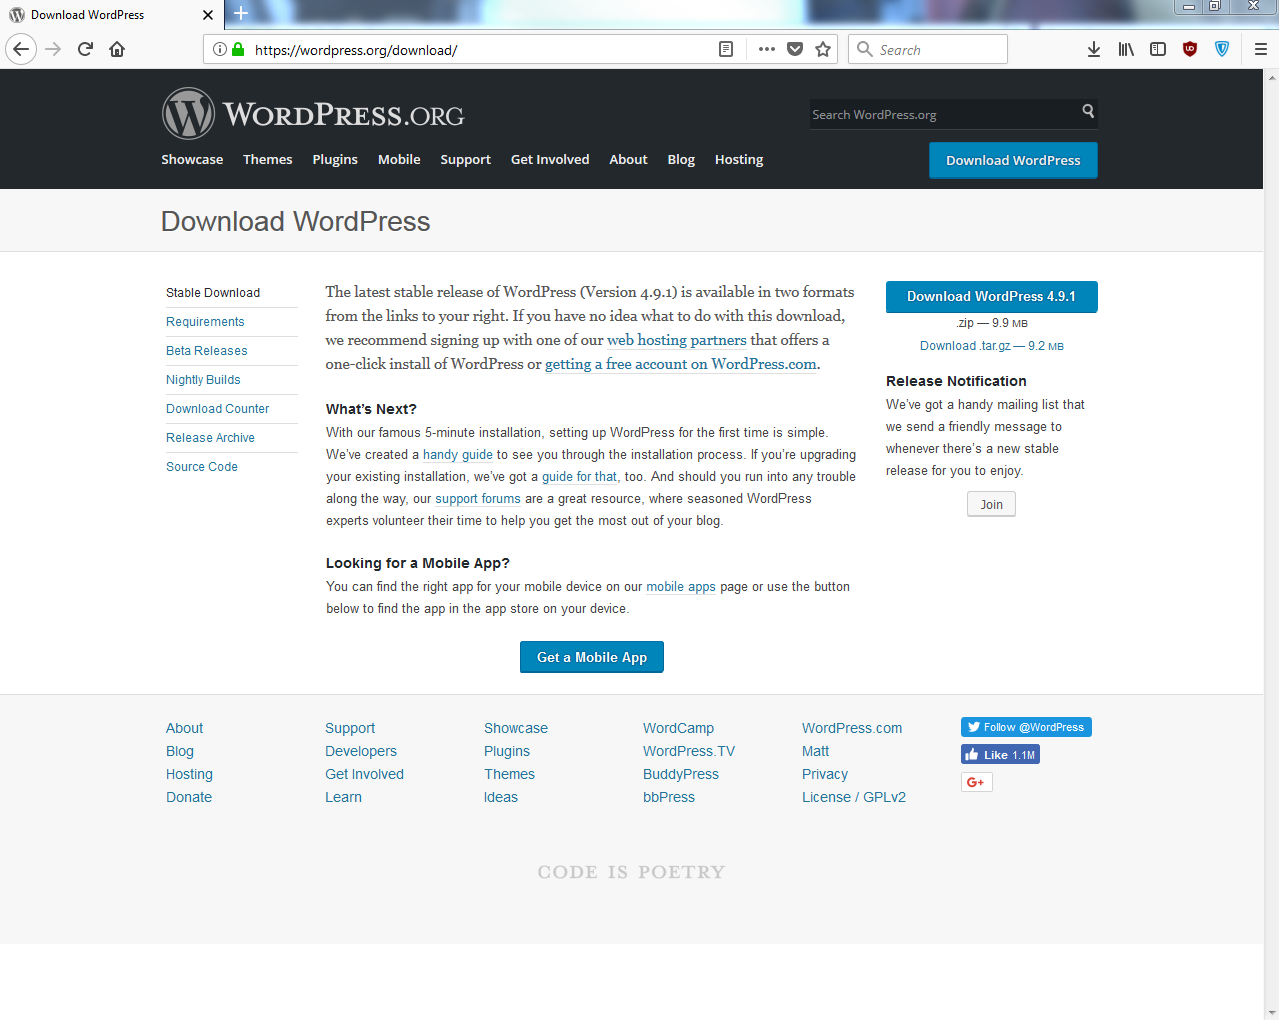
- Go to the link https://wordpress.org/download/ and click on the Download WordPress button:
- Download the package and go to your server root folder, as shown here:
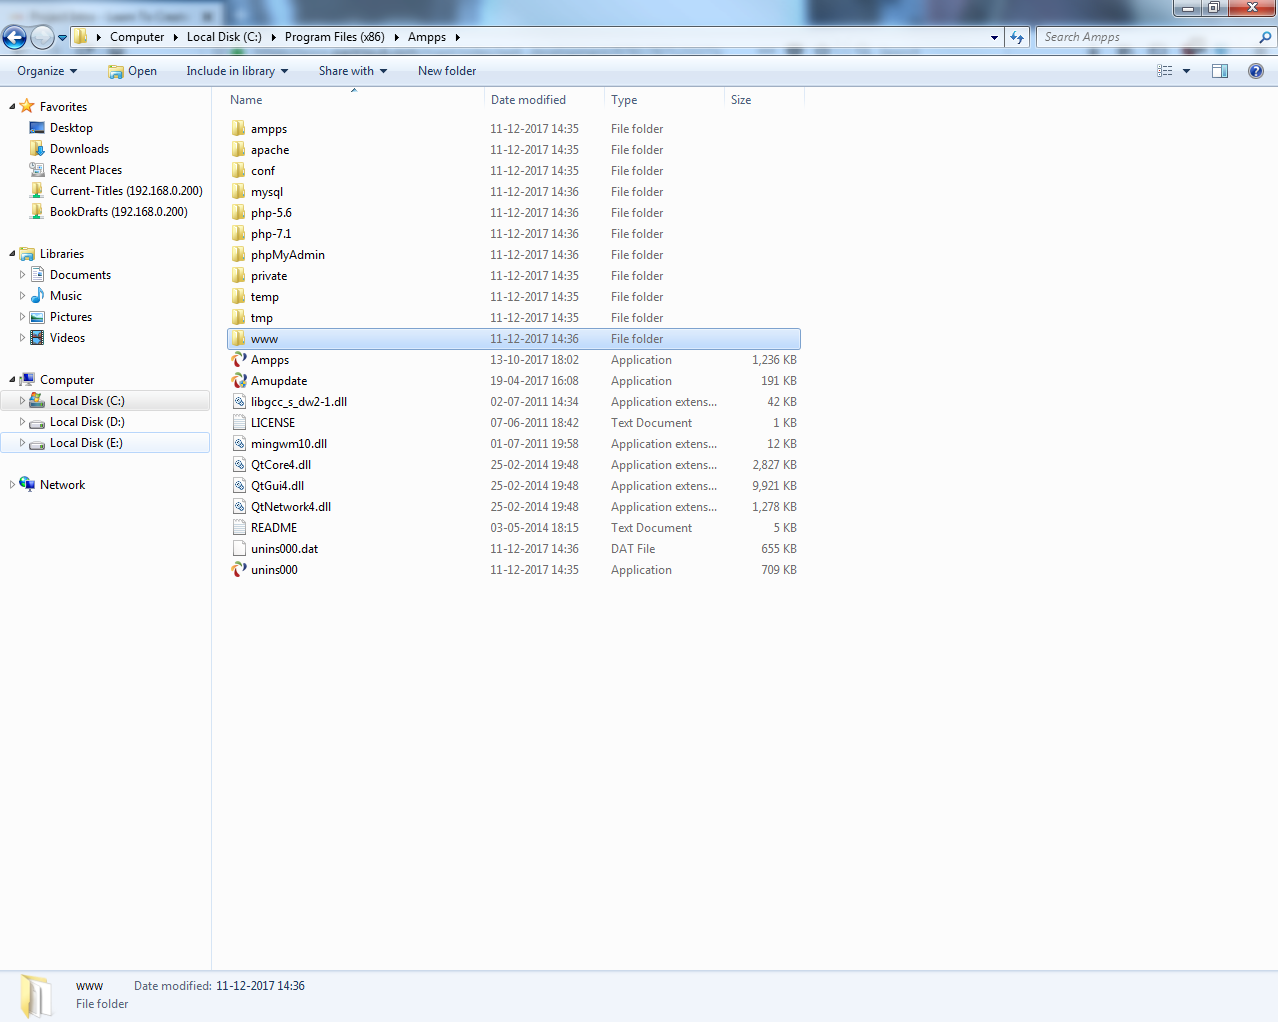
If you're using AMPPS, the package should be in your C:\ drive or in your route drive. In the Ampps folder, you'll find a www folder; this is the hosting root, as shown in the preceding image. In most cases, the default folder will be Program Files in the C:\ drive.
- Create a folder called wpthemes; this is where we will install WordPress.
- Go to the Downloads folder and open the WordPress package. Next, extract all the files into the project folder, wpthemes. Before we proceed, we need a database, a MySQL database, and if you installed AMPPS or if you're using XAMPP or something similar, then you most likely have phpMyAdmin, as shown as follows; this is what we'll be using.
- Now, go to http://localhost/phpmyadmin:
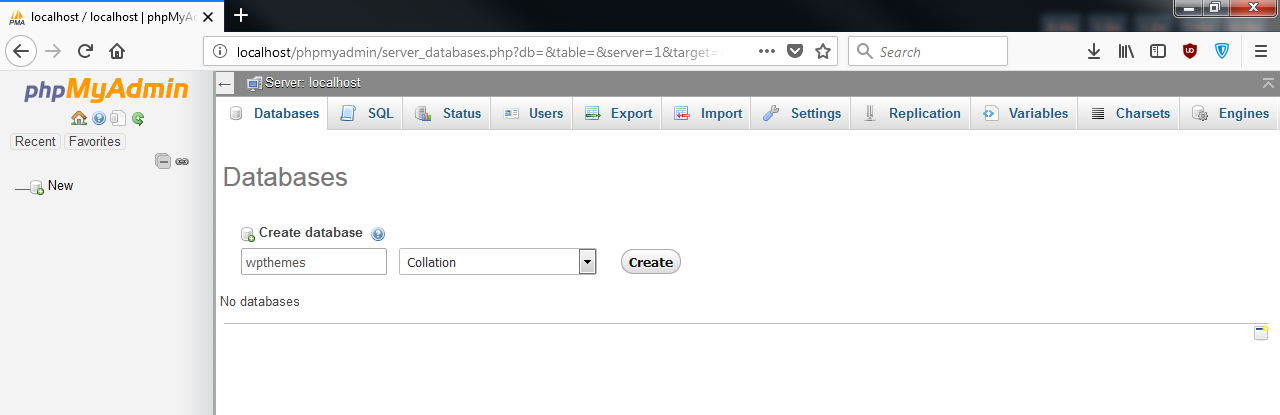
- Next, go to the Databases tab to create a new database called wpthemes and click on Create. We will see an empty database.
- We'll go back to the files we created or brought over from the WordPress package. You will see the wp-config-sample.php file. We'll rename this to just wp-config, and get rid of the -sample.
- Open the wp-config file using Sublime Text as the editor. You can use whichever editor you feel comfortable with.
- Now, in this editor, we will change or add some information:
      /** The name of the database for WordPress */
      define('DB_NAME', 'wpthemes');

      /** MySQL database username */
      define('DB_USER', 'root');

      /** MySQL database password */
      define('DB_PASSWORD', '123456');
We will add DB_NAME, as shown here, which in this case is wpthemes, then DB_USER, which in this case is root, and then DB_PASSWORD—you need to enter whatever the password is for your database. The rest can stay the same.
- We'll go ahead and save the entered information, and then we should be able to go to localhost/wpthemes:
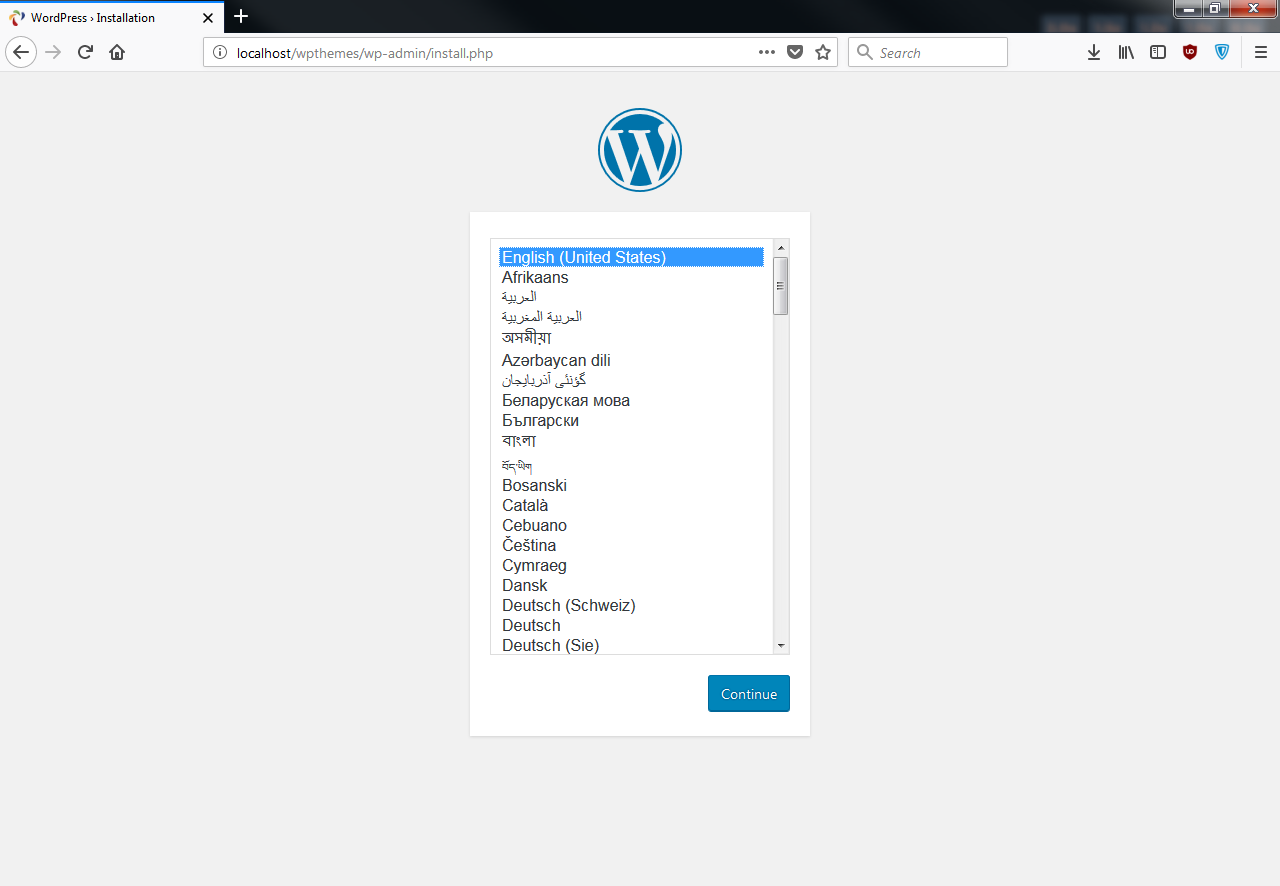
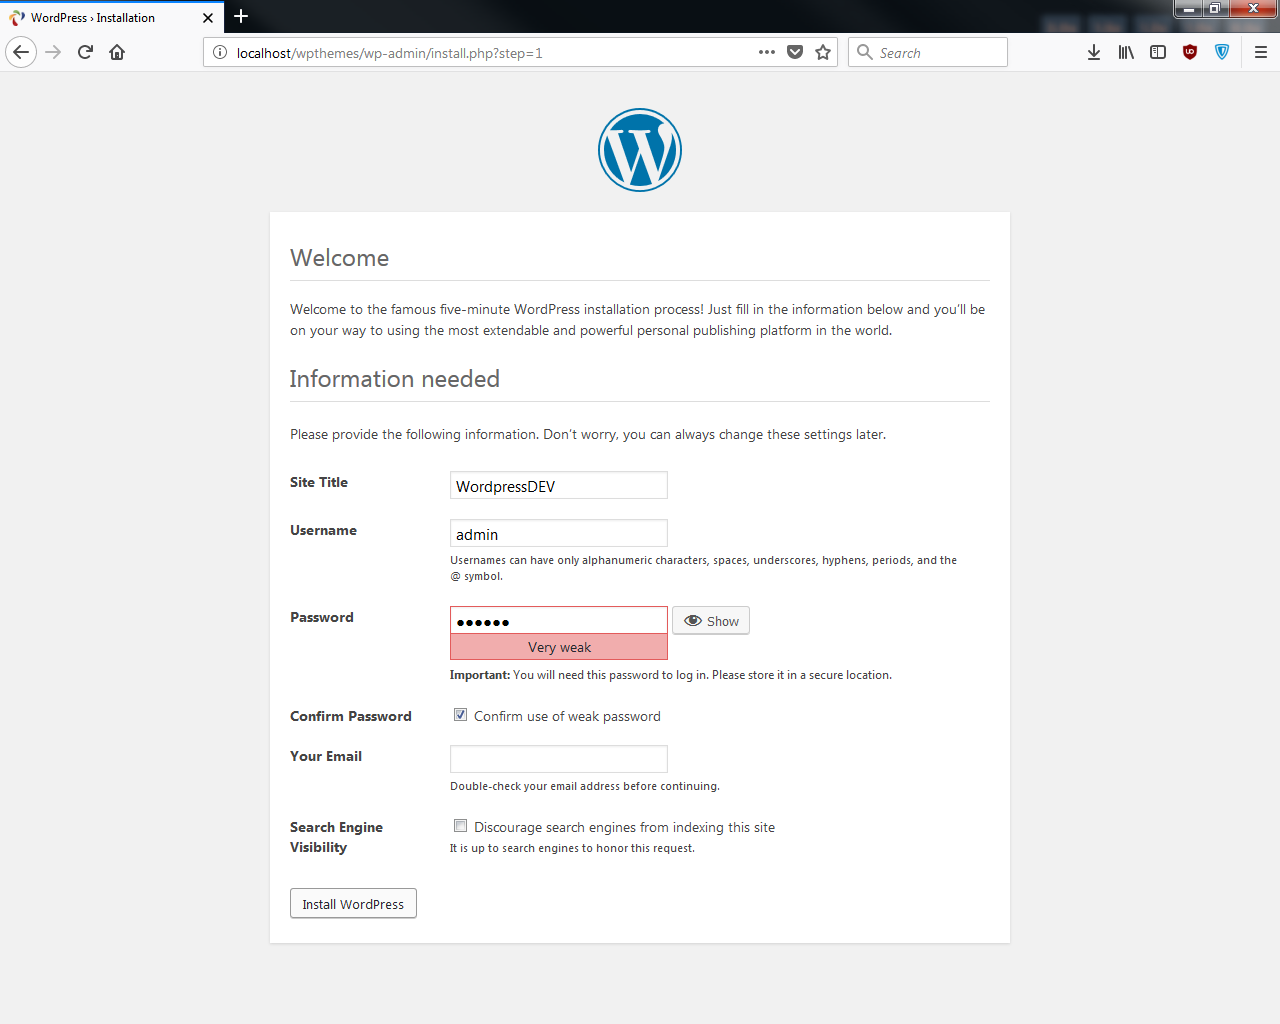
- We can now go ahead and run the installation. As shown in the following screenshot, we will enter Site Title as WordpressDEV and Username as admin. Next, you need to enter the password; I'm using a very weak password here. After you enter the email address, click on Install WordPress:
You can see that WordPress has been installed.
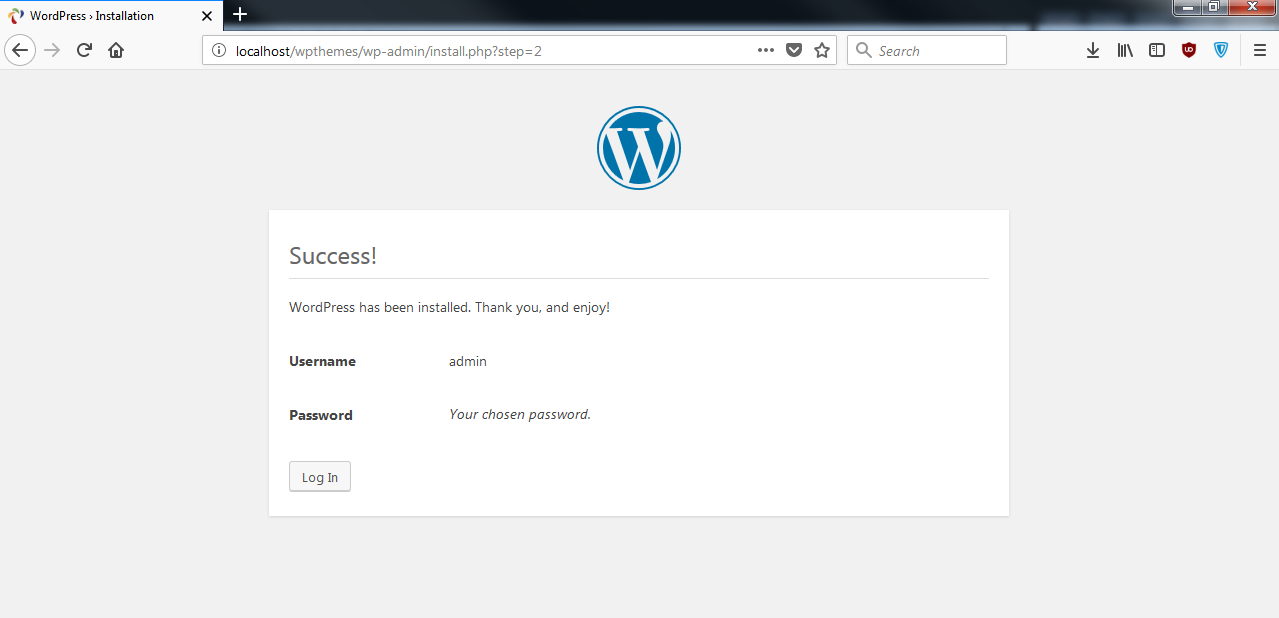
- Now, click on Log In, and this will take us to the admin login. Go ahead and put your username and password in, and it'll take you to your backend:
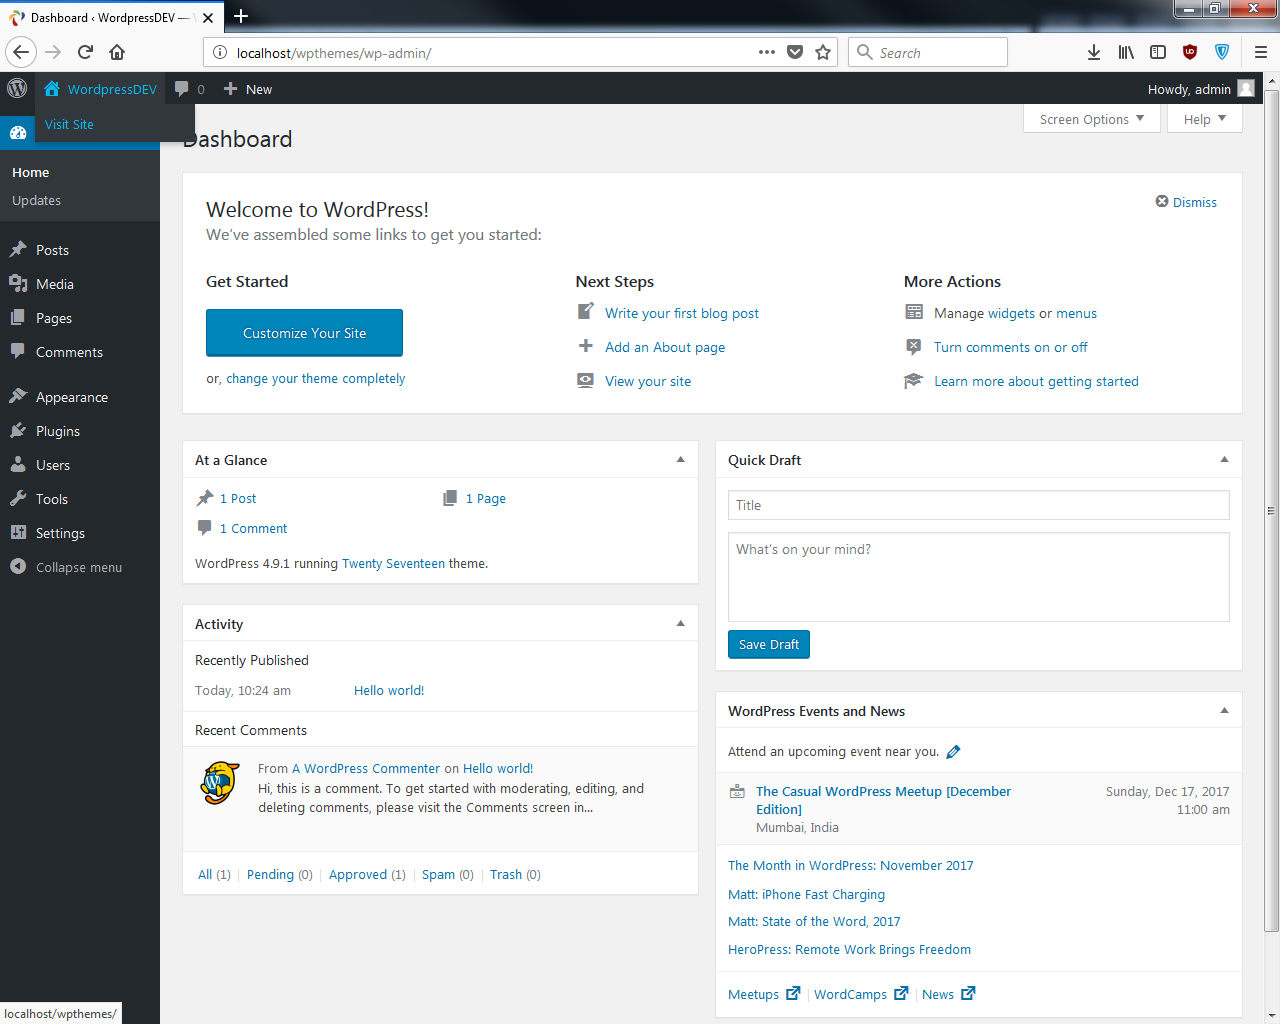
- Now we can click on Visit Site, as shown in the preceding image. Open this in a new tab, and you'll see that we have a brand new WordPress site:
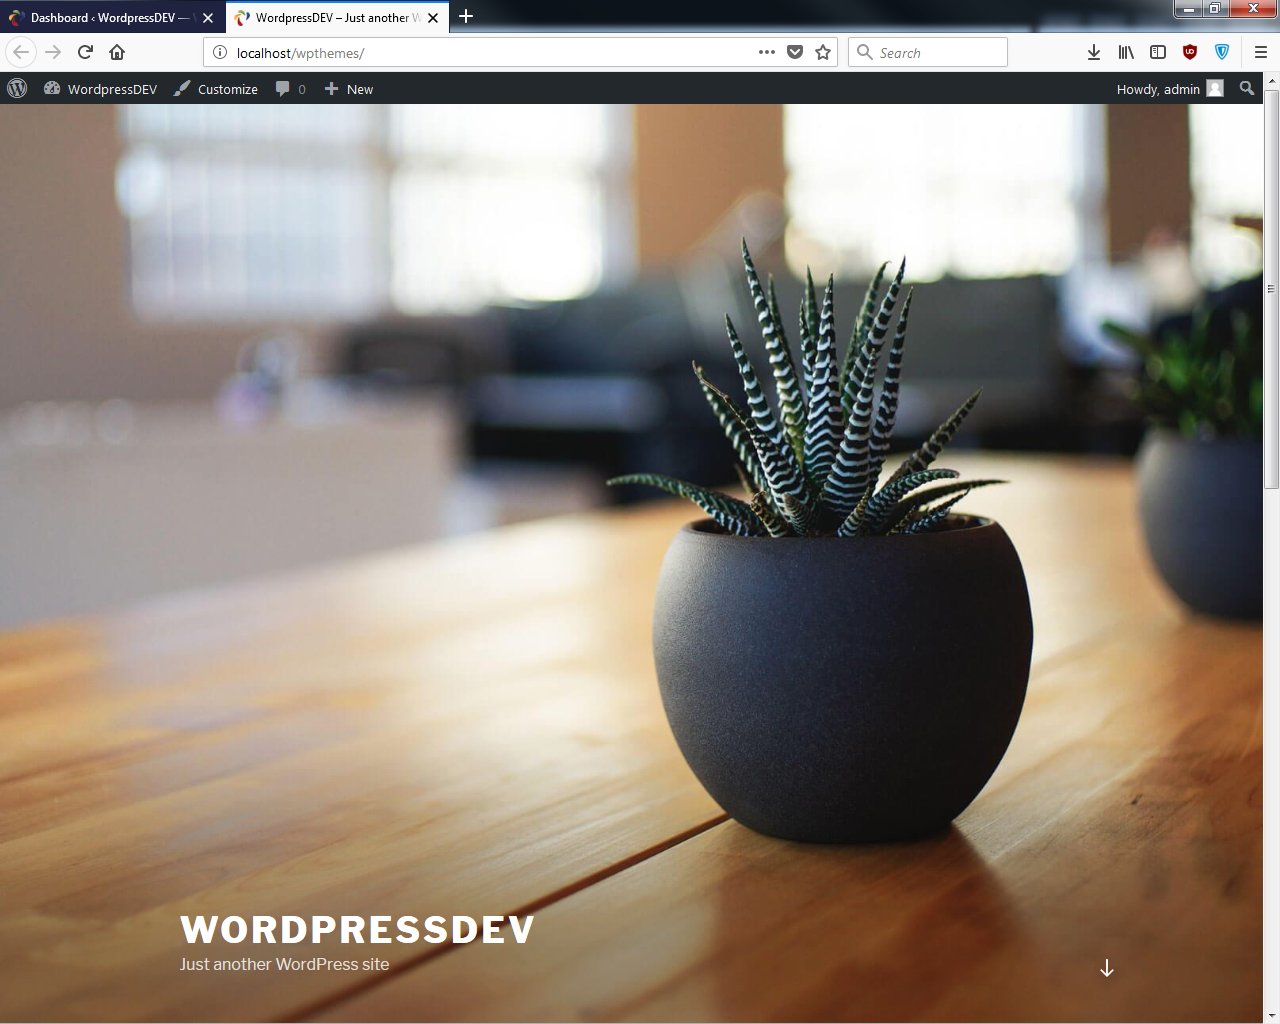
This is what we'll be working with.
I'm sure a lot of you have experience with WordPress.
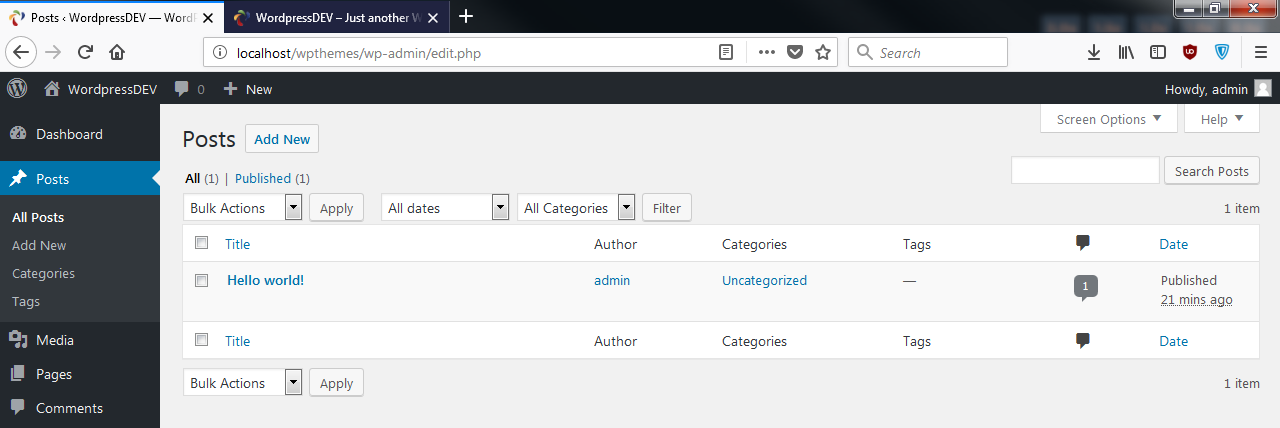
On the localhost/wpthemes/wp-admin/ WordPress page, we have our Posts area, where we can create and manage posts:
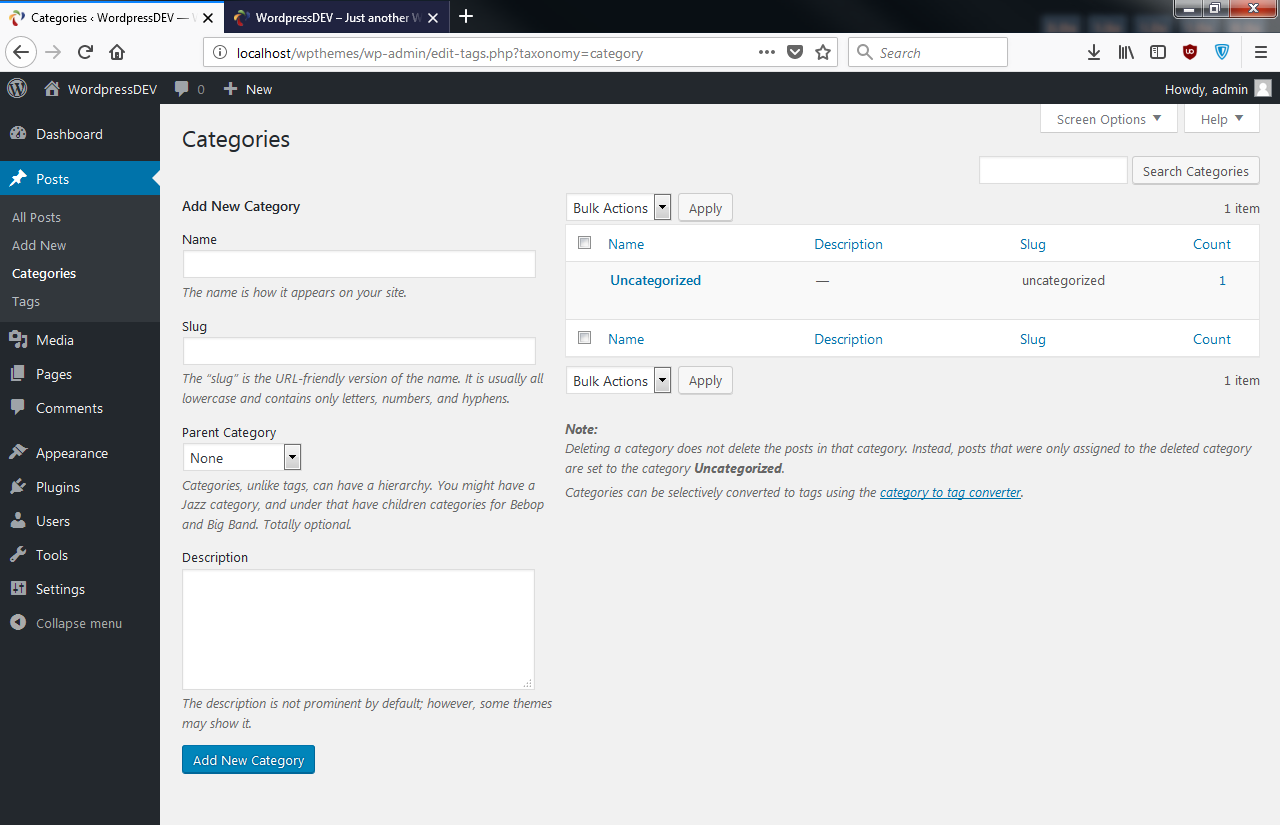
We can have Categories, as shown in the following screenshot:
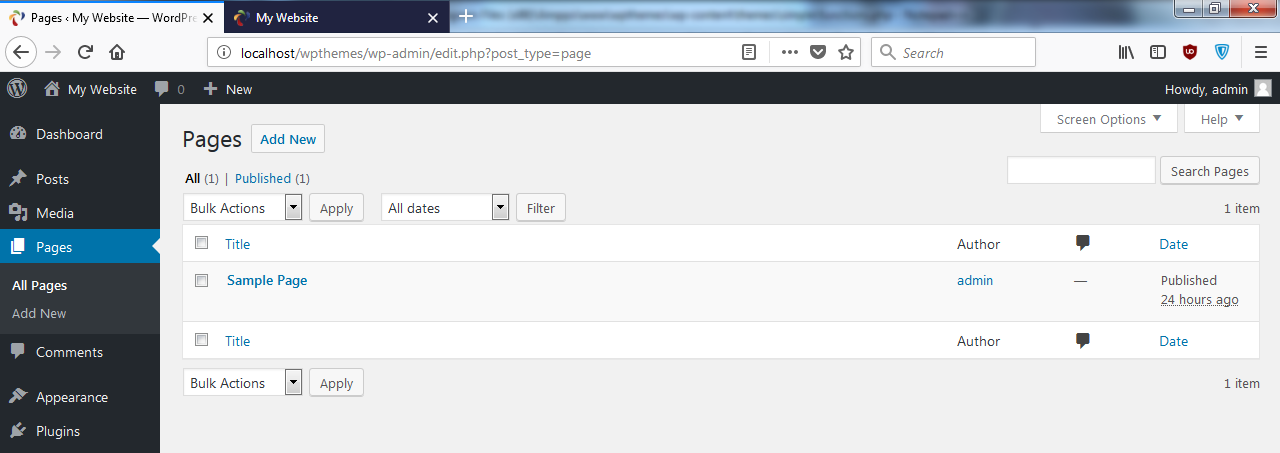
We can also see Pages:
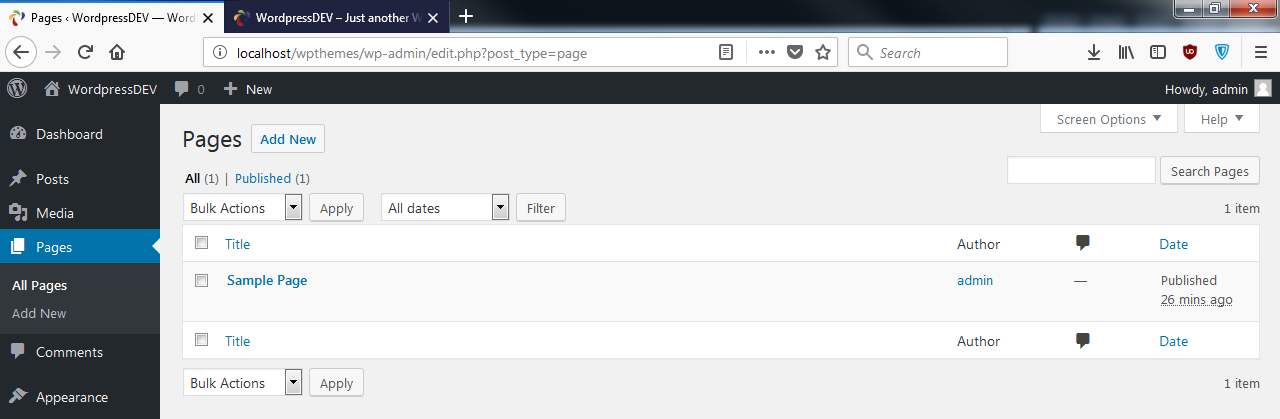
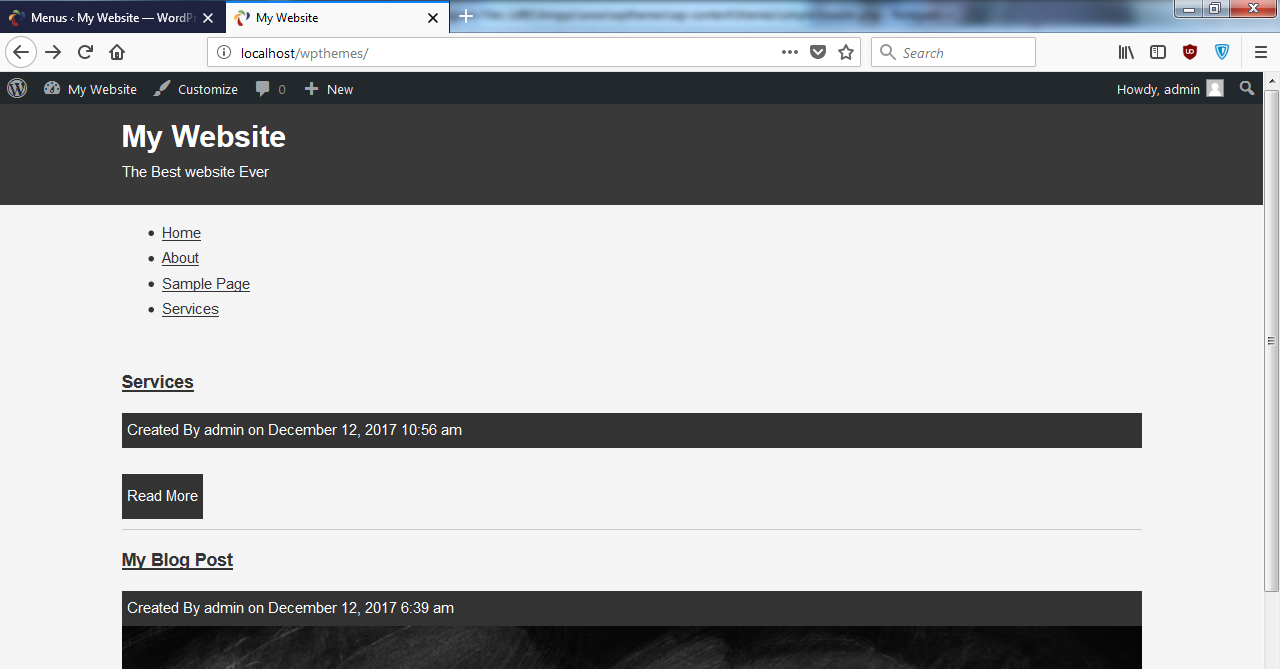
Website pages such as About Us, or Services, would go on Pages. If we go to Appearance, and click on Themes, it will show us the installed themes, as shown in the following screenshot:
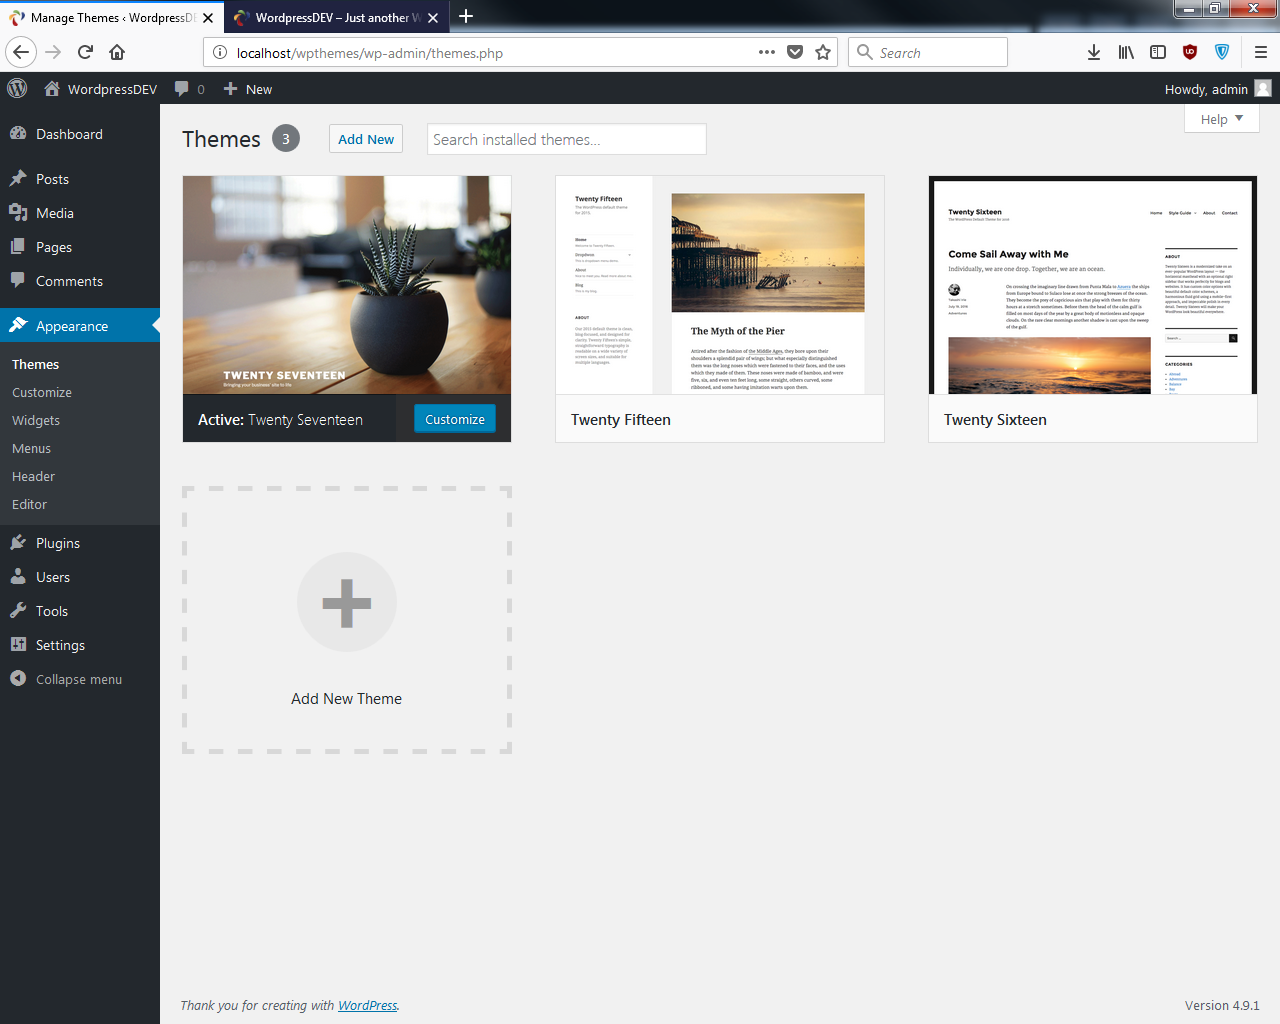
By default, we have Twenty Seventeen, Twenty Fifteen, and Twenty Sixteen, but we will be creating a new theme in the next section.
Creating and enabling themes
In this section, we'll see how to create our theme files and enable a theme. We'll use Sublime Text and add the project folder, so that we can access the files easily:
- Go to C:\Ampps\www\wpthemes.
- The folder in which you want to create your theme is going to be themes, which is within the wp-content folder:

You can see here that we have the three themes that come with WordPress already installed, namely twentyfifteen, twentyseventeen, and twentysixteen.
- We'll create a new folder and call it simple. This is going to be the name of our theme:

There are two files that you absolutely need in order to enable your theme: one will be style.css, and the other will be index.php. Now, the reason we need style.css is because that's where all of our declarations, such as theme name and the descriptions, go.
- We'll open up a comment block and enter the fields, shown as follows:

- We will enter the Theme Name as Simple. We also need to have an Author; you can put your own name there if you'd like. We'll also have Author URI. If you are creating themes for clients, you'd probably want to put your company's website there. We can have a Description. We'll enter Very Simple Wordpress Theme, and then enter Version: 1.0. Let's save this. Now, just having this information will allow WordPress to see your theme.
- Now let's go back into our localhost/wpthemes/wp-admin/themes.php backend, and go to Appearance and then Themes; you can see the Simple theme, and we can actually activate it:

- Now, in order for a screenshot to show in the Simple theme, we need to put an image in the root of the theme folder and call it screenshot.png:

- Let's create a sample screenshot using Photoshop, which just says SimpleTheme, and place that in our theme folder, as shown in the preceding screenshot. Go to the server root, www\wpthemes\wp-content\themes, and then simple. We'll just paste that screenshot in there. Now if we go back to the backend and reload, you can see that we have a screenshot, as shown here:

Well, it's not really a screenshot but it's an image.
- Now if we go ahead and activate our theme for this, and go to our frontend and reload—we get absolutely nothing because we haven't added any code yet:

Our theme just contains nothing, it's completely blank.
- Now let's open the index.php file and enter TEST, then save and reload; we can see that we get TEST on our frontend too:

Basically, it's reading our index.php file by default.
Creating an HTML structure
- Now let's create our HTML structure. We will put in some core HTML tags, as shown here:
      <!DOCTYPE html>
      <html <?php language_attributes(); ?>>
      <head>
         <title><?php bloginfo('name'); ?></title>
As you can see, we have DOCTYPE, an html, head, body, and title tags. Now, if you consider starting at the top, we have our <html> tags; sometimes, you want to include a language here, and WordPress has a function that we can actually include in this file to make it dynamic. We can add php language_attributes, which is a function that will determine the language we want the theme to display. You probably want to make your title dynamic, or you want to add your site name; to do that, we can say php and use a function called bloginfo, as shown in the preceding code block. This is really useful because it has a bunch of things that you can get, such as the site name, the description, the character set, URLs, and the list goes on. You can actually look at the documentation to see exactly what it includes. However, what we'll use is name.
- Once you save this, you can go back and reload the page. You can see that the title says WordpressDEV, as shown here:

If you remember, this is what we named the site.
- Let's go back to our head tag and continue. We'll need a character set, so we'll enter meta charset. Then, we can use bloginfo here as well, and just pass in charset:
      <!DOCTYPE html>
      <html <?php language_attributes(); ?>>
      <head>
         <meta charset="<?php bloginfo('charset'); ?>">
         <title><?php bloginfo('name'); ?></title>
- Let's save this, and take a look at our source code. Using Ctrl + U, you can look at both the language attributes; it says that we're using English US and the character set is UTF-8, as shown here:

These things can now be controlled from within WordPress.
Working with the style sheet
The next thing we will do is include our style sheet:
- Open the style.css file and enter the following code:
      body{
          background:#000;
      }
- Save this and reload; we'll not get a black background as the style sheet is not being read:

- In order for that style sheet to be seen, we'll enter the following code:
      <!DOCTYPE html>
      <html <? php language_attributes(); ?>>
      <head>
         <meta charset="<?php bloginfo('charset'); ?>">
         <title><?php bloginfo('name'); ?></title>
         <link rel="stylesheet"
          href="<?php bloginfo('stylesheet_url'); ?>">
The preceding code will get the style sheet from the correct location.
- Save this code and reload. We can now see a black background:

So whatever we put in our style sheet will now be registered.
Adding a function in the head tag
We will next see how to enter a function called wp_head() in the <head> tag. This puts any additional information that is needed into the head tag. For example, when you install a plugin and, let's say, it needs to include a style sheet, or it needs to do something in the head, to do this we need to enter the following code. So when you create plugins, you can have stuff pop out right in the head:
<!DOCTYPE html>
<html <? php language_attributes(); ?>>
<head>
   <meta charset="<?php bloginfo('charset'); ?>">
   <title><?php bloginfo('name'); ?></title>
   <link rel="stylesheet" href="<?php bloginfo('stylesheet_url'); ?>">
   <?php wp_head(); ?>
In the following source code, we have a bunch of other stuff now, and this is all coming from that wp_head() function:

If I go ahead and take the wp_head() function out, and then go back and reload, it just gives us what we have in the index.php file. So we're going to need the wp_head() function:

In the next section, we'll start to build out the body. We will see how to grab posts, create menus, and so on.
Building the HTML body
We will now see how to add basic HTML tags in the body:
- We'll create a <header> tag, which is an HTML5 tag. We will enter an <h1> tag, and in this tag we will add the website name:
      <header>
         <h1><?php bloginfo('name'); ?></h1>
      </header>
- We can actually take the dynamic code from the <title> tag, which we saw earlier, and put that in <h1> as well. Now if we save that and look at our frontend, we get WordpressDEV:

- Now, if we wanted to change the frontend output, we could go to Settings, and change Site Title to My Website:

- Save the settings. Now, we can see the change.
- In addition to the name, we can also include a Tagline. To do this, we will enter the <small> tags, but instead of using name, we will use description, as shown in the following code block:
      <header>
         <h1><?php bloginfo('name'); ?></h1>
         <small><?php bloginfo('description'); ?></small>
      </header>
- When you reload it, you can see that we get Just another WordPress site:

- We can make the changes in the settings. We'll enter The Best Website Ever in the Tagline textbox:

- Save the changes and put description in the span tag, as shown in the following code block:
      <h1><?php bloginfo('name'); ?></h1>
      <span><?php bloginfo('description'); ?></span>
- When we reload, we get this:

- Now let's add more HTML tags, as shown in the following code block:
         <header>
            <h1><?php bloginfo('name'); ?></h1>
            <span><?php bloginfo('description'); ?></span>
         </header>

         <div class="main">
         <?php if(have_posts()) : ?>
            post found
         <?php else : ?>
            <?php echo wpautop('Sorry, No posts were found'); ?>
         <?php endif; ?>
         </div>
      </body>
      </html>
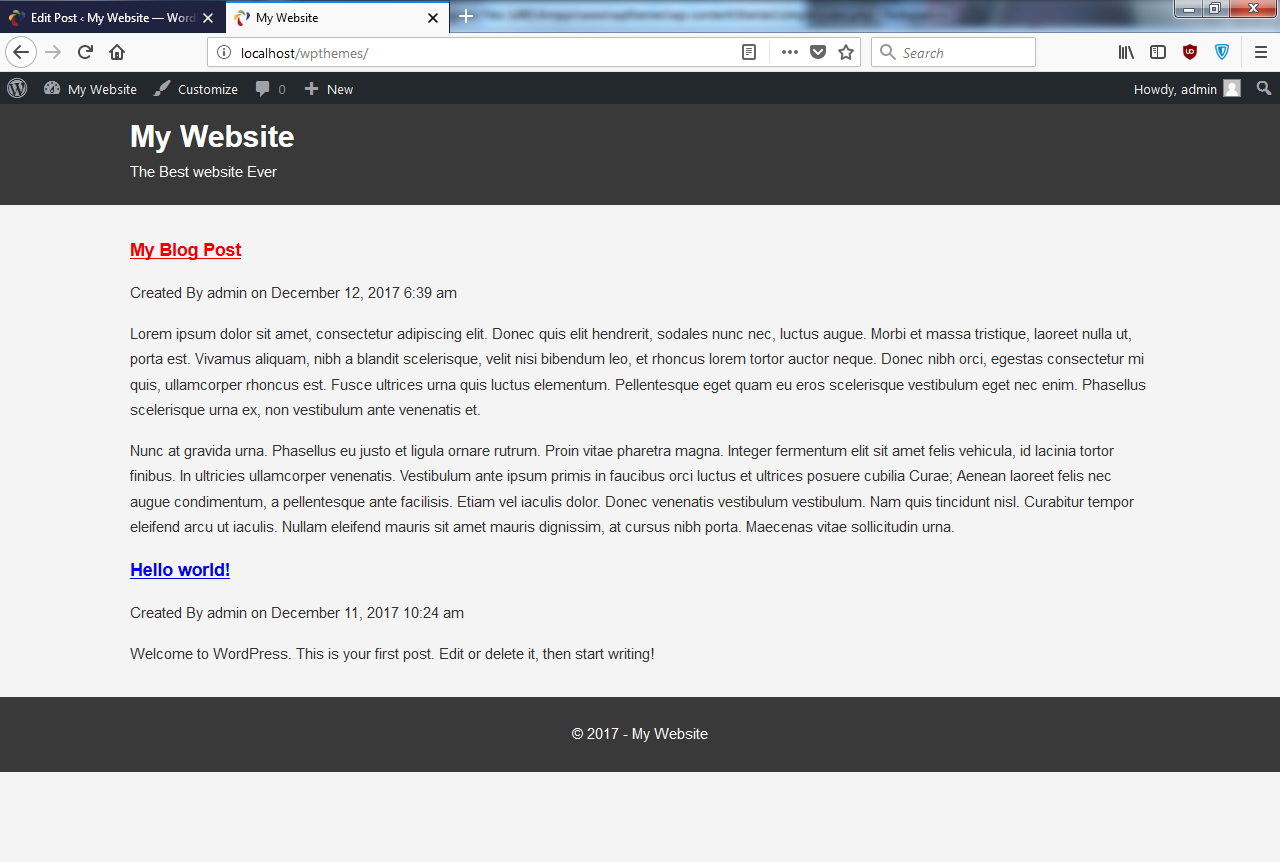
Here, we go under the <header> tag and enter the div class as main. We'll fetch our blog posts; WordPress uses something called the loop, or the main loop, which will fetch every blog post that you have, regardless of the category or whatever it may be. Without specifying any restrictions, it's going to get every post. So, the first thing we'll do is check to see whether there are any posts. We'll use an if statement for that, and then use the shorthand. We will use the syntax that will help us go quickly in and out of php. We'll then use if(have_posts) to see whether there are any posts in WordPress. We'll also put an else statement here, so that if there are no posts, then we just want to let the user know that. Now, instead of just spitting out text, we'll use a function. We'll say echo wpautop; what this does is that it takes double line breaks and automatically makes them into paragraphs. It's a good function to use when you just want to output text. We'll say, Sorry, No posts were found. Then, inside if(have_posts), we'll use post found. Let's go and reload, and you can see that we get post found:

- Let's go back to our backend and go to Posts; you can see that we have Hello world. We will move that to Trash, and if we now go back and reload, we get Sorry, No posts were found, as shown in the following screenshot:

- Now let's go to Trash and restore it. We will see that the post can be seen again. We will now see how to display these posts. We'll delete post found within the if statement and we'll use a while loop for this with a php tag. We'll use while(have_posts). Now, with WordPress, we have to use this thing called the_post(), so we'll use the_post(), which is a little weird as far as a syntax is concerned. I've never really seen this anywhere else apart from WordPress, but just know that you need to have this as well. Then, we'll use endwhile; again, this is just using shorthand syntax, so you could just use the curly braces. But what we'll do here is when it finds a post, we want to get the title. So, in an <h3> tag, we'll use <?php the_title(); ?>, which is a function:
      <div class="main">
      <?php if(have_posts()) : ?>
         <?php while(have_posts()): the_post(); ?>
            <h3><?php the_title(); ?></h3>
         <?php endwhile; ?>
      <?php else : ?>
         <?php echo wpautop('Sorry, No posts were found.'); ?>
      <?php endif; ?>
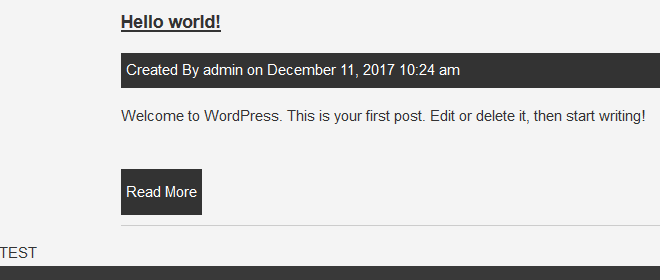
- Let's go and reload, and now you can see that it's getting the Hello world! title:

- Now, let's go ahead and create a post as an example. We will name it My Blog Post, and let's just get some sample text. I have taken some text from the www.lipsum.com website:

We will add a couple of paragraphs and publish it.
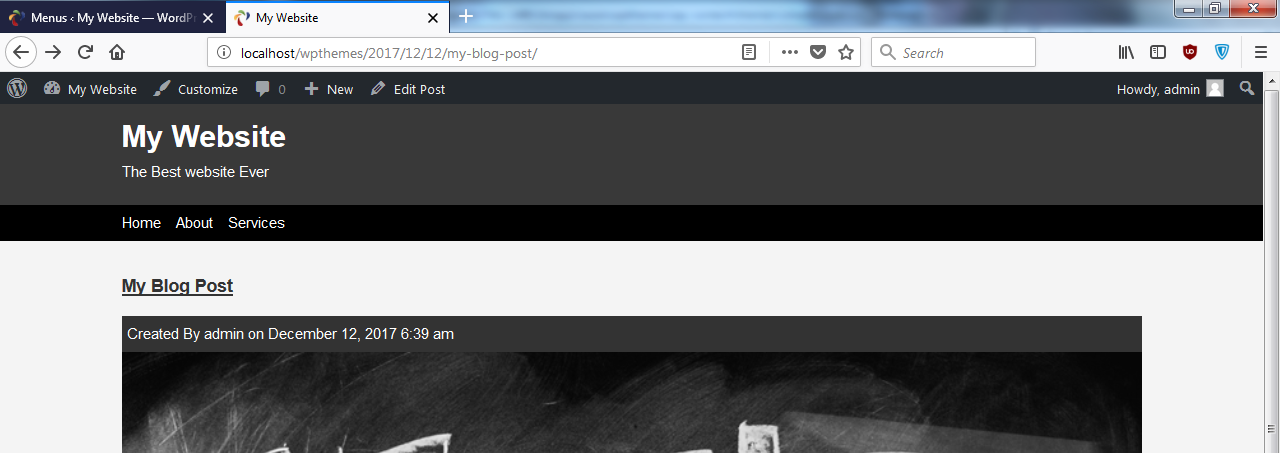
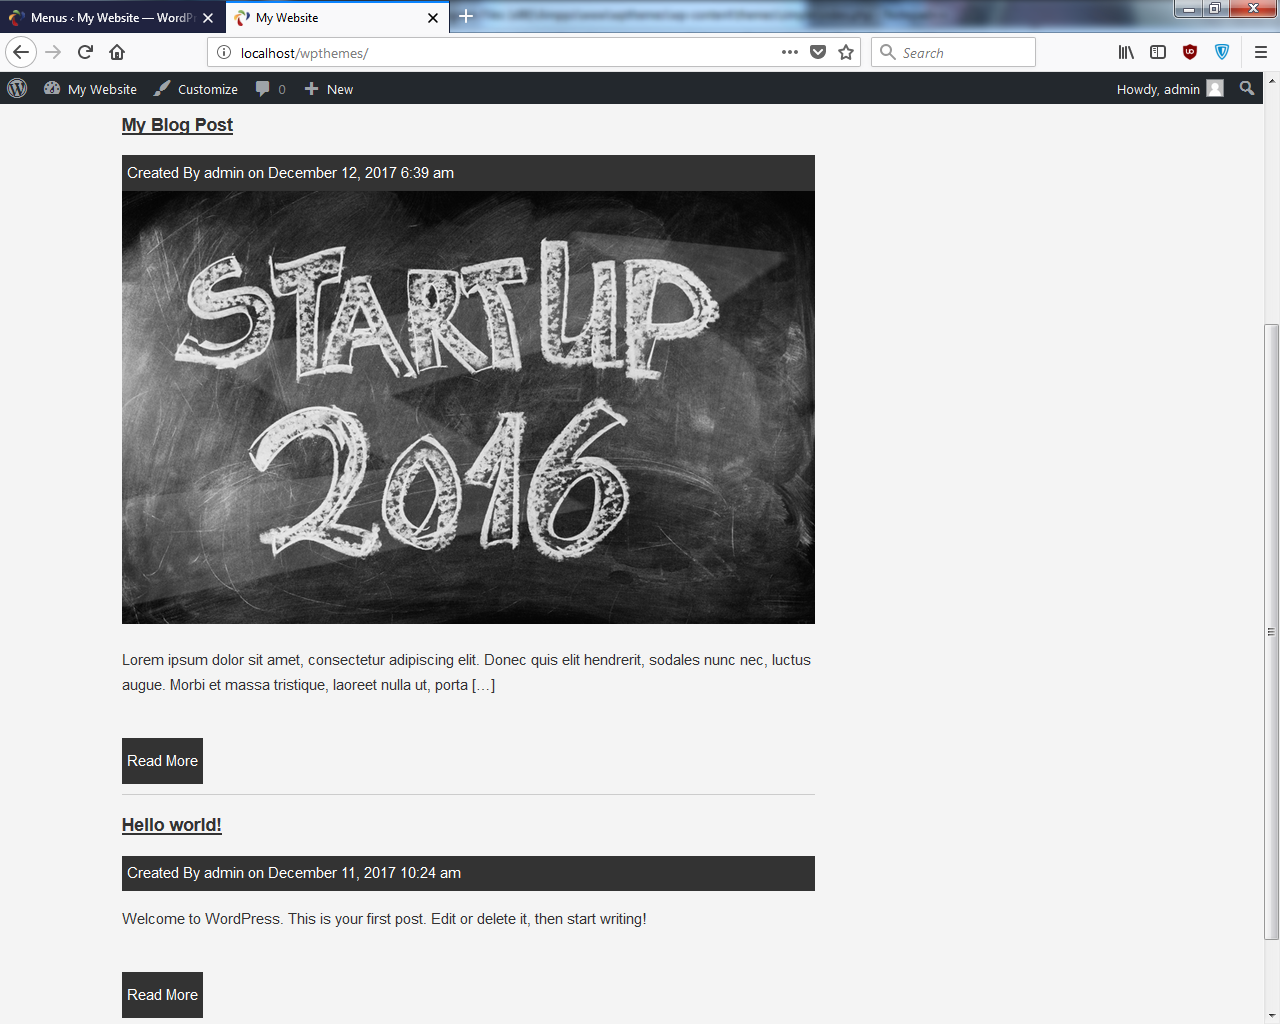
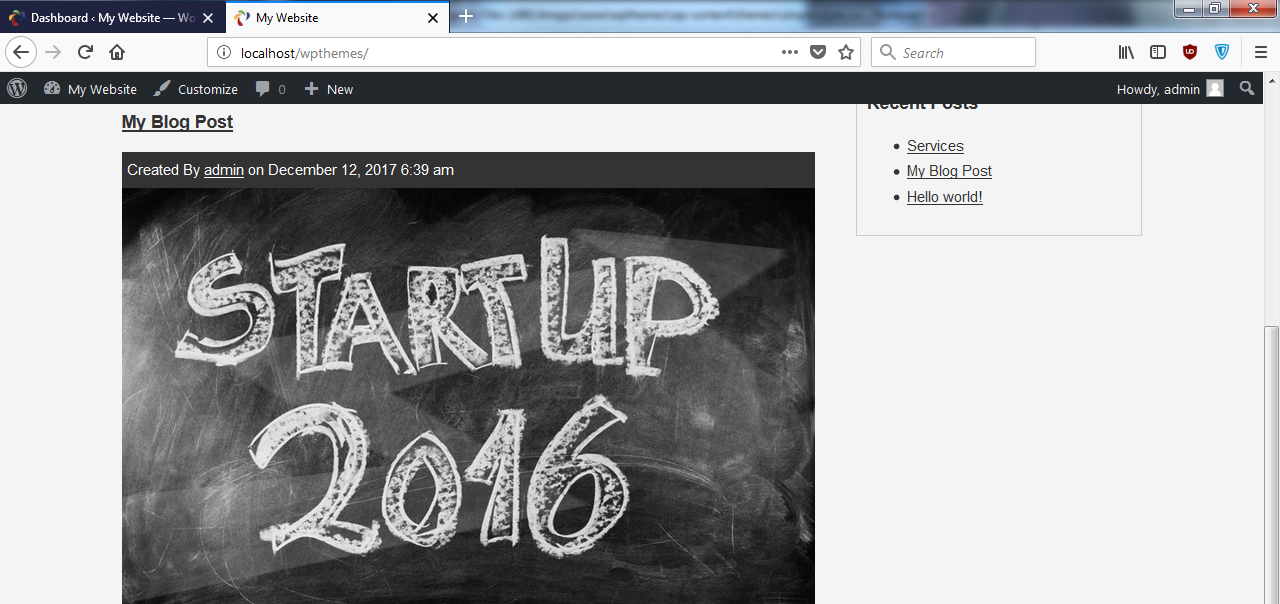
- Now let's reload; you can see that it gives us My Blog Post:

- Now, to get the actual content, we'll go right to the <h3> tag and enter <?php the_content(); ?>. As you can see, WordPress makes it really easy in terms of the names of the functions:
      <div class="main">
      <?php if(have_posts()) : ?>
         <?php while(have_posts()): the_post(); ?>
            <h3><?php the_title(); ?></h3>
            <?php the_content(); ?>
        <?php endwhile; ?>
      <?php else : ?>
         <?php echo wpautop('Sorry, No posts were found'); ?>
      <?php endif; ?>
      </div>
So now, this gets us the content from each blog post and displays it:

- There are different things that we can display with the posts: the date, author, categories, and so on. Let's go right under the title and add the following code block:
         <h3><?php the_title(); ?></h3>
         <div class="meta">
         Created By <?php the_author(); ?>
         </div>
         <?php the_content(); ?>
      <?php endwhile; ?>
Here, we added Created By along with the author's name.
- When we reload, we can see the following output:

In this case, admin is the username of the person who created the post.
- Now, if you want the date, you can add this code:
Created By <?php the_author(); ?> on <?php the_date(); ?>
- When we reload, we get Created By admin on December 12, 2017; basically, it gives us the date:

- We will now see how to format the date. You can format the date in a lot of different ways; if you know PHP and you've worked with the date function, you know that there's a lot of different formatting options.
We will take a look at one such example from php.net/manual/en/function.date.php:
      Created By <?php the_author(); ?> on <?php the_date('l jS \of F
          Y h:i:s A'); ?>
- Let's see what that gives us. You can see the format, shown in the following screenshot, with the day, date, time, and PM or AM:

One thing that I like to do is to use the time instead of the date:
Created By <?php the_author(); ?> on <?php the_time(); ?>
This will give you just the time; it doesn't give you the date, but you can actually format it to give you the date:
Created By <?php the_author(); ?> on <?php the_time('F j, Y g:i a'); ?>
If we take a look at this, it gives us the date and the time:

So it's all up to you, it all depends on your preferences.
Now, let's do a little bit of styling. We will see how to add a <footer> tag at the bottom, and a paragraph to make it dynamic. We can put a copyright symbol, and then for the year, instead of just typing in the year, we can use the_date(), and then just pass in as a parameter, Y, as shown in the following code:
<footer>
<p>© <?php the_date('Y'); ?></p>
</footer>
So we get © 2017:

Then, if we want the site name, we can just say bloginfo and pass in name:
<footer>
<p>© <?php the_date('Y'); ?> - <?php bloginfo('name'); ?></p>
</footer>
So now we have a dynamic footer.
Base styling
Now let's add some base styling. To do this, we will work with the style sheet. Now, the idea of this whole project actually is not to create some great-looking theme, I just want you to get familiar with the PHP code and how themes are set up.
- Let's enter the following code:
      body{
          font-family: Arial;
          font-size:15px;
          color:#333;
          background:#f4f4f4;
          margin:0;
          padding:0;
          line-height: 1.7em;
      }

      header{
          background: #393939;
          color:#fff;
          padding:20px 10px;
      }

      header h1{
          color:#fff;
          margin:0;
      }
- Save the code and reload. You will get the following result:

You can see the empty space at the top; this is because we're logged in as an admin, so even on the frontend it knows that, and it's trying to display the admin bar. Now, it's not displaying the admin bar because we don't have the special function to display it.
- Let's go to index.php, and before the ending body, we'll add <?php wp_footer(); ?>:
<footer>
<p>© <?php the_date('Y'); ?> - <?php bloginfo('name'); ?>
</p>
</footer>
<?php wp_footer(); ?>
</body>
</html>
- Save this and reload. You can see that we have the admin bar:

- We will add a little padding to h1 at the bottom:
      header h1{
          color:#fff;
          margin:0;
          padding:0;
          padding-bottom: 10px;
      }
- We will also add a container div to the code, as shown here:
      .container{
          width:1020px;
          margin:0 auto;
          overflow: auto;
      }
We have set width to 1020 px, margin to 0 auto, and overflow to auto.
- We will now go to index.php, to the <header> tag, and enter this code:
      <header>
         <div class ="container">
         <h1><?php bloginfo('name'); ?></h1>
         <span><?php bloginfo('description'); ?></span>
         </div>
      </header>
- We'll add the same code to main:
      <div class="main">
         <div class="container">
      <?php if(have_posts()) : ?>
- Also, for footer, it would be the same:
<footer>
<div class="container">
<p>© <?php the_date('Y'); ?> - <?php bloginfo('name'); ?>
</p>
</div>
</footer>
- When you reload, you can see that everything's moved to the middle.
- Let's add a little bit of styling to footer. Just copy what we have in the header. We'll also align the text to the center:
      footer{
          background: #393939;
          color:#fff;
          padding:10px 10px;
          text-align: center;
      }
- Next, we will add margin to the main div:
      .main{
          margin:15px 0;
      }
- Let's reload and this is what we get:

You can see that we have our header and main area, where we're looping through the posts and displaying them, and we have our footer area.
Now, common practice in WordPress is to break the header and footer into their own files and then include them in the index.
- To do this, we will now create a new file, call it header.php, and then create a new file called footer.php.
- Let's go to the index.php file and cut the portion of code, as shown in the following code block:
      <!DOCTYPE html>
      <html <?php language_attributes(); ?>>
      <head>
         <meta charset="<?php bloginfo('charset'); ?>">
         <title><?php bloginfo('name'); ?></title>
         <link rel="stylesheet"
          href="<?php bloginfo('stylesheet_url'); ?>">
         <?php wp_head(); ?>
      </head>
      <body>
         <header>
            <div class="container">
               <h1><?php bloginfo('name'); ?></h1>
               <span><?php bloginfo('description'); ?></span>
            </div>
         </header>
- We'll replace the highlighted portion with php get_header:
<?php get_header(); ?>
- Go into header.php and paste the previous code which was cut, and save it.
- We will now do the same thing with footer:
<footer>
<div class="container">
<p>© <?php the_date('Y'); ?> - <?php bloginfo('name');
?>
</p>
</div>
</footer>
<?php wp_footer(); ?>
</body>
</html>
- We will cut the code shown in the preceding code block and replace it with php get_footer(), as shown in the following code block:
<?php get_footer(); ?>
- Paste the footer code that was cut in step 18 and place that in the footer file. The output will look the exact same.
Next, we will see how just a click on these posts will take us to the actual individual post page.
Single posts and thumbnails
Now we'll take a look at the single post page. Right now, we have this roll of posts from our site, but that's it; we can't click on it and go to the individual post, where we would have our comments and things like that. So let's go ahead and work on that:
- Let's go to the index.php file and make the title clickable. We'll add a link to the title. To do this, let's go to the <h3> tag, as shown in the following code; add the <a> tag, and wrap that around the <title> tag:
      <?php get_header(); ?>
         <div class="main">
            <div class="container">
               <?php if(have_posts()) : ?>
                  <?php while(have_posts()): the_post; ?>
                     <h3>
                     <a href="<?php the_permalink(); ?>">
                        <?php the_title(); ?>
                     </a>
                     </h3>
                     <div class="meta">
                     Created By <?php the_author(); ?> on <?php the_time('F
                         j, Y g:i a'); ?>
                     </div>
                     <?php the_content(); ?>
                  <?php endwhile; ?>
               <?php else : ?>
                  <?php echo wpautop('Sorry, No posts were found.'); ?>
               <?php endif; ?>
            </div>
         </div>
         <?php get_footer(); ?>
- Let's save it and reload:
Now you'll see we have a link on the titles. For example, when we click on My Blog Post, it takes us to the post.
- Let's add a little bit of style to the links. I don't like the color of the links; I also want to make the description bold so that it stands out. It is good to wrap each post in its own div. Where we have while, we'll put it in <article>, as shown in the following code:
      <?php get_header(); ?>
         <div class="main">
            <div class="container">
               <?php if(have_posts()) : ?>
                  <?php while(have_posts()): the_post(); ?>
                     <article class="post">
                        <h3>
                        <a href="<?php the_permalink(); ?>">
                           <?php the_title(); ?>
                        </a>
                        </h3>
                        <div class="meta">
                        Created By <?php the_author(); ?> on
                        <?php the_time('F j, Y g:i a'); ?>
                        </div>
                        <?php the_content(); ?>
                     </article>
                  <?php endwhile; ?>
               <?php else : ?>
                  <?php echo wpautop('Sorry, No posts were found'); ?>
               <?php endif; ?>
            </div>
         </div>
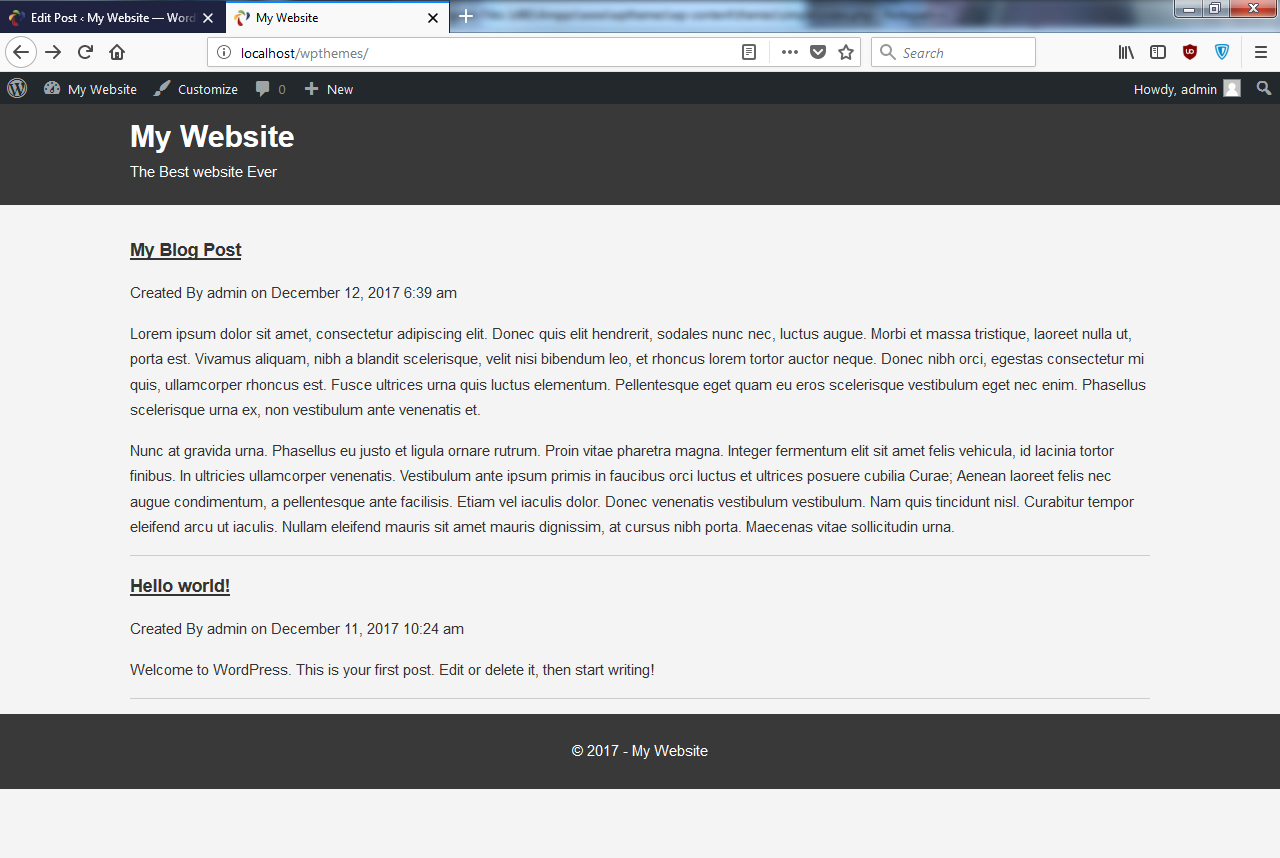
- Then, in our style sheet, let's add the color:
      a{
          color:#333;
      }
The color will be just the same as the text.
- Now we will just add a border at the bottom using this code:
      article.post{
          border-bottom:1px #ccc solid;
      }
- When you reload you can see the border at the bottom:
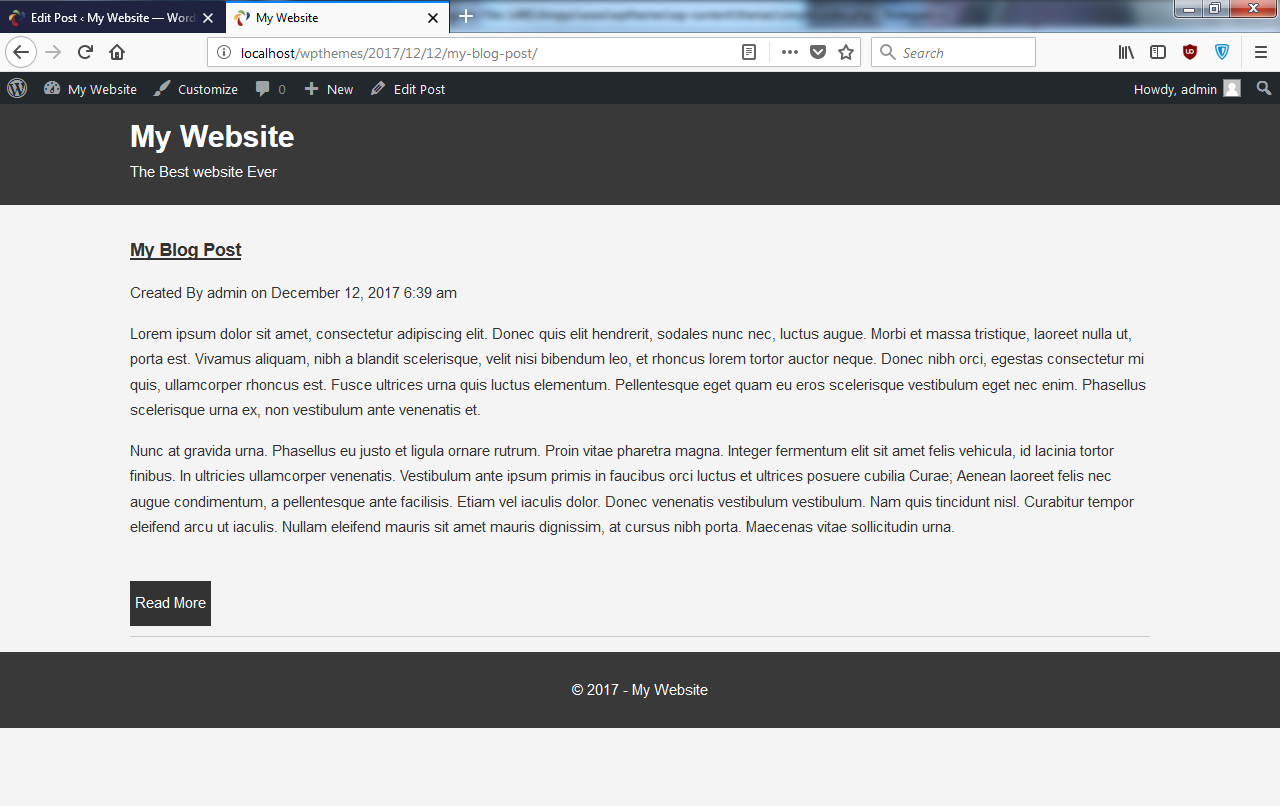
- Now we have the title. The title has a link, but we'll usually see some kind of Read More button as well, so let's go ahead and add that. All we have to do is just add the code, shown in the following code block. We'll say Read More and give it the class of a button:
      Created By <?php the_author(); ?> on <?php the_time(
        'F j, Y g:i a'); ?>
      </div>
      <?php the_content(); ?>
      </article>
      <br>
      <a class="button" href="<?php the_permalink(); ?>">
         Read More
      </a>
- Now, we should have a link for Read More. To do that, we will add the following code block:
      article.post{
          border-bottom:1px #ccc solid;
          overflow:hidden;
      }

      article.post a.button{
          display:inline-block;
          background:#333;
          color:#fff;
          padding:10px 5px;
          margin-bottom: 10px;
          text-decoration: none;
      }
- We can now go to the single page, as shown in the following screenshot:
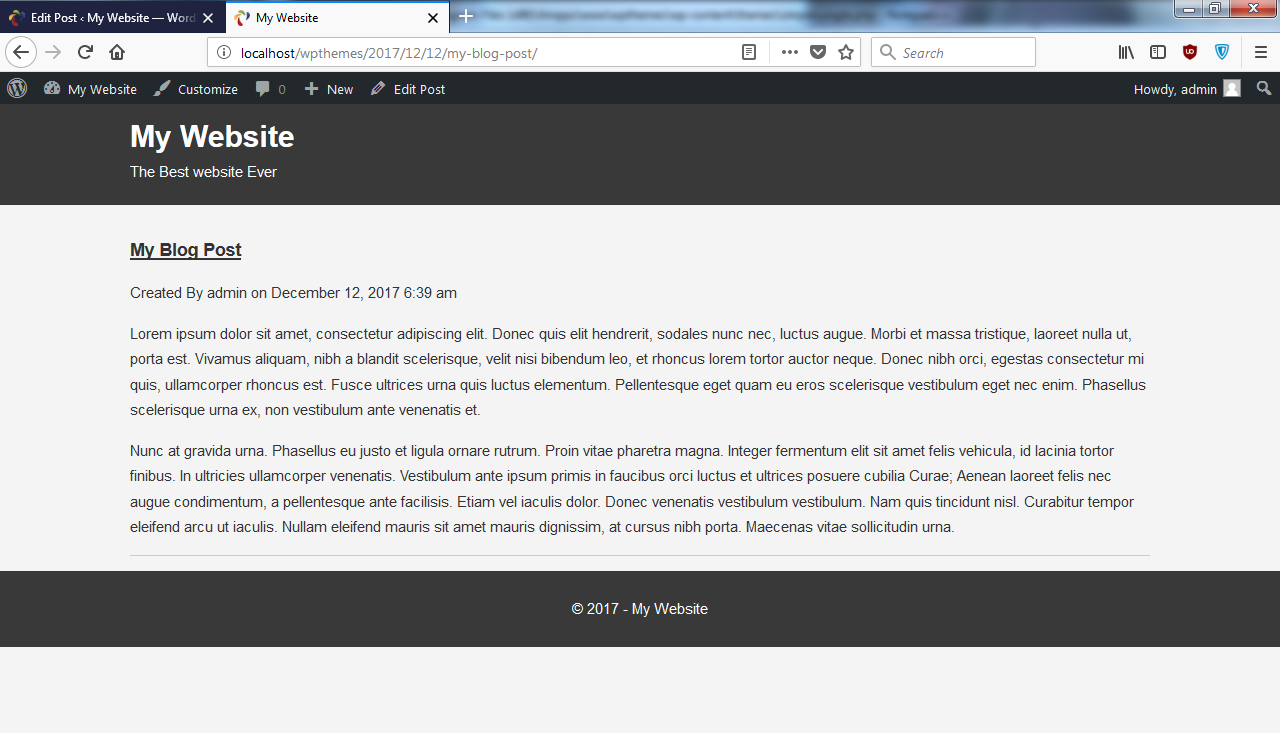
- Now, in the single page, we don't want My Blog Post to be a link; that's kind of silly, so we want to change that. Also, there's going to be other things we want. We'll want a comment form as well, so we need to have a special page for single posts.
- So we'll create a new file in our theme, and we'll just call it single.php, and let's just say TEST.
- If we go back to the single page and reload, we get TEST. If we go back to our main website, which is our main post roll, it is the same as before, but if we go to a single page we get TEST only, because it's automatically looking at the single.php file. So what we can do is copy the code from index.php, and we can use this code as a starting point. If we paste that in single.php and save, it'll show us the same result. Now we can change whatever we want in the single.php file, and it will only take effect on the single page.
- We can get rid of the link and Read More in the code; we're obviously not going to want that. So now we have a single page:
- Let's add a little bit of style to our single page. To do that, we will make meta, as shown here:
      .meta{
          background:#333;
          color:#fff;
          padding:5px;
      }
As you can see here, I have also added some padding at the bottom of the post.
I'm not trying to go nuts with the styling, because like I said, I just want you to kind of learn the code rather than learn how to create a great design; we'll be getting into that later.
Adding an image to the post
Now, if we go to the form shown here to add a post, and you look on the right-hand side, you don't see a Featured Image box, which you may have seen in other WordPress themes or on other WordPress websites. The reason for that is we didn't include that functionality:

- Let's go into our themes folder, and we'll create a file and save it as functions.php. Now, this is where we can put a custom function; this is where we can hook into certain parts of the code, register widgets, and do all that—basically, anything dynamic.
- Here, we'll create a setup function. To do this, we will add the following code block:
      <?php
      function simple_theme_setup(){
          // Featured Image Support
          add_theme_support('post-thumbnails');
      }
      add_action('after_setup_theme', 'simple_theme_setup');
Here, we have added a comment, Featured Image Support, followed by a function called add_theme_support. Now this function isn't going to run if we leave it just like this. So, we have used add_action and certain hooks that we can hook into and run this function. The one that we want is called after_setup_theme. Then, the second parameter will be the name of the function. We will save it and then run it.
- Let's go back and reload this page:

Now you'll see down at the bottom that we have the Featured Image box. If we click on that, we can go ahead and upload files, as shown here:

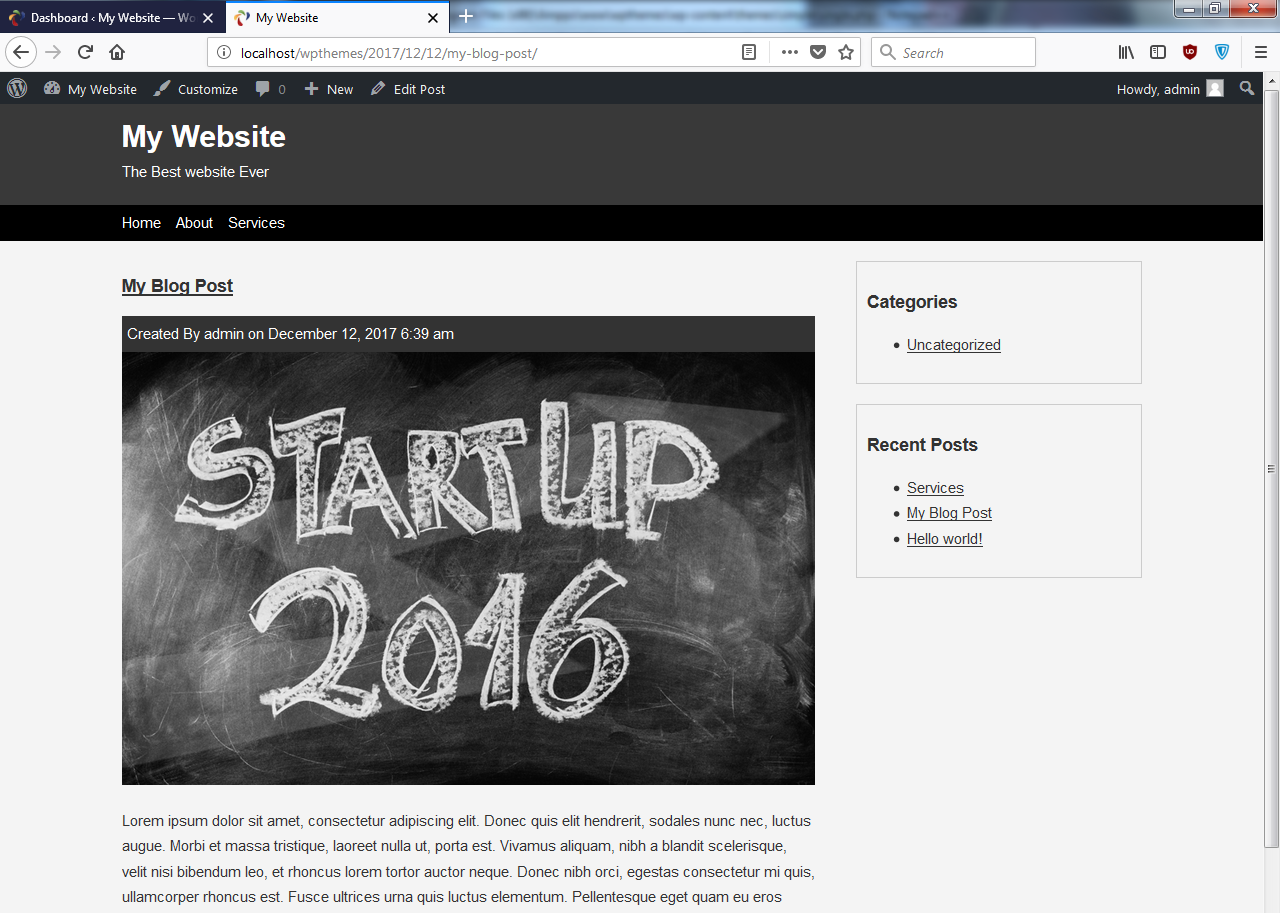
- Now, I'll choose an image and save it so that you can see it's inserted, and we can then click on Update:

Now, if we go to the frontend and reload, we'll not see it yet, because we didn't add it to our index.php file.
- Let's go to the index.php file. You don't have to show the image in the index. You can just show it in single page if you want, but usually you want it to be shown on both pages. So, in index.php, let's just add the image right below meta, as shown here:
      <div class="meta">
      Created By <?php the_author(); ?> on <?php the_time(
        'F j, Y g:i a'); ?>
      </div>
      <?php if(has_post_thumbnail()) : ?>
         <div class="post-thumbnail">
         <?php the_post_thumbnail(); ?>
         </div>
      <?php endif; ?>
At first, it's not going to look too great, but we'll fix that later on. In the preceding code, we have first checked to see if there's an image using an if statement. If there's a thumbnail, then we'll create a <div> tag. We'll give it a class of post-thumbnail and then add php the_post_thumbnail, as shown in the preceding code block.
- Let's save it, go back, and reload. You will get the following result:

Now, it looks a little out of the way because it's not reaching 100% across the page, but we're actually going to put a sidebar in a little bit, when we get to the widgets, so that it looks a lot better. However, I am going to add a width of 100% in the CSS, where we have this post, this class="post-thumbnail".
- Let's go into our style sheet and add the following code block:
      .post-thumbnail img{
          width:100%;
          height:auto;
      }
For the image, we want the width to be 100% and we can keep height:auto.
- When we reload, we can see that it reaches across the whole page:

I know that's really big, but like I said, we'll get a sidebar in there, and it'll shrink that a little bit.
- Now we also want the image on the single post page. So we'll copy the code from index.php and paste it in the single.php file, right under meta:
      <div class="meta">
      Created By <?php the_author(); ?> on <?php the_time(
        'F j, Y g:i a'); ?>
      </div>
      <?php if(has_post_thumbnail()) : ?>
         <div class="post-thumbnail">
            <?php the_post_thumbnail(); ?>
         </div>
      <?php endif; ?>
Now we'll get the same image on the single page as well.
As you can see, in the posts on the index page, it shows the whole content, but we want just a piece of the content to show.
- To do that, let's go to the index.php file, and instead of saying the_content, we can actually say the_excerpt, as shown in the following code:
<?php the_excerpt(); ?>
What this will do is, it will cut the content to around 55 words. You can actually customize that and make it as long or as short as you want, and that's actually really easy.
- Go to the functions.php file and create a custom function, as shown here:
      <?php
      function simple_theme_setup()>{
          // Featured Image Support
          add_theme_support('post-thumbnails');
      }

      add_action('after_setup_theme', 'simple_theme_setup');

      // Excerpt Length
      function set_excerpt_length(){
          return 25;
      }

      add_filter('excerpt_length', 'set_excerpt_length');
We'll just say set_excerpt_length, and all we need to do here is just return a number, so let's say we wanted it to be 25. Then, what we can do is, instead of add_action, we'll say add_filter, because add_action is usually used to add something or create something; add_filter is usually used to change something. The filter we want to hook into here is called excerpt_length. Then, we just want to put in the name of our function, which is set_excerpt_length.
- If we go back and reload, we can see that it's only 25 words long. If you want it a little longer, let's say return 60. I just wanted to show you that it's possible.
So we have our index page set up, and we have our single post page set up, apart from the comments, which we'll do a little later. However, in the next section, we will see how we can create a menu and start dealing with pages as well as posts.
Pages and menus
In this section, we'll start looking at pages and menus. In addition to creating posts in WordPress, we can also create pages:
- If we go to the backend and click on Pages, you'll see we have a Sample Page:
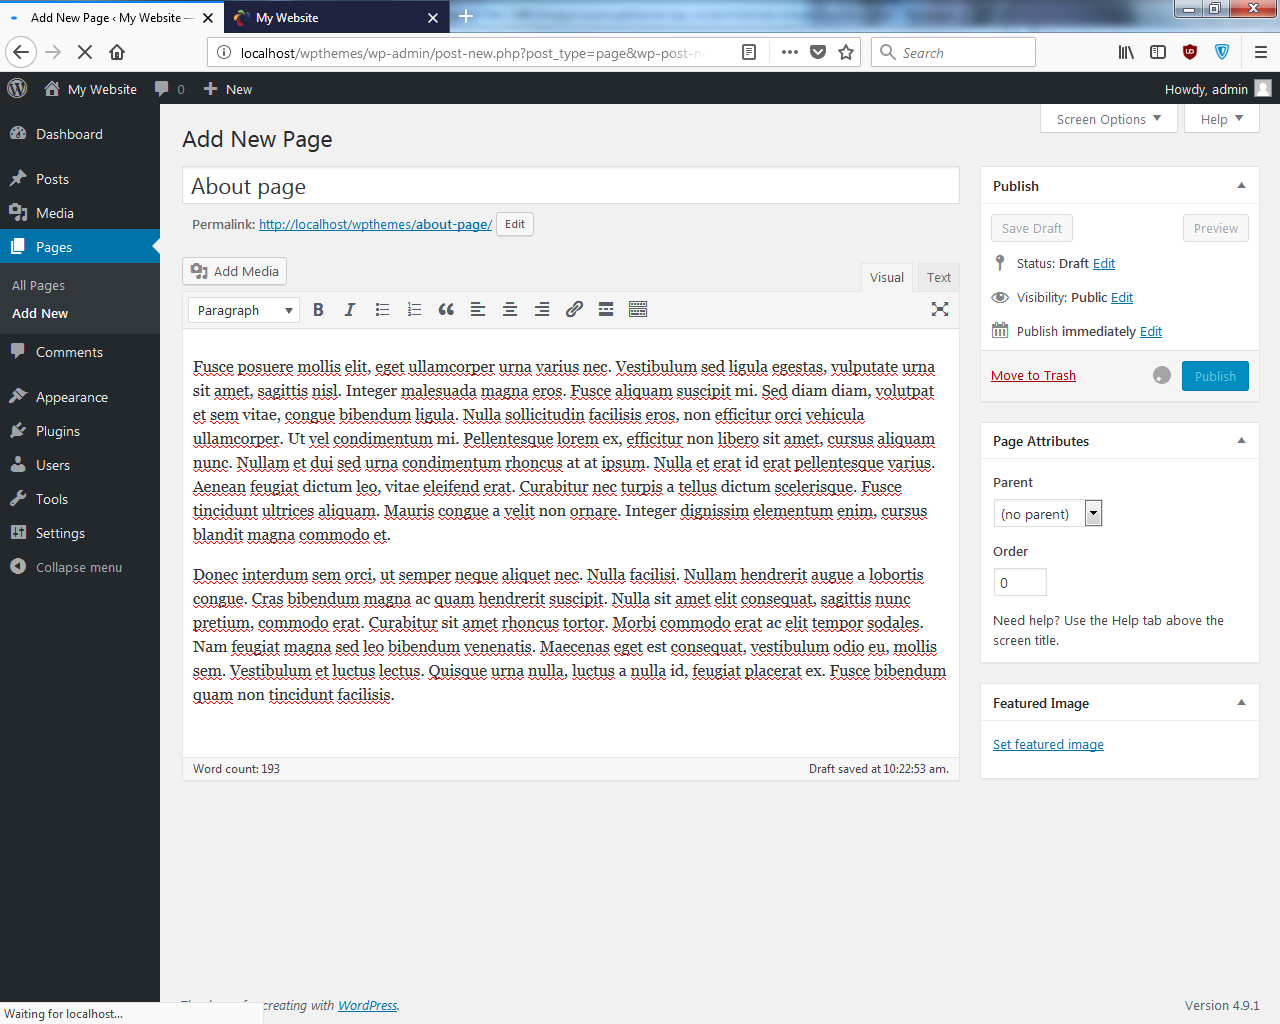
- Let's create a new one, and we'll just call it About page. Then we'll just grab some content, say two paragraphs. Let's just click on Publish:
- So we have an About page, and we have a Sample Page. Let's create one more and call it Services. Now we need some kind of navigation. Let's go ahead and do that.
- In order to use the menu system, we need to edit the functions.php file, because right now, if we go to Appearance, there's no Menus option. So let's open up functions.php and enter the following code:
      <?php
      function simple_theme_setup(){
          //Featured Image Support
          add_theme_support('post-thumbnails');

          //Menus
          register_nav_menus(array(
              'primary' => __('Primary Menu')
          ));
      }

      add_action('after_setup_theme', 'simple_theme_setup');
In this simple_theme_setup function that we created, we will add register_nav_menus. Then we will pass in an array, and to do that, we will set the primary and then the readable version. We'll use the double underscore function; we don't need quotes here, though. It is a localization function, and it has to do with using multiple languages in your theme. So we'll enter Primary Menu and then save it.
- Now, if we go to the backend, reload, and go to Appearance, you'll see we have this Menus option:
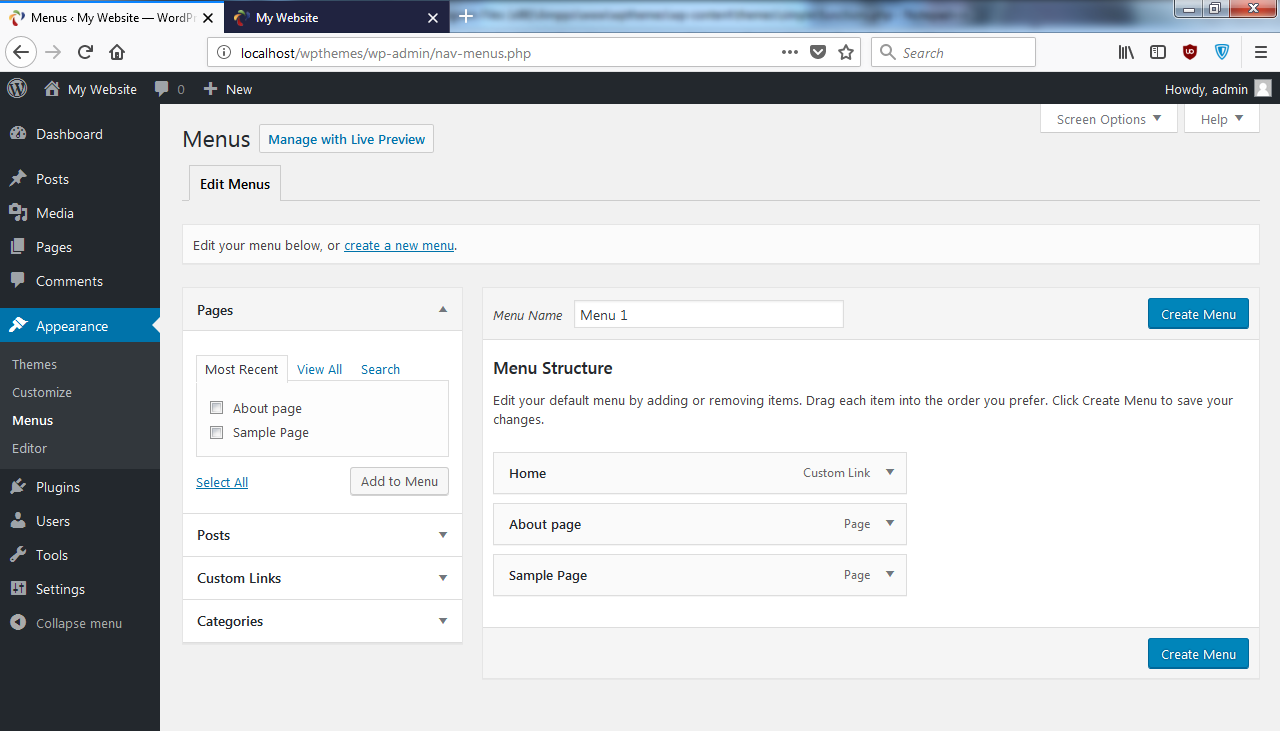
- If we click on Create Menu, now you can see that by default it has all the pages on the site and you can remove some if you want:
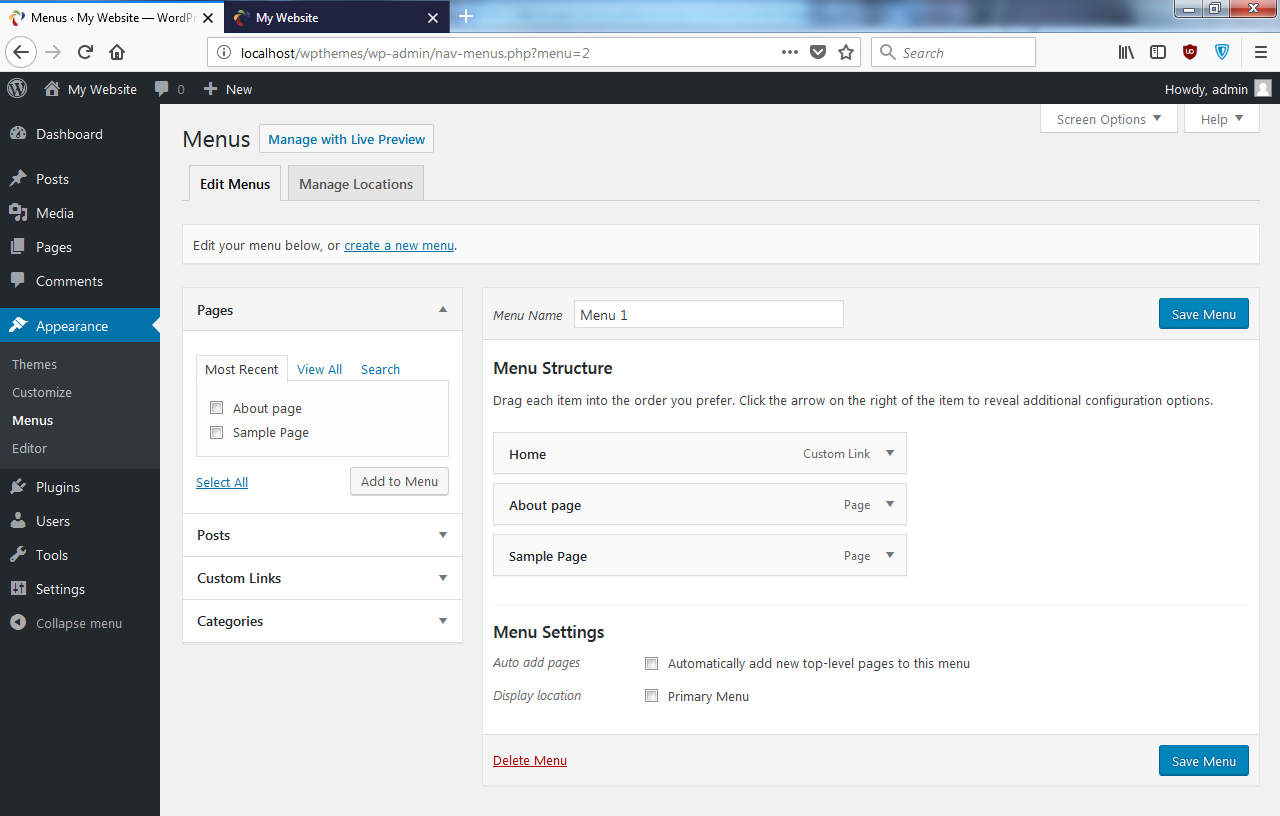
If you want to add pages, you can easily do it; click on Add to Menu. We'll just keep what we have here, and then we need to make sure to choose Primary Menu, where it says Theme locations. We'll save this.
- Now, if we go to the frontend and reload, we'll not see anything yet because we haven't included it in our header file; this is where we want to add the menu, because we want it on every page.
- Let's go right underneath the <header> tag and create a <nav> tag, as shown here:
      <!DOCTYPE html>
      <html <?php language_attributes(); ?>>
      <head>
         <meta charset="<?php bloginfo('charset'); ?>">
         <title><?php bloginfo('name'); ?></title>
         <link rel="stylesheet"
          href="<?php bloginfo('stylesheet_url'); ?>">
         <?php wp_head(); ?>
      </head>
      <body>
         <header>
            <div class="container">
               <h1><?php bloginfo('name'); ?></h1>
               <span><?php bloginfo('description'); ?></span>
            </div>
         </header>
         <nav class="main-nav">
            <div class="container">
               <?php
                  $args = array(
                    'theme_location' => 'primary'
                  );
               ?>
         <?php wp_nav_menu($args); ?>
         </div>
         </nav>
We'll add a class of main-nav, then we'll wrap it in a container. Then, all we have to do is open up some php tags and create a variable called args. This is just going to hold an array of arguments; we only need one for now, and that'll be theme_location. We're basically specifying what menu we want to put here, and that'll be primary, which is the only one we have. Then, what we can do is, we can call a function called wp_nav_menu and just pass in that args variable. Let's save this.
- Go to the frontend, reload, and there's our menu:
The menu has all the pages that we created.
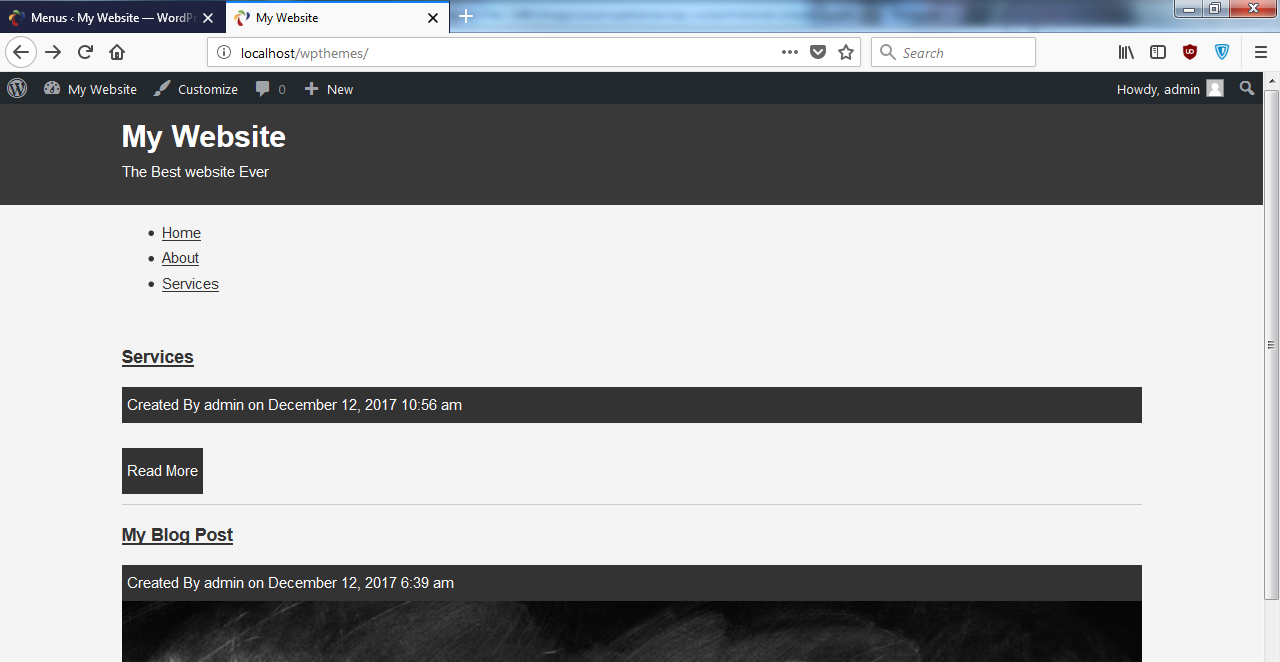
- If we want to remove one, go to Menus, select Sample Page we want to remove, save, reload, and now that's gone:
- Just to style this a little bit, let's go to style.css and add this code:
     .main-nav{
         background:#000;
         color:#fff;
         padding:5px;
     }

     .main-nav ul{
         margin:0;
         padding:0;
     }

     .main-nav li{
         list-style:none;
         float:left;
         padding-right:15px;
     }

     .main-nav a{
         color:#fff;
         text-decoration:none;
     }
We'll add main-nav and give it a background; we'll add a black background and white color for text. To style the list items, we will add main-nav li; first we want to remove the bullet, so we'll say list-style: none, and then we want to float these menu to the left. We will also add padding-right:15px, and then we will add the links; make sure that they are white, and remove the text decoration as well. Next we will add ul, and we will remove the default margin and padding. Then we'll add some padding to main-nav, say 5px.
- When we reload, we have a little navigation menu:
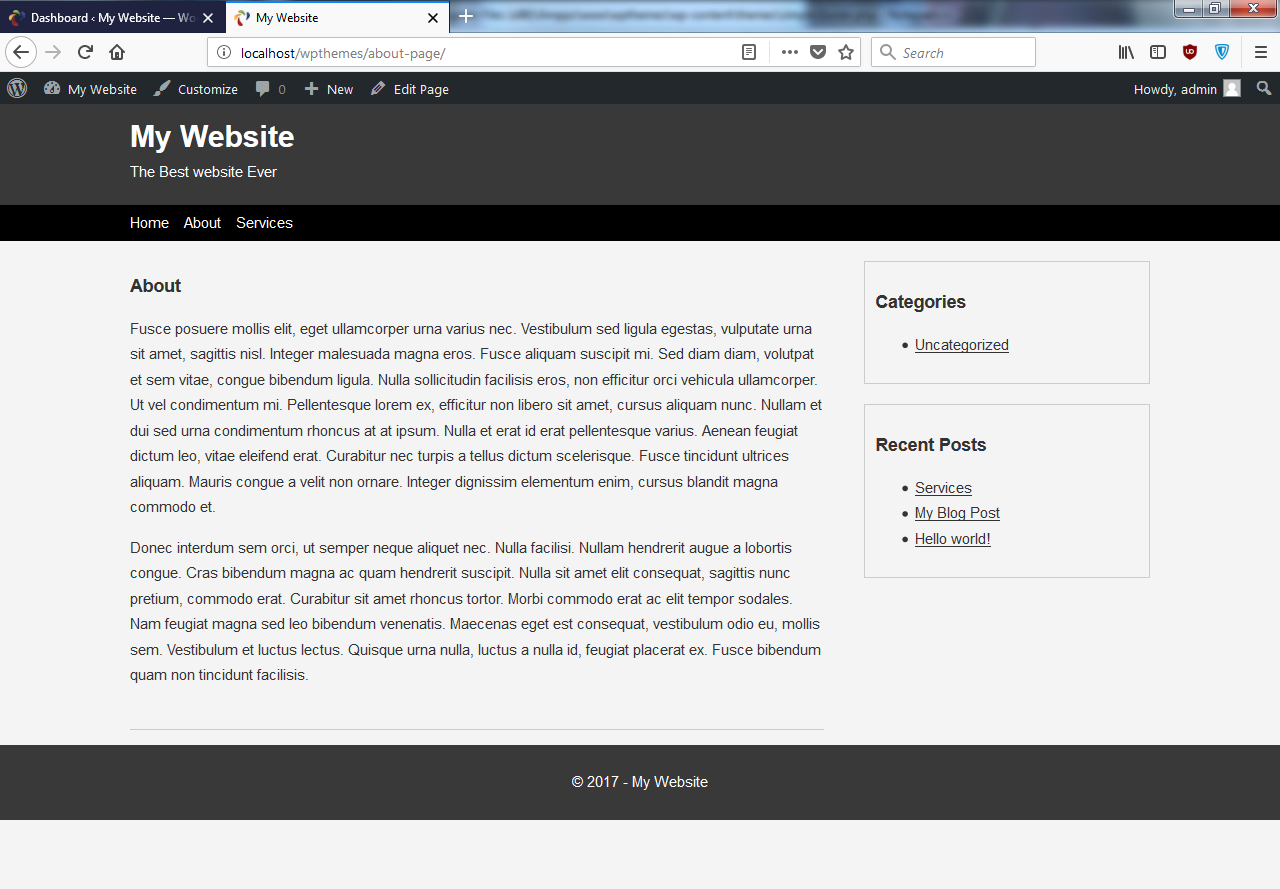
- If we click on About, it'll take us to the About page, and it's the same with Services. Now you will notice that when we go to About, it has been formatted the exact same way as the index.php page, as if it was a post—but it's not, it's a page:
We'll not need the metadata or the Read More link. So what we need to do is add another page to our theme.
- Let's create a new file and save it as page.php.
- Now if I go back and reload, it's blank because it's looking at the empty file. So what we can do is copy the code that's in index.php and use it in page.php.
- Here are few changes that we will do in the code:
      <?php get_header(); ?>
         <div class="main">
            <div class="container">
               <?php if(have_posts()) : ?>
                  <?php while(have_posts()): the_post(); ?>
                     <article class="post">
                        <h3>
                           <?php the_title(); ?>
                        </h3>
                        <?php if(has_post_thumbnail()) : ?>
                           <div class="post-thumbnail">
                              <?php the_post_thumbnail(); ?>
                           </div>
                        <?php endif; ?>
                        <?php the_content(); ?>
                        <br>
                     </article>
                  <?php endwhile; ?>
               <?php else : ?>
                  <?php echo wpautop('Sorry, No posts were found.'); ?>
               <?php endif; ?>
            </div>
         </div>

      <?php get_footer(); ?>
The first thing we'll do is remove the link from the title, because we don't want to go anywhere else. Also, we can get rid of Read More completely. It also has an excerpt, and we don't want that; we want the whole thing, so we'll change that to the_content(). Then, in meta, we can get rid of the whole div and save it; let's take a look:
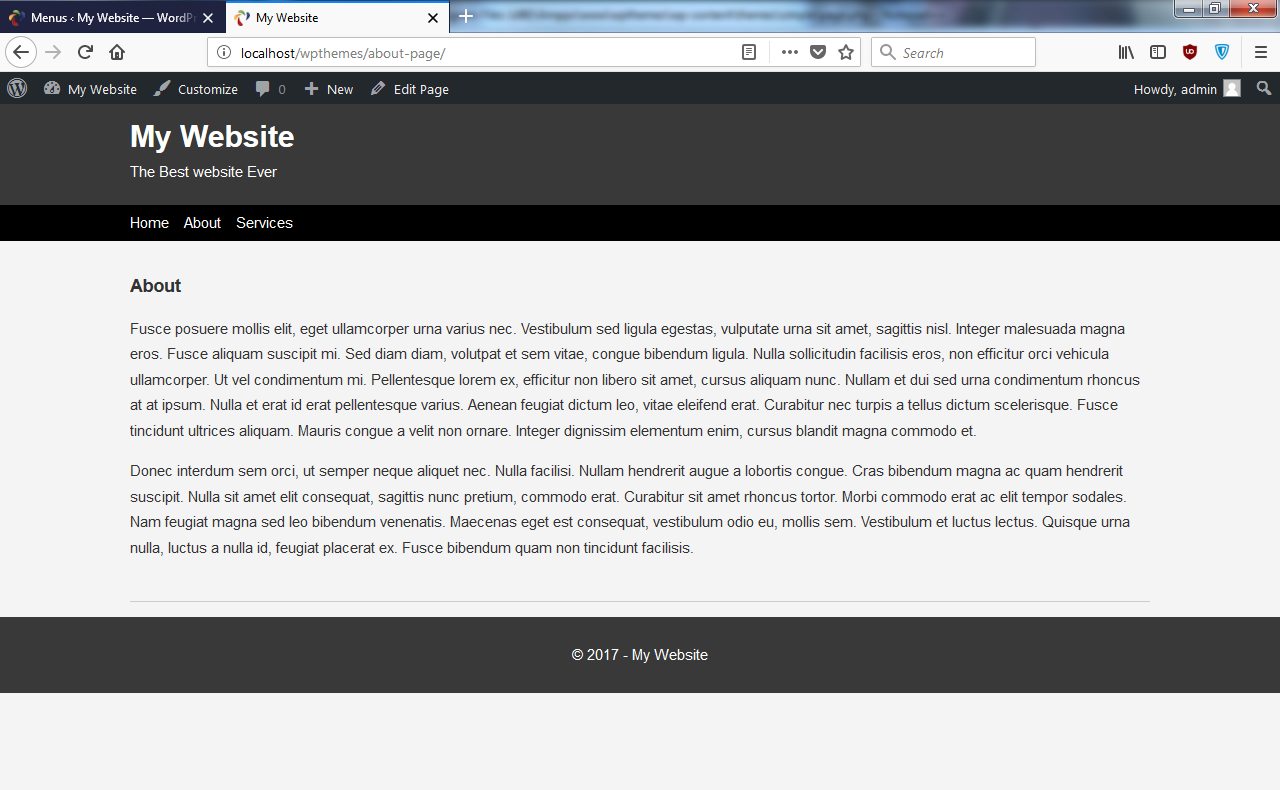
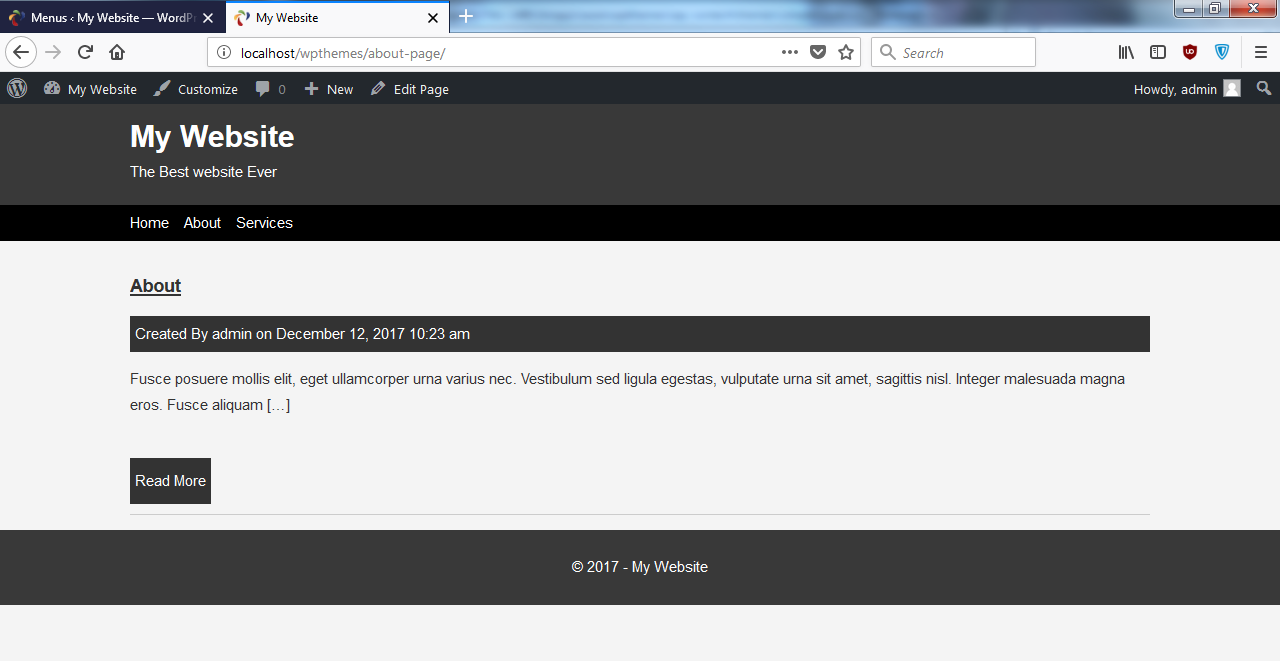
Now it looks more like a regular web page. We'll do the same thing with Services. This is how you can create pages and how you can target the markup for that page. You can also create custom pages and custom templates; you can kind of have different layouts for different pages, but we'll get into that in the next project. There's a lot more to building a theme. There's a lot more you can do that we're not going to get into in this project, but I just want to cover the basics in this project. We now have pages and a menu. In the next section, we'll get into widget locations, because now we want to be able to have a sidebar with widgets.
Widget locations and comments
Now I'll show you how to create a widget location in the theme. We'll have one widget location, and that'll be in the sidebar. Let's get started!
Working with widgets
- Let's take a look at index.php, where we have this <div> tag with the class of main. What we want to do is go right between main and the ending </div> tag. We'll create a <div> tag with the class of sidebar, as shown in the following code:
      <div class="sidebar">
      TEST
      </div>
We have also added TEST in the next line, which shows up as follows:
Now we want to float the main <div> and set a width, and then have the sidebar float to the right.
- Let's go to the style sheet, where we have main with margin:15px, both at the top and bottom. Let's go ahead and float this to the left, and let's set a width of 68%, as shown in the following code block:
      .main{
          margin:15px 0;
          float:left;
          width:68%;
      }

      footer{
          background:#393939;
          color:#fff;
          padding:10px 10px;
          text-align:center;
      }
Let's see what that gives us:

The reason that this looks really weird is because we didn't clear the float.
- So what we'll do is go under the sidebar div and enter <div class="clr">:
      <div class="sidebar">
      TEST
      </div>

      <div class="clr"></div>
- Now, we'll go to our CSS, add a class called clr, and we'll just say clear:both;:
      .clr{
          clear:both;
      }
- Then let's add the sidebar class; that's going to float to the right, and we'll set a width of 28%, as shown in the following code:
      .sidebar{
          float:right;
          width:28%;
      }
- Now, we'll want to put a container around both of the files—index.php and style.css, because right now, main has a container inside of it, but what we want is to remove that and put it above main, as shown in the following code:
      <?php get_header(); ?>

      <div class="container">
         <div class="main">
We will end it here:
         <div class="sidebar">
         TEST
         </div>

         <div class="clr"></div>
      </div>
      <?php get_footer(); ?>
Now, let's run this:
- So now we have the main area and a sidebar.
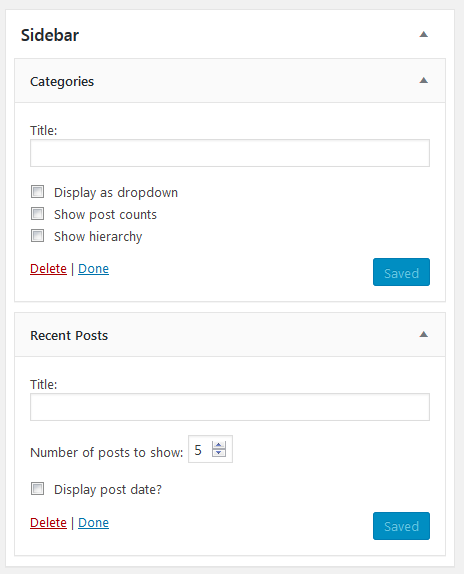
- Next, we will see how to add widgets, and to do that, we'll go to functions.php. Here, we can actually use widgets and define what location we want the widgets to be allowed in. We'll go down to the very bottom of the file and create a function, as shown in the following code block. We'll call it init_widgets, and that'll take in id, and we'll call it register_sidebar. Now we will create a sidebar widget, but just know that no matter where you put it, register_sidebar is the function that we'll use, even if it's not a sidebar—if it's down below, or in the header, or wherever it may be, this is what's used to actually register widget locations. Now, that's going to take in an array, and it's going to take a name; let's set that to Sidebar, and then the ID, which is usually the same, just lowercase and no spaces. You can use hyphens if there's more than one word. Then, we can also use before_widget. We can also use <div class="side-widget">, and then we can add after_widget; that's going to be the ending </div> tag. Then, we can also add before_title and after_title for the widget, as shown in the following code block. We want an <h3> tag before the title. Now, this code isn't going to run yet. We need to perform add_action, and the hook we want is called widgets_init; we want to put in our function name, which is init_widgets:
      //Excerpt Length
      function set_excerpt_length(){
          return 60;
      }

      add_filter('excerpt_length', 'set_excerpt_length');

      //Widget Locations
      function init_widgets($id){
          register_sidebar(array(
              'name' => 'Sidebar',
              'id' => 'sidebar',
              'before_widget' => '<div class="side-widget">',
              'after_widget' => '</div>',
              'before_title' => '<h3>',
              'after_title' => '</h3>'
          ));
      }

      add_action('widgets_init', 'init_widgets');
- Now we'll save the code. If we go back and reload, we get this:
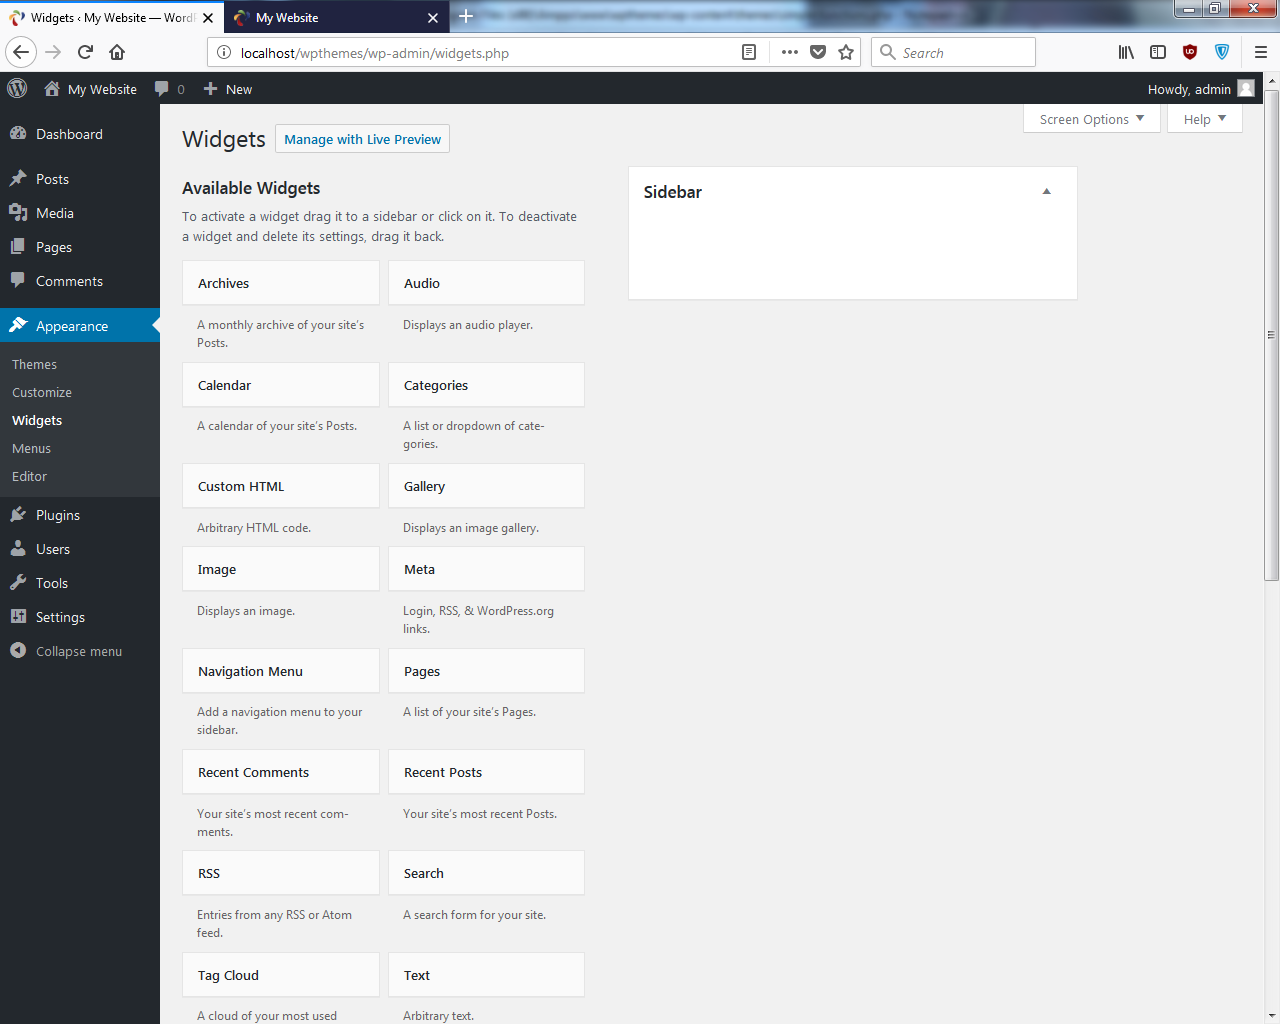
We have a Widgets item at the side and a Sidebar location.
- Let's drag the Categories widget and bring that over to the Sidebar. We will also bring Recent Posts:
Save and go to the frontend; if we reload now, we'll not see anything because we need to add it to our template.
- Let's go down to where we have the sidebar in the index.php file, and we'll first check for the widget using the following code:
      <div class="sidebar">
         <?php if(is_active_sidebar('sidebar')) : ?>
            <?php dynamic_sidebar('sidebar'); ?>
         <?php endif; ?>
      </div>
We'll check whether it'll be a function called is_active_sidebar(), and like I said before, even if it's not a sidebar, this is still going to work. We will also add our location, which happens to be sidebar. We will also add a dynamic_sidebar() function, and then the ID of the widget again is sidebar.
- Save it, reload, and take a look at it:
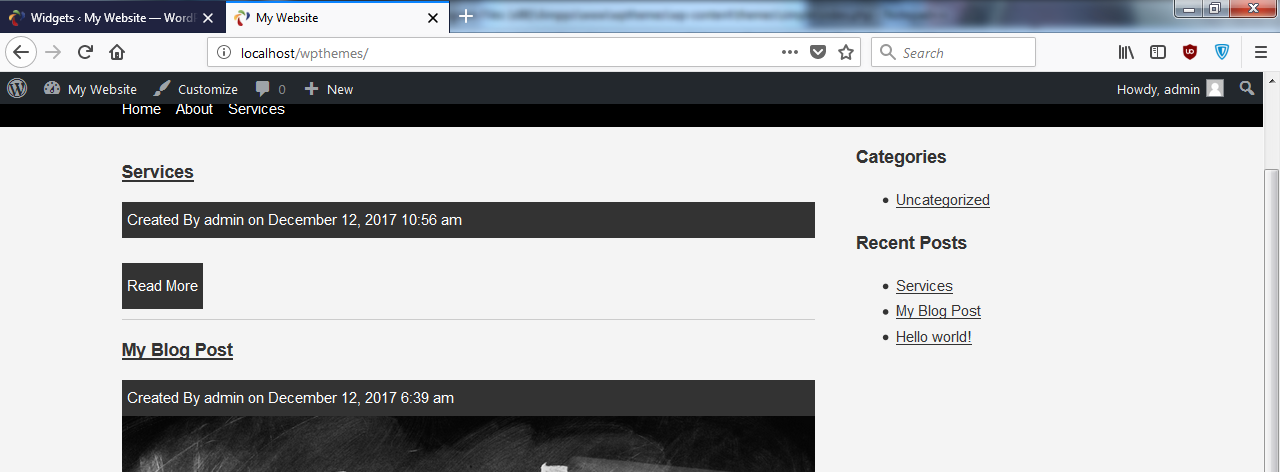
We get our two widgets: Categories and Recent Posts.
- Now, remember that we put the side-widget class in the function.php file so that we can style widgets using the style.css file, as shown in the following code block:
      .side-widget{
          border:1px #ccc solid;
          padding:10px 10px;
          margin-bottom:20px;
          margin-top:20px;
      }
We have added side-widget with a border and padding of 10px 10px. We have added margin-bottom. Now if we reload, you can see that they have a border. Therefore, we will add margin-top too. We'll say margin-top:20px.
- To make this look a little better, we will use the following code:
      .Side-widget li{
          list-style: none;
          line-height:2.2em;
          border-bottom:dotted 1px #ccc;
      }

      .Side-widget a{
          text-decoration: none;
      }
Here, we have taken away text-decoration.
- When you save and reload, you get this:
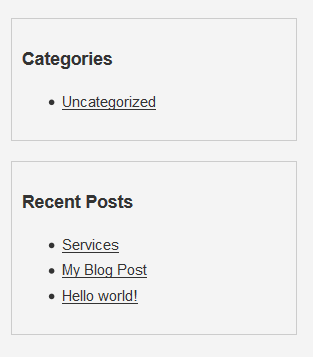
So this looks good.
- We can see that the pages will be messed up now:
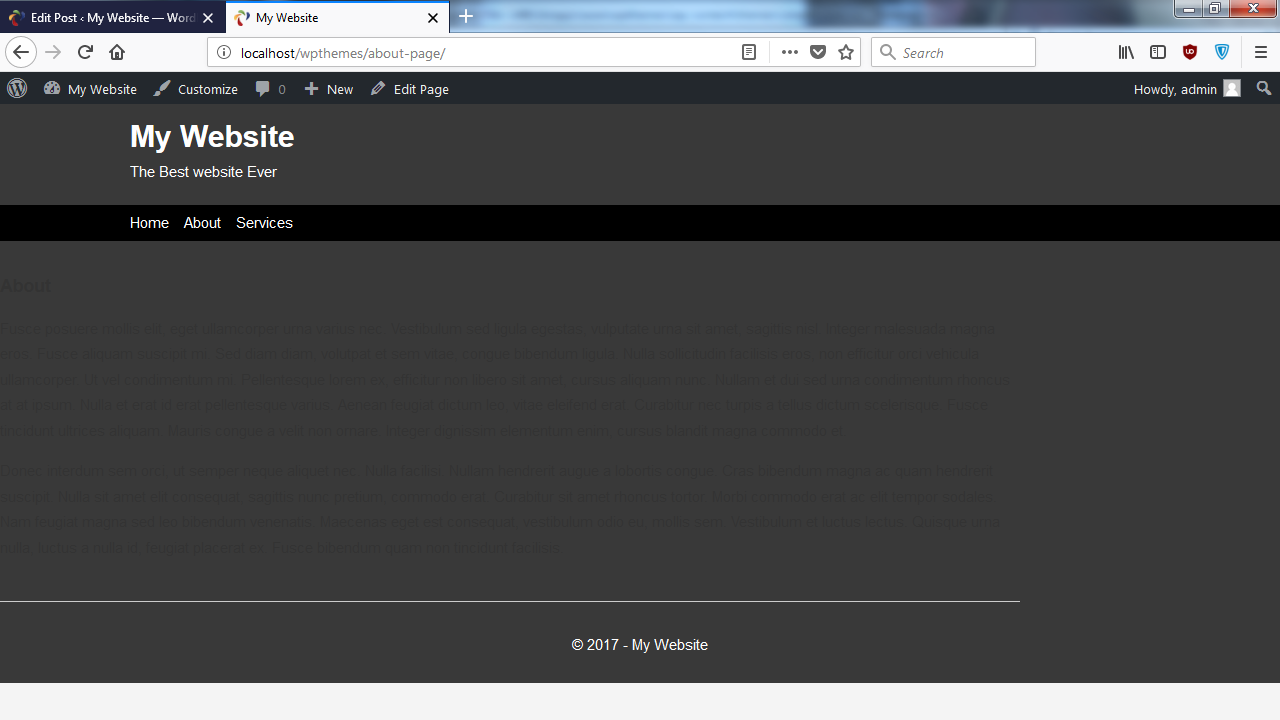
This is because in page.php, we still have the container class inside of main.
- What we want to do is just copy what we did in index.php:
         <div class="sidebar">
            <?php if(is_active_sidebar('sidebar')) : ?>
               <?php dynamic_sidebar('sidebar'); ?>
            <?php endif; ?>
         </div>

         <div class="clr"></div>
         </div>
      <?php get_footer(); ?>
We need to add the sidebar after main ends, and then we actually want to take the container out and put that above main. We'll need to make sure to take the ending </div> tag and put that on the outside down.
- Let's go ahead and check that out:
So this looks good.
- We will repeat the same thing with Single.php, and we will get the following result:
So all the different formats and all the different pages are all set; they have the sidebar implemented. And, of course, if you didn't want the sidebar on one of those, you don't have to have it. If we want to kind of minimize the code a little bit, we can put the following code inside the footer.php:
      <div class="sidebar">
      <?php if(is_active_sidebar('sidebar')) : ?>
         <?php dynamic_sidebar('sidebar'); ?>
      <?php endif; ?>
      </div>

      <div class="clr"></div>
      </div>
- We can cut and save, and then add that code in footer.php at the top, as shown here:
      <div class="sidebar">
      <?php if(is_active_sidebar('sidebar')) : ?>
         <?php dynamic_sidebar('sidebar'); ?>
      <?php endif; ?>
      </div>

      <div class="clr"></div>
      </div>
<footer>
<div class="container">
<p>© <?php the_date('Y'); ?> - <?php bloginfo('name'); ?>
</p>
</div>
</footer>
<?php wp_footer(); ?>
</body>
</html>
- Save, and then get rid of the following code from page.php and index.php, because it's now in footer.php:
<div class="sidebar">
<?php if(is_active_sidebar('sidebar')) : ?>
<?php dynamic_sidebar('sidebar'); ?>
<?php endif; ?>
</div>
<div class="clr"></div>
</div>
Our frontend should look the exact same way. So that's good, that's widgets.
Adding the comment functionality
- Now, the one thing that is left is comments—we want the comment functionality. This is actually really easy; all we have to do is go to our single.php file and see where we want the comment, which is right under the end </div> tag, as shown in the following code block:
         <?php endif; ?>

         <?php comments_template(); ?>
      </div>
- We can save the code and reload. Here is the output:
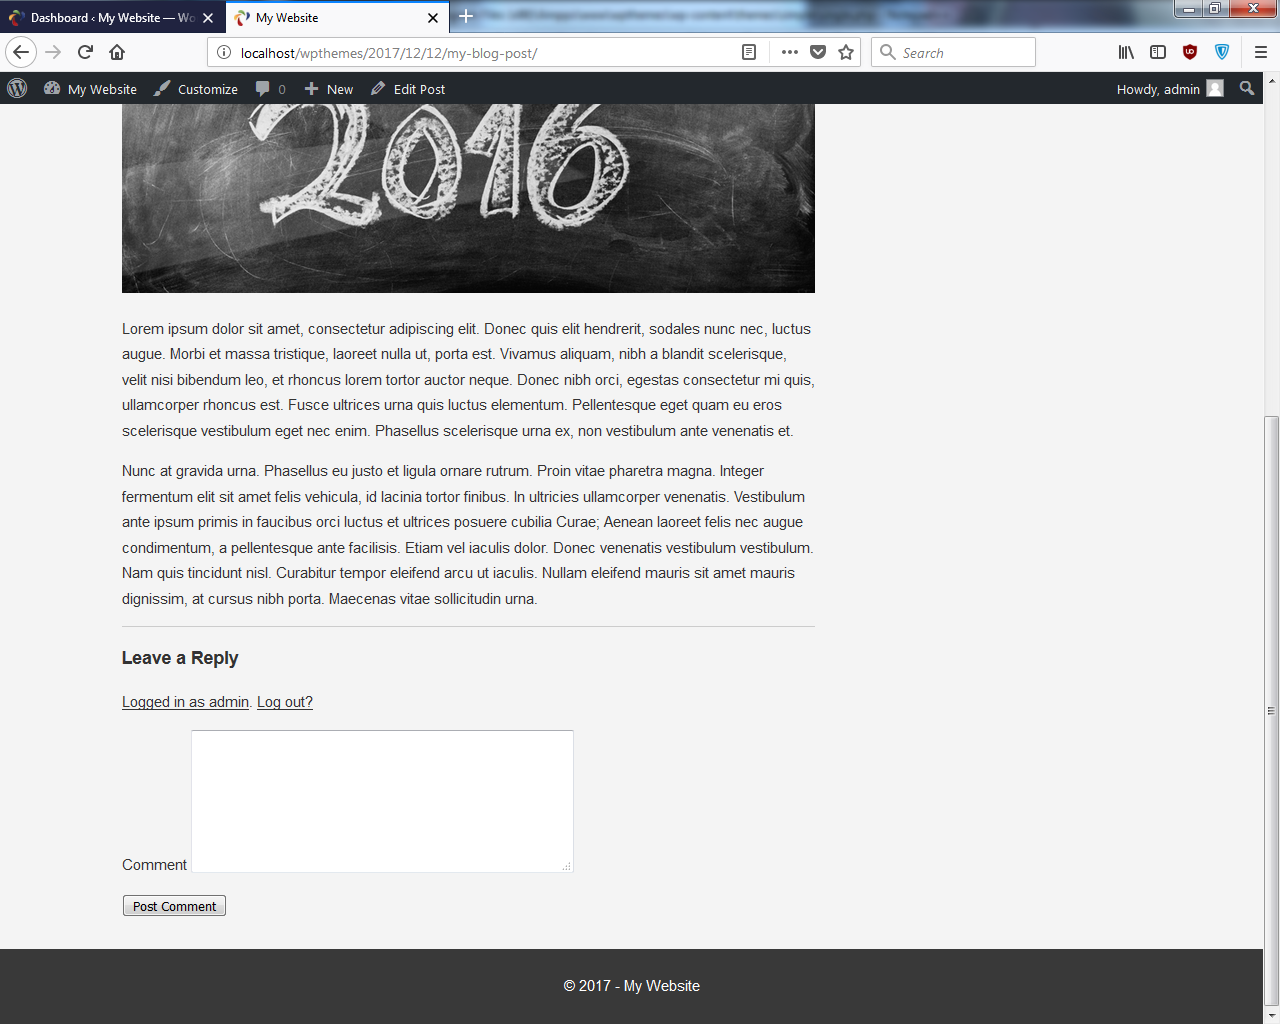
- We can now see the comment functionality. Let's add Great Post! and then click on Post Comment.
Here is what we get:
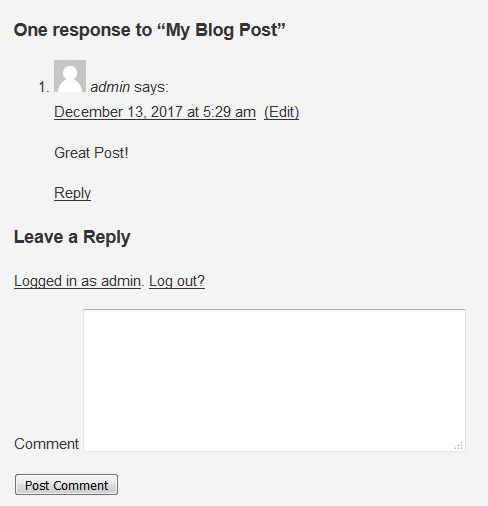
- We can see that it has an avatar, the username, date, and also a reply link. Now you'll realize that this doesn't look like the best comments section you've ever seen, but that's just because it's the default design.
- If we take a look at the markup, we can see that they separate everything so you can style:
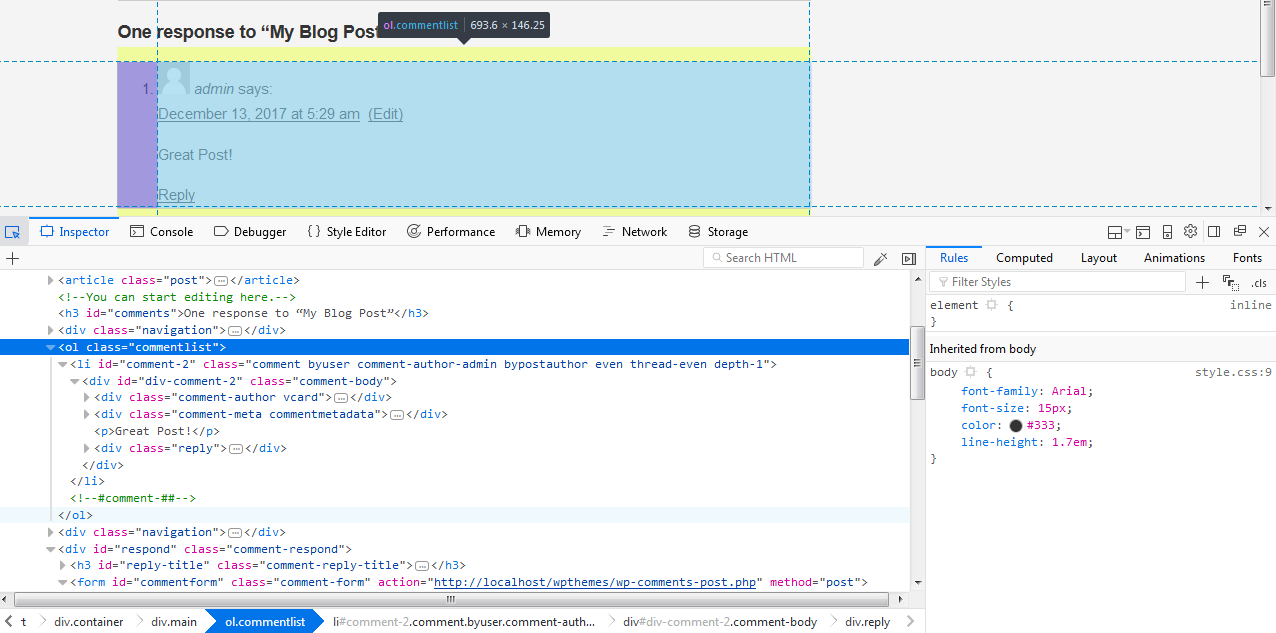
Here, we have ol commentlist; each <li> has a class of comments, and we have classes around the author, around vcard, and around the reply. You can style this however you like.
Now you can actually replace this whole template by creating a comments.php file; we'll get into that later on. I don't want to do it in this chapter because this is just a very basic introductory theme.
Since the comments are working, we'll not go ahead and create a custom comment template or anything like that. I think that's pretty much it. Like I said, there's more we could do; we could create a separate template for archived posts.
Actually, what I want to do real quick is to make the author's name a link, so that you can click on it and see all of the author's posts.
- Let's go to index.php and go to where we have the author, and enter following highlighted code:
      Created By
      <a href="<?php get_author_posts_url(
          get_the_author_meta('ID')); ?>">
         <?php the_author(); ?>
      </a>
      on <?php the_time('F j, Y g:i a'); ?>
      </div>
      <?php if(has_post_thumbnail()) : ?>
As shown here, we'll just add a link around that.
- Let's reload, and now admin is a link; I need to change its style because we can't see it. Open style.css. Go to meta and add the following code:
      .meta{
          background:#333;
          color:#fff;
          padding:5px;
      }

      .meta a{
          color:#fff;
      }
- We can see the author in white now:
- If I click on admin now, it shows us all the posts by admin, but if there were multiple users—multiple authors—this would allow us to see all the posts from that particular author.
- We'll wrap this up here. You may realize that this isn't the greatest design you've ever seen, but the point of this project was to get you familiar with not just the code but also the structure of the theme and what files are included. As we saw, there are certain names that we need for the files such as page and single.php.
Summary
Hopefully, you enjoyed this chapter.
In this chapter, we started off by installing and setting up WordPress. We moved on to create and enable themes. We also created an HTML structure and body, and applied some base styling to it. We dealt with single posts, thumbnails, pages, and menus. Later, we saw how we could add images and links to the post. In the end, we saw how to create a widget location in the theme and how to add the comments functionality to the widgets.
We'll be using what you've learned in this project and applying it in the future projects. You'll also learn more as we go.
In the next chapter, we will see how to build a WordPress theme.

