


You always know a thing is good if it's got a TLA (that's a Three Letter Abbreviation). By the end of this chapter you will be fluent in a double TLA—the OOo IDE. The OpenOffice.org Integrated Development Environment is our interface into the world of writing OpenOffice.org Calc macros.
If you already know your way around OOo, then jump on to Chapter 2 where we'll start looking at writing macros. If, however, you're still new to all of this, then spend some time learning about the IDE. This is where we'll do all of our work—and so in this chapter we'll spend our time getting acclimatized to it. We will see how to manage macros, how to navigate around the IDE, and how to start designing dialogs.
And by the way, by 'OOo's Basic IDE' I don't mean that it's low-level. By 'Basic' I mean that we'll be using OOo Basic as the programming language.
As you're reading this chapter, you may want to follow the examples on your own PC. When you do, you'll probably see differences in the way that the screens look. Don't worry—that's because the look and feel varies according to the OS (Operating System) that you're using. For instance, here are the OOo start‑up screens for Debian 3.1 and SUSE 10.1, respectively:

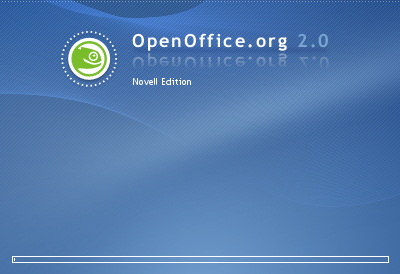
And a little advice—before you do anything else, make sure that you save your spreadsheet with a sensible name, something that is meaningful to the project that you're currently working on. In this case, we'll be look at a spreadsheet for Penguin P.I.—Private Investigator in the dark world between Windows and Linux.
As you're reading this chapter, you may want to follow the examples on your own PC. When you do, you'll probably see differences in the way that the screens look. Don't worry—that's because the look and feel varies according to the OS (Operating System) that you're using. For instance, here are the OOo start‑up screens for Debian 3.1 and SUSE 10.1, respectively:
And a little advice—before you do anything else, make sure that you save your spreadsheet with a sensible name, something that is meaningful to the project that you're currently working on. In this case, we'll be look at a spreadsheet for Penguin P.I.—Private Investigator in the dark world between Windows and Linux.
With our appropriately named Calc spreadsheet open, getting into the IDE (regardless of the OS that you're using) is simple enough:
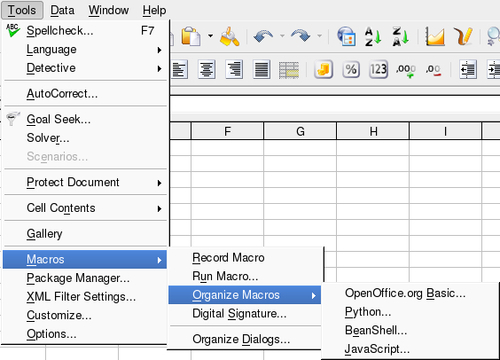
Start with creating a new Calc document and save it with the name penguin_private_investigators.ods. Next, use Tools | Macros | Organize Macros | OpenOffice.org Basic... to open the Basic IDE.
You'll notice that other than OpenOffice.org Basic, you actually have a choice of three languages in which you can work:
Python (a common object-oriented programming language)
BeanShell (a Java scripting language)
JavaScript (the scripting language behind many web pages)
That's good, because it means that if you already have skills in one of these then you don't need to learn a new programming language. However, we will be only working in OpenOffice.org Basic, and so that's the option to choose from the menu.
As soon as you click on OpenOffice.org Basic..., you'll be presented with the OpenOffice.org Basic Macros dialog:
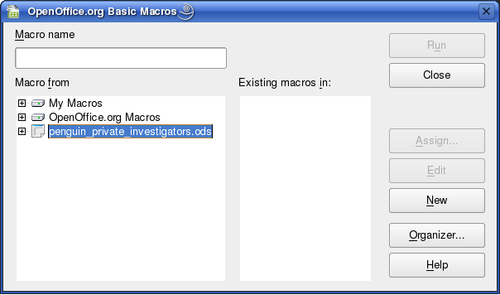
It's from here that you can choose where to create your first macro. However, you've got a choice of areas in which to create it. You can see that there are three groupings, and each one is used for a different purpose:
1. My Macros: If you want a macro to be used in all of your spreadsheets then store it here. This is useful for commonly used functionality, but don't forget —if you email your spreadsheet to someone else, then the macros won't work (because, of course, each user will have their own 'My Macros').
2. OpenOffice.org Macros: If you want to write a macro that's to be available to spreadsheets used by all users on your system, then store it here. 'OpenOffice.org Macros' is a system directory, so on Linux you will need root privileges to do this.
3. penguin_private_investigations.ods: (You will, of course, see the name of your own spreadsheet here.) If the macro is to be embedded in the spreadsheet, and not to be used elsewhere, then store it here. Use this storage method if you are going to email your spreadsheet to someone else to use, or if you're going to store it on a network drive.
So, at the moment, we're only really going to be interested either in using My Macros or for the macro to be embedded into the spreadsheet.
When you are ready, highlight either My Macros or your new spreadsheet, then click New. You'll now be presented with a New Module dialog box:
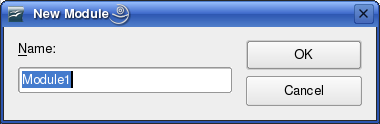
And what is a module? Quite simply—a module is a file in which you'll store all of your code (we'll learn more about the structures of modules and macros in Chapter 2).
At this point, the best bit advice I can give you is—Don't Click 'OK'. Well, not yet anyway. Why? Because you need to break a bad habit before it starts. If you save this module as 'Module1' then the next will be 'Module2', then 'Module3', and so on. Well, you get the picture don't you? At the moment we have no modules, but imagine that we've got 5, or 10, or 100, or imagine that you come back to your modules in six months time or a year. How can you possibly remember what each module is to be used for?
So make your life easier by naming the module sensibly (just as you did with the spreadsheet):
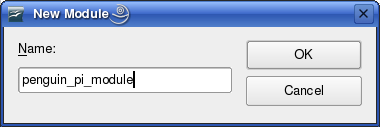
Now you can click OK, and you'll have a module with a name that has meaning, whenever you come back to it.
At last! We're finally looking at the OOo Basic editor:
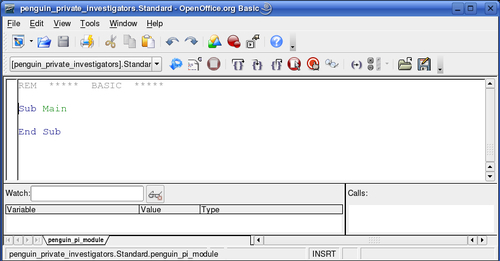
It's in this window that we'll be spending most of our time, because this is where you'll write all of your macros. Notice one interesting thing: OOo kindly creates a macro for you—Main. You can remove this if you wish; it just shows you the format that OOo expects.
It's tempting to just jump straight in and start writing your code. However, it will be worth your while spending some time looking at the controls of the IDE and seeing how they can help you develop even better macros. So that's what we're going to do next.
If there are only two buttons that you ever use in the IDE, they are these:
The Save button: Use it a lot. Don't come crying to me when you've just written 500 lines of code, accidentally introduced an infinite loop, crashed the OOo IDE, and lost all of your work—just because you didn't press the save button (of course, if you don't use the button make sure that you use: File | Save).

The Run button: Obviously once you've written some code, you'll want to see it in action. If you click this button, then OOo will run the first macro in the module.

If you remember, we saw that screens may not always look the same—depending on whether you're Windows or Linux, and which version of Linux you're using. This is one of those cases. If you don't recognize the run button above, then your one may look like the following:

If all goes well, then those are the only two buttons you'll need. Just write the code, save it, and run it. Unfortunately this is the real world, and most people will tell you Sod's law—If anything can go wrong, it will go wrong. There are also those that will add an addendum—If anything can't go wrong, it will go wrong. And then there are a lot of people who think that all the others are being just a little bit too optimistic.
If things do start to go wrong, then you may find that the Stop button comes in handy. Clicking this button will stop the macro from running and return to edit mode in the Basic editor window:

Occasionally you may find that you have to amend your code, but you don't want to actually run the macro (let's say, for instance, it's a macro that writes information to a database). If this is the case, then you can use the Compile button. This will check the syntax of the macro without running it.

You may find that the button may look different depending on your system, for example, we've just seen the Compile button for Linux, so here's the button for Windows:

Having written the macro and compiled it, things may still not be running as you think they should. Fortunately, the OOo IDE can help you analyze exactly what's going on.
If things aren't running exactly as you expected, or even if you just want to see what's going on inside your macro, then the IDE has the tools to help you. Three buttons that you'll find very useful are:
Step Into: This allows you to run the code one line at a time so that you can see exactly what's going on

Step Over: As you're stepping through the code, you may come across a call to another macro. If you don't want to step through that macro and just want to run it as a single command, then use the Step over button.

Step Out: When you've stepped through all of the code that you want to see running, then use this button to end and let the current macro that you're in finish running normally.

You'll find these buttons extremely useful as you try to understand what's going on with your macros, especially if something is going on that you don't quite understand. You can gain even more understanding by using another button.
The Watch button: As you step through the macro the values of variables in the code are going to change. To see these changes all you have to do is select the variable (in code window), click the watch button, and then step through the code, and watch the values as they are displayed in the watch window.

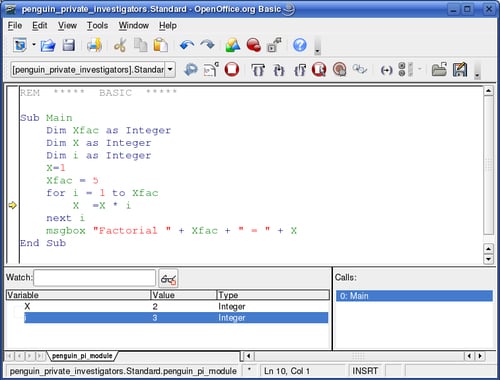
Now we're able to see exactly what's going on in the macro:
The marker on the left‑hand side tells you exactly where your are in the code.
The watch window at the bottom left shows you the current value of your selected variables.
The window at the bottom right gives you information on which macros are being called; this can be particularly useful if one macro calls another.
"Hang on", I hear you say, "What happens if I've got 100 lines of code, or 1000? I don't want to have to step through every one of them to see the status of a variable." Quite right too! This is where we can make use of the Breakpoints button.
Select the line of code in the macro that you want to monitor. Click the Breakpoint button. You will see a red dot appear in the left-hand border (or you can double-click in the left hand border to toggle a break point on or off). The Breakpoint button looks like the following:

Now you can click the Run button—the macro will start working, but will pause on the line where you placed the breakpoint, and you can view the Watch window and the Calls window to see what's going on. When you're happy, you can click the Run button again and the macro will resume its operation.
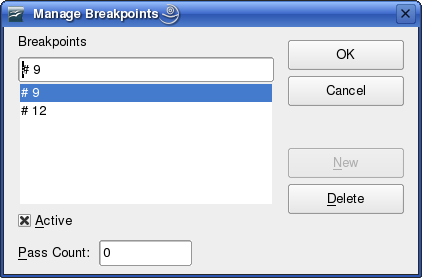
You're not just limited to one breakpoint, you can mark as many lines as you need. If you do use a number of them, then it can become laborious to scroll through all of the code to see where they are. To make life easier use the Manage Breakpoints dialog, after clicking the following button:

The Manage Breakpoints dialog will tell you the line numbers on which you have breakpoints, and you can activate, deactivate, or delete them.
So far in this chapter we've covered all of the crucial elements of the OOo Basic editor part of the IDE. We've seen what each part of the screen is for, and we've also seen how to use the key buttons. You may now feel that you want to start actually writing macros. If that's the case, then you're ready for Chapter 2.
However, there are still some more elements of the IDE that you'll find useful, and are there to make your life easier.
In all probability you'll find that before long you've written dozens of macros. If you're writing a more complex application, then this may even run into hundreds of macros. When it comes to maintaining the macros, you can make this easier by organizing your layout. For example, you could write the macros in alphabetical order or group them according to functionality. But come on—scrolling up and down the screen is not the most efficient way of finding the macro that you want.
So is there an easier way for us to move from macro to macro? Of course there is. In fact there are a few ways, and we'll look at them now.
The first thing that you'll need to do is find the Object Catalog icon on the IDE toolbar:

If you've got the Object Catalog open, then you just have to click on the macro that you want to edit and OOo will move to it in the Basic IDE.
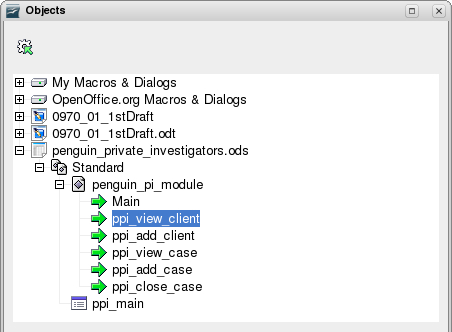
You can keep this window open while you're working; however, you will notice that any new macros that you write will not automatically appear in it. In order for the new macro to appear just minimize the module (penguin_pi_module in the above example) by clicking the minus sign. Expand it again (you'll see a plus sign next to the module name) and then the new macro name will appear in the window.
The next button to find on the IDE gives us access to the Select Macro dialog. You'll need to find an icon that looks like:

If you can't see the icon above, then have a look for:

Once you've found the right button you'll be able to call up the OpenOffice.org Basic Macros dialog:
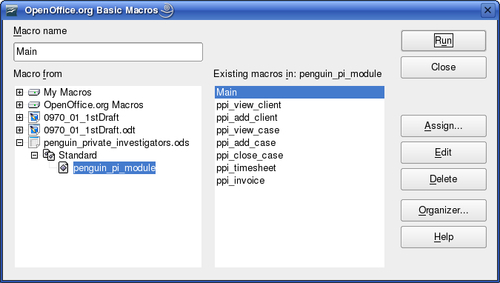
You may be thinking that this screen looks familiar. In fact, if you care to look back to the start of this chapter, then you'll see something very similar—it looks just like the very first dialog that we came across (if you remember, we accessed it from the menus by clicking on Tools | Macros | Organize Macros | OpenOffice.org Basic). There are, however, some key differences:
The Existing macros in box is now populated with the macros that you've written.
The Run, Assign, and Edit buttons are now enabled.
There's no New button; it's been replaced by Delete.
So is this the same screen? Well, yes it is, and you can prove that to yourself by clicking on My Macros—immediately the buttons will change so that the screen looks like the first one that we saw. Click back on to our module and the buttons will change back again.
You'll probably be able to guess what most of the buttons do (such as Run, Edit, and Delete), but what about Assign...? If you click the Assign... button, then a new window will open:
You'll find this is a very useful screen; with it you can assign any of your macros to menu items, toolbar buttons, or even window events. For instance, by using this you could automatically run a macro every time that you open your spreadsheet.
If you close this window (for now) and return to the OpenOffice.org Basic Macros dialog, then there's another button that you may be wondering about—Organizer.... Click it and you'll see the screen for the OpenOffice.org Basic Macro Organizer.
A dialog that you'll see a lot of is the Basic Macro organizer:

You can also get to this screen from a couple of other places as well:

There's a menu selection on the spreadsheet—click on Tools | Macros | Organize Dialogs....
If you look at the form you'll see that it has three tabs—Modules, Dialogs, and Libraries. We'll be looking at Modules and Libraries in Chapter 2, but for the time being just remember:
Libraries are storage areas for grouping modules and dialogs.
Modules are storage areas for grouping macros.
Dialogs are used to create buttons, combo-boxes, and all the normal things that you would expect in any GUI (Graphical User Interface).
You can create a dialog to provide a user interface for your macros. We'll be looking at dialogs in depth in Chapter 8, but for now we'll see how we can create dialogs using the IDE:
Open up the OOo Basic Macro Organizer dialog box (you can open it by any of the methods that we've already discussed), and select the Dialogs tab.
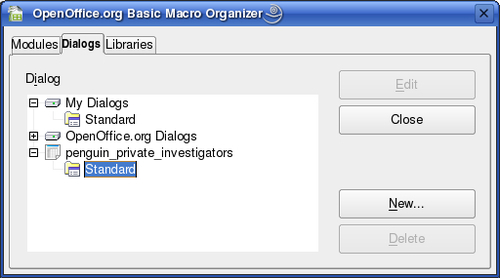
Next select the library in which you want to store the dialog. In the example on the previous page you can see that we're using the Standard library in our
penguin_private_investigatorsspreadsheet. Do that and you're ready to click New to create the dialog.
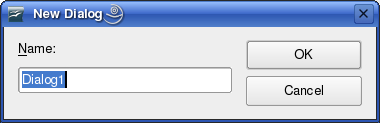
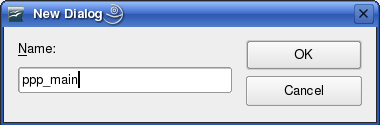
If you cast your mind back to when we created our module, then you'll remember that we didn't use the default name that OOo gave us. This is just the same. Using the default 'Dialog1', 'Dialog2', etc. will only lead to confusion later on. So, we will choose a sensible name—something that has some meaning for the project:

You'll see that OOo will take you back to the Organizer dialog box and not to the newly created dialog. This means that you can create all the dialogs that you're going to need before you continue. Once you've created all the ones that you want, or if you're only going to create one at the moment, then click on Edit to continue.
If you stop to look at the Macro Editor, then you'll realize that it is actually the same Basic editor that we've already been working with. In fact, if you look at the bottom of the screen, then you'll see a tab for the module that we've already created, and you can easily switch between the two. This is important because we have to write the code as a macro and then assign the macro to an object in the dialog (such as a button, combo-box, etc.). Technically speaking, you can configure Controls to call your macros when Events occur.
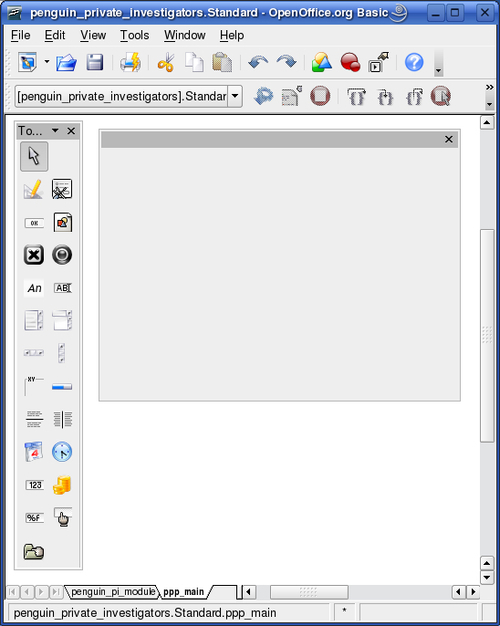
It's easy to design your new dialog, just add the objects from the Toolbox toolbar. (Click on the one that you want and then use the mouse to drag it to the correct position on the dialog itself. Don't forget, if the Toolbox toolbar is not displayed, you can use View | Toolbars | Toolbox.) If you've drawn an object (such as a button), and then decide that it's in the wrong place, or too big, or too small, then just click on it and you can resize or reposition it. If you decide that you don't need it at all, then click on it and press the Delete key on your keyboard.
With very little effort you'll end up with a professional looking dialog:
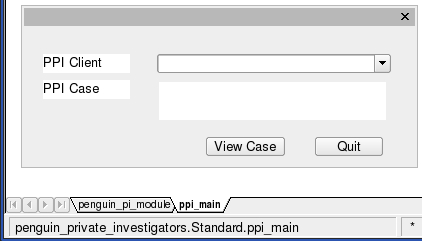
"But mine doesn't look like that", I hear you cry; "All the buttons and labels display things like CommandButton1 and Label1". That's soon remedied—just use your mouse to right-click on the object and then select Properties:
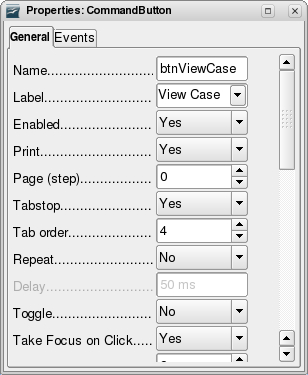
Once you're in the Properties screen, edit the Label field to change the text that you want to be displayed on the label or button. And while you're here, change the name of the object to something more meaningful—just as we don't want modules called Module1, Module2, or dialogs called Dialog1, Dialog2 nor do we want loads of buttons all called CommandButton1 or CommandButton2. For instance, if we're going to use a button to view all of Penguin P.I. cases, then name it btnViewCase or maybe cmdViewCase.
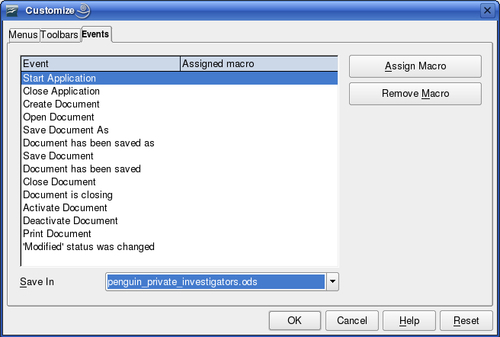
Now, you may have noticed that there is a second tab called Events:
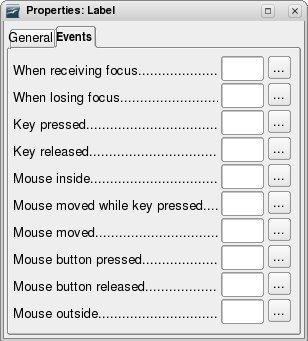
If you're desperate to know more about working with dialogs, and already have some knowledge of macros, then you may now want to move on to Chapter 8. There we'll see how to use this dialog to assign macros to any event on the dialog that you've designed here; for example running a macro when you click on a button.
However, if not then it's time to move on to Chapter 2 where we'll look in depth at how to use the OOo Basic IDE to write macros.
In this first chapter, we've had a look at all of the elements that make up the OOo IDE, and how to call them up. If you've just opened a spreadsheet:
For the OOo Basic Editor click on Tools | Macros | Organize Macros | OpenOffice.org Basic...
For the OOo Basic Organizer click on Tools | Macros | Organize Macros | Organize Dialogs...
Remember that you can store modules in one of three areas—My Macros, OpenOffice.org Macros, or embedded in the spreadsheet.
We have seen different useful buttons in the OOo Basic editor toolbar. We have also seen how to navigate around the IDE using the Object Catalog, Select Macro, and the OOo Organizer (remember there may be an alternative icon).
The OOo Basic editor is used for both writing macros and designing dialogs. If you are using the OOo Basic editor to design a dialog, then change the text on an object (such as a button or label) by using the properties window. You can also use the properties window to assign macros to the objects.
We've now covered the OOo IDE, and you're now able to navigate around it and use each of the elements in it. In Chapter 2 we'll be using the IDE some more when we look at libraries, modules, subroutines, and functions.

