Setting Up Kali Linux and the Testing Lab
In this chapter, we will cover:
- Installing VirtualBox on Windows and Linux
- Creating a Kali Linux virtual machine
- Updating and upgrading Kali Linux
- Configuring the web browser for penetration testing
- Creating a vulnerable virtual machine
- Creating a client virtual machine
- Configuring virtual machines for correct communication
- Getting to know web applications on a vulnerable virtual machine
Introduction
In this first chapter, we will cover how to prepare our Kali Linux installation to be able to follow all the recipes in the book and set up a laboratory with vulnerable web applications using virtual machines.
Installing VirtualBox on Windows and Linux
Virtualization is, perhaps, the most convenient tool when it comes to setting up testing laboratories or experimenting with different operating systems, since it allows us to run multiple virtual computers inside our own without the need for any additional hardware.
Throughout this book, we will use VirtualBox as a virtualization platform to create our testing targets as well as our Kali Linux attacking machine.
In this first recipe, we will show you how to install VirtualBox on Windows and on any Debian-based GNU/Linux operating system (for example, Ubuntu).
Getting ready
If we are using Linux as a base operating system, we will need to update our software repository's information before installing anything on it. Open a Terminal and issue the following command:
# sudo apt-get update
How to do it...
The following steps need to be performed for installing VirtualBox:
- To install VirtualBox in any Debian-based Linux VirtualBox, we can just open a Terminal and enter the following command:
# sudo apt-get install virtualbox
- After the installation finishes, we will find VirtualBox in the menu by navigating
to Applications | Accessories | VirtualBox. Alternatively, we can call it from a Terminal:
# virtualbox
- In Windows, we need to download the VirtualBox installer from https://www.virtualbox.org/wiki/Downloads
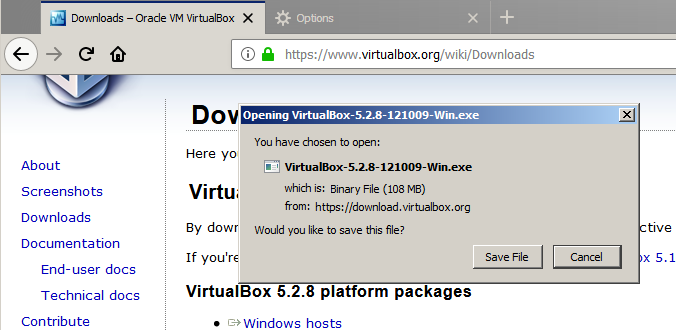
- Once the file is downloaded we open it and start the installation process.
- In the first dialog box, click Next and follow the installation process.
- We may be asked about installing network adapters from the Oracle corporation; we need to install these for the network in the virtual machines to work properly:

- After the installation finishes, we just open VirtualBox from the menu:
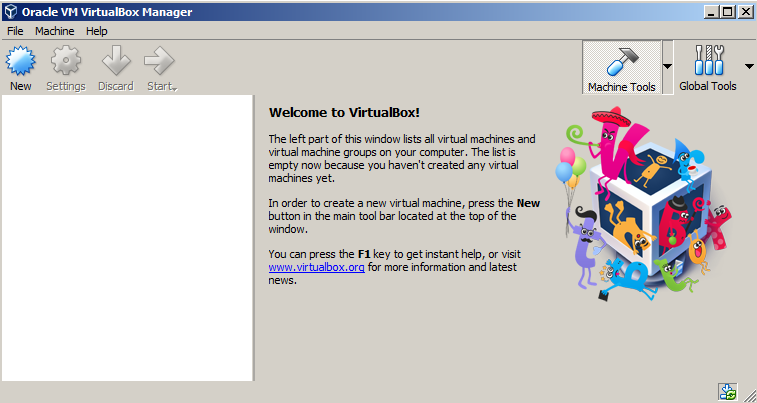
- Now we have VirtualBox running and we are ready to set up the virtual machines to make our own testing laboratory.
How it works...
VirtualBox will allow us to run multiple machines inside our computer through virtualization. With this, we can mount a full laboratory with different computers using different operating systems and run them in parallel as far as the memory resources and processing power of our host allow us to.
There's more...
The VirtualBox extension pack gives the VirtualBox's virtual machine extra features, such as USB 2.0/3.0 support and remote desktop capabilities. It can be downloaded from https://www.virtualbox.org/wiki/Downloads. After it is downloaded, just double-click on it and VirtualBox will do the rest.
See also
There are some other virtualization options out there. If you don't feel comfortable using VirtualBox, you may want to try the following:
- VMware Player/Workstation
- QEMU
- Xen
- Kernel-based Virtual Machine (KVM)
Creating a Kali Linux virtual machine
Kali is a GNU/Linux distribution built by Offensive Security that is focused on security and penetration testing. It comes with a multitude of tools preinstalled, including the most popular open source tools used by security professionals for reverse engineering, penetration testing, and forensic analysis.
We will use Kali Linux throughout this book as our attacking platform and we will create a virtual machine from scratch and install Kali Linux in it in this recipe.
Getting ready
Kali Linux can be obtained from its official download page https://www.kali.org/downloads/. For this recipe, we will use the 64-bit image (the first option on the page).
How to do it...
The process of creating a virtual machine in VirtualBox is pretty straightforward; let's look at this and perform the following steps:
- To create a new virtual machine in VirtualBox, we can use the main menu, Machine | New, or click the New button.
- New dialog will pop up; here, we choose a name for our virtual machine, the type, and the version of the operating system:

- Next, we are asked about the memory size for this virtual machine. Kali Linux requires a minimum of 1 GB; we will set 2 GB for our virtual machine. This value depends on the resources of your system.
- We click Next and get to the hard disk setup. Select Create a virtual hard disk now and click Create for VirtualBox to create a new virtual disk file in our host filesystem:

- On the next screen, select these options:
- Dynamically allocated: This means the disk image for this virtual machine will be growing in size (in fact, it will be adding new virtual disk files) when we add or edit files in the virtual system.
- For Hard disk file type, pick VDI (VirtualBox Disk Image) and click Next.
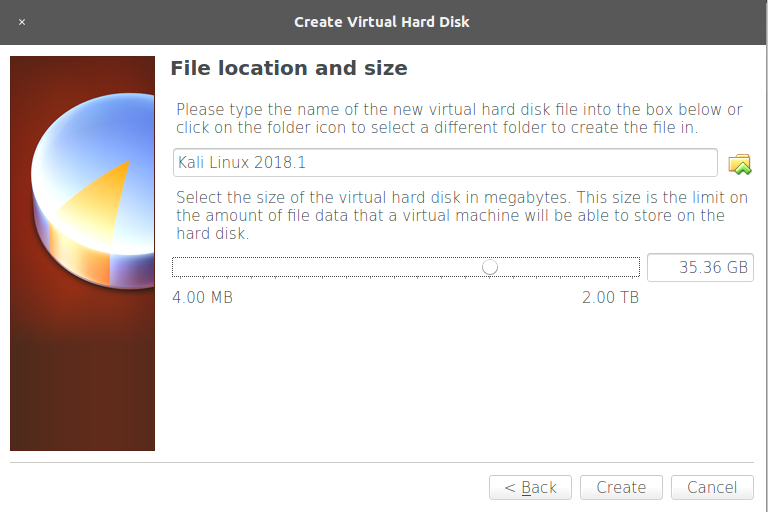
- Next, we need to select where the files will be stored in our host filesystem and the maximum size they will have; this is the storage capacity for the virtual operating system. We leave the default location alone and select a 35.36 GB size. This depends on your base machine's resources, but should be at least 20 GB in order to install the requisite tools. Now, click on Create:
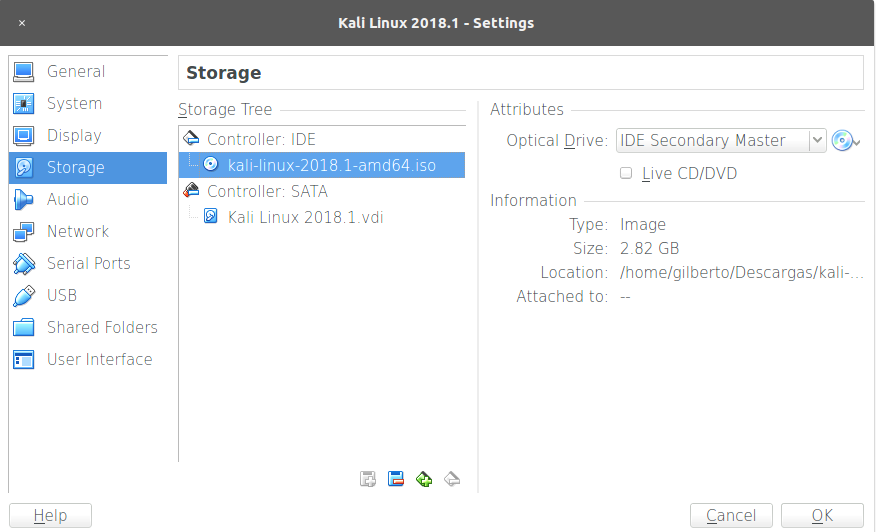
- Once the virtual machine is created, select it and click Settings, and then go to Storage and select the CD icon under Controller: IDE. In the Attributes panel, click on the CD icon and select Choose Virtual Optical Disk File and browse to the Kali image downloaded from the official page. Then click OK:
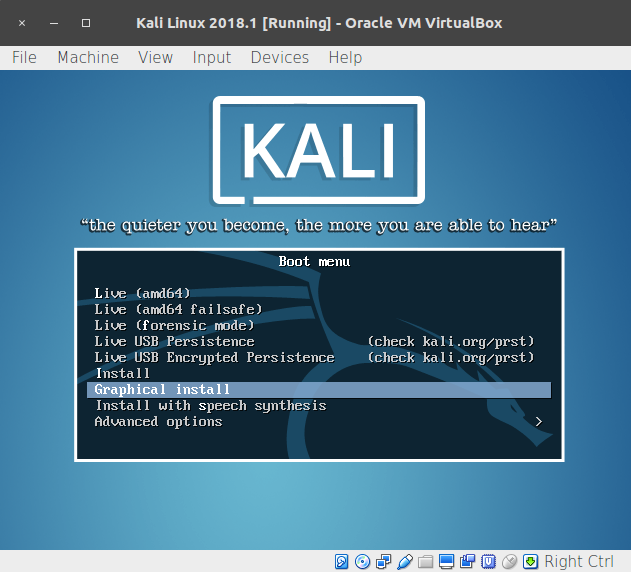
- We have created a virtual machine, but we still need to install the operating system. Start the virtual machine and it will boot using the Kali image we configured as the virtual CD/DVD. Use the arrows to select Graphical install and hit Enter:
- We are starting the installation process. On the next screens, select the language, keyboard distribution, hostname, and domain for the system.
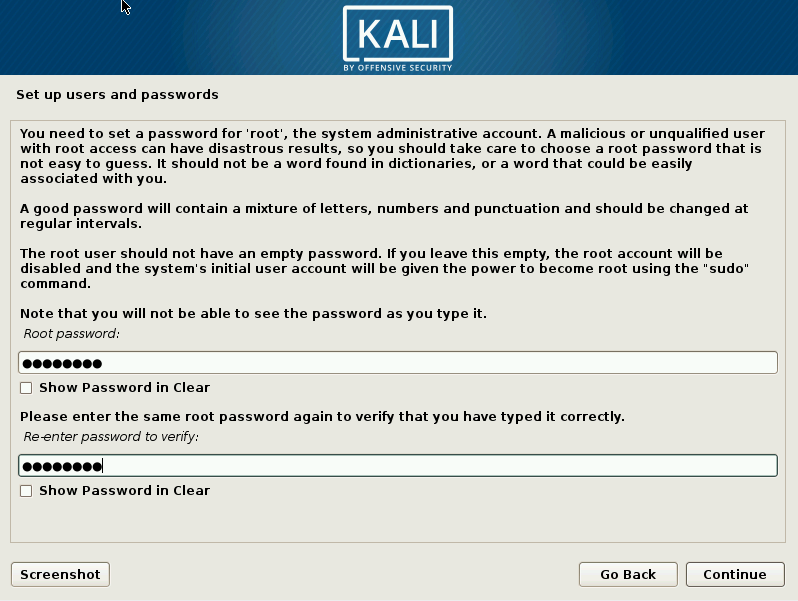
- After that, you will be asked for a Root password; root is the administrative, all-powerful user in Unix-based systems and, in Kali, it is the default login account. Set a password, confirm it, and click Continue:
- Next, we need to select the time zone, followed by configuration of the hard disk; we will use guided setup using the entire disk:

- Select the disk on which you want to install the system (there should only be one).
- The next step is to select the partitioning options; we will use All files in one partition.
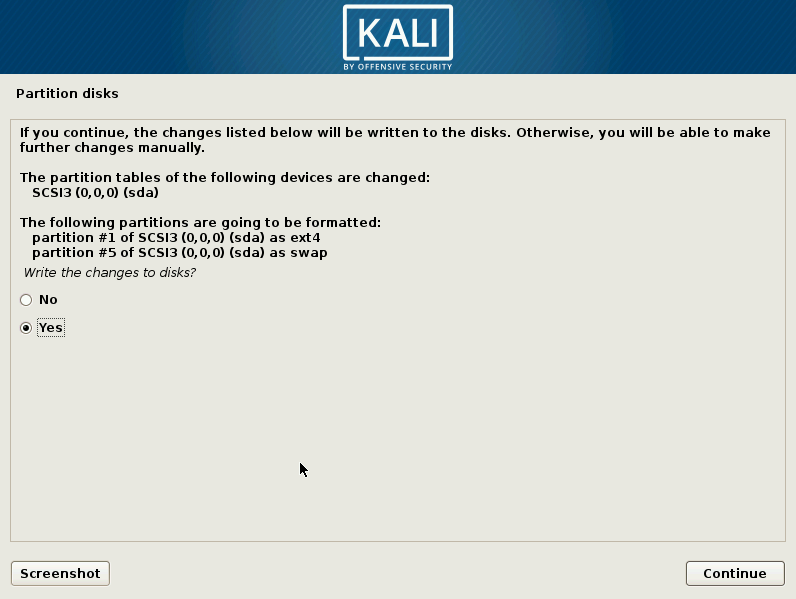
- Next, we need to confirm the setup by selecting Finish partitioning and write changes to disk and clicking Continue. Then select Yes to write the changes and Continue again on the next screen. This will start the installation process:
- When the installation is finished, the installer will ask you to configure the package manager. Answer Yes to Use a network mirror and set up your proxy configuration; leave it blank if you don't use a proxy to connect to the internet.
- The final step is to configure the GRUB loader: just answer Yes and, on the next screen, select the hard disk from the list. Then, click Continue and the installation will be complete.
- Click Continue in the Installation complete window to restart the VM.
- When the VM restarts, it will ask for a username; type root and hit Enter. Then enter the password you set for the root user to log in. Now we have Kali Linux installed.
How it works...
In this recipe, we created our first virtual machine in VirtualBox, set the reserved amount of memory our base operating system will share with it, and created a new virtual hard disk file for the VM to use and set the maximum size. We also configured the VM to start with a CD/DVD image and, from there, installed Kali Linux the same way we would install it on a physical computer.
To install Kali Linux, we used the graphical installer and selected guided disk partitioning, this is, when we install an operating system, especially a Unix-based one, we need to define which parts of the system are installed (or mounted) in which partitions of the hard disk; luckily for us, Kali Linux's installation can take care of that and we only need to select the hard disk and confirm the proposed partitioning. We also configured Kali to use the network repositories for the package manager. This will allow us to install and update software from the internet and keep our system up to date.
There's more...
There are different (and easier) ways to get Kali Linux running in a virtual machine. For example, there are pre-built virtual machine images available to download from the Offensive Security site: https://www.offensive-security.com/kali-linux-vm-vmware-virtualbox-hyperv-image-download/. We chose this method as it involves the complete process of creating a virtual machine and installing Kali Linux from scratch.
Updating and upgrading Kali Linux
Before we start testing the security of our web application, we need to be sure that we have all the necessary up-to-date tools. This recipe covers the basic task of maintaining the most up-to-date Kali Linux tools and their most recent versions. We will also install the web applications testing meta-package.
How to do it...
Once you have a working instance of Kali Linux up and running, perform the following steps:
- Log in as a root on Kali Linux; and open a Terminal.
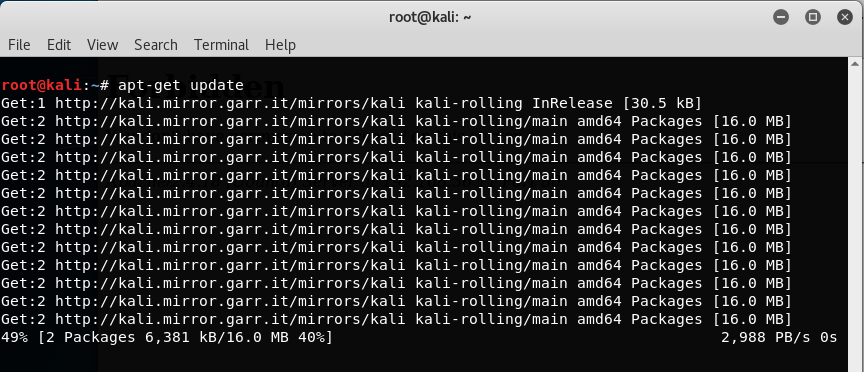
- Run the apt-get update command. This will download the updated list of packages (applications and tools) that are available to install:
- Once the update is finished, run the apt-get full-upgrade command to update the system to the latest version:
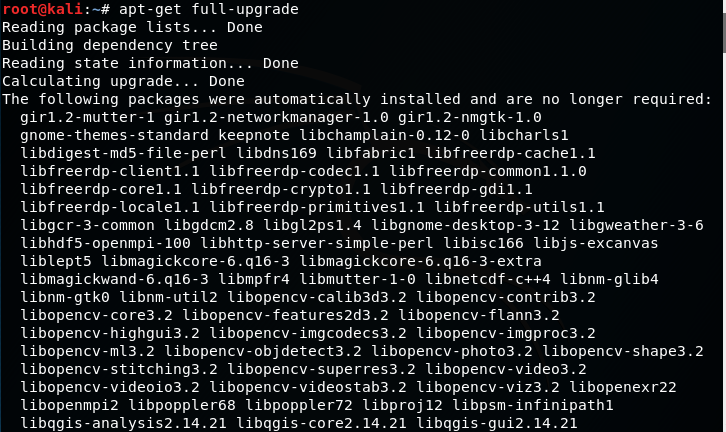
- When asked to continue, press Y and then press Enter.
- Now, we have our Kali Linux up to date and ready to continue.
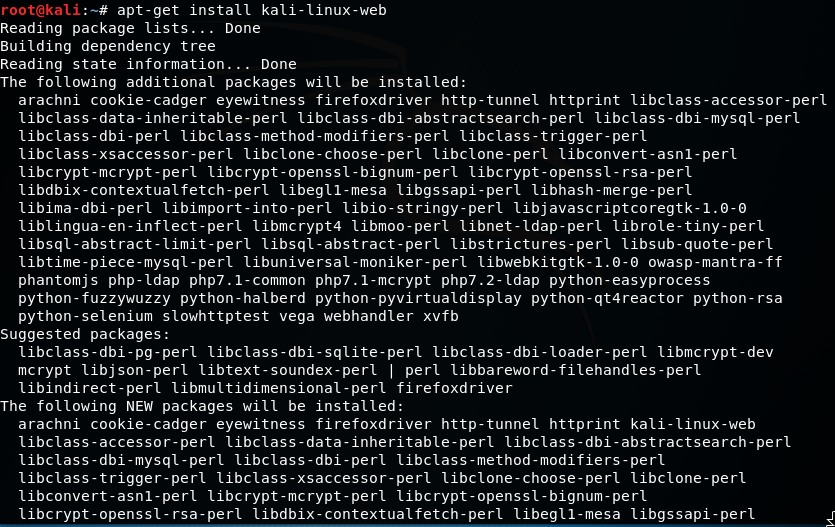
- Although Kali comes with a good set of tools preinstalled, there are some others that are included in its software repositories but not installed by default. To be sure we have everything we need for web application penetration testing, we install the kali-linux-web meta-package by entering the apt-get install kali-linux-web command:
- We can find the tools we have installed in the Applications menu under 03 - Web Applications Analysis:

How it works...
In this recipe, we have covered a basic procedure for package updates in Debian-based systems (such as Kali Linux) by using the standard software manager, apt. The first call to apt-get with the update parameter downloaded the most recent list of packages available for our specific system in the configured repositories. As Kali Linux is now a rolling distribution, this means that it is constantly updated and that there are no breaks between one version and the next; the full-upgrade parameter downloads and installs system (such as kernel and kernel modules) and non-system packages up to their latest version. If no major changes have been made, or we are just trying to keep an already installed version up to date, we can use the upgrade parameter instead.
In the last part of this recipe, we installed the kali-linux-web meta-package. A meta-package for apt is an installable package that contains many other packages, so we only need to install one package and all of the ones included will be installed. In this case, we installed all web penetration testing tools included in Kali Linux.
Configuring the web browser for penetration testing
Most web penetration testing happens in the client, that is, in the web browser; hence, we need to prepare our browser to make it a useful tool for our purposes. In this recipe, we will do that by adding several plugins to the Firefox browser installed in Kali Linux by default.
How to do it...
Firefox is a very flexible browser that fits the purpose of web penetration testing very well; it also comes pre-installed in Kali Linux. Let's customize it a little bit to make it better using the following steps:
- Open Firefox and go to Add-ons in the menu:

- In the search box, type wappalyzer to look for the first plugin we will install:
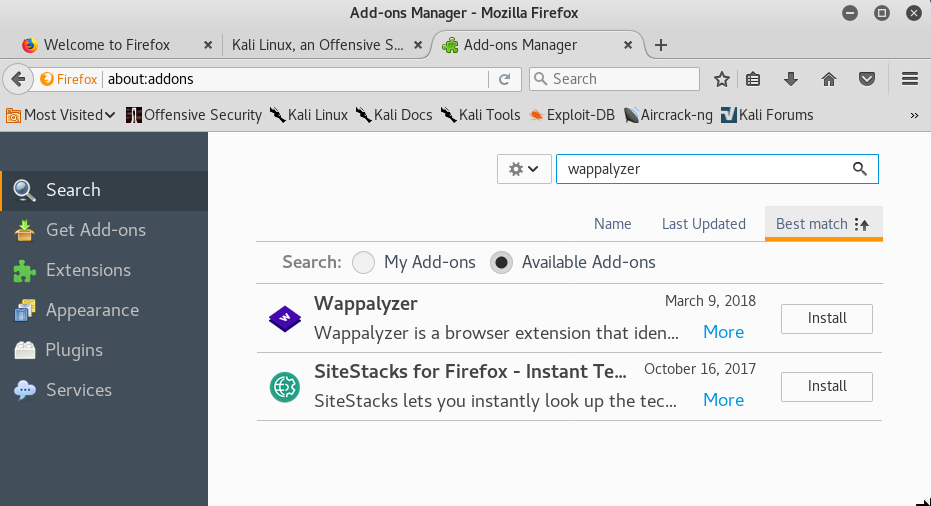
- Click Install in the Wappalyzer add-on to install it. You may also need to confirm the installation.
- Next, we search for FoxyProxy.
- Click on Install.
- Now search for and install Cookies Manager+.
- Search for and install HackBar.
- Search for and install HttpRequester.
- Search for and install RESTClient.
- Search for and install User-Agent Switcher.
- Search for and install Tampermonkey.
- Search for and install Tamper Data and Tamper Data Icon Redux.
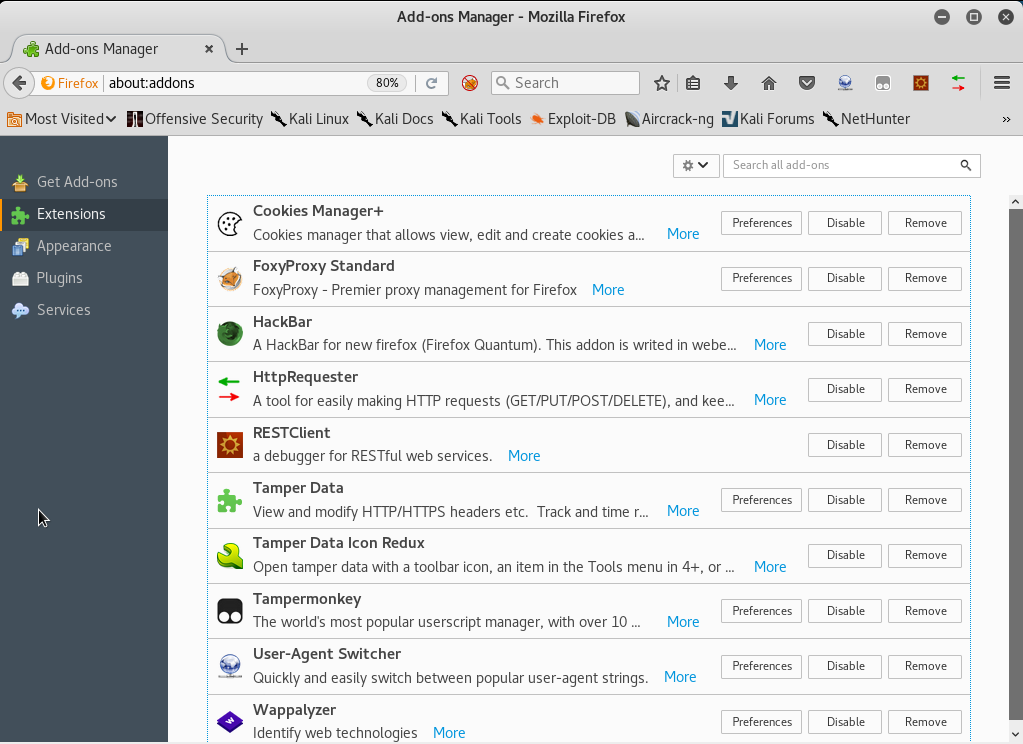
- The list of extensions installed should look like the following screenshot:
How it works...
So far, we've just installed some tools in our web browser, but what are these tools good for when it comes to penetration testing a web application? The add-ons installed are as follows:
- HackBar: A very simple add-on that helps us try different input values without having to change or rewrite the full URL. We will be using this a lot when doing manual checks for cross-site scripting and injections. It can be activated using the F9 key.
- Cookies Manager+: This add-on will allow us to view and sometimes modify the value of cookies the browser receives from the applications.
- User-Agent Switcher: This add-on allows us to modify the user-agent string (the browser identifier) that is sent in all requests to the server. Applications sometimes use this string to show or hide certain elements depending on the browser and operating system used.
- Tamper Data: This add-on has the ability to capture any request to the server just after it is sent by the browser, giving us the chance to modify the data after introducing it in the application's forms and before it reaches the server. Tamper Data Icon Redux only adds an icon.
- FoxyProxy Standard: A very useful extension that lets us change the browser's proxy settings in one click using user-provided presets.
- Wappalyzer: This is a utility to identify the platforms and developing tools used in websites. This is very useful for fingerprinting the web server and the software it uses.
- HttpRequester: With this tool, it is possible to craft HTTP requests, including get, post, and put methods, and to watch the raw response from the server.
- RESTClient: This is basically a request generator like HTTP requester, but focused on REST web services. It includes options to add headers, different authentication modes, and get, post, put, and delete methods.
- Tampermonkey: This is an extension that will allow us to install user scripts in the browser and make on-the-fly changes to web page content before or after they load. From a penetration testing point of view, this is useful to bypass client-side controls and other client code manipulations.
See also
Other add-ons that could prove useful for web application penetration testing are the following:
- XSS Me
- SQL Inject Me
- iMacros
- FirePHP
Creating a client virtual machine
Now, we are ready to create our next virtual machine; it will be the server that will host the web applications we'll use to practice and improve our penetration testing skills.
We will use a virtual machine called OWASP Broken Web Apps (BWA), which is a collection of vulnerable web applications specially set up to perform security testing.
How to do it...
OWASP BWA is hosted in SourceForge, a popular repository for open source projects. The following steps will help us in creating a vulnerable virtual machine:
- Go to http://sourceforge.net/projects/owaspbwa/files/ and download the latest release of the .ova file. At the time of writing, it is OWASP_Broken_Web_Apps_VM_1.2.ova:

- Wait for the download to finish and then open the file.
- VirtualBox's import dialog will launch. If you want to change the machine's name or description, you can do so by double-clicking on the values. Here, you can change the name and options for the virtual machine; we will leave them as they are. Click on Import:

- The import should take a minute and, after that, we will see our virtual machine displayed in VirtualBox's list. Let's select it and click on Start.
- After the machine starts, we will be asked for a login and password; type root as the login, and owaspbwa as the password, and we are set.
How it works...
OWASP BWA is a project aimed at providing security professionals and enthusiasts with a safe environment to develop attacking skills and identify and exploit vulnerabilities in web applications, in order to be able to help developers and administrators fix and prevent them.
This virtual machine includes different types of web applications; some of them are based
on PHP, some in Java. We even have a couple of .NET-based vulnerable applications. There
are also some vulnerable versions of known applications, such as WordPress or Joomla.
See also
There are many options when we talk about vulnerable applications and virtual machines. A remarkable website that holds a great collection of such applications is VulnHub (https://www.vulnhub.com/). It also has walkthroughs that will help you to solve some challenges and develop your skills.
In this book, we will use another virtual machine for some recipes, bWapp bee-box, which can be downloaded from the project's site: https://sourceforge.net/projects/bwapp/files/bee-box/.
There are also virtual machines that are thought of as self-contained web penetration testing environments, in other words, they contain vulnerable web applications, but also the tools for testing and exploiting the vulnerabilities. A couple of other relevant examples are:
- Samurai web testing framework: https://sourceforge.net/projects/samurai
- Web Security Dojo: https://www.mavensecurity.com/resources/web-security-dojo
Configuring virtual machines for correct communication
To be able to communicate with our virtual server and client, we need to be in the same network segment; however, having virtual machines with known vulnerabilities in our local network may pose an important security risk. To avoid this risk, we will perform a special configuration in VirtualBox to allow us to communicate with both server and client virtual machines from our Kali Linux host without exposing them to the network.
Getting ready
Before we proceed, open VirtualBox and make sure that the vulnerable server and client virtual machines are turned off.
How to do it...
VirtualBox creates virtual network adapters in the base system in order to manage DHCP and virtual networks. These adapters are independent from the ones assigned to virtual machines; we will create a virtual network and add the Kali and vulnerable virtual machines to it by using the following steps:
- In VirtualBox, navigate to File | Preferences... | Network.
- Select the Host-only Networks tab.
- Click on the plus (+) button to add a new network.
- The new network (vboxnet0) will be created and its details window will pop up.
- In this dialog box, you can specify the network configuration; if it doesn't interfere with your local network configuration, leave it as it is. You may change it and use some other address in the segments reserved for local networks (10.0.0.0/8, 172.16.0.0/12, 192.168.0.0/16).
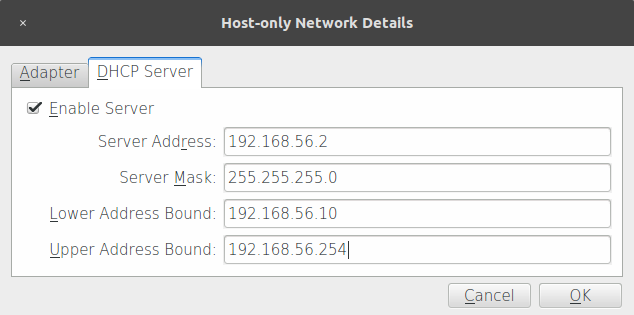
- Now, go to the DHCP Server tab; here, we can configure the dynamic IP address assignation in the host-only network. We'll start our dynamic addressing at 192.168.56.10:
- After proper configuration is done, click OK.
- The next step is to configure the vulnerable virtual machine (vm_1). Select it and go to its Settings.
- Click Network and, in the Attached to: drop-down menu, select Host-only Adapter.
- In Name, select vboxnet0.
- Click OK.
- Follow steps 8 to 11 for the Kali virtual machine (Kali Linux 2018.1) and all of the testing machines you want to include in your lab.
- After configuring all virtual machines, let's test whether they can actually communicate. Let's see the network configuration of our Kali machine; open a Terminal and type:
ifconfig
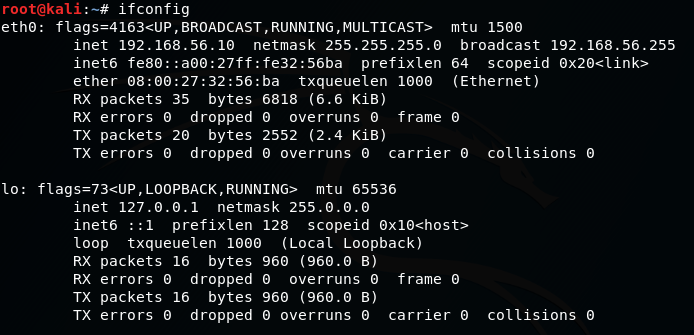
- We can see that we have a network adapter called eth0 and it has the IP address 192.168.56.10. Depending on the configuration you used, this may vary.
- For vm_1, the network address is displayed on the start screen, although you can also check the information by logging in and using ifconfig:
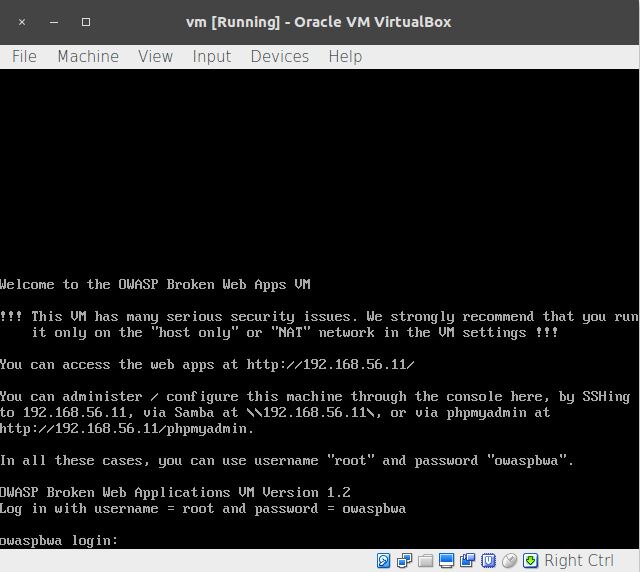
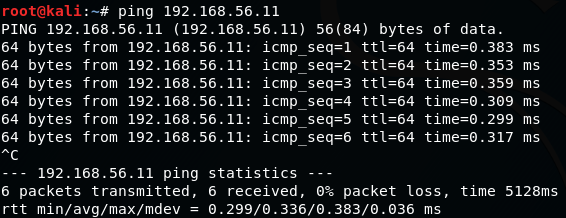
- Now, we have the IP addresses of our three machines: 192.168.56.10 for Kali Linux, and 192.168.56.11 for the vulnerable vm_1. Let's test the communication; we are going to ping vm_ 1 from our Kali Linux:
ping 192.168.56.11
- We do the same to and from all of the virtual machines in our laboratory to check whether they can communicate with each other.
- Windows desktop systems, like Windows 7 and Windows 10, may not respond to pings; that's normal because Windows 7 is configured by default to not respond to ping requests. To check connectivity in this case, if you have Windows machines in your lab, you can use arping from the Kali machine:
arping -c 4 192.168.56.103
How it works...
A host-only network is a virtual network that acts as a LAN, but its reach is limited to the host that is running the virtual machines without exposing them to external systems. This kind of network also provides a virtual adapter for the host to communicate with the virtual machines as if they were in the same network segment.
With the configuration we just made, we will be able to communicate between the machine that will take the roles of client and attacking machine in our tests and the web server that will host our target applications.
Getting to know web applications on a vulnerable virtual machine
OWASP BWA contains many web applications, intentionally rendered vulnerable to the most common attacks. Some of them are focused on the practice of some specific technique,
while others try to replicate real-world applications that happen to have vulnerabilities.
In this recipe, we will take a tour of our vulnerable_vm and get to know some of the applications it includes.
Getting ready
We need to have our vulnerable_vm running and its network correctly configured. For this book, we will be using 192.168.56.10 as its IP address.
How to do it...
The steps that need to be performed are as follows:
- With vm_1 running, open your Kali Linux host's web browser and go to http://192.168.56.10. You will see a list of all the applications that the server contains:
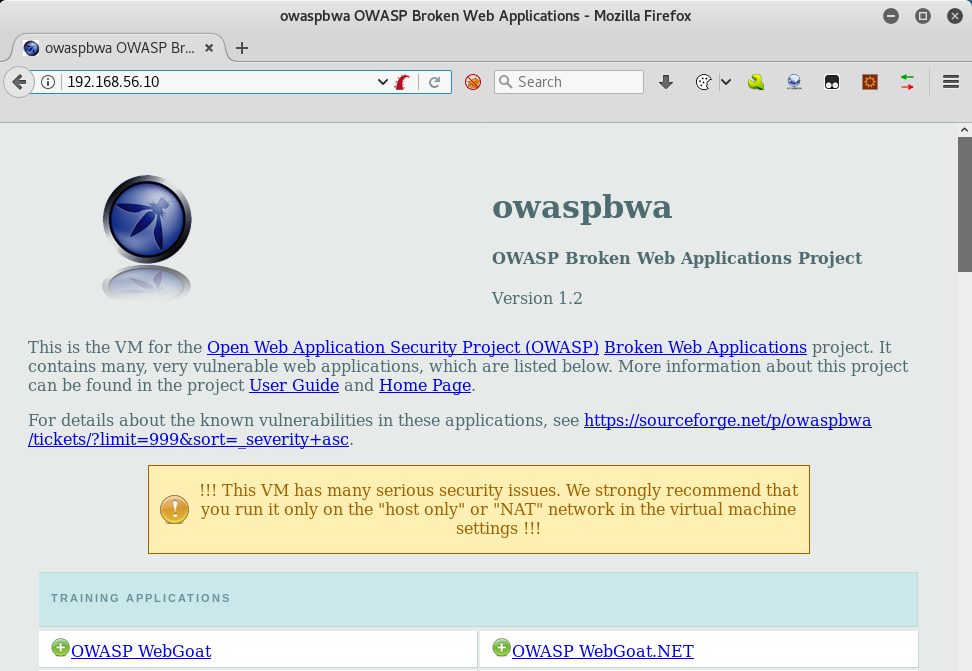
- Let's go to Damn Vulnerable Web Application.
- Use admin as a username and admin as a password. We can see a menu on the left; this menu contains links to all the vulnerabilities that we can practice in this application: Brute Force, Command Execution, SQL Injection, and so on. Also, the DVWA Security section is where we can configure the security (or complexity) levels of the vulnerable inputs:

- Log out and return to the server's homepage.
- Now, we click on OWASP WebGoat.NET. This is a .NET application where we will be able to practice file and code injection attacks, cross-site scripting, and encryption vulnerabilities. It also has a WebGoat Coins Customer Portal that simulates a shopping application and can be used to practice not only the exploitation of vulnerabilities, but also their identification:

- Now return to the server's home page.
- Another interesting application included in this virtual machine is BodgeIt, which is a minimalistic version of an online store based on JSP. It has a list of products that we can add to a shopping basket, a search page with advanced options, a registration form for new users, and a login form. There is no direct reference to vulnerabilities; instead, we will need to look for them:

- We won't be able to look at all the applications in a single recipe, but we will be using some of them in this book.
How it works...
The applications in the home page are organized in the following six groups:
- Training applications: These are the ones that have sections dedicated to
practice-specific vulnerabilities or attack techniques; some of them include
tutorials, explanations, or other kinds of guidance. - Realistic, intentionally vulnerable applications: Applications that act as real-world applications (stores, blogs, and social networks) and are intentionally left vulnerable by their developers for the sake of training.
- Old (vulnerable) versions of real applications: Old versions of real applications,
such as WordPress and Joomla, are known to have exploitable vulnerabilities;
these are useful to test our vulnerability identification skills. - Applications for testing tools: The applications in this group can be used as benchmarks for automated vulnerability scanners.
- Demonstration pages/small applications: These are small applications that have only one or a few vulnerabilities, for demonstration purposes only.
- OWASP demonstration application: OWASP AppSensor is an interesting application; it simulates a social network and could have some vulnerabilities in it. But it will log any attack attempts, which is useful when trying to learn, for example, how to bypass some security devices such as a web application firewall.
See also
Even though OWASP BWA is one of the most complete collections of vulnerable web applications for testing purposes, there are other virtual machines and web applications that could complement it as they contain different applications, frameworks, or configurations. The following are worth a try:
- OWASP Bricks, included in BWA, also has an online version: http://sechow.com/bricks/index.html.
- Hackazon (http://hackazon.webscantest.com/) is an online testing range meant to simulate a modern web application. According to its Wiki (https://github.com/rapid7/hackazon/wiki), it can also be found as a virtual machine OVA file.
- Acunetix's Vulnweb (http://www.vulnweb.com/) is a collection of vulnerable web applications, each one using a different technology (PHP, ASP, JSP, HTML5) created to test the effectiveness of the Acunetix web vulnerability scanner.
- Testfire (http://testfire.net/) is published by Watchfire and simulates an online banking application. It uses the .NET framework.
- Hewlett Packard also has a public testing site created to demonstrate the effectiveness of its Fortify WebInspect products; it is called ZeroBank (http://zero.webappsecurity.com/).