


In this chapter, we will cover the basic tasks related to setting up Kali Linux for first time use. The recipes include:
- Installing Kali Linux on Cloud - Amazon AWS
- Installing Kali Linux on Docker
- Installing NetHunter on OnePlus One
- Installing Kali Linux on a virtual machine
- Customizing Kali Linux for faster package updates
- Customizing Kali Linux for faster operations
- Configuring remote connectivity services - HTTP, TFTP, and SSH
- Configuring Nessus and Metasploit
- Configuring third-party tools
- Installing Docker on Kali Linux
Kali was a complete revamp of the most popular Linux penetration testing distribution, Backtrack. Kali Linux 2.0 launched on August 11, 2015, is an improved version of Kali Linux, which features brand new kernel 4.0, and is based on the Jessie version of Debian with improved hardware and wireless driver coverage, support for a variety of desktop environments (GNOME, KDE, XFCE, MATE, e17, LXDE, and i3wm) and tools, and the list goes on.
If you are upgrading to Kali Linux 2.0 from Kali Linux, there is a good news. The good news is that now we have a rolling distribution. For example, the Kali Linux core gets updated continuously.
Kali Linux has got everything you will need for penetration testing and security assessment without thinking of downloading, installing, and setting up the environment for each tool in your arsenal. Kali Linux 2.0 includes over 300 security tools. You can now get the most preferred security tools by professionals all over the world, all at one place installed, configured, and ready to use.
All security tools have been logically categorized and mapped to the testers performing a combination of steps while assessing a target, for example, reconnaissance, scanning, exploitation, privilege escalation, maintaining access, and covering tracks.
Security tools are usually expensive but Kali Linux is free. The biggest advantage of using Kali is that it contains open source or community versions of various commercial security products.
Kali Linux 2.0 now supports even more hardware devices than ever. Since ARM-based systems are getting cheaper and readily available, running Kali Linux on these devices is now possible with ARMEL and ARMHF support. Currently, Kali Linux can be used for the following ARM Devices:
- Raspberry Pi (Raspberry Pi 2, Raspberry Pi A/B+, and Raspberry Pi A/B+ TFT)
- CompuLab - Utilite and Trim-Slice
- BeagleBone Black
- ODROID U2/X2
- Chromebook - HP, Acer and Samsung
- Cubieboard 2
- CuBox (CuBox and CuBox-i)
- Nexus 5 (Kali Nethunter)
- Odroid (U2, XU, and XU3)
- USBArmory
- RioTboard
- FriendlyARM
- BananaPi
Almost 2 years ago, Kali has been listed in Amazon EC2 Marketplace. It was a really good news for penetration testers, as they can setup their very own Kali in Amazon AWS Infrastructure and use for penetration testing, moreover it is eligible for Free Tier, wherein you can use it to set up your EC2 instance for $0, as long as you stay within the designated limits, which is fair enough.
The steps provided in this recipe will help you in setting up an instance running a Kali Linux on Amazon AWS EC2 console securely within minutes.
For this recipe, you require:
- An Amazon AWS Account
- Minimum 2 GB RAM, if you want to run Metasploit
Perform the steps for this recipe:
- Once you have the AWS account created, login to
https://aws.amazon.com
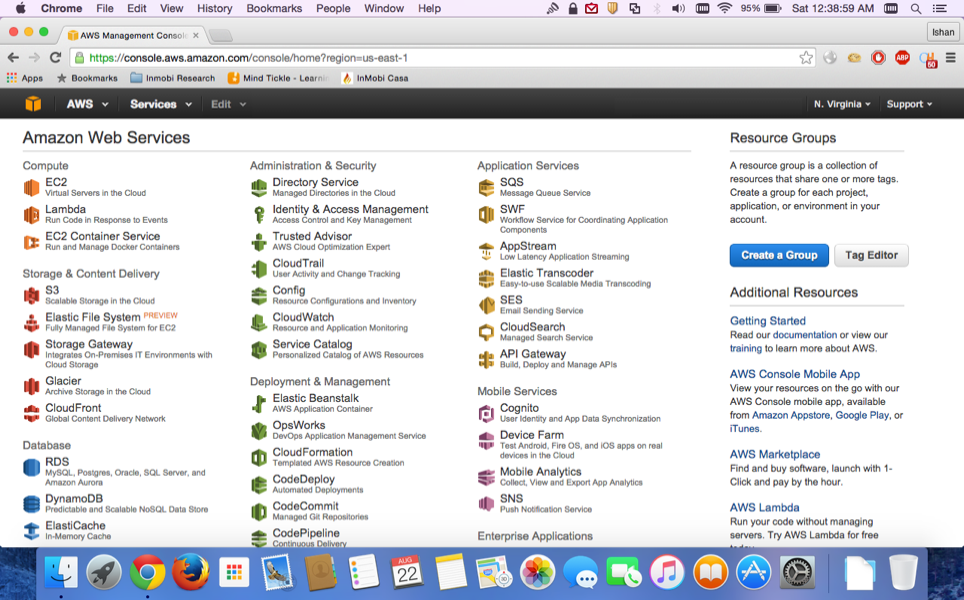
and navigate to
Web Servicesdashboard as shown in the following screenshot. Go toEC2|Launch Instance:
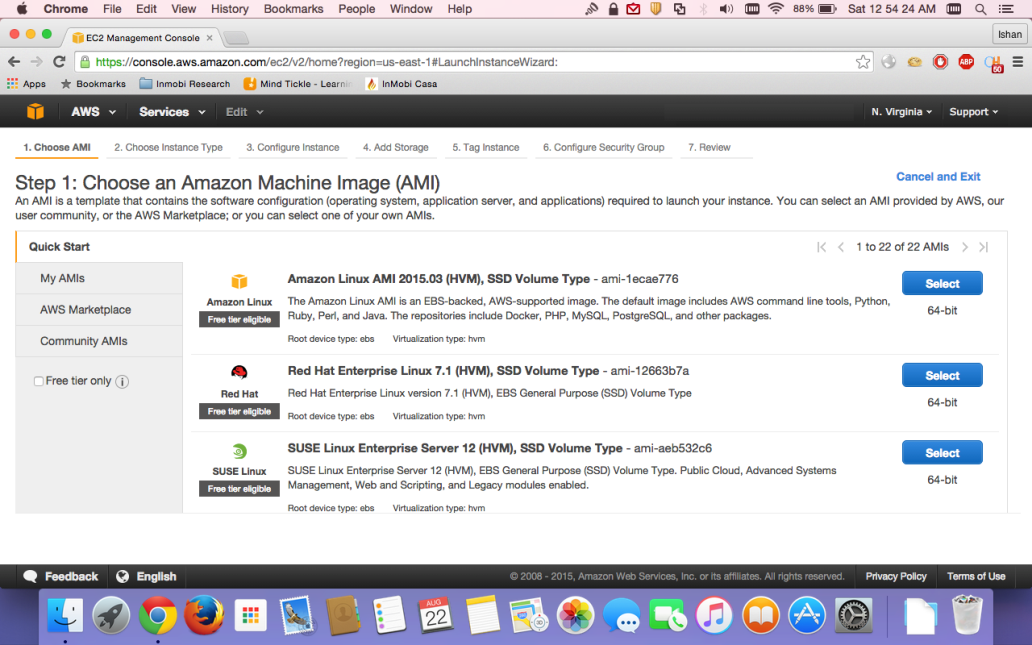
- You will need to select
Machine Image (AMI)as shown in the screenshot:
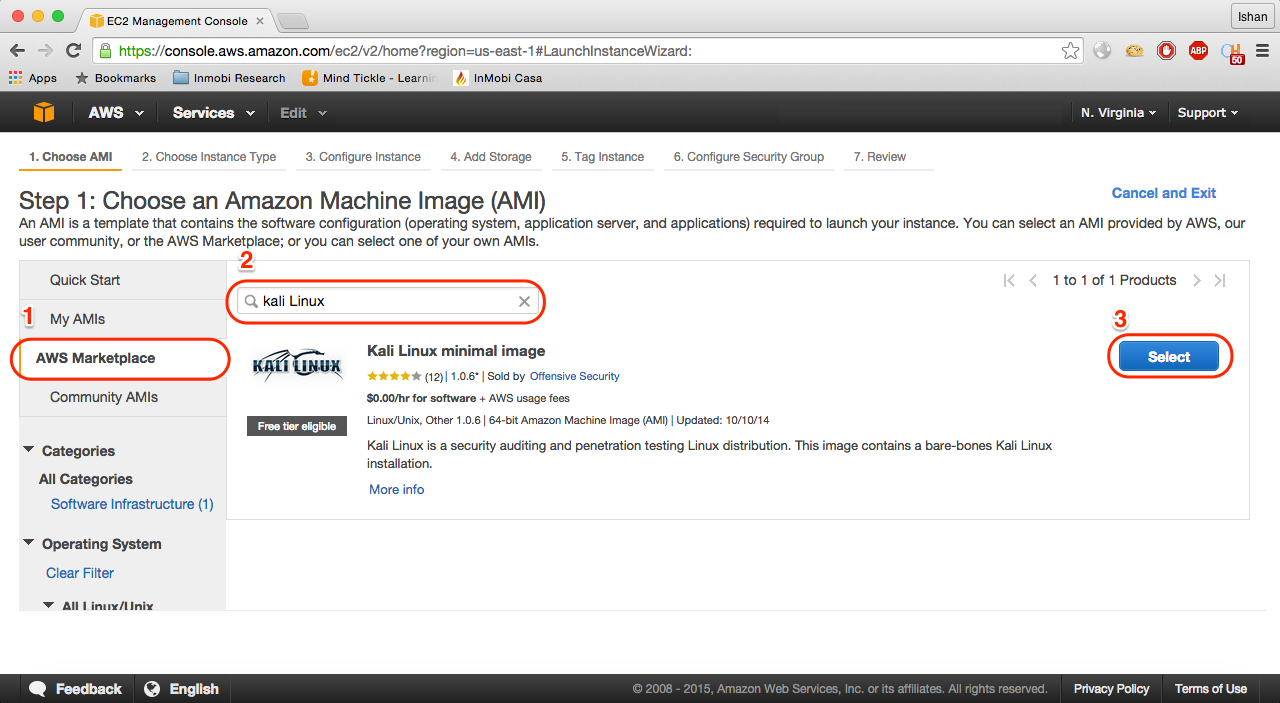
- Click on the
Marketplaceoption and search for Kali Linux onAWS Marketplaceas shown in the screenshot:
- Click on
Selectand then click onContinueas in the screenshot:
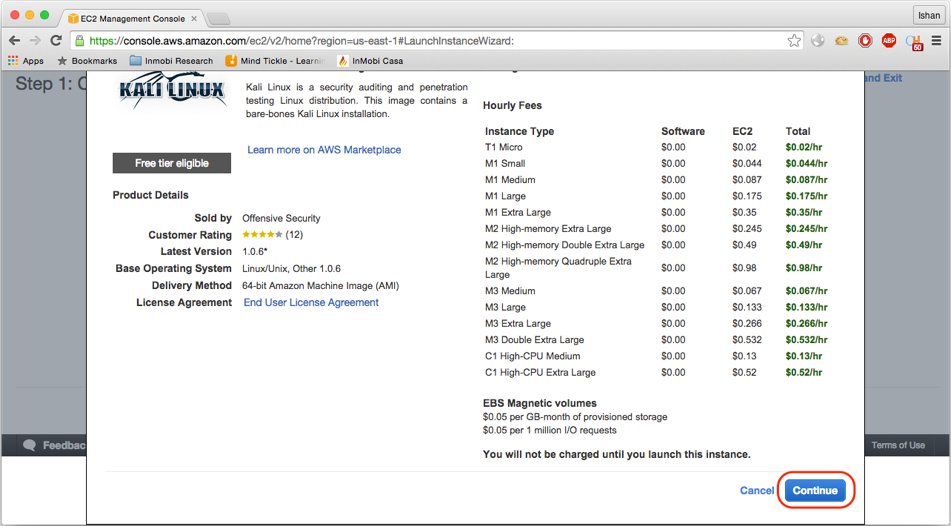
- Now you are on the screen displayed in step 2. Here you can select an instance type; be informed that only
t1.microandt2.microwill be eligible for free tier. However, running Metasploit requires minimum 2 GB RAM. For this you can opt fort2.smallort2.mediumas per your budget as in the screenshot:
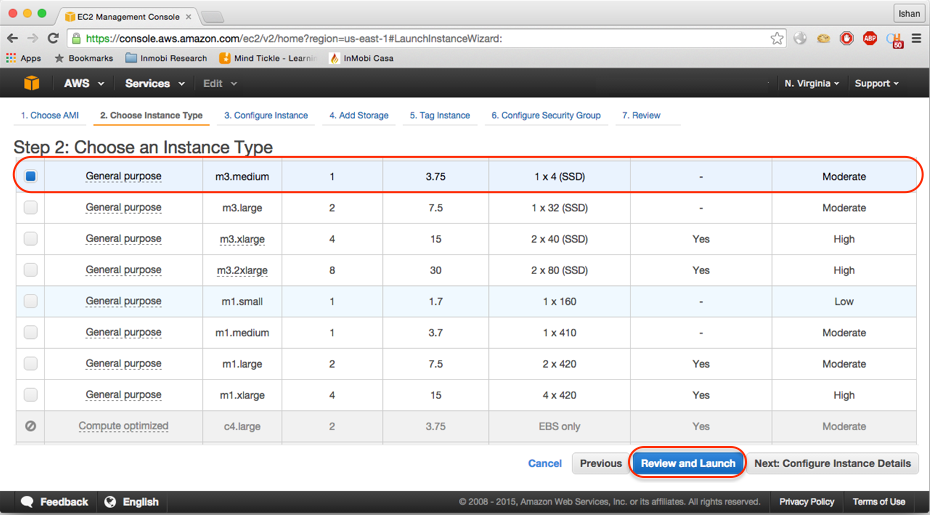
- Click on
Review and Launch. You will see a popup window asking you to use SSD as your boot volume. SelectMake general purpose (SSH)...(recommended)and click onNext, as in the screenshot:
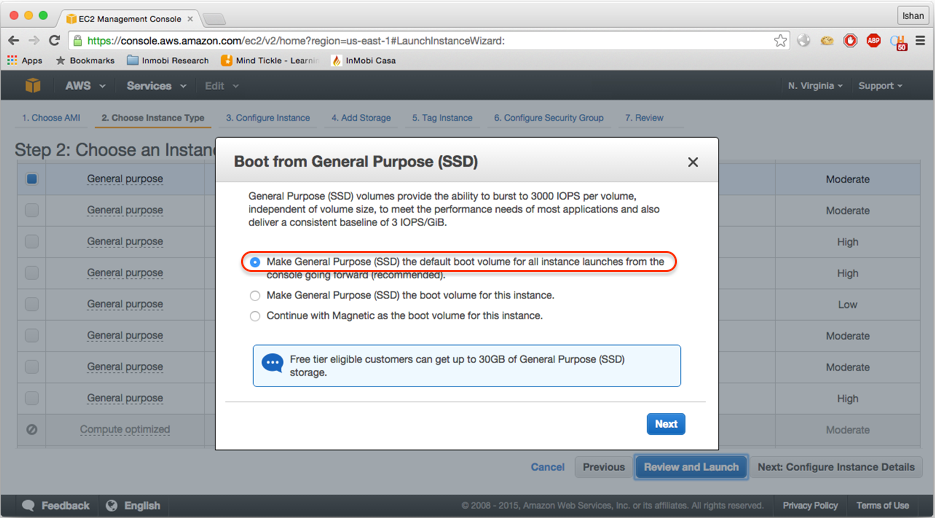
- You will be directly taken to step 7 for review, as in the screenshot:
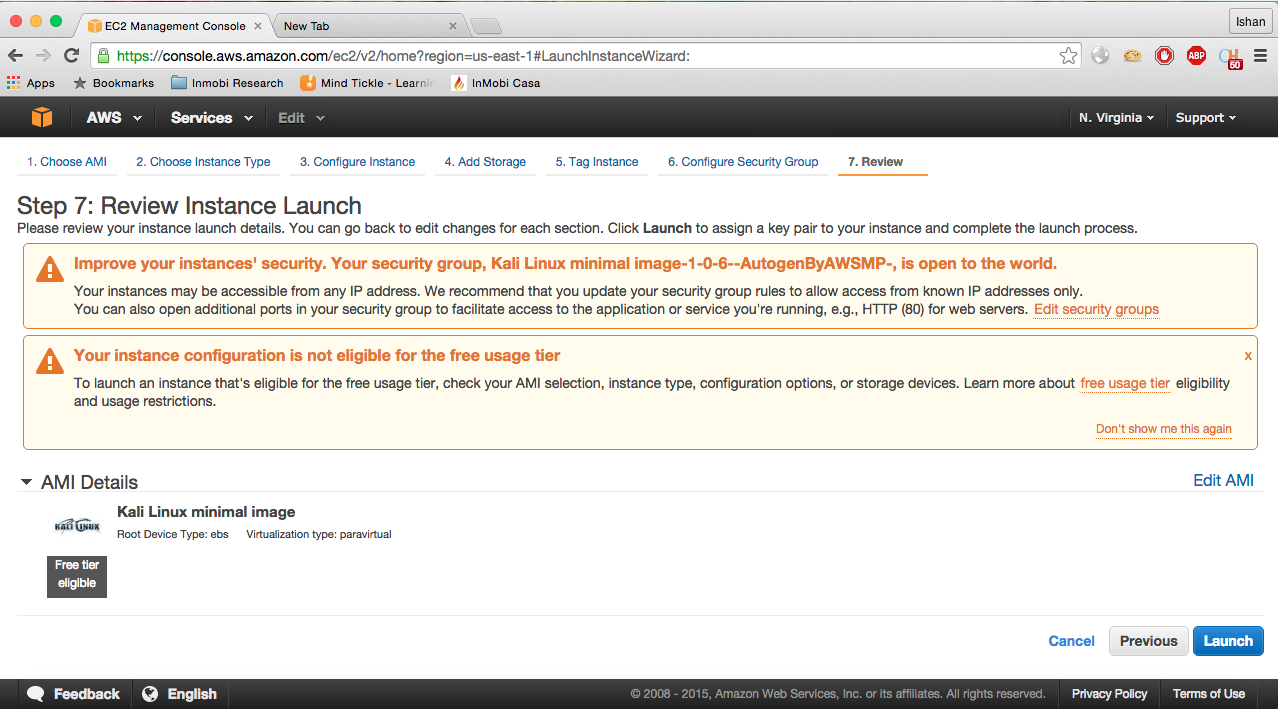
- You will first see the warning, which is to improve your instance security; click on
6. Configure Security Group, as in the screenshot:
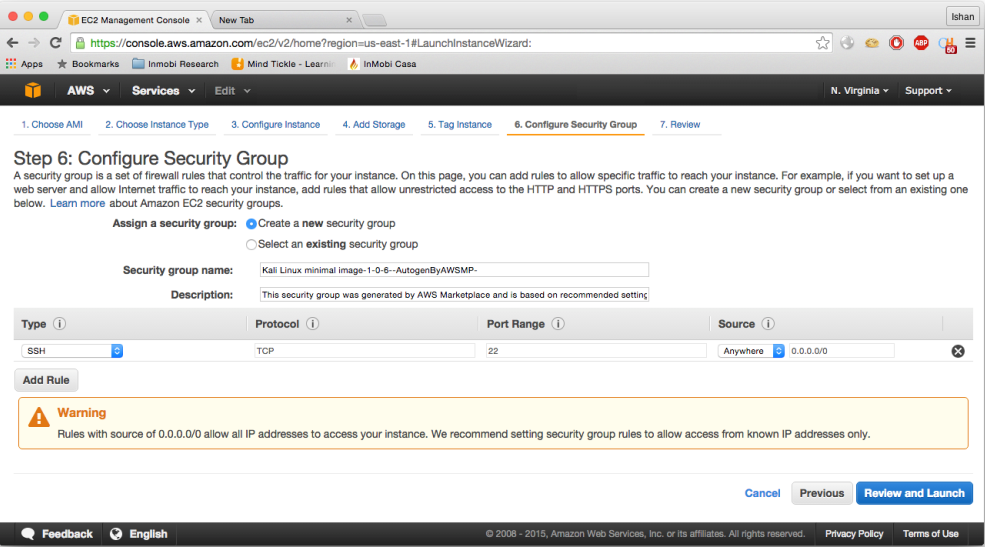
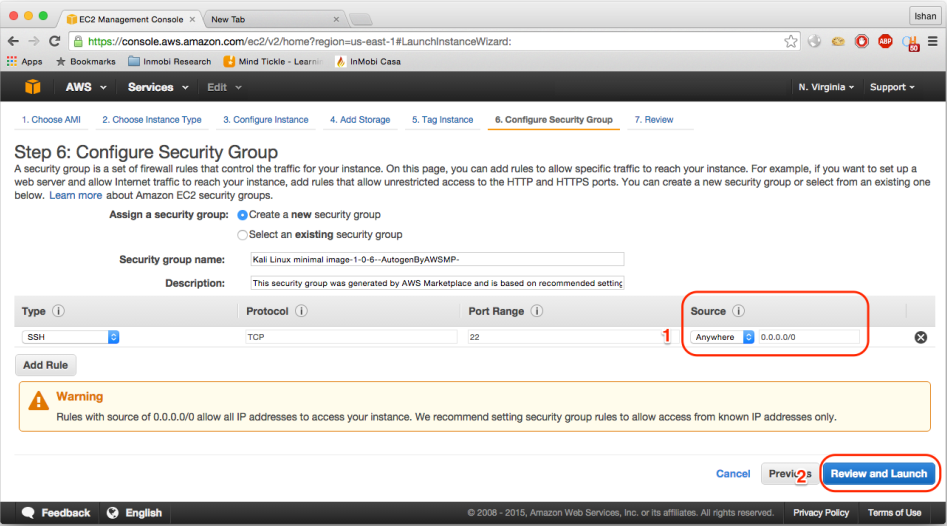
- Click on the
Sourcelistbox and selectMy IP, it will automatically detect your public IP range. Click onReview and Launch. Note that it would only if you have a public IP. If you have a dynamic IP, you will need to login back to the AWS console and allow your updated IP address:
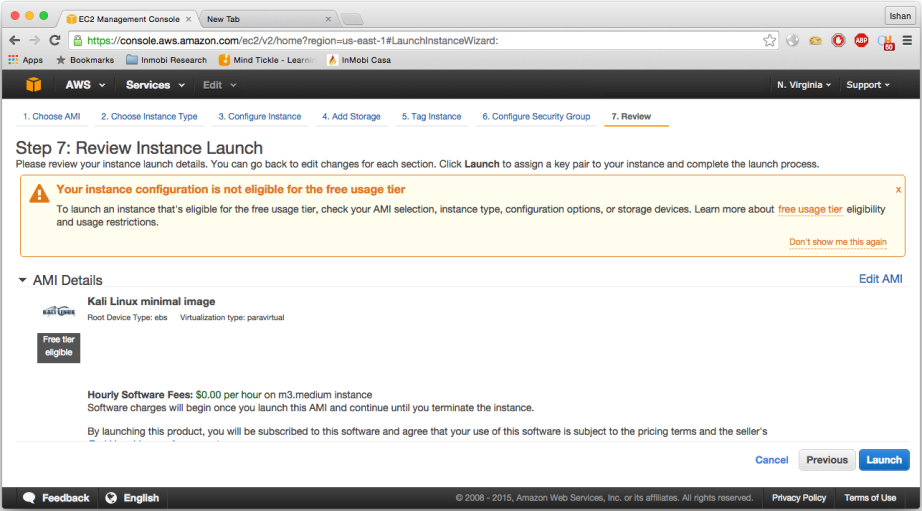
- As you see, there is a that says you are not eligible for free usage tier since we have selected
m2.mediumfor minimum 2GB RAM:
- Click on
Launch; here you need to a new key pair before and download it before you proceed, as shown in the following screenshot:
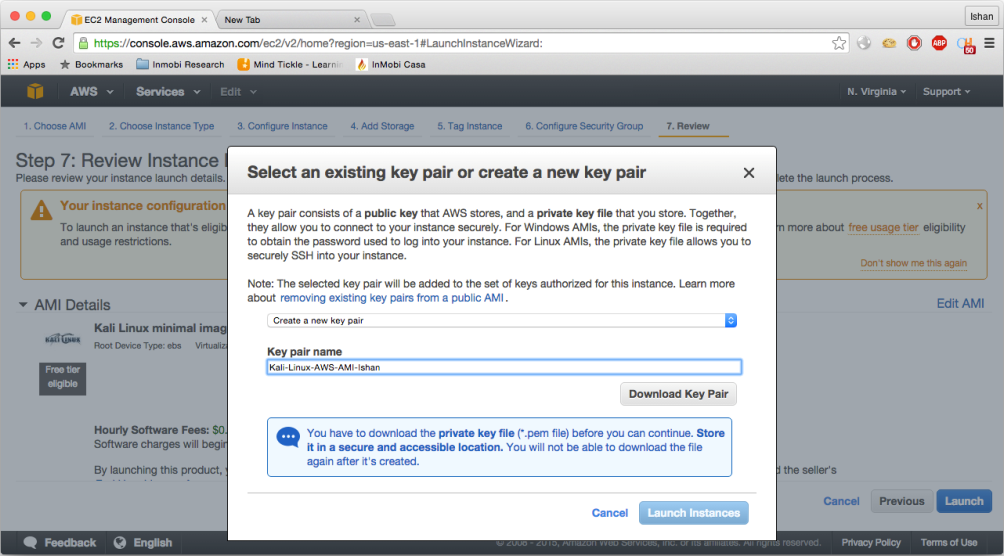
- Once you downloaded the pair, go ahead and click on
Launch Instances, as shown in the following screenshot:
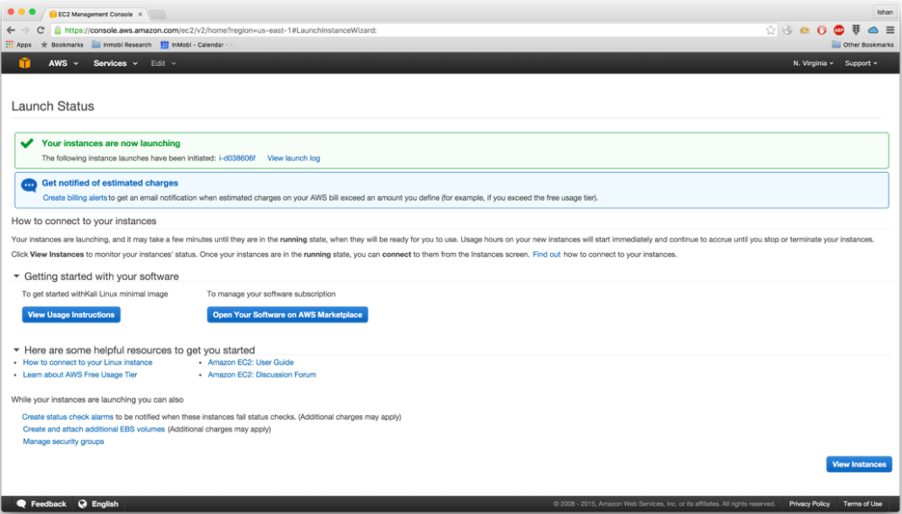
EC in EC2 stands for elastic computing, and the short answer is bringing up a virtual in the cloud. Amazon AWS has a collection of all the popular OS images already available and all you need to do is select the one you need for requirement, followed by the hardware requirement. Based on your OS and the hardware configuration you selected, AWS will provision that hardware and install that OS. You can select the type of storage you want, traditional or SSD, and then attach/de-attach the hard drive based on your requirement. Best of all, you only pay for the time you want to use it, and when you stop the EC2 machine, AWS will free up those resources and add them back its stock, that's how flexible AWS is. Now, it's time for a quick recap of what we did in this recipe. As a prerequisite, you need to first create an amazon AWS account, which is very easy to create. Then, step 1 shows you how to select EC2. Steps 2 and 3 show how to search and select Kali Linux's minimal image. In step 4, you get to read everything that Kali Linux AMI has to offer, the basic requirements and the user login information. Step 5 shows you how to select an instance type depending on your requirement and budget. In steps 6 to 7 you will go through the simple wizard while choosing the default recommended SSD to boot from. Step 8 shows you the final page with warnings and points you should take care of or be aware of. In step 9, you choose to set up a security group on SSH protocol port 22 only to allow you from a specific IP range that belongs to you. In step 10, you are shown the review page, where based on your instance type selection it informs you whether you are eligible for free tier or not. In step 11, you create a new SSH Key pair and download it on your local machine. In step 12, you finally click on launch to start the instance.
Having Kali Linux installed in Amazon AWS infrastructure with a public IP address, with just few clicks, can prove to be very helpful during external penetration testing. As you know, we have selected and installed Kali Linux's minimal image for use in AWS infrastructure, due to which our installation does not have any tools installed by default.
In our next recipe, we will cover how to use SSH and setup Kali Linux on Amazon AWS box for use. In this recipe, we will also solve few problems that you might face while updating the repository and installing Kali Linux tools and setting up GUI and installing all the required tools we will need for use.
I think a little about is justified here. Docker is a new open source container technology, released in March 2013 that automates the deployment of applications inside self-sufficient software containers. Docker (built on top of Linux containers) provides a much simpler way of managing multiple containers on a single machine. Think of it as a virtual machine but it is more lightweight and efficient.
The beauty of this is that you can install Kali Linux on almost any system, which can run Docker. Let's say, for example, you want to run Kali on Digital Ocean droplet but it does not let you spin-off a Kali Linux directly like it does for Ubuntu. But now, you can simply spin-off Ubuntu or centos on digital ocean and install Docker on it and pull the Kali Linux Docker image and you are good to go.
Since Docker provides another layer of abstraction, it is beneficial from security standpoint as well. Let's say, if you are running an apache server that is hosting an application, you can simply create a Docker container for this and run it. Even if your application gets compromised, the attacker would be self-contained within the Docker image only and will not be able to harm your host operating system.
Having said all that, now with installing Docker on your machine, for the purpose of demonstration we will be installing Docker on a Mac operating system.
For this recipe, you will need the following things:
- Connection to the Internet
- An installed Virtualbox
Perform the following steps for this recipe:
- To install Docker on Mac operating system, you need to download and install toolbox from https://www.docker.com/docker-toolbox . On running this installer on your mac, you will setup the Docker environment; the toolbox will install Docker Client, Machine, Compose (Mac only), Kitematic and VirtualBox.
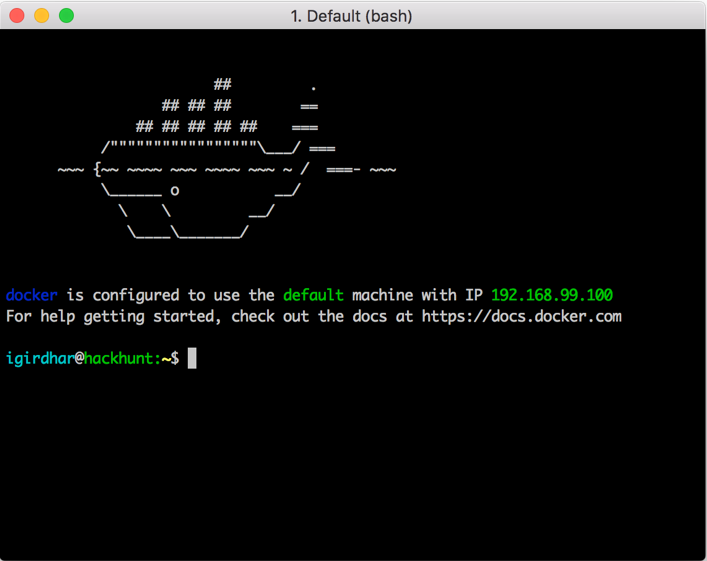
- Once the installation is done, go to
Applications|Docker|Docker Quickstart Terminal.appor open the Launchpad and click on Docker Quickstart, When you double-click on the application, you will see the terminal as shown in the following screenshot:
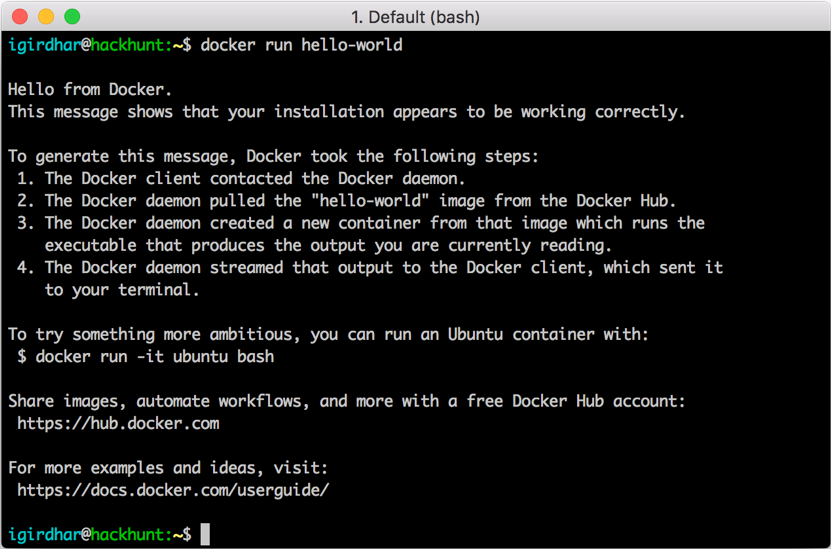
- To check your has succeeded, you can run the following command:
docker run hello-world
You will see the following output if your installation succeeded:
- Now, let's go to hub (
https://hub.docker.com
) and search for
Kali Linuximage, as shown in the screenshot:
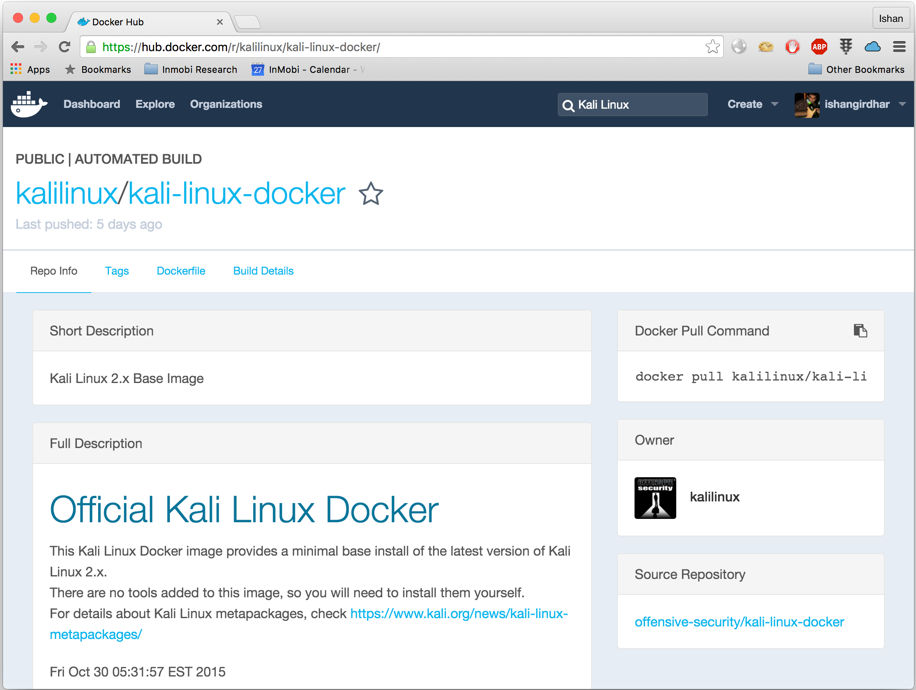
- As you can see, the official Kali image is available; we will use the following command to pull and run it in our Docker:
      docker pull kalilinux/kali-linux-docker

      docker run -t -i kalilinux/kali-linux-docker
- Now, you have your minimal base version of Kali Linux running in Docker; there are no tools added to this image, you can install them as per your need or you can refer to https://www.kali.org/news/kali-linux-metapackages/ .
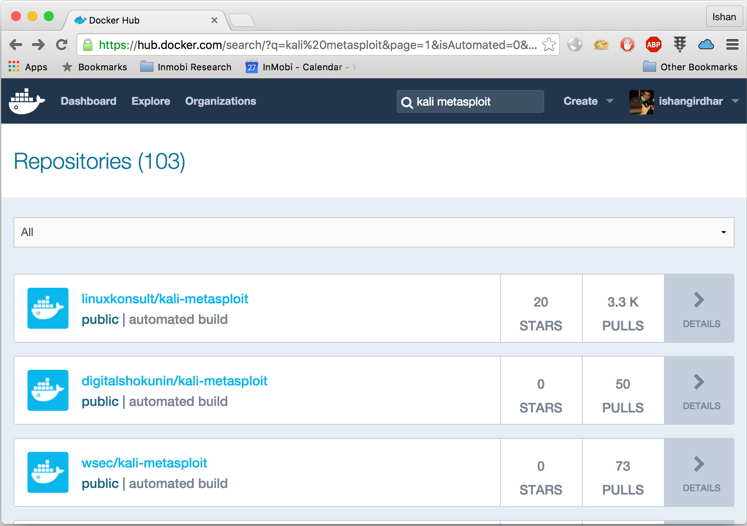
- Let's say, you just want to only Metasploit; for that you can search for
kali Metasploitimage on the hub and install the one with the highest number of pulls so far, as shown in the screenshot:
- Pull the image using the following command; but before you do that, note that this is not an official image. Therefore, it is at your discretion whether you want to trust this image:
docker pull linuxkonsult/kali-metasploit
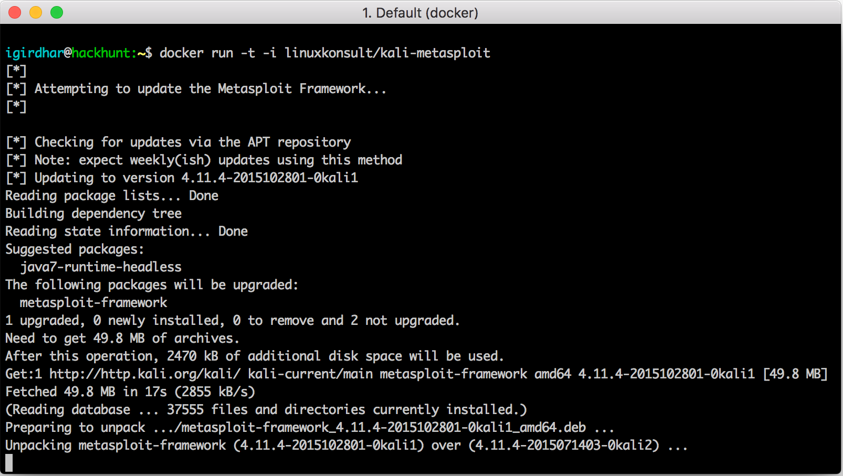
- Then, run the Docker image with the
docker runcommand as shown:
docker run -t -i linuxkonsult/kali-metasploit
The will be as shown in the screenshot:
Once the framework is prepared it is unpacked and executed, it should look as follows:
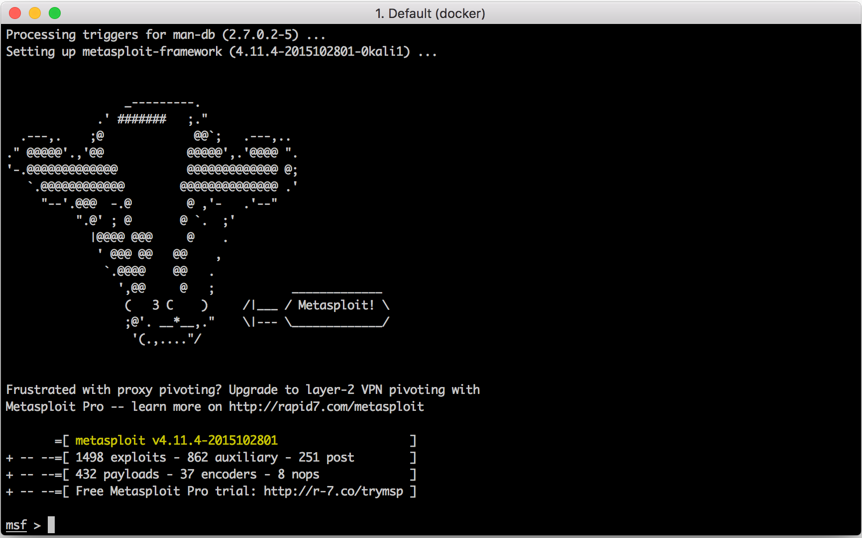
As you can see, you have Metasploit updated and running. But this is not it; all the changes you have made are not permanent, until you commit the changes. Once you commit the changes, you can pick up next time from where you left off. To commit the changes, open another console window and type the command:
docker ps
- On running this command, you will see the output, as shown in the following screenshot:

- To commit the changes, you need to enter the command in the following format:
      docker commit <docker-id> <docker-name>
docker commit bd590456f320 admiring_pike
On successful commit, you will see the following output:
b4a7745de59f9e106029c49a508c2f55b36be0e9487dbd32f6b5c58b24fcb57
In this recipe, we need Virtualbox already installed as a prerequisite, and we downloaded and installed the Docker toolbox. Once Docker toolbox is installed, simply open the Docker Quickstart Terminal.app and pull the image you want to run, you can search for the desired image from
https://hub.docker.com
and use the docker run command to run it. Once you have performed your operations, simply commit the changes with the docker commit command.
Here, we have used the -i and -t switches. For interactive processes (such as a shell), you must use -i
-t together in order to a teletype (TTY) for the container process. The-i
-t switches is often written -it.
You can learn more about at https://www.docker.com . To search for images, you can visit https://hub.docker.com . To install Linux meta-packages, you can visit https://www.kali.org/news/kali-linux-metapackages/ .
Kali Linux is the first open source network pen testing platform for nexus and one plus devices. In this chapter, we will see how to install Kali Linux on One Plus One.
Before we begin, make sure you backup your device data before proceeding to do any of the following.
In order to commence with this, you will require the following:
- A OnePlus One device, 64 GB
- A USB cable
- Any Windows operating system
- NetHunter Windows Installer
- Active Internet connection
Perform the following steps for this recipe:
- Download the NetHunter Windows Installer at http://www.nethunter.com/download/ , you will see the following page:

- Install the downloaded setup, as shown in the following screenshot:

- Once the installation is complete, run the shortcut created on the desktop:

- Once the application loads, make sure you check for any updates. If there are none, click on the
Nextbutton:

- Now we will select the device for rooting. Our recipe sticks to OnePlus, so let's select the
ONEPLUSONE-BACON (A0001) - 64GBoption and click onNext:

- Now we will be to install drivers, these are drivers for the laptop/PC to with the mobile device over a USB connection. Click on
InstallDrivers...to commence the installation process. Once the installation is done, click onTest Drivers...to make sure that the drivers are working correctly, as shown in the following screenshot:

- Once the drivers are installed correctly, proceed by clicking on
Nextand now we will come across the installer configuration. Here, it is recommended to proceed withInstall Official Kali Linux NetHunter. In case you have a custom NetHunter, proceed with the second option but be careful with the compatibility issues:

- Clicking on
Next, we will be coming on theDownload Filesoption where the application will determine the available packages with us and the missing files can be obtained with the help of theDownload + Update All File Dependenciesoption. In case you get stuck or any file is not getting downloaded, you can simply Google the filename and download it and put it in the folder where the application was installed:

- Once all the are made available, make you do the following:

- After this has done, we can proceed with unlocking the bootloader. Click on
Unlock Device Bootloader. Make to back up all the important data from the device before you start from this point onwards:

- The phone will go in the
Fastbootmode and proceed with its unlocking. Once that is done, proceed to the next step of flashing the stock ROM. This is a new ROM that will be mounted on your device to keep the compatibility with Kali Linux NetHunter. Click onFlash Stock...as shown in the following screenshot:

- Once the flash stock is done, proceed to the next step and click on
Flash Kali Linux + Root!, as shown in the following screenshot:

The preceding step will get the Kali Linux NetHunter in your device. Once successful, the device will go into the TWRP recovery mode.
- In the mode, click on
Rebootand it will ask that Super user is not installed Swipe to once the swipe is done the Kali linux will boot. Now, click onSuperSUand see whether it is working:

- Download

- Click on the called
NetHunter, as in the following screenshot:

- Once you get the application running, you will be asked to grant root permissions. Click on
Grantand commence to the Kali Launcher and then the terminal, as shown in the following screenshot:

- Select the terminal and launch
Metasploit, as in the following screenshot:

- Launch
msfconsoleon the device:

In this recipe, we have how you can install Linux, which is called NetHunter. NetHunter is ARM which was ported to run on a non-intel processor, which is built on your trusted Kali Linux and tool sets. The Kali Linux NetHunter project is an open source Android penetration testing platform for ARM devices, created as a joint effort between the Kali community member BinkyBear and Offensive Security.
We installed Kali on our device and now we can perform our pen testing from OnePlus one, which is highly efficient in case of red team exercises, social engineering, or during physical security assessment.
More information for the same can be found at http://www.nethunter.com .
Installing Linux on a hard disk is the first step. The process of installing Kali Linux on a physical hard disk or on Virtual Hard Disk is absolutely similar. So, feel free to use the same steps to install Linux on your physical machine. Needless to say that by using this method only Kali Linux 2.0 will be installed on your hard disk as the primary operating system.
Before installing Kali Linux, you will require Linux Latest ISO Image, which can be downloaded from https://www.kali.org/downloads/ .
Perform the steps for recipe:
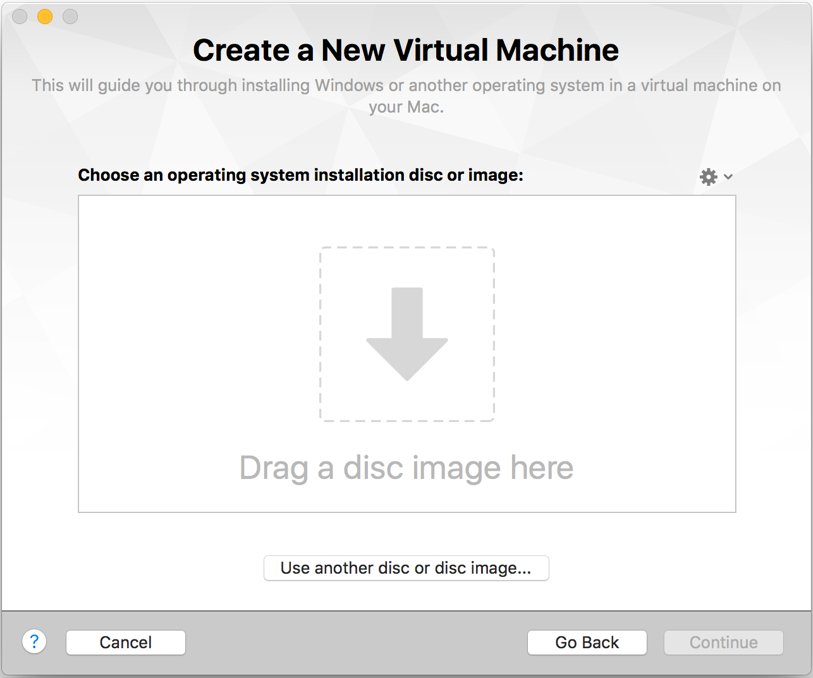
- Open VMware on your macOS and press command + N , once the same is done we will see something like the following screenshot:
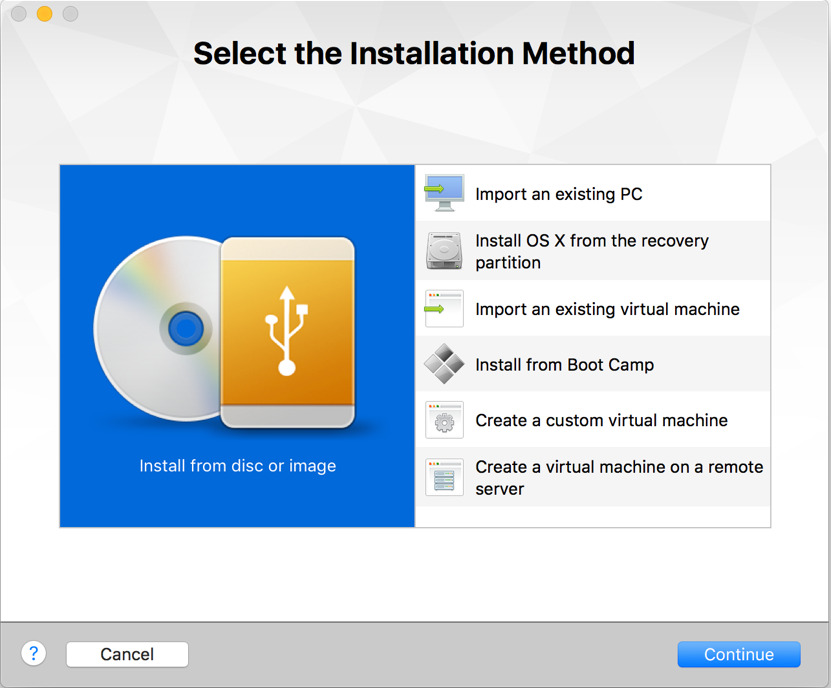
- Select
Install from or imageand onContinue:
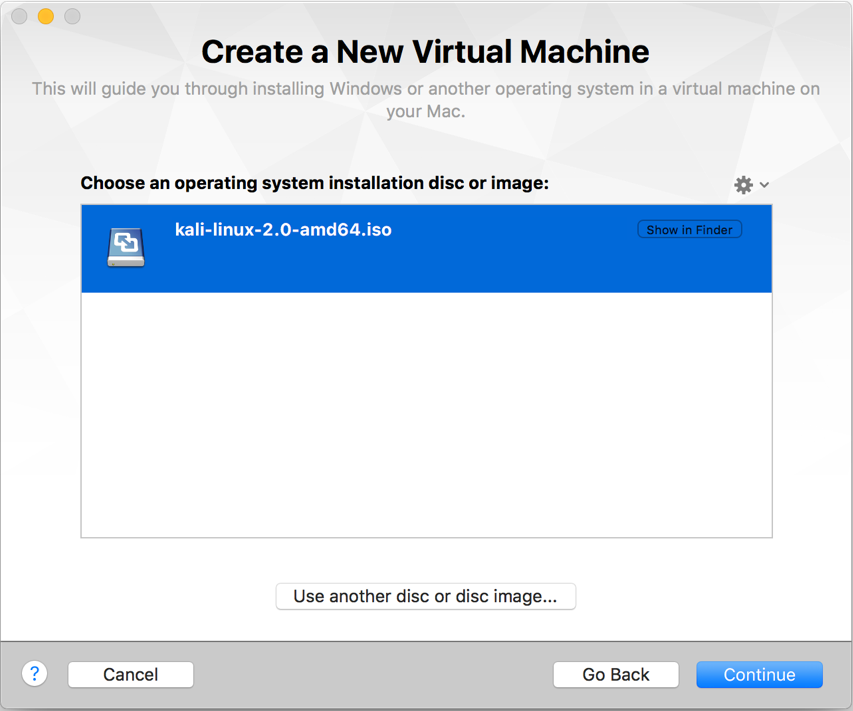
- Drag and the Kali Linux 2.0 ISO, which have just downloaded, as shown in the following screenshot:
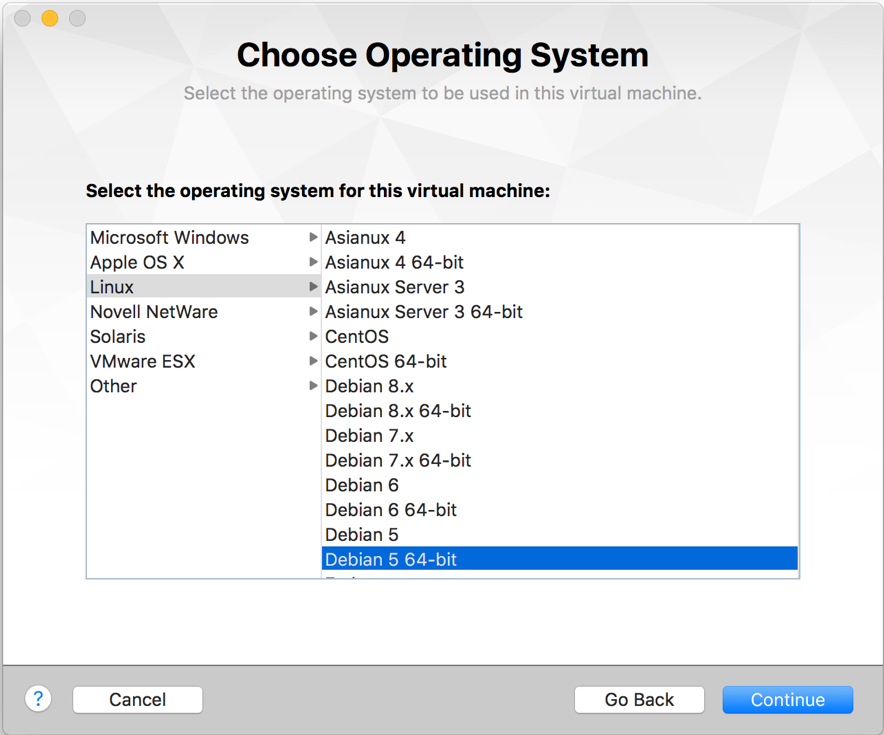
- Select
Debian 5 64bitand onContinue, as shown in the screenshot:
- Click on
Settingand select the location to save your virtual machine:

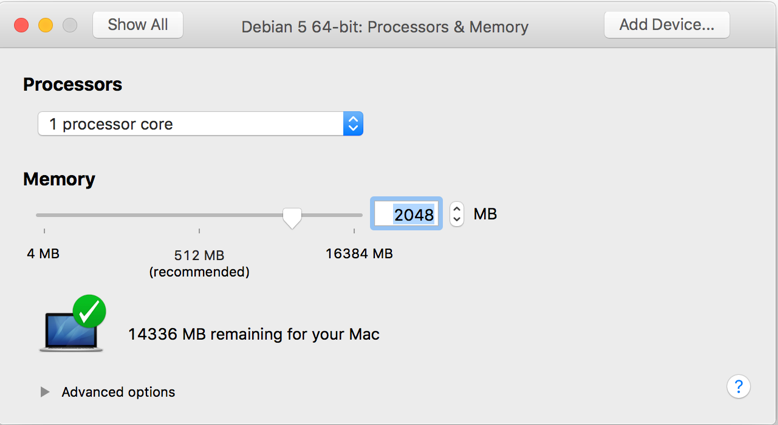
- After saving, opens
Debian settings. OpenProcessors & Memoryand the RAM size to 4 GB (or based on the memory available in your laptop). Remember that Metasploit requires minimum 2GB of RAM to run as a prerequisite:
- Close the and click on
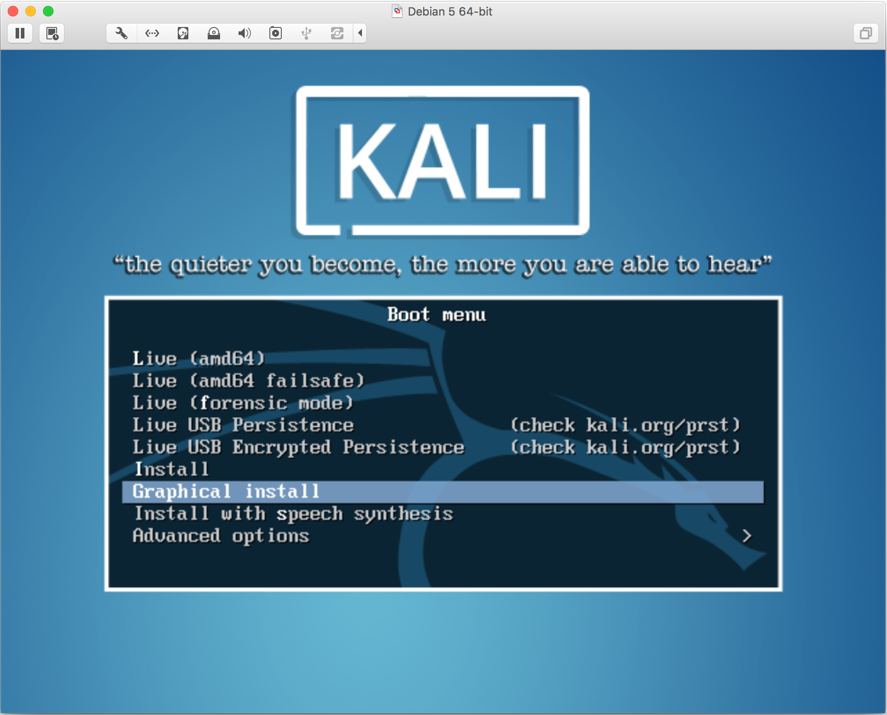
Startand then inside the window. The cursor control will go toGuest VM. Scroll down and selectGraphical installas shown in the following screenshot:
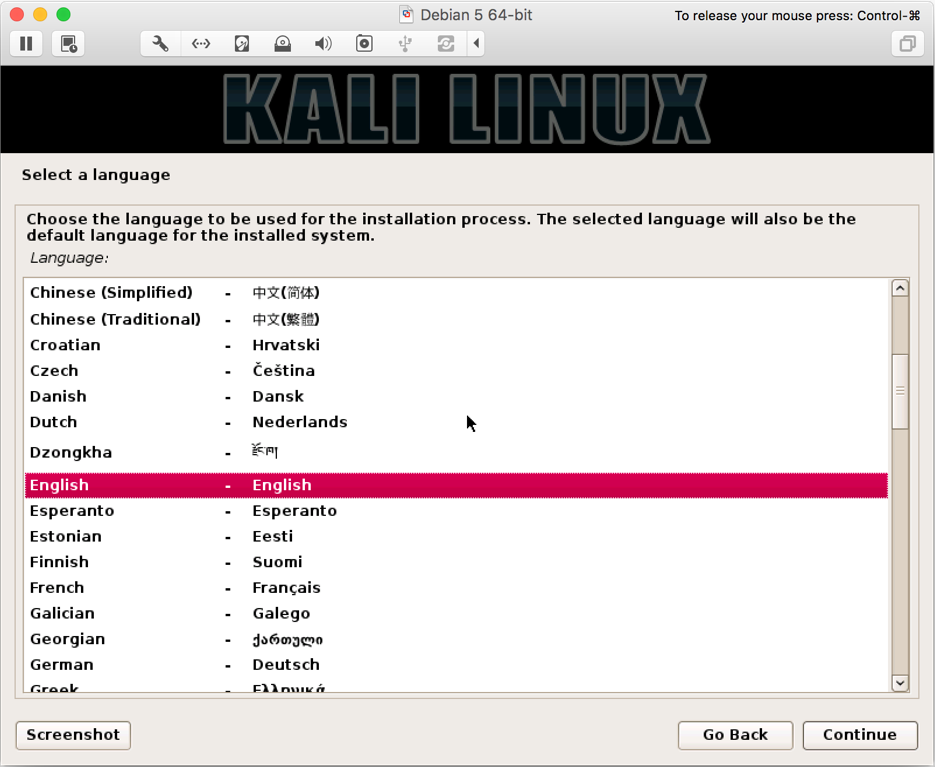
- Select your language and on
Continue(we choseEnglish):
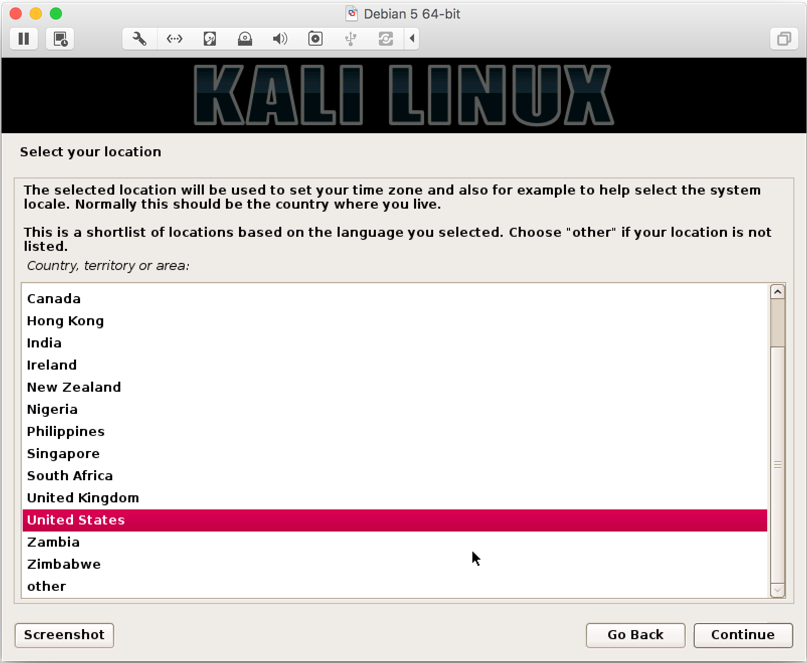
- Select country (we
United States):
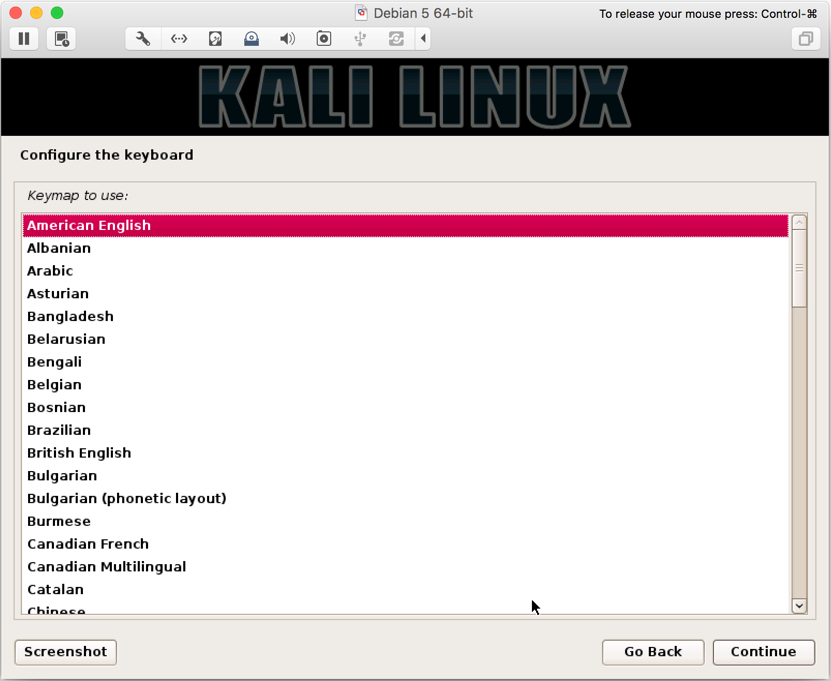
- Select keyboard (we selected
American English):
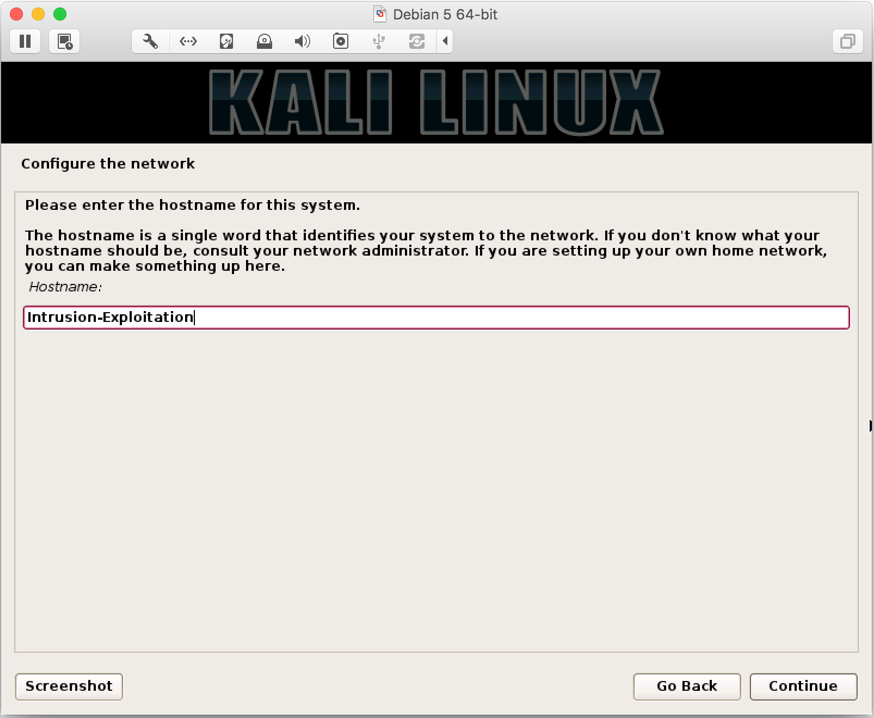
- Next, we to configure the network services. Enter your preferred hostname (we named it
Intrusion-Exploitation):
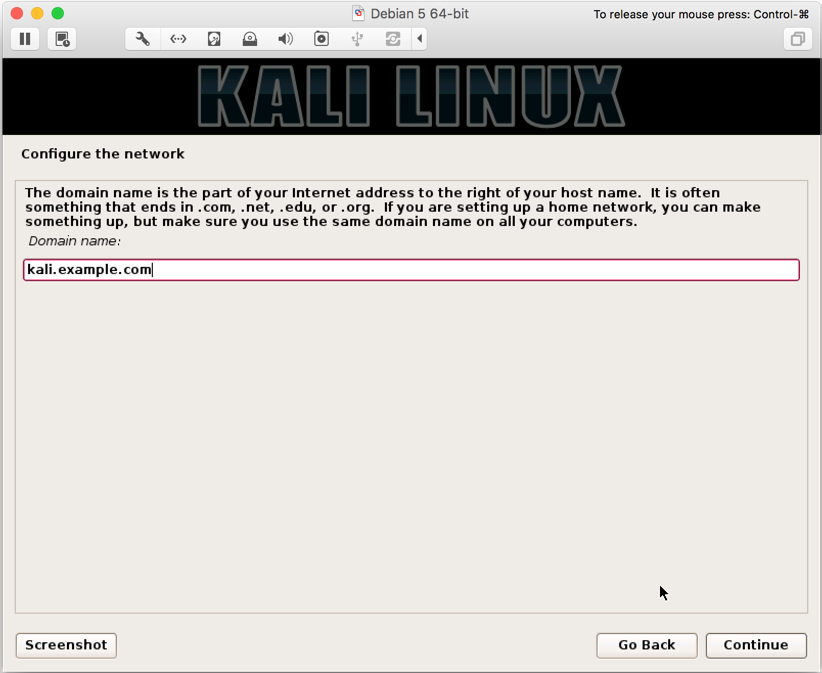
- Next, enter domain of your choice (we entered
kali.example.com):
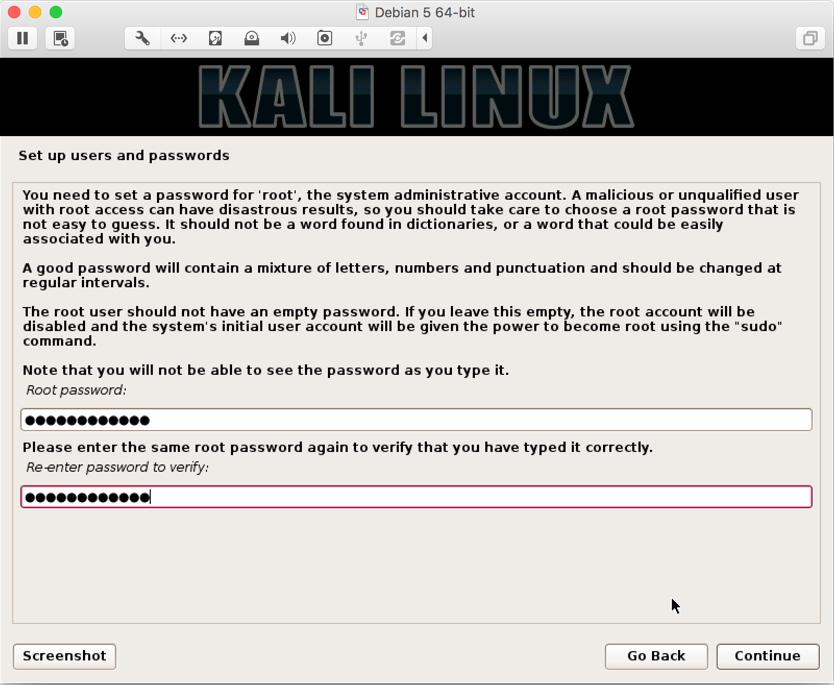
- The most step is to enter your password, and make sure you have a strong password, and that you don't forget it (use a combination of A-Z, a-z, 0-9, and special characters):
- In next screen, you select your zone (we chose
Eastern):

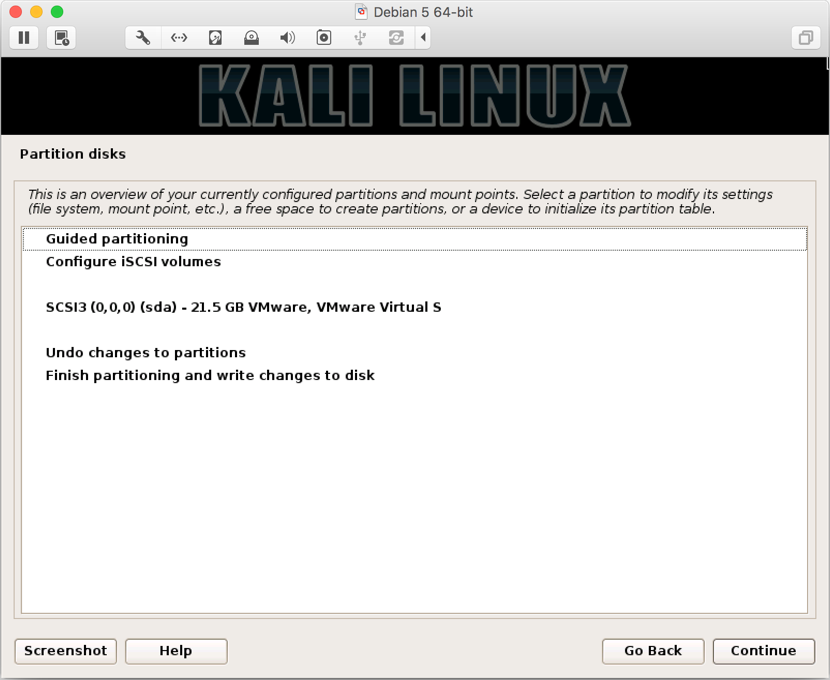
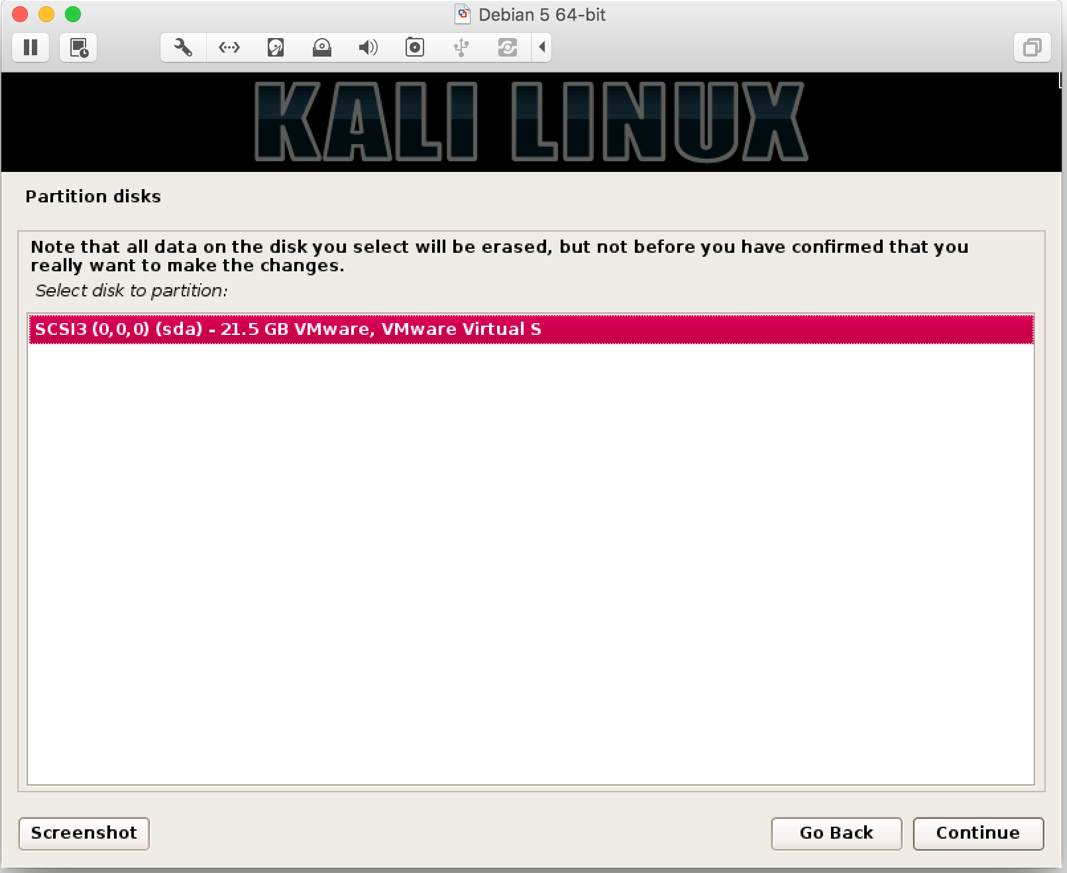
- Next, you will be four options to from; if you have a preferred way of partitioning disk, you can select
Manual. However, for easy partitioning, we will be usingGuided - Use Entire Disk:
- On the screen, you will be prompted that the entire disk space will be formatted, click on
Continue:
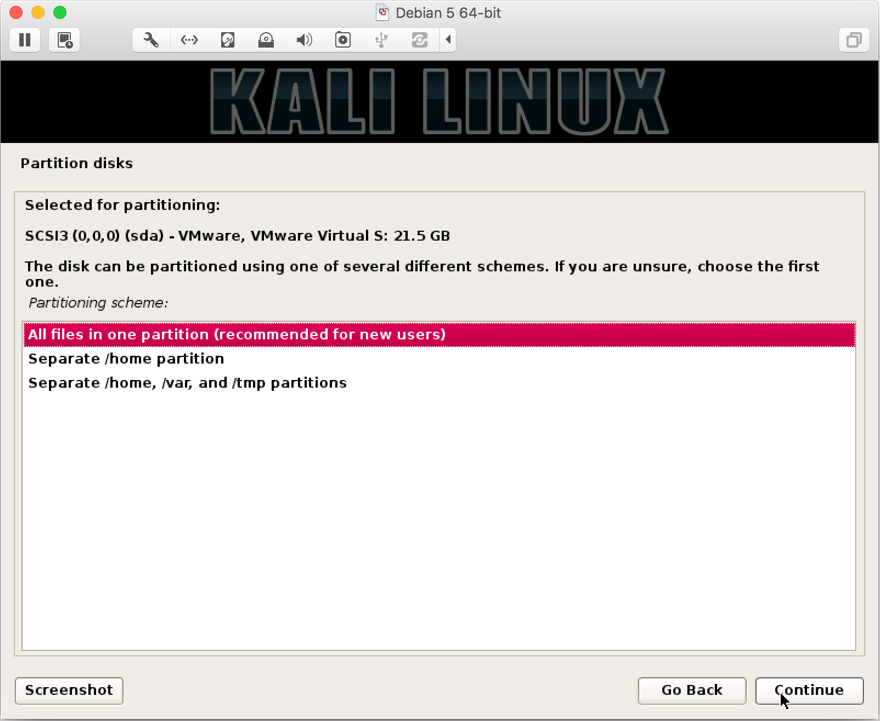
- Next, you will be shown options. Since we are only going to use it for penetration and not as a server or main desktop operating system, it is safe to select
All files in one partition:
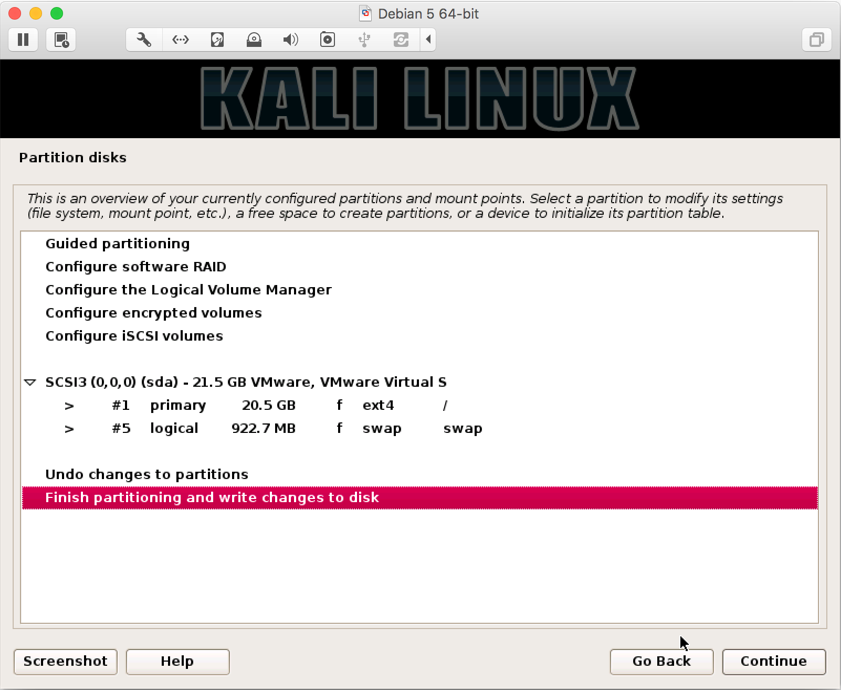
- You will be a summary of to be made on your disk. Select
Finish Partitioning and write changes to the diskand click onContinue:
- Select
YesclickContinue:

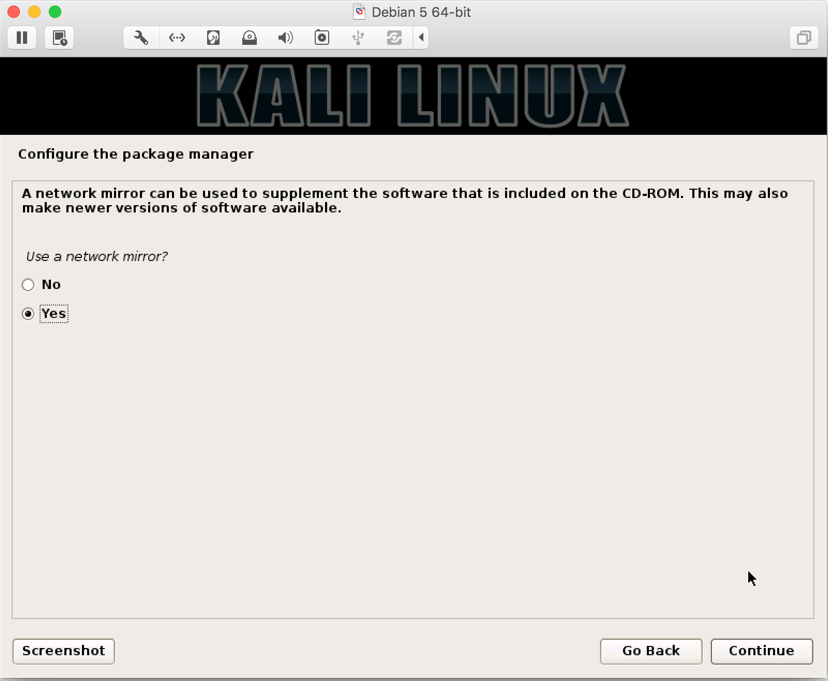
- Next, you will be asked to configure your manager using a network mirror. It allows you to update your Kali tools collection as and when are available, and, in our case, we selected
Yes:
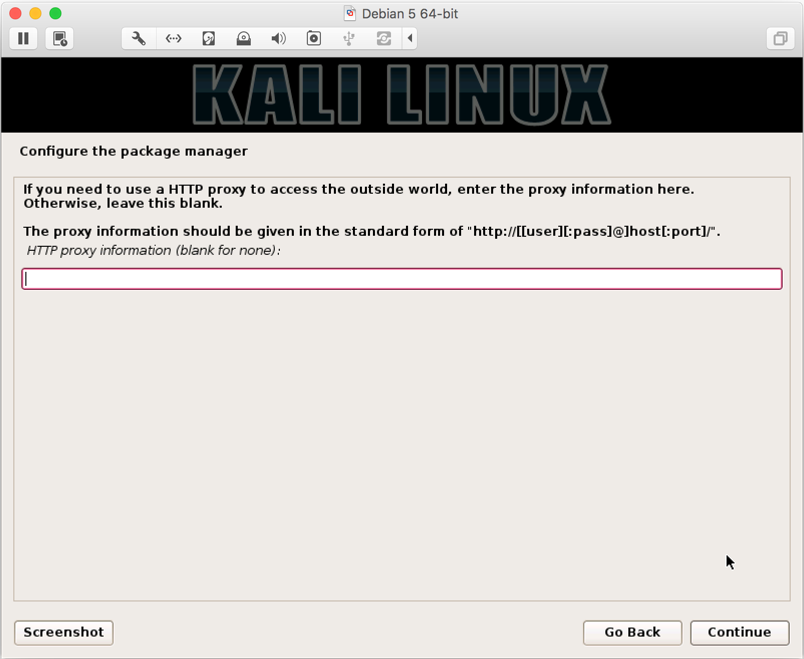
- Next, you can enter if you any proxy server in network. If not, you can simply skip and click on
Continue:
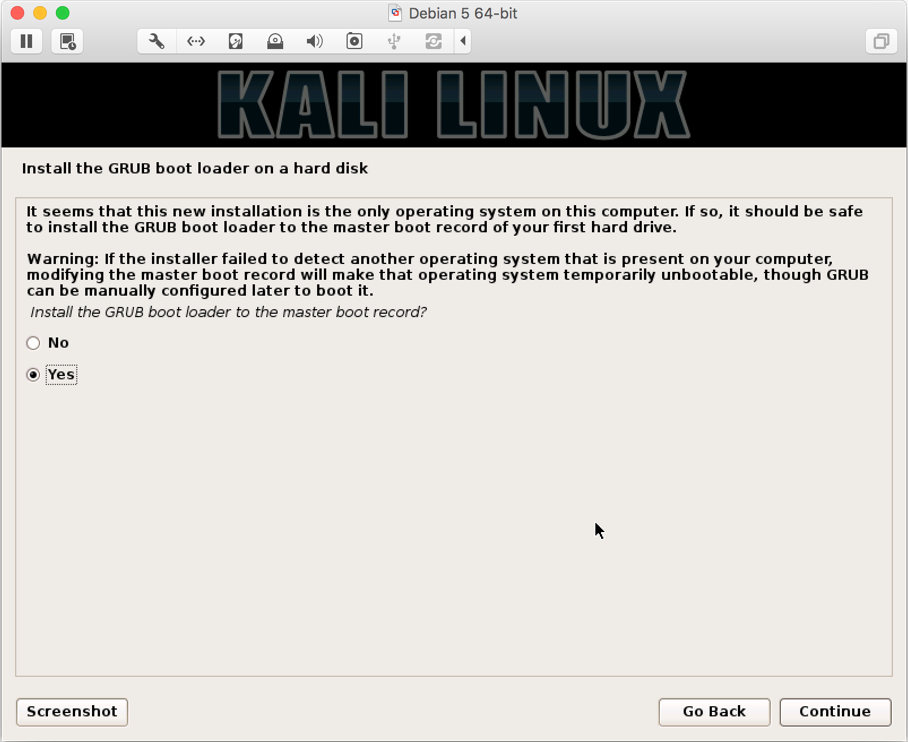
- Finally, you be asked to GRUB Bootloader to/Dev/SDA- Master Boot Record; select
Yesand click onContinue:
- Finally, you will be asked to enter the device or
/dev/sda; select/dev/sdaand onContinue:
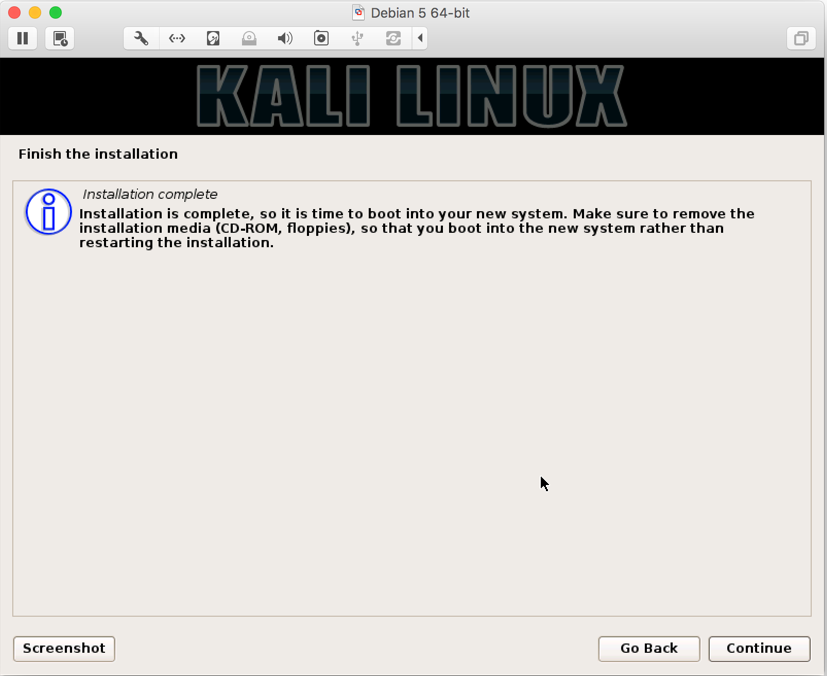
- If you see the preceding screen, it means that you have made it till the end and Kali installation is complete. Congratulations! Click on
Continueand your system will be rebooted to bring you fresh installed Kali Linux.
In this recipe, we inserted the Linux ISO and the graphical install. During the graphical install, we started configuring with our preferred language, keyboard language, country, and timezone. From step 5 onwards, we entered the hostname for our Kali Linux and in step 6, we entered the domain name for our Kali Linux.
From steps 9 to 13, we configured the hard disk partition to use the entire disk for installation and created one partition for all folders since we will only be using it for penetration testing. Once the installation is finished, step 14 onwards we configured Kali to use network mirrors for faster updates, configured any network proxy (if required) and finally installed GRUB bootloader.
Kali contains more than 300 security tools and system binaries. After installing Kali Linux, first thing you would need to do is update the Linux to get the latest collection of security tools and features. Since Kali is based on Debian Linux, you can use the apt-get update command to update the repositories for the binaries and tools.
However, at times while updating Kali Linux, you will notice that updates can be slow regardless of your Internet speed and bandwidth. In this recipe, we will show you how you can update your source file, which your package manager refers to, for faster package updates:
Perform the following steps for this recipe:
- Open the terminal and use an editor to open the
sources.listfile:
vim /etc/apt/sources.list
- The default
sources.listfile looks like:
      #deb cdrom:[Debian GNU/Linux 7.0 _Kali_ - Official Snapshot i386
      LIVE/INSTALL Binary 20140721-23:20]/ kali contrib main non-free


      deb http://http.kali.org/kali kali main non-free contrib

      deb-src http://http.kali.org/kali kali main non-free contrib

      ## Security updates
      deb http://security.kali.org/kali-security kali/updates main
      contrib non-free
All you need to do is to change http to repo as shown in the following code:
      #deb cdrom:[Debian GNU/Linux 7.0 _Kali_ - Official Snapshot i386
      LIVE/INSTALL Binary 20140721-23:20]/ kali contrib main non-free

      deb http://repo.kali.org/kali kali main non-free contrib
      deb-src http://repo.kali.org/kali kali main non-free contrib

      ## Security updates
      deb http://security.kali.org/kali-security kali/updates main
      contrib non-free
- Make the following changes, save the file, and exit the editor by pressing the
Esc
key and then type
wq!and press Enter . - Now, update and upgrade your Kali using the following command; you will notice the difference in speed:
apt-get update && apt-get upgrade
Kali Linux has multiple different mirrors around the world. Based on your IP address location, it automatically selects the mirror closest to your location. Due to various reasons, these mirrors may become slow over a period of time. You can find the list of mirrors closest to your location at
http://http.kali.org/README.mirrorlist
. The apt-get command takes the list of update servers from /etc/apt/sources.list. Changes made to the sources.list files ensures that our Kali connects to the correct servers and gets served with faster updates.
You will be using your Linux during audits and penetration testing. You would need your Kali Linux to be configured and customized for highest speed possible during those crucial testing processes. In this recipe, we will show you several tools that can used to optimize your Kali Linux experience.
Perform the following steps for this recipe:
- Preload is a written by Behdad Esfahbod, which runs as a daemon. This application closely observes the usage of frequently used applications and binaries and loads into memory when the system is idle. This results in faster start-up time because less data is fetched from the disk. You can read more about this at https://wiki.archlinux.org/index.php/Preload . To install the application, issue the following command on the terminal window:
apt-get install preload
BleachBit quickly frees disk space and tirelessly guards your privacy. Frees cache, deletes cookies, clears Internet history, shreds temporary files, deletes logs, and discards junk that you didn't know existed. You can read more about this application at http://bleachbit.sourceforge.net/ .
- To install the application, issue the following command on the terminal window:
apt-get install bleachbit
- By default, Kali does not show all applications and scripts, which are there in the startup menu. Every application you installed ultimately slows down the booting process by starting up even if it is required or not. You can install Boot-Up manager and keep a close eye on what services and applications are allowed during the booting process. You can always disable the unnecessary services and applications to increase the booting speed of your Kali.
To install the application, issue the command on the terminal window:
apt-get install bum
During penetration testing and auditing, we will be required to deliver payload on target machines from our Linux. For that purpose, we will leverage basic network services such as HTTP, FTP, and SSH. Services such as and SSH are installed by default in Kali Linux but Kali does not enable any network services to minimize detection.
In this recipe, we will show you to configure and start running services securely:
Perform the following steps for this recipe:
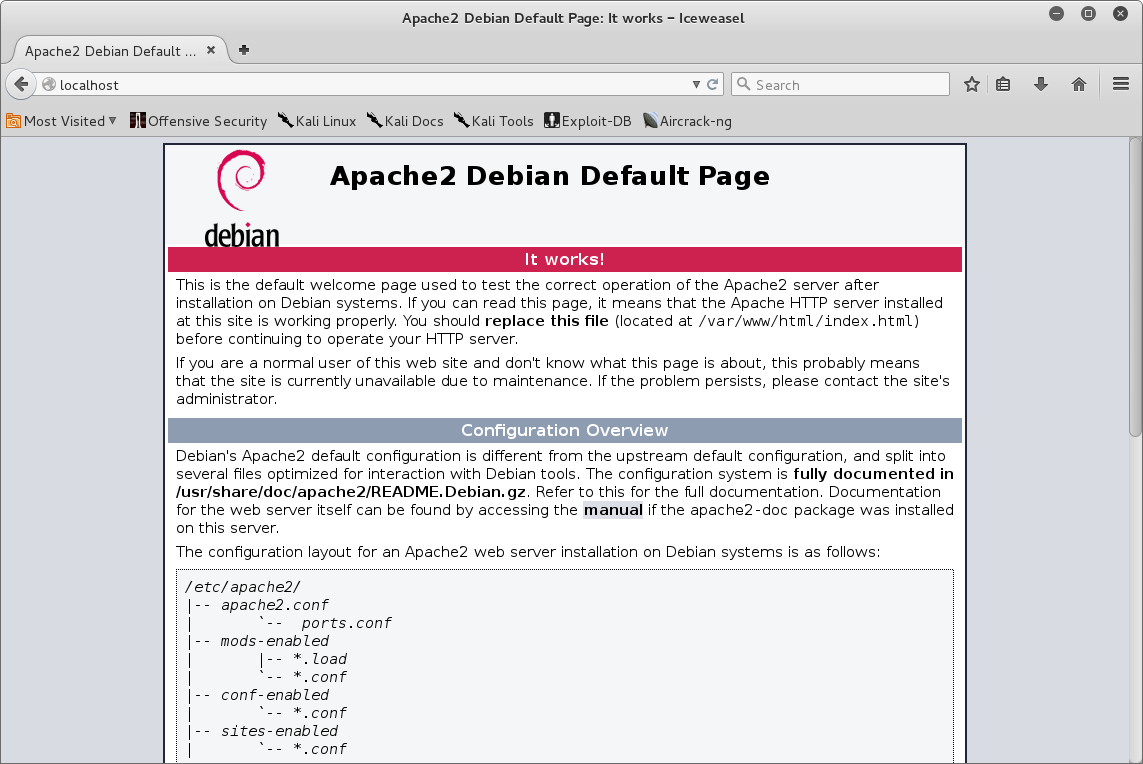
- Let's begin with starting an Apache webserver. To start the Apache service, use the following command:
service apache2 start
You can verify that the service is by to the localhost using a as shown in the screenshot:
- To start the SSH service, SSH keys needs to be generated. Back in Backtrack r5, you used to generate SSH keys using the
sshd-generatecommand, which is not available in Kali Linux. Using default SSH keys is a security risk and therefore a new SSH key should be generated. To generate SSH keys, you can either delete or backup your default keys generated by Kali Linux:
      # cd /etc/ssh
      # mkdir default_kali_keys
      # mv ssh_host_* default_kali_keys/
      # cd /root/
- First, we need remove run levels for SSH by issuing the following command:
# update-rc.d -f ssh remove
- Now we need to the SSH run by issuing the command:
# update-rc.d -f ssh defaults
- Regenerate the keys:
      # dpkg-reconfigure openssh-server
      Creating SSH2 RSA key; this may take some time ...
      Creating SSH2 DSA key; this may take some time ...
      Creating SSH2 ECDSA key; this may take some time ...
      insserv: warning: current start runlevel(s) (empty) of script
      `ssh' overrides LSB defaults (2 3 4 5).
      insserv: warning: current stop runlevel(s) (2 3 4 5) of script
      `ssh' overrides LSB defaults (empty).
- You can check whether the SSH key hashes are different now:

- Start the SSH service using the following command:
service ssh start
- You can verify the service is using the
netstatcommand:
netstat - antp | grep ssh
- Start the FTP server using the command:
service pure-ftpd start
- To verify that the service is running, use the following command:
netstat -ant | grep ftp
- To stop any service, you can the following command:
service <servicename> stop
Here, <servicename> is the name of service required to terminate:
service ssh stop
In this recipe, we have configured and started basic network services, which we will be using to deliver payloads to our victim machines depending on the scenario. We have started HTTP service, FTP service, and we have backed up default SSH keys and generated new SSH keys, and started the SSH service.
In this recipe, we will you how to install, configure, and start running Nessus and Metasploit.
Perform the steps for this recipe:
- Open Firefox and go to
http://www.tenable.com/products/nessus/select-your-operating-system
and select the home version. On the next page, select the operating system as
6 and 7(as Kali is based on Debian Jessie) as shown in the following screenshot:

- To the Nessus, open the command in the terminal and type:
dpkg -i Nessus-6.2.0-debian6_amd64.deb
- Now, your Nessus has been installed as shown in the following screenshot:

- Once the installation is complete, start the Nessus service using the following command:
/etc/init.d/nessusd start
- Open link
https://kali:8834as shown in the screenshot:
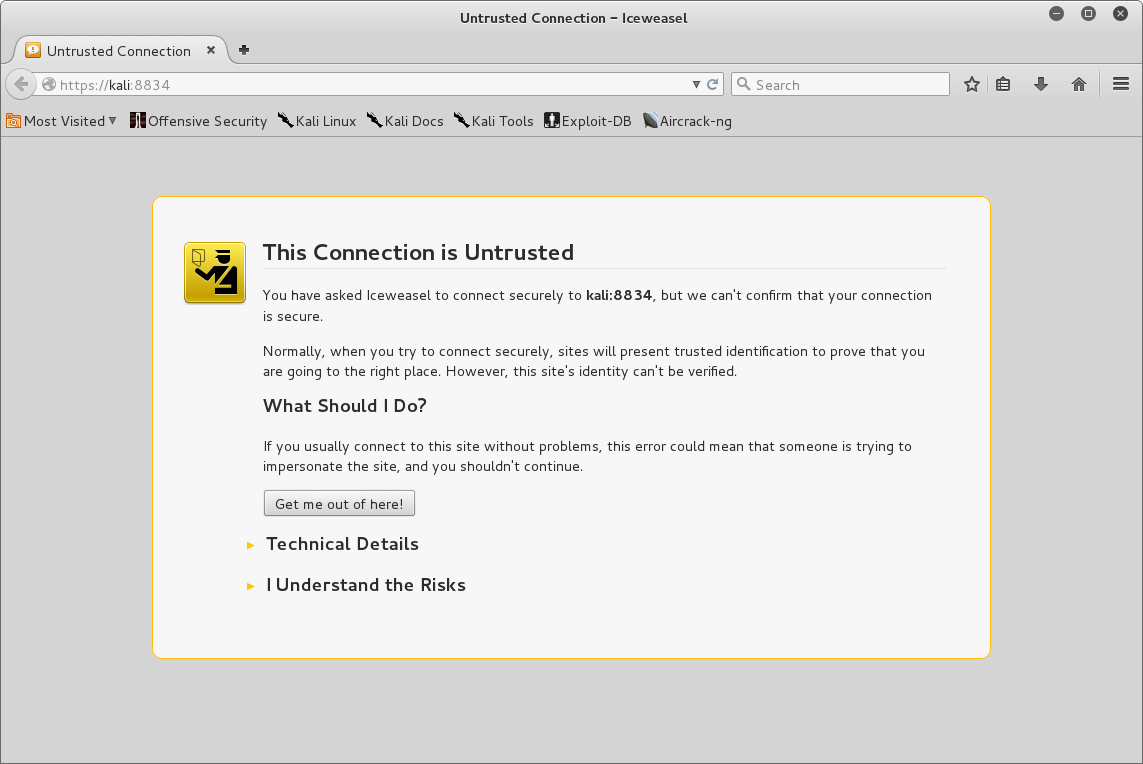
- By default, during installation, Nessus is configured for using self-signed certificates to the traffic between your browser and the Nessus server; therefore, you are seeing page shown in the preceding screenshot. If you have downloaded the Nessus from a tenable website, you can consider it safe to click on
I understand the risk and accept the certificateto continue and you will see the following page:

- Click on
Continue, and you will be shown the initial account setup page, as in following screenshot:

- Enter the username and password combination you want to create and click on
Continue. On the next page, you will be required to enter the code as shown in following screenshot:

- To obtain the activation, go to http://www.tenable.com/products/nessus-home and fill the form on the right-hand side of the page to receive the activation code. You will receive your activation code on your e-mail account. Copy the activation and enter it on this screen and continue:

Now, the Activation has been completed and Nessus will update the plugins and the tool will be ready for your use.
- We now have Nessus in place. So, let's set up Metasploit. Metasploit is installed by default during OS installation. To invoke, you will need to start the following services:
      # service postgresql start
      [ ok ] Starting PostgreSQL 9.1 database server: main.
      root@Intrusion-Exploitation:~#
      root@Intrusion-Exploitation:~# msfconsole
      [ ok ] Starting Metasploit rpc server: prosvc.
      [ ok ] Starting Metasploit web server: thin.
      [ ok ] Starting Metasploit worker: worker.
- Metasploit will be started as shown in following screenshot:

In this recipe, we have downloaded Nessus home feed and started the service. We completed the basic initial account setup and entered the account activation key to activate our home feed version of Nessus and finally updated the plugins.
Later on, we turned on PostgreSQL and Metasploit services, and finally, using msfconsole we started an instance of Metasploit.
Nessus is a scanner and is an exploitation framework from Rapid7. However, most network environments require only vulnerability assessment and not in-depth exploitation. But, if in some cases it is needed, Metasploit is one of the best frameworks available. Similar to Nessus, Rapid7 has also launched their own vulnerability scanner called Nexpose. can be configured to be integrated with Metasploit, which allows Metasploit to use NexPose for vulnerability scanning and select exploits based on the information gathered by and thus it provides better experience as compared to using Nessus with Metasploit. For more information, visit http://www.rapid7.in/products/nexpose/ .
In this recipe, we will install some third-party tools, which were there as part of Backtrack 5 or can be a good addition to the pen testing toolbox.
Perform the following steps for this recipe:
- Lazy is a Bash script that is created to automate the updates and install all other third-party tools that you might require to make Kali as your default operating system. You can read more about this script at https://code.google.com/p/lazykali/ .
To download and install this script, issue the following command on the terminal window:
      Wget https://www.lazykaligooglecode.com/files/lazykali.sh
      Give it executable permission and execute:
      chmod +x lazykali.sh
      sh lazykali
- When run the
lazykali.shscript, it shows you if the script is already installed, and if not, you can install it as shown in the following screenshot:

- After self-updating the script, continue and you will see the following screen:

- Next, enter
6to install extra tools: - Then, choose
Select All. It will then install all the tools that will be required in the further recipes.
In this recipe, we will be to and setting-up on Kali Linux.
To step through this recipe, you will need a running Kali Linux in Oracle Virtualbox or VMware, and an Internet connection. No other prerequisites are required.
For this recipe, you need to perform the following steps:
- At the time of writing this book, Kali Linux 2.0 Rolling is based on Debian Wheezy and therefore these steps will only work for Debian Wheezy based Kali Linux. In future, if Kali is updated, then kindly check the latest steps to install Docker from the Docker documentation.
- In your terminal window open
/etc/apt/sources.list.d/backports.listin your favorite editor. If the file doesn't exist, create it. - Remove any existing entries and add an entry for backports on Debian wheezy:
deb http://http.debian.net/debian wheezy-backports main
- Update the package information and ensure that APT works with the HTTPS method, and that CA certificates are installed:
      $ apt-get update
      $ apt-get install apt-transport-https ca-certificates
- Add the GPG key:
      $ apt-key adv --keyserver hkp://p80.pool.sks-keyservers.net:80
      --recv-keys 58118E89F3A912897C070ADBF76221572C52609D
- Open
/etc/apt/sources.list.d/docker.listin your favorite editor. If the file doesn't exist, create it. - Remove any existing entries and add an entry for backports on Debian wheezy:
$ deb https://apt.dockerproject.org/repo debian-wheezy main
- Update the package information and verify that APT is pulling from the right repository:
$ apt-get update && apt-cache policy docker-engine
- Install Docker:
$ apt-get install docker-engine
- Start the Docker daemon:
$ service docker start
- Verify that Docker is installed properly:
$ docker run hello-world
Since, you're already logged in as root in your Kali Linux installation, you don't need to use sudo. But it is important to note that the docker daemon always runs as the root user and the docker daemon binds to a Unix socket instead of a TCP port. By default, that Unix socket is owned by the user root, and so, you will need to use the preceding commands with sudo, if you are not logged in as root.
In this recipe, we have added the docker source list so that we can fetch the Docker updates every time we use the apt-get update command on our system. Then, update the apt-get sources and install the prerequisites required for installing Docker. We added the GPG key to ensure that whatever updates we are installing are valid official unchanged packages. After all this basic configuration, we ran a basic apt-cache to ensure APT is fetching the docker-engine from the right repository. Finally, we installed docker-engine using apt-get.


