Introduction to the JBoss Ecosystem
JBoss initially referred to an application server edited by JBoss Inc. The first JBoss version was designed by Marc Fleury; he incorporated the JBoss Company in 1999 with an innovative business model around services, training, and certifications.
JBoss is fully written in Java, and it obtained the Java 2 Enterprise Edition version 1.4 certification in 2004. This standardization by SUN Microsystems largely contributed to propel the Jboss application server into large accounts to the point of making it a first choice element while deploying enterprise Java applications.
This situation has naturally fueled the appetite in companies looking for external growth, and it was almost natural that Red Hat Inc. acquired Jboss in 2006 to embrace the service industry.
One decade after, the most important acquisition in history, Red Hat has not only worked to significantly improve the JBoss application server, but has also been designing a strong portfolio of middleware and application development products, which also have the JBoss denomination.
Today, the Red Hat JBoss Middleware portfolio is mainly maintained by the open source community and the Red Hat JBoss division. It covers a set of products to enable developers to have the tools they need to create, integrate, deploy, and manage enterprise applications. Regarding the product delivery strategy, there are two main editions for each product: a community edition driven by the open source Community, and an Enterprise edition taken from the community stream.
The community edition is open source and is available to all for free while the Enterprise edition is accessible through a subscription. With the subscription model, companies, organizations, and individuals with an active subscription are allowed to download and use Red Hat certified and tested enterprise software; the editor, in return, provides them with guidance, support, patches, updates, and services around the product through an online network.
Even if there are two distinct editions, it is truly an open organization; bug fixes, for example, from the community version are reported in the commercial edition and vice versa. Red Hat provides and maintains the tested configuration for each product enterprise version release.
The JBoss ecosystem is very large indeed, from developers tools to application platforms. JBoss products now cover the following categories: applications and web servers, enterprise service buses, messaging, data management platforms, rules, workflow management, services, APIs and many other features.
You may have often wondered what is the best JBoss product to solve a specific problem or need, how to get started with a specific JBoss product, or how to integrate different JBoss products in your IT systems.
Through hands-on labs from the business world, this book presents practical use cases that you can leverage to build your own enterprise services around the JBoss ecosystem. In this chapter, we will cover the following topics:
- Presenting the global project that will serve as a compass throughout the book
- Installing and setting up the JBoss developer studio
- Setting up the integration stack, to start our Jboss development journey
- Creating our first project
- Creating objects using the Forge console
Beos bank project
Beos bank is a financial institution that operates worldwide, and its main locations are in five continents: Mexico, Boston, Chennai, Paris, and Baham. Beos bank provides various digital financial services, including mobile banking and instant payment. It also allows individuals and companies to realize money transfers and cross-border remittances. As a lead developer, the reader will have the responsibility to drive the Beos bank digital transformation using JBoss products. The following projects have been identified to make Beos bank the next billion-dollar company:
- Money transfer web application: Users have been complaining about the instability of the current web transfer portal--sometimes servers go down during transfer operations and user data is lost. You have to set up a new architecture to deploy the money transfer application to support new business reorganization. Develop a new transfer application allowing users to send money to a recipient using JSF, and use JBoss EAP to host and cluster the application. Configure and test the session replication between 02 or 03 nodes. Deploy a HA cluster behind an undertow load balancer and check load balancing features; persist transfers data using JPA and JBoss data sources.
- Banking API Management System: Use Undertow to build and deploy serverless microservices for staff/user authenticated money transfer requests. Use Undertow to reduce the server park and help Beos bank enter the microservices and container world; this program will also help the bank achieve ISO 50001 certification.
- Withdraw remittances: Beos bank has a centralized database to host transfer data; some countries are complaining about the response time to validate a transaction: poor network connections, timeouts, and so on. Use a JBoss data grid cluster to keep in different countries. Use the JBoss data grid Hot Rod client to validate user remittances.
- Cash and currency management: Beos bank would like to be agile enough to quickly adapt to new regulation policies and would like the transfer fees and commissions to depend on both the sender and receiver countries. Coding this rule, use the BRMS decision table to compute transfer fees based on country and ranges. Use the Virtual Data Model from Yahoo and partners to convert currency rates, and use JBoss Data Virtualization to refactor the price catalog from different countries.
- Fraud detection system: Some illegal transactions have been identified; use BRMS rules, Complex Event processing, and a real-time decision server to detect frauds and illegal transactions. Use the Virtual Data Model from Yahoo and partners to convert currencies.
- Invoices and accounting: Use the JBoss Fuse OSGi flow to process/send bills, and use JBoss Fuse to send a file to regulatory institutions.
- Promotions and coupons: Use JBoss AMQ to notify the partner working on loyalty cards, and use JBoss AMQ to communicate with a mission critical-bank approval system with no message lost. Configure Active MQ to support various runtime and production incidents.
- Customer relationship management: Users are complaining about some Beos bank processes in some countries. Design the incriminated Beos bank business processes with JBoss BPM and improve the process.
In all the book, we will be relying on System.out.println(String out) to print some output on the console when needed; for more advanced ouputs you can refer to String.format method to format the output before printing it to the console.
To understand all the coding stuff related to this project, we will work with a brilliant project called JBoss Developer Studio.
JBoss Developer Studio
JBoss Developer Studio (JBDS) is a development environment created on top of Eclipse and is currently developed by the Red Hat JBoss division. Some companies such as Exadel, the Eclipse foundation, and open source individuals are also working on the JBoss Developer Studio project. JBDS empowers users with a set of plugins, called JBoss Tools; it supports multiple programming models, frameworks, and technologies, including Maven, SVN, and Git.
JBoss Developer Studio is modular like Eclipse and supports development with multiple JVM versions. At the time of writing this book, the last JBDS release version is 10.3.0. JBDS is available as other Jboss products on the Red Hat developer portal--developers.redhat.com; you need a social account (GitHub, Stack Overflow, Linkedin, Twitter, Facebook, Google, or Microsoft) and credentials to download the software.
Installation
JBoss Developer studio installation requires the following configuration:
- 4 GB RAM (minimum 2 GB RAM)
- 2 GB hard disk space
- JDK 8 to run, but it can deploy applications using lower versions
Download devstudio-10.3.0.GA-installer-standalone.jar and begin the installation using the following command:
java -jar devstudio-10.3.0.GA-incstaller-standalone.jar
This installation needs JRE 8 to proceed; once launched, the GUI installer starts an installation workflow where you will have to click on the Next button to move to the next step:
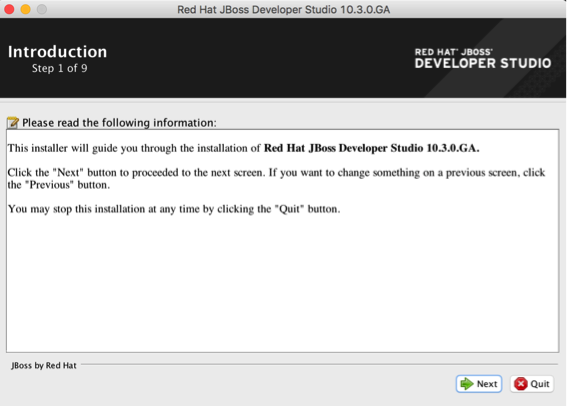
The installation wizard has nine steps, which are easy to follow:
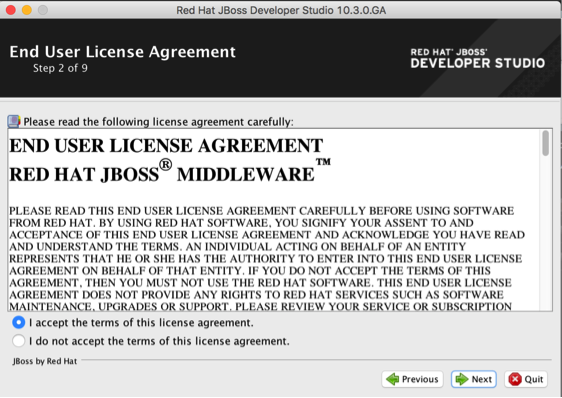
Read and accept the terms of the license agreement:

Installation is done by default in /Applications/devstudio; you can change this directory to use a custom one:
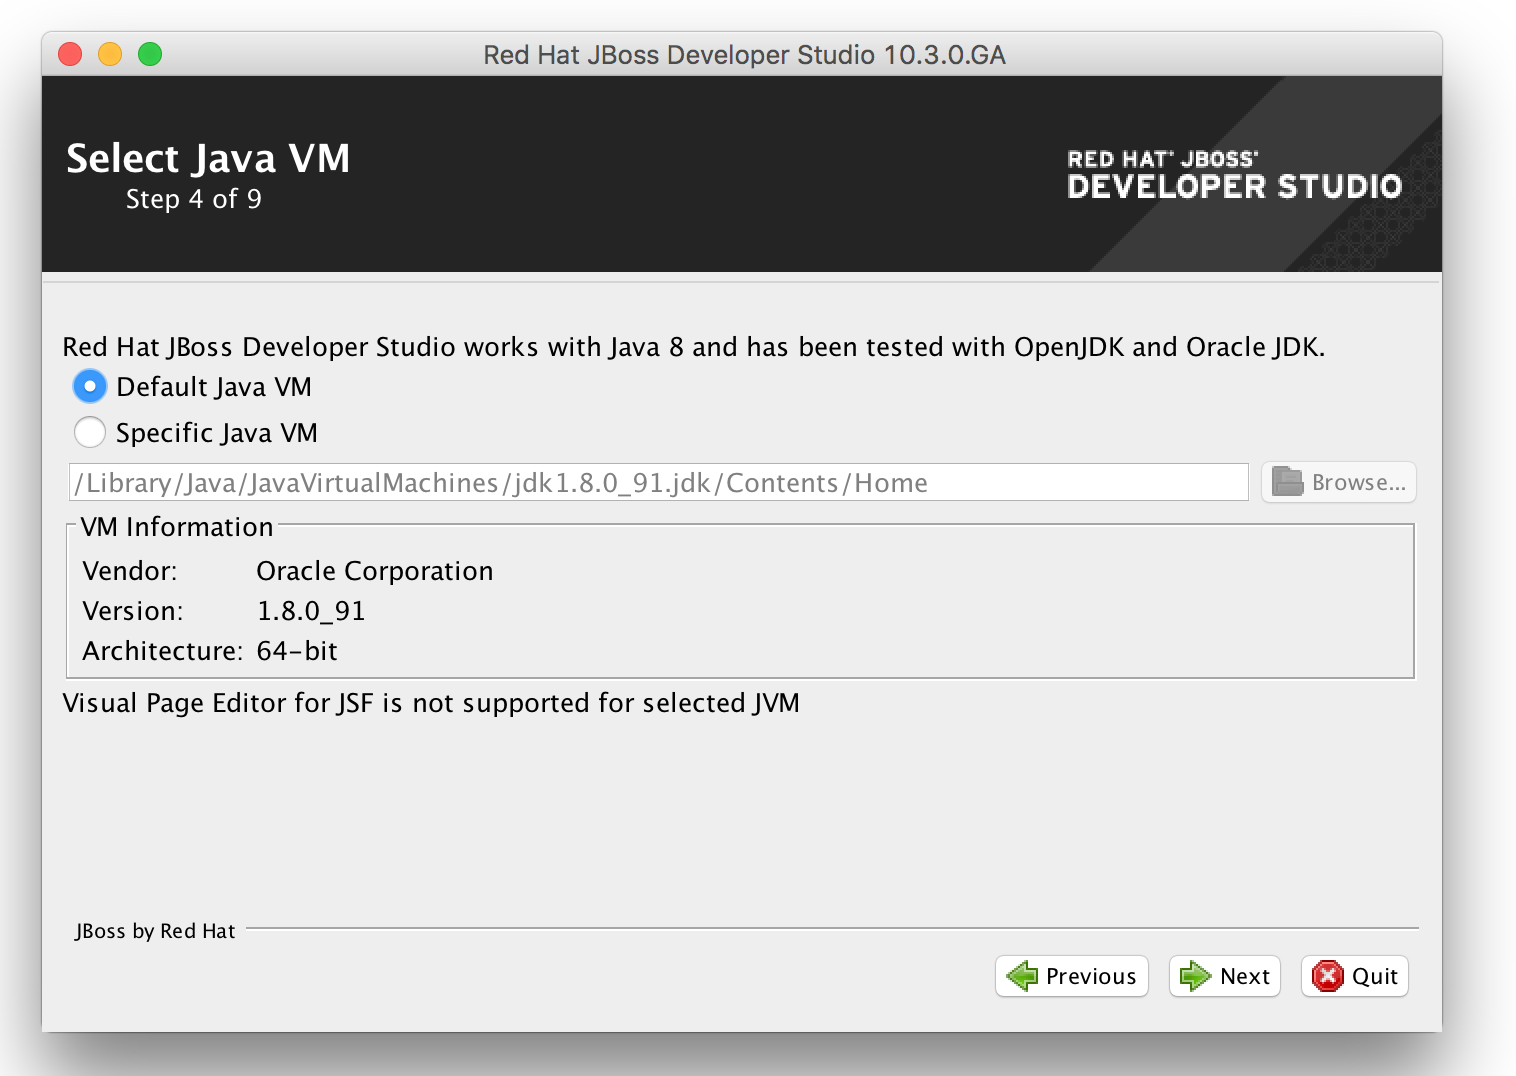
Select the default Java 8 Virtual machine and click on Next button:
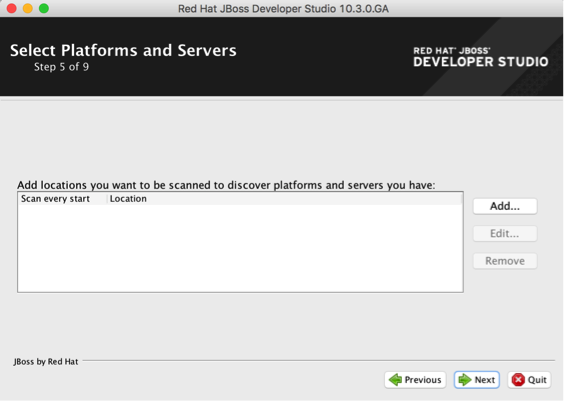
JBDS can scan specific directories to reference your existing JBoss servers.
We will not add a specific location for now; we will just move on to the next steps:

The installer displays the installation path, the component to be installed, as well as the available and required space on your computer. Click on the Next button to proceed with the installation:

In step 7/9 details of each installed component are printed on screen. Wait for the overall installation process to complete:

Click on Done to finish, with the Run Red Hat JBoss Developer after installation option checked. Select a fresh workspace to reach the welcome view.
We will use the $HOME/jbdevgWorkspace folder for our installation throughout this book:

This completes the JBDS installation. Once the JBDS installation is complete, you need to ensure that all the development plugins are also installed. While working with JBoss, the integration stack provides a set of plugins and features to ease the development process; let's install the JBoss integration stack plugin.
Integration Stack
By default, JBoss Tools is installed along with JBDS; this is not the case for the JBoss Integration Stack, which provides users with a toolset to integrate applications. It works with Apache Camel, JBoss Data virtualization, and various others features related to Integration.
The most simple way to install the JBoss Integration Stack is from the Red Hat central view:
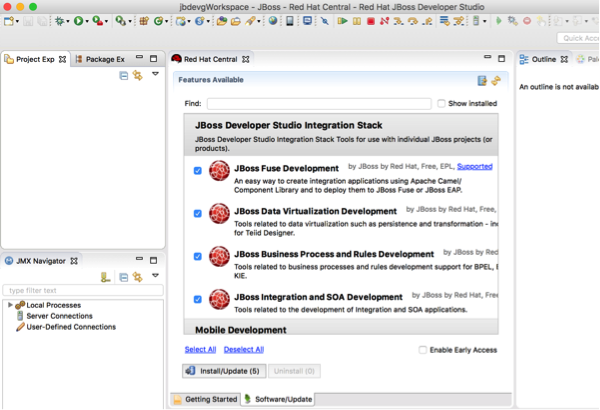
Check the listed options:
- JBoss Fuse Development
- JBoss Data Virtualization Development
- JBoss Business Process and Rule Development
- JBoss Integration and SOA Development
Click on the install/update button and complete the installation steps. Each plugin has its own working problem to solve, and the user manual, as far as possible, refers to the official documentation of the plugin. In the current section, we install both the JBoss Developer Studio and the Integration stack plugin. We are now ready to create projects and work on them within the IDE. JBDS has an integrated console, called the Forge console, to perform some tasks quickly. In the next section, we will perform various project tasks using this console.
The Forge console
The Forge console provides an integrated command-line interface in the IDE. The Forge console command actions automatically synchronize the workspace views. Forge brings out a powerful command line interface to interact with the IDE. Forge is also available as an Eclipse wizard for users who really don’t want to remember the commands. We will perform various Forge console tasks on a new Java project called Name bank-forge-demo.
Working with the Forge CLI
In order to interact with the Forge CLI, the console needs to be started. In the quickview, search for Forge console; click on the green button to start the Forge CLI:

The command line starts, and a shell is opened on the current workspace directory. You can now enter various commands to create projects, and to interact with the project model and objects. Now, let's see how to create a project using the Forge console.
Creating Maven projects
Use the command list to see the commands available and the man command to get help on a specific command's usage. Forge commands work both interactively and with options. To create a new project, use the project-new command, and provide answers to the interactive questions asked.
[jbdevgWorkspace]$ project-new beosbank-forge-demo
***INFO*** Required inputs not satisfied, entering interactive mode
* Project name: beosbank-forge-demo
? Top level package [org.beosbank.forge.demo]: com.beosbank.forge.demo
? Version [1.0.0-SNAPSHOT] HIT ENTER to pick the default version
? Final name: beosbank-forge-demo
? Project location [/Users/enonowog/jbdevgWorkspace]:
? Use Target Location Root? (If specified, it won't create a subdirectory inside the specified Project location) [y/N]: N
[0] (x) war
[1] ( ) jar
[2] ( ) parent
[3] ( ) forge-addon
[4] ( ) resource-jar
[5] ( ) ear
[6] ( ) from-archetype
[7] ( ) generic
Press <ENTER> to confirm, or <CTRL>+C to cancel.* Project type: [0-7] 1
[0] (x) Maven
Press <ENTER> to confirm, or <CTRL>+C to cancel.* Build system: [0] 0
[0] ( ) JAVA_EE_7
[1] ( ) JAVA_EE_6
[2] ( ) NONE
Press <ENTER> to confirm, or <CTRL>+C to cancel.
? Stack (The technology stack to be used in this project): [0-2] 2
***SUCCESS*** Project named 'beosbank-forge-demo' has been created.
The project is created with the specified input options and is available in the workspace immediately:
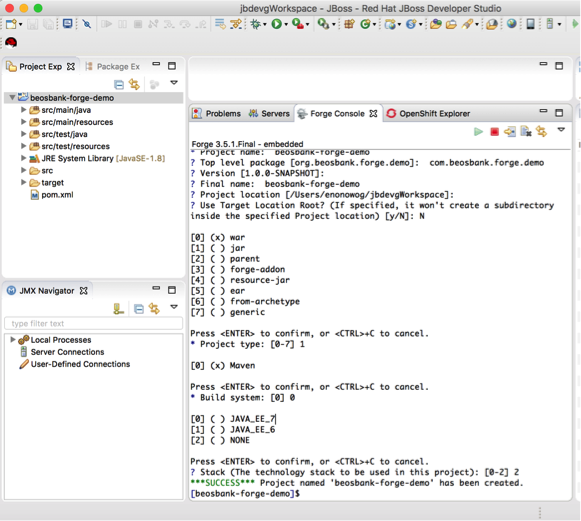
By default, the Forge CLI relies on your system's command-line font configuration. After creating a project, the next step may be to add a class; let's see how to create Java class in the project source folder using the Forge console.
Creating a Java class
Use the java-new-class command to add a non-final HelloJBossWorld class to the beosbank-forge-demo project:
[beosbank-forge-demo]$ java-new-class
***INFO*** Required inputs not satisfied, entering interactive mode? Package Name (The package name where this type will be created) [com.beosbank.forge.demo]: HIT ENTER
* Type Name (The type name): HelloJBossWorld
? Extends (The type used in the extends keyword):
? Interfaces []:
? Is Final? [y/N]: N
? Is Abstract? [y/N]: N
? Is Serializable? [y/N]: Y
***SUCCESS*** Class com.beosbank.forge.demo.HelloJBossWorld was created
[HelloJBossWorld.java]$
The new class is empty; you may wonder how to add attributes and methods to this newly created class using the Forge console.
Adding attributes to classes
To add a private name property with getters and setters to the HelloJBossWorld class, use the java-new-field Forge command. This command is applied to the selected classes:
[HelloJBossWorld.java]$ java-new-field
***INFO*** Required inputs not satisfied, entering interactive mode
[0] (x) com.beosbank.forge.demo.HelloJBossWorld
Press <ENTER> to confirm, or <CTRL>+C to cancel.
* Target Class (The class where the field will be created): [0] 0
* Field Name (The field name to be created in this class): name
* Field Type (The type intended to be used for this field) [String]:
[0] ( ) public
[1] ( ) protected
[2] (x) private
[3] ( ) default
Press <ENTER> to confirm, or <CTRL>+C to cancel.
? Access Type (The access type): [0-3] 2
? Generate Getter (Generate accessor method) [Y/n]: Y
? Generate Setter (Generate mutator method) [Y/n]: Y
? Update toString (Updates the toString method by adding the field) [Y/n]:Y
***SUCCESS*** Field name created
We now have a mini project set up with a single class. Forge commands are not only used to create a project's objects but can also serve as gateways to interact with project builder tools such as maven.
Building projects with Forge
Using the Forge CLI, you can run maven goals on your project. The forge build command can be used to run maven goals on the created project:
[HelloJBossWorld.java]$ build
[INFO] Scanning for projects...[INFO]
[INFO] -------------------------------------------------------------------[INFO] Building beosbank-forge-demo 1.0.0-SNAPSHOT
[INFO] ------------------------------------------------------------------------
[INFO]
[INFO] --- maven-clean-plugin:2.5:clean (default-clean) @ beosbank-forge-demo ---
[INFO] Installing /Users/enonowog/jbdevgWorkspace/beosbank-forge-demo/target/beosbank-forge-demo.jar to /Users/enonowog/.m2/repository/com/beosbank/forge/demo/beosbank-forge-demo/1.0.0-SNAPSHOT/beosbank-forge-demo-1.0.0-SNAPSHOT.jar
[INFO] Installing /Users/enonowog/jbdevgWorkspace/beosbank-forge-demo/pom.xml to /Users/enonowog/.m2/repository/com/beosbank/forge/demo/beosbank-forge-demo/1.0.0-SNAPSHOT/beosbank-forge-demo-1.0.0-SNAPSHOT.pom
[INFO] ------------------------------------------------------------------------
[INFO] BUILD SUCCESS
[INFO] ------------------------------------------------------------------------
[INFO] Total time: 8.509 s
[INFO] Finished at: 2017-03-10T14:12:56+01:00
[INFO] Final Memory: 193M/496M
[INFO] ------------------------------------------------------------------------
***SUCCESS*** Build Success
[HelloJBossWorld.java]$
So, the Forge console can be used to invoke maven commands on the project. The Forge console is a powerful tool on which you can rely to be more productive in your development tasks. It comes in complements to various shortcuts available in Eclipse and JBoss Developer Studio.
Summary
At the end of your first journey, you completed your first steps in the JBoss ecosystem with brilliance. You are now more familiar with what the JBoss ecosystem is about. You discovered the JBoss Developer Studio Development and integration platform, how to install plugins such as the JBoss integration stack to gain in productivity, and how to use the Forge command line to perform various tasks in your workspace very quickly. The global project was also introduced, and we hope you are ready to drive the Beos bank digital transformation with JBoss products.
In Chapter 2, Developing and Hosting Scalable, Web Applications you will be working with JBoss Doctor and a BeosBank Project Manager to streamline and secure the Beosbank money transfer web portal.


 Download code from GitHub

