


In this chapter, we will cover the following recipes:
Configuring your Galileo for the first time
Using a simple Linux image
Using the IoT Linux image
Accessing the Galileo board remotely
Installing and updating modules
Accessing Galileo via Wi-Fi
Troubleshooting Linux installation issues
This first chapter of the book is focused on getting you started with Linux on your Intel Galileo board. You will learn how to set up your board out of the box. You will also learn how to install the different Linux images that you can install on the Galileo board. We will also learn how to install Linux on an external SD card that can be inserted into the Galileo board.
We are also going to see how to access a Galileo board remotely, and how to install new modules on it. Finally, we will see how to get rid of the Ethernet cable and use Wi-Fi to access the Galileo board.
The first step when you receive your Galileo board is to set it up. This is relatively easy but is a bit more complex than it is with other boards such as the Arduino. Therefore, we need to make sure that it is perfectly configured and set up before we move on to the other recipes in this chapter.
Inside the box, you will find the board itself and a power adapter that you can use to power up the board. You will also find a short manual about the board and the Intel Galileo platform.
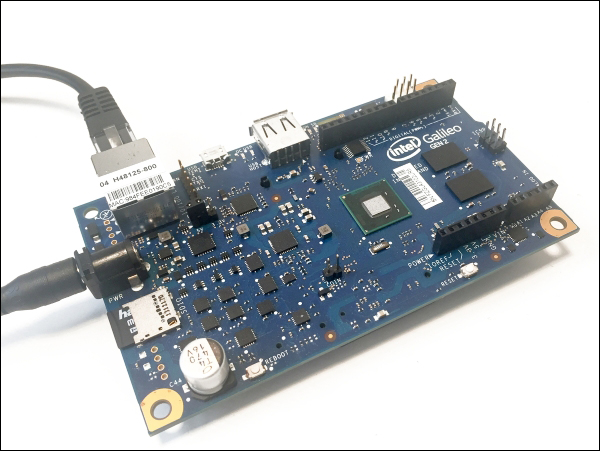
The first thing you will need is, of course, a Galileo board, which is shown here:
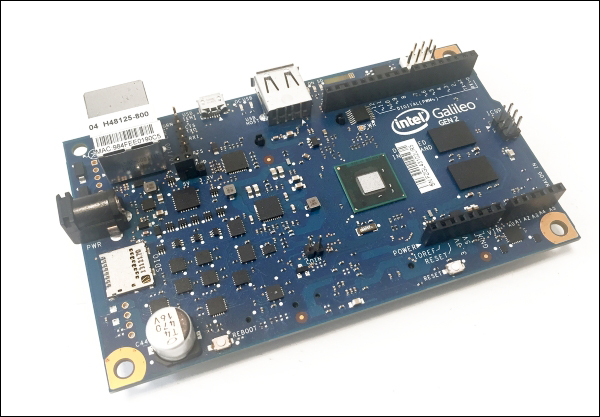
Note that you will need a Galileo Gen 2 board for the rest of this book. You might be able to follow along just fine with a Gen 1, but there might be some differences.
You can find a Galileo board on SparkFun:
https://www.sparkfun.com/products/13096
You also need an external power supply for your board, which is shown here:
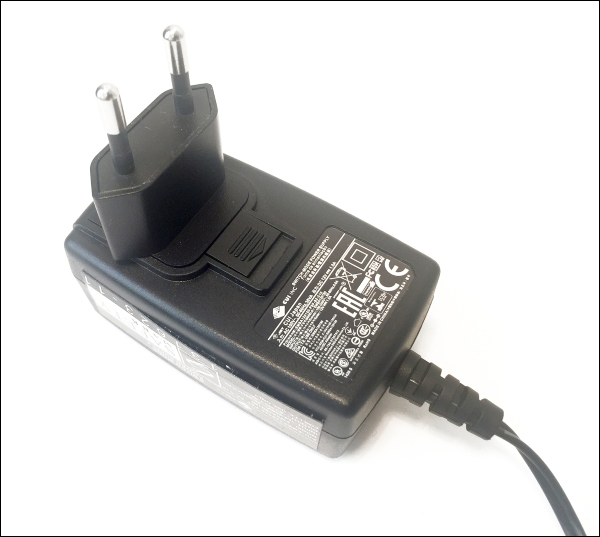
This power supply is usually provided with the Galileo board but, if this is not the case, or you got your Galileo board separately, you will need to use the 12V DC power supply found in the box, or any other DC power supply in the 7V to 15V range.
Finally, you will also need a micro SD card, as shown here, which we will use in some projects in this chapter:
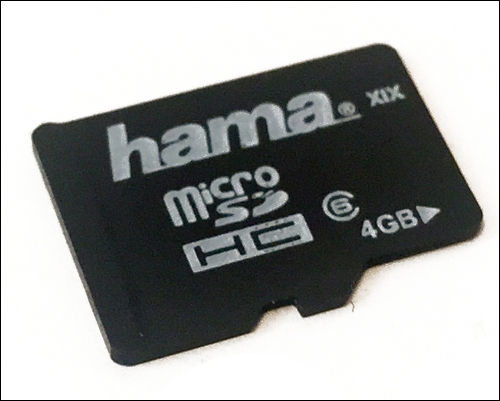
This SD card will be used to install the different Linux images, and also to store measurement data. I recommend an SD card with more than 2 GB of storage.
Let's now assemble our Galileo board. These are the steps to follow to set up your Galileo board:
Insert the micro SD card into the corresponding slot on the Galileo board.
Insert an Ethernet cable from your router into the Galileo board.
Connect the Galileo board to your power supply by connecting the DC jack.
This should be the result:
You will see that some LEDs light up when this is done.
The Galileo board basically needs three things to work correctly:
The correct power supply
A connection to your local network via Ethernet or Wi-Fi
A micro SD card inserted into the board (this is not required for the basic operation of the board, but to install Linux images)
Having done this, we are then able to use our board for all the projects in this book.
To really make use of the board and create exciting projects, we need to install a Linux image on our Galileo board. We will see that we have two options. The first one is the one we are going to see in this recipe—it is a simple Linux image, which is also simple to install. We will see how to install it in this guide.
First, you have to make sure that you have followed the recipe at the beginning of this chapter, so you should have your board ready to be use.
Then you can get the Linux image from the following location:
https://communities.intel.com/docs/DOC-22226
You will be redirected to a page that contains a table with all the available downloads for the Galileo board:
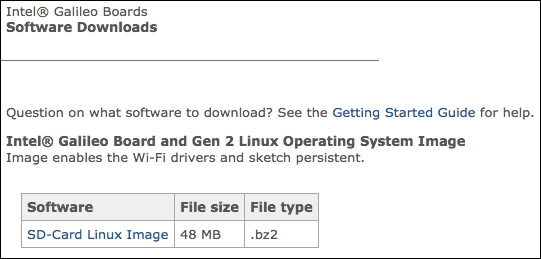
Simply click on the first link and wait until the image is downloaded onto your computer.
You are now ready to install the Linux image on your Galileo board. To do so, simply follow these steps:
Unzip the contents of the file you just downloaded.
Remove the micro SD card from the Galileo board.
Insert the micro SD card into your computer.
Format the SD card, if necessary, in the FAT32 format (if there are files on it already).
Copy the contents of the Linux image to the SD card.
Power down your Galileo board. You can also connect your board to your local network with the Ethernet cable at this point.
Insert the SD card into your Galileo board again.
Power the Galileo board up again.
The simple Linux image is now installed and running on your Galileo board.
The Galileo board will now boot every time on this Linux image, allowing you to access all the functions and modules that we listed earlier.
Using the simple Linux image that we described in the previous recipe is great, but it can be quite difficult to use. You need to manually login to your board, and then use command lines to install new modules and run your applications. For example, you would have to use terminal software (such as PuTTY) to access the board.
Luckily for us, Intel has come up with a whole suite of software to allow you to code your application directly with a graphical interface, without typing a single line of code into a terminal. In this recipe, we are going to see how to install this software suite.
This software suite comes in two parts— a new image, called the IoT image, that you need to install on the SD card, and also some software called (Cross-Platform Development Kit) XDK that needs to be installed on your computer.
The first step is to download this IoT image from the Intel website:
https://software.intel.com/en-us/iot/downloads
This is the page you will see when going to this web address:
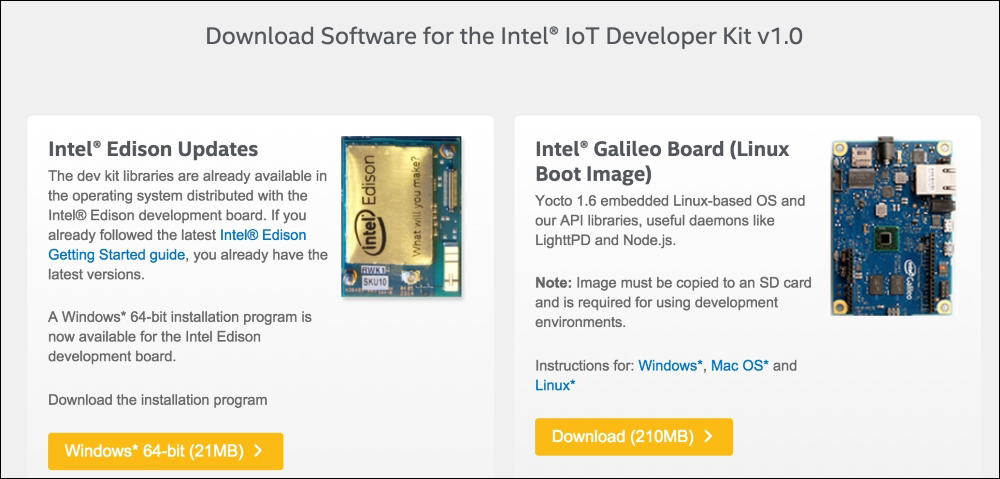
Download the image from the web page. Then, go to the following address to download the Intel XDK software:
https://software.intel.com/en-us/html5/xdk-iot
You will be redirected to the page where you can download the Intel XDK software for your operating system:

Installing the Intel IoT image is a bit more complex than it is with the simple Linux image. It varies depending on your operating system. Luckily for us, Intel has written guides to help install this image, depending on your operating system:
https://software.intel.com/en-us/iot/downloads
Simply follow the corresponding guide before continuing this recipe.
Installing the Intel XDK software is actually much easier. You simply need to execute the installer and just let yourself be guided by the instructions. When you first launch the software, you will be asked to create an account on the Intel website.
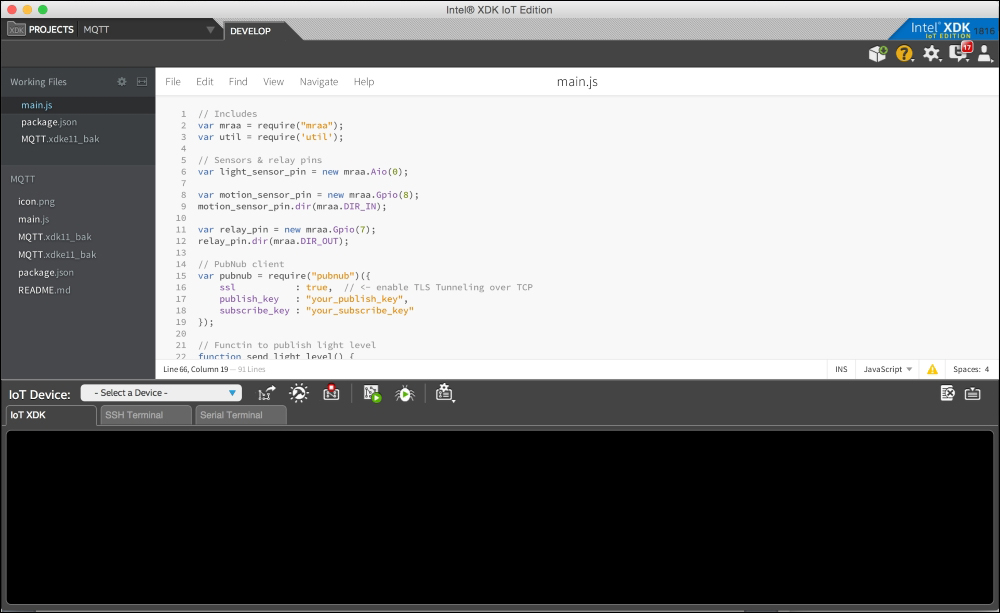
This is what the software looks like:
Congratulations, you are now completely ready to use the Intel IoT development suite on your computer!
The Intel IoT image and Intel XDK work together to make development on your Galileo board much simpler. XDK is able to locate your Galileo board automatically on your network, develop applications in Node.js inside the software, and then automatically upload and run these applications on your Galileo board!
You will see that the Intel XDK software offers much more than what we are going to use in this book. You can actually develop mobile applications that work on your phone and communicate directly with your Galileo board, right from Intel XDK!
You have other options to program your board at this point. The first option is to use Eclipse, which also lets you program the board, but by using C/C++ instead of Node.js. The next option is to use the special version of the Arduino IDE for the Galileo board, which lets you program the board with the well-known Arduino language.
If you have followed one of the two previous recipes in this chapter, you now have a fully operational Linux image running on your Intel Galileo. Now, we are going to see what you can do with it. The first step is to verify that the installation was actually successful and that you can access your board remotely. To do that, we are going to use Secure Shell (SSH) to log in to your Galileo board remotely.
You will need to have a Linux image installed on your Galileo board. I recommend using the IoT image for this, as this is the image we will be using in the rest of the book.
For the rest of this recipe, we will assume that the IoT image is installed and running on your Galileo board.
The first step is to get the IP address of your board. This is important, as we will always use this IP to access your board. For your board to get a relevant IP address, it needs to be connected to the same local network as your computer.
To do so, the simplest way is to open the Intel XDK software. Log in, and then you will see, at the bottom part of the window, that you have a Select a Device menu. You should see your Galileo board in this menu, along with the IP address next to it, as shown in this screenshot:

For this to work correctly, you also need to have Bonjour installed on your computer.
Now, go to a terminal to login to your board via SSH. If you are using Linux or OS X, you already have a terminal that you can use.
If you are using Windows, I recommend using PuTTY:
PuTTY is a basic type of terminal software for Windows that allows you to use the board remotely.
Now, go to a terminal and type in the following command by putting in the IP address of your board:
ssh root@192.168.1.102
You should see that you are logged in to your Galileo board:

If you can see these messages, it means you can successfully access your board via SSH!
SSH is a protocol to securely login to a remote Linux machine, such as the Galileo board, running a small Linux distribution. It allows you to control your board from any machine in your network, and install updates and new modules.
This is just the first step in using your Galileo board remotely. In the next recipes, we will use it for much more than just logging in, for example to install new modules and to run applications.
So far, we have learnt how to access the board remotely via SSH, from any machine on your local network. Now, we are going to see what we can actually do with that. As we are still in an introductory chapter, we will see how to perform a simple operation—update the Linux modules that are already installed on the board, and install new ones.
To follow this recipe, you need to have a Galileo board with a fully operational Linux image, on which you can access via SSH just as we did in the previous recipe. The Linux image you are using doesn't actually matter that much.
Once you are logged in to your Galileo board via SSH, you are able to type commands directly into the terminal. Every time you see a line starting with root@galileo, this means we will be using the terminal.
If you are using the IoT image, the first thing you can do is type the command:
opkg update
This will update the list of available packages and updates for your Galileo board. This is the result inside the console:
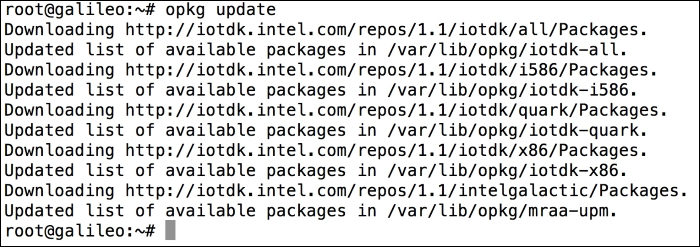
Note that this also requires the Galileo board to be connected to the Internet, for example, by plugging it into your Internet router.
Now, you can actually update the packages themselves by typing:
opkg upgrade
This will automatically update all packages that need to be updated. Make sure you run it regularly, as Intel comes up with new versions of these packages all the time.
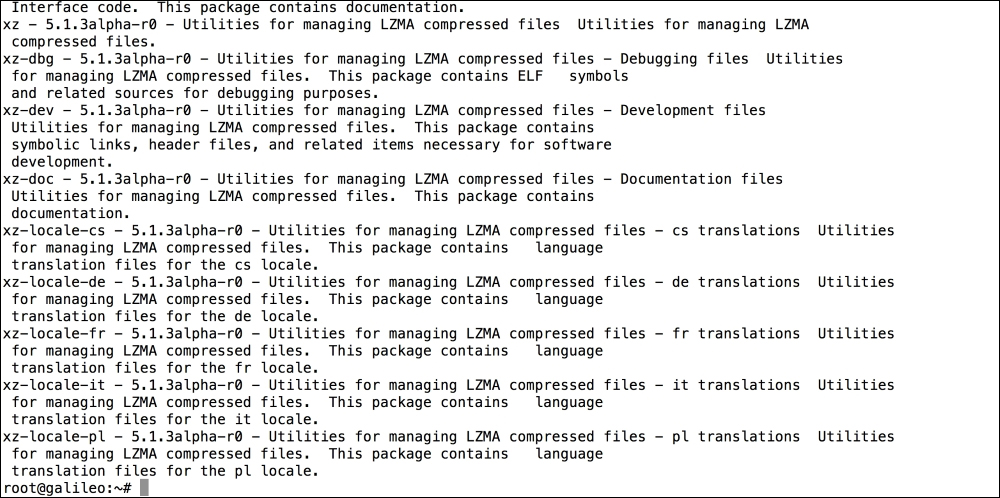
You can also use the package manager to install new modules. To see which packages are available, type:
opkg list
This will list all the available packages, as shown in this screenshot:
To install a given package, just type the following command, replacing package_name with the name of the package you want to install:
opkg install package_name
The opkg command installs the package manager (opkg) for the Intel Galileo Linux machine. It allows you to update your existing packages automatically and also install new packages on your Galileo board. In this way, you can always stay up-to-date and extend the functionalities of your board with new modules.
We only covered the basics of what the opkg tool can do. To see all the possibilities offered by the tool, type this into the terminal:
opkg –h
This will list all the commands and options offered by this tool.
Using the onboard Ethernet port is great for accessing your Galileo board remotely. However, this is not always convenient. Most of our devices nowadays are connected wirelessly, and it can be strange sometimes to still use Ethernet cables.
This is why we are going to find out how to easily install a Wi-Fi board on the Galileo and then access the board remotely. You will then be able to complete all the projects in this book without ever connecting an Ethernet cable again.
For this recipe to work, you will need to have followed most of the previous recipes in this chapter. You need a working Galileo board, with either the simple Linux image or the IoT image installed. You should also have checked that you can access the board via Ethernet first, to make sure that everything is working.
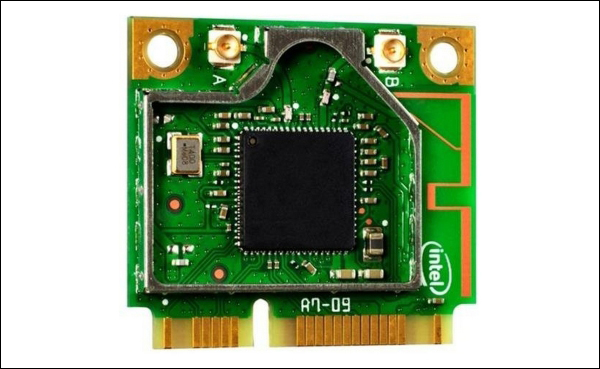
Then, you need a Wi-Fi board. I recommend using the Intel N-135 Wi-Fi board, which is very easy to install and will work out of the box. This is a picture of this board:
You can easily find it online, for example on Amazon, here:
It might be possible to use other Wi-Fi boards, but they could be more difficult to use or require the use of drivers to work. You can also use a Wi-Fi dongle that is compatible with the Galileo board.
You can simply install the board by following all the steps in this section:
First, power down the Galileo board and remove all the connection cables.
Then, turn the board over and locate the mini PCI express port, as shown here:

Insert the Wi-Fi card into the port at a small angle.
After that, press it down until you hear a click, meaning the board was successfully installed.
Connect all the cables to the Galileo board again and power it up.
Now that the Wi-Fi module is correctly installed, you will have some simple steps to follow to set up your Wi-Fi connection. Let's assume here that you have a WPA-secured Wi-Fi network, which is the case for most Wi-Fi networks, then follow these steps:
Log on to your Galileo as
root, just as you learned in the previous recipes in this chapter.Create the file that will contain your network's configuration by typing the following command, replacing
MySSIDwith your Wi-Fi network name:# wpa_passphrase MySSID << EOF > /etc/wpa_supplicant.confThen, type the following command, replacing
MyPassPhrasewith your Wi-Fi network password:> MyPassPhraseFinally, type:
> EOF
This will connect your board to your Wi-Fi network. You can then follow these steps to connect it to your network automatically:
Edit the
/etc/network/interfacesfile withvi.Add the line
auto wlan0.Save, using the
:wcommand followed by the:qcommand.Restart the wireless interface by typing:
/etc/init.d/networking restart
ifdown wlan0
ifup wlan0
From now on, your Galileo board will automatically connect to your network using Wi-Fi. You need to take these steps again if you modify your Wi-Fi network name and/or password.
You can now remove the Ethernet cable and login to your Galileo board again via Wi-Fi.
The Galileo board mini PCI express port was made specifically to support extensions such as this Wi-Fi board. This port can be used to extend the possibilities offered by the Intel Galileo board.
In this last section of the chapter, we are going to see what can go wrong when configuring your board and installing Linux on it. Indeed, some of the steps involved here are quite complex and many things can work out differently than expected.
Some of the most commonly faced issues working with the Intel Galileo board are as follows:
The board doesn't boot: The first thing that can happen is that the board doesn't actually boot. If no LEDs light up at all, you have some serious problems. First, make sure that the power adapter you are using is working. Then, if the problem persists, it probably means your Galileo board has a problem, and needs to be replaced.
Installing the Linux image failed: If you can't install the simple Linux image on an SD card, format the SD card first using your computer. It can be the case that there are files on the SD card or it was formatted using the wrong file format.
Installing the IoT image failed: If, for any reason, the installation of the IoT image fails, the first thing to do is repeat the procedure. Also, make sure to follow step-by-step the instructions from the Intel website, as only missing a single step can lead to a problem with the SD card.
You can also try to reformat the SD card before following the steps from the Intel website.
The board cannot be accessed remotely: If you cannot log on to your board via SSH, first make sure that you are trying to access the correct IP address. Use the Intel XDK software for that. You can also try to ping the board from a terminal to make sure that it is answering network requests. Also, make sure that Bonjour is installed on your computer.
The package manager doesn't work: The main reason for the package manager not working is that you are not connected to the Internet. Make sure that your Internet router is configured to share Internet access across all devices connected to it.
Also, I noticed that the Galileo board sometimes just loses Internet connectivity. To solve this problem, simply push the Reboot button on the board.
New packages can't be installed: If you are sure that your Internet connectivity is working, it could simply be that you are trying to install a module that is not available for the Galileo. Not all Linux packages are available, so make sure first that the desired package is available for the Intel Galileo board.
The board cannot be accessed via Wi-Fi: If the Wi-Fi connection doesn't work, first make sure that the Wi-Fi extension board is correctly connected to the board. If the board doesn't show up on the Galileo board interface (as
wlan0), there might be a hardware problem with the extension board.
