


This chapter describes Silverlight/WPF concepts needed for creating animations, namely dependency and attached properties, bindings, transforms, and storyboards. We assume that the reader is already familiar with most of the concepts within this section and uses it simply as a refresher, as well as a way to jump-start the samples for the rest of the application.
In this chapter we will look at:
Dependency properties: These are a special type of properties that can be animated using the storyboards in Silverlight.
Attached properties: These are very similar to dependency properties except that they do not have to be defined in a class that uses them.
Bindings: These bind two properties together so that when one changes the other does as well.
Transforms: These are used to modify the visual elements. Transforms are often used for animations.
Storyboards: These are objects that encapsulate information about animations including what properties are animated and how.
We will start developing a simple control sample and gradually expand it to demonstrate all the required concepts.
The resulting sample application is located under CODE\SpinningControlSample\SpinningControlSample.sln, but we recommend that you build this sample from scratch, based on the instructions within this chapter.
The goal of this sample is to develop a
lookless control that has a RotationAngle dependency property and later to provide a view for this control (for example, as a rectangle), and to animate the RotationAngle so that the rectangle would be seen as rotating.
Lookless controls are controls that do not contain any visual implementation details. Such controls need a ControlTemplate in order to display them. This provides a great advantage to developers/designers because it separates the control's implementation details from its presentation.
Firstly, let's create a Silverlight Application project called SpinningControlSample. Follow the instructions in Appendix A, Creating and Starting a Silverlight Project, to create a browser-based, empty Silverlight solution. As mentioned in Appendix A, the solution will actually contain two projects, SpinningControlSample and SpinningControlSample.Web. The project with the .Web extension is just an ASP project to embed the Silverlight page. We are not going to concentrate on it. The real project of interest to us is SpinningControlSample.
Within the SpinningControlSample project, we create a new empty C# class, SpinningControl.
Make the SpinningControl class inherit from the Control class as shown in the following code snippet:
public class SpinningControl : Control
{

}
We are going to populate this class to provide the functionality that is previously described.
Dependency properties (DPs) are a special type of properties introduced in WPF and Silverlight. Just like the usual .NET properties, they describe a property of a .NET object. Unlike the usual .NET properties, their storage does not take space within the class that uses them. Rather, they are stored in some static collections, indexed, and accessed by the corresponding objects.
Silverlight and WPF provide natural ways to animate the dependency properties using Storyboard objects (which are described later in the chapter).
Silverlight and WPF also have natural mechanisms to bind two dependency properties together (or a usual property to a dependency property) so that changing one of them will trigger the other to change.
Now let's define the RotationAngle dependency property of a type double within this class. Put the cursor between the curly brackets defining the body of the class and type propdp followed by a tab keystroke. Follow the instructions in Appendix D, Using Snippets, to set up the name, type, and default value of the property.
    public class SpinningControl : Control
    {
        #region RotationAngle Dependency Property
        // Dependency Properties' getter and setter for accessing the//DP as
        // if it is a usual property
        public double RotationAngle
        {
            get { return (double)GetValue(RotationAngleProperty); }
            set { SetValue(RotationAngleProperty, value); }
        }

        // static field for storing and accessing the DPs by object//reference
        public static readonly DependencyProperty RotationAngleProperty = DependencyProperty.Register
        (
            "RotationAngle",                  // DP name
            typeof(double),                   // DP type
            typeof(SpinningControl),          // Class defining the DP
            new PropertyMetadata(0.0)         // DP's default value
        );
        #endregion RotationAngle Dependency Property
    }
You might have noticed that the RotationAngle property within the SpinningControl class does not refer to any object field. Rather, it uses GetValue and SetValue methods inherited from DependencyObject to get and set the dependency objects correspondingly. The field values themselves are stored within the RotationAngleProperty static class member, and individual objects of the class SpinningControl get their RotationAngle property values from this static field via their object reference (using the functionality embedded within the DependencyObject class).
This is one of the advantages of using the dependency properties – the SpinningControl object that does not set the property does not need any extra space for this property; it gets the default from the static RotationAngleProperty structure defined once for all the objects of the same class. Take a look at the following section within DP's definition:
public double RotationAngle
{
    get { return (double)GetValue(RotationAngleProperty); }
    set { SetValue(RotationAngleProperty, value); }
}
It provides a way to access the dependency property as a usual .NET property. Many .NET calls to the DP, however, are not using these get and set accessors; instead such calls use the DependencyObject class GetValue() and SetValue() methods directly. Because of this, you should not add any code to these property accessors – such a code simply won't be executed in many cases.
This is all we need to define a lookless control – just a class extending Control and containing some non-visual properties (usually DPs), functions, and events. Such a control is called lookless because it does not define any visual presentation for itself. Visual presentation of a lookless control is defined by a control template, which is usually represented by XAML code residing in some XAML resource file. The advantage of lookless controls lies in the fact that you do not have to change the control itself in order to achieve various different visual representations. All you need to do is to change the template. Since it is the control itself and not its template that is responsible for interacting with the rest of the application, by changing the templates one can completely change the visual presentation of the application without affecting any underlying logic. More on lookless controls can be found at http://tinyurl.com/lookless.
For most of the samples within this book, I am using lookless controls since this is the best practice, even though it is not related to the subject of animations.
Now we are going to add code to MainPage.xaml to display a SpinningControl object. When you open the MainPage.xaml file, you will see the following XAML code created for you by Visual Studio:
<UserControl
    x:Class="SpinningControlSample.MainPage"
    xmlns="http://schemas.microsoft.com/winfx/2006/xaml/presentation"
    xmlns:x="http://schemas.microsoft.com/winfx/2006/xaml"
    xmlns:d="http://schemas.microsoft.com/expression/blend/2008"
    xmlns:mc="http://schemas.openxmlformats.org/markup-compatibility/2006"
    xmlns:i="http://schemas.microsoft.com/expression/2010/interactivity"
    xmlns:se="http://schemas.microsoft.com/expression/2010/interactions"
    xmlns:SpinningControlSample="clr-namespace:SpinningControlSample"
    mc:Ignorable="d"
    d:DesignHeight="300"
    d:DesignWidth="400">
    <Grid x:Name="LayoutRoot" Background="White">

    </Grid>
</UserControl>
Let's modify this class to display our SpinningControl object as a rectangle rotated by an angle specified by its RotationAngle property:
<UserControl x:Class="SpinningControlSample.MainPage"
             ...
             d:DesignHeight="300"
             d:DesignWidth="400">
    <Grid x:Name="LayoutRoot" Background="White">
        <!--Dependency Property RotationAngle is referred to within
        XAML in exactly the same way as the usual
         property (as in the line below)-->
        <SpinningControlSample:SpinningControl x:Name="TheSpinningControl"
                                         RotationAngle="45">
            <SpinningControlSample:SpinningControl.Template>
                <!-- SpinningControl's template is set to create a visual
                        representation for the control. -->
            <ControlTemplate
                   TargetType="SpinningControlSample:SpinningControl">
                    <Rectangle Fill="Orange"
                               Width="100"
                               Height="30"
                               RenderTransformOrigin="0.5,0.5">
                     <Rectangle.RenderTransform>
                       <!-- We use "Binding" to connect
                                 RotateTransform's Angle property
                                 to the RotationAngle Dependency
                                 Property. -->
                            <RotateTransform
                                  Angle="{Binding
                                             Path=RotationAngle,
                                             Mode=OneWay,
                                             RelativeSource=
                                             {RelativeSource
                                               Mode=TemplatedParent}}" />
                        </Rectangle.RenderTransform>
                    </Rectangle>
                </ControlTemplate>
            </SpinningControlSample:SpinningControl.Template>
        </SpinningControlSample:SpinningControl>
    </Grid>
</UserControl>
If you build and run the SpinningControlSample solution, you will get a 45 degree rotated orange rectangle displayed in a browser window as shown in the following screenshot:

Note that we defined the template for our lookless control inline (see the <SpinningControlSample:SpinningControl.Template> tag).
Binding is a powerful Silverlight/WPF concept allowing two or more properties on two objects to be tied together, so that when one of them changes, the other changes as well. One of the binding's properties is called source property and the other target property. Usually we assume that the target property changes when the source does, but if the binding mode is two-way, the opposite is also true, that is, a change in the source property will be triggered by a change in the target property. The target property should always be a dependency property while the source property can be a usual .NET one. More on bindings can be found at http://tinyurl.com/wpfbindings.
The XAML code presented in the previous subsection uses binding to bind the RotationAngle dependency property of the SpinningControl object to the Angle property of the RotateTransform object:
<RotateTransform Angle="{Binding Path=RotationAngle,
                                 Mode=OneWay,
                                 RelativeSource={RelativeSource
                                                 Mode=TemplatedParent}}" />
In this case, the RotationAngle property of the SpinningControl object is the source property of the binding, while the Angle property of the RotateTransform object is its target property. The binding mode being set to OneWay specifies that the target property changes whenever the source property does, but not vice versa. The RelativeSource property of the binding, when set to TemplatedParent, specifies that the binding's source property is chosen by the Path property taken with respect to the control to which the template applies (in our case it is SpinningControl).
Silverlight provides a powerful set of transforms to apply to the visual object. The following is a full set of 2D transforms:
TranslateTransform: This shifts an object in a 2D plane.ScaleTransform: This scales (or resizes) the object by theScaleXfactor along the X-axis and theScaleYfactor along the Y-axis.SkewTransform: Skewing along the X-axis turns every vector orthogonal to the X-axis by the same angle defined byAngleX, and expands its length so that its Y coordinate stays the same. TheAngleYparameter of the transform is in charge of skewing along the Y-axis.RotateTransform: This rotates an object by theAngleparameter.MatrixTransform: This is a generic transform that can represent any linear transformation and translation within a 2D plane.
We previously used RotateTransform to rotate the rectangle.
There is also the PlaneProjection transform imitating the moving of an object in a 3D space. We will describe this transform in detail later in the book.
Storyboards are Silverlight entities that are used for describing the animations of various dependency and attached properties. They consist of one or several animation entities each one of which is dedicated to animating just one dependency property. This section gives an overview of storyboard and animation functionality.
We are about to make this rectangle rotate by changing the dependency property, that is, RotationAngle using a storyboard.
The storyboard can be created as the page's resource by adding the following XAML code above the <Grid x:Name="LayoutRoot" …> line:
<Storyboard
    x:Key="RotationStoryboard"
      Storyboard.TargetName="TheSpinningControl"
      Storyboard.TargetProperty="(SpinningControlSample:SpinningControl.RotationAngle)">
    <DoubleAnimation BeginTime="00:00:00"
                        Duration="00:00:01"
                        From="0"
                        To="360"
                        RepeatBehavior="Forever" />
</Storyboard>
Once this storyboard runs, it will change the RotationAngle property on the visual element called TheSpinningControl from 0 to 360 over a period of 1 second and then continue repeating the same change forever, which will result in a rotating rectangle.
The only thing remaining is to start the storyboard based on some event.
We are going to add a button at the bottom of the window, which when clicked will start the rotation. Here is the code we need to add to our XAML file under the </SpinningControl> end tag in order to create the button:
<Button x:Name="StartRotationButton"
        Content="Start Rotation"
        VerticalAlignment="Bottom"
        HorizontalAlignment="Center"
        Margin="0,0,0,20"
        Width="100"
        Height="25">
</Button>
It would be easy to get the reference to the button, within the MainPage.xaml.cs (code-behind) file and add a handler to the button's Click event to pull the storyboard out of the page's resource and start it. However, we do not want to split the button click action triggering a storyboard from the XAML code which defines both the button and the storyboard. This is where MS Expression Blend SDK, mentioned in the Preface, comes in handy.
MS Expression Blend SDK does not require having MS Expression Blend installed. It is simply a number of free and redistributable DLLs that make Silverlight/WPF programming easier.
One can download MS Expression Blend SDK using the URL specified in the Preface, or simply use the two files, Microsoft.Expression.Interactions.dll and System.Windows.Interactivity.dll, that come with our code. These files are located in the MSExpressionBlendSDKDlls folder and you need to add references to them in our SpinningControlSample project. MS Expression Blend SDK allows us to connect the Click button event to the ControlStoryboardAction functionality that starts the animation without any C# code. Also, we can disable the button once it is clicked, by using MS Expression Blend SDK's ChangePropertyAction object.
Add the following namespace reference to the <UserControl… tag at the top of the MainPage.xaml file:
<UserControl …
        …xmlns:i="http://schemas.microsoft.com/expression/2010/interactivity"
         xmlns:se="http://schemas.microsoft.com/expression/2010/interactions"
           …/>
Now we can use i: and se: prefixes to access the MS Expression Blend functionality within XAML.
To start the storyboard on a button click, add the following XAML code between the button's start and end tags:
<i:Interaction.Triggers>
<!-- MS Expression Blend SDK trigger will start on "Click"
event of the button-->
<i:EventTrigger EventName="Click">
<!-- ChangePropertyAction below will disable the StartRotationButton after it is clicked first time -->
<se:ChangePropertyAction
TargetObject="{Binding ElementName=StartRotationButton}"
PropertyName="IsEnabled"
Value="False" />
<!-- ControlStoryboardAction will start the RotationStoryboard -->
<se:ControlStoryboardAction
ControlStoryboardOption="Play"
Storyboard="{StaticResource RotationStoryboard}" />
</i:EventTrigger>
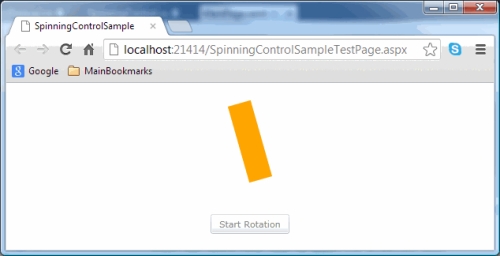
</i:Interaction.Triggers>You can run the sample now. Once you click the button, the orange rectangle in the middle starts rotating and the button gets disabled:
As we learned earlier, Silverlight Storyboards consist of one or more animation objects. Each animation object controls an animation of one and only one dependency property. Note that only dependency or attached properties can be animated by Silverlight animations. There are two types of animation classes:
Simple animations (that have properties
to,from, andby): Such animations change the dependency property linearly in time (unless easing is used). The propertiestoandfromspecify the dependency property value in the beginning and end of the iteration. Using the propertyby, you can specify by how much the animation should change (obviously if you use the propertyby, the other two properties are redundant – the animation will simply increase the current value by the value specified in the propertyby). You can also specify at what point an animation should start, and how long it should last by using theBeginTimeandDurationproperties of the animation class. Since the animations control DPs of different types, there is a specific built-in animation class for every type that is likely to be animated. Animation names usually start with the name of the type. The following Silverlight simple animations are the most important ones:DoubleAnimation: This animates a double DP (we used it previously to animate theRotationAngleDP of theSpinningControlobject).ColorAnimation: This animates color transitions.PointAnimation: This animatesPoints, that is, pairs ofdoublevalues.
Key frame animations: These animations also allow us to specify property values at certain points between the beginning and the end of the iteration. Correspondingly, key frame animations do not have
to,from, andbyproperties. Instead, such animations have theKeyFramesproperty – a collection that can be populated with objects of the key frame class. Key frame classes differ by the type of interpolation that they use in order to interpolate the value between the key frame times. There areDiscrete,Linear, andSplineinterpolations. The names of key frame classes are composed of the interpolation type, animation type (corresponding to the DP type), andKeyFramesuffix, for example,LinearDoubleKeyFrame. Key frame animation class names start with the interpolation type followed by the animation type and end with theUsingKeyFramessuffix. The most important key frame animations are:DoubleAnimationUsingKeyFramesColorAnimationUsingKeyFramesPointAnimationUsingKeyFrames
One constraint on the dependency properties is that they have to be defined within a class that uses them. In many cases, however, developers might want to add properties to an object of a predefined class without extending the class. WPF and Silverlight came up with a new concept that allows doing just that – attached properties (APs). APs can be defined in some (usually static) class and can be used to attach properties to any object derived from a DependencyObject.
An attached property sample can be found in the SpinningWithAttachedPropertySample folder. To create your own sample, create a new project and add a C# file/class to it called AttachedProperties. Make this class static and use the propa snippet to create the RotateAngle attached property in it:
#region RotationAngle attached Property
public static double GetRotationAngle(DependencyObject obj)
{
    return (double)obj.GetValue(RotationAngleProperty);
}

public static void SetRotationAngle(DependencyObject obj, double value)
    {
    obj.SetValue(RotationAngleProperty, value);
}

public static readonly DependencyProperty RotationAngleProperty =
DependencyProperty.RegisterAttached
(
    "RotationAngle",
    typeof(double),
    typeof(AttachedProperties),
    new PropertyMetadata(0.0)
);
#endregion RotationAngle attached Property
You can see that unlike dependency properties, the attached properties have two static accessor methods GetRotationAngle and SetRotationAngle.
Now we can animate this attached property within the MainPage.xaml file in a very similar way to animating the dependency property. In the following section, we show the regions of XAML code that are different from the dependency property code.
In our attached property animation project, we will define a Storyboard object in exactly the same way as we did for the dependency property, the only difference is that we cannot specify Storyboard.TargetProperty within XAML:
<UserControl.Resources>
        <Storyboard x:Key="RotationStoryboard"
                    Storyboard.TargetName="TheRotatingRectangle">
            <DoubleAnimation BeginTime="00:00:00"
                             Duration="00:00:01"
                             From="0"
                             To="360"
                             RepeatBehavior="Forever" />
        </Storyboard>
</UserControl.Resources>
Unfortunately, Silverlight does not allow a storyboard to reference a custom attached property in XAML. Due to this limitation, we are forced to add such a reference in the C# code-behind.
The following is the XAML definition of a spinning Rectangle. The only difference between this code and the DP-related code previously presented is that we are using the full path within parentheses to point to the attached property within the Binding definition:
<Rectangle x:Name="TheRotatingRectangle"
            Fill="Orange"
            Width="100"
            Height="30"
            RenderTransformOrigin="0.5,0.5">
    <Rectangle.RenderTransform>
        <RotateTransform
          Angle="{Binding
                   Path=(SpinningWithAP:AttachedProperties.RotationAngle),
                   Mode=OneWay,
                   ElementName=TheRotatingRectangle}"/>
    </Rectangle.RenderTransform>
</Rectangle>
You can see that the visual element does not have to be a custom control, we can use an attached property on an element built into Silverlight – Rectangle.
Finally, as was previously stated, due to a Silverlight limitation, we have to specify the storyboard's TargetProperty within the C# code. We can do this in the MainPage constructor as shown in the following snippet:
public MainPage()
{
    InitializeComponent();

    Storyboard rotationStoryboard =
        (Storyboard) this.Resources["RotationStoryboard"];

    Storyboard.SetTargetProperty
    (
    rotationStoryboard,
    new PropertyPath(AttachedProperties.RotationAngleProperty)
    );
}This chapter has defined the building blocks for future discussion, namely dependency and attached properties, lookless controls, bindings, and storyboards. It gives an example of using the MS Expression Blend SDK interactivity functionality. All of these will be used throughout the book to build animations. It is assumed that the reader already has some knowledge of the aforementioned subjects and uses this chapter only as a refresher. For an in-depth treatment of these subjects, we provide the reader with references within the text.
The next chapter will build on this material to cover creating animation is Silverlight business applications.