


Welcome to Instant JRebel. This book is for Java developers who are not aware of JRebel technology and the improvement of deployment time.
Most programmers face long compilation times on large projects. This is also a problem when a web application has to be restarted to apply some changes. Most development environments provide tools to reduce these delays, but JRebel is probably the most innovative way to handle large projects. You will learn how to integrate this technology into your current and future projects: Java SE and EE projects on local and remote servers, with any IDE.
Before trying to use JRebel, let's have a look at the existing features offered by modern IDEs such as NetBeans. They are already able to accelerate your developments. We will see later why JRebel is a better choice.
Also, many developers associate JRebel with Java EE applications only, but keep in mind it works with any Java SE application too, including GUI software!
Modern IDEs offer some ways to accelerate your developments and deployments. We will show one of them, called Deploy on Save on NetBeans using the following steps:
Understand what a class loader is. Download and install the latest version of Oracle JDK7 from http://www.oracle.com/technetwork/java/javase/downloads/index.html (on Ubuntu, you may use
the sudo apt-get install openjdk-7-jdkcommand to install JDK7) and NetBeans IDE from https://netbeans.org/downloads/. Please choose the Java EE or All bundle of NetBeans.Download and install the latest binary version of Apache Tomcat server from http://tomcat.apache.org/download-70.cgi. You should use the ZIP version. It is easier to register in NetBeans than the Windows Service Installer version.
Register the Tomcat server in NetBeans by launching NetBeans and going to the Services tab. Right-click on the Servers node, then click on the Add Server... register, then choose Apache Tomcat from the server list to register the Tomcat server.

Registering Tomcat into NetBeans
Create a simple Java web project. You can do it by navigating to File | New Project | Java Web | Web Application. Remember to choose Tomcat as the server. It will create a simple web application with a HelloWorld JSP file. Now, create a simple servlet by navigating to File | New File | Web | Servlet. See the differences when Compile on Save is enabled and disabled. You can activate this feature present in the Projects Properties panel by checking the Deploy on Save checkbox.

The Deploy on Save feature
A web application is a good example to explain the principle of the Deploy on Save feature of NetBeans.
You probably already know that you can modify and save a JSP file; the server will automatically reload it without restarting or redeploying anything. Meanwhile, servlets are Java classes and won't be reloaded so easily. Without the help from an IDE, you would normally need to rebuild your application and redeploy it.
The Deploy on Save feature is designed to redeploy your servlets automatically. You only have to save the edited file and you'll see the changes immediately.
So, is there anything else to improve the development process?
Unfortunately, the Deploy on Save system is limited it consumes time and can't update the entire web applications or configuration files. This is exactly why JRebel is useful. JRebel is comparable to the best Deploy on Save systems, but it also offers many advanced capabilities. It offers two types of improvements:
Changes to Class structure: This targets Java SE applications (such as desktop applications) and Java EE applications.
JRebel is able to apply changes to many Java elements. The following are the details:
It applies changes to method bodies
It adds/removes methods
It adds/removes constructors
It adds/removes fields
It adds/removes annotations
It adds/removes classes
It applies changes to static field values
It adds/removes enumeration values
It applies changes to interfaces
Instant Builds: It targets Java EE applications only. JRebel is able to apply changes to Java EE elements. The following are the details:
It skips builds for WAR directories
It skips builds for WAR/EAR class updates
It skips builds for WAR/EAR resource updates
It maps multiple source dirs to one WAR/EAR target dir
It maps classes and resources with include/exclude patterns
It maps multiple source dirs with Ant-style patterns
It uses system properties to make mapping machine-independent
JRebel is entirely transparent; simply save the modifications to observe changes in the live application. It works with any kind of Java application.
To use JRebel, you need a ZeroTurnaround account. We'll see how to register a trial account for commercial projects and a free account for open source and non-commercial development.
You can register two types of accounts: a free account for open source or Scala projects, or a 14-day trial (for commercial purposes).
Also, free accounts don't allow you to integrate JRebel in a standalone server, you'll have to use the JRebel plugin for IDEs. In other words, it means that a free account allows you to register a server in the IDE and use the JRebel plugin only; you always work on your local machine. The trial version doesn't have this limitation and allows you to install JRebel directly in a server; this way you can use a server installed on a remote machine, and use NetBeans and its JRebel plugin to connect to the remote server.
To get a free account, go to https://my.jrebel.com/register and fill out the form to register an account. You can also use your Facebook or Twitter account, but keep in mind ZeroTurnaround will ask you about posting contents on your behalf. You will receive a confirmation e-mail. Once your account is confirmed, return to the previous link and use your new account to log in (if needed). Now, you have to choose one of the three available plans. Go to https://my.jrebel.com/plans and choose a plan from the following:
Scala: This plan is used for Scala projects
OSS: This plan is used for open source software
Social: This means that you will connect your Facebook or Twitter account to your JRebel account
Complete the forms and you will receive a license key by e-mail. You can also visit https://my.jrebel.com/account/how-to-activate to get it immediately.
To get a trial license, go to http://zeroturnaround.com/software/jrebel/trial/ and fill out the form on right-hand of the web page to register a 14-day trial account. Once registered, you will be automatically redirected to a web page that shows your JRebel Product Activation Key. Copy it in a text editor, we will be using it very soon. You will also receive an e-mail from zeroturnaround.com containing this key.
If you have already tested JRebel with a free trial account, you may want to use it in a commercial project. To buy a commercial license, visit http://zeroturnaround.com/software/jrebel/buy/ and choose the Base or Enterprise option. The main difference between these two plans is the number of developers in your company. Also, enterprise licenses come with a license server, a tool that gives you more control of your license files (you can easily activate and revoke licenses). Check http://zeroturnaround.com/software/jrebel/download/license-server/ for more details.
In this section, we will see how to register and activate your JRebel license. The following are the steps to register and activate it:
Download the JRebel runtime from http://zeroturnaround.com/software/jrebel/download/#!/. The download link is at the bottom of the page: please use the «current stable» version of JRebel), and extract it to your local drive. In this tutorial, we will assume that JRebel has been unpacked to
C:\packtpub\jrebel\.Run
C:\packtpub\jrebel\bin\jrebel-config.cmd(or the corresponding*.shscript file, if you are using a Linux operating system).
Choosing the license
Choose the New 14-day trial option if you have registered a 14-day trial account. Otherwise, choose the myJRebel license option.
Validate the first screen and paste your license key.

Copy/paste the license key
Validate the screen. You'll see the following message: JRebel has been successfully activated, thank you!. Close the wizard; your JRebel license is now activated.

License validation
To finish, go to the user profile directory of your operating system, in the
.jrebelsubdirectory (%userprofile%\.jrebel\on MS Windows); you will see ajrebel.licfile that contains your (encrypted) license key. This is the file that JRebel will check at every startup.
We'll see how to install and activate JRebel on a Tomcat standalone server.
The following are the steps that describe how to activate JRebel on a Tomcat server:
Download and unzip the Tomcat server.
Launch Tomcat with the startup script located in its
bindirectory (bin\startup.baton MS Windows).Enable the JRebel Java Agent for the Tomcat server. To proceed, simply append
-javaagent:C:\packtpub\jrebel\jrebel.jarto theJAVA_OPTSenvironment variable.
To proceed, you will need the latest version of Tomcat 6 or Tomcat 7, a Java 6 (or Java 7) JRE or JDK, and a trial (or commercial) activated license. Free licenses don't allow you to run JRebel on standalone servers!
Once installed and configured, add the JRebel Java Agent to the startup parameters of Tomcat.
Tomcat is now configured to launch the JRebel Java Agent.
Launch Tomcat with the startup script and look at the console output or Tomcat logs. If JRebel is correctly launched, you will see messages that indicate your JRebel license is active. Otherwise, you have probably forgotten to register your license, or you have misspelled the JRebel Java Agent path.
The following is an example of the normal JRebel activation, with message displayed in Tomcat's default output:
JRebel: JRebel 5.3.1 (201307011846)
JRebel: (c) Copyright ZeroTurnaround OU, Estonia, Tartu.
JRebel:
JRebel: Over the last 1 days JRebel prevented
JRebel: at least 0 redeploys/restarts saving you about 0 hours.
JRebel:
JRebel: You are running with an evaluation license.
JRebel: You have 14 days until the license expires.
JRebel:
JRebel: You will see this notification until you obtain a
JRebel: full license for your installation.
Please note that Tomcat will display timestamps in its default output and logs. They have been removed from this example for visibility purposes.
We'll see how to install and activate JRebel on GlassFish standalone server.
The following are the steps that describe how to activate JRebel on GlassFish server:
Download and GlassFish server from https://glassfish.java.net/download.html and unzip it.
Launch GlassFish with the startup script located in its
binfolder (bin\asadmin.baton MS Windows). To start the default domain, run this command:asadmin start-domain domain1.Enable the JRebel Java Agent for the GlassFish server. To proceed, launch your favorite Internet browser and visit
http://localhost:4848/, you will be connected to the administration interface of GlassFish. Navigate to Configurations | server-config | JVM-settings in the left-side panel.Add the two JVM options:
javaagent:C:\packtpub\jrebel\jrebel.jarand-Drebel.log=true.
To proceed, you will need the latest version of GlassFish 3 (or GlassFish 4), and a Java 6 (or Java 7) JDK. Once installed and configured, launch GlassFish with its startup script l.
Launch your favorite Internet browser and visit http://localhost:4848/.
Now, add two JVM options as displayed on the following screenshot:
-javaagent:C:\packtpub\jrebel\jrebel.jar-Drebel.log=true
Setting JVM options in GlassFish
You already know the first JVM option, this is the JRebel Java Agent.
The second JVM option asks JRebel to enable its logs. These logs will contain information about your current license validity, and so on. We have to turn on this option because GlassFish won't write JRebel logs to the default output. So, without JRebel logs, you could not know If JRebel is correctly loaded by GlassFish.
When you have added the two JVM options and validated the corresponding form, shut down your GlassFish server with the asadmin stop-domain domain1 command. After that, start your server again and check the C:\Packtpub\jrebel\jrebel.log file. It will contain a lot of information, including the message that indicates your license is active.
Now, please note that you don't need the -Drebel.log=true JVM option anymore; we used it to check JRebel configuration only. You can edit the GlassFish JVM option list and remove it. Re-enable it only if you encounter problems with JRebel.
Congratulations, your server is now configured to run JRebel!
The JRebel technology can be integrated in many IDEs, like Eclipse, IntelliJ IDEA, and NetBeans. We'll see how to install and activate the JRebel plugin on each platform.
You need to download and install at least one of these IDEs: Eclipse, IntelliJ IDEA, or NetBeans, and perform the following steps:
Download and install the latest version of Eclipse IDE for Java EE Developers from http://www.eclipse.org/downloads/. Please note that JRebel works on Eclipse IDE for Java Developers and Eclipse Standard editions too. Also, distributions delivered by Linux package managers (from Ubuntu, and so on) may work correctly. Once downloaded and installed, run it.
In this section, we will use the free version of IntelliJ IDEA Community Edition. If you have a commercial license for IntelliJ IDEA Ultimate Edition, you can use it. Download and install the latest version of IntelliJ IDEA Community Edition from http://www.jetbrains.com/idea/download/.
Download and install the latest version of NetBeans from https://netbeans.org/downloads/. Since the rest of this book will use NetBeans as its main IDE for Java SE and Java EE example projects, it is preferable to download the Java EE or All version.
The following steps will help you to integrate the JRebel plugin into your favorite IDE:
Download the JRebel plugin for IDE.
Activate your JRebel license in the IDE.
In Eclipse, go to the menu toolbar and navigate to Help | Eclipse Marketplace. If you are lucky, you should already see the JRebel plugin listed in the Eclipse Marketplace window. Otherwise, simply search for JRebel and install it.

Eclipse Marketplace
Eclipse will ask you what components to install. Choose them all and validate.

Features selection
Accept the JRebel license and validate again. Eclipse will now download the JRebel plugin.
Once downloaded, please restart Eclipse in order to complete the JRebel plugin installation.
To check the JRebel installation, go into the Eclipse preferences and type JRebel in the search box; you will see a JRebel section.
To finish, we need to activate the JRebel license, or simply check its status. To proceed, return to the Eclipse preferences, go to the JRebel section, and accept to open JRebel Config Center.
If you have already registered a license (as described in the How to do it... section of the Registering a JRebel account (Must know) recipe), you should see an activated license in the Licensing panel.

Licensing the information
Otherwise, use the Activate / Update License link, paste your license key and validate; your Eclipse JRebel plugin is now correctly installed and activated.
Also, please note this screen is useful to renew your license.
In IntelliJ IDEA, navigate to the File | Settings menu, and go to the Plugins section. Use the Browse repositories… button and search for JRebel. The full name of the plugin is JRebel Plugin Tools Integration. Download it.
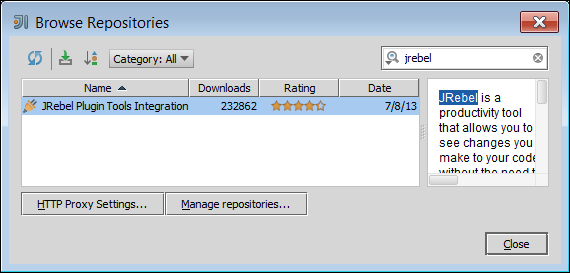
The Browse Repositories menu
Once downloaded, please restart IntelliJ IDEA in order to complete the JRebel plugin installation.
To check the JRebel installation, return into IntelliJ IDEA Settings and type jrebel in the search box; you will see a JRebel section.

The Settings menu
To finish, use this screen to check your JRebel license activation. If needed, use the Activation panel to paste and register your license key.
Your IntelliJ IDEA JRebel plugin is now correctly installed and activated.
Also, please note that this screen is useful to renew your license.
In NetBeans, navigate to Tools | Plugins | Available Plugins, and search for JRebel.

The Plugins manager
Download the plugin, accept the license, accept the JRebel self-signed certificate, and install the plugin. Once done, restart NetBeans.
To check the JRebel installation, navigate to Tools | Options, and open the JRebel panel.

The JRebel panel
In the General tab of the JRebel panel, you can check the License info field. If your license is not activated, you can open the Activation tab to register your license key.
Your NetBeans JRebel plugin is now correctly installed and activated.
Also, please note that this screen is useful to renew your license.
Now, let's talk about NetBeans special case.
We will now see how to download and install the JRebel plugin manually. There is one reason to proceed this way; every NetBeans plugin displayed in the Plugins manager has been validated by a verification team. If a plugin validation fails (for quality reasons), it may temporarily disappear from the Plugins manager. That's why you should know how to download the plugin manually.
To proceed, go to http://plugins.netbeans.org/plugin/22254/. This is the download page of the JRebel plugin for NetBeans. Choose the plugin version corresponding to your NetBeans version and download it—this is an NBM (NetBeans Module) file.

The NetBeans Plugins website
The UC badges indicate the plugin that has been validated and is available in the NetBeans integrated Plugins manager.
Now, return to NetBeans and navigate to Tools | Plugins | Downloaded, and use the Add Plugins… button to select the NBM file you have just downloaded. You can now install the plugin into NetBeans from this file.
This method is also a good way to install a new version of the JRebel plugin that has not been validated yet (plugins are usually validated after one week).
We'll see how to work with JRebel on the Ant Java SE projects: a simple graphical application will be built and modified without any additional compilation, thanks to the JRebel live code injection. You will also get some words about Maven Java SE projects support. NetBeans will be used as the main IDE.
The following steps will show you how to experiment with JRebel on a Java SE application:
Create a simple Swing application and test it.
Enable JRebel on your project.
Try live code injection with JRebel.
We will create a simple Swing application, a frame that contains a label and a button. The action associated with the button will update the label. We will use JRebel to change the button's action without recompiling or restarting the application.
Start NetBeans and create a new Java application project. Create a package, delete the default main class, and use the NetBeans assistant to create a new JFrame object by navigating to File | New File | Swing GUI Forms | JFrame Form, and then choose a name and validate.

The Projects view
Use the Palette tab on your right to drag-and-drop a JLabel and a JButton to your JForm (these two components are located in the Swing Controls section, under the Label and Button names).

The Palette tab
Now, double-click on the button you have generated. You will be redirected to the jButton1ActionPerformed method of your JFrame object.
private void jButton1ActionPerformed(java.awt.event.ActionEvent evt) {
  // TODO add your handling code here:
}
Insert a code to update JLabel of your form, as shown in the following code:
private void jButton1ActionPerformed(java.awt.event.ActionEvent evt) {
  // TODO add your handling code here:
  jLabel1.setText("Hello World");
}
The application is now ready for testing. You can test it by pressing F6 key. NetBeans will ask you for the name of the main class. Select the JFrame form and validate. Use the jButton1 button to update the label.

The first Hello World window
Do not close the application immediately, and return to the code editor to update the jButton1 button's action in order to display a new message and save the new code.
private void jButton1ActionPerformed(java.awt.event.ActionEvent evt) {
  // TODO add your handling code here:
  // jLabel1.setText("Hello World"); // previous message
  jLabel1.setText("Hello Planet");   // new message
}
Tip
Downloading the example code
You can download the example code files for all Packt books you have purchased from your account at http://www.packtpub.com. If you purchased this book elsewhere, you can visit http://www.packtpub.com/support and register to have the files e-mailed directly to you
Hit the jButton1 button in your application again; the change is not effective. Actually, your application hasn't been updated and it can't reflect code changes immediately. You will have to restart your application to see the new behavior, and this is normal. Now, let's see how JRebel will accelerate the development.
You may have noticed the presence of a JRebel node in the Projects view. Right-click on it and choose Generate rebel.xml.

The JRebel XML
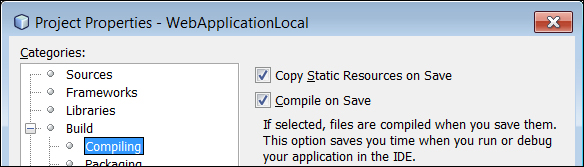
The rebel.xml file will contain the path of the compiled classes. JRebel will use these compiled classes to update your running application. Also, that means we have to ensure the Compile on Save feature is turned on for your project. Every time you apply changes to a Java class, NetBeans will recompile it and JRebel will update your running application with it. To proceed, go to the Projects Properties panel and enable the Compile on Save feature.

Enabling the Compile on Save feature
To finish, you have to activate JRebel (locate the JRebel button on the NetBeans toolbar).

Enabling the JRebel button
Now, restart your application and hit the jButton1 button a first time. Return to the code editor, modify the button's action to display a new message, save, and carefully observe the NetBeans console; you will see two interesting messages:
Firstly, JRebel indicates if your license is active
Secondly, you can see a message that indicates a class which has been reloaded, as follows:
2013-07-28 15:08:03 JRebel: Reloading class 'demo.ant.OurJFrame'.
2013-07-28 15:08:03 JRebel: Reloading class 'demo.ant.OurJFrame$2'.
2013-07-28 15:08:03 JRebel: Reloading class 'demo.ant.OurJFrame$1'.
Hit the jButton1 button again; the message changes without restarting the application. It works! You can now continue to update and save code in order to see the changes. Try to update the displayed message again, it works again; you don't need to restart your application again (except for some changes that are not supported by JRebel).
Ant is not the only build system, so you may want to use JRebel with Maven-based projects.
Maven- and Ant-based projects are handled the same way: generate a rebel.xml file, activate the Compile on Save feature, enable JRebel, and simply update your code without restarting your application. You don't have to deal with the Maven pom.xml file.
Also, you will still see the two same JRebel messages in the NetBeans console. They are useful to check the JRebel license and class reloading.
Last but not least, to activate the Compile On Save feature, the Compile On Save menu should be set to For application execution only (or better).

Maven's Compile On Save feature
We'll see how to work with JRebel on Ant-based Java EE projects: a simple web application will be built and modified without any additional compilation. Also, two cases will be explained: when the server is on the development machine and managed by the IDE, and when the server is running on a remote machine. NetBeans will be used as the main IDE. Please note that Ant-based means that the NetBeans uses Ant to handle the project (such as the classical Java SE Ant-based project); we won't use Ant inside the application itself.
The following steps will help you to test the live code injection in a Java EE project:
Register the GlassFish local server in NetBeans.
Create a simple Java EE servlet-based project.
Enable JRebel on your project.
Try the live code injection with JRebel.
First, register GlassFish in NetBeans (you can use the same GlassFish server that you have installed in the JRebel for standalone GlassFish server (Should know) recipe). To proceed, go to the Services panel and right-click on the Servers node.

Registering GlassFish
Select Add Server…, choose GlassFish Server, locate your GlassFish server-base installation directory, and validate with the Next button.

Locating GlassFish
Choose the Register Local Domain option and validate. Your GlassFish server is now registered into NetBeans.
To enable JRebel on GlassFish, you have the following two options:
As described in the JRebel for standalone GlassFish server (Should know) recipe, you have already added the JRebel Java Agent as a startup parameter. It will automatically enable JRebel on your server.
If you haven't added the JRebel Java Agent to the startup parameters, don't worry, the JRebel plugin can automatically add this Java Agent to any server that is registered in NetBeans. You simply have to check that the JRebel button in the NetBeans toolbar is turned on, and—this is very important—check that the Use IDE's proxy settings feature is activated in the Servers settings. To verify this last point, right-click on the registered server and show its Properties panel. Make sure that the Use IDE's proxy settings feature in checked.

Activating the Use IDE's Proxy Settings feature
Right-click on the registered server and start it. Observe the NetBeans console; you will see a message that indicates JRebel is activated on your server.

The NetBeans console and registered GlassFish
Now, create a new Ant-based web application project by navigating to File | New Project | Java Web | Web Application. Choose a name, select the registered GlassFish server and a Java EE version (version doesn't matter), and click on the Finish button.
Delete the default index.html (or index.jsp) file located in the Web Pages section, displayed in the Projects panel.
Create a package and use the NetBeans assistant to generate a servlet. This can be done by navigating to File | New File | Web | Servlet. Give it a name and click on the Next button. At the Configure Servlet Deployment step, fill the Servlet Name and URL Pattern(s) field.

Configuring the servlet deployment properties
Similar to Java SE projects in the Working with Java SE projects (Should know) recipe, you have to generate a rebel.xml file. Go to the Projects panel, and use the JRebel node to generate this file.
You have to check the following two features in the Projects Properties panel:
Enable the Compile on Save feature
Enabling the Compile on Save feature
Disable the Deploy on Save feature

Disabling Deploy on Save feature
Note
The Deploy on Save and JRebel features are incompatible because they do the same thing: they try to update your web application without any restart. Since we want to use JRebel for its advanced capabilities, we have to disable the Deploy on Save feature. Actually, you can keep it enabled; you will see a warning message that indicates that these two features are incompatible and JRebel has been temporarily turned off.
To test JRebel with our web application, simply press the F6 key. This will deploy your web application and start your web browser to show the main servlet.
We will assume your project is called WebApplicationLocal, and deployed at http://localhost:8080/WebApplicationLocal.
You will see a web page with the following message:
Servlet NewServlet at /WebApplicationLocal
This message is generated by the servlet which was created previously. We will now modify this message without restarting or redeploying anything. To proceed, open the Servlet class in the code editor, and go to the processRequest method. You will see the following line of code:
out.println("<h1>Servlet NewServlet at " + request.getContextPath() + "</h1>");Modify it to display a new message, save it, and refresh only your web browser (do not redeploy); the message has been updated!
Look at the NetBeans console (as with Java SE projects), JRebel writes a message for each class that has been reloaded.
INFO: 2013-07-28 16:59:57 JRebel: Reloading class 'demo.web.NewServlet'.
Congratulations, you can now update your web application by simply saving changes in the code editor!
We will see how to work with a remote Tomcat server and a simple servlet-based web application.
Note
NetBeans is not able to register a remote Tomcat server but JRebel is. So, we will proceed this way: register a (dummy) local Tomcat in NetBeans and configure JRebel to work with the remote Tomcat server.
Register a local Tomcat server in NetBeans the same way you previously registered a local GlassFish server. This is the same assistant. Simply don't forget to enable the Use IDE's proxy settings feature.
Also, install a Tomcat server on a remote computer (you can install it on your local machine for this tutorial; JRebel will simply warn you it is not a common scenario, but it will work fine). Don't forget to add the JRebel Java Agent to its list of startup parameters. In addition, there is another parameter to add, as follows:
-Drebel.remoting_plugin=true
This parameter will allow JRebel to receive new class definitions over the network.
Start the remote server. Compile your web application, upload it to your remote Tomcat server and deploy it via the Tomcat web administration interface. Note down its deployment context.
When it is done, open your web application Projects Properties panel and do the following two things:
Change the targeted server for Tomcat.

Changing the targeted server
In the JRebel Remoting section, fill the Application URL field with your remote web application context (something like
http://yourserver:8080/WebApplicationLocal, where "yourserver" is the name of your remote machine, "8080" is the communication port, and "WebApplicationLocal" is the context path of the web application). Also, click on the Generate keys, Generate rebel.xml, and Generate rebel-remote.xml buttons.
The JRebel Remoting section

JRebel is able to dramatically accelerate your developments, but it works for development phases only. You probably won't use JRebel with a production server. Of course, you could use an IDE, connect it to your production server, and use this system to keep your deployed applications up-to-date, but you would rapidly encounter problems—you have to use only one IDE to update your applications. This scenario is not suitable for a team of developers, and it is unprofessional.
An appropriate solution is LiveRebel. Since JRebel is ideal for the development stage, LiveRebel is designed to help you keep your production applications up-to-date, without any restart or redeployment.
LiveRebel is a link between your production environment and your continuous-integration server. More precisely, it is able to use your continuous-integration server to get the latest build and update your deployed application with it, live.
LiveRebel is very configurable and platform agnostic, which means it is not limited to Java! For details, please visit http://zeroturnaround.com/software/liverebel/what-we-support/#headline. Also, note that LiveRebel comes with a free license that is valid for one year and works for two nodes (environments). LiveRebel commercial licenses are sold as annual licenses per JVM instance. You can get details by visiting http://zeroturnaround.com/liverebel/pricing/.
The following are the general steps on how to install LiveRebel and connect it to your environment:
These general steps will help you to prepare a testing environment and accelerate your deployments with LiveRebel. Set up a version-control system, such as Subversion, Mercurial, or Git.
Set up a continuous-integration server, such as TeamCity, Jenkins, Hudson, or Bamboo.
Set up your (pre)production application server and database (for example, Tomcat and MySQL).
Optionally, configure your favorite IDE to use your versioning system and continuous-integration server.
Visit http://zeroturnaround.com/software/liverebel/ to get LiveRebel.
You will get the final download link by e-mail, with a license key. Download LiveRebel and unzip it.
Run the
bin/lr-command-centerscript (BAT or SH, depending on your platform).
LiveRebel command center startup
Open the URL displayed in the console. To log in, please use information received by mail (with your license key). Create a user.
Use the ADD SERVER button to add your production application server, and follow the steps displayed in your Internet browser.
Use your IDE to modify code, commit to your versioning system and observe live changes on your production application.
After code is committed or schedule, your continuous-integration server will release a new build, and LiveRebel will simply use it to update your production application, live.
This way, you neither have to install updates manually, nor restart or redeploy anything.
Since LiveRebel is a complex and large subject (you can configure a lot of features), it cannot fit in this short book. For details about LiveRebel installation, configuration, and capabilities, please visit its online documentation. Also, you may find helpful information at http://manuals.zeroturnaround.com/liverebel/index.html.
