


So you are using Lotus Notes 8.5.3 for e-mail, calendar, and collaboration, and you want to know how to go from just using Lotus Notes, to letting Lotus Notes work for you. Lotus Notes is highly customizable, adapting to the way you want to work. We will show you how to make Lotus Notes look and behave in the manner you choose.
Your IBM Lotus Notes 8.5.3 client should be installed and connected to your home mail server to receive mail.
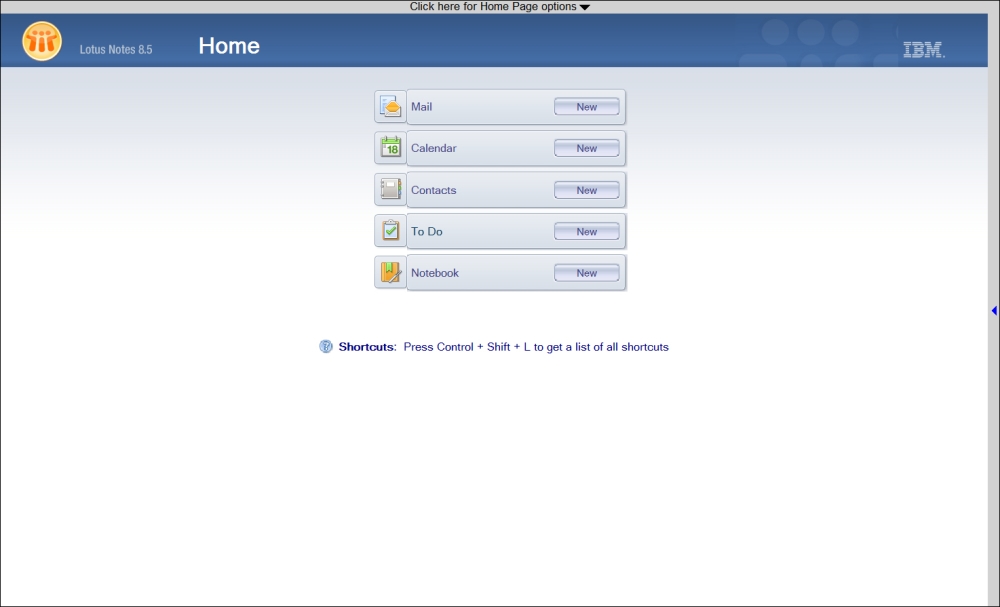
Let's start with the Home page. The Home page is the first page you will see when setting up a new client. You can also access it in many different ways if your client is already set up. One way to get to it is from the Open list as shown in the following screenshot:

Here is what the default Home page looks like after you open it:
To customize the Home page, click on Click here for Home Page options. Then click on Create a new Home Page. This will bring up the Home Page wizard. Give your new Home page a name, and then you can choose how you want your important data to be displayed via your new Home page.
As you can see, there are many ways to customize your Home page to display exactly what you need on your screen.
Now we will look at more ways to customize your IBM Lotus Notes 8.5.3 experience.
By clicking on the Open button in the upper left corner of the Notes client, you can access the Open list. The Open list is a convenient place to launch your mail, calendar, contacts, to-dos, websites, and applications. You can also access your workspace and Home page from the Open list. Applications added to your workspace are dynamically added to the Open list. The contextual search feature will help you efficiently find exactly what you are looking for. One option when using the Open list is to dock it. When the Open list is docked, it will appear permanently on the left-hand side of the Lotus Notes client. To dock it, right-click on the Open list and select Dock the Open list. To undock it, right-click in an empty area of the docked list and uncheck the Dock the Open list.
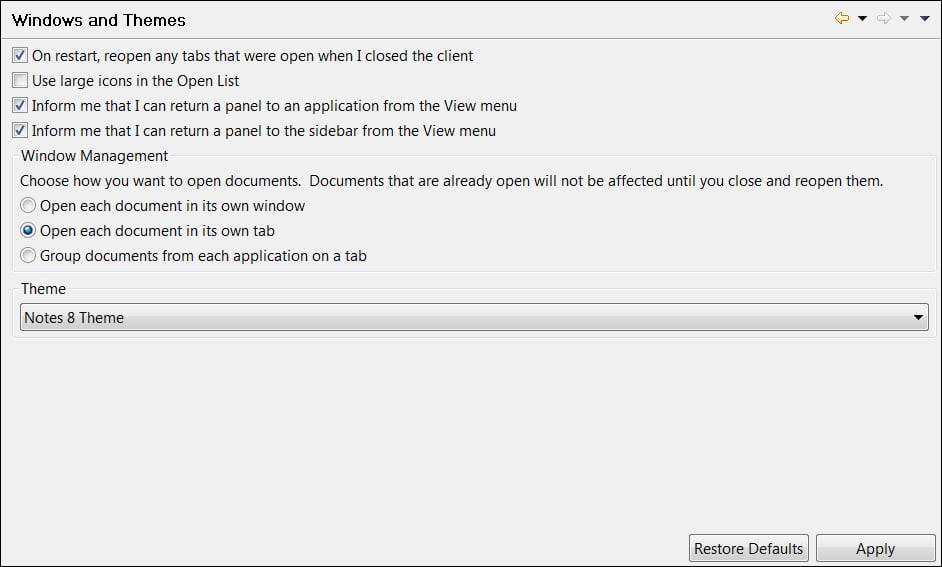
You can choose how you want your windows in Lotus Notes 8.5.3 to look. In the Windows and Themes preference panel, you can control how you want Notes to behave. First, decide if you want your open documents to appear as tabs or windows. Then decide if you want the tabs that you had left open when you exit the client to be retained when you open it again. The option to Group documents from each application on a tab will group any documents or views opened from one application. You can see these options in the following screenshot:
By checking the preference setting called Sending and Receiving under Preferences | Mail, you can display a pop-up alert when a new mail arrives. The pop up displays the sender and the subject of the message. You can then open the e-mail from the pop up. You can also drag the pop up to pin it open. To turn this off, uncheck the preference setting.
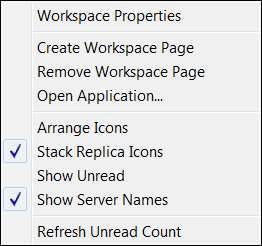
The workspace has been around for a long time, and this is where icons representing Domino applications are found. You can choose to stack icons or have them un-stacked. Stacking the icons places replicas of the same applications on top of each other. The icon on the top of the stack dictates which replica is opened. For example, for a mail if the server is on top, then the local replica will be ignored causing potential slowness. If you would like to make your workspace look more three-dimensional and add texture to the background select this setting in the Basic Notes Client preference. You can also add new pages, change the color of pages and name them, by right clicking on the workspace.
Mail is the most used aspect of the Lotus Notes client. You will learn tips and tricks to optimize your mail experience.
This will entail using your IBM Lotus Notes 8.5.3 mail file. You will need an installed IBM Lotus Notes 8.5.3 client and access to your mail file.
When you open your inbox, you will see the familiar columns, such as Who, Subject, Date, Size, and so on. By clicking on them and dragging them, you can reorder the mail columns.

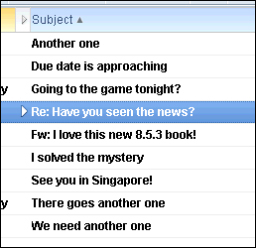
By clicking on the arrow in the same mail columns, you can sort your mail. If you click on the Date column, for example, you can navigate between the most recent to the oldest mail and the oldest to the most recent mail. One of the improvements in the 8.5.3 client is sorting by subject. Now the prefixes, such as Re: and Fw: are ignored to give you a more accurate sorted view.
Conversation threads allow all messages belonging to the same thread to be grouped together. The conversations' view in a mail file's Inbox or All Documents option shows only the last message in each thread, while the Individual Messages view displays all the messages (as does the standard Inbox). In both cases, the entire thread that a message belongs to can be viewed by expanding the twisty next to the currently selected message.
The total number of messages in the thread is also displayed in parenthesis next to the message subject. To enable conversations, go to the Actions menu and select Conversations.
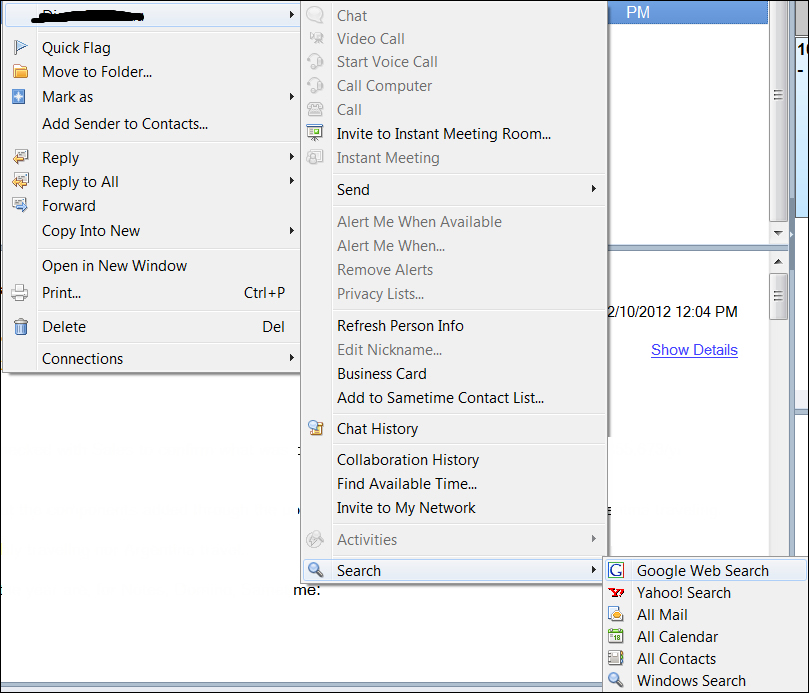
Searching your mail file for a particular e-mail is now a little bit easier. You can choose to search the entire mail file or if you know what folder the message is in, you can search just that folder. There are a few ways to do this. One way is to right-click on an e-mail in your inbox. You will see the following:
Another option is to use the search bar in the upper right-hand corner. You can also search in views by using the View – Search this View.
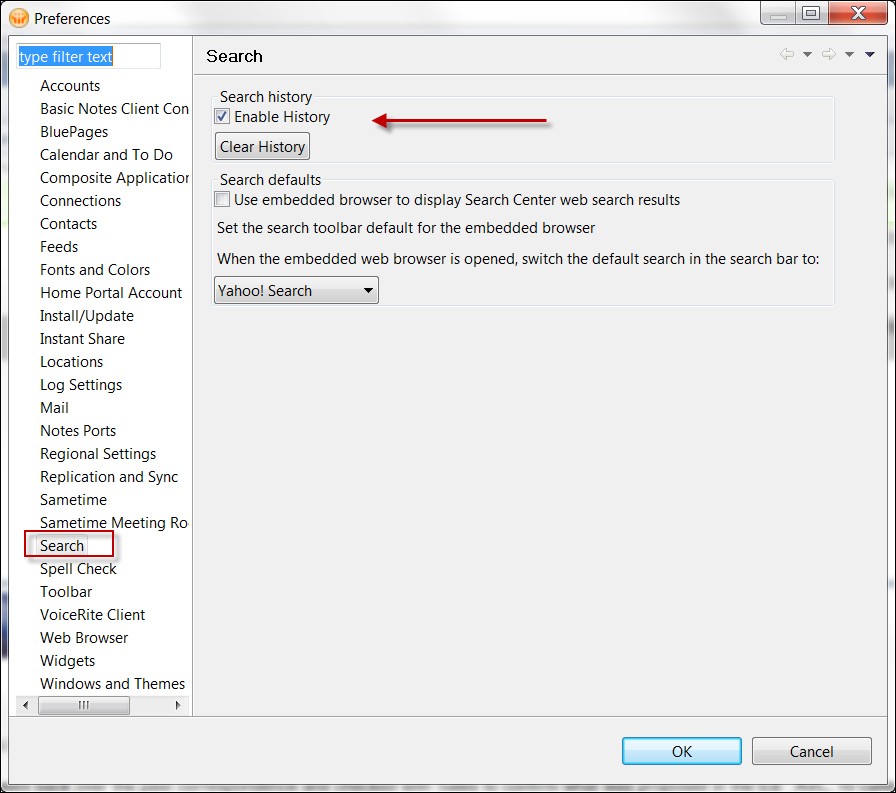
To save your previous searches, enable the following preference settings:
Folders are one way to further organize your mail and clear out your inbox. Notes will now remember the folder state when the client is restarted. If a folder was open when you exited Notes, it will be open the next time you start Notes. If it was closed when you exited Notes, it will be closed. The less mail you have in your inbox view, the more efficient and responsive your Notes client will be. Folders can have subfolders as well. When naming folders, do not use system names, such as Inbox, Sent, or use the word Folder or Folders in the name. It is also recommended to stay away from special characters such as _ and /. Folders can be moved or nested by selecting the folder and dragging it to where you want it. Mail can be moved to folders by right-clicking on the message and selecting move to folder, or you can select a message or messages and drag-and-drop to the folder name. Mail rules are a great way to automate this process based on the criteria that you select.
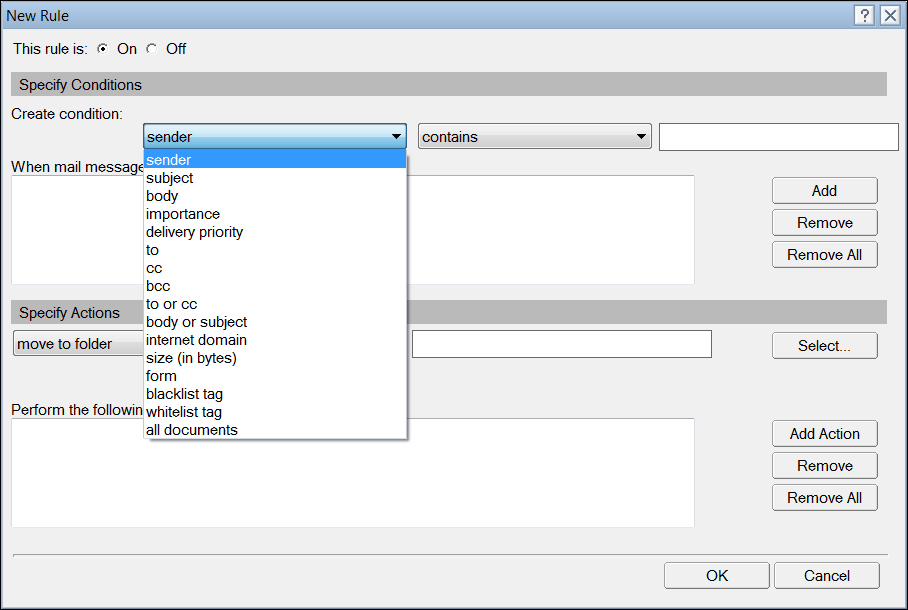
Mail rules can be set up to help you automatically perform actions on mail. By setting the criteria you can have rules act on your mail. The mail rules you create are stored in the Rules folder in your mail application. The current limit on the number of mail rules you can create is 100. The more rules you have, the slower your mail router will run, as it must go through each one before the message is delivered. One way to avoid this limit is to not create rules based on specific senders. You can create rules to a sender's domain to avoid this. To create a rule you can go to the navigation pane of your mail, and navigate to Tools | Rules.
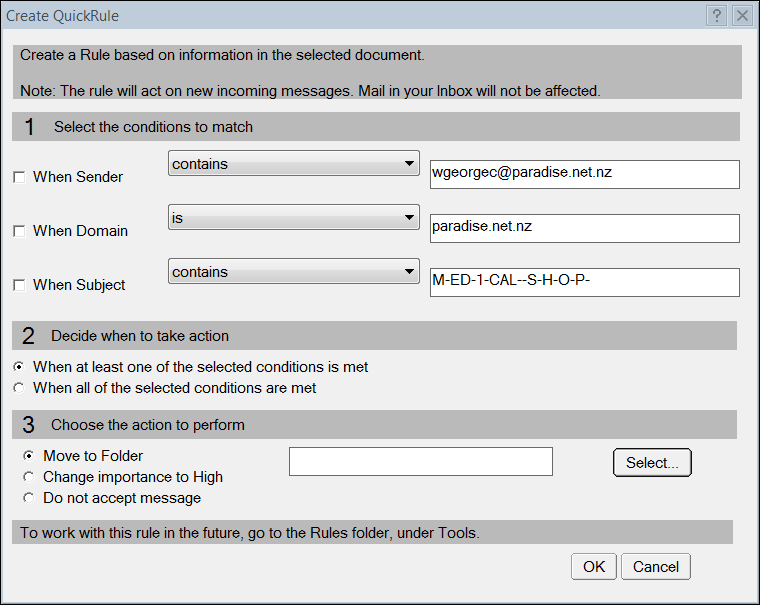
You can also use QuickRules. QuickRules lets you create simple rules based on received messages to act on incoming messages with specific subject lines, sender names, or domains. To use QuickRules select the message you want to create a QuickRule with and go to More and select Create QuickRule. This will pre-populate the QuickRule with the sender and subject from the message. Here is an example of a QuickRule on a spam message. This will send mail to the Junk Mail folder. Make sure you do not include your own domain.
EML files are used by other e-mail systems as a file type. Now in Lotus Notes 8.5.3, you can save your messages in this format. To do this, simply open the message, navigate to File | Save As, and select the .eml file extension. At this time the Lotus Notes client can not import .eml files, it can only save this file type.
Preferences can be set to color-code messages from different senders. This is a handy way to visually see who is sending you mail in your inbox. To color-code mail from specific senders, navigate to File | Preferences, click on Mail, and then click on the Sender Colors tab as shown in the following screenshot:
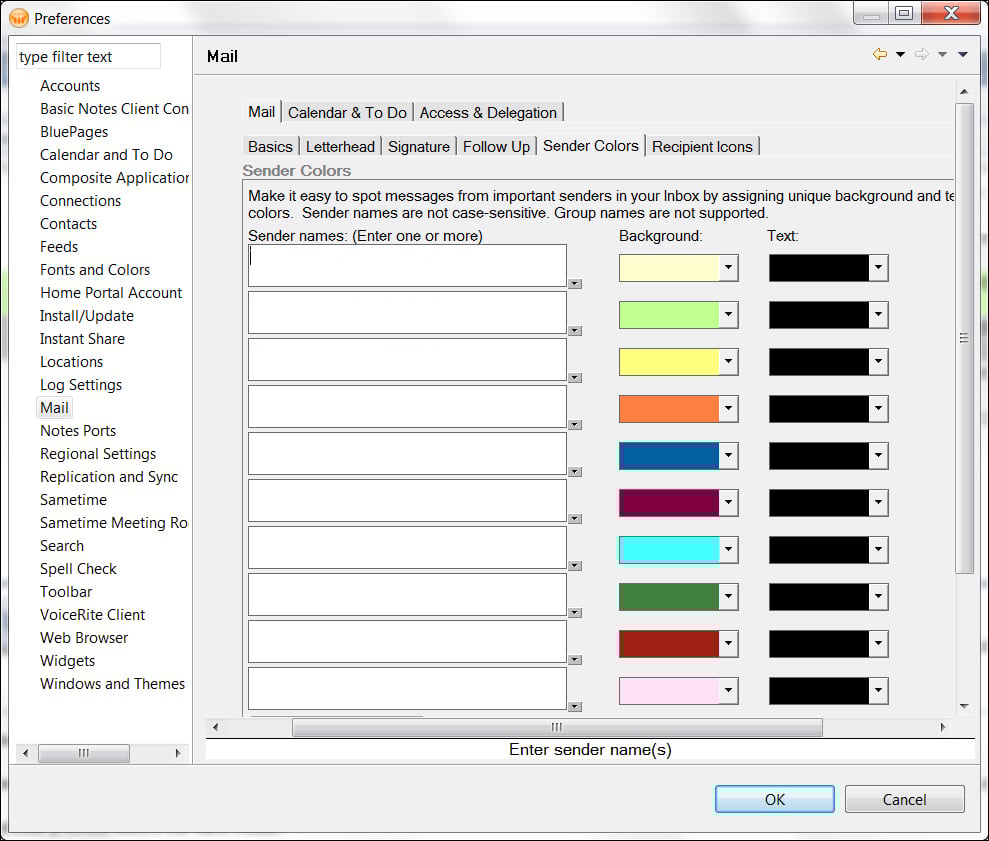
You can enter more than one name for each color combination. Separate names by pressing Enter (rather than using a comma). To select names from a directory, click on the down arrows next to the field.
To show an icon in your Inbox that identify messages in which you are the only recipient, a primary recipient, or a secondary recipient, based on the number of message recipients and whether your name is in the To or Cc field, go to the following preference:
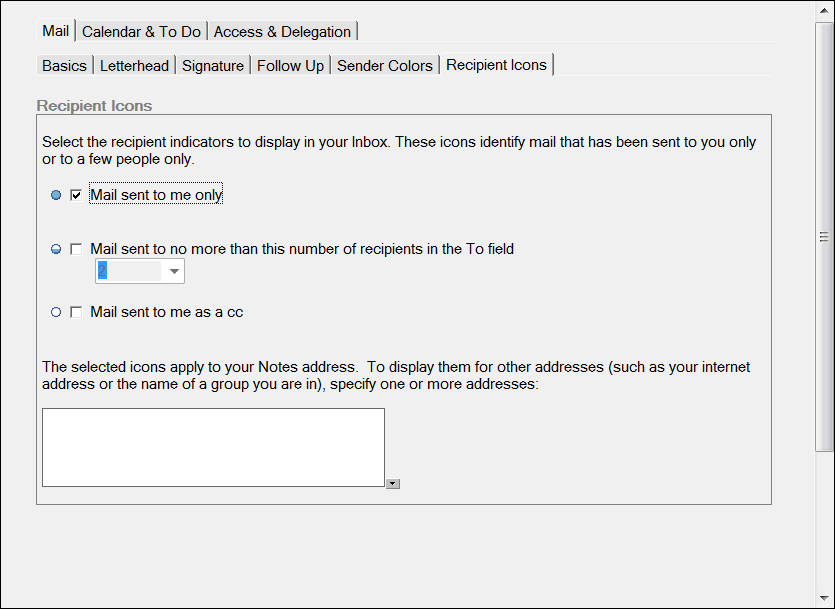
This is found under Preferences | Mail on the Recipient Icons tab.
There are spell check preferences to correct simple typing errors. You can correct common typing errors. As you type in characters or words within the body of a memo or document, if there's a match to an entry in the correction tables, the entered word will be adjusted to reflect that entry. These options can be found in the Spell Check preference settings.
If you have ever sent out a message that you wish you could have back, Message Recall is the way to do this. Message Recall has to be enabled on the server side, so there is a possibility that you can not use this function. The other caveat is that this will only work on messages sent internally. This means messages sent to the internet can not be recalled. There may be other restrictions as well, depending on how this has been enabled. These include a time limit on recalling messages, and you may not be able to recall a message if the recipient has read it. To recall a message, go to your Sent view and select the message. Then click on the Recall Message button. This will open the Recall Message dialogue box. In the box you can select the recipients to recall as shown in the following screenshot:
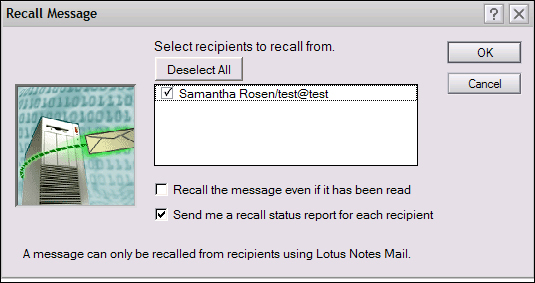
After you click on OK, the recall request is acknowledged with a dialog box. You will receive a report if the message was recalled.
You can automatically add a personal signature to all the messages you send. To set your signature file, go to Preferences and click on the Signature tab.
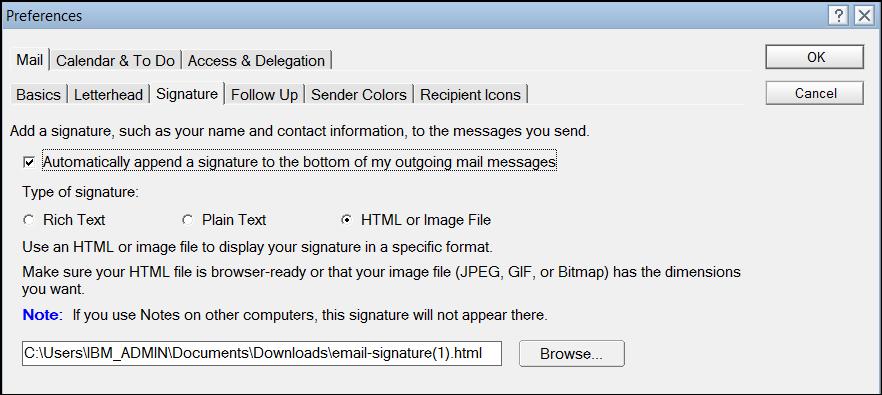
If you have a different signature for internal and external mail, you can use an alternate signature. The signature that you use more frequently should be added to your preferences as described previously, so it's automatically added to all the e-mail you send.
Save your alternate signature file to your computer (it must be a TXT, HTML, JPEG, Bitmap, or GIF file). The file can exist anywhere on your computer.
To use your alternate signature, follow these steps:
Create a new memo and delete your primary signature from the e-mail message.
Navigate to Actions | More | Insert Signature.
Select Import from the File menu and select a file type. Now select your alternate signature file, and click on Open.
Click on OK.
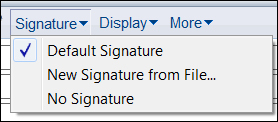
There is one other signature. You can choose whether to add a signature, or have no signature on individual messages. To see this option, select the signature setting when you create a new memo as shown in the following screenshot:
Replication is one of the strengths of Lotus Notes and Domino. What this allows you to do is create a local copy of your mail file on your workstation. When working off of your local replica, you do not need to be connected to your mail server. This allows you to work offline. You can read, delete, file, and respond to mail without being connected to the network. When you connect back to the network, all of your changes will get replicated back to your server-based mail file.
Your IBM Lotus Notes 8.5.3 client should be installed, connected to your home mail server and receiving mail. You may or may not have an existing local or managed replica of your mail file.
If you do not have a local replica, you can create one. While in your mail file, navigate to File | Replication | New Replica. Choose local and click on OK.
There are some things to be aware of when working off a local replica. You must have the disk space available to create the local replica. It is also a good idea to encrypt the local replica so that if your workstation is compromised, your e-mail will be encrypted. There are benefits as well to the performance of your mail file when working locally.
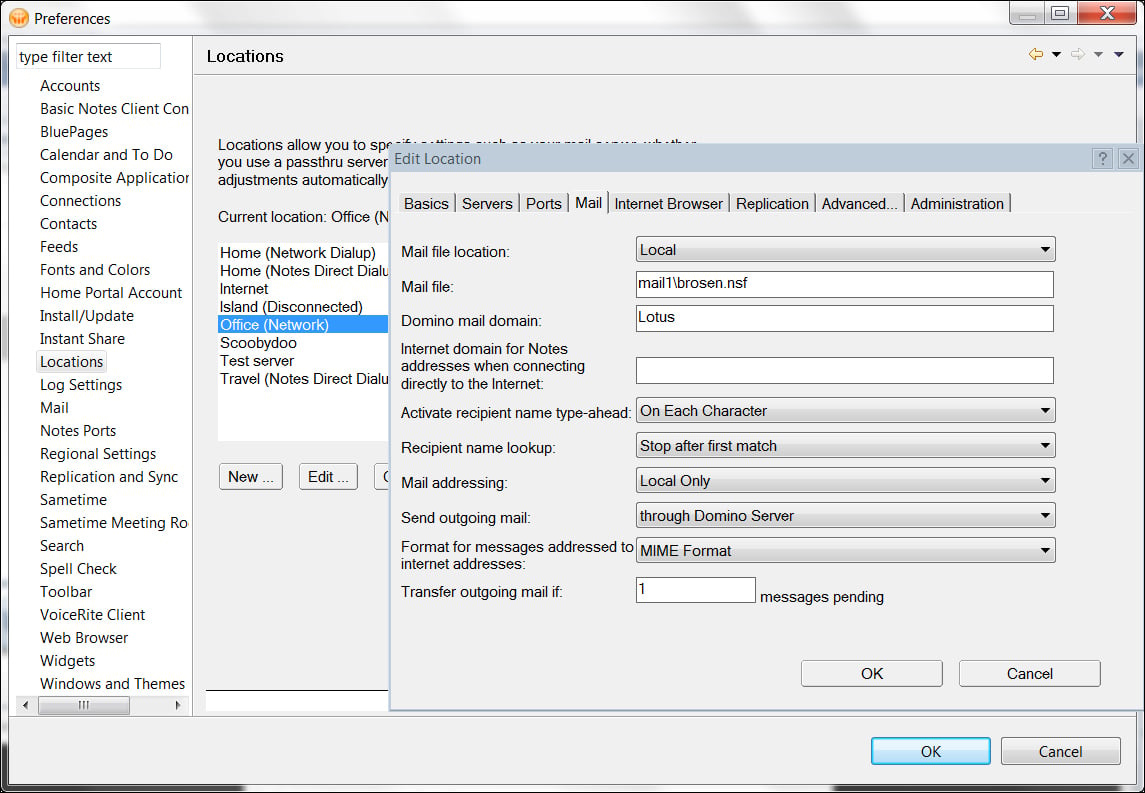
To determine if you are using a local replica, navigate to your Preferences | Locations and edit your current location. Then go to the Mail tab. If your mail file location is set to Local, you are working off of a local replica as shown in the next screenshot. If you are working off the server, your location would say on Server.
Some differences to be aware of are around the behavior of sending and receiving mail. When working off of a server copy, when you send and receive mail it will go out immediately and appear in your inbox immediately. When you send mail from a local replica it is sent immediately. Receiving mail to a local replica will show up in the inbox when replication occurs. This delay in receiving mail is offset by the performance gains from using a local replica.
Some of the other benefits of working off a local replica is the behavior if a server goes down or is unavailable. In this scenario, a user working on the local replica will never know if the server goes down. They can continue to work without interruption. If the users mail file is on a clustered mail server, the replica will replicate against the next most available server.
When using local replicas offline, you have full control of the local mailbox. For example, if you send a message by mistake, you can recall it by navigating to the local mailbox and deleting the message before it is replicated to the Domino server. This is similar to the Message Recall functionality that we discussed earlier.
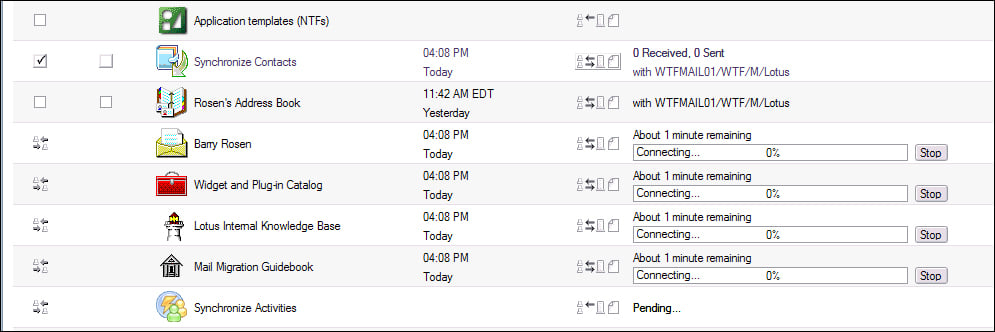
One of the improvements around replication that helps to speed up this process on the client, is multi-threaded replication. Now, when you replicate your local databases, they will run multiple databases at once as shown in the following screenshot:
As with any database, local replicas can become corrupt and require corrective actions to be performed. When this occurs, the best remedy to the issue is to delete the local replica and create a new one. You must be sure to delete the local replica and not the server copy. If you are unsure about this procedure, you should contact your local help desk for assistance.
Managed replica is the new option for working locally.
Starting with Lotus Domino 8.5.2, IBM introduced a new feature called managed replicas. Managed replicas take the concept of the local replica and improve the functionality with additional features. It is the best of both worlds of receiving mail immediately and working off a local replica. As the managed replica is essentially a local replica with a couple of special attributes, it uses the same background replicator as local replicas to replicate changes between the local file and the server-based replica. The local managed replica is created in the background while you continue to use the server replica. After the managed replica is created, you are automatically switched to the managed replica. As opposed to a standard local replica, if the managed replica becomes corrupt, it will be deleted and recreated automatically in the background. The other major benefit of the managed replica, is that mail is sent out immediately to the server. Managed replica can be configured manually, but is most often set via a policy by the Domino administrator. To set this up manually, add the following parameters to the notes.ini file:
CacheMail=3: This setting will create the managed replica if a local replica does not already exist.OutgoingMailsendThreshold=1: This setting will set the mail threshold to a value of 1. With this value, every time a new message is deposited in the local mailbox it will be sent to the server immediately.ReplicateOnNewMail=1: This setting will replicate new mail from the server every time a new mail has been delivered.
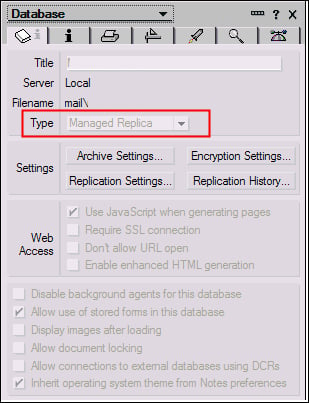
To verify or check that you do have a managed replica, there are two options. The first option is to go to the Open list and navigate to Open | Mail. When your mail file is opened, it should say that it is Local. Then check your current location document as explained previously. The mail file location should say On Server and not Local. The second option is to check the local mail replica's application properties. To do this, open your mail file and navigate to File | Application | Properties. On the first tab of the properties the Type field should indicate Managed Replica as shown in the following screenshot:
Now that we have covered mastering your mail, lets walk through some calendar and to do features to improve your Lotus Notes experience.
This will entail using your IBM Lotus Notes 8.5.3 mail file. You will need an installed IBM Lotus Notes 8.5.3 client and access to your mail file. You will need to be in your calendar view
To create a federated calendar, go to your calendar and click on Add a Calendar. This will bring up the window shown in the following screenshot:
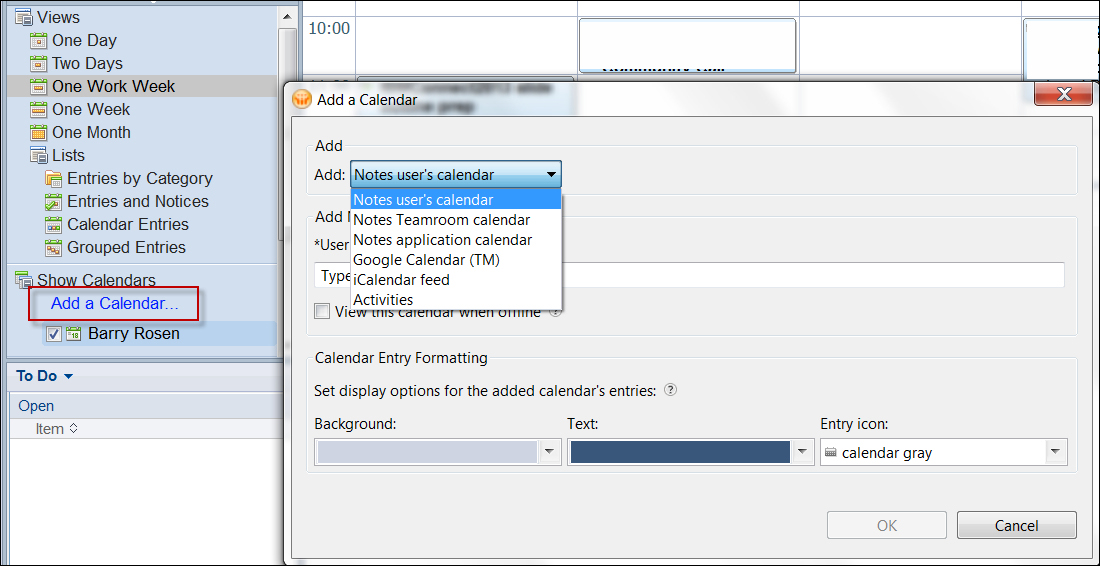
From the Add drop-down menu, select the type of calendar you would like to federate on your calendar. If you want to view this calendar when offline, check the setting View this calendar when offline. Any updates will not be reflected until you have access to the federated calendar. On calendars other than Notes users, you can select to view offline or on a mobile device. When you select the option to sync with a mobile device, you will see your federated calendar entries 45 days before and 45 days after the current date on your mobile device. Each federated calendar can also have a unique color so you can visually differentiate between federated calendars.
Calendar Federation allows you to federate calendars from external sources, such as Google. You can federate calendars from web-based sources, other Lotus Notes users, or from files. It will overlay the calendar into your Lotus Notes 8.5.3 calendar. The benefit of the overlay feature in Lotus Notes 8.5.3 is that you have the option of adding another user's calendar directly into your calendar.
Calendar cleanup will help you to clear out your calendar of old entries that you no longer need or use. It will also help when you are trying to reduce the size of your mail file. To run a calendar cleanup, from your calendar view, go to the More menu and select Calendar Cleanup.
The Calendar Cleanup dialog box will now come up. You can specify a cut-off date or timeframe, along with whether to act on Calendar entries or To Do entries. The latest cleanup you can specify is for entries that occurred over 1 day ago or entries that occurred before <yesterday>, which would include documents up to two days prior as shown in the following screenshot:
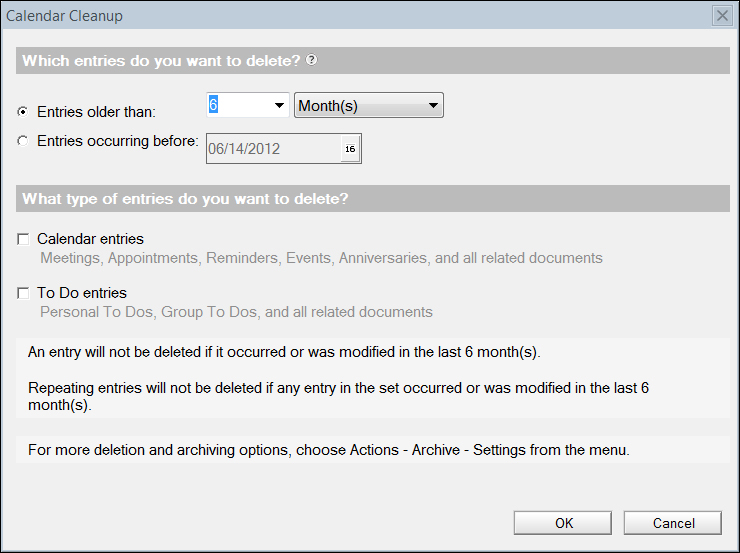
A meeting will not be removed unless all of its response documents meet the criteria, and it is not a repeating meeting whose end date is later than the date specified. One thing to note is that deleted calendar entries do not go into Trash, but are deleted completely. This means once you have deleted or removed the calendar entries, they are no longer in your mail file. If you do not want to delete the entries, archiving is an option to clean up your calendar.
This feature in Notes 8.5.3 fixes issues where duplicate repeating calendar entries exist in the mail file. The Notes client detects the duplicated calendar entries and displays a Repair Calendar dialog box when you attempt to open any of the entries in the repeat set that contains duplicates. When you click on OK, the Repair Calendar feature fixes the duplicates. The duplicate calendar entries are not removed from the mail file. They will no longer show on the Calendar view, such as One Day, Two Day, and so on. If you need to reference them, they can be found in the Entries and Notices or Grouped Entries lists views.
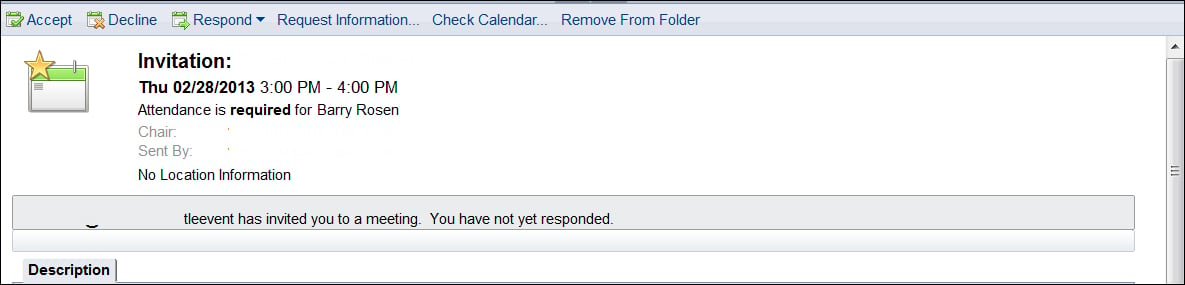
You can act on calendar invites in your inbox preview pane as shown in the following screenshot:
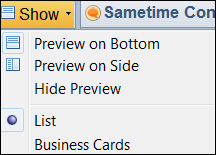
To control where the preview pane is or how your calendar entries will be displayed, go to the Show menu from the calendar view.
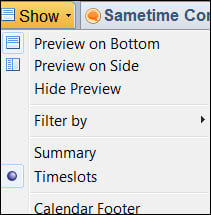
You can choose to filter what calendar entries will show and how they appear from here.
If you have an online meeting URL or a conference line, you can add these to your preferences. When creating a new meeting entry you will be able to add these to your invites.
Under preferences on the Calendar & To Do tab, on the Display tab, under the Entries tab is where you put your conference call information.
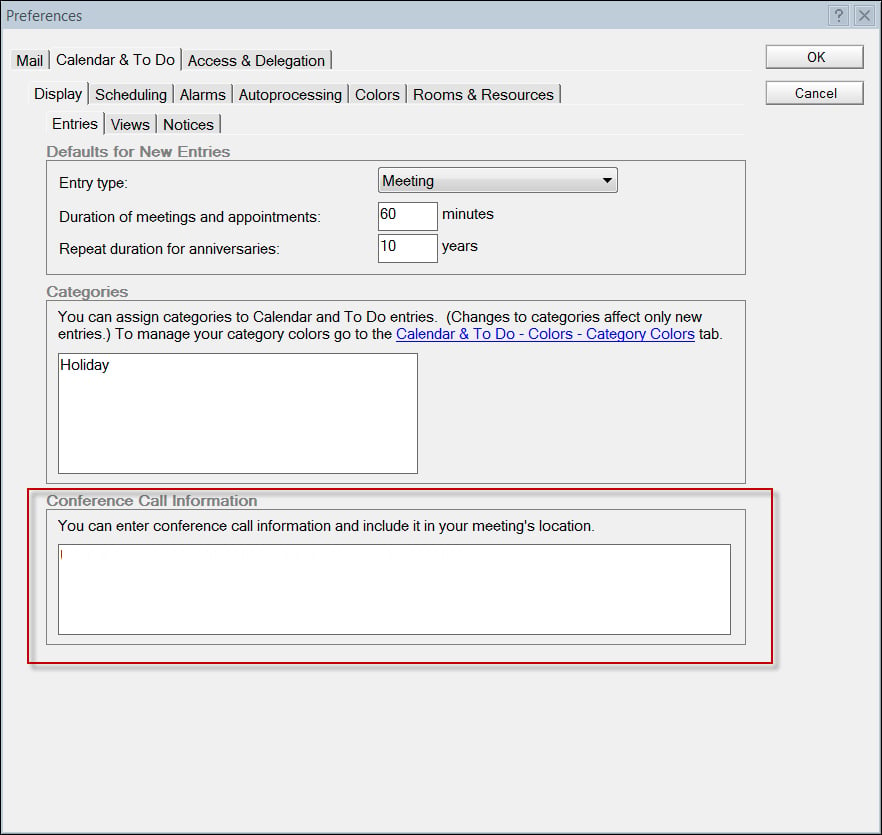
After adding this information, you will have the option to add your conference call information to meetings.

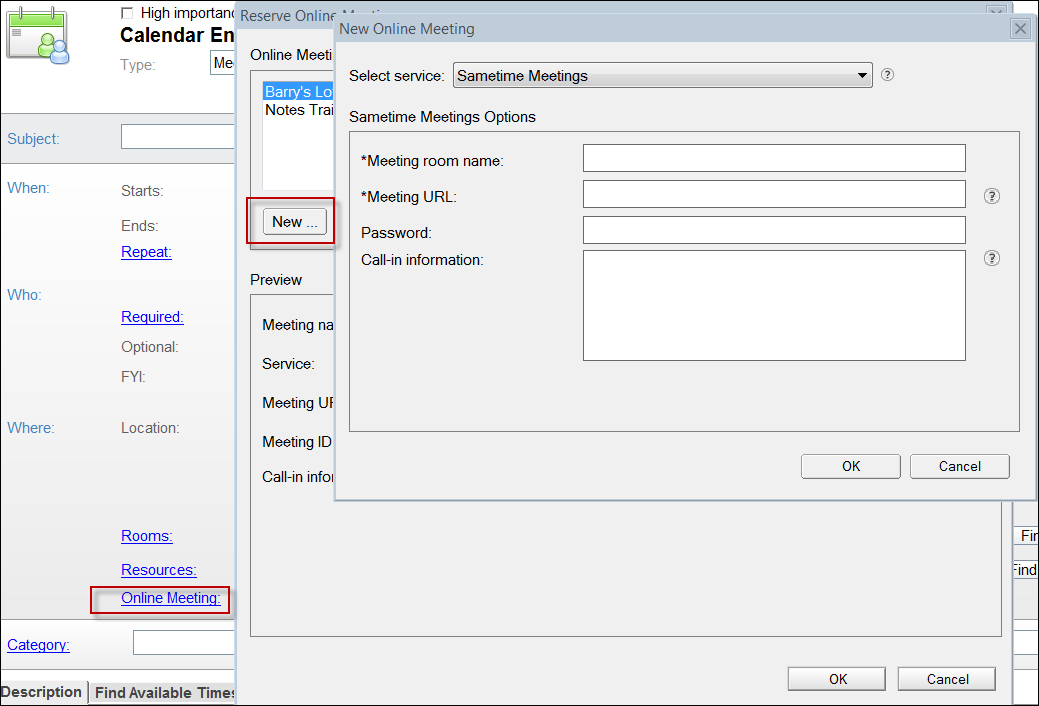
If you have an online meeting URL, you can add it to your invitations as well. When creating a new meeting click on Online Meeting. To add a new online meeting URL, first click on the New button. You will be able to select the type of meeting and add additional information, such as the meeting password, as shown in the following screenshot:
By default, Lotus Notes will leave a countered meeting on your calendar. If you do not want countered meetings on your calendar, you can simply change the setting in the following manner, that is, by unchecking By default, leave a placeholder for countered meetings:
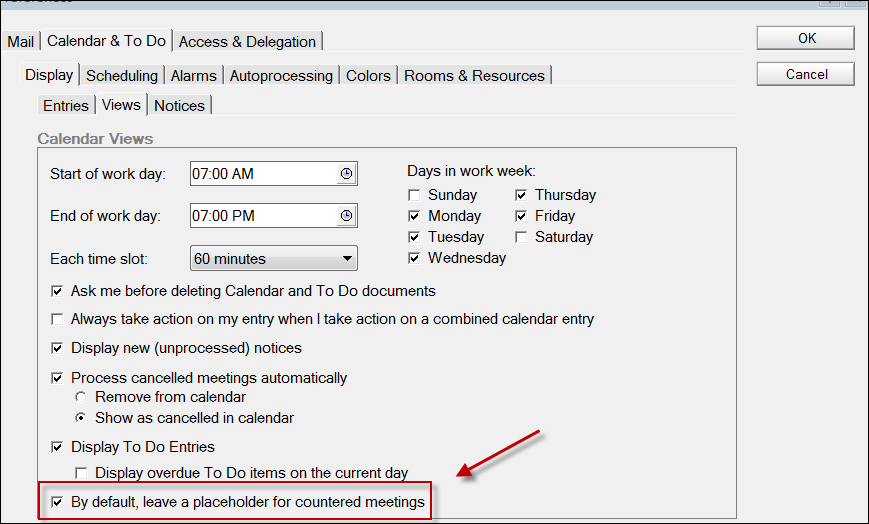
Countered meetings will display on the calendar with the following characteristics:
The countered meeting will be at the time the meeting was scheduled for
The meeting will have a unique color on the calendar to visually distinguish itself
When hovering over the calendar entry, the hover text will indicate the new proposed time
All invitee actions will still be available so that an invitee can modify the response
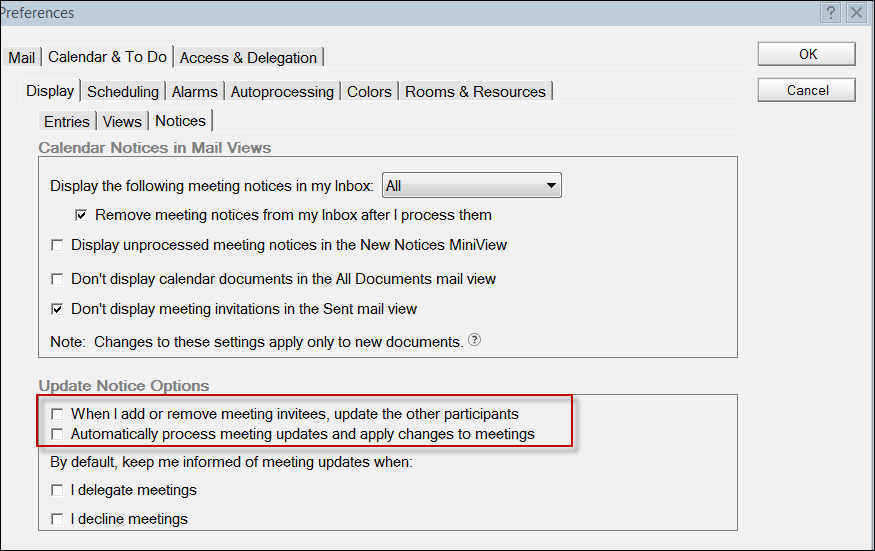
A preference has been added to turn on invitee list updates and auto processing information updates. This preference can also be set via a policy.
When the option When I add or remove meeting invitees, update other participants is checked, all participants are notified when adding or removing invitees. This is sent as an informational update to the meeting. Be aware that in some cases of repeating meetings, enabling this can result in multiple updates being sent in order to maintain data.
Enabling Automatically process meeting updates and apply changes to meetings, will automatically apply any non-time change updates to accepted meetings. This removes the step of having to update the calendar from the inbox, or having to open the calendar entry to update it. This will not apply to reschedules. A reschedule will still require you to accept or decline it.
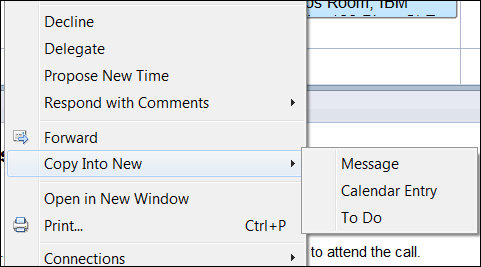
The Copy Into feature is very helpful when you want to create a message or To Do from an existing calendar entry. This can also be done to create a calendar entry from an existing message. To do this, select the calendar entry either from the Calendar view or the side bar and right-click the entry. This will keep all of the information from the calendar entry and add it to the message.
Just as you can sort your Inbox view, you can also sort your to-dos by priority, due date, category, assigner, or assignee. Click on the column and drag-and-drop it to the order you prefer.

To do items can be displayed or hidden on your calendar. Navigate to File | Preferences, click on Calendar and To Do, and then click on Display. Click on Views and then select or clear Display To Do Entries.
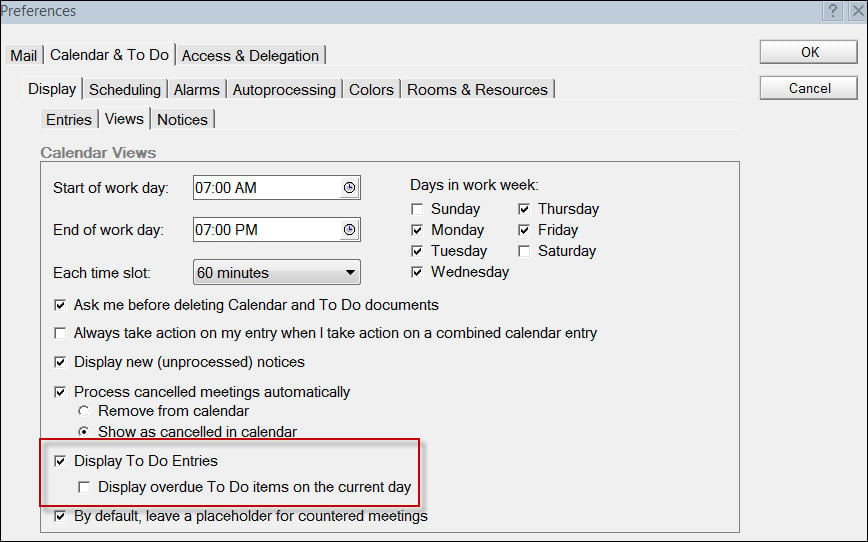
Select Display overdue To Do items on the current day. Otherwise the to-dos remain displayed on their due dates.
Contacts are just as important as your e-mail. Here, you will learn how to manage your Lotus Notes contacts.
All of this work will be done in your contacts, which you will access via your IBM Lotus Notes 8.5.3 client.
Here you will see how to get to and manage your contacts.
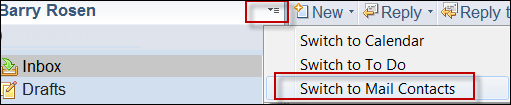
There are several different ways to access your contacts. Perhaps the quickest and easiest, is to use the switcher icon and select Switch to Mail Contacts as shown in the following screenshot:
Your contacts are stored in your personal address book. They can be synced with your mobile devices. When they are synced, they are added to a view in your mail file.
You can personalize your contacts.
As in the Mail, Calendar, and To Do views, you can drag-and-drop the categories around to customize your contact experience. You can also choose where you want the preview pane to be displayed. Under the Show menu, you also have the option of displaying your contacts as a list or as business cards.
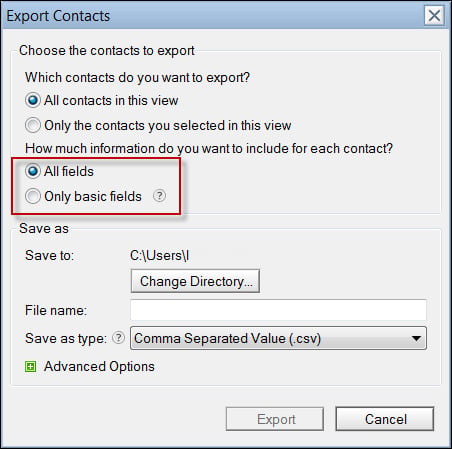
Sharing contacts can be done by importing, exporting, and forwarding them. When importing contacts, field mapping can be done before or after they are imported. When you export contacts, you can filter the fields and you now have the option to export only basic fields.
Your contacts can be forwarded as a vCard. Make sure you are in the My Contacts view of your local contacts. You will see the Forward vCard button. This will forward the selected contacts as vCards. You can also import vCards into your contacts.

When asking for a new contact or a group, you have the option to mark it as private via the checkbox or by right-clicking the menu. This will hide the contact or group from people that are delegated to manage your contacts.

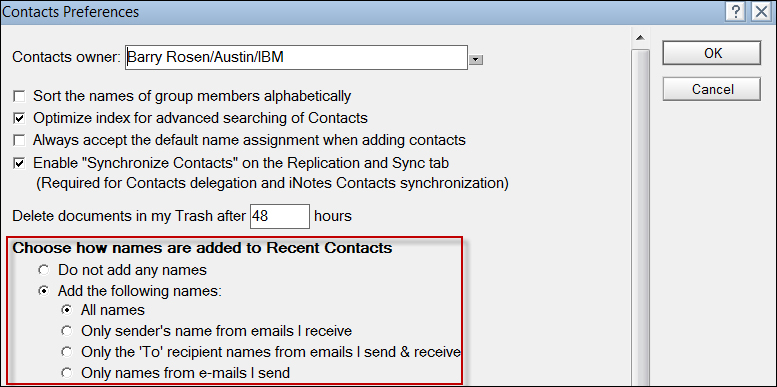
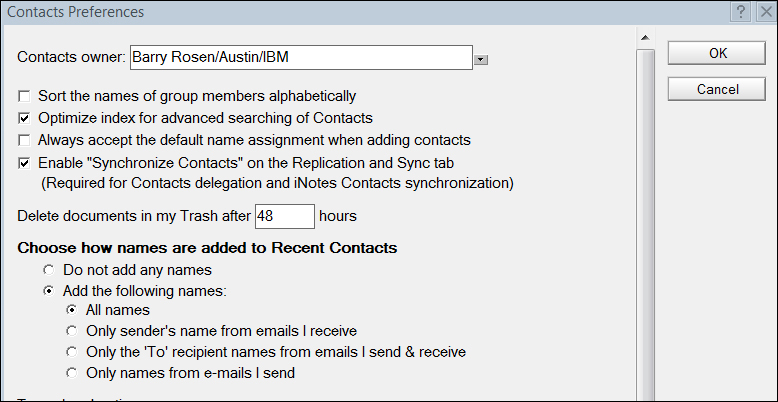
Recent Contacts stores your most recent collaborations, to aid in type-ahead messaging. There are times when you might want to remove someone from your Recent Contacts. Perhaps you have entered the incorrect e-mail address. You can easily remove someone from your Recent Contacts via a right-click menu option in the e-mail type-ahead list or Recent Contacts view. A preference setting has been added, so that Cc and Bcc recipients of the mail will not be added to recent contacts. As you add more contacts, the size of the results will increase as well.
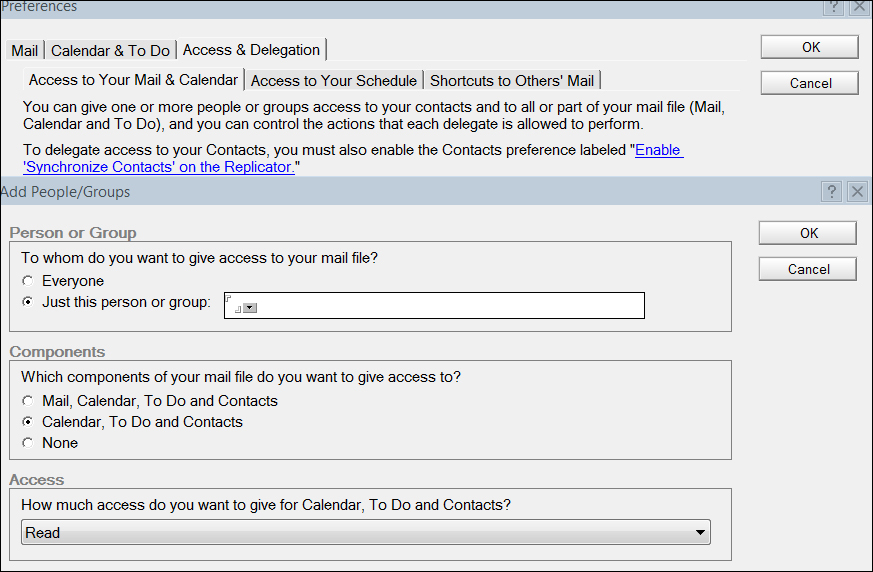
To synchronize your contact, first check the Enable Synchronize Contacts on the Replication and Sync tab. Then go to the Replicator page and enable Synchronize Contacts. This will check for changes, such as phone number or address changes from the local contacts and synchronize them with your mail file on the server. This allows you to use your contacts in iNotes, as well as on a smartphone. It will also sync back the changes from your smartphone to your local contacts. Some mobile phones require that the Notes-specific contacts are stored in a different location than the contacts on the phone.

Using the built-in RSS feeder, you can add RSS feeds to your IBM Lotus Notes 8.5.3 client.
All of this will be done in your sidebar, which you will access via your IBM Lotus Notes 8.5.3 client.
You will start in your client preferences and then use your sidebar RSS feed reader.
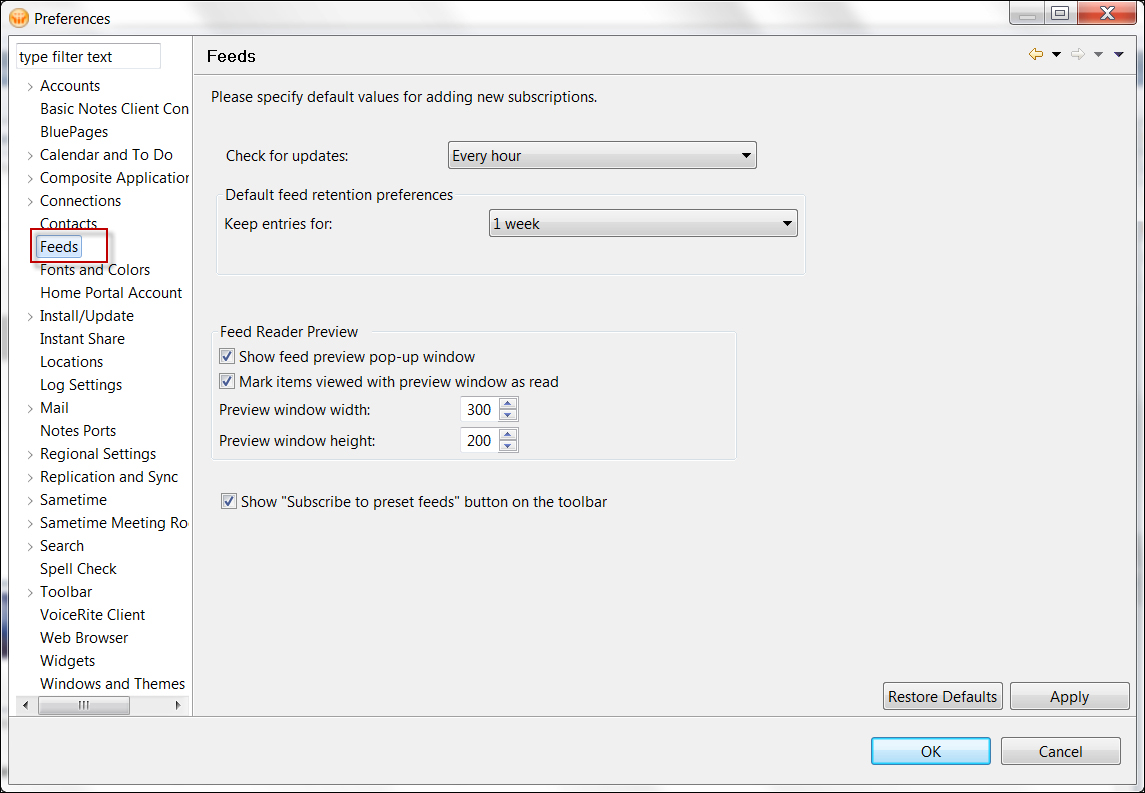
The Lotus Notes feed reader can be found in the sidebar panel to display and manage your feed subscriptions. Use the Feeds preferences dialog box for Feeds to specify default values for the Feeds sidebar panel feature. Use any of the following options to change the defaults of your Feeds:
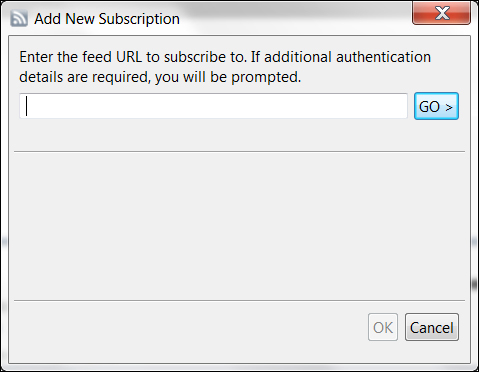
If the feed requires authentication, you will be prompted to authenticate.
You can subscribe to feeds using the built-in feed reader. Feed subscriptions notify you of new web content without requiring you to actively check for it. Feeds provide an alternative to mail list subscriptions sent to your e-mail Inbox.
You can add feeds and manage them from your sidebar.
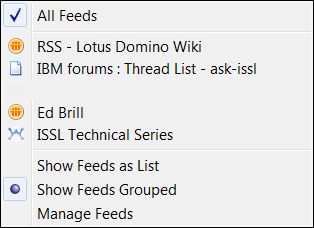
To update your feeds content, click on the Refresh All Feeds toolbar button. The Settings toolbar button enables you to display your feeds list in one of the three ways. Click on Settings, and click on either Show Feeds as List to display all individual feed entries listed alphabetically, Show Feeds Grouped to display only the parent feed names with all child feeds grouped hierarchically below their feed source, or Manage Feeds to allow double-clicking of a feed to open the Manage Feeds dialog box.
Widgets are standalone applications that can be added to the Lotus Notes sidebar. These can come from external sources, such as Google, or they can be created and distributed internally by your Domino administrator. You can also create your own widgets.
All of this work will be done in your preferences and your widget sidebar in the IBM Lotus Notes 8.5.3 client. To obtain the new IBM social widgets, you can go to https://greenhouse.lotus.com/.
Here you will see how to get manage and add widgets to your sidebar.
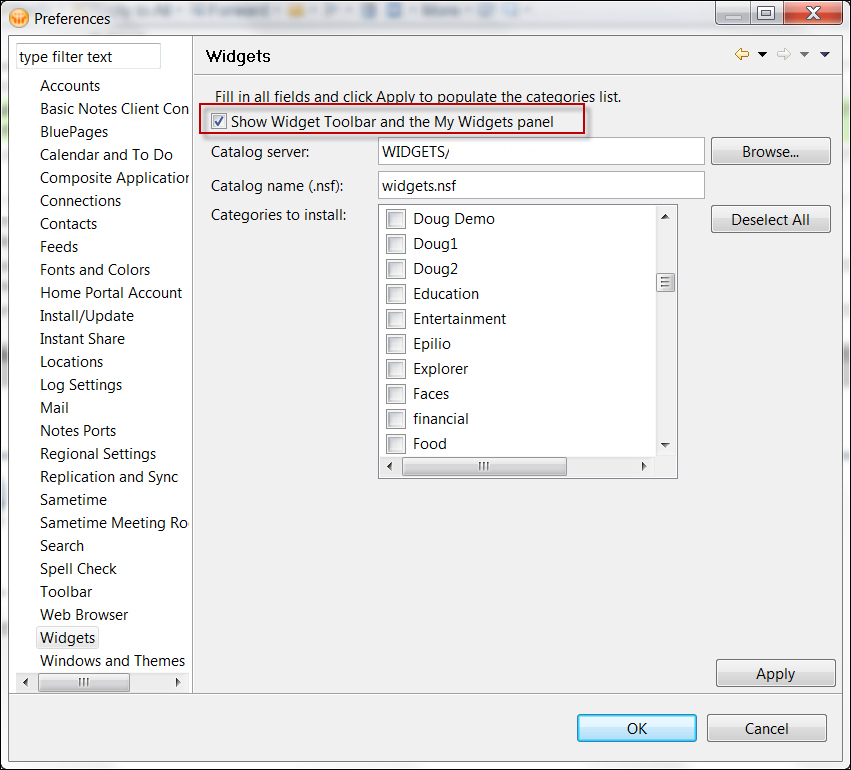
There are several ways to add a widget to your client, or My Widgets sidebar. If you do not see your widget sidebar, enable it from the Widgets preferences.
To add widgets, right-click on the widget in the My Widgets sidebar panel, click on Properties, and check the Add as a panel on startup option.
Open the widget from your source, and then click on the Add as a Panel toolbar button. If you are using this method to add a web page, gadget, or feed to the sidebar, you must use the Lotus Notes embedded browser. To enable the embedded browser, navigate to File | Preferences | Web Browser | Use the browser embedded in this client.
To install all the widgets from a category in the widget catalog, select the category in the Widgets preferences.
The widget appears as a new sidebar panel item and will appear in your sidebar each time you start Notes. Using this method creates the widget with the option Add as a panel on startup.
The following are a few ways to add an existing widget to the My Widgets sidebar panel:
Drag-and-drop the widget from the widget catalog that you want to your My Widgets sidebar panel.
To install a widget that was e-mailed, just drag-and-drop it to the My Widgets sidebar panel.
Select one or more widget documents in the widget catalog, and navigate to Tools | Widgets | Install this Widget.
Widgets on your file system can be imported or dragged-and-dropped to your My Widgets sidebar panel.
You can remove widgets from the sidebar.
To remove a widget from your sidebar, right-click on it and select Remove:
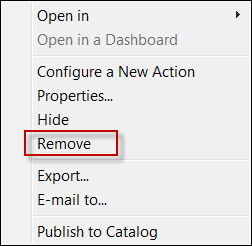
Provisioned widgets can not be removed.
IBM has introduced a suite of widgets that work in the Lotus Notes client to access and update IBM Connections. In order for these widgets to work, you must have IBM Connections as well. To obtain these widgets you can go to https://greenhouse.lotus.com/. You will need a Greenhouse account. If you do not have one, you can join at the same URL.
Once you download the installer, launch it and the installation wizard will take you through the installation.
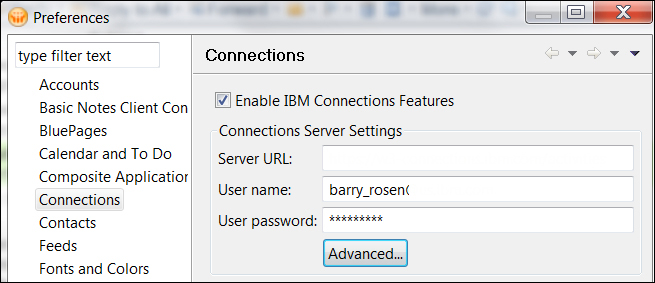
In Preferences under Connections, fill out the requested information.
Only two of these widgets will be described here, they are the Status Updates widget and the Files widget. In Connections you can see status updates for users that you follow. Using this widget you can also update your status to Connections. When using the Status Updates widget and Connections 4.0, you can do the following from the widget in your Lotus Notes 8.5.3 client:
Attach a file to a status update
Like/unlike a status update
Activity stream integration allows to monitor updates for all the Connections services
Search by people and communities
Post status, letting your colleagues know what you are doing
View status for people in your network
Comment on status updates
Delete your status or associated comments
Forward an update by e-mail
View or post updates from the icon in the system tray when you are not working in the Notes client

Connections 4.0 allows you to store and share files with other users in your organization. When using the Files widget and Connections 4.0, you can do the following from the widget in your Lotus Notes 8.5.3 client:
Lock/unlock files
Upload files for your own use or to share with others
Drag-and-drop an attached file or a file from your desktop to Files
Drag-and-drop or copy and paste a file from Files to your desktop
Send an HTML link to a file
Search for people or communities
Sort files for easier browsing
Detach the Files window from the Notes sidebar
Open Connections Files in a browser

As you can see, widgets extend the Lotus Notes client and can be a convenient way to follow and update IBM Connections without ever leaving your Lotus Notes client.
Domino applications can have many functions. Some examples are discussion databases, document collections, and workflow applications. They can be custom made or based on templates that are provided by Domino. Applications can also be secured by using Access Control Lists (ACL). The ACL controls who can access the database and what level of access they have. Some examples of ACL access levels are reader, editor, and manager.
This will require access to IBM Lotus Notes applications. If you have accessed any applications in the past, they can be found on your workspace.
Here you will see how to access your applications.
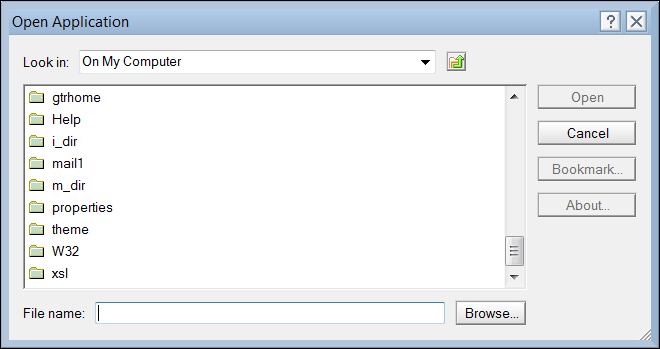
If this is the first time you are opening an application, go to the File menu and navigate to Open | Lotus Notes Application. You can also use the Ctrl + O shortcut.

If the application is on a server, you will need to know the server name. It will be in the format Server/Region/Company. If you have already accessed this server, the name will be in the list. Then select the application you would like to open and click on the Open button.
If the application is local to your workstation, just select On My Computer or browse using the Browse button.
Applications can be either custom or default, and can provide various functions. Examples of applications are discussion database, custom workflow applications, as well as document repositories.
Applications can be bookmarked for later use.
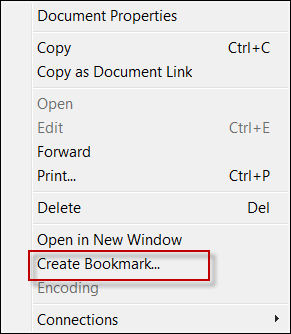
To bookmark an application before you open it, follow the same steps as discussed previously. Instead of opening the application, click on the Bookmark button to bookmark the application. If you have already opened the application, then right-click on the application and select Create Bookmark.
Sametime is an enterprise instant messaging system. The Lotus Notes 8.5.3 has an embedded Sametime client in it. In order to use the Sametime client in Lotus Notes 8.5.3, you must have a Sametime community to connect to. We will explore the Sametime preferences as well as logging into and using Sametime from your Lotus Notes 8.5.3 client.
This will require access to an IBM Sametime community. If you are unsure as to what the Sametime community is, contact your administrator for details.
Here you will see how to access Sametime through your IBM Lotus Notes 8.5.3 client.
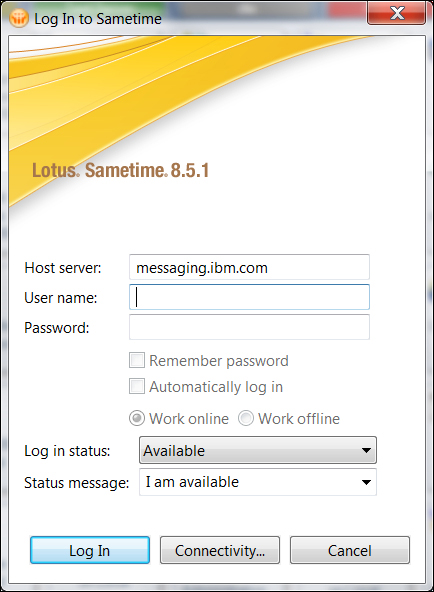
The first thing you should do when accessing Sametime from your Lotus Notes 8.5.3 client, is log in. Go to your Sametime sidebar and click on Log in. In order to do this you will need to know three values. Your Host server may be filled in for you, if your administrator has supplied this via a policy. You need to fill in your User name and Password. To have Sametime remember these settings, check the Remember password checkbox. If you want to have Sametime automatically log you in when you start the client, check the Automatically log in checkbox.
Logging into Sametime will allow you to use the Sametime server in your environment to chat and instant message with your colleagues.
Sametime behavior can be changed through the Sametime preferences.
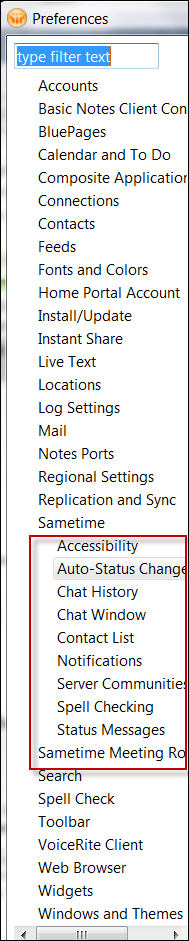
The Sametime preferences can be accessed via File | Preferences.
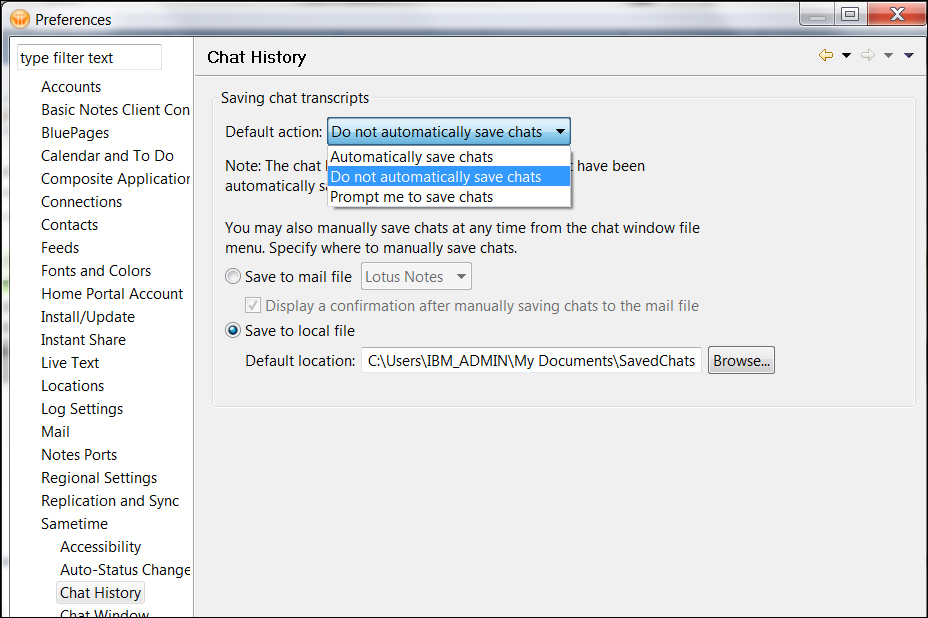
In these settings you can control the functionality of how Sametime behaves. Using the Chat History preference you can control your chat history. If you want to save your chats, choose Automatically save chats. This will then allow you to choose where you want your chat transcripts to be saved. You can choose to save them in your mail file or to a local location as shown in the following screenshot:
By going to the Status Messages preference you can customize your status messages.
As you can see there are many options when using Sametime in the Lotus Notes 8.5.3 client.
In the next recipe, if you are formerly a Microsoft Outlook user, you will learn to configure your Notes client to help with your transition to Notes 8.5.3.
The transition from Microsoft Outlook to Lotus Notes 8.5.3 can be challenging. This recipe will help you to configure Lotus Notes in a way that can make this transition a little easier. We will look at mail, calendar, and contacts tips to enhance your Lotus Notes 8.5.3 experience.
If you are new to IBM Lotus Notes 8.5.3 and are moving from Microsoft Outlook, you will need to have your Lotus Notes client installed and connected to your mail file.
Here you will see how to configure and access IBM Lotus Notes 8.5.3, in a way that will be familiar to you as a former Microsoft Outlook user.
The default order for mail to be displayed in the Inbox view in Lotus Notes 8.5.3 is by dates in descending order. To change this to be more like Outlook, and make new mail appear at the top of your inbox, click on the Date column in your Inbox and have the arrow point up. Now all new mail will appear at the top of your Inbox.
In Microsoft Outlook, you can have Favorite Folders that will stay at the top of your folders list. This does not exist in Lotus Notes. In Notes, the folders sort alphabetically. If you want a folder to appear at the top of the list, consider adding a number, such as 1 in front of the name. To move a folder down the list to the bottom add a letter Z.
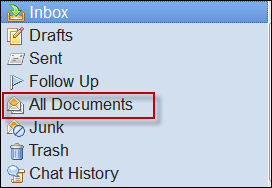
To search all the mail in your mail file, you can use the All Documents view. as shown in the following screenshot:
We can also search for the mail using the search bar as shown in the following screenshot:

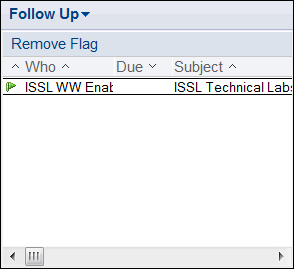
Mail can be flagged for follow up. To do this, select the message to be flagged and click on the flag button in the tool bar. You can also right-click on the message and select Quick Flag.

This will then add the message to the Follow Up pane. In the Follow Up pane you can remove the flags when you need to.
The calendar can be made to look like the calendar in Outlook as well.
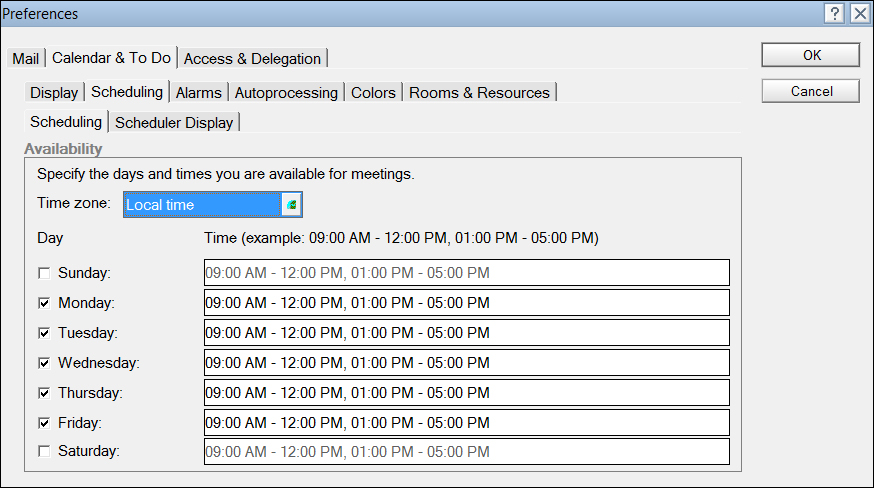
In Outlook you could set the hours that you are available for meetings. This way when people try to invite you to meetings, they can see when you are free. In Outlook this is called the Scheduling assistant. To do this in IBM Lotus Notes 8.5.3, navigate to your File | Preferences | Calendar and To Dos. Then go to the Scheduling tab. Place a check mark in the days of the week that you will be available and then set the times.
To send another user a screenshot of your calendar, you can do the following:
Go to your Calendar view and navigate to File | Print. Select Print Calendar to a document. You can choose what style you want and which week of your calendar to send, as shown in the following screenshot:

Once you have selected what you want to send, click on the Preview button. This will bring up your calendar in the format you selected. To send this press the Forward button.

When you do this only your calendar entries will appear. Calendars that you have added or Calendar feeds, will not appear in the e-mail.
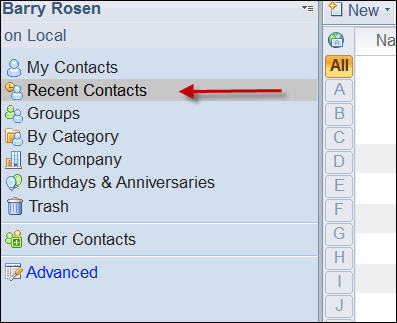
The behavior of your recent contacts can be adjusted to help with type ahead when you are addressing an e-mail or a calendar invite. To do this, open your contacts and look for the recent contacts view. If you do not see this view, it is possible that your administrator has turned this view off.
The Contacts preferences is where you can control how recent contacts behave. To turn them off you can do so from here.
If you have saved your contacts in an Excel spreadsheet, you can import them. To do this, you must open the Excel spreadsheet and save them in the vCard format. You can then import the vCards into your Lotus Notes contacts. Open your contacts and then navigate to File | Import contacts and select the files to import.
If you want to import contacts in an Excel spreadsheet as a group, you can do this in a similar manner. Follow the same instructions as discussed earlier. Then in your Lotus Notes contacts, select all of the contacts you want to add to a group. Navigate to More | Copy into a new Group.
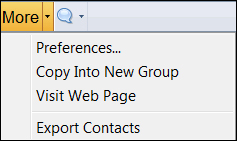
Name the group you have created. Next time you want to send mail or a calendar invite to the group, just type in the name.
You can also send another user to a group that you have created in your contacts. Go to your Groups view in your contacts.
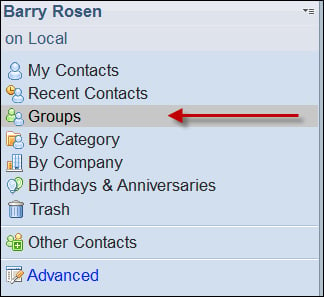
Then select the group that you want to send, and click on the Send button.

Dynamic help is available in most of the areas of the Notes client. To access the Dynamic Help press F1 and navigate to Help | Dynamic Help, or click on the question mark on any dialog box or properties box. Doing this will bring up the help for the area you are currently in. Following is an example of what you would see when accessing the Dynamic help from your inbox:
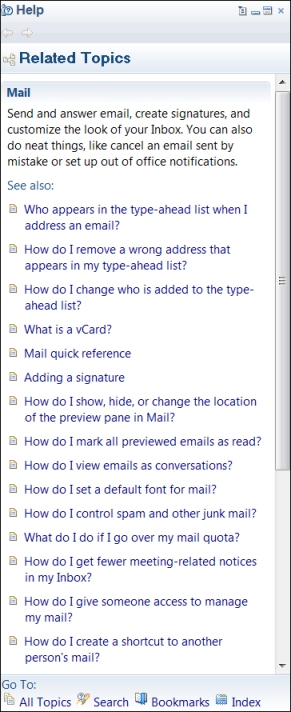
You can use this feature to help out yourself whenever you need it. As you can see, there are several changes you can make to your Lotus Notes 8.5.3 client to ease the transition from Microsoft Outlook.