Download code from GitHub
Chapter 1: Getting Started with Visual Studio 2022
Visual Studio (VS) is the most popular integrated development environment (IDE) for .NET developers. It's the perfect tool to design, develop, debug, and deploy all .NET applications and even other technologies.
In this chapter, you will learn about the history, historical versions, and installation process of VS, as well as the initial configurations to start working with this IDE. After learning about the VS flavors, you will be able to choose the option that best suits your needs.
By the end of this chapter, you will get a brief overview of VS's history and understand the main evolutionary changes across its different versions. You will also learn how to install and start using this amazing tool.
In this chapter, you will learn about the following main topics:
- A brief history of VS
- VS flavors
- Installing VS 2022
- VS for Mac
Technical requirements
We will begin the chapter by learning how to install VS 2022. To get VS to run on your machine, you will need the following requirements:
- Windows 10, version 1909 or higher
- Windows Server, 1016 or higher
- A 1.8 GHz or faster 64-bit processor; quad core or better is recommended
- 4 GB of RAM; 8 GB is recommended
- Hard disk free space – 25 GB (up to 40 GB depending on the components installed)
- Administrator rights
- Full internet access during the installation
Important Note
32-bit and ARM operating systems are not supported; you will need either Windows 10 Enterprise LTSC edition, Windows 10 S, or Windows 10 Team Edition. To check all the requirements and technologies or systems not supported, go to https://docs.microsoft.com/en-us/visualstudio/releases/2022/system-requirements.
A brief history of VS
VS 2022 is version 13 of this application created by Microsoft. VS has been consolidated among developers for having a friendly user experience, good support with regular updates, and powerful tools for writing clean and scalable code. VS has support for many technologies and platforms. For many developers, VS is the ultimate tool for all project types.
To understand the evolution of this tool, we must examine its history and timeline.
VS 6.0 was released in 1997, and it was the first version of this tool. This version was created to work with Visual Basic 6.0. Then, in 2002, a new version was released, which included compatibility with .NET and C# (a new programming language at that time). Since then, it's been the favorite tool for .NET developers.
VS started as a premium application with a closed license, but since VS 2005, Microsoft began a new strategy with a freemium (free/premium) version, which is a basic/free public version that you can use for your personal projects, study, or midsize applications, and other versions at a cost for professional developers, large companies, or for those who want to use advanced tools.
Microsoft releases a new VS version every 2 or 3 years and provides updates for that version every 2 or 3 months, which means complete support.
A version of note is VS 2012 because the development team implemented a new look and feel and many improvements in the user experience, which are also present in the 2022 version. Some of the most important improvements in VS 2012 over previous versions were performance, the possibility to choose from light and dark themes, and new icons.
Now that you have a general idea of what VS is, let's examine each of the flavors available today.
VS flavors
Since version 2012, VS has had three flavors that cover all developers' preferences and needs. Just one of these three alternatives is completely free for the community.
In the following sections, you will see the differences between each version and learn about the features supported by each version, which are the following:
- Visual Studio Community
- Visual Studio Professional
- Visual Studio Enterprise
So, let's understand the main aspects of each version.
Visual Studio Community
Visual Studio Community is a free version that incorporates all the basic tools to create, build, debug, and deploy .NET applications and all the collaboration instruments integrated into VS.
Visual Studio Community has a limit of five users and is restricted to non-enterprise organizations.
The main tools in Visual Studio Community are the following:
- Basic debugging tools (tools for inspecting code during debugging)
- A performance and diagnostics hub (tools to analyze application performance and memory use)
- Refactoring tools (tools to clean and style code following best practices)
- Unit testing (a feature to navigate, run, and collect results from unit tests)
- Peek definition (a functionality to navigate to the definition of a method or function)
- VS Live Share (a tool for real-time collaboration development)
This version is suitable for students, independent developers, freelancers, and small companies. Even though this version includes all the main tools that you will use on a daily basis, in some scenarios associated with unit testing, memory, or inspection, these tools aren't enough.
Visual Studio Professional
Visual Studio Professional is a licensed version of VS offered by subscription; this version is recommended for enterprise applications and teams with more than five developers. VS Professional includes the same tools as Visual Studio Community but with some additions, such as CodeLens (a VS feature to find references, changes, and unit testing in code).
At the time of writing, the cost of VS professional subscription is $45 per month for an individual user.
The professional subscription includes $50 in Azure credit, training, support, and Azure DevOps (basic plan).
Visual Studio Enterprise
Visual Studio Enterprise is the top-level subscription version of VS (with Visual Studio Professional) that includes all of VS Community's features, Visual Professional's improvements, and some additional tools.
Some features to highlight are as follows:
- Live unit testing (a feature wherein unit testing is rerun every time a change is made)
- The Snapshot Debugger (a tool for saving snapshots during debugging when an error occurs)
- Performance analysis tools for mobile applications
- Architectural layer diagrams (to visualize the logical architecture of your app)
Enterprise subscription has a $250 fee per month, but it includes $150 in Azure credit, Power BI Pro, Azure DevOps with test plans, and all the features available for VS.
To see a comparison of the different flavors and prices, you can go to https://visualstudio.microsoft.com/vs/pricing/.
Important Note
For this book, we are going to use Visual Studio Community. Since this is a free version, you don't have to pay any subscription, and all the topics are covered with this version.
Installing VS 2022
The VS installation process has improved with each new version that has been released. Today, it is even possible to reuse the same installer to perform upgrades or workload modifications to create different types of projects.
In this section, you will learn how to do the following:
- Get the installer from the VS website
- Install VS
Let's see how to carry out the installation process in detail.
Getting the installer from the website
VS is easy to install, and you don't need an account or to take a lot of steps to get the installer. By typing Visual Studio community Download in any browser, you can easily find the link to download VS from the official page.
From the following link, you can directly get the installer:
https://visualstudio.microsoft.com/downloads/
On the webpage, go to the Visual Studio section, click on the drop-down control marked Download Visual Studio, and select the Community option (see Figure 1.1):
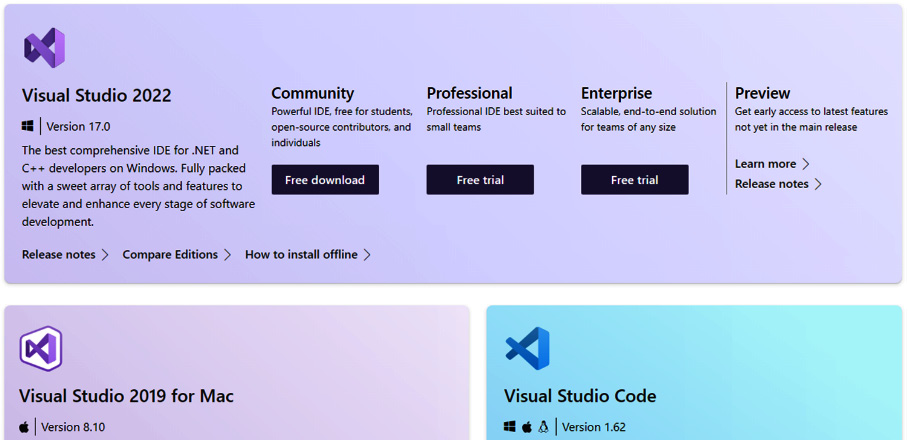
Figure 1.1 – Downloading VS
Installation process
Once you have downloaded the VS installer, you must run it to start the update process of the installer itself, as shown in Figure 1.2:
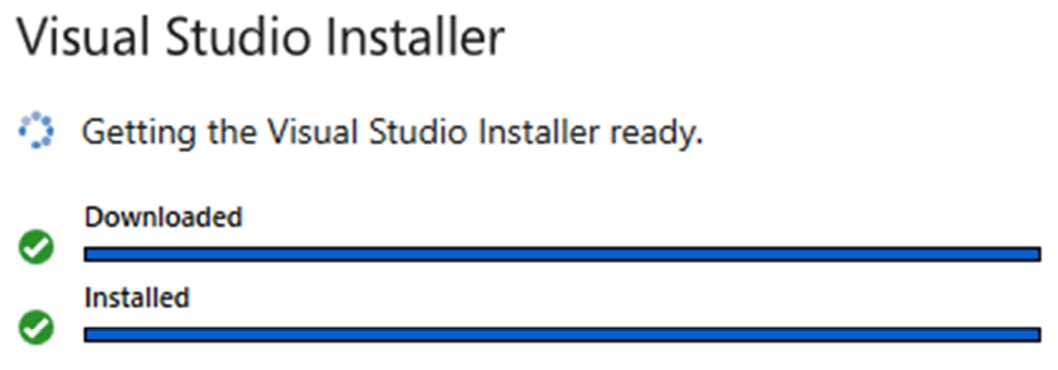
Figure 1.2 – Updating the VS installer
VS is an IDE that is constantly updated by the development team, so the installer will always look for the latest available update to perform the corresponding installation.
When the installer update has been completed, the initial screen of the installer will be presented, which is composed of four main sections, with the Workloads section the one that is displayed by default.
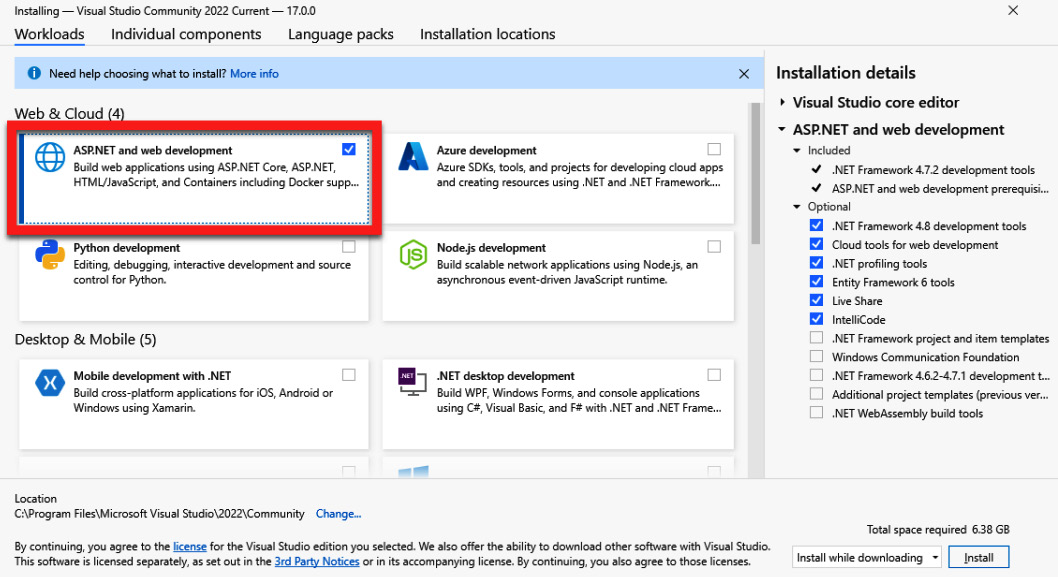
Figure 1.3 – The VS Workloads tab
It is possible to find workloads for different types of projects – for example, mobile projects, desktop-focused projects, and Python-focused projects, among others.
To install the templates and tools related to web development, you must select the workload called ASP.NET and web development, as shown in Figure 1.3.
Each workload includes a set of tools and components associated with the technology selected.
However, it is also possible to select these components individually, within the tab called Individual components, as shown in Figure 1.4:
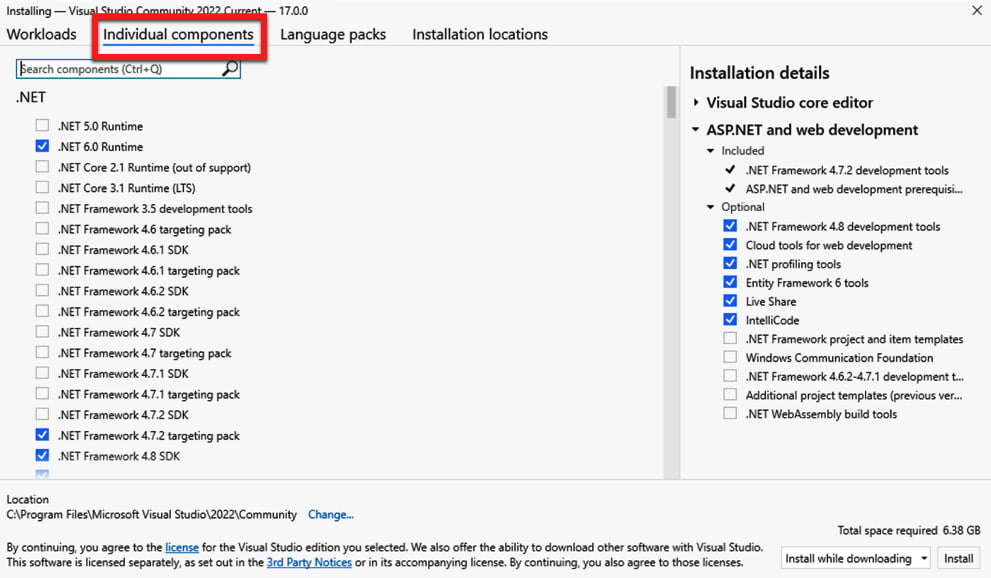
Figure 1.4 – The VS Individual components tab
These components are grouped into categories, such as .NET, clouds, databases, and servers, among others, and you only need to select a component to add it to the installation.
Within the tab called Language packs, you will be able to select the language or languages of the VS interface, as shown in Figure 1.5:
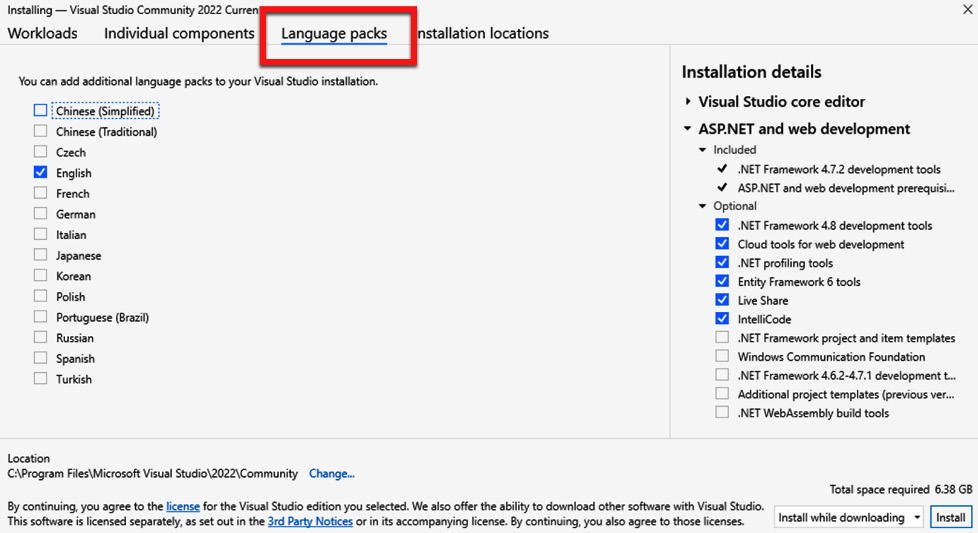
Figure 1.5 – The VS Language packs tab
This is very useful, since the default language usually corresponds to the language in which the VS installer has been downloaded. From here, you will be able to deselect the default language and select a different one or multiple languages to switch between in your development process.
In the last tab called Installation locations, you can configure the system paths of both the VS IDE and the download cache, as shown in Figure 1.6:
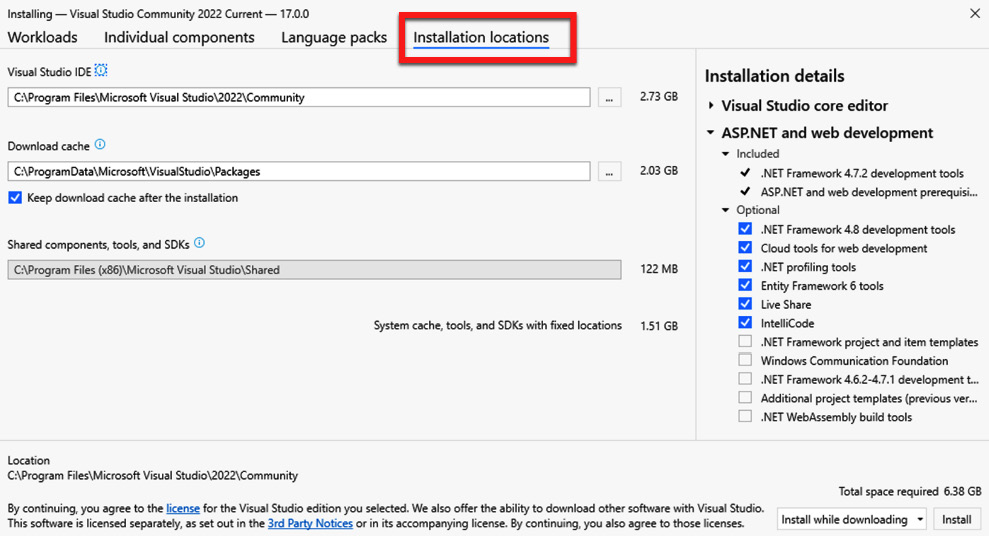
Figure 1.6 – The VS Installation locations tab
In this tab, you will be able to see how much space is needed in each of the paths to perform a correct installation.
Finally, there is a list of options to choose the installation method – whether you want to proceed to download all the components and install them at the same time, or you want to download all the necessary components first and install them later (Figure 1.7):
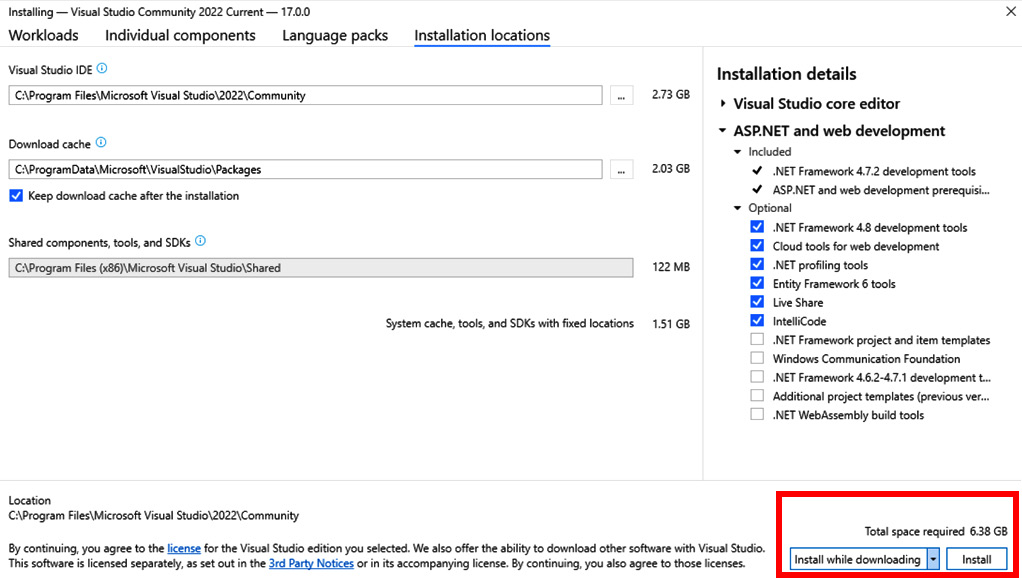
Figure 1.7 – The VS Install button
If you agree with the details and size of the installation, you can proceed to start the process by clicking on the Install button.
Once you have clicked the button to start the installation, a window will appear showing the details of the download and installation of the components, as shown in Figure 1.8:
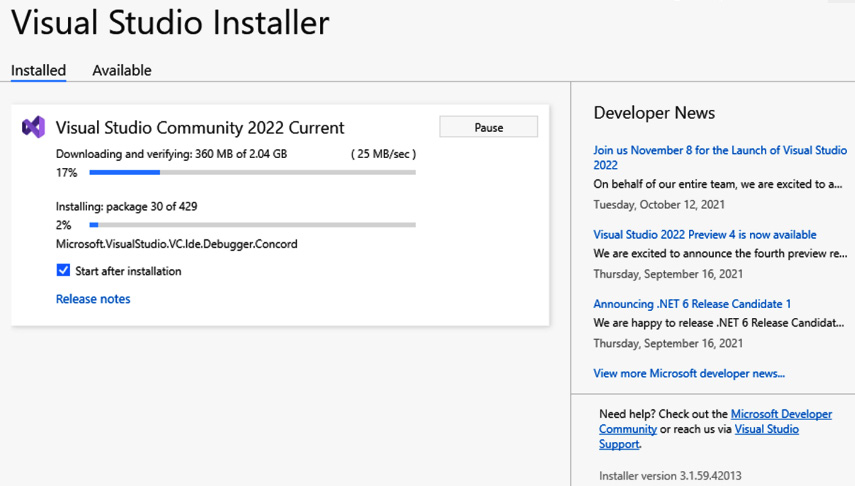
Figure 1.8 – The VS installation in process
Once the installation process has finished, a window will appear, suggesting that you log in with a Microsoft account to get a license for the use of the tool. It is recommended that you log in at this time so that you do not lose access to the tool in the future, as shown in Figure 1.9:
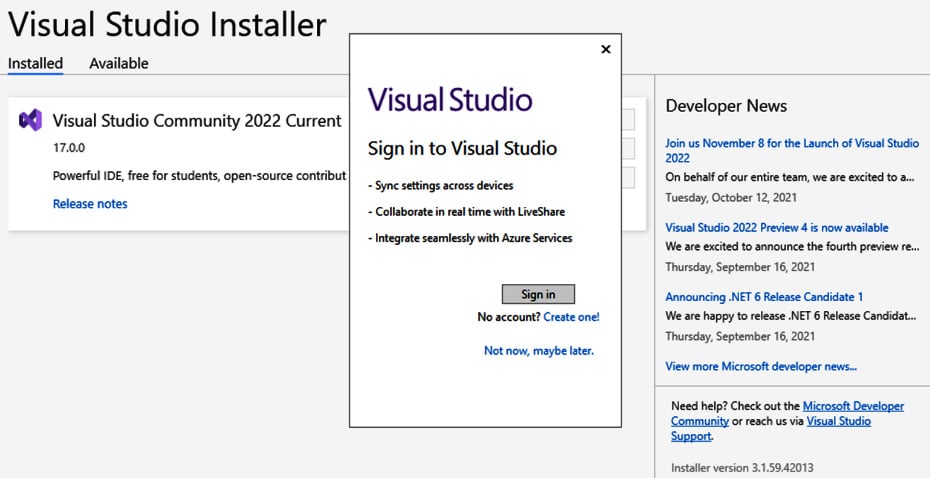
Figure 1.9 – The VS login window
After you have obtained a license to use VS 2022, you will be shown the startup screen for creating, cloning, and opening projects, so you can check that the installation has been successful, as shown in Figure 1.10:
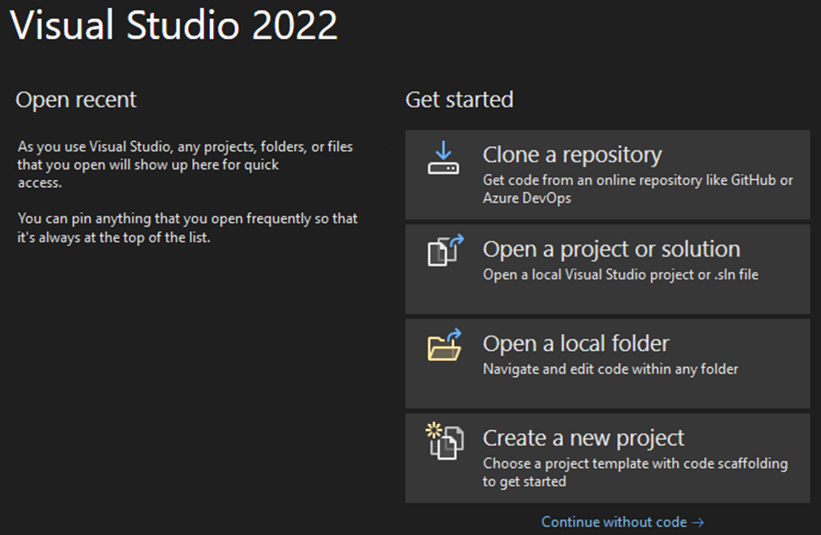
Figure 1.10 – The VS startup window
Important Note
You can have different versions of VS on the same machine; for compatibility with all technology, sometimes we need to keep old versions – for example, VS 2010 to work with Silverlight (an unsupported framework used to create web applications with C# and XAML, which was executed through a plugin in the browser).
After installing VS and getting the first screen, you can open VS using the Continue without code option.
You will now see the main screen in VS without having opened or created any project. For now, you only need to know that you can check the version and VS documentation using the Help menu (Figure 1.11):
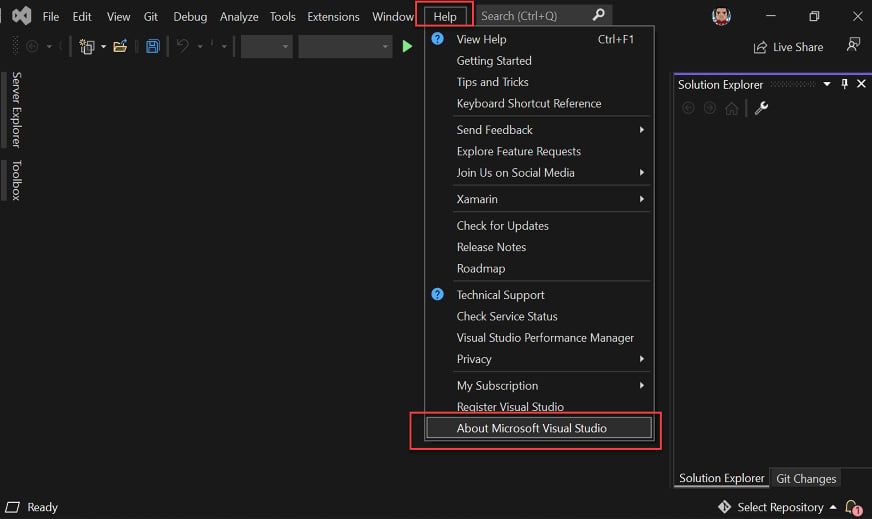
Figure 1.11 – The VS main screen and help menu
In Figure 1.11, the About Microsoft Visual Studio option is highlighted; by clicking on it, you will know the version being used and whether there is any update to install.
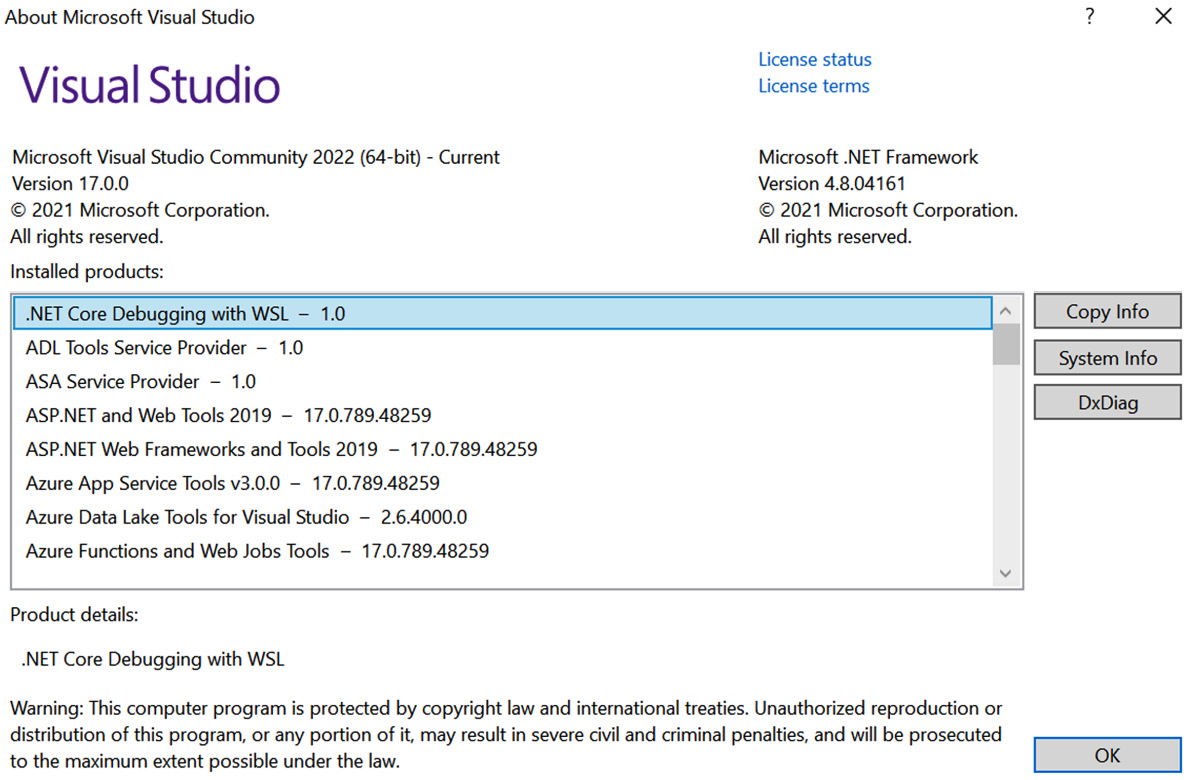
Figure 1.12 – The About Microsoft Visual Studio screen
Finally, if you need to repair, modify, or uninstall VS, you can use the VS installer that you downloaded earlier, or search for the term Visual Studio Installer in Windows Explorer at any time. Also, it will find updates and show you other versions that you can install or try (Figure 1.13):
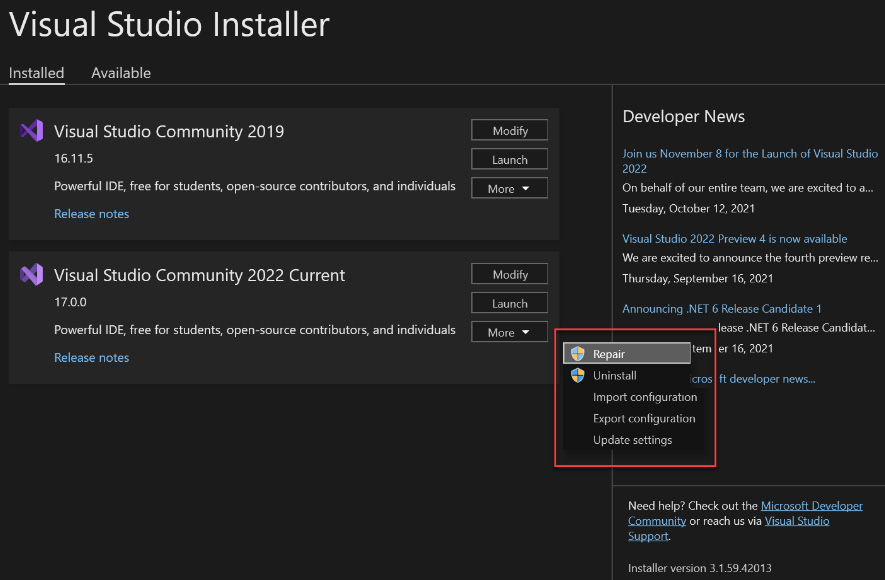
Figure 1.13 – The VS Installer options
Now that we know the VS 2022 installation process, let's explore VS for Mac users.
VS for Mac
VS has a new version for Mac users. Using this version, developers can have a similar experience in MacOS as Windows users.
Due to incompatibility issues, which have to do with the operating system, .NET Framework is not supported in VS for Mac, only VS for Windows.
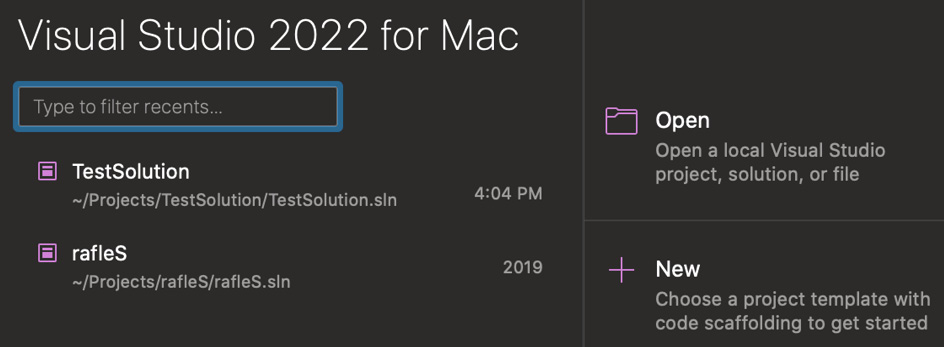
Figure 1.14 – VS for Mac – the startup screen
In Figure 1.14, you can see how VS for Mac looks when it is opened; it looks pretty much like the Windows version. The user can choose a recent project, open a project, or create a new one.
Important Note
Even though VS for Mac was made using technology for macOS operating system, the development team is working to maintain the same experience as VS for Windows.
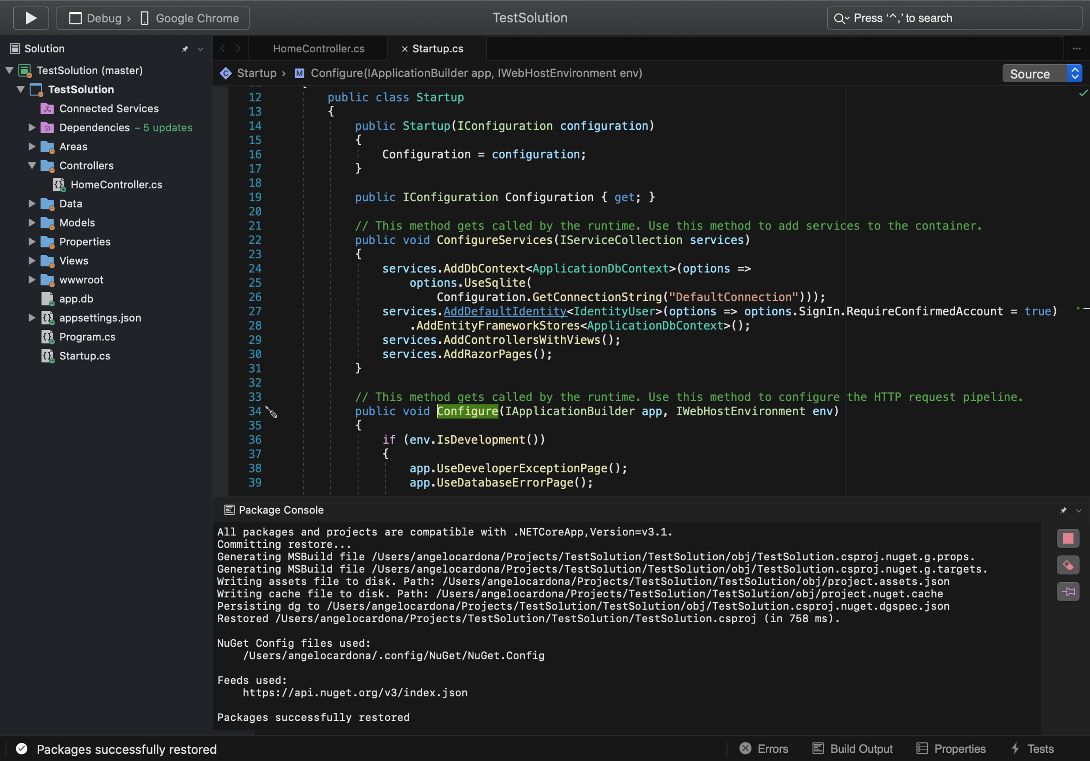
Figure 1.15 – VS for Mac – the main screen
After opening a project, you can set up your toolbar, but by default, VS for Mac has the Solution Explorer, Properties, and Errors sections. VS for Mac is an excellent option for developers that need debugging and performance tools as well as for .NET MAUI (technology to create native apps using C# and XAML or using Blazor) developers who want to create apps for Android, iOS, and MacOS.
If you want to try VS for Mac, you can get the installer at the following link:
https://visualstudio.microsoft.com/vs/mac/
Summary
In this chapter, you have learned what VS is, the different versions of the IDE available that you can choose to suit your project needs, the installation processes of VS 2022 for Windows, and the general concept of VS for Mac.
In Chapter 2, Configuring the IDE, you will learn how to customize the IDE to suit your needs as a web developer.