This is the beginning of our journey in to the world of 2D game development with Unity. This book is structured to guide you through the creation of an entire 2D game from scratch, in particular a tower defense game.
Despite the fact that we will focus on 2D game development, our final goal is to learn how to use Unity, and therefore this means that we will also have a glance at how Unity handles 3D. So, if later on you want to dedicate some time to 3D games, by the end of this book you will have the necessary background for doing so. In fact, the book is structured to contain as much detail as possible for each topic, and this includes historical overviews and references to further readings.
In every chapter, we will face different challenges that will improve our skills. Furthermore, this book doesn't stop by telling you just what needs to be done (like many others), but it also explains the different tools that we will encounter and how to use them. In this way, we will learn how to use and apply them in different contexts as well. Thus, you can use this book as a reference manual, in order to speed up your workflow. To help you out, I recommend that you use the index, to quickly locate each one of the specific topics we will face.
At the end of each chapter, there is a Homework section, which leaves you with some exercises that are related to the topics that we have dealt in that chapter. Of course, you are free to skip this section, but I recommend that you do the exercises if you feel that you need to improve your skills even more.
For now, this chapter is an introduction to the 2D world inside Unity, and what needs to be done in order to create our game. In particular, we will look at the following topics:
What are 2D games?
What does designing and developing 2D games mean?
Where to get Unity and its different versions
Downloading a graphical package from an external source
How to organize a project in Unity
Understanding Unity when it is set in 2D
What are Sprites?
The Sprite Renderer component
Import settings for Sprites
How to use the Sprite Editor with all its different modes
Preparing the assets for our game
Setting up scenes and proportions
One last thing. Sometimes I'll refer to the player and to characters in order to make examples or explain concepts. As such, sometimes I'll refer to them as if they were males, and at other times as if they were females (and sometimes both). The reason derives from my personal point of view so as to not to discriminate between the two genders.
And with this said, let's get started!
Game development and design are some of the most extensive works of art around. This is due to the large amount of expertise that is required to bring a game to life. You can get an idea of this by just looking at any credits in a game. They are extensive and contain a lot of names of people who have dedicated a lot of their time to the game in various roles.
Like most things in life, game development can be learned not only through practice, but iteration as well. And even when you master one of the many branches in game development, there is still something new to learn.
Regardless of your level of knowledge of Unity, I strongly suggest that you follow each step in this book, even if you think you know the topic. You just never know, there is always something new to learn!
Tower defense games come in many different styles. For example, in the following screenshot of Defense Grid: The Awakening and Unstoppable Gorg, both are top-down isometric style games. However, they are set in different worlds, with different objectives. So, given this, what makes a tower defense game? For one, they are centered on the idea of defending something, whether it is buildings, resources, weapons, and so forth. This is the main mechanism that defines the genre and drives the gameplay. Secondly, most tower defense games require economic and resource management. For example, after each wave of enemies, you may obtain a certain amount of virtual currency that you must then allocate to either the purchase of new defenses (weapons, towers, and so on) or upgrades. Each has their benefits depending on a range of factors such as weak points in your defense as well as the anticipated amount and strength of enemies that will be in the next wave. The number and difficulty of enemies increases after each wave, therefore challenging the player to manage resources and build defenses strategically. The idea is to build up enough resources to upgrade your defenses and to outlast the incoming wave. Sometimes, the player must stop the enemies (or an opponent) from destroying their own base.
In other cases, the player must prevent the enemies from reaching the end, as each enemy that manages to get through cause damage to the player's health bar.
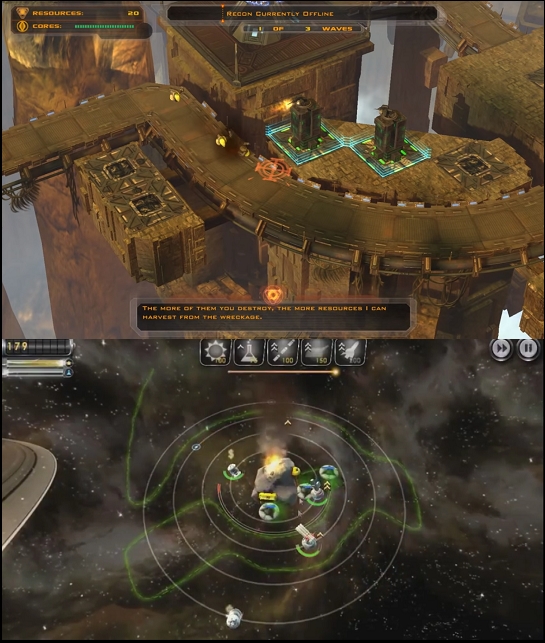
(Top) Defense Grid: The Awakening and (bottom) Unstoppable Gorg
There are many places on the Internet where you can find tower defense games. For example, Kongregate (http://www.kongregate.com/) and Newgrounds (http://www.newgrounds.com/) are examples of sites where a varied array of free tower defense games exist (such as Kingdom Rush or Bloons Tower Defense 5). However, many exist for iOS (App Store) and Android (Play Store), operating systems such as Linux, OSX, and PC (for example, Steam), and consoles (Playstation, Xbox), and so on.
Before you even think about turning your computer on, you need to design your game. It's not enough to have a rough idea in mind. You need to write down all your ideas before hand to start working. The first phase of game design is brainstorming. There are different techniques and methodologies of brainstorming that, unfortunately, we don't have the time, in this small section, to describe. However, the final outcome should be tons of paper with thousands of ideas written down. It's not meant to be a work of art, but the foundations upon which your game will be built.
Note
Some information about brainstorming can be found also in a practical book, Gamification with Unity, by Packt publishing. You can find it here: https://www.packtpub.com/game-development/gamification-unity-5x.
The next step is to refine your ideas, discard (or keep for other projects) the ones that you don't need, and organize them in a coherent form.
The final result should be something like the following.
Panda Invasion is a 2D tower defense game. In fact, hungry pandas are invading to steal all the sugar from the player. He or she has to push back the pandas by using cupcake towers. There are different kinds of cupcake towers that the player can decide to place in the map. In every level, there will be a path that pandas will follow. Furthermore, they are spawned at the beginning of this path. At the end, there is the ambitious sugar castle that the player has to defend. If the pandas steal too much, bringing the sugar-meter to zero, the player has failed his or her important mission. On the contrary, if he or she is able to push all of them back, the player will gain victory. However, cupcake towers are not free. In fact, the player has to buy them by using candy. Every time that a panda is pushed back, then the player will earn a certain amount of candy. Furthermore, the player can use candy to upgrade the cupcake towers and make them even stronger!
From this excerpt, you are now able to understand what we are going to do in this book. You also have a basic idea of how to write down your ideas. I strongly suggest that you always do this step, even when you are the only developer, and especially when you have a team.
Now that we have our idea, the next thing to do is to get Unity. It comes in different versions: Personal (which is free), Plus, Professional, and Enterprise. The last three contain more features than the Personal one. However, all the topics covered in this book can be done with the free version. In any case, you can get or buy Unity on the official website: www.unity3d.com.
This is the comparison screen between the different versions of Unity on the Unity Technologies website (if you scroll down, you will find which feature is included in which version):

Note
This is a very short summary of how model pricing for Unity has varied in recent years. In fact, to become a developer also means to be aware of the world around you, and having basic marketing knowledge could also help. At the beginning, the model price of Unity didn't allow developers to publish commercial games with the free version. In addition, the game engine didn't have all the features, such as the Profiler or the Movie Textures. Epic Games, the company that owns Unreal Engine, changed its model prices by making its game engine free in March 2015, also for commercial use (although it will take in return the 5% of the game's gross revenue). After a period of time, Unity Technologies also allowed developers to publish commercial games even with the free version, but it was still watermarked. From Unity 5.x, features that were only in the Pro version became available in the free version as well. During the beginning of 2016, Unity used to come in two different versions: Free (or Personal) and Professional. The latter contains more features than the Personal one, and here is the comparison screen of the two:
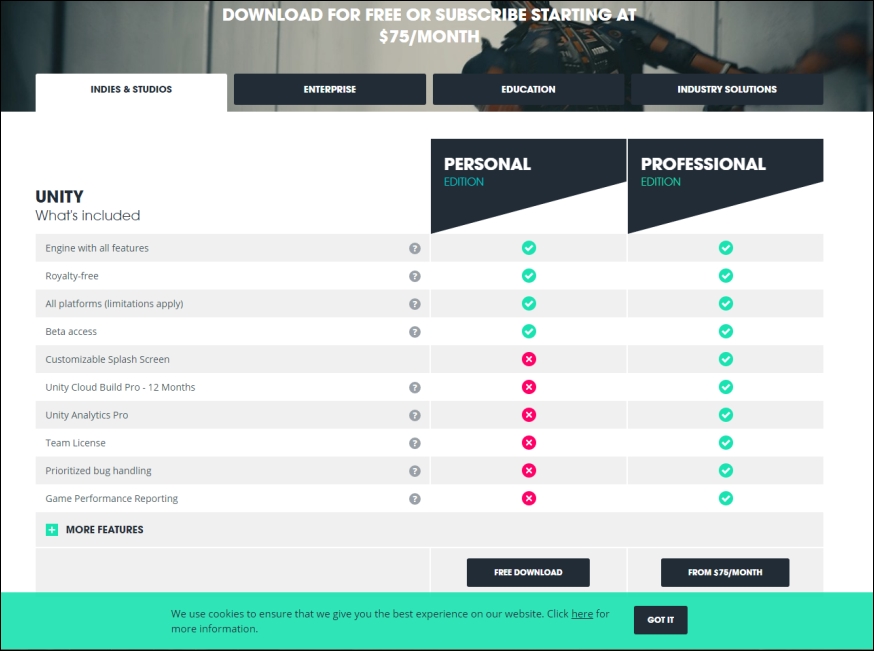
In June 2016, Unity changed its price model in the one described earlier.
Once we have installed Unity, we can begin creating new projects. If we click on the New project button in the top-right corner of the window, Unity will ask us to insert the details for our project. We can name it Panda Invasion and choose the destination path, which is where the files of the project will be stored. There is another an important thing to note. Unity gives us the possibility to choose between a 3D and a 2D project. This is not important decision, since it can be changed at any time. However, it is useful to already have in mind whether or not the game will be 2D or 3D. By selecting the 2D mode, Unity adapts the default settings to the game that we have in mind. We will see these settings in the following sections. For now, you should have a screen that looks like the following:
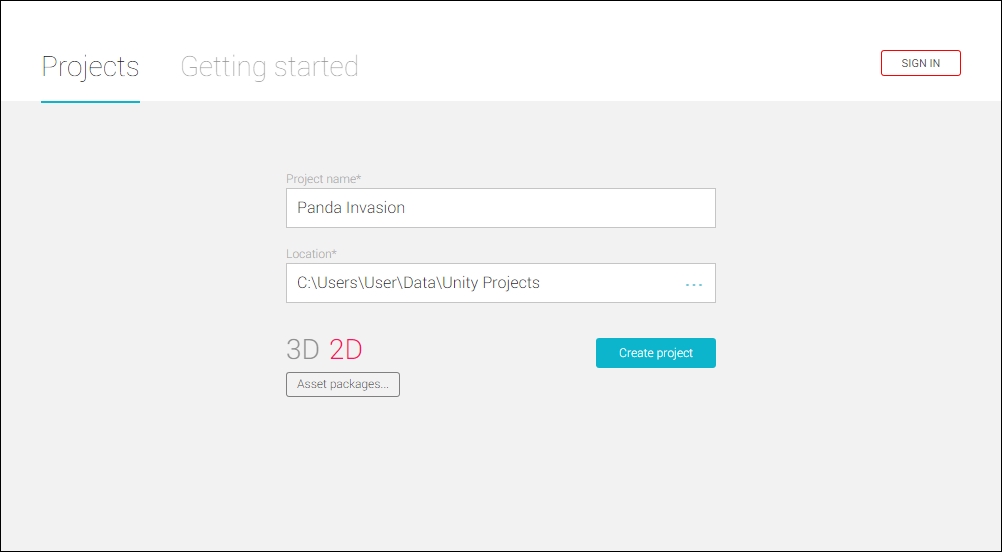
Now, we can press the Create project button, and we have successfully created our project and are ready to build it.
This book assumes that you are fairly familiar with the Unity interface and with C# code. If you are not, don't worry. There are different ways that you can learn before continuing on with this book. For example, I wrote a small free e-guide that briefly goes through the main interfaces and concepts of Unity. Don't expect to learn all you need from there, but it is a good start. You can find it at https://www.packtpub.com/packt/free-ebook/what-you-need-know-about-unity-5. If you are a complete newcomer to Unity, please read that small e-guide. I'll still be here once you have finished and we can resume our awesome journey. Furthermore, the official manual of Unity and its documentation are great companions in the Unity game development world. You can find them both on the official website, at https://docs.unity3d.com/Manual/index.html.
Since we don't have the time to create our own graphics for the game that we are going to develop, we need to download a custom package. Of course, you are free to choose the one you like most. For this book, we are going to use the Tower Defence Pack 2 package, which can be downloaded from http://player26.com/.
Note
Tower Defence Pack 2 features a delicious assortment of cupcakes ranging from infamous fluffy white frosting and colorful sprinkles, to decadent chocolate chip, not to mention an all-time favorite, lemon meringue with silver dragees. It also features the Sugar Castle, a home away from home for candy lovers! In addition to all this sugary goodness are trees, mountains, rainbows, and various other assets to populate your sugary environment. Just be beware, there are some hidden dangers among it all with the pandas, so be careful to keep your stash well protected from thieving sweet-toothed animals!
The package includes all the basic assets that we need to create our tower defense game. It is free, even for commercial use, and even if credits are required. There is also a premium version that contains more assets and some of the decorations in different Sprites to increase customizability. In particular, in the free version we can find:
Maps designed for tower defense games
Evil pandas (with animation)
Three different upgrading levels for cupcakes towers
Multiple icons for each object in the package
And many more assets to populate the level with!
The following image can give you an idea of the kind of graphics this package contains:
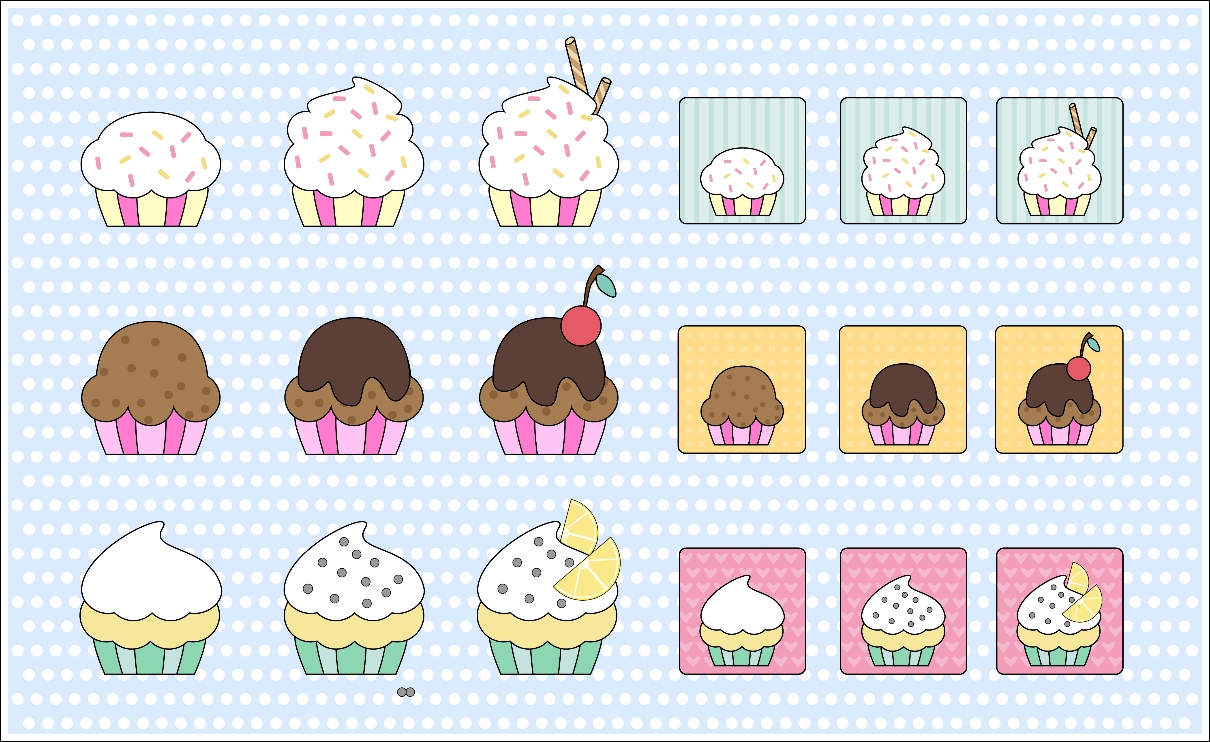
So, download this package before moving on to the next section.
If you are new to Unity, or you have only used Unity 5.x, you can skip this section or read it just for curiosity.
In Unity 4.x (before version 4.6) and other previous versions, building 2D games was a bit harder. In fact, you needed to use a range of different methods and tricks to achieve the illusion on 2D. All the 2D objects were actually 3D objects viewed in a particular perspective or with a particular camera, which gave the illusion of a 2D object.
From Unity 4.6 on, and especially since Unity 5.x, this is not needed any more. There is built-in support for 2D games. So now, there are special components to deal with 2D objects, and the following sections will explore some of them.
There are different ways to organize a project within Unity, therefore giving a bit more freedom. In this section, we propose one method, which we will use during the development of the project in this book.
The key idea is to organize the different assets by type (and not, as in other methods, by their position within the level).
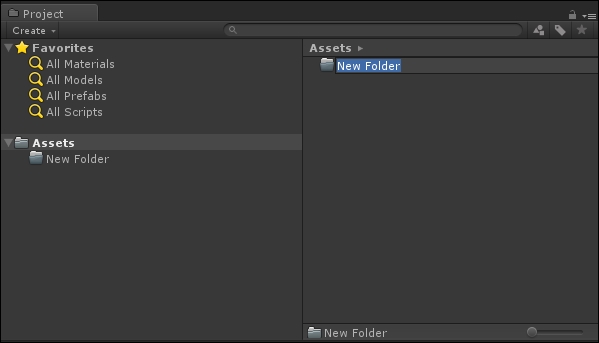
First of all, let's understand how Unity organizes assets. All of them are placed inside a folder named Assets, which can be found also inside the Project folder. Therefore, all our assets should be contained in this folder or subfolder. In order to create a new folder, right-click on the Project panel and then Create | Folder. As a result, a new folder is created within the folder you clicked. Since we don't have any folders, it will be a subfolder of the Assets one. We have the option to rename it as we want. If you miss this, you can just select it and then click on it again (but not too fast, otherwise Unity will consider this as a double-click and it will open the folder), as shown in the following screenshot:
Note
It is important to note that Unity will ignore the following categories, in order to avoid importing system files:
Hidden folders and files
Folder and files that starts with
~and with.Folders and files named
cvsFiles which have a
.tmpextension
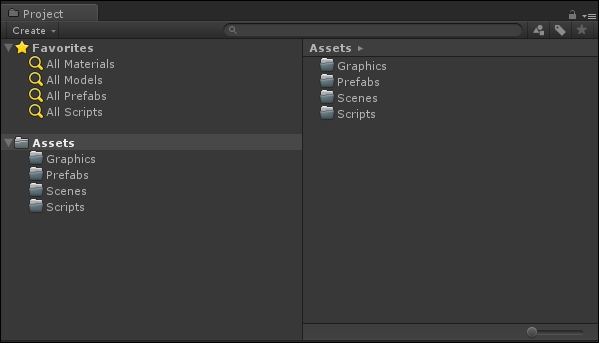
We need to create the following folders (you should only create the ones in bold, since we will not use the other ones):
Fonts
Graphics
Materials
Animations (we will see them in more detail in Chapter 4, No Longer Alone - Sweet-Toothed Pandas Strike )
Music and sounds
Other assets (to store, for instance,
.txtassets)Physical materials
Prefabs (we will see what they are in the next chapter)
Scenes
Scripts
Note
If you are planning to create a 3D game, the folders will be different and they will include other kind of assets, such as 3D models and textures.
At the end, we should see the following in our Project panel (I'll add the Animation folder in Chapter 4, No Longer Alone - Sweet-Toothed Pandas Strike, when we will see animations, but feel free to add it immediately if you like):
There is something else to know about the folders in your projects. If you create folders with some specific names, Unity will treat them in a special way. We are not going to use them; however, it's worth giving them a quick look:
Editor(or a subfolder within it): This contains editor scripts rather than runtime scripts. These are designed to implement new functionality in Unity during the development of your games, and will not be included in the published game. As a result, you cannot use any of the scripts inside this folder within yourScene. Furthermore, it's possible to use more than oneEditorfolder in your project (even if this affects the execution order).Editor Default Resources: This contains resources that can be loaded on-demand by editor scripts by using theEditorGUIUtility.Load()function.Resources(or a subfolder within it): This contains all the assets that can be loaded on demand from a script by using theResources.Load()function. In fact, you may need to load an asset that is not present in the scene yet. As with theEditorfolder, you can have as many as you want in your project.Plugins: This contains native DLLs, written in C/C++, which can access third-party libraries, system calls, and other functions that Unity doesn't provide directly. As the name suggests, it is used to implement or import plugins.StreamingAssets: This contains assets that will not be included in your main game file, but that can be streamed from a script.WebPlayerTemplates: This contains custom host pages to use when the target platform is theWebPlayer. Scripts in this folder will not be compiled.
Coming back to our folder, we need to import the package that we have downloaded. This can be done in a number of different ways, but the easiest way is to drag and drop the folder of the package within our Graphics folder.
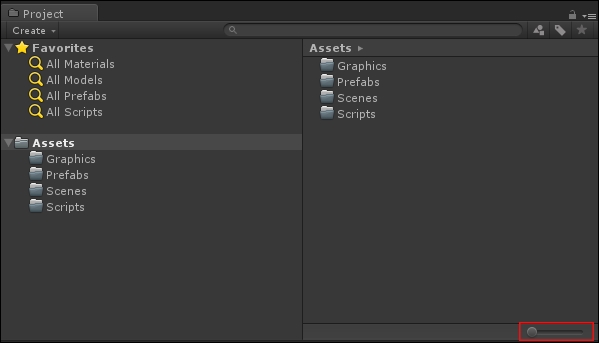
If you need to select an asset to use, in the bottom-left corner of the Project panel, there is a slider that allows you to increase the size of the icons in the Project panel. This function is useful when there are a lot of assets and we need to find the right one without knowing the name, or when exploring new packages we don't know yet. The slider is highlighted in the following screenshot for your convenience:
There are few things to notice in our project when it is set to 2D mode, which we are going to explore in this section.
First of all, if you ever need to switch between 2D and 3D mode, you can do so by navigating to Edit | Project Settings | Editor. If you go in to the Default Behavior Mode settings, you can change the Mode, as shown in the following screenshot:
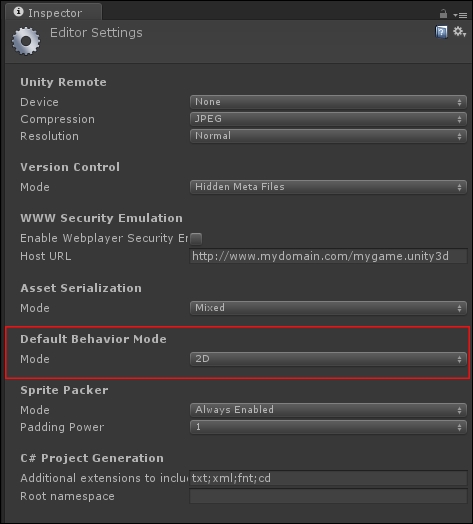
Coming back to our main interface, let's see the main differences between 2D and 3D mode. The Scene view is set by default to 2D, as you can see in the following screenshot:
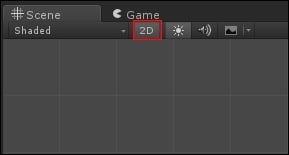
This allows us to have the Scene view locked on to the xy plane.
Note
The z axis is used to determine which object should be rendered first. This decides which objects are in the foreground and which ones are in the background.
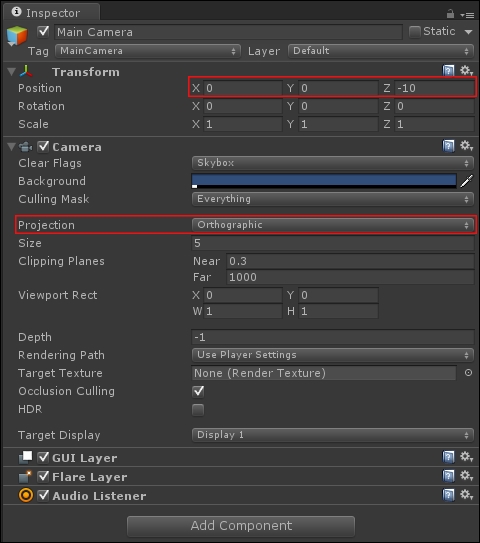
Then, every time we create a new scene, the default camera that comes with it is always set in Orthographic mode. Furthermore, its position is set to (0, 0, -10), whereas in 3D mode, it is set to (0, 1, -10). You can also check this by selecting the Main Camera in the Hierarchy panel and seeing its properties in the Inspector, as shown in the following screenshot:
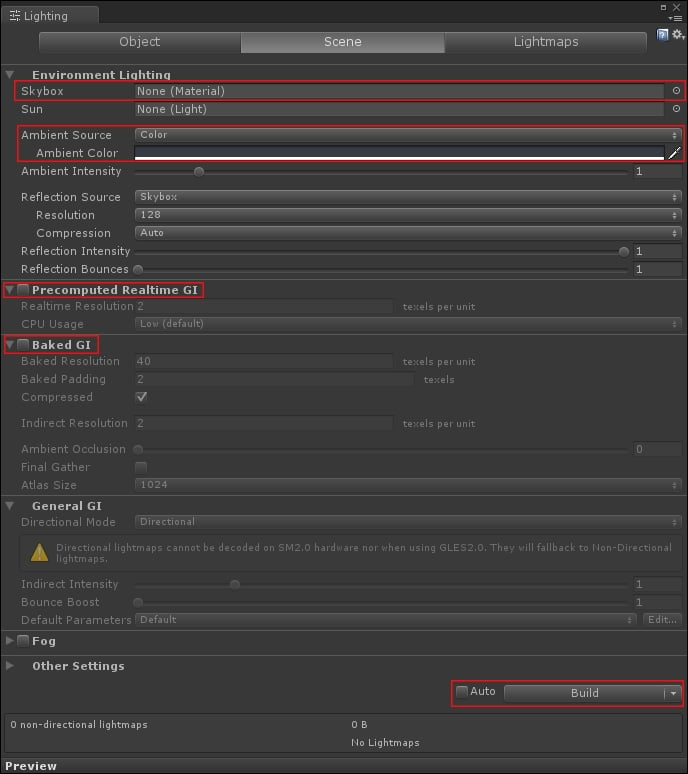
Other differences are the options to use the Sprite Packer or the default objects that don't have real-time directional lights. There are also changes in the Lighting settings (you can access them from Window/Lighting). In particular, the Skybox is disabled for new scenes and Precomputed Realtime GI, Baked GI, and Auto-Building are set to off. In addition, the Ambient Source comes with a dark grey color.
In the following screenshot, you can see the default Lighting settings:
Note
The RGB code of the color of the Ambient Source that is set by default in the 2D mode is (54, 58, 66).
However, the most important difference is how Unity imports new 2D assets, but we are going to see this in detail in the following sections.
The fundamental bricks of a 2D game in Unity are the Sprites. You can think of them as pictures, but actually as we are going to see, they are something more. In fact, one image can contain more than one Sprite. Usually, this kind of image takes the name of a Sprite Sheet. Here is an example of a Sprite Sheet within our package:
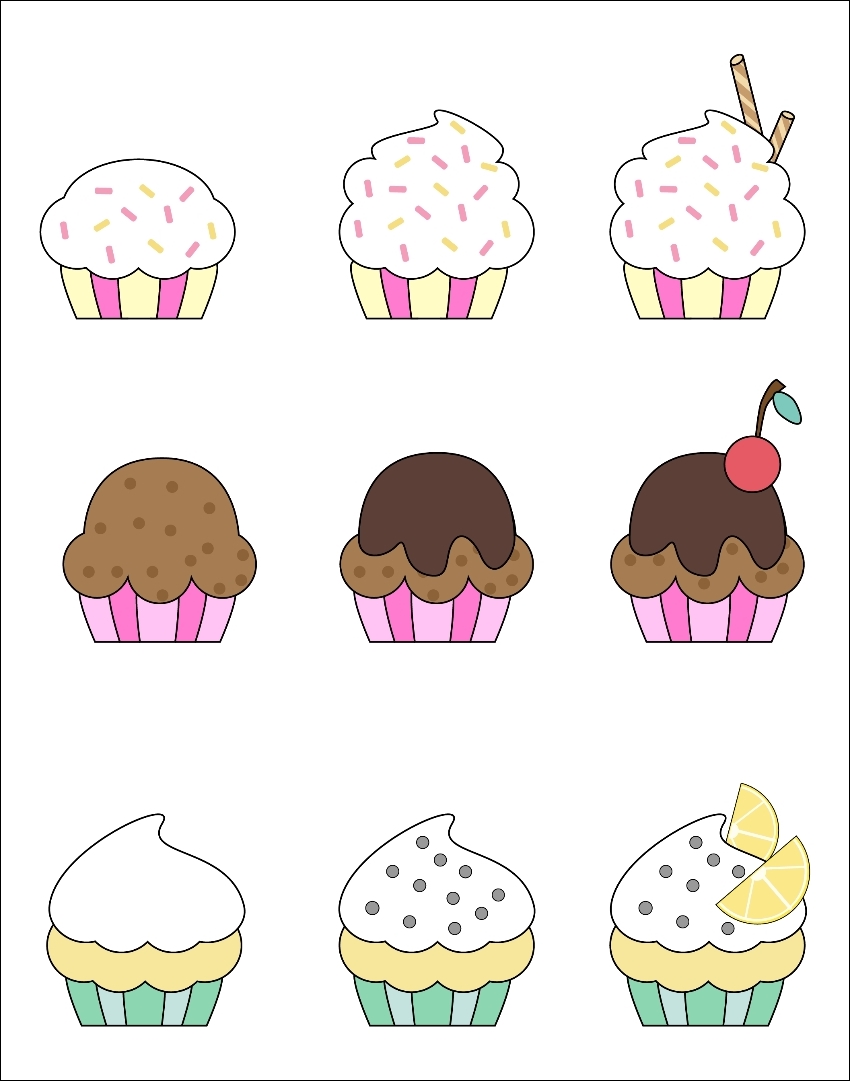
There are different reasons why we want to have all the Sprites on a single image, rather than display them separately. The most important one is efficiency. Every time you want to render something on the screen, this has to be rendered by the graphics card in your computer. If all the Sprites are in separate images, the graphics card will have to process a lot of images. As a result, your game will run slowly.
Another reason for having Sprite Sheets is for animations. While 3D animations are made of data that describes how a 3D model has to be moved, 2D animations are made of frames. Like a movie or a cartoon, an animation is made of different images, or in this case, Sprites. Each of them describes a moment, and if you change them quickly enough, such as 25 per second, you can give the illusion of movement. Having all of the frames in a unique image is both efficient and well organized.
Naturally, there are other reasons for Sprite Sheets, but the two preceding reasons should be enough to convince you that Sprite Sheets are the best practice. On the other hand, there is a tradeoff to pay: the game engine needs to be able to distinguish between them on the image. We will see how Unity handles this in the following sections. But before we move on, there are other important concepts to learn about Sprites in Unity.
Like a 3D object, a Sprite also has a pivot point. Usually, this is located in the middle, but it can be changed in the Sprite Editor. The pivot point is where Unity starts to do all the calculations from. For instance, when you give a position for the Sprite to be within the Scene, Unity places the pivot point in that specific location, and then draws the Sprite around it. The pivot point is also important for rotations. Every time we rotate the Sprite, the rotation will be around the pivot point. In other words, during a rotation, the pivot point is the only point that does not change position.
This can be better explained with a screenshot, where the arrow is indicating the location of the pivot point:
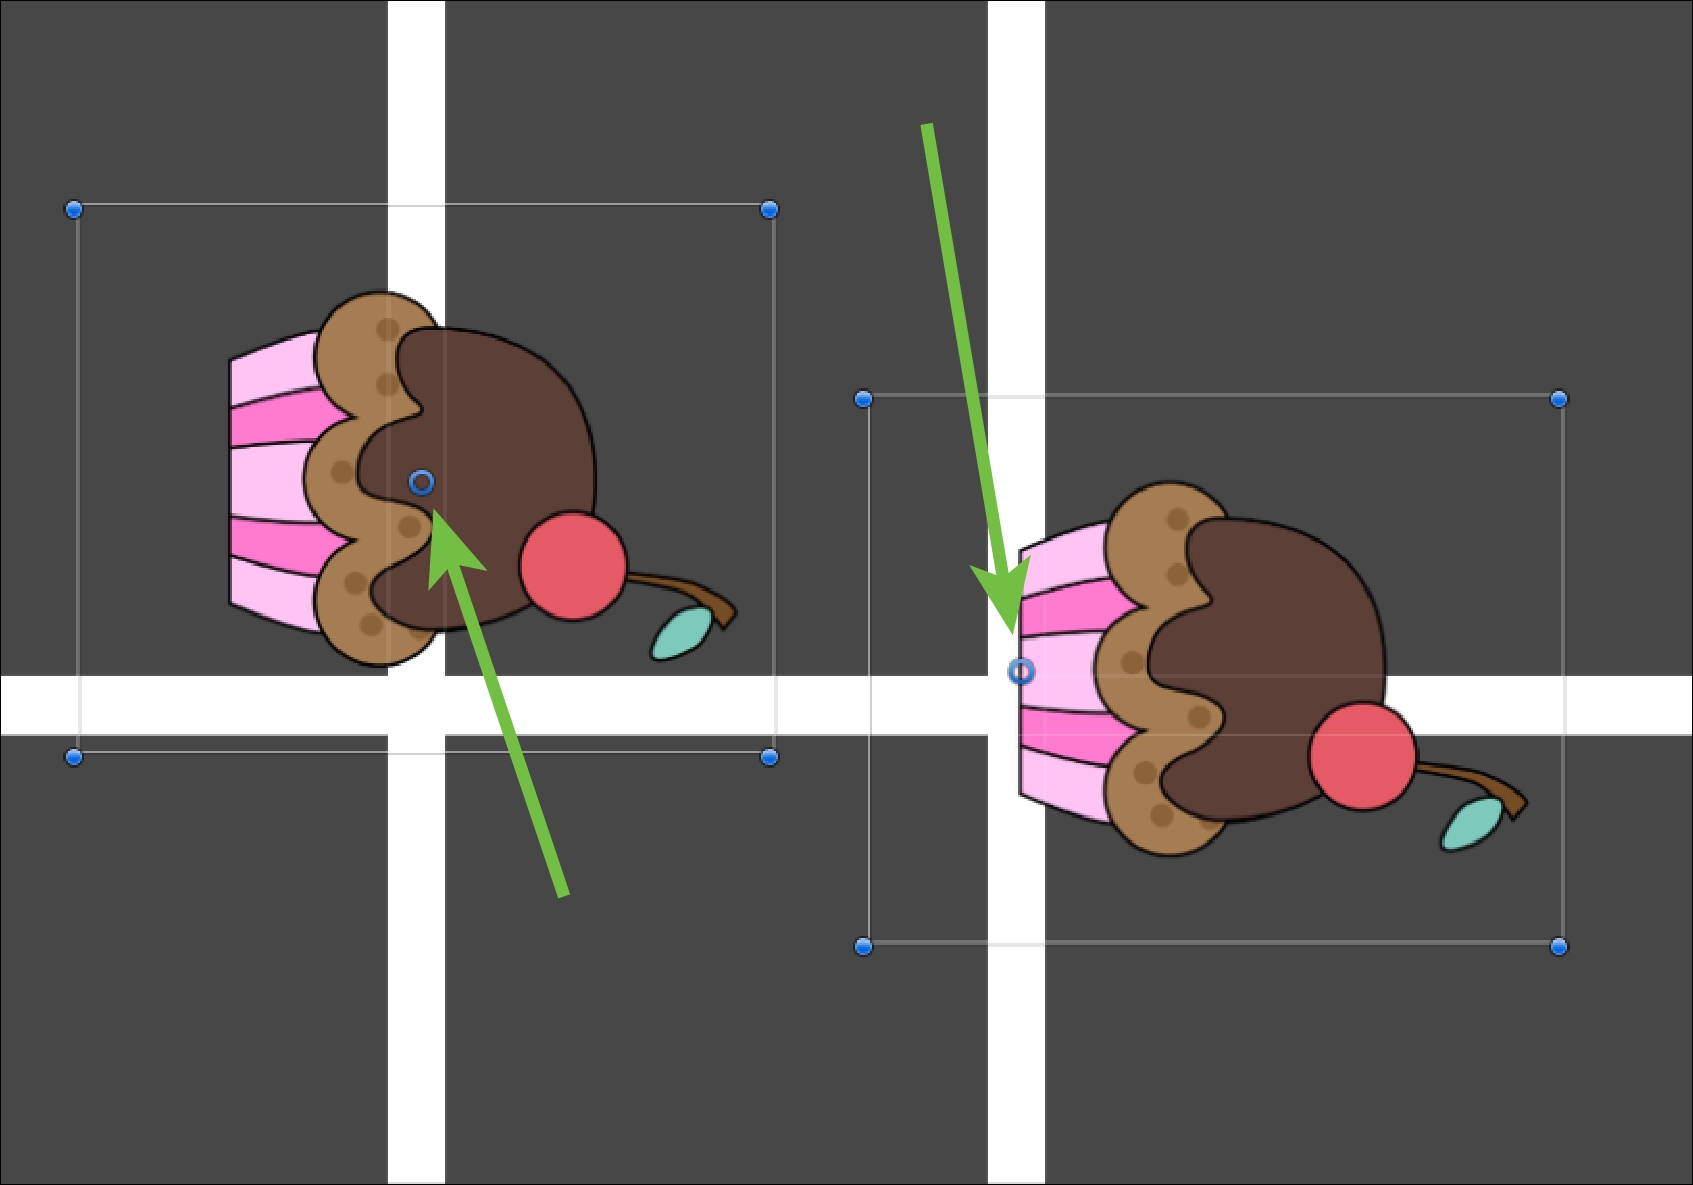
As you can see, there is the same Sprite rotated by 90 degrees clockwise. The one on the left has the pivot point in the middle, whereas the one on the right has it toward the left-hand side (the pivot point can be identified by the blue circle). Of course, you can make them coincide with a translation, but it is important to keep where it is in mind, especially when we code, in order to easily achieve what we want.
Now, there is another aspect to take into account about Sprites. In a 2D game, both the background and the character who is moving around the world are considered Sprites. However, we would like to render the background behind the character, and not vice versa. Therefore, the Sprites are rendered in a certain order that determines which one should render on top of the others.
In Unity there are two main ways to decide this order:
Sorting Layers: Each Sprite Render, which is a component attached to a game object that renders the Sprite selected, has a variable called Sorting Layer. There, we can chose on which layer the Sprite will be rendered. The order of the different sorting layers can be determined in the Tags and Layers Settings (we will see how to access this menu later on in the chapter). Furthermore, Sorting Layers can offer an internal order for Sprites within the same layer by using the Order In Layer variable, which is always in the Sprite Render component.
Z-Buffering: Since a 2D object only needs two coordinates to describe its position (the x and y axes), we have the z axis to describe depth. Unity uses depth to determine which Sprite should be rendered first. Since you need to imagine this as a depth, it's good practice to use only negative values. The greater the negative value, the closer the character or object is to the camera.
There aren't any great differences between these methods in terms of computational efficiency. Therefore, both can be used. Actually, they can also be used together. A general approach is to use the z axis for visually structuring characters. Imagine a character who is carrying a weapon. Depending on which hand the weapon is held in and in which direction the character is facing, the weapon should be rendered behind the character or in front of it. Sorting Layers, instead, are used for organizing the Sprites at a higher level, such as background, foreground, player, enemies, and so on.
However, for the sake of learning, in this book we will not use Sorting Layers, but only Z-Buffering, since it can be easily changed within the code.
Before we mention this component, it might be worth discussing it a bit more.
This component will be automatically attached every time we add a Sprite to the scene. It should look like the following screenshot:

Let's break down the different parameters:
Sprite: This holds the Sprite that it has to render.
Color: This is a color that is multiplied to the Sprite image. If you know bit about shaders and renderers, this is actual the vertex color of the rendered mesh.
Flip: This defines on which axis the Sprite needs to be flipped. This is a new function from Unity 5.3.
Material: This is the material Unity should use to render the Sprite. The default one is more than enough for our needs. If you are an expert in shaders, there are two kinds of built-in shader. Both are simple alpha-blended shaders, but the Diffuse one interacts with light, generating a (
0,0,-1) front-facing normal vector.Sorting Layer: This is in which Sorting Layer the Sprite should be rendered (as discussed previously).
Order in Layer: This is the order within that particular Sorting Layer (as we discussed previously).
If you have downloaded and imported the package from the Getting ready section, we should now have all the files inside our Project folder. If you go to the Graphics/towers folder and select cupcake_tower_sheet-01, we should see the following in the Inspector:
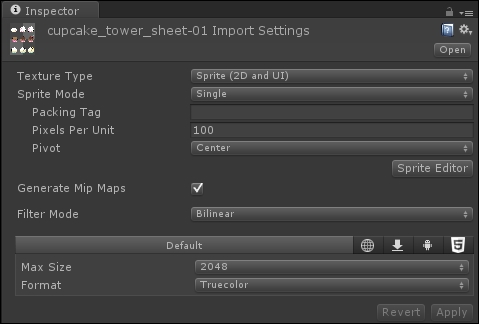
These are the Import Settings, where different options can be set. After we have changed something, we need to press the Apply button at the bottom to confirm the changes. Likewise, if we are not happy, we can press the Revert button to discard our changes.
It is important to note that the Texture Type is Sprite (2D and UI). In 2D mode, Unity always imports image files as Sprites and not as Textures.
The other important parameter that we need to take into consideration is the Sprite Mode. By default, it is set to Single, but it can be changed to Multiple or Polygonal (only from Unity 5.3). As the names suggests, the first is used when the image contains a single Sprite, and the second mode is used when we have a Sprite Sheet with more than one Sprite. The last one is used to identify a polygonal Sprite with a custom number of edges.
Furthermore, the Pixel Per Unit parameter determines how big the Sprite will be in the Scene. It represents how many pixels are needed to have a unitary length in the Scene View. By default, it is set to 100, but you should modify this value when you need to adapt your assets and change them to the right dimensions. However, if you already have a scale in mind, creating the graphics accordingly could be a useful time saver for the later stages of development.
With regard to the other settings (Packing Tag, Generate Mip Maps, Filter Mode, Max Size, and Format), we will see them in detail in the last chapter of this book, when we will talk about optimization.
Since the file that we have selected contains more than one Sprite, let's set the Sprite Mode to Multiple before we move on to the next section.
In Import Settings, there is also a button named Sprite Editor. If we press this button, a new window appears. This is the Sprite Editor, as we can see in the following screenshot:
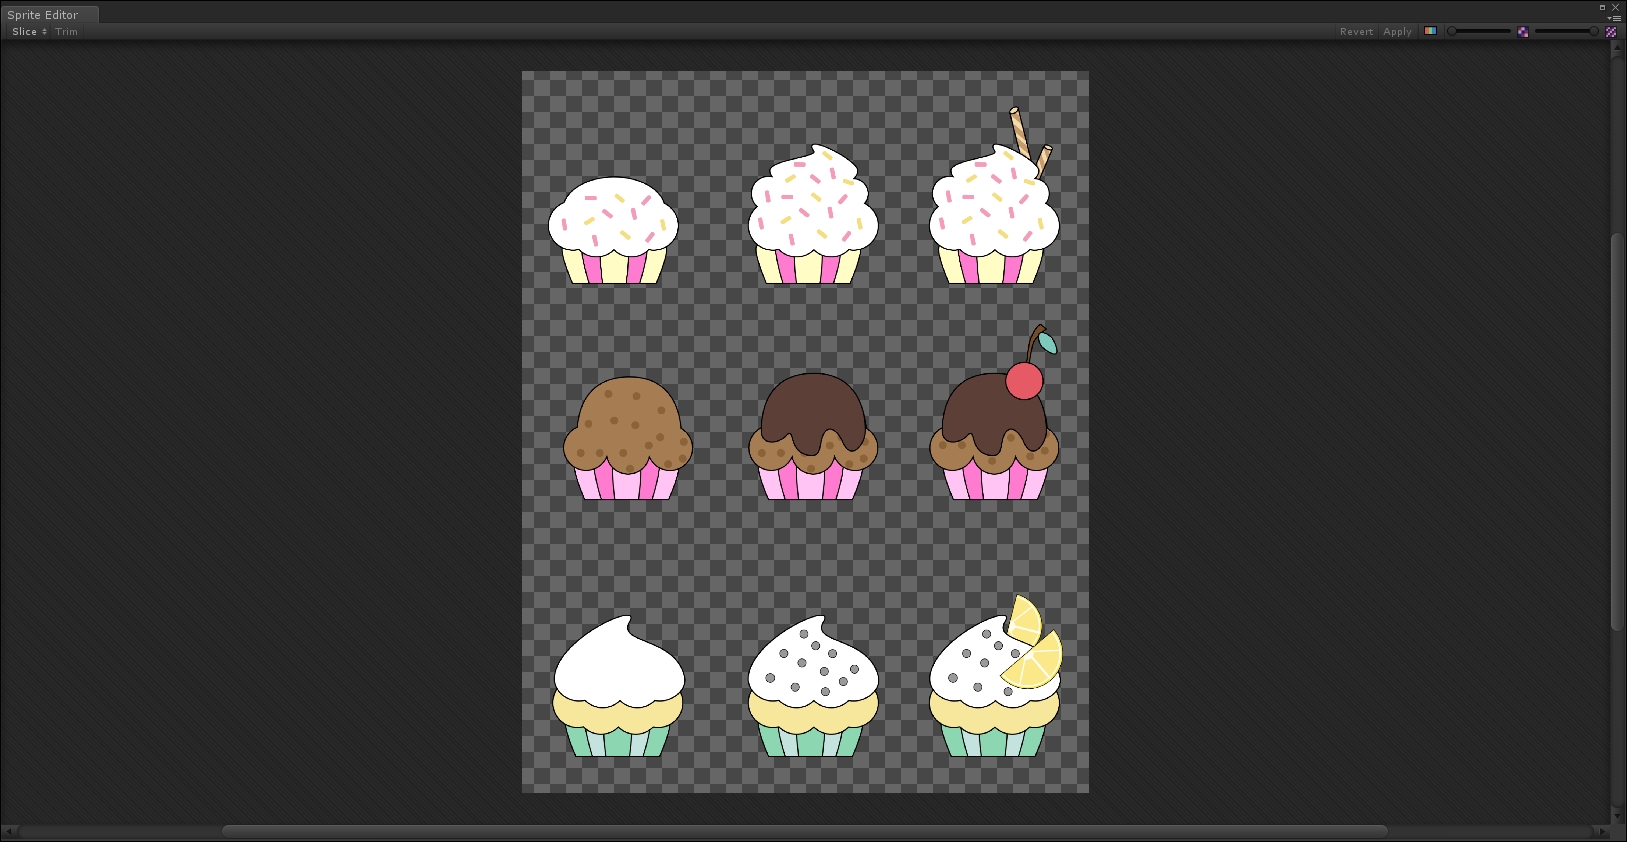
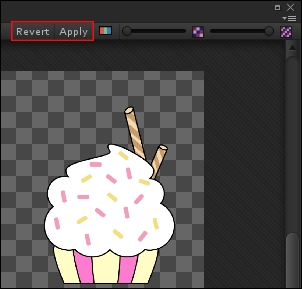
If we mess things up, we can always revert them back by clicking on the Revert button in the top-right corner of the Sprite Editor. Next to it, you can also find an Apply button, which you use to confirm your choices, so be careful which one you press!
For your own reference, they are highlighted in the next screenshot:
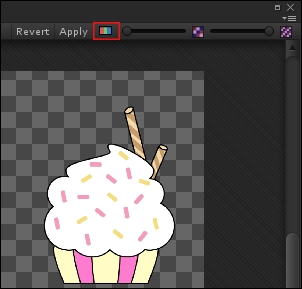
Near these two buttons, you can find some features that might help you when working in the Sprite Editor. The first is a button that is easy to miss, but that allows you to switch from the colored asset (RGB channels) to B/W (alpha channel). This is particularly useful when you need to define contours and the image has transparency, as we will see later. So that you avoid missing it, you can find it highlighted in the following screenshot:
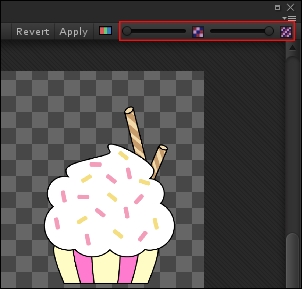
To the right of it, there are two sliders, which allow you to either zoom in/out or increase/decrease the resolution (number of pixels). These features are shown in the following screenshot:
The Sprite Editor allows you to do different things. For single sprites, it gives the possibility to change the pivot point. For Sprite Sheets, such as in this case, it is the way for Unity to understand how many Sprites there are and where they are located on the image.
Now, there are different ways to do this, so let's have a look at them in more detail.
In manual mode, it's you that selects each Sprite in the image, and tells Unity where it is and how big it is.
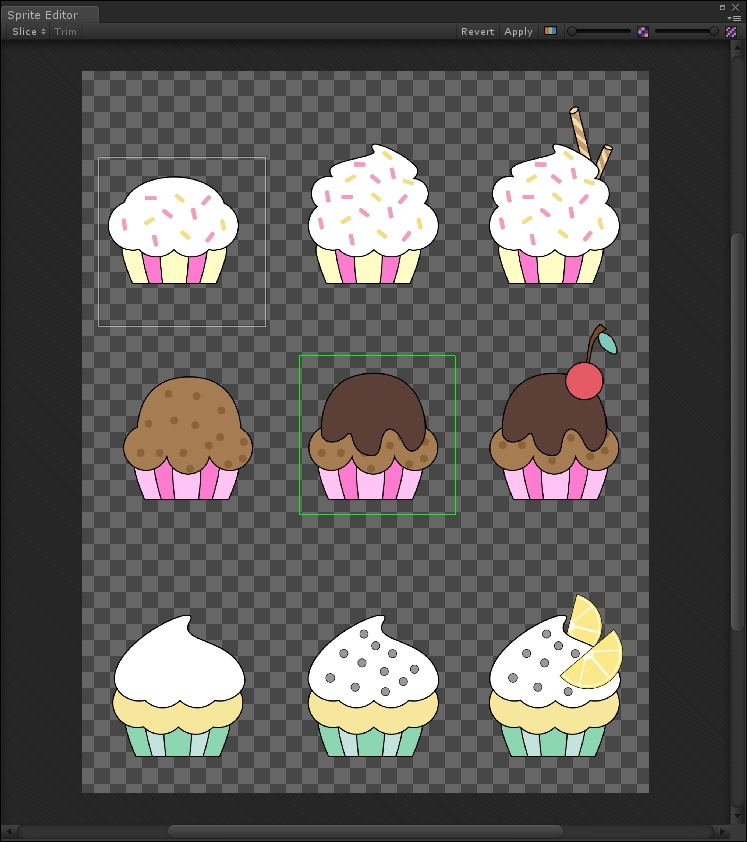
To create a new selection, you need to click in a corner of your Sprite and drag the mouse until you have selected the whole Sprite. A green rectangle appears, showing you the selected area, and you can see how the Sprite changes in real time while dragging the mouse. If you release the mouse button, the green rectangle becomes blue and Unity will interpret everything that is inside it as a Sprite.
You can create as many selections (rectangles) as you want. Also, by clicking on them, you can move them around the image and change their dimensions. Here is an example of our Sprite Sheet with some manual selections:
If you have made a rectangle that is bigger than the Sprite, Unity can try to trim it. In the top-left corner of the Sprite Editor, there is the Trim button, as shown in the following screenshot:
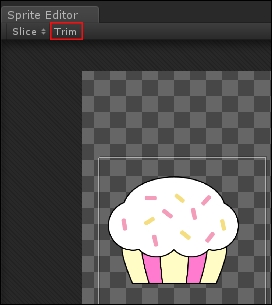
It is active only when a selection is highlighted. If you don't like the final result, you can always modify the selection.
Furthermore, in the middle of each selection, there is a small blue circle. This is the Pivot Point of that selection. We are free to drag it to another position. However, other than very specific cases, having the pivot point in the middle is common and useful. So at the moment, don't worry much about it, and just leave it in the middle.
Another thing you may notice is four small green squares in the middle of each edge of the rectangle. We will need them to do 9-slice scaling in a few sections.
Once we have highlighted a selection, it is possible to modify it in more detail by using the menu that appears in the bottom-right corner of the Sprite Editor. Here is what it looks like:
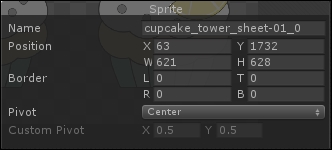
From this menu, you can modify the name of the selection, which will be reflected in the name of the Sprite when we use it. By typing numeric values, you can precisely set the dimension, the position, and the Pivot Point of the selection.
To conclude, manual mode is particularly useful when the shape and the dimensions of the Sprite in the Sprite Sheet are different. Even if the designer of the picture is careful and avoids placing single Sprites close to each other, the objects can still have very different dimensions.
In automatic mode, Unity tries to slice the Sprites, which means it creates the different selections for you. However, to get a better result, you need to give some information about the image. In any case, once Unity has offered its selections for the image, you can still modify them as you would in manual mode.
In the top-left corner of the Sprite Editor, next to the Trim button, we can see the Slice button, as shown here:
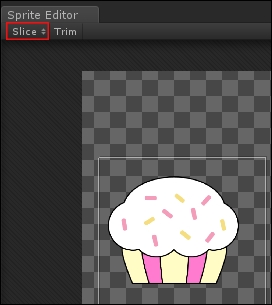
By clicking on it, a menu appears that looks like this:
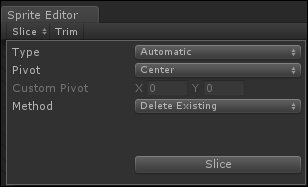
As you can see, we can select different types. Let's go through them.
The Automatic type is the best guess of Unity about the selections. Besides the method that we will see in a bit, and where to place the pivot points of the selections, there is nothing else to set. Unity will do everything automatically, and if we don't need our Sprites to be the same size, this way works pretty well. Here is the final result applied to our image:

The Automatic type comes with three different methods:
The Delete Existing method erases all the previous selections before slicing the image
The Smart method tries to create selections for the Sprites that are not yet in a selection
The Safe method creates new selections without erasing the previous ones
The Grid By Cell Size type, instead, divides the image into a grid of selections. From the menu, you can select the dimension of each cell. As a result, the number of cells will depend on how big they are.
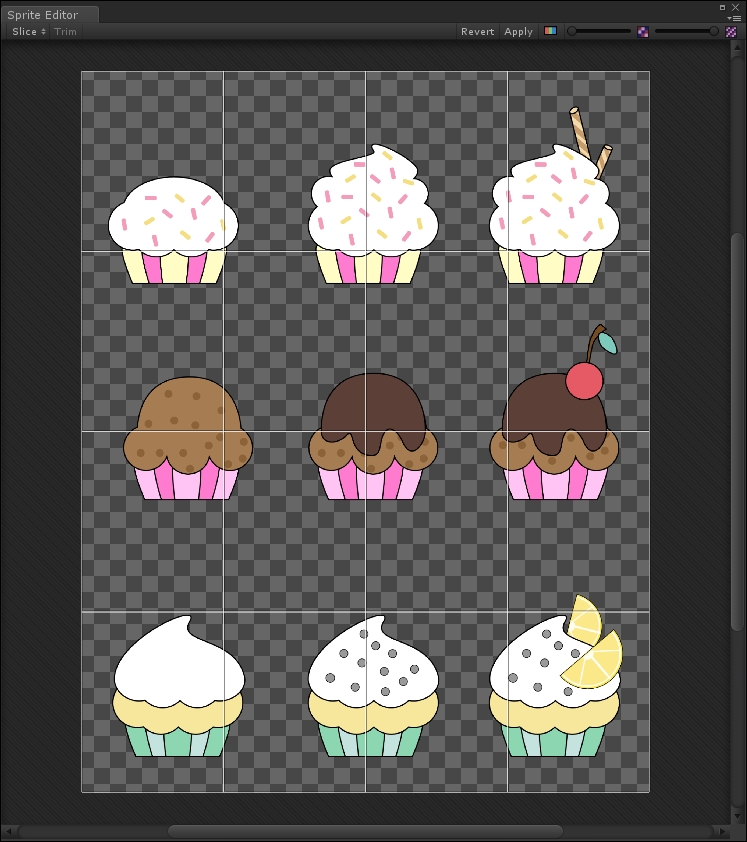
The Grid By Cell Count type, again, divides the image into a grid of selections. However, this time, you can set from the menu how many cells will be in the image, and their dimensions will depend on this. Here is our image sliced using a 4 x 4 grid:
From Unity 5.3, you can have access to this new feature of the Sprite Editor. In order to use it, you need to set the Sprite Mode to Polygonal in the import setting of the asset.
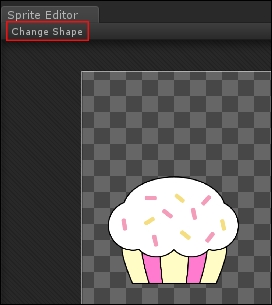
In this mode, Unity automatically slices the Sprite as a polygon. Once we open the Sprite Editor, we will immediately be able to set the number of sides or edges of the polygon. If we miss this, we can always press the Change Shape button in the top-left corner of the Sprite Editor, as shown here:
If we select an octagon (eight-sided polygon), this is the final result we would get in our image:

There is another important feature of the Sprite Editor, called 9-slice. It is used when a UI element needs different scaling in different parts of it. This feature is in the Sprite Editor because UI elements are treated as Sprites by Unity.
We will see the UI in another chapter, but let's start understanding why some UI elements need to be scaled differently. As you know, the game can run on different screens that usually have different resolutions and aspect ratios. As a result, the UI needs to be scaled properly depending on the screen. However, if you create a button with beautiful rounded corners, once it's scaled they will look completely different to how we had originally designed them, and not for the better.
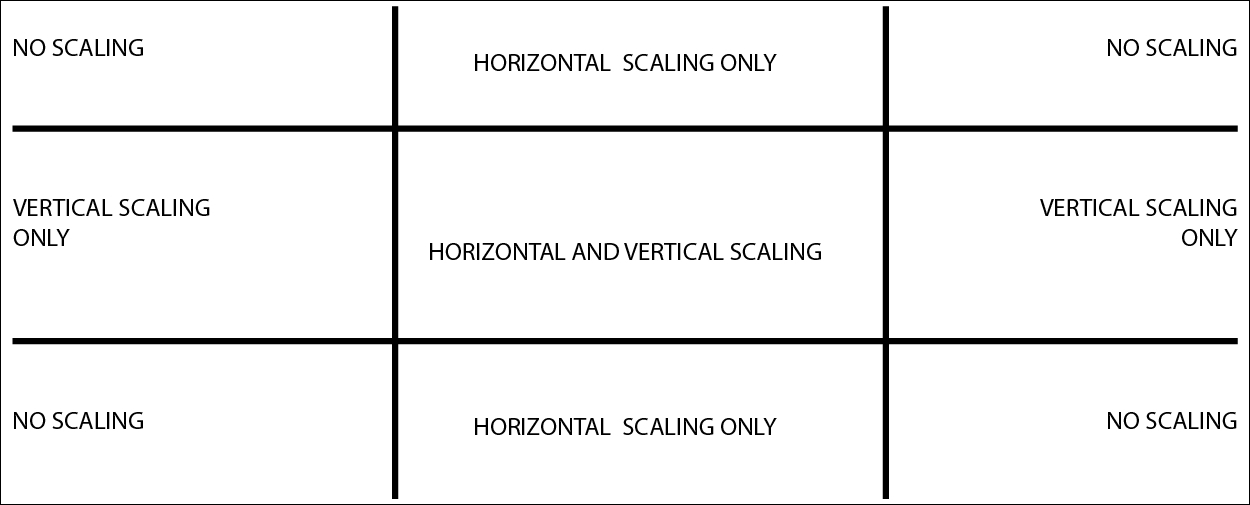
The 9-slice technique avoids this problem by defining nine sections on the Sprite that will be scaled differently. In particular, corners will not be scaled at all: only edges along their axis and the central section will scale in all the directions. The following image should help in understanding these nine sections and how they scale:
Let's take a UI image to learn how to do a 9-slice with the Sprite Editor of Unity. Select ui_blank_square_icon_pink in the Graphics/UI folder, and open it in the Sprite Editor. Since we didn't set its Sprite Mode to Multiple, we have only one selection around the entire image.
As we have already noticed, there are some green squares at the edges of our selection. If we drag them, we can divide the image into nine sections, and we are performing a 9-slice on that Sprite. Here is how the 9-slice should be done with a button:
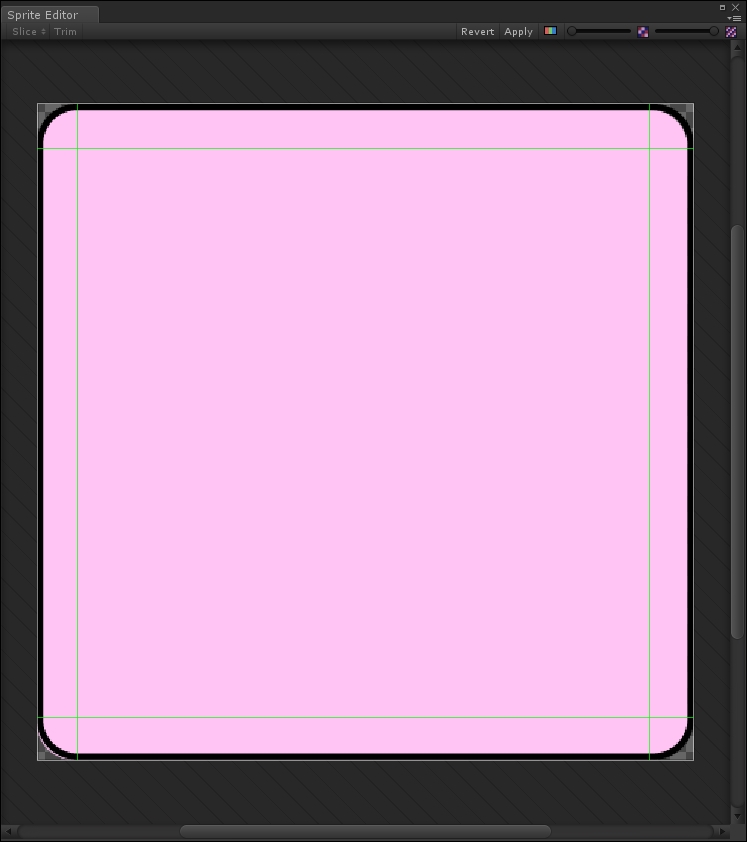
You need to leave the central section as big as possible, and keep the others the right size to include corners and edges.
Now, we should know a lot about the Sprite Editor. I suggest that you practice with the Sprite Editor for a bit before moving to the next section of this book. In fact, you will need to practice the methods that we have covered so far to prepare all our assets for the game we are going to build.
In this section, you will have the chance to practice what we have learned so far. In fact, we need to prepare the assets for our game.
Let's start by selecting Graphics/towers/cupcake_tower_sheet-01 (the same file we used before) and slice it with a 3 x 3 grid. Then, we should rename each Sprite.
In the first row, we can give them these names (from left to right):
Sprinkles_Cupcake_Tower_0Sprinkles_Cupcake_Tower_1Sprinkles_Cupcake_Tower_2
In the second row, we can give them these names:
ChocolateChip_Cupcake_Tower_0ChocolateChip_Cupcake_Tower_1ChocolateChip_Cupcake_Tower_2
Finally, the third row:
Lemon_Cupcake_Tower_0Lemon_Cupcake_Tower_1Lemon_Cupcake_Tower_2
At the end, we should have the following in the Project panel:
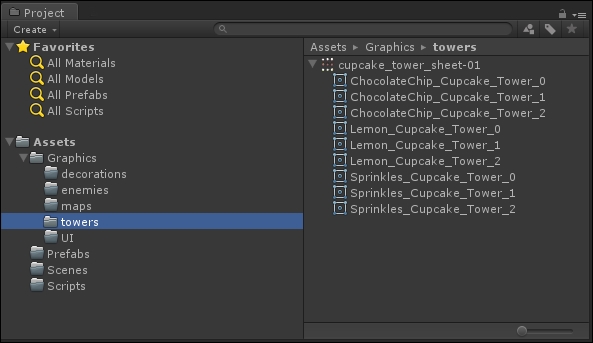
Repeat the same process with the Graphics/enemies and Graphics/UI folders by dividing the different Sprite Sheets. Don't forget to assign meaningful names. For the rest of the book, when we refer to an asset, its name will be self-explanatory. For your convenience, the original file where the Sprite has been taken will be specified.
A Unity game is made of different scenes that you can think of as levels. It's good practice to create a folder in our Project panel to store all the scenes. So, if we haven't done so already, right-click on the Project panel, then navigate to Create | Folder, and finally rename it Scenes.
In the toolbar menu, under File, there are options to create, save, and load scenes. Let's save the current one, even if it's empty, by navigating to File | Save Scene, as shown here:
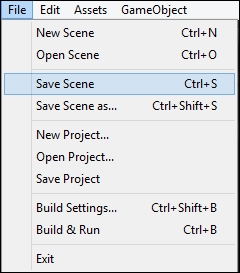
Unity will ask where to save the scene. Select the Scenes folder that we have just created and name the file Level_01. As a result, every time we save our scene, Unity will save it in this file.
When building our game, we need to think about the target platform that we are intending to develop for. Of course, we would like to adapt the game to as many devices and platforms as possible. For this reason, it's an important step in the game development process to do this adaptation.
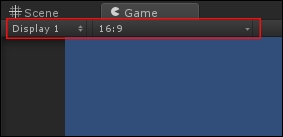
Without going into too much detail, since it is out of the scope of this book, it is important to have the screen proportion of your target platform, and develop the game accordingly. For this book, we will stick to 16:9 since it is a common proportion, and it is easy to adapt to other proportions later, and also because the package that we have downloaded has been created for 16:9 proportions.
To change the proportion in Unity, you need to select the Game tab. In the top-left corner, there are two drop-down menus. The first is for the displays (available from Unity 5.3) and the other one is the proportion. They are highlighted in the following screenshot:
Note
From Unity 5.5, next to these settings, there is also a slider that allows you to zoom in and out in the scene, by changing its scale.
If you need a custom proportion, you can select the + button at the end of the list, and a screen like the following will appear:
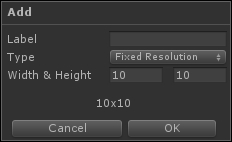
From here, it is possible to assign a label to this resolution and its dimensions. Once you have added a resolution, it will be shared among all of your projects.
Before we move on to the next section, remember to select 16:9 as the project's resolution.
From the e-guide that I suggested to you at the beginning of the chapter, you should have learned more about the Unity interface. But, I want to share a little trick with you.
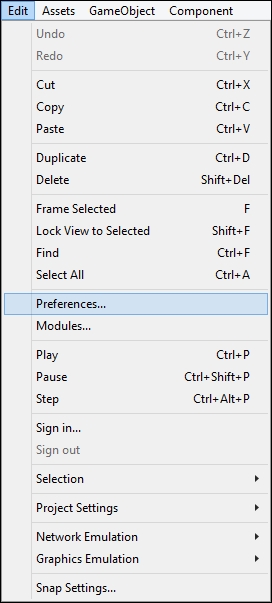
Navigate from the top-bar menu and select Edit | Preferences..., as shown in the following screenshot:
Then, from the menu that appeared, select the third tab, Colors, and in this screen you will have the possibility to change the color of the the main graphical elements (or Gizmos; see in the next chapter) of the scene view, such as the axis or the grid as shown in the following screenshot:.
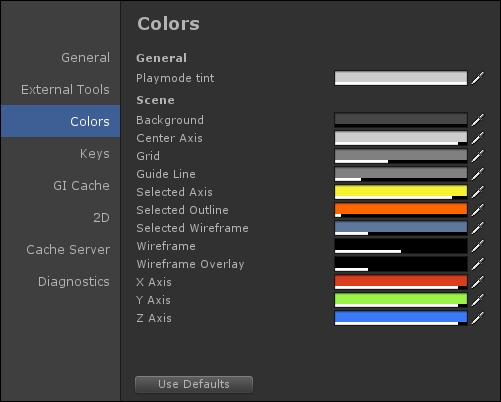
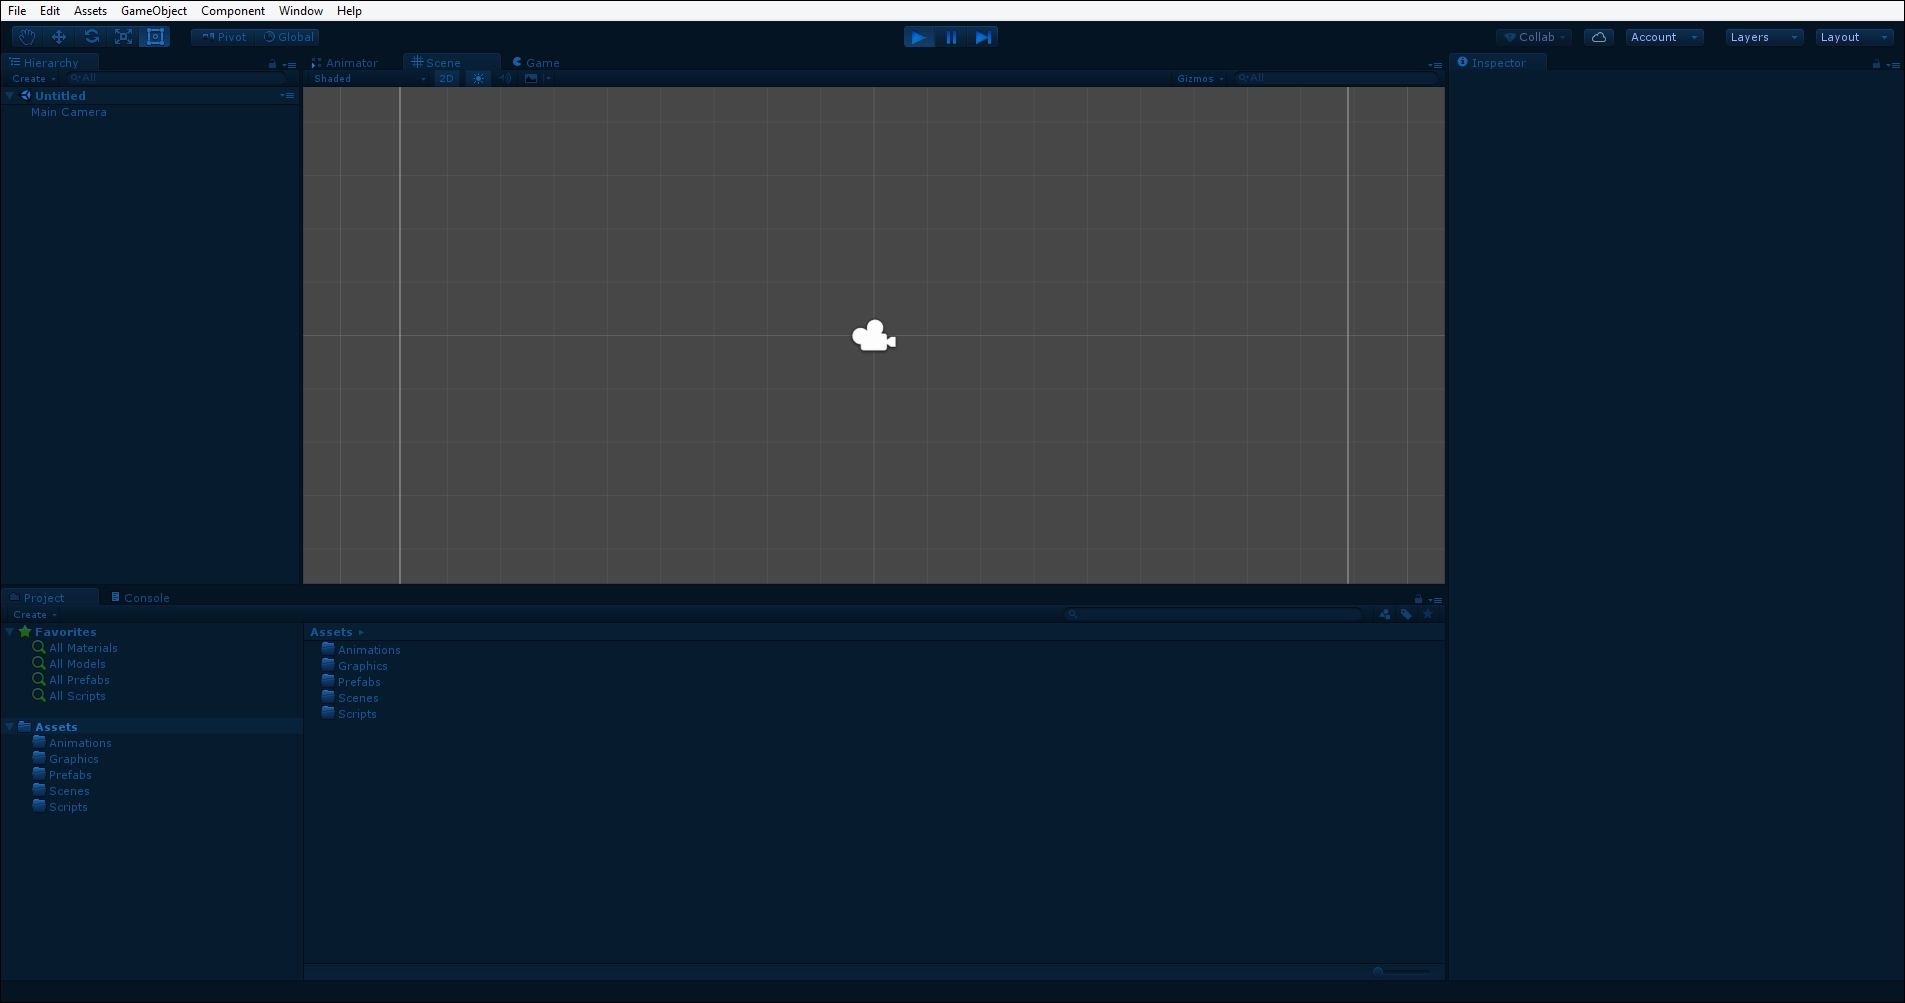
However, the trick lies in the Playmode tint setting. It allows you to change the overall tint of the interface when the game is running. You may not see the usefulness now, but it will be of great help when you want to modify parameters, and often you may forget to be in play mode. Personally, this little trick has helped me in many situations. Here is an example of how the Unity interface appears when it is in play mode with a blue tint:
In this chapter, you have already spent some time working with the Sprite Editor, so there is no need to do more exercises about it. However, if for some reason you want to keep practicing, you can download the standard assets from the Asset Store of Unity (Window | Asset Store), since it is free. Then, import the Standard Assets/2D/Sprites folder, and try to slice them from scratch using different modes to achieve the same result.
In this chapter, we have seen the entire pipeline for importing Sprites and preparing them to use in our game. During this process we have understood what Sprites are, how to import them, and use the Sprite Editor in different ways. Furthermore, we have explored Unity when it is set in 2D and seen an introduction to 2D game development. Finally, we have learned how to set up scenes with the right screen resolution for our target platform.
I think that we have covered a lot in this chapter and now it's time to take a break. Go grab a coffee or even a cupcake before moving on to the next chapter, where we will learn about 2D game scripting.


 Download code from GitHub

