


This book covers, in a compressed way, the whole range of cutting edge and advanced features available in Dreamweaver CS6. Our emphasis is on the new features in HTML5 that structure content and make it more accessible, on CSS3 styles that add transformations (such as rotations) and effects (such as rounded corners) to elements, and on mobile design with HTML5 Media Queries and jQuery Mobile. Dreamweaver CS6 provides all the important tools for implementing all these features.
We'll get to that very shortly. But first, in this chapter, it will be important to review (and for those of you new to Dreamweaver, understand) some fundamental tools for maximizing productivity in Dreamweaver. Doing this serves two purposes: it provides a fast-and-furious overview of the basics of Dreamweaver CS6, and probably more importantly, it grounds us all in the protocols that protect the integrity of everything else that we are going to cover in this book.
In this chapter, we will:
Define a Dreamweaver site
Create HTML5 pages
Apply elements to text
Define links
Insert images
Create CSS files and link HTML pages to those stylesheets
Define and apply ID and class Div styles for page design
Everything you do in Dreamweaver requires that you first create a Dreamweaver site. Without that Dreamweaver site, nothing really works in Dreamweaver.
Why is that? Basically, this is because the web pages you learn to build in the course of this book involve dozens of files. Dozens? Really? Well, count them: a few JavaScript files, links to internal and external pages, embedded audios, videos, and images, links to CSS files, and embedded content from other pages using the iFrame technique. We're up to dozens already!
If any of the relationships or links between these files gets corrupted—through a file being moved, renamed, or deleted—our page collapses. But if we are working within (and following the rules for working in) a Dreamweaver site, Dreamweaver keeps track of all the files in all your web pages—for example, embedded image files and video clips and links to other web pages—and makes sure all those files work together.
A Dreamweaver site also provides tools to manage file transfers between our local (preview) site and the online remote version of the site.
All this starts with defining a separate (and just one) Dreamweaver Site for every website you manage with Dreamweaver. We have "Site" in italics and capitalized here to emphasize that we are not talking about organizing files in a "website", but defining a very specific Dreamweaver thing—a Site.
The easiest way to do that from any interface in Dreamweaver is through the Site menu. And the first (and only essential) part of defining a site is to create a local version on your own computer; linkage to a remote (online) server can come later.
Before defining a Dreamweaver site, create a folder on your computer (your desktop is a convenient place) that will serve as the root folder for your site. Avoid spaces or special characters while naming that folder (that is, daves-website not Dave's Website!).
To define a local site, follow these steps:
With Dreamweaver CS6 launched, choose Site | New Site. The Site Setup dialog opens.
In the Site Name field, enter any content that helps you distinguish this site from other sites. There are no constraints on using spaces or special characters.
In the Local Site Folder field, use the Browse for Folder icon to locate the folder you created to serve as your site's root folder.

The preceding screenshot shows how to create a root folder for a Dreamweaver site.
After you click on the Browse for Folder icon, the Choose Root Folder dialog opens. Navigate to your root folder and click on Choose. This returns you to the Site Setup dialog.
Click on Save to complete the local site's definition:

The previous screenshot shows a Dreamweaver site with the Local Site Folder file defined.
We'll return shortly to our local site and see how to use it, but first let's walk through how to define a remote connection for our site.
Most websites are intended for public distribution on the Internet. They are hosted on servers that enable this; these server hosts are easy to find (one reliable list of pricing and features is at http://reviews.cnet.com/web-hosting-plans/).
You need to have contracted for remote hosting before you can define a Dreamweaver CS6 link to a remote server. This hosting service will provide you with three essential pieces of information—an FTP address, a username, and a password. Some hosting setups include a defined root directory as well. Record that information when you contract for hosting, or look up the login info for your current hosting service if you are incorporating that server into a Dreamweaver site only now.
With your FTP address, username, and password taken care of, the following steps walk through what is required to define a remote connection for your Dreamweaver site. Or don't. Remember, a remote site is not necessary to build a site on your own computer, and you'll be able to work through almost everything in this book without a remote connection.
To define a remote connection for a Dreamweaver site, follow these steps:
With Dreamweaver CS6 launched, choose Site | Manage Sites. This opens the Manage Sites dialog, and by the way, you use this technique (managing a site) to edit anything in your Dreamweaver site definition, not just the remote connection.
In the Manage Sites dialog, double-click on your site from the Your Sites list to open the Site Setup dialog again.
In the list of categories on the left-hand side of the Site Setup dialog, select Servers.
Click on the Add New Server (+) button. Another dialog named Site Setup… opens.
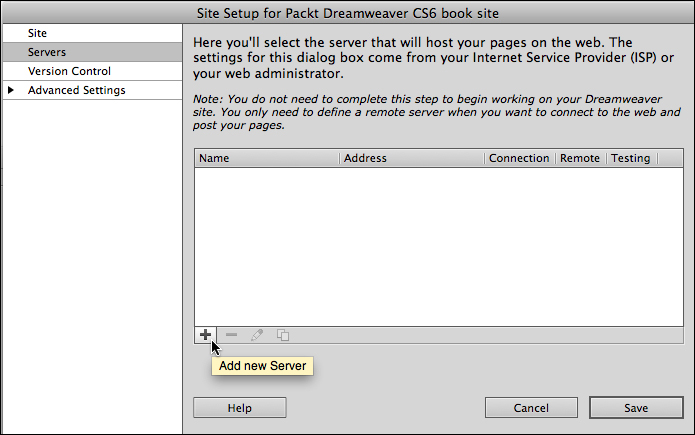
The previous screenshot shows a new server connection being added to a site definition.
In the Server Name field, enter any text that helps you remember what server you are connecting to.
In the FTP Address field, enter the FTP address provided by your hosting administrator, in the Username field enter the provided username, and in the Password field enter your password. Most sites use Port 21, so don't change the default value in the Port field unless instructed by your site administrator.
Selecting the Use Passive FTP and Use FTP Performance Optimization checkboxes can be advantageous in avoiding connection glitches. To see these options, expand the More Options section of the Site Setup… dialog. By default, these checkboxes are selected in Dreamweaver CS6.
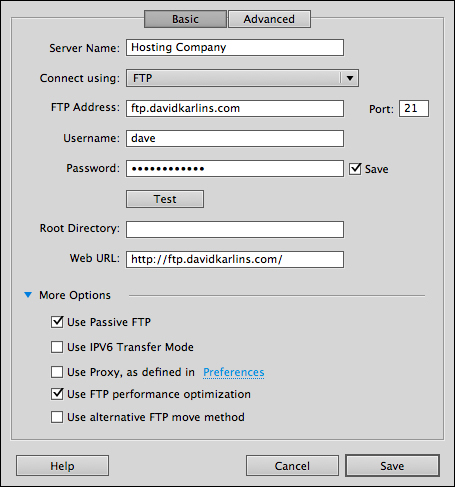
The preceding screenshot illustrates a defined remote connection.
The Web URL field is filled in automatically by Dreamweaver based on what you enter in the FTP Address field. This information is used by Dreamweaver for tools such as its built-in, link-checking features, but it is not relevant to, and serves more as a distraction from the process of defining a site. If you wish, you can replace the generated URL with the actual URL for your website.
Don't click on Save yet. First, click on the Test button. If you get an error message, check your FTP address, login credentials, and password with your site-hosting company (and be sure you are connected to the Internet). When the Test button produces a message saying that you have connected to your web server successfully, click on Save.
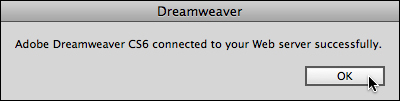
The preceding screenshot illustrates a successfully tested remote connection.
After you save the remote connection, the Site Setup … dialog reappears. Click on Save again. Then, click on the Done button in the Manage Sites dialog. Your site is now defined!
After you define a Dreamweaver site, you can view files in either the local or remote version of the site in the Files panel. Like any other panel in Dreamweaver, you can view or hide the Files panel through the Window menu.
There are two drop-down menus in the toolbar at the top of the Files panel. Use the first one to select a Dreamweaver site. If you have only one site, that site will be selected by default.
The second drop-down menu in the Files toolbar toggles between four views, two of which are relevant and two of which are esoteric for most designers. The first two options toggle between viewing files on the local or remote versions of the site. The Testing server option is for backend programming scripts, which manage data, and the Repository view option is for stored code snippets.
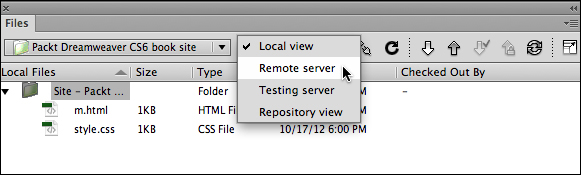
The preceding screenshot illustrates toggling between local and remote views.
When you click on the Connect to Remote Server button, you can use the Files panel to view files in your remote site. You can split the Files panel by clicking on the Expand/Collapse icon at the far right of the Files panel toolbar:
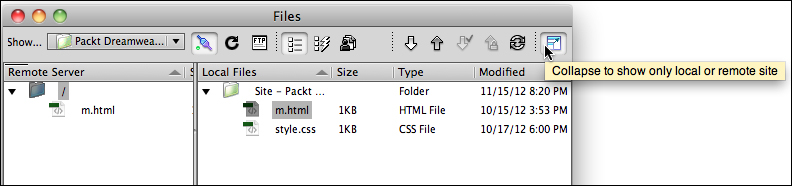
In the preceding screenshot, the Connect to Remote Server button is pressed, and the Collapse/Expand button is hovered over; this allows us to toggle between viewing both local and remote views together, (when expanded) or only the local or remote view (when collapsed).
You can drag files from the local to remote sides of the Files panel, or use the Get Files (down arrow) or Put Files (up arrow) notation to download or upload your files respectively.
With a site defined, you are ready to create HTML5 pages in Dreamweaver. HTML5 is the current standard for HTML, and is also the most widely supported version of HTML, including the older browsers. There are some new features in HTML5 that are not supported by older browsers, but HTML5 documents produce per-se the fewest error messages for visitors using older browsers to view modern websites. For these reasons, HTML5 is the default document type for web pages in Dreamweaver CS6.
Dreamweaver CS6 comes with predesigned HTML5 page layouts, one for two-column pages, and one for three-column pages. These are useful and well documented, but we'll have to rush past them in this compressed introduction to Dreamweaver CS6 to get right to building HTML5 pages from scratch.
Follow these steps to create a new HTML5 page in Dreamweaver CS6:
Choose File | New from Dreamweaver's main menu. The New Document dialog appears.
From the left-hand side column, choose Blank Page. In the Page Type column, choose HTML. In the Layout column, choose <none>. And leave HTML 5 as the setting in the DocType drop-down menu. Click on the Create button to generate a new page.

Creating a new HTML5 page
The new page opens in Dreamweaver's Design window. We won't explore every option in the Design window, but will identify key ones:
The Code, Split, and Design buttons in the upper-left corner of the Document toolbar toggle between a code editor, a screen split between a code editor, and a WYSIWYG page, or simply the WYSIWYG view. Most of you will find the Split view most effective as it provides quick access to WYSIWYG design tools, plus access to code.
The Live view when toggled on, displays pages more like they appear in a browser (for example, useful for seeing how links will look in the browser). But you can't edit with the Live view toggled on.
The Preview/Debug in Browser button provides quick previews of your page in any installed browser.
The File Management buttons allow you to upload the open page directly from the Design view without recourse to the Files panel.
The Refresh button updates the Design view to match new code.
The Title field defines the page title that appears in the browsers' title bars.

The preceding screenshot illustrates some key tools in the Document toolbar.
Choose File | Save to save your file. Use lowercase letters and numbers with no spaces or special characters (except _ or -) to ensure your files and links will not get corrupted and will open in the browsers.
The Save As dialog opens the first time you save a file.
Use the Site Root button in the Save As dialog to quickly navigate to your Dreamweaver site's root folder. For smaller sites, you can save all the files directly in this folder. For more complex sites, you can create subfolders within this folder.
The most widely supported way to define a home page for any folder is to name it
index.html.Use either
.htmor.htmlfor filename extensions, but avoid using both to prevent any chaos that will result from two files with the same name and different extensions.When you have entered a valid filename in the Save As field, click on Save.
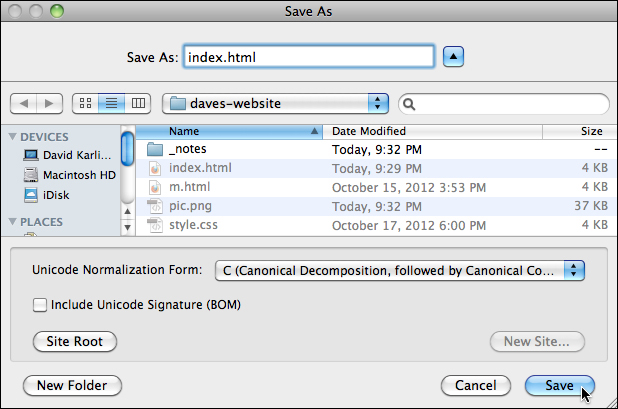
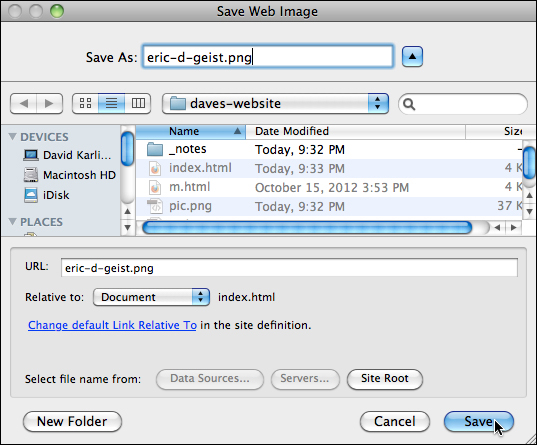
The preceding screenshot illustrates saving an HTML5 page as a home page for a website with the index.html filename.
One of the valuable and productivity-enhancing features in the Dreamweaver Document window is that the Design view (or the Design side of the Split view) serves as a functional word processor. You can compose text here using a standard set of editing tools as you type.
That said, it is more likely you'll copy text content from web pages or word processor documents.
Depending on the source of the text, Dreamweaver offers a set of options for pasting text into the Document window. These are accessed by choosing Edit | Paste Special. Use trial-and-error to find the option (ranging from minimalist Text Only to options that retain more formatting) that does the best job of pasting copied text into the Document window.
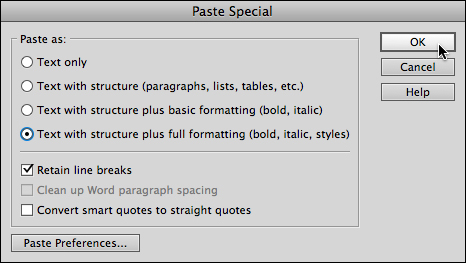
Pasting copied text into a Dreamweaver page
HTML text elements (tags)—headings, paragraphs, and lists—should be used to denote prioritization of content. CSS styles (which we'll soon get to) are used to define how these elements look.
In general, the h1 element is applied to the most important headline(s) on a page, h2 to secondary headlines, and so on.
Apply heading elements by clicking anywhere in a paragraph, and choosing a heading from the Format drop-down menu in the Properties inspector (if it's not visible, choose Window | Properties).
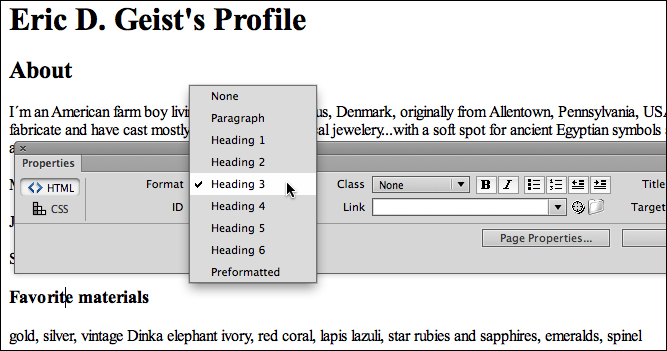
The preceding screenshot illustrates applying an h3 tag to a selected line of text.
By default, the content you enter in the Document window has paragraph tags added to apply paragraph formatting (which includes a line of spacing between paragraphs). You can apply paragraph tags to selected paragraphs from the Format drop-down menu in the Properties inspector.
Apply ordered (numbered) or unordered (bullet) lists to the selected text by clicking on either of those two icons in the Properties inspector.
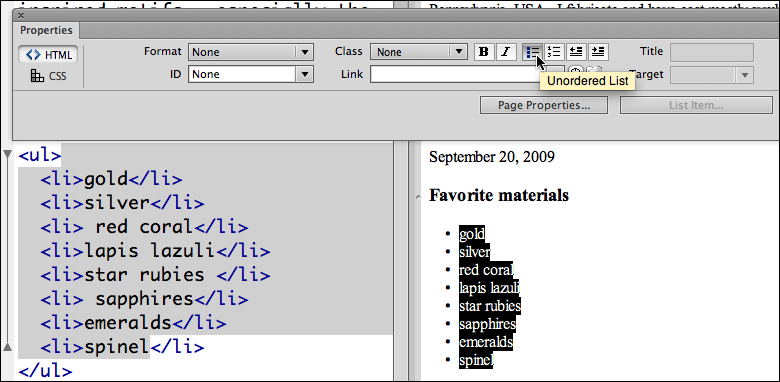
In the preceding screenshot, an unordered list and list tags have been applied in the Document window.
You can assign links to selected text by entering a URL (including the http://www part) in the Link field of the Properties inspector. Choose _blank from the Target drop-down menu to open the link in a new browser window (or tab, depending on the user's configuration). Enter the title text that will display when a link is hovered over in the Title field.
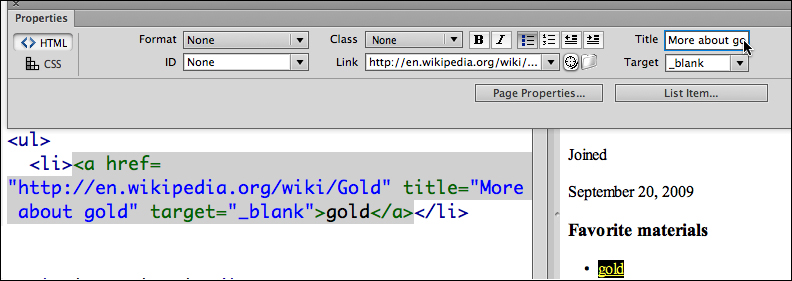
In the preceding screenshot, a link is defined that will open in a new browser window; also, a link title is applied.
You can also use the Browse for File icon located at the right of the Link field, to browse and link to a file in your Dreamweaver site.
If you have your images saved and prepared for the Web, you can embed them by clicking in the Document window to define the insertion point, and choosing Insert | Image. The Select Image Source dialog appears. Navigate to and select your image file and click on Open to insert the image. When you do that, the Image Tag Accessibility Attributes dialog appears. Enter text in the Alternate Text field that will be accessible to users who have images disabled or are vision impaired. The Long Description field can be used to link to HTML pages that describe images when the main audience for your site are users who will not be able to view images.
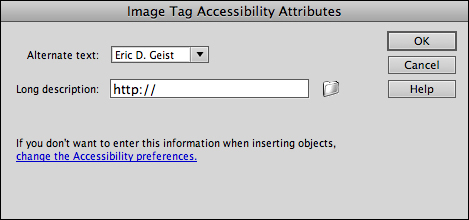
In the preceding screenshot, the alternative text is defined for an image.
You can also copy and paste artwork from any source into the Dreamweaver Document window. Pasting a copied image launches the Image Optimization dialog. The Preset drop-down menu provides clearly-explained options for converting the image to one of the available web-friendly image formats. Choose one and click on OK to insert and launch the Save Web Image dialog.
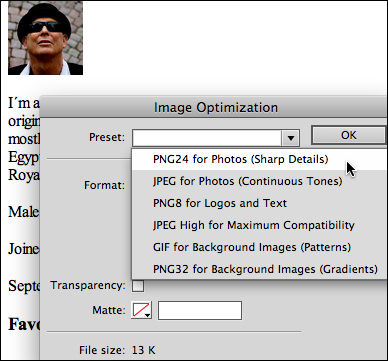
The preceding screenshot illustrates how to select a file format for a pasted image.
In the Save Web Image dialog, enter a filename (no spaces or special characters except – or _) in the Save As field. Click on Save to save the image, as shown in the following screenshot:
Having quickly surveyed the basic techniques required for creating an HTML5 web page with text, images, headings, lists, and links, let's turn to an even more compressed survey of defining and linking that page to an external CSS stylesheet.
External Cascading Style Sheet (CSS) files have been, for some time, the standard way to format web page content, replacing earlier steps in the evolution of web design, such as using data tables for page design, or HTML attributes (for example, color=red) for formatting.
We'll return to meshing styles and HTML for designing pages in the next chapter when we structure page content using the new HTML5 elements that are associated with different kinds of content (such as articles, headings, footers, and sidebars). Here, we'll simply establish the basic technique for creating and linking a stylesheet.
A basic website, even a large one, can often function with a single external stylesheet linked to hundreds, even thousands of pages. Keeping styles organized in an external stylesheet allows global updating—when the page background is changed in a stylesheet, the background changes throughout the site.
To create a stylesheet, follow these steps:
Choose File | New from Dreamweaver's main menu. The New Document dialog appears.
In the left column, choose Blank.
In the Page Type column, choose CSS.
Click on Create. A new CSS file opens with a
@charsetdeclaration, which provides support for the widest set of characters, and a comment indicating this is a CSS file.Save the file by choosing File | Save. Your stylesheet file can have a simple name such as
style.css(as always, avoid spaces, upper-cases, or special characters). Enter the filename in the Save As field of the Save As dialog and click on Save to save the file, as shown in the following screenshot:
To link a CSS file to an HTML page, you must first be sure the HTML page is open in the Document window.
Note that after you save the file, you can toggle between your CSS file and your open HTML file(s) in the tabbed bar above the Document toolbar, as shown here (you can toggle between open files using these tabs):

Follow these steps to link a CSS file to an open HTML page:
With your HTML file open, view the CSS Styles panel (Window | CSS Styles).
Click on the Attach Style Sheet icon at the bottom of the CSS Styles panel. The Attach External Style Sheet dialog opens.
Use the Browse button to navigate to and select your CSS file, and click on OK in the Attach External Style Sheet dialog to link the CSS file to your open HTML page.
The linked CSS file now appears in the CSS Styles panel (make sure the All tab—not the Current tab—is selected at the top of the CSS Styles panel).
The single most defining element in any web page is the <body> tag, since it controls all the visible page content. As your stylesheet grows, more specific tags will override the body tag styling, but the style you apply to the body tag sets the default look of your page. So, let's use that as an example for how to define a style in Dreamweaver.
To define a body style with font, font color, and page background color, follow these steps:
In the CSS Styles panel, click on the New CSS Rule icon at the bottom of the panel; the New CSS Rule dialog opens.
From the Selector Type drop-down menu, choose Tag.
From the Selector Name drop-down menu, choose body.
In the Rule Definition drop-down menu, choose your linked stylesheet.
Click on OK to launch the Rule Definition dialog.
In the Type category, choose a font family from the Font-family drop-down menu.
Choose other font parameters and values from other drop-down menus and swatches in the Type category.
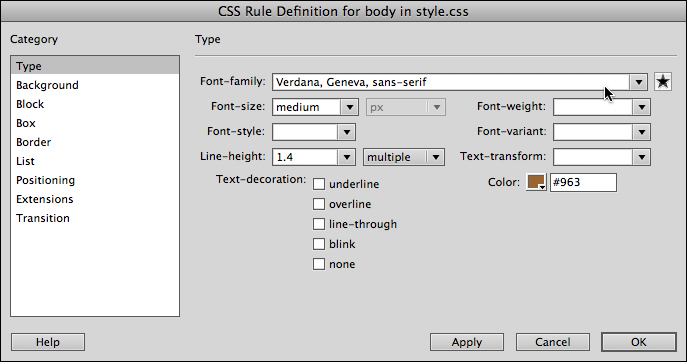
The preceding screenshot illustrates defining a font family for the body element.
In the Background category of the CSS Rule Definition… dialog, choose a background color.
Click on Apply to preview your settings.
Click on OK to apply your settings.
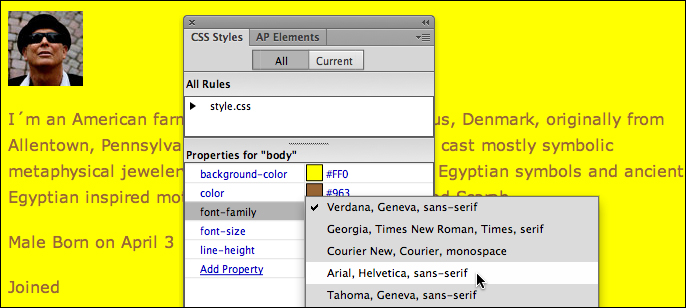
Once defined, styles can be tweaked in the bottom half of the CSS Styles panel. This is shown in the following screenshot, where the font-family property is edited in the CSS Styles panel:
Before "wrapping" our compressed exploration/review of basic page building techniques in Dreamweaver CS6, let's apply a "wrapper" div tag to constrain our page width and create a separate page background distinct from the page itself.
While the HTML5 styles we create in the following chapter will give us a chance to explore page design with CSS in depth, HTML5 does not come with a "wrapper" element, and we have to create our own.
The technique we apply to do this is to enclose all our page content in a special tag called a Div tag. Div tags divide sections of content, and can't do much without having a style associated with them.
Dreamweaver radically streamlines the process of wrapping a page in a wrapper div tag. To do that, just follow these steps:
With your HTML file open, and your cursor on the Design side of the Split view, choose Edit | Select All to select all the page content.
With all the page content selected, choose Insert | Layout Object | Div tag. The Insert Div Tag dialog opens.
Leave the Insert drop-down menu set to Wrap Around the Selection.
Enter
wrapperin the ID field and click on the New CSS Rule button. The New CSS Rule dialog opens; the following screenshot illustrates how to use the Insert Div Tag dialog to create an ID style: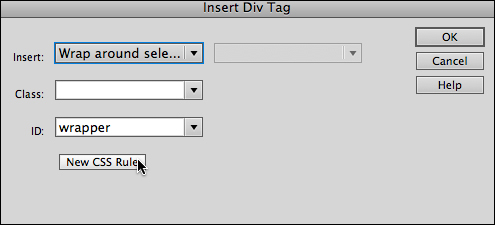
In the New CSS Rule dialog, simply click on OK. The CSS Rule Definition… dialog opens.
In the Box category, enter
950in the Width field to constrain our page width to a standard 960-pixel size (we're going to use up the missing ten pixels with padding).In the Padding section of the dialog, enter a value of
5(px).In the Margin section of the dialog, deselect the Same for All checkbox and enter
Autofor the Left and Right margins to center the wrapper.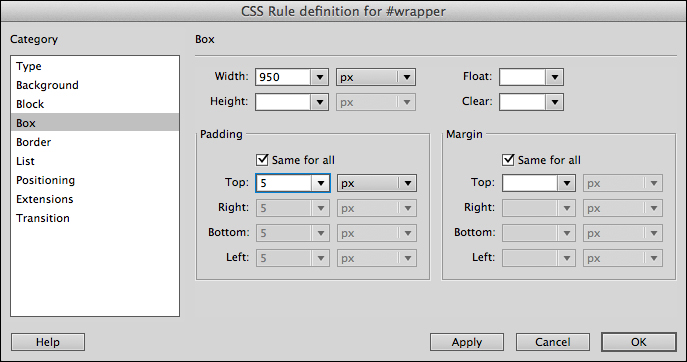
In the preceding screenshot, width, padding, and margin are being defined for an ID style named
wrapper.In the Background category, define a distinct background color for the wrapper (different from the background color for the
bodytag).Click on OK to apply the wrapper.
In this first chapter of the book, we completed a compressed survey of the basic and foundational techniques for working in Dreamweaver CS6. These include defining and working within a Dreamweaver Site, building HTML5 pages, and linking CSS stylesheet files.
We also walked through the process of defining ID div tag styles and laying out page content in a container div tag. This is the basic building block of modern web page design.
In the next chapter, we'll learn to build web pages in Dreamweaver, relying on HTML5 container tags, which make page content structures more rational and easy to design, and which optimize page content for search engines.