Download code from GitHub
Chapter 2: Understanding the Project Structure and Creating Our First App
Django projects contain a predefined structure with some key files. In this chapter, we will discuss the Django project structure and how some of those files are used to configure our web applications. Furthermore, Django projects are composed of one or more apps. We will learn how to create a movie app and how to register it inside our Django project.
In this chapter, we will cover the following topics:
- Understanding the project structure
- Creating our first app
Technical requirements
In this chapter, we will be using Python 3.8+. Additionally, we will be using the Visual Studio (VS) Code editor for building our web application in this book, which you can download from https://code.visualstudio.com/.
The code for this chapter is located at https://github.com/PacktPublishing/Django-4-for-the-Impatient/tree/main/Chapter02/moviereviewsproject.
Understanding the project structure
Let's look at the project files that were created for us in Chapter 1, Installing Python and Django, in the Installing Django section. Open the moviereviews project folder in VS Code. You will see the following elements:
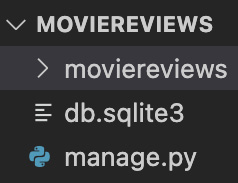
Figure 2.1 – The MOVIEREVIEWS directory structure
Let's learn about each of these elements.
The moviereviews folder
As you can see in Figure 2.1, there is a folder with the same name as the folder we opened in VS Code originally – moviereviews. To avoid confusion and to distinguish between the two moviereviews folders, we will keep the inner moviereviews folder as it is and rename the outer folder moviereviewsproject.
After the renaming, open the inner moviereviews folder. You will see the following elements, as shown in Figure 2.2:
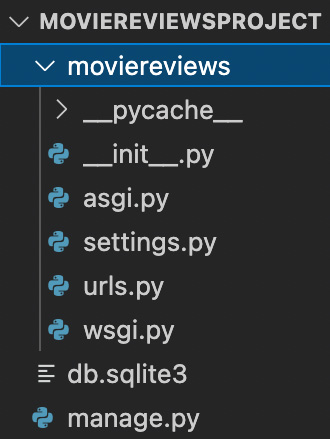
Figure 2.2 – The MOVIEREVIEWSPROJECT directory structure
Let's briefly look at all the elements in the moviereviews folder:
__pycache__: This folder stores compiled bytecode when we generate our project. You can largely ignore this folder. Its purpose is to make your project start a little faster by caching the compiled code that can then be readily executed.__init__.py: This file specifies what to run when Django launches for the first time.asgi.py: This file allows an optional Asynchronous Server Gateway Interface (ASGI) to run.settings.py: Thesettings.pyfile is an important file that controls our project's settings. It contains several properties:BASE_DIR: Determines where on your machine the project is situated.SECRET_KEY: Used when you have data flowing in and out of your website. Do not ever share this with others.DEBUG: Our site can run in debug mode or not. In debug mode, we get detailed information on errors – for instance, if we try to runhttp://localhost:8000/123in the browser, we will see a Page not found (404) error:
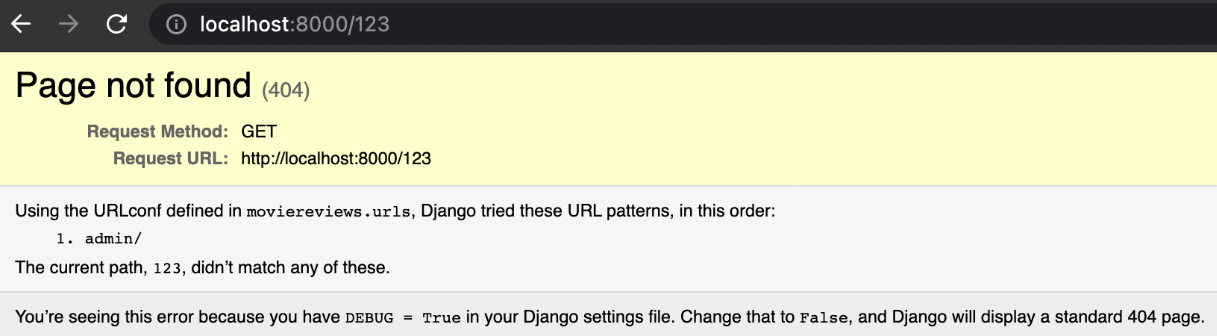
Figure 2.3 – Accessing an invalid application route
Note
It is important to remember the following:
- When deploying our app to production, we should set
DEBUGtoFalse. IfDEBUG=False, we will see a generic 404 page without error details. - While developing our project, we should set
DEBUG=Trueto help us with debugging.
INSTALLED_APPS: Allows us to bring different pieces of code into our project. We will see this in action later.MIDDLEWARE: Refers to built-in Django functions to process application requests/responses, which include authentication, session, and security.ROOT_URLCONF: Specifies where our URLs are.TEMPLATES: Defines the template engine class, the list of directories where the engine should look for template source files, and specific template settings.AUTH_PASSWORD_VALIDATORS: Allow us to specify the validations that we want on passwords – for example, a minimum length.
There are some other properties in settings.py, such as LANGUAGE_CODE and TIME_ZONE, but we have focused on the more important properties in the preceding list. We will later revisit this file and see how relevant it is in developing our site.
urls.py: This file tells Django which pages to render in response to a browser or URL request. For example, when someone enters thehttp://localhost:8000/123URL, the request comes intourls.pyand gets routed to a page based on the paths specified there. We will later add paths to this file and better understand how it works.Wsgi.py: This file stands for the Web Server Gateway Interface (WSGI) and helps Django serve our web pages. Both files are used when deploying our app. We will revisit them later when we deploy our app.
manage.py
The manage.py file seen in Figure 2.1 and Figure 2.2 is an element we should not tinker with. The file helps us to perform administrative operations. For example, we earlier ran the following command in Chapter 1, Installing Python and Django, in the Running the Django local web server section:
python3 manage.py runserver
The purpose of the command was to start the local web server. We will later illustrate more administrative functions, such as one for creating a new app – python3 manage.py startapp.
db.sqlite3
The db.sqlite3 file contains our database. However, we will not discuss this file in this chapter, as we do not need it to create our file. We will do so in Chapter 5, Working with Models.
Let's next create our first app!
Creating our first app
A single Django project can contain one or more apps that work together to power a web application. Django uses the concept of projects and apps to keep code clean and readable.
For example, on a movie review site such as Rotten Tomatoes, as shown in Figure 2.4, we can have an app for listing movies, an app for listing news, an app for payments, an app for user authentication, and so on:
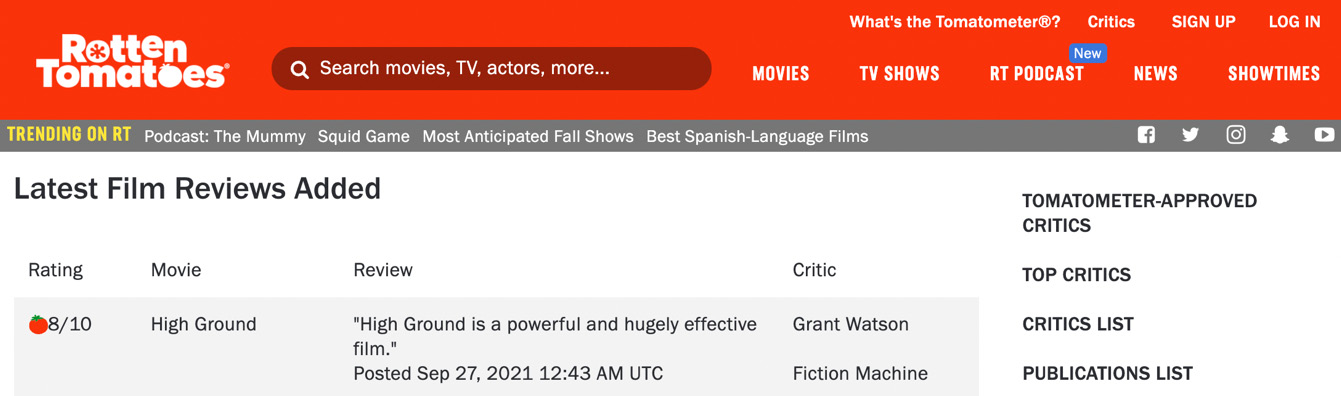
Figure 2.4 – The Rotten Tomatoes website
Apps in Django are like pieces of a website. You can create an entire website with one single app, but it is useful to break it up into different apps, each representing a clear function.
Our movie review site will begin with one app. We will later add more as we progress. To add an app, in the Terminal, stop the server by using Cmd + C. Navigate to the moviereviewsproject folder and run a command like the following in the Terminal:
python3 manage.py startapp <name of app>
In our case, we will add a movie app:
For macOS, run the following command:
python3 manage.py startapp movie
For Windows, run the following command:
python manage.py startapp movie
A new folder, movie, will be added to the project. As we progress in the book, we will explain the files that are inside the folder.
Although our new app exists in our Django project, Django doesn't recognize it till we explicitly add it. To do so, we need to specify it in settings.py. So, go to /moviereviews/settings.py, under INSTALLED_APPS, and you will see six built-in apps already there.
Add the app name, as highlighted in the following (this should be done whenever a new app is created):
…
INSTALLED_APPS = [
    'django.contrib.admin',
    'django.contrib.auth',
    'django.contrib.contenttypes',
    'django.contrib.sessions',
    'django.contrib.messages',
    'django.contrib.staticfiles',
    'movie',
]
…
Back in the Terminal, run the server:
For macOS, run with the following:
python3 manage.py runserver
For Windows, run with the following:
python manage.py runserver
The server should run without issues. We will learn more about apps throughout the course of this book.
Currently, you may notice a message in the Terminal when you run the server, as follows:
"You have 18 unapplied migration(s). Your project may not work properly until you apply the migrations for app(s): admin, auth, contenttypes, sessions.
Run 'python manage.py migrate' to apply them."
We will see how to address this problem later. But for now, remember that we can have one or more apps inside a project.
Summary
In this chapter, we discussed the Django project structure. We analyzed some of the most important project files and their functionalities. We saw how a web project can be composed of several applications, and we learned how to create a Django app. In the next chapter, we will see how to manage Django routes to provide the project with custom pages. And in upcoming chapters, we will see how the Django architecture model-view-template fits inside the Django project structure.