


As children, we learn many useful skills by playing games. We learn coordination, strategy, and memory skills. These are all skills we take with us throughout our lives. The perfect place to start is a traditional childhood game.
In this chapter, we cover the following topics:
Scenes versus layers
Sprites and sprite sheets
Loading sequential files
Random playfield generation
Touch handlers
Using actions
Basic matching strategies
Scoring
Tracking lives
Game over conditions
SimpleSoundEngine
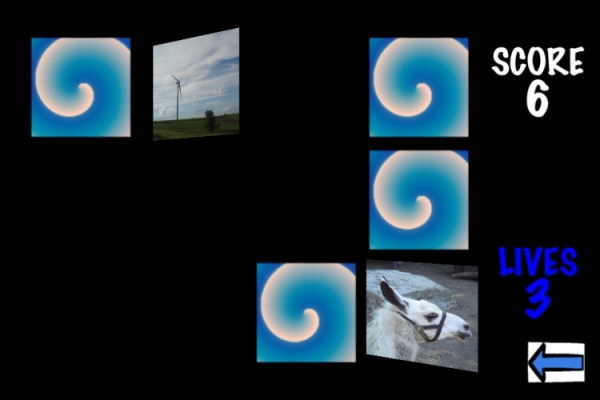
We will begin with classic memory game. Not just any memory game – the memory game that is the source of joy and frustration of children everywhere. In case you've never been exposed to this game (really?), the gameplay is simple. The playing field is a set of tiles with pretty pictures on the front, and a generic back image. You turn over two tiles to see if you made a match. If not, you turn them back over. Pick another pair of tiles and see if they match. Repeat this till all the tiles are matched. Let's take a look at the finished game:

Our memory game needs to be flexible enough to allow different skill levels in the game. We will create different skill levels by varying the number of memory tiles on the board. If there are four tiles (two each of two designs), that's pretty easy. Creating a 4 x 5 grid of tiles is a lot more challenging (20 tiles, 10 designs). We will build a single project that will handle these variations dynamically.
Our game will be a little different from the traditional version in two ways: it is single player only, and we will add a way to lose the game, to make it more exciting. We'll go into detail on that aspect later.
We'll start building the project from the default cocos2d v2.x - cocos2d iOS template. Once the project is created, we first remove the HelloWorldLayer.h/.m files. HelloWorld is a good starting point for learning the code structure, but we don't really want (or need) this boilerplate class for anything
(don't forget to remove the #import "HelloWorldLayer.h" at the top of the
IntroLayer.m class). For now we'll leave the reference in the bottom of the IntroLayer.m's makeTransition class.
One of the most commonly used classes in the cocos2d framework is probably the CCLayer. A CCLayer is the object that is (usually) represented on the screen, and acts as our "canvas" for our game. We use the
CCLayer object as a basis, and then create subclasses of it to add our own game code.
There is another often-used class, the CCScene class. A
CCScene class can be thought of as a "container" for CCLayer objects. A
CCScene object is rarely used for much more than adding CCLayers as children. A good comparison is like the creation of cartoons before the age of computers. Each scene was assembled from a stack of transparent plastic sheets, each with a different part of the scene on it: each main character would have their own layer, another for the background, another for each different element of the scene. Those plastic sheets are the equivalent of
a CCLayer objects, and the CCScene class is where these are stacked up to display on screen.
We will start with a basic
CCLayer subclass, MTMenuLayer. We create a title, and a basic menu. We need to pay attention to how we call the MTPlayfieldScene
class (our main game screen) from the menu.
Filename: MTMenuLayer.m
-(void) startGameEasy {
    [[CCDirector sharedDirector] replaceScene:
     [MTPlayfieldScene sceneWithRows:2 andColumns:2]];
}

-(void) startGameMedium {
    [[CCDirector sharedDirector] replaceScene:
     [MTPlayfieldScene sceneWithRows:3 andColumns:4]];
}

-(void) startGameHard {
    [[CCDirector sharedDirector] replaceScene:
     [MTPlayfieldScene sceneWithRows:4 andColumns:5]];
}
You will notice that the
startGameXXX methods are calling a custom constructor for the scene, rather than the normal [MyLayer scene] that is commonly used. We will explain the
sceneWithRows:andColumns: method shortly.
This book will not include the complete code within the text. Portions that aren't interesting for the discussion will be omitted.
Tip
Downloading the example code
You can download the example code files for all Packt books you have purchased from your account at http://www.packtpub.com. If you purchased this book elsewhere, you can visit http://www.packtpub.com/support and register to have the files
e-mailed directly to you.
Oh, you noticed? The boilerplate cocos2d template includes a class method +(id) scene inside the layer (in HelloWorldLayer). While this approach works, it can lead to confusion as we build more complex scenes with multiple layers. Using the template-based approach may seem odd when you call a method that
takes a CCScene object as a parameter, yet you pass it a value like [MySpecialLayer scene]. So are you referencing a CCScene or CCLayer object? It makes a lot more logical sense to us that you would, in this example, pass a value like [MySpecialScene scene]. It is less confusing to pass a scene object when a CCScene is requested. A CCScene object is a higher-level container that was designed to contain CCLayer objects, so why not keep it as its own class? Let's go ahead and examine our approach:
Filename: MTMenuScene.h
#import <Foundation/Foundation.h>
#import "cocos2d.h"
#import "MTMenuLayer.h"

@interface MTMenuScene : CCScene {
}

+(id)scene;

@end
Filename: MTMenuScene.m
#import "MTMenuScene.h"

@implementation MTMenuScene

+(id)scene {
    return( [ [ [ self alloc ] init ] autorelease ] );
}

-(id) init
{
  if( (self=[super init])) {
        MTMenuLayer *layer = [MTMenuLayer node];
        [self addChild: layer];
  }
  return self;
}

@end
Here we have followed the convention that the scene method returns an
autoreleased object. We do not explicitly call alloc on it (when we instantiate the class), so we don't "own" the object.
Now we can go back to the IntroLayer.m file, and change the
makeTransition method to point to our new menu scene:
-(void) makeTransition:(ccTime)dt
{
  [[CCDirector sharedDirector] replaceScene:
     [CCTransitionFade transitionWithDuration:1.0
        scene:[MTMenuScene scene] withColor:ccWHITE]];
}
We also need to make sure we are importing the
MTMenuScene.h file in the AppDelegate.m file. Now that our menu is complete, we can concentrate on the game itself.
Note
It is important to note that this design of using CCScene as a separate class in the structure is not universally adopted. Many people choose to follow the same approach as the templates. Both ways will work, but we are of the "camp" that strongly believes these should kept separate, as we have done here. Both ways are perfectly valid coding practice, and you are free to structure your code in other way.
Next, we will add a CCScene class to drive our main game screen, here named MTPlayfieldScene. Much of this looks the same as the
MTMenuScene class we defined earlier, except here we define a method
sceneWithRows:andColumns: instead of the simpler scene method we used in the previous code.
Filename: MTPlayfieldScene.m
+(id) sceneWithRows:(NSInteger)numRows
         andColumns:(NSInteger)numCols {
  return [[[self alloc] sceneWithRows:numRows
                             andColumns:numCols]
                                    autorelease];
}

-(id) sceneWithRows:(NSInteger)numRows
         andColumns:(NSInteger)numCols {

  if( (self=[super init])) {
        // Create an instance of the MTPlayfieldLayer
        MTPlayfieldLayer *layer = [MTPlayfieldLayer
                                   layerWithRows:numRows
                                   andColumns:numCols];
        [self addChild: layer];
  }
  return self;
}
Here we have the custom sceneWithRows:andColumns: method we referenced in the MTMenuLayer earlier. The class method handles the alloc and init methods, and identifies it as an autoreleased object, so we don't have to worry about releasing it later. The sceneWithRows:andColumns: method passes the rows and columns variables directly to the MTPlayfieldLayer class' custom init method, layerWithRows:andColumns:. This lets us pass the requested values through the scene to the layer, where we can use the values later.
Before we proceed with building the playing field, we need some graphics to use in our game. Our design calls for square images for the tiles, and one image to use for the common back of the tiles. Because we want them to be able to scale to different sizes (for our different skill levels), we need images large enough to look good at the simplest skill level, which is a two by two grid. Unless your goal is the "chunky pixel" look, you never want to scale images up. Based on the screen size, we want our tiles to be 150 points wide and 150 points high. Since we want to use better graphics on iPhone (and iPod Touch) Retina Display devices, our -hd version of the graphics will need to be 300 pixels by 300 pixels.
Tip
Points are the easiest way to use cocos2d effectively. On an older iOS Device, one point equals one pixel on the screen. On Retina Display devices, one point equals two pixels, which occupy the same physical space on the screen as the one pixel on the non-Retina screens. From a practical perspective, this means that once you provide the -hd graphics, cocos2d will treat your Retina and non-Retina layouts identically, with no extra layout code. You can do things in pixels if you really want to, but we wouldn't recommend making a habit of it.
For this game, we will be using a variety of photos. There was some amount of manipulation needed to arrive at the proper aspect ratio and size. This is a great place to make use of Automator that is part of Mac OS X. There is an Automator script in the source code for this chapter inside a folder called Helpers. When you run it, it will prompt for a folder of images. Once selected, it will create a folder on your desktop called ch1_tiles, and it will contain sequentially numbered images (that is tile1.png, tile2.png, and so on), with each image being exactly 300 pixels by 300 pixels.
Two other images will be needed to build the game: backButton.png will be used for navigation and tileback.png will be used as the image for the back of the tiles when they are face down.
Sprite sheets are one of the foundations of any effective cocos2d game. Compiling all of your sprites into sprite sheets lets cocos2d load fewer files as well as giving you the ability to use a batch node. We won't delve into the "under the hood" details of the
CCSpriteBatchNode class here except at a high level. When you load a sprite sheet into a batch node, it acts as a "parent" for all the sprites on it. When you use a batch node, the calls to draw the sprites on the screen are batched together, which gives a performance boost. This batch drawing allows the system to draw 100 sprites with about the same efficiency (and speed) as drawing one sprite. The bottom line is batch nodes allow you to draw a lot more on-screen without slowing your game down.
There are two files needed for a sprite sheet: the texture (image file) and the plist file. We don't even want to think about attempting to hand-build the sprite sheet. Fortunately, there are a number of very good tools that were built for this. The most established sprite sheet tools in the cocos2d community are TexturePacker (http://www.texturepacker.com) and Zwoptex (http://zwopple.com/zwoptex), although there are a number of newer apps that are also available. Which tool you use is a matter of personal preference. Regardless of the tool, you will need to create both the standard and -hd versions of the images. (Most current tools have built-in options to aid in this process.)
No matter which tool is used, the desired result is four files: memorysheet.png, memorysheet.plist, memorysheet-hd.png, and memorysheet-hd.plist. The -hd files include the 300 x 300 images for the iPhone Retina Display, and the others include the 150 x 150 pixel images for non-Retina iPhone Displays. We also include the backButton.png and tileback.png files in appropriate sizing in both sprite sheets as well. Let's take a look at the final sprite sheet we will use for this game:

Now we're ready to get to the playfield layer itself. We know we need to keep track of the size of the game screen, how big each tile should be, how big the game board should be, and how much spacing we need between the tiles when they are laid out in a grid.
In the header, we also have the declaration for the class method initWithRows:andColumns:
that we called in the MTPlayfieldScene class.
Filename: MTPlayfieldLayer.h
#import <Foundation/Foundation.h>
#import "cocos2d.h"
#import "MTMemoryTile.h"
#import "SimpleAudioEngine.h"
#import "MTMenuScene.h"

@interface MTPlayfieldLayer : CCLayer {
    CGSize size; // The window size from CCDirector

    CCSpriteBatchNode *memorysheet;

    CGSize tileSize; // Size (in points) of the tiles

    NSMutableArray *tilesAvailable;
    NSMutableArray *tilesInPlay;
    NSMutableArray *tilesSelected;

    CCSprite *backButton;

    NSInteger maxTiles;

    float boardWidth; // Max width of the game board
    float boardHeight; // Max height of the game board

    NSInteger boardRows; // Total rows in the grid
    NSInteger boardColumns; // Total columns in the grid

    NSInteger boardOffsetX; // Offset from the left
    NSInteger boardOffsetY; // Offset from the bottom
    NSInteger padWidth; // Space between tiles
    NSInteger padHeight; // Space between tiles

    NSInteger playerScore; // Current score value
    CCLabelTTF *playerScoreDisplay; // Score label

    NSInteger livesRemaining; // Lives value
    CCLabelTTF *livesRemainingDisplay; // Lives label
    BOOL isGameOver;
}

+(id) layerWithRows:(NSInteger)numRows
         andColumns:(NSInteger)numCols;

@end
One item to point out in the header is the
CGSize size variable. This is a convenience variable we use to avoid repetitive typing. The name size is an abbreviation for winSize, which is a value that the CCDirector class will provide for you that identifies the size of the screen, in points. You can read the value from the CCDirector every time you use it, but doing so will make your code lines a bit longer. Our approach will work fine, as long as we do not support both portrait and landscape modes in the same layer. If we do allow both orientations, then the value we have cached in the size variable will be incorrect. Since our app only allows
LandscapeLeft and
LandscapeRight orientations, the size is identical in both orientations, so the size will be stable for our game.
In the MTPlayfieldLayer.m file, we
implement our custom layerWithRows:andColumns: and initWithRows:andColumns: methods as follows:
Filename: MTPlayfieldLayer.m
+(id) layerWithRows:(NSInteger)numRows
         andColumns:(NSInteger)numCols {
  return [[[self alloc] initWithRows:numRows
                    andColumns:numCols] autorelease];
}

-(id) initWithRows:(NSInteger)numRows
        andColumns:(NSInteger)numCols {
    if (self == [super init]) {

        self.isTouchEnabled = YES;

        // Get the window size from the CCDirector
        size = [[CCDirector sharedDirector] winSize];

        // Preload the sound effects
        [self preloadEffects];

        // make sure we've loaded the spritesheets
        [[CCSpriteFrameCache sharedSpriteFrameCache]
         addSpriteFramesWithFile:@"memorysheet.plist"];
        memorysheet = [CCSpriteBatchNode
                batchNodeWithFile:@"memorysheet.png"];

        // Add the batch node to the layer
        [self addChild:memorysheet];

        // Add the back Button to the bottom right corner
        backButton = [CCSprite spriteWithSpriteFrameName:
                      @"backbutton.png"];
        [backButton setAnchorPoint:ccp(1,0)];
        [backButton setPosition:ccp(size.width - 10, 10)];
        [memorysheet addChild:backButton];

        // Maximum size of the actual playing field
        boardWidth = 400;
        boardHeight = 320;

        // Set the board rows and columns
        boardRows = numRows;
        boardColumns = numCols;

        // If the total number of card positions is
        // not even, remove one row
        // This against an impossible board
        if ( (boardRows * boardColumns) % 2 ) {
            boardRows--;
        }

        // Set the number of images to choose from
        // We need 2 of each, so we halve the total tiles
        maxTiles = (boardRows * boardColumns) / 2;
        // Set up the padding between the tiles
        padWidth = 10;
        padHeight = 10;

        // We set the desired tile size
        float tileWidth = ((boardWidth -
                            (boardColumns * padWidth))
                           / boardColumns) - padWidth;
        float tileHeight = ((boardHeight -
                             (boardRows * padHeight))
                            / boardRows) - padHeight;

        // We force the tiles to be square
        if (tileWidth > tileHeight) {
            tileWidth = tileHeight;
        } else {
            tileHeight = tileWidth;
        }

        // Store the tileSize so we can use it later
        tileSize = CGSizeMake(tileWidth, tileHeight);

        // Set the offset from the edge
        boardOffsetX = (boardWidth - ((tileSize.width +
                        padWidth) * boardColumns)) / 2;
        boardOffsetY = (boardHeight - ((tileSize.height+
                        padHeight) * boardRows)) / 2;

        // Set the score to zero
        playerScore = 0;

        // Initialize the arrays

        // Populate the tilesAvailable array
        [self acquireMemoryTiles];

        // Generate the actual playfield on-screen
        [self generateTileGrid];

        // Calculate the number of lives left
        [self calculateLivesRemaining];

        // We create the score and lives display here
        [self generateScoreAndLivesDisplay];
    }
  return self;
}
The class method
layerWithRows:andColumns: is the method we saw in the MTPlayfieldScene class earlier. The class method calls the alloc and
initWithRows: andColumns: methods, and then wraps it all in an autorelease call since it is a convenience method. The instance method initWithRows:AndColumns: (called by the class method) sets up a few of the variables we established in the header, including the assignment of our passed
numRows and
numColumns parameters into the instance variables boardRows and boardColumns.
Memory games are traditionally played with a square or rectangular layout. They also need an even number of tiles in the game, since there
will be two of each type of tile. Because we are allowing flexible parameters for the number of rows and the number of columns, there are certain combinations that will not work. Requesting five rows and five columns means we will have 25 tiles on the board, which is impossible to win. To protect our game from these invalid values, we multiply the boardRows times the boardColumns. If the result is not even (using the % 2 check), then we remove one boardRow from the game. From the prior example, if we requested a five by five board (resulting in 25 tiles), the code would alter it to a four by five grid, which has 20 tiles.
We also set the tileSize value here, based on an even spacing of the tiles, along with the extra pad space we will be using between the tiles. Because we need square tiles, there is also the additional check to force the tiles to be square if the source images are not. This will distort the images, but it won't disrupt the game mechanics. Additionally, the boardOffsetX
and
boardOffsetY variables simply ensure the board will be nicely centered in the available board space.
We will need several arrays in the game to help track the tiles. The first,
tilesAvailable, will be used in the loading and building of the playfield. The second,
tilesInPlay, will contain all of the tiles that have not yet been matched. The third,
tilesSelected, will be used for the match detection methods. Since we are handling a relatively small number of tiles, using this multiple array structure will work fine for our purposes without any performance concerns. Let's add the code for the arrays now:
Filename: MTPlayfieldLayer.h
(already in variable declarations)
    NSMutableArray *tilesAvailable;
    NSMutableArray *tilesInPlay;
    NSMutableArray *tilesSelected;
Filename: MTPlayfieldLayer.m
(initWithRows, add after "Initialize the arrays")
        tilesAvailable = [[NSMutableArray alloc]
                          initWithCapacity:maxTiles];
        tilesInPlay = [[NSMutableArray alloc]
                       initWithCapacity:maxTiles];
        tilesSelected = [[NSMutableArray alloc]
                         initWithCapacity:2]; MTPlayfieldLayer.m:
- (void) dealloc
{
    // Release of the arrays
    [tilesAvailable release];
    [tilesInPlay release];
    [tilesSelected release];

  [super dealloc];
 }
Here we established the three
NSMutableArray arrays in the header as variables, instantiated them in the initWithRows:andColumns: method, and added them to a new dealloc method. The
dealloc method releases the three arrays. The
[super dealloc] call is always required, and it should be the last line of the dealloc method. This call to
super dealloc tells the parent class of the current class to do whatever it needs to clean up. This is important to call because our current class doesn't have to worry about the details of any clean up that is done by the parent CCLayer class.
Now we need to define the class for the tiles themselves. We have a few variables we need to track for the tiles and we will use the MTMemoryTile class to handle some of the touch detection and tile animation.
For this, we will be subclassing CCSprite. This will allow
us to still treat it like a CCSprite, but we will enhance it with other methods and properties specific to the tile.
Filename: MTMemoryTile.h
#import <Foundation/Foundation.h>
#import "cocos2d.h"
#import "SimpleAudioEngine.h"

// MemoryTile is a subclass of CCSprite
@interface MTMemoryTile : CCSprite {
    NSInteger _tileRow;
    NSInteger _tileColumn;

    NSString *_faceSpriteName;

    BOOL isFaceUp;
}

@property (nonatomic, assign) NSInteger tileRow;
@property (nonatomic, assign) NSInteger tileColumn;
@property (nonatomic, assign) BOOL isFaceUp;
@property (nonatomic, retain) NSString *faceSpriteName;

// Exposed methods to interact with the tile
-(void) showFace;
-(void) showBack;
-(void) flipTile;
-(BOOL) containsTouchLocation:(CGPoint)pos;

@end
Here we are declaring the variables with an underscore prefix, but we set the corresponding property without the underscore prefix. This is usually done to avoid accidentally setting the variable value directly, which would bypass the getter and setter methods for the property. This split-naming is finalized in the
@synthesize statements in the .m file, where the property will be set to the variable. These statements will be of the basic format:
@synthesize propertyName = _variableName;
We're planning ahead with this class, including the headers for three methods that we will use for the tile animation:
flipTile,
showFace, and showBack
. This class will be responsible for handling its own animation.
All animation in our game will be done using cocos2d actions. Actions are essentially transformations of some sort that can be "run" on most types of cocos2d objects (for example, CCLayer, CCSprite, and so on). There are quite a number of different actions defined in the framework. Some of the most commonly used are actions such as CCMoveTo (to move an object), CCScaleTo (to change the scale of the object), and CCCallFunc (to call another method). Actions are a "fire and forget" feature. Once you schedule an action, unless you explicitly change the action (such as calling stopAllActions), the actions will continue until complete. This is further extended by "wrapping" several actions together in a CCSequence action,
which allows you to chain several actions together, to be run in the order specified.
We will use CCSequence "chaining" extensively throughout the book. Actions can be run on most cocos2d objects, but they are most commonly called (via the runAction: method) on the CCSprite and CCLayer objects.
Filename: MTMemoryTile.m
@implementation MTMemoryTile

@synthesize tileRow = _tileRow;
@synthesize tileColumn = _tileColumn;
@synthesize faceSpriteName = _faceSpriteName;
@synthesize isFaceUp;

-(void) dealloc {
    // We set this to nil to let the string go away
    self.faceSpriteName = nil;

    [super dealloc];
}

-(void) showFace {
    // Instantly swap the texture used for this tile
    // to the faceSpriteName
    [self setDisplayFrame:[[CCSpriteFrameCache
                            sharedSpriteFrameCache]
                spriteFrameByName:self.faceSpriteName]];

    self.isFaceUp = YES;
}

-(void) showBack {
    // Instantly swap the texture to the back image
    [self setDisplayFrame:[[CCSpriteFrameCache
                            sharedSpriteFrameCache]
                spriteFrameByName:@"tileback.png"]];

    self.isFaceUp = NO;
}

-(void) changeTile {
    // This is called in the middle of the flipTile
    // method to change the tile image while the tile is
    // "on edge", so the player doesn't see the switch
    if (isFaceUp) {
        [self showBack];
    } else {
        [self showFace];
    }
}

-(void) flipTile {
    // This method uses the CCOrbitCamera to spin the
    // view of this sprite so we simulate a tile flip

    // Duration is how long the total flip will last
    float duration = 0.25f;

    CCOrbitCamera *rotateToEdge = [CCOrbitCamera
                actionWithDuration:duration/2 radius:1
                deltaRadius:0 angleZ:0 deltaAngleZ:90
                angleX:0 deltaAngleX:0];
    CCOrbitCamera *rotateFlat = [CCOrbitCamera
                actionWithDuration:duration/2 radius:1
                deltaRadius:0 angleZ:270 deltaAngleZ:90
                angleX:0 deltaAngleX:0];
    [self runAction:[CCSequence actions: rotateToEdge,
                      [CCCallFunc actionWithTarget:self
                      selector:@selector(changeTile)],
                      rotateFlat, nil]];

    // Play the sound effect for flipping
    [[SimpleAudioEngine sharedEngine] playEffect:
                                    SND_TILE_FLIP];
}

- (BOOL)containsTouchLocation:(CGPoint)pos
{
    // This is called from the CCLayer to let the object
    // answer if it was touched or not
  return CGRectContainsPoint(self.boundingBox, pos);
}
@end
We will not be using a touch handler inside this class, since we will need to handle the matching logic in the main layer anyway. Instead, we expose the containsTouchLocation method
, so the layer can "ask" the individual tiles if they were touched. This uses the tile's boundingBox, which is baked-in functionality in cocos2d. A
boundingBox is a CGRect representing the smallest rectangle surrounding the sprite image itself.
We also see the
showFace and
showBack methods. These methods will set a new display frame for the tile. In order to retain the name of the sprite frame that is used for the face of this tile, we use the faceSpriteName variable to hold the sprite frame name (which is also the original image filename). We don't need to keep a variable for the tile back, since all tiles will be using the same image, so we can safely hardcode that name.
The
flipTile method makes use of the CCOrbitCamera to deform the tile by rotating the "camera" around the sprite image. This is a bit of visual trickery and isn't a perfect flip (some extra deformation occurs nearer the edges of the screen), but it gives a fairly decent animation without a lot of heavy coding or prerendered animations. Here we use a CCSequence action to queue three actions. The first action, rotateToEdge, will rotate the tile on its axis until it is edge-wise to the screen. The second calls out to the
changeFace method, which will do an instant swap between the front and back of the tile. The third action, rotateFlat, completes the rotation back to the original "flat" orientation. The same flipTile method can be used for flipping to the front and flipping to the back, because the isFaceUp Boolean being used allows the
changeTile method to know whether front or back should be visible. Let's look at following screenshot, which shows the tile flips, in mid-flip:
Tip
Downloading the color images of this book
We also provide you a PDF file that has color images of the screenshots/diagrams used in this book. The color images will help you better understand the changes in the output.
You can download this file from http://www.packtpub.com/sites/default/files/downloads/9007OS_ColoredImages.pdf
Now we have our tile class, we're ready to load some tiles into the
tilesAvailable array:
Filename: MTPlayfieldLayer.m
-(void) acquireMemoryTiles {
    // This method will create and load the MemoryTiles
    // into the tilesAvailable array

    // We assume the tiles all use standard names
    for (int cnt = 1; cnt <= maxTiles; cnt++) {
        // Load the tile into the array
        // We loop so we add each tile in the array twice
        // This gives us a matched pair of each tile
        for (NSInteger tileNo = 1; tileNo <= 2; tileNo++) {
            // Generate the tile image name
            NSString *imageName = [NSString
                    stringWithFormat:@"tile%i.png", cnt];

            //Create a new MemoryTile with this image
            MTMemoryTile *newTile = [MTMemoryTile
                    spriteWithSpriteFrameName:imageName];

            // We capture the image name for the card face
            [newTile setFaceSpriteName:imageName];

            // We want the tiles to start face down
            [newTile showBack];

            // Add the MemoryTile to the array
            [tilesAvailable addObject:newTile];
        }
    }
}
Here we loop through all the unique tiles we need (up to the value of maxTiles, which is set to half of the available spaces on the board). Inside that loop, we set up another for loop that counts to 2. We do this because we need two copies of each tile to assemble our board. Since we have established that our tiles are named as tile#.png, we create an NSString with the incremental name, and create an MTMemoryTile object with a standard CCSprite constructor. As we said earlier, we want to keep a copy of the
image name for the showFace method, so we set the
faceSpriteName variable to that value. It wouldn't be much of a game if we had all the tiles face up, so we call showBack, so the tiles are face down before they are used on screen. Finally, we add the tile we just created to the tilesAvailable array. Once this method completes, the
tilesAvailable array will be the only retain we have on the tiles.
Now we need to draw a randomly selected tile in every position to make a nice grid. First we need to figure out where each tile should be positioned. If we were using a fixed number of tiles, we could use absolute positioning. To account for the dynamic number of tiles, we add a "helper" method to determine positioning as follows:
Filename: MTPlayfieldLayer.m
-(CGPoint) tilePosforRow:(NSInteger)rowNum
               andColumn:(NSInteger)colNum {
    // Generate the coordinates for each tile
    float newX = boardOffsetX +
            (tileSize.width + padWidth) * (colNum - .5);
    float newY = boardOffsetY +
            (tileSize.height + padHeight) * (rowNum - .5);

    return ccp(newX, newY);
}
To calculate the x position, we determine the total footprint of a single tile and the associated padding. We multiply this times the column number minus one half. We add this result to the board offset we calculated earlier. Why do we subtract one half? This is because our positions are based on the complete size of the tile and the padding. What we need is the center point of the tile, because that is our
anchorPoint (that is the point on which the tile will pivot or rotate.). We need this anchor point left at the center (the default anchorPoint for a
CCSprite object, as it happens), because when we flip the tiles, the flip will be based on this anchorPoint, so we want them to flip around the middle of the tile. Now that we have our tile positioning established,
we can go ahead and start building the tiles on the screen.
Filename: MTPlayfieldLayer.m
-(void) generateTileGrid {
    // This method takes the tilesAvailable array,
    // and deals the tiles out to the board randomly
    // Tiles used will be moved to the tilesInPlay array

    // Loop through all the positions on the board
    for (NSInteger newRow = 1; newRow <= boardRows; newRow++) {
        for (NSInteger newCol = 1; newCol <= boardColumns;
           newCol++) {

            // We randomize each card slot
            NSInteger rndPick = (NSInteger)arc4random() %
                                ([tilesAvailable count]);

            // Grab the MemoryTile from the array
            MTMemoryTile *newTile = [tilesAvailable
                                objectAtIndex:rndPick];

            // Let the card "know" where it is
            [newTile setTileRow:newRow];
            [newTile setTileColumn:newCol];

            // Scale the tile to size
            float tileScaleX = tileSize.width /
                            newTile.contentSize.width;

            // We scale by X only (tiles are square)
            [newTile setScale:tileScaleX];

            // Set the positioning for the tile
            [newTile setPosition:[self tilePosforRow:newRow
                                        andColumn:newCol]];

            // Add the tile as a child of our batch node
            [self addChild:newTile];

            // Since we don't want to re-use this tile,
            // we remove it from the array
            [tilesAvailable removeObjectAtIndex:rndPick];

            // We retain the MemoryTile for later access
            [tilesInPlay addObject:newTile];
        }
    }
}
Here we use two nested for loops to iterate through all rows and all columns. We use arc4random()
to select a random tile from the tilesAvailable array and build a new
MTMemoryTile object that references the tile selected. After setting the MTMemoryTile object's variables for which row and column it represents, we set the scale factor for the tile. Since our images are bigger than needed for most game types, we divide the desired tileSize by the actual contentSize of the image. When applied, this will correctly scale our image to the desired display size. We only use the x (width) value, since we already enforced in the initWithRows:andColumns: method that the images will always be square.
We use the
tilePosforRow method to determine where it should be on the layer, and we add it. After adding it to the layer, we also add the new tile to the tilesInPlay array and remove it from the
tilesAvailable array. By removing it from tilesAvailable, we ensure that we cannot select the same tile twice. After all iterations of the nested loops, the tilesAvailable array should be empty, and the board should be fully populated with tiles.
Now that we have our randomized grid of tiles on the board, we need to add the touch handler to let us interact with them. Since our game mechanics are pretty simple, we will use just the
ccTouchesEnded method as follows:
Filename: MTPlayfieldLayer.m
-(void) ccTouchesEnded:(NSSet *)touches
             withEvent:(UIEvent *)event {

    // If game over, go back to the main menu on any touch
    if (isGameOver) {
        [[CCDirector sharedDirector]
                    replaceScene:[MTMenuScene node]];
    }

    UITouch *touch = [touches anyObject];

    CGPoint location = [touch locationInView: [touch view]];
    CGPoint convLoc = [[CCDirector sharedDirector]
                            convertToGL:location];

    // If the back button was pressed, we exit
    if (CGRectContainsPoint([backButton boundingBox],
                            convLoc)) {
        [[CCDirector sharedDirector]
                replaceScene:[MTMenuScene node]];
    }

    // If we have 2 tiles face up, do not respond
    if ([tilesSelected count] == 2) {
        return;
    } else {
        // Iterate through tilesInPlay to see which tile
        // was touched
        for (MTMemoryTile *aTile in tilesInPlay) {
            if ([aTile containsTouchLocation:convLoc] &&
                [aTile isFaceUp] == NO) {
                // Flip the tile
                [aTile flipTile];
                // Hold the tile in a buffer array
                [tilesSelected addObject:aTile];

                // Call the score/fail check,
                // if it is the second tile
                if ([tilesSelected count] == 2) {
                    // We delay so player can see cards
                   [self scheduleOnce:@selector(checkForMatch)
                                 delay:1.0];
                   break;
                }

            }
        }
    }
}
In the touch handler, the touches are provided in an NSSet. However, since we do not have multiple touches enabled, we can be sure we will only be getting a single touch that we care about. Why is there no multi-touch in this game? Multiple simultaneous touches would cause confusion for the player and really complicate the code to determine which tiles should be checked for a match. So by not enabling multiple touches, we save ourselves extra work, and reduce the confusion for the flow of the game.
The first section of the method checks to see if we have reached a game over state (as represented by a YES value in the
isGameOver variable, any touch after we have reached game over will return the player to the menu screen.
The second section of the method is detecting touches on the back button. The location and convLoc variables together convert the touch into a coordinate in our game screen. We use this location to check if the backButton was touched. If it has been touched, we also exit to the menu screen, regardless of what else is going on in the game.
We then check to make sure the
tilesSelected array doesn't have two items in it. The tilesSelected array is with the tiles that have been flipped face up. If there are two tiles already face up, that means the match checking has not yet been resolved. In those cases, we don't want to let the user keep flipping over tiles, so we simply return without responding to the touch. This will effectively throw away the touch, so we can safely move on with our game.
If we don't have two tiles selected already, then we iterate through all of the tiles in the tilesInPlay array and poll it to determine: a) are you being touched? and b) are you face down. If both of these are true, we send the message to the touched tile to flip over (flipTile), and we add the tile to the tilesSelected array. If this was our second tile added to the tilesSelected array, we will call the
checkForMatch method after a delay of one second. This delay gives us two benefits: it allows the player to see the potential match they just made, and it gives plenty of time to finish iterating through the
tilesInPlay array so we don't risk mutating the array.
Mutating an array means you tried to change it while it was being evaluated. If we skipped the delay, the checkForMatch method would cause this mutation (and crash) because it can remove tiles from the tilesInPlay array. Go ahead and try it yourself. Actually seeing the error messages when you know what you did wrong will help you know where to look later, when you cause a crash without knowing what you did wrong.
Since we have done quite a bit of preparation for the rest of the mechanics of the game, it might come as a surprise that the logic to check for matching tiles is very simple. Since we stored the name of the image used for each tile inside the MTMemoryTile object, it is a matter of comparing the two and see if they are the same.
Filename: MTPlayfieldLayer.m
-(void) checkForMatch {
    // Get the MemoryTiles for this comparison
    MTMemoryTile *tileA = [tilesSelected objectAtIndex:0];
    MTMemoryTile *tileB = [tilesSelected objectAtIndex:1];

    // See if the two tiles matched
    if ([tileA.faceSpriteName
            isEqualToString:tileB.faceSpriteName]) {
        // We remove the matching tiles
        [self removeMemoryTile:tileA];
        [self removeMemoryTile:tileB];
    } else {
        // No match, flip the tiles back
        [tileA flipTile];
        [tileB flipTile];
    }

    // Remove the tiles from tilesSelected
    [tilesSelected removeAllObjects];
}

-(void) removeMemoryTile:(MTMemoryTile*)thisTile {
    [thisTile removeFromParentAndCleanup:YES];
}
If you recall, in the
ccTouchesEnded method we stored the face up tile in the tilesSelected array. Our logic only allows there to be two objects in the tilesSelected array, and the
checkForMatch method is called only when there are two objects in that array. Because of those restrictions, we can safely assume that there are objects in that array at index 0 and index 1. (We create references to them as tileA and tileB to make the code simpler.)
It is trivial at this point to call
isEqualToString on the
faceSpriteName variable of tileA and pass it the value of the faceSpriteName variable from tileB. If these strings are equal, we have a match. When comparing strings, you cannot use == operations, you must use isEqualToString:.
When a match is found, we call the
removeMemoryTile method that simply removes the tile passed. If we don't have a match, we send the message to each tile to flip itself back over. Since we have resolved the matching, either by making a match or by turning the tiles back over, we then remove the tiles from the
tilesSelected array so we have an empty array to hold the next possible match.
The game works well with the development we have covered, but there are a few places where we can add a little more visual flair and some excitement. Players love having a game that keeps score. They also love animation. There is excitement to be had by having the ability to lose. Let's give the player what they want.
We build the score and lives displays using
CCLabelTTF labels, with the variables playerScore and livesRemaining as their label contents. These are declared as variables of the layer, so we can easily update them. When we
start animating tiles, it will be useful to know where the score and lives displays are on screen.
There are two main approaches to adding text to the screen:
CCLabelTTF and CCLabelBMFont
. Both have their uses, which we will briefly outline here. CCLabelTTF uses a standard TTF font file. The way it draws the text on the screen is not very efficient and can cause performance issues in some uses. The other approach, CCLabelBMFont, uses a bitmap (image file) of the font and internally uses a batch node to render the text. This means it is highly efficient at drawing, with very little performance concern. Other than the use of a TTF file versus an image file, the way you code for them is very similar. One potential issue with a
BMFont file is that you must have the entire font in a single bitmap. If you are using a large font size, this often causes you to need to leave out some characters that may be needed to support international keyboards. A TTF file does not have this problem. Also, it is common with the CCLabelBMFont approach to have multiple versions of the font if you want to use different font sizes. In this book, we will use CCLabelTTF labels throughout because we do not have any performance (frame rate) concerns with any of these projects.
If we were to have performance issues, we would certainly switch to using CCLabelBMFont instead of CCLabelTTF. We leave it as an exercise for the reader to convert these projects to use the CCLabelBMFont class. (For creation of the bitmaps, an excellent resource is Glyph Designer, available at http://glyphdesigner.71squared.com.)
Filename: MTPlayfieldLayer.m
-(CGPoint) scorePosition {
    return ccp(size.width - 10 - tileSize.width/2,
               (size.height/4) * 3);
}

-(CGPoint) livesPosition {
    return ccp(size.width - 10 - tileSize.width/2,
               size.height/4);
}
Rather than hardcoding the values in multiple places, it is a preferred approach to create helper methods such as scorePosition and livesPosition, which return a CGPoint reference of where those elements are onscreen. Here we see the calculations, which place the score and lives near the left edge of the screen, with the score three quarters of the way up the screen, and the lives one quarter of the way up the screen.
The creation of simple labels is very basic, using the positioning we saw above. To see how the score and lives are created, please consult the accompanying code bundle for this book.
Now we will need a way to score and animate the tiles when the player makes a successful match. When a match is scored, we will fly the tiles to the score, and then have them shrink into the score position until they disappear. Let's see how that works:
Filename: MTPlayfieldLayer.m
-(void) scoreThisMemoryTile:(MTMemoryTile*)aTile {
    // We set a baseline speed for the tile movement
    float tileVelocity = 600.0;

    // We calculate the time needed to move the tile
    CGPoint moveDifference = ccpSub([self scorePosition],
                                    aTile.position);
    float moveDuration = ccpLength(moveDifference) /
                                    tileVelocity;
    // Define the movement actions
    CCMoveTo *move = [CCMoveTo actionWithDuration:
               moveDuration position:[self scorePosition]];
    CCScaleTo *scale = [CCScaleTo actionWithDuration:0.5
                                            scale:0.001];
    CCDelayTime *delay = [CCDelayTime
                          actionWithDuration:0.5];
    CCCallFuncND *remove = [CCCallFuncND
                    actionWithTarget:self
                    selector:@selector(removeMemoryTile:)
                    data:aTile];

    // Run the actions
    [aTile runAction:[CCSequence actions:move, scale,
                      delay, remove, nil]];

    // Play the sound effect
    [[SimpleAudioEngine sharedEngine]
                        playEffect:SND_TILE_SCORE];

    // Remove the tile from the tilesInPlay array
    [tilesInPlay removeObject:aTile];

    // Add 1 to the player's score
    playerScore++;

    // Recalculate the number of lives left
    [self calculateLivesRemaining];
}
Here we leverage the cocos2d actions heavily, using the stock actions of CCMoveTo, CCScaleTo, CCDelayTime, and CCCallFuncND. One aspect of our flying-to-score effect is that we want the tiles to move at a constant rate. If we hardcoded a duration for the CCMoveTo action, the tiles closer to the score would move slowly, and those farther away would move really fast. To achieve a constant rate, we set a desired speed (tileVelocity), then calculate how far away the tile is from the score. We divide these out to arrive at the correct movement duration for this tile. After we initiate the actions, we increment the score by one (playerScore++), and call the
calculateLivesRemaining method (which we will see shortly).
Now that we have the tile animation added, now we should do something more flashy with the score itself.
Filename: MTPlayfieldLayer.m
-(void) animateScoreDisplay {
    // We delay for a second to allow the tiles to get
    // to the scoring position before we animate
    CCDelayTime *firstDelay = [CCDelayTime
                actionWithDuration:1.0];
    CCScaleTo *scaleUp = [CCScaleTo
                actionWithDuration:0.2 scale:2.0];
    CCCallFunc *updateScoreDisplay = [CCCallFunc
                actionWithTarget:self
                selector:@selector(updateScoreDisplay)];
    CCDelayTime *secondDelay = [CCDelayTime
                actionWithDuration:0.2];
    CCScaleTo *scaleDown = [CCScaleTo
                actionWithDuration:0.2 scale:1.0];

    [playerScoreDisplay runAction:[CCSequence actions:
                firstDelay, scaleUp, updateScoreDisplay,
                secondDelay, scaleDown, nil]];
}

-(void) updateScoreDisplay {
    // Change the score display to the new value
    [playerScoreDisplay setString:
     [NSString stringWithFormat:@"%i", playerScore]];

    // Play the "score" sound
    [[SimpleAudioEngine sharedEngine]
                            playEffect:SND_SCORE];
}
We finally settled on scaling the score up, change it to the new value, and scale it back to normal. This is all done with standard cocos2d actions, so we could add in more flair with other effects. A CCRotateTo action might add a nice touch by spinning the score around when it updates. For this game, we will stick to this simpler animation. We leave it as a challenge to the reader to add these types of enhancements for more "visual flair."
Now we come to the point where we decide how the player can win or lose. You win after you have successfully matched all the tiles on the board. Losing is less obvious in a one-player game like this. Our approach is to give the player a number of lives. When you take a turn and fail to match the tiles, you lose a life. Lose all of them, and it's game over. The challenge comes from deciding how many lives the player should have. After testing several approaches, we determined the most exciting way would be to have the number of lives set to half the number of tiles currently on the board. If the board has 20 tiles in play, the player has 10 lives. Once the player makes a successful match, the lives are recalculated based on the new number of tiles in play. This gives some level of excitement as the lives are dwindling, and it encourages the player to think about their moves more carefully.
Filename: MTPlayfieldLayer.m
-(void) animateLivesDisplay {
    // We delay for a second to allow the tiles to flip back
    CCScaleTo *scaleUp = [CCScaleTo
            actionWithDuration:0.2 scale:2.0];
    CCCallFunc *updateLivesDisplay = [CCCallFunc
            actionWithTarget:self
            selector:@selector(updateLivesDisplay)];
    CCCallFunc *resetLivesColor = [CCCallFunc
            actionWithTarget:self
            selector:@selector(resetLivesColor)];
    CCDelayTime *delay = [CCDelayTime
            actionWithDuration:0.2];
    CCScaleTo *scaleDown = [CCScaleTo
            actionWithDuration:0.2 scale:1.0];
    [livesRemainingDisplay runAction:[CCSequence actions:
            scaleUp, updateLivesDisplay, delay, scaleDown,
            resetLivesColor, nil]];
}

-(void) updateLivesDisplayQuiet {
    // Change the lives display without the fanfare
    [livesRemainingDisplay setString:[NSString
            stringWithFormat:@"%i", livesRemaining]];
}

-(void) updateLivesDisplay {
    // Change the lives display to the new value
    [livesRemainingDisplay setString:[NSString
            stringWithFormat:@"%i", livesRemaining]];
    // Change the lives display to red
    [livesRemainingDisplay setColor:ccRED];

    // Play the "wrong" sound
    [[SimpleAudioEngine sharedEngine]
                        playEffect:SND_TILE_WRONG];

    [self checkForGameOver];
}

-(void) calculateLivesRemaining {
    // Lives equal half of the tiles on the board
    livesRemaining = [tilesInPlay count] / 2;
}

-(void) resetLivesColor {
    // Change the Lives counter back to blue
    [livesRemainingDisplay setColor:ccBLUE];
}
The preceding section of code looks very similar to the score methods. We leverage cocos2d actions to animate the lives display, only this time we also turn the text red when the number of lives is reduced, and then change it back to blue at the end of the CCSequence of actions. One item of note here is the
updateLivesDisplayQuiet method. This method is called when the player makes a successful match to let us change the lives to their new value without the "oh-no" fanfare that we use when the player loses a life.
We now have two game over conditions to consider. If livesRemaining is zero, the player loses. If the
tilesInPlay array is empty, the player has won. This feels like a good time to put the code together into a single method to check these conditions.
Filename: MTPlayfieldLayer.m
-(void) checkForGameOver {
    NSString *finalText;
    // Player wins
    if ([tilesInPlay count] == 0) {
        finalText = @"You Win!";
    // Player loses
    } else if (livesRemaining <= 0) {
        finalText = @"You Lose!";
    } else {
        // No game over conditions met
        return;
    }

    // Set the game over flag
    isGameOver = YES;

    // Display the appropriate game over message
    CCLabelTTF *gameOver = [CCLabelTTF
                    labelWithString:finalText
                    fontName:@"Marker Felt" fontSize:60];
    [gameOver setPosition:ccp(size.width/2,size.height/2)];
    [self addChild:gameOver z:50];
}We have added extra flash and flair in the code, but we haven't tied it all together yet. Most of the new code is integrated into the
checkForMatch method, so let's see how that looks with everything integrated:
Filename: MTPlayfieldLayer.m
-(void) checkForMatch {
    // Get the MemoryTiles for this comparison
    MTMemoryTile *tileA = [tilesSelected objectAtIndex:0];
    MTMemoryTile *tileB = [tilesSelected objectAtIndex:1];

    // See if the two tiles matched
    if ([tileA.faceSpriteName
            isEqualToString:tileB.faceSpriteName]) {
        // We start the scoring, lives, and animations
        [self scoreThisMemoryTile:tileA];
        [self scoreThisMemoryTile:tileB];
        [self animateScoreDisplay];
        [self calculateLivesRemaining];
        [self updateLivesDisplayQuiet];
        [self checkForGameOver];

    } else {
        // No match, flip the tiles back
        [tileA flipTile];
        [tileB flipTile];

        // Take off a life and update the display
        livesRemaining--;
        [self animateLivesDisplay];
    }

    // Remove the tiles from tilesSelected
    [tilesSelected removeAllObjects];
}
Now we have a fully functional game, complete with scoring, lives, a way to win and a way to lose. There is only one necessary element still missing.
A major mistake some casual game designers make is to downplay the importance of audio. When you are playing a quiet game without the aid of a computer, there are always subtle sounds. Playing cards give a soft "thwap" sound when playing solitaire. Tokens in board games click as they tap their way around the board. Video games should have these "incidental" sound effects, too. These are the button clicks, the buzzers when something goes wrong, and so forth.
We will be using CocosDenshion, the
audio engine that is bundled with cocos2d. CocosDenshion includes a very easy to use interface appropriately named SimpleAudioEngine. To initialize it, you need to import it into your classes (including the AppDelegate.m file) and add one line near the end of
the application:didFinishLaunchingWithOptions: method (before the return YES; line).
Filename: AppDelegate.m
    // Initialize the SimpleAudioEngine
    [SimpleAudioEngine sharedEngine];
For our implementation, we want to preload all of our sound effects so there is no lag the first time the sound effect is played. We do this with a method that is called from the initWithRows:andColumns: method
of our MTPlayfieldLayer.
Filename: MTPlayfieldLayer.m
-(void) preloadEffects {
    // Preload all of our sound effects
    [[SimpleAudioEngine sharedEngine]
                        preloadEffect:SND_TILE_FLIP];
    [[SimpleAudioEngine sharedEngine]
                        preloadEffect:SND_TILE_SCORE];
    [[SimpleAudioEngine sharedEngine]
                        preloadEffect:SND_TILE_WRONG];
    [[SimpleAudioEngine sharedEngine]
                        preloadEffect:SND_SCORE];
}
The
preloadEffect method of SimpleAudioEngine actually takes an NSString as an argument. We have defined constants to hold the names of the sound files. (These constants are at the top of the MTPlayfieldLayer.m file, above the @implementation statement.)
#define SND_TILE_FLIP @"button.caf"
#define SND_TILE_SCORE @"whoosh.caf"
#define SND_TILE_WRONG @"buzzer.caf"
#define SND_SCORE @"harprun.caf"
Why do we do this? By using #define statements in a single location, we can easily change the sound files we are using in one place, rather than relying on find-and-replace functionality to change the filenames throughout our code. Having done this, anywhere we want to play the button.caf file, we can simply refer to it as SND_TILE_FLIP (no quotes around it), and Xcode takes care of the rest.
We have peppered the code with various playing of these sound effects, but we won't go into detail on where each sound is triggered. When you want to play a sound effect, you can call it with a single line of code, as follows:
    [[SimpleAudioEngine sharedEngine]
                            playEffect:SND_SCORE];
It doesn't get much simpler than that!
We've covered a lot of ground with this memory game. At this point you should be familiar with the methodology we will continue you use throughout the book regarding CCScene and CCLayer organization. We have used a custom init method to make our game engine more flexible. We have also covered effective use of actions, SimpleSoundEngine, a couple ways of handling touches, and some basic game flow intelligence. And this is just the beginning! In the next chapter, we tackle a modern favorite, a Match-3 game. We'll explore a couple ways to solve the match detection problem, and build a fun game along the way.
