


Developing web-based applications can be complex. We have to be able to work with teams of people, who all need to be able to run and work on these projects, and we work with an ever-changing stack of technologies. I know personally I've spent countless hours setting up developers onto new projects in the past, and countless hours wrangling with WAMP and MAMP to switch to a newer or older version of PHP when juggling multiple projects. With everyone in a team working on their own machine, with their own development tools on their own operating systems, it's almost impossible to keep a consistent configuration across all the machines; especially if you have remote workers or freelancers where you can't force IT policies on them.
As projects get more complicated, it's also easier for auxiliary configurations to be forgotten about. Asynchronous workers, message queues, cron jobs; typically, we need to tell the rest of the team about these, and hope someone remembers them when it is time to deploy.
A virtualized development environment can help with this. Instead of having to battle configurations when working on other projects, each project can simply have its own virtualized environment. It can have its own dedicated web server, database server, and the versions of the programming language and other dependencies it needs. Because it is virtualized, it doesn't impact on other projects, just shut it down and boot up the environment for the other project.
With a virtualized environment, the development environments can also mimic the production environment. No more needing to worry if something will work when it gets deployed, if it is being developed on a machine with the exact same software configuration. Even if you deploy on a Linux machine but develop on Windows, your virtualized environment can be Linux, running the same distribution as your production environment.
While a virtualized environment makes things easier, by their nature, they are not the easiest of things to configure and manage themselves. They still need to be configured to work with the project in question, which often involves some level of system administrator skills, and we need to connect to these environments and work with them. They also, by design, are not very portable. You need to export a large image of the virtualized environment and share that with colleagues, and keeping that up-to-date as projects evolve can be cumbersome. Thankfully, there is a tool, which can manage these virtualized environments for us and provide a simple interface to configure them; an interface which involves storing configuration in simple plain text files, which are easy to share with colleagues, keeping everyone up-to-date as the project changes. This tool is Vagrant.
Vagrant (http://www.vagrantup.com/) is a powerful development tool, which lets you manage and support the virtualization of your development environment. Instead of running all your projects locally on your own computer, having to juggle the different requirements and dependencies of each project, Vagrant lets you run each project in its own dedicated virtual environment.
Vagrant provides a command-line interface and a common configuration language, which allows you to easily define and control virtual machines which run on your own systems, but which tightly integrate, allowing you to define how your own machine and the virtual machine interact. This can involve syncing folders such that the project code on your computer, which you edit using your IDE is synced so that it runs on the Vagrant development environment.
Vagrant uses Providers to integrate with the third-party virtualization software, which provides the virtualized machines for our development environment. The default provider is for Oracle's VirtualBox however, there are providers to work with Amazon Web Services and VMware Fusion. The entire configuration is stored in simple plain text files. The Vagrant configuration (Vagrantfile ), Puppet , and Chef manifests are simply written in text files in a Ruby Domain Specific Language. This means we can easily share the configurations and projects with colleagues, using Version Control Systems such as Git or Subversion.
When using Vagrant, the next time you need to go back to a previous project, you don't need to worry about any potential conflicts with changes made to your development environment (for example, if you have upgraded PHP, MySQL, or Apache on your local environment, or within the Vagrant environment for another project). If you bring a new team member into the team, they can be up and running in minutes Vagrant will take care of all the software and services needed to run the project on their machine. If you have one project, which uses one web server such as Apache, and another which uses Nginx, Vagrant lets you run these projects independently.
If your project's production environment involves multiple servers (perhaps one for the Web and one for the database), Vagrant lets you emulate that with separate virtual servers on your machine.
Your development environment can mimic the production environment.
Integrated provisioning tools such as Puppet and Chef allow you to store configuration in a standard format, which can also be used to update production environments.
Each project is separate in its own virtualized environment, so issues as a result of configuration and version differences for dependencies on different projects are things of the past.
New team members can be onboarded to new projects as easy as
git clone && vagrant up."It works on my machine" is an excuse of the past.
The headache of linking code that you write on your own machine to your virtualized development environment, is taken care of either through custom-synced folders or the default-synced folder (everything in your project's folder gets mapped to Vagrant).
The environment can act as if it was your local machine and can map the web server port (80) of your development machine to your development environment if you wish.
You can let colleagues view your own development environment, as well as easily share the development environment.
Your local WAMP or MAMP installations will be gathering dust!
In this chapter, we will:
Discuss the requirements and prerequisites for Vagrant
Install Oracle's VirtualBox
Install Vagrant
Verify if Vagrant was successfully installed
Once we have Vagrant and its prerequisites on our machine, we can then look at using it for our first project.
Vagrant can be installed on Linux, Windows, and Mac OS X, and although it uses Ruby, the package includes an embedded Ruby interpreter. The only other requirement is a virtualization tool such as Oracle's VirtualBox. The Oracle's VirtualBox provider is available for free, and is included built-in with Vagrant, so we will use and install VirtualBox in order to use Vagrant during the course of this book. Other providers are available, including one for VMware Fusion or Workstation, which is available as a commercial add-on (http://www.vagrantup.com/vmware).
Now that we know the software, which we need in order to get Vagrant running on our machine, let's start installing VirtualBox (so that we can use Vagrant's built-in VirtualBox provider) and Vagrant itself.
VirtualBox (https://www.virtualbox.org/) is an open source tool sponsored by Oracle, which lets you create, manage, and use virtual machines on your own computer.
VirtualBox is a graphical program, which lets you visually create virtual machines, allocate resources, load external media such as operating system CDs, and view the screen of the virtual machine. Vagrant wraps on top of this and provides an intuitive command-line interface along with integration of additional tools (including provisioners such as Puppet and Chef), so that we don't need to worry about how VirtualBox works or what to do with it; Vagrant takes care of it for us.
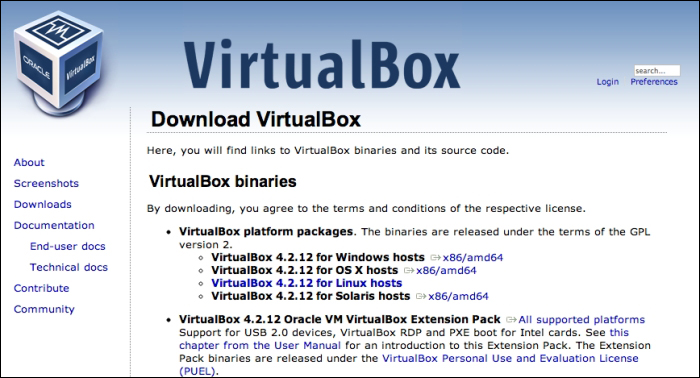
The first stage is to download the installer from the VirtualBox downloads page (https://www.virtualbox.org/wiki/Downloads). We need to select the download, which relates to our computer (OS X, Windows, Linux, or Solaris).
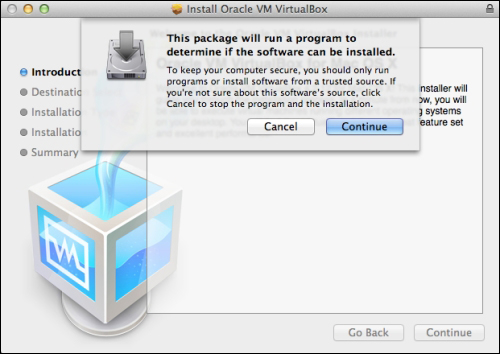
Once downloaded, let's open it up and run the installer. On OS X, this involves clicking on the VirtualBox.pkg icon that is shown on the screen. On Windows, simply opening the installer opens the installation wizard.

Before the installer runs, it first checks to see if the computer is capable of having VirtualBox installed we need to click on Continue to begin the installation process. While this process will vary from OS X to Windows to Linux, the process is very similar across all platforms. There are fully detailed installation instructions for all platforms on the VirtualBox website (https://www.virtualbox.org/manual/ch02.html).
The first step in the process provides us with an introduction to the installation process and reminds us as to what we are actually installing.

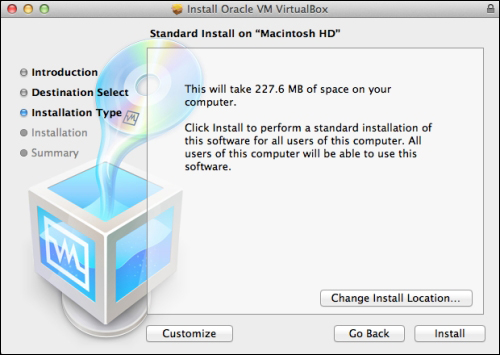
Next, the installer informs us as to how much space it will use on our computer, and provides us with the option to customize the installation if we want to Change Install Location... and install the software in another location (perhaps another disk drive if our disk is getting full).
Let's leave the default install location as it is, and click on the Install button to have the installer install VirtualBox on our computer.
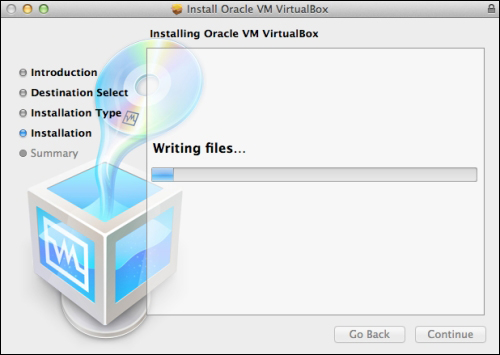
The installer then automatically installs VirtualBox for us.
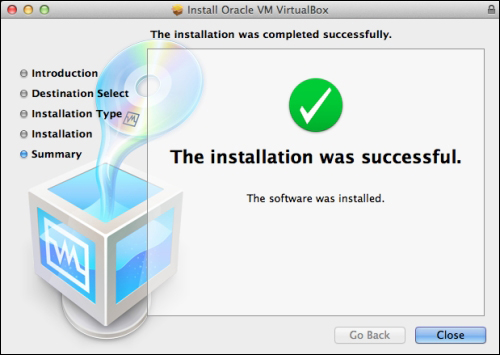
Once the installation has finished, we are shown a confirmation screen with the option of clicking on Close to close the installer.
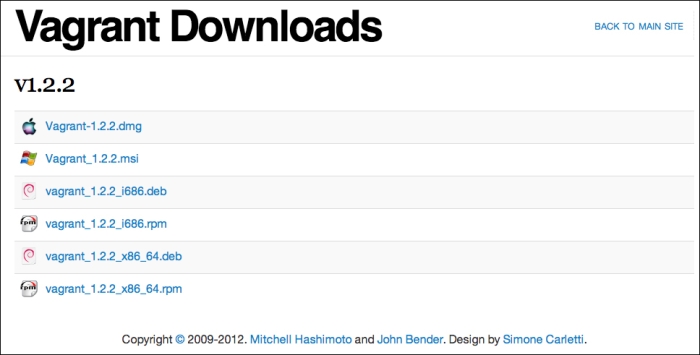
Now that we have the prerequisites installed on our computer, we can actually install Vagrant itself. This process is similar to that of installing VirtualBox. First, let's download the relevant installer from the Vagrant page (http://downloads.vagrantup.com/tags/v1.2.2).
Let's open up the installer and start the process. Again, on OS X, the first step is to double-click on the Vagrant.pkg icon.

We now need to follow the installation steps which are provided; this is very similar to the earlier steps for VirtualBox, and for most of the software packages in general.
Let's verify if Vagrant has been successfully installed, by opening a command prompt (terminal on Linux/OS X or cmd on Windows) and running Vagrant.
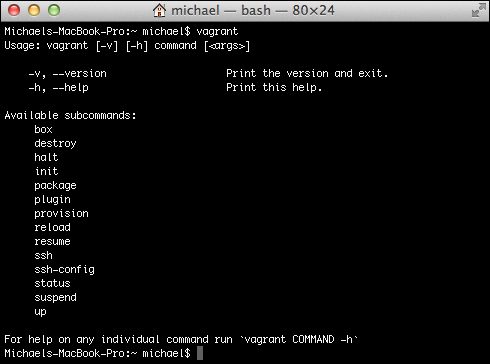
The preceding output shows that we have successfully installed Vagrant, and that we are able to run it.
In this chapter, we have looked at the requirements and prerequisites for Vagrant, which include a virtualization tool such as Oracle's VirtualBox (which works with Vagrant's built-in VirtualBox provider). We then downloaded and installed both Oracle's VirtualBox and Vagrant, and ran Vagrant to check if it was installed correctly.
Now that we have it installed, we can now move on to using Vagrant to set up and manage some of our projects.

