


Before getting started with Cocos2d you need to learn how to set up a project. This will make things easier than starting from scratch. By the end of this chapter, you will know how to install the templates that come with the source code and we'll take a look at the samples included.
In this chapter, we shall:
Learn how to get the example projects (called templates) working
Play with those templates
Take a look at the basic structure of a Cocos2d game
So let's get on with it.
Note
In this book we will always mention the term iOS programming, which refers to iPhone, iPod Touch, and iPad programming, as they all share the same iOS and are similar in programming terms.
There are many topics which this book does not cover because they are advanced topics; some of them are not so simple for beginners, but when you feel ready, give them a try.
Visit http://www.cocos2d-iphone.org for downloading the latest files. Search the downloads page, and there you will find the different versions available. As of this writing, Version 0.99.5 is the latest stable version.
Once you have downloaded the file to your computer, uncompress the folder to your desktop, and rename it to Cocos2d. Open the uncompressed folder and take a look at its contents. Inside that folder, you will find everything you will need to make a game with Cocos2d. The following is a list of the important folders and files:
CocosDenshion: The sound engine that comes along. We'll explore it in Chapter 9.
Cocoslive: Cocos2d comes packed with its own highscore server. You can easily set it up to create a scoreboard and ranking for your game.
External: Here are the sources for Box2d and Chipmunk physics engines among other things.
Resources: Images, sounds, tilemaps, and so on, used in the tests.
Templates: The contents of the templates we'll soon install.
Test: The samples used to demonstrate all the things Cocos2d can do.
Tools: Some tools you may find useful, such as a ParticleView project that lets you preview how particles will look.
License files: They are here in case you need to look at them.
We'll start by taking a look at the samples.
Inside the cocos2d-iphone folder, you will find a file named cocos2d-iphone.xcodeproj. This project contains all the samples and named tests that come with the source code. Let's run one of them.
Open the
.xcodeprojfile: In the groups and files panel you will find the source code of all the samples. There are more than 35 samples that cover all of the capabilities of Cocos2d, as shown in the following screenshot: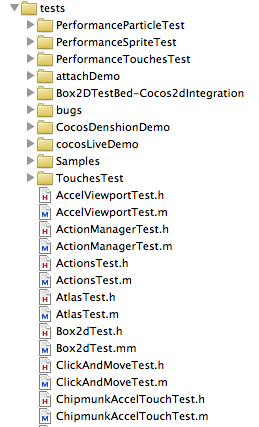
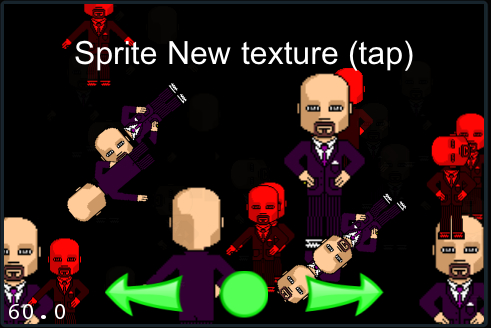
Compile and run the SpriteTest: This project comes with a target for each of the available tests, so in order to try any of them you have to select them from the overview dropdown.
Go ahead and select the SpriteTest target and click on Build and Run. If everything goes well the test should start running. Play a little with it, feel how it behaves, and be amazed by the endless possibilities.
You have just run your first Cocos2d application. If you want to run another sample, just select it by changing the "Active target". When you do so, the "active executable" should match to the same; if it doesn't select it manually by selecting it from the overview dropdown box. You can see which "active target" and "active executable" is selected from that overview dropdown box, they should be selected.
Try taking a look at all of the samples included with Cocos2d; some are just performance tests, but they are still useful for knowing what to expect from the framework and what it can do.
Although these tests don't make anything that looks like a game, they are useful for learning the basics, and they are very good consulting material. So, when you are in doubt and reading the source code does not help, check these examples, and you will surely find your answer.
Carry out the following steps for installing the templates:
Open the terminal. It is located in Applications | Utilities | Terminal.
Assuming that you have uncompressed the folder on your desktop and renamed it as
Cocos2d, type the following:cd desktop/Cocos2d ./install_template.sh
You will see a lot of output in the terminal (as shown in the following screenshot); read it to check if the templates were installed successfully.
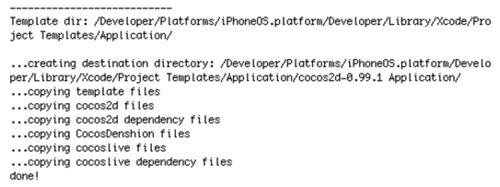
We just installed the Xcode templates for Cocos2d. Now, each time you create a new project in Xcode, you will be given the choice of doing it by using a Cocos2d application. We'll see how to do that in a moment.
Note
Each time a new version of Cocos2d is released, there is a template file for that version. So, you should remember to install them each time. If you have a lot of older templates and you want to remove them, you can do so by going to Developer/Platforms/iPhoneOS.platform/Developer/Library/Xcode/Project Templates/Application and deleting the respective folder.
Templates are very useful and they are a great starting point for any new project. Having these templates available makes starting a new project an easy task. You will have all the Cocos2d sources arranged in groups, your AppDelegate already configured to make use of the framework and even a simple starting Layer.
We are going to create a new project named HelloCocos2d from the templates you have just installed. This won't be anything like a game, but just an introduction on how to get started. The steps are as follows:
Open Xcode and select File | New project (Shift + cmd + N).
Cocos2d templates will appear right there along with the other Xcode project templates, as shown in the following screenshot:
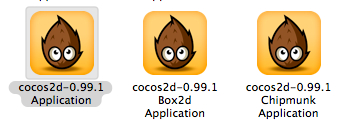
Select Cocos2d-0.99.1 Application.
Name the project
HelloCocos2dand save it to yourDocumentsfolder.
Once you perform the preceding steps, the project you just created should open up. Let's take a look at the important folders that were generated:
Cocos2dSources: This is where the Cocos2d source code resides. Generally, you won't touch anything from here unless you want to make modifications to the framework or want to know how it works.Classes: This is where the classes you create will reside. As you may see, two classes were automatically created, thanks to the template. We'll explore them in a moment.Resources: This is where you will include all the assets needed for your game.
Go ahead and run the application. Click on Build and go and congratulate yourself, as you have created your first Cocos2d project.
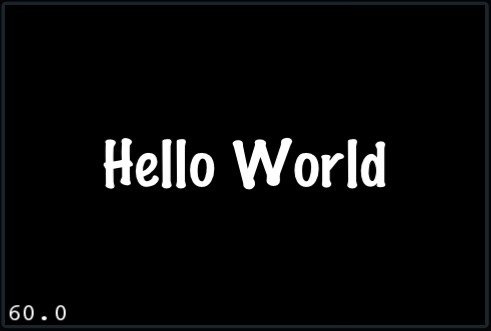
Pretty boring, isn't it? As you advance in the book, you will build many more interesting things, but let's stop for a moment and take a look at what was created here.
When you run the application you'll notice a couple of things, as follows:
In a moment, we'll see how this is achieved by taking a look at the generated classes.
The CCDirector is the class whose main purpose is scene management. It is responsible for switching scenes, setting the desired FPS, the device orientation, and a lot of other things.
The CCDirector is the class responsible for initializing OpenGL ES.
Note
If you grab an older Cocos2d project you might notice that all Cocos2d classes have the "CC" prefix missing. Those were added recently to avoid naming problems. Objective-c doesn't have the concept of namespaces, so if Apple at some point decided to create a Director class, those would collide.
There are currently four types of directors; for most applications, you will want to use the default one:
NSTimer Director: It triggers the main loop from an NSTimer object. It is the slowest of the Directors, but it integrates well with UIKit objects. You can also customize the update interval from 1 to 60.
Mainloop Director: It triggers the main loop from a custom main loop. It is faster than the NSTimer Director, but it does not integrate well with UIKit objects, and its interval update can't be customized.
ThreadMainLoop Director: It has the same advantages and limitations as the Mainloop Director. When using this type of Director, the main loop is triggered from a thread, but it will be executed on the main thread.
DisplayLink Director: This type of Director is only available in OS 3.1+. This is the one used by default. It is faster than the NSTimer Director and integrates well with UIKit objects. The interval update can be set to 1/60, 1/30, or 1/15.
Those are the available Directors, most of the times you will not need to make any changes here.
The AppDelegate is the main entry point of your application. Here is where Cocos2d is initialized. There are a lot of useful things you can tweak from the Director in here to change the behavior of your application. Let's take a look.
@implementation HelloCocos2dAppDelegate
@synthesize window;
- (void) applicationDidFinishLaunching:(UIApplication*)application
{
	// Init the window
	window = [[UIWindow alloc] initWithFrame:[[UIScreen mainScreen] bounds]];

	// cocos2d will inherit these values
	[window setUserInteractionEnabled:YES];
	[window setMultipleTouchEnabled:YES];

	// Try to use CADisplayLink director
	// if it fails (SDK < 3.1) use the default director
	if( ! [CCDirector setDirectorType:CCDirectorTypeDisplayLink] )
		[CCDirector setDirectorType:CCDirectorTypeDefault];

	// Use RGBA_8888 buffers
	// Default is: RGB_565 buffers
	[[CCDirector sharedDirector] setPixelFormat:kPixelFormatRGBA8888];

	// Create a depth buffer of 16 bits
	// Enable it if you are going to use 3D transitions or 3d objects
   //[[CCDirector sharedDirector] setDepthBufferFormat:kDepthBuffer16];

	// Default texture format for PNG/BMP/TIFF/JPEG/GIF images
	// It can be RGBA8888, RGBA4444, RGB5_A1, RGB565
	// You can change anytime.
	[CCTexture2D setDefaultAlphaPixelFormat:kTexture2DPixelFormat_RGBA8888];

	// before creating any layer, set the landscape mode
	[[CCDirector sharedDirector] setDeviceOrientation:CCDeviceOrientationLandscapeLeft];
	[[CCDirector sharedDirector] setAnimationInterval:1.0/60];
	[[CCDirector sharedDirector] setDisplayFPS:YES];

	// create an openGL view inside a window
	[[CCDirector sharedDirector] attachInView:window];
	[window makeKeyAndVisible];


	[[CCDirector sharedDirector] runWithScene: [HelloWorld scene]];
}

- (void)applicationWillResignActive:(UIApplication *)application {
	[[CCDirector sharedDirector] pause];
}
- (void)applicationDidBecomeActive:(UIApplication *)application {
	[[CCDirector sharedDirector] resume];
}
- (void)applicationDidReceiveMemoryWarning:(UIApplication *)application {
	[[CCTextureCache sharedTextureCache] removeUnusedTextures];
}
- (void)applicationWillTerminate:(UIApplication *)application {
	[[CCDirector sharedDirector] end];
}

- (void)applicationSignificantTimeChange:(UIApplication *)application {
	[[CCDirector sharedDirector] setNextDeltaTimeZero:YES];
}
- (void)dealloc {
	[[CCDirector sharedDirector] release];
	[window release];
	[super dealloc];
}

@endA lot is happening in here. Don't worry if you don't understand it yet, as you won't have to deal with most of this stuff until you have advanced more into your game.
Let's analyze each line in here, as follows:
// Try to use CADisplayLink director
	// if it fails (SDK < 3.1) use the default director
	if( ! [CCDirector setDirectorType:CCDirectorTypeDisplayLink] )
		[CCDirector setDirectorType:CCDirectorTypeDefault];
These lines of code set the type of director that will be used. If you are targeting your game for OS 3.1 + it will use the DisplayLink Director. Let's take a look at each of them.
Let's continue looking at the code generated in the AppDelegate.
// Use RGBA_8888 buffers
	// Default is: RGB_565 buffers
	[[CCDirector sharedDirector] setPixelFormat:kPixelFormatRGBA8888];

	// Create a depth buffer of 16 bits
	// Enable it if you are going to use 3D transitions or 3d objects
//	[[CCDirector sharedDirector] setDepthBufferFormat:kDepthBuffer16];

	// Default texture format for PNG/BMP/TIFF/JPEG/GIF images
	// It can be RGBA8888, RGBA4444, RGB5_A1, RGB565
	// You can change anytime.
	[CCTexture2D setDefaultAlphaPixelFormat:kTexture2DPixelFormat_RGBA8888];
The preceding lines set the Texture's format and definition. We'll talk about this in the next chapter.
[[CCDirector sharedDirector] setDeviceOrientation:CCDeviceOrientationLandscapeLeft];
The preceding line of code sets the orientation of the device. You can choose from any four types of orientations.
[[CCDirector sharedDirector] setAnimationInterval:1.0/60];
This sets the frames per second that the application will run at. By default, it runs at 60 fps but sometimes you may need to set it at 30 fps for performance reasons. 60 fps is also the highest framerate that the iOS devices can support.
[[CCDirector sharedDirector] setDisplayFPS:YES];
Remember the numbers that appear at the lower-left corner? They show the current FPS. These can be removed by commenting this line or setting it to NO.
Finally:
[[CCDirector sharedDirector] runWithScene: [HelloWorld scene]];
This runWithScene method tells Cocos2d to start running with a given CCScene. In this case, we are starting it with the scene created by HelloWorld.
The CCDirector handles the scene management. It can tell the game which scene to run, suspend scenes, and push them into a stack. In Chapter 5, you'll learn how to do this, for now should know that in the AppDelegate you need to tell the Director which is the scene you wish run when starting the application.
Take a look at the following method that is implemented. Those are methods found in any iPhone application, but the template has done the work of adding some useful and necessary calls.
- (void)applicationWillResignActive:(UIApplication *)application {
	[[CCDirector sharedDirector] pause];
}
When your game is about to stop being active (for example, when you lock the screen), the applicationWillResignActive:
method is called. The template added the pause method from the CCDirector class. This method will pause all the timers and set the FPS to a low value, so the application does not consume much CPU.
- (void)applicationDidBecomeActive:(UIApplication *)application {
	[[CCDirector sharedDirector] resume];
}
On the other side, when the application becomes active again (for example, you unlocked the screen) applicationDidBecomeActive: method will be called. The template will add the resume method from the
CCDirector class. This method resumes the timers.
In the following chapters, you'll learn how to display a UIAlert, so that the action does not resume instantly. Later on, you'll learn how to do a nice pause screen with options to resume and quit the game.
- (void)applicationWillTerminate:(UIApplication *)application {
	[[CCDirector sharedDirector] end];
}
When you quit your game (be it by pressing the home button or answering a call) the applicationWillTerminate: method will be called. This is a good time to save your game's state, if you need to.
Start by opening the
HelloWorldScene.hfile. Let's analyze it line by line:#import "cocos2d.h"
Each class you create that makes use of Cocos2d should import its libraries. You do so by writing the preceding line.
 // HelloWorld Layer
@interface HelloWorld : CCLayer
{
}

// returns a Scene that contains the HelloWorld as the only child
+(id) scene;

@end
These lines define the Interface of the HelloWorld CCLayer.
A CCLayer is where all the content of your game goes. We'll explain it better soon, but for now, think of them as in any graphic design software, where you can have as many layers as you want and each of them contains different elements. Layers are also responsible for handling touches and accelerometer events. That is all there is for that file.
Take a look at the
HelloWorldScene.mfile, where the action happens:// on "init" you need to initialize your instance -(id) init { // always call "super" init // Apple recommends to re-assign "self" with the "super" return value if( (self=[super init] )) { // create and initialize a Label CCLabel* label = [CCLabel labelWithString:@"Hello World" fontName:@"Marker Felt" fontSize:64]; // ask director the the window size CGSize size = [[CCDirector sharedDirector] winSize]; // position the label on the center of the screen label.position = ccp( size.width /2 , size.height/2 ); // add the label as a child to this Layer [self addChild: label]; } return self; }
The preceding code is the one that will be called when the layer is initialized. What it does is create a CCLabel to display the Hello World text.
CCLabel* label = [CCLabel labelWithString:@"Hello World" fontName:@"Marker Felt" fontSize:64];
CCLabelis one of the three existent classes that allow you to show text in your game. We'll do a lot of things with labels throughout this book.What we are doing here is creating a CCLabel object named label. We are initializing it with the String
"HelloWorld"using the "MarkerFelt" font, with a 64 font size.As you may notice, the CCLabel is instantiated using a convenience method, so you won't have to worry about releasing it later.
Note
Most Cocos2d classes can be instantiated using convenience methods, thus making memory management easier. To learn more about memory management check the Apple documents at the following URL:
http://developer.apple.com/library/mac/#documentation/Cocoa/Conceptual/MemoryMgmt/MemoryMgmt.html
CGSize size = [[CCDirector sharedDirector] winSize];
The preceding line gets the size of the current window. Right now the application is running in landscape mode so it will be 480 * 320 px.
Note
Remember that the screen sizes might vary from device to device and the orientation you choose for your game. For example, in an iPad application in portrait mode, this method would return 768 * 1024.
label.position = ccp( size.width /2 , size.height/2 );
This line sets the label's position in the middle of the screen.
Now, all that is left is to actually place the label in the layer.
[self addChild: label];
You must always add any new object as a child of a layer (or another CCNode) by calling
addChild. This allows the framework to actually render the object. There are a few more things you can do, such as setting the Z-order and assigning a tag to that object. We'll see how to do that soon.Note
You can find further information about parent-child relationships in the Cocos2d documentation at:
http://www.cocos2d-iphone.org/wiki/doku.php/prog_guide:basic_concepts
We took a look at the code generated by the template. This particular template just creates a scene, which contains a layer that displays some text. Texts are displayed using one of the three different types of labels which are subclasses of CCNode.
Everything that is a subclass of CCNode has the following features:
They can contain other CCNodes: In the preceding example, a CCLabel is being added to a CCLayer, but with both of them being CCNodes you could also create a deeper hierarchy and add some other element, such as a Sprite, as a child of the label.
They can schedule periodic callbacks: This means you can have them execute certain methods in a period of time you set. We'll see a lot of examples of this throughout the book as it is a very useful feature.
They can execute actions: For example, you could tell the CCLabel we had in the previous example to move to the position (0,0) in 1 second. Cocos2d allows for this kind of action in a very easy fashion.
In the preceding example we changed one of the label's properties.
label.position = ccp( size.width /2 , size.height/2 );
This is only one of the several properties CCNodes have that can be modified to suit your needs.
Let's have a quick look at some of them:
Anchorpoint: Sets the anchor point of the node. By default, it is placed at (0,0) of the node; that being the center. An exception to these are CCScene and CCSprite whose anchor point is set to (0.5,0.5). The anchor point also affects how the objects are rotated and scaled.Position: Sets the position of the node relative to its parent node.Z-order: Objects with a higher z-order will appear on top of others with a lower z-order.
As you learned before, nodes can contain other nodes. Cocos2d provides several methods for adding nodes inside other nodes, retrieving them, and even removing them. These are as follows:
|
Method |
Description |
|---|---|
|
This method adds the CCNode node as a child of the CCNode you called this method from. It's z-order will be 0. | |
|
The same as above but lets you specify a z-order for the child. | |
|
The same as above but also lets you specify a tag for the child. This will allow you to retrieve the child later. | |
|
Removes the node from its parent and if specified cleans up all its actions and schedulers. | |
|
The same as above but instead of passing the node, you pass the tag value for that node. | |
|
It removes all children from the parent. | |
|
Gets a child from the object with the desired tag. | |
|
Returns an array with all the children of the node. |
When a CCNode is added to or removed from the stage, a couple of useful callback methods that are called, which are as follows:
onEnter: This is called when you add the CCNode as a child of a CCLayer. Adding a CCNode as the child of another node will not fire this method unless the parent node is already on the stage. If it enters the stage with a transition, this method will be called when the transition starts.onEnterTransitionDidFinish: The same as preceding method, but if it enters with a transition, this method will be called when the transition ends.onExit: This will be called when the CCNode is removed. If it is removed with a transition, it will be called after the transition ends.
You have just learned how to include simple text into your layer, why don't you try the following?
Create another CCLabel
Change its text, font, and size to something you like
Add this new label as a child of the other label
Try changing the positions of both labels one by one
You may notice that moving the label that is the parent of the other one causes both of them to move. This is because of the parent-children relationship between them. This is very useful in most cases.
Sometimes you will need to call a method many times every two seconds. Normally, you would have to check every tick in your game loop to see how many milliseconds have passed and add them up. Imagine doing this for every object that needs to know how much time has passed since it did something. Fortunately, Cocos2d has a way of doing this quite easily. Let me introduce you to Cocos2d Schedulers.
Imagine you are making the next blockbuster game like Castle Defense. You need your deployed units to fire at the enemy troops every second, once they have been created. Let's do a simple text example of this.
For this small example, you can use the HelloCocos2d project we started before or create a new one using the simple template just as we did back then.
Let's begin by creating the Unit class.
In Xcode go to File | New File (cmd + N).
Use Objective-C class as template for this class. We'll change its content in a moment.
Click on Next and name the new class as
Unit.Xcode should have created two files in your
Classesfolder as shown in the following screenshot: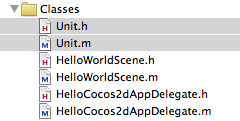
Open
Unit.h. It should look like the following:#import <Foundation/Foundation.h> @interface Unit : NSObject { } @endModify the Interface of this class to make use of Cocos2d.
Begin by importing the Cocos2d.h file. Every class that makes use of Cocos2d should include this file.
#import "cocos2d.h"
Unit should inherit from CCNode to be able to schedule methods, so let's make the corresponding changes.
@interface Unit
 : CCNode {
}
Import the
HelloWorldScene.h. We'll need this class soon.#import "HelloWorldScene.h";
That is all you must change for now in the Unit.h file. Now, open the Unit.m file. You should see something like this:
#import "Unit.h"
@implementation Unit
@end
What we have to do now is fill it up.
Create the
initmethod for theUnitclass. This one is a simple example so we won't be doing a lot here:-(id) initWithLayer:(HelloWorld*) game { if ((self = [super init])) { [game addChild:self]; [self schedule:@selector(fire) interval:1]; } return (self); }This init method takes the HelloWorld layer as a parameter. We are doing that because when the object is instantiated it will need to be added as a child of the layer node.
[game addChild:self];
When adding the unit object as a child of the layer node it allows it to schedule methods.
Note
If you are scheduling a method inside a custom class and it is not running, check whether you have added the said object as a child of a layer. Not doing so won't yield any errors but the method won't run!
[self schedule:@selector(fire) interval:1];
This line is the one that does the magic! You pass the desired selector you want to run in the schedule parameter and a positive float number as the interval in seconds.
-(void)fire
{
  NSLog(@"FIRED!!!");
}
You did expect a bullet being fired with flashy explosions, didn't you? We'll do that later! For now content yourself with this. Each second after the Unit instance is created a "FIRED!!!" message will be output in the Console.
We just need to make a couple of changes to the HelloWorldScene class to make this work.
In the
HelloWorldScene.hfile, add the following line:#import "Unit.h"
Then in the HelloWorldScene.m file let's create an instance of the
Unitclass.Unit * tower = [[Unit alloc]initWithLayer:self];
As you can see we are passing the HelloWorld layer to the Unit class to make use of it.
That is all, now Build and Run the project. You should see the following output:
2010-04-13 14:47:10.114 HelloCocos2d[1240:207] FIRED!!!
2010-04-13 14:47:11.132 HelloCocos2d[1240:207] FIRED!!!
2010-04-13 14:47:12.147 HelloCocos2d[1240:207] FIRED!!!
2010-04-13 14:47:13.164 HelloCocos2d[1240:207] FIRED!!!
2010-04-13 14:47:14.164 HelloCocos2d[1240:207] FIRED!!!
2010-04-13 14:47:15.180 HelloCocos2d[1240:207] FIRED!!!
2010-04-13 14:47:16.180 HelloCocos2d[1240:207] FIRED!!!
As you can see, the unit created is firing a bullet each second, defeating every enemy troop on its way.
CCNodes can schedule selectors to run at an interval of seconds. This gives them a lot of versatility. You can use timers in the following two ways:
To call a method at an interval of every X seconds
To delay a method call
In the previous example, we used timers to have a Unit object fire a bullet each second after its creation.
Usually, you will want to delay the execution of some methods. For example, when one of your units is hit, you will want to give a visual feedback like an explosion, some movement, or something nice, and then remove it from the screen (and from its parent node).
Continuing from the previous example, modify Unit.m to look like the following:
#
import "Unit.h"

@implementation Unit
-(id) initWithLayer:(HelloWorld*) game
{
	if ((self = [super init]))
	{
	  [game addChild:self];
	  [self fireAndDestroy];
	}

	return (self);
}

-(void)fireAndDestroy
{
	NSLog(@"FIRED!!!");
	NSLog(@"Destroying...");
	[self schedule:@selector(destroy) interval:3];
}
-(void)destroy
{
	[self unschedule:@selector(destroy)];
	NSLog(@"Unit Destroyed.");
	[self.parent removeChild:self cleanup:YES];
}

-(void)dealloc
{
	[super dealloc];
}
@end
You should see the following output now:
2010-04-13 16:04:34.734 HelloCocos2d[1413:207] FIRED!!!
2010-04-13 16:04:34.738 HelloCocos2d[1413:207] Destroying...
2010-04-13 16:04:37.777 HelloCocos2d[1413:207] Unit Destroyed.
Notice how the Unit Destroyed message is output three seconds after the previous ones.
For starters, we have made the worst units of any game. These units will fire a bullet and then start destroying themselves. After a couple of seconds of explosions (don't you see them?), they will be gone. So, let's go through the new code step by step, as follows:
[self fireAndDestroy];
As soon as the object is initialized, the
fireAndDestroy method is called.
-(void)fireAndDestroy
{
	NSLog(@"FIRED!!!");
	NSLog(@"Destroying...");
	[self schedule:@selector(destroy) interval:3];
}
This method just prints some text to the Console and then schedules the destroy method to run every three seconds.
-(void)destroy
{
	[self unschedule:@selector(destroy)];
	NSLog(@"Unit Destroyed.");
	[self release];
}
We just want this method to be called once. So, we use the
unschedule CCNode method to stop the selector that is passed from being called over and over. Then it prints a message and we release the object.
So, what we are doing here is having a method run after three seconds and then stopping it, thus calling it just once.
That is all there is for CCNodes right now. Remember that you will use them a lot when making your games, as they are the base class for almost everything that you wish to show onscreen. In the next chapter, you will learn how to use CCSprites, another subclass of CCNode.
Let's take a look at the HelloCocos2d project and the debug message that it generates. They will be few, but as you add more elements to your game, you will be able to get a lot of useful information from this data, as shown here:
Run the HelloCocos2d application.
Once it is running, open the Console. To do this go to Run | Console (Shift + cmd + R)
You will see the following output:
2010-04-09 15:05:13.189 HelloCocos2d[3197:207] cocos2d: cocos2d v0.99.1
2010-04-09 15:05:13.207 HelloCocos2d[3197:207] cocos2d: Using Director Type:CCDisplayLinkDirector
2010-04-09 15:05:13.388 HelloCocos2d[3197:207] cocos2d: GL_VENDOR:   Apple Computer, Inc.
2010-04-09 15:05:13.389 HelloCocos2d[3197:207] cocos2d: GL_RENDERER: Apple Software Renderer
2010-04-09 15:05:13.389 HelloCocos2d[3197:207] cocos2d: GL_VERSION:  OpenGL ES-CM 1.1 APPLE
2010-04-09 15:05:13.390 HelloCocos2d[3197:207] cocos2d: GL_MAX_TEXTURE_SIZE: 2048
2010-04-09 15:05:13.391 HelloCocos2d[3197:207] cocos2d: Supports PVRTC: YES
2010-04-09 15:05:13.391 HelloCocos2d[3197:207] cocos2d: GL_MAX_MODELVIEW_STACK_DEPTH: 16
2010-04-09 15:05:13.425 HelloCocos2d[3197:207] cocos2d: Frame interval: 1
There you can see the current version of Cocos2d, the type of CCDirector it is using (we talked about them a while back), the version of OpenGL it is using, and so on.
Cocos2d debug mode can inform you about a lot of things, such as when there is some error retrieving a file or having you know when an object is removed from memory (you will see a "cocos2d:deallocing <object>" message). Let's have a look:
While the application is running, press the Home button. This will cause the application to gracefully end and the Cocos2d objects that were living will be dealloced.
Open the console again.
You will see the following output:
2010-04-09 15:14:35.284 HelloCocos2d[3197:207] cocos2d: deallocing <CCScheduler: 0x3a2b2f0>
2010-04-09 15:14:35.287 HelloCocos2d[3197:207] cocos2d: deallocing <CCTextureCache = 03A0E9A0 | num of textures =  1>
These two messages show what was dealloced in this particular case. What these classes do does not matter right now. However, CCScheduler is responsible of triggering scheduled callbacks and CCTextureCache is responsible of handling the loading of textures.
Let's take a look at one more example. When you make a mistake and you want to use an image file from the resources folder, if you mistype its name, you will get an exception. Normally, you would have to take a look at Xcode's debugger and check where the error happens. Fortunately, Cocos2d debug comes to your rescue!
Add the following lines of code right after adding the label:
CCSprite * image = [CCSprite spriteWithFile:@"Icoun.png"];
[self addChild:image];
That line of code creates a Sprite from an image file in your resource folder. As you may notice,
"Icoun.png"is not present in the project's resource folder, so when the application is run and execution gets to that line of code, it will crash.
Run the application and see it crash.
Open the Console, and you will see the following output:
2010-04-09 16:07:46.875 HelloCocos2d[4394:207] cocos2d: CCTexture2D. Can't create Texture. UIImage is nil
2010-04-09 16:07:46.875 HelloCocos2d[4394:207] cocos2d: Couldn't add image:Icoun.png in CCTextureCache
2010-04-09 16:07:46.876 HelloCocos2d[4394:207] *** Assertion failure in -[HelloWorld addChild:], /Users/pabloruiz/Documents/HelloCocos2d/libs/cocos2d/CCNode.m:300
The debug messages tell you exactly what is failing. In this case, it couldn't use the image
icoun.png. Why? This is because it is not there!Change the string to match the file's name to see the error go away.
Sometimes you will need to get a better look at your own debug messages or you will notice your application is running very slowly for no apparent reason. This could be caused by all the debug messages being written to the console. So, let's take a look at how to disable them:
Go to Project | Edit active target.
Search for gcc_preprocessor_defination, and you will find the flag COCOS2D_DEBUG set to 1.
Change it to 0 to disable it.
Rebuild your project.
Cocos2d debug messages will now disappear.

As debug messages are written to the console, many times when you have a lot of things going around in your game it will start running slowly. In such cases, you may want to prevent Cocos2d from logging all that useful data. If you follow the preceding steps you will be able to switch the debug logging on and off at will.
In this chapter, we've explored the basics of creating your first project.
We began by exploring the samples that are included with Cocos2d. Then we went a step further and created a brand new project from the templates. We also took a look at the code created by these templates.
Then we learned about the basics of Cocos2d - how to configure the CCDirector, how to use CCNodes, and we went over the basic structure of a Cocos2d application.
Finally, we learned how to interpret the debug messages given by Cocos2d.
In the next chapter, we will learn everything there is to know about CCSprites by building the first game of the book, "Colored Stones".