


The topics covered in this chapter are as follows:
Downloading and installing Cocos2d
The 2D coordinate system
Getting access to MainScene
Adding sprites to scenes
Creating a sprite using RenderTexture
Creating a custom sprite class
Animating sprites
Adding actions to sprites
Drawing glPrimitives
Adding the parallax effect
In the first chapter, we will cover some basics of the Cocos2d framework so that everyone is up to speed on the concepts. We will go through the process of downloading and installing SpriteBuilder/Cocos2d. Then we will cover the 2D coordinate system that Cocos2d uses.
After going through the basics, we will cover the basic properties of sprites and how they can be added to a scene. We will take a look at how to add an image to a sprite object. We will discuss how to create a sprite that is used as placeholder asset to test basic game mechanics and collision in the prototyping stage of any game. We will then consider how to create basic shapes using glPrimitives. After this, we will move on to discussing how to move, rotate, scale, and combine actions on the sprite object using actions. Next, we will look at how to animate a character using sprite frames. Finally, we will add parallax scrolling to the scene to add more dynamism to it.
To create and run a Cocos2d project, you have to install SpriteBuilder and Xcode. In this section, we will briefly cover how to do so.
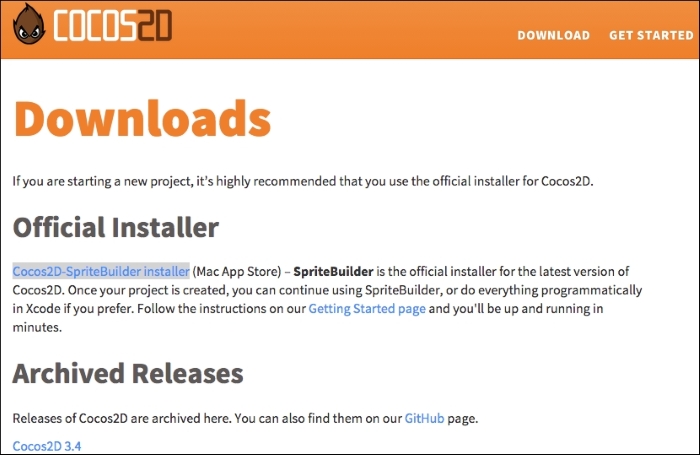
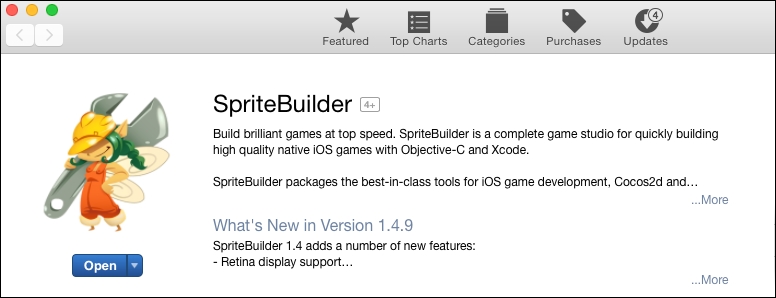
To download and install Cocos2d, go to http://cocos2d.spritebuilder.com/download.
SpriteBuilder is the official installer of Cocos2d now. To install, click on the Cocos2d-SpriteBuilder installer link. This will open the Mac App Store Preview page.
If you would like to download an older version of Cocos2d, you can go through the links in the archive section of the page and download it from there as well.
Click on the View in Mac App Store link and then click on Launch Application when prompted.

Once the App Store opens, click on Install to start the installation process. You will need to sign in to an account to download the file.
Once installed, it should be in your applications folder. Open up Launchpad and click on the application to open it.
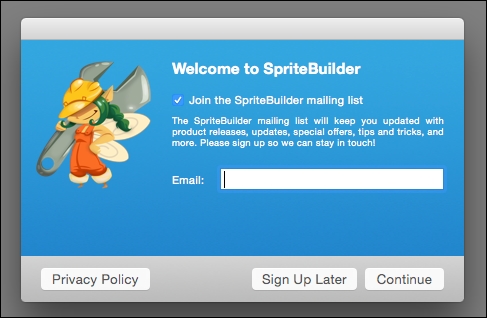
Once the application starts, you will be asked to join the SpriteBuilder mailing list. Add your e-mail address and click on Continue or select Sign Up Later.
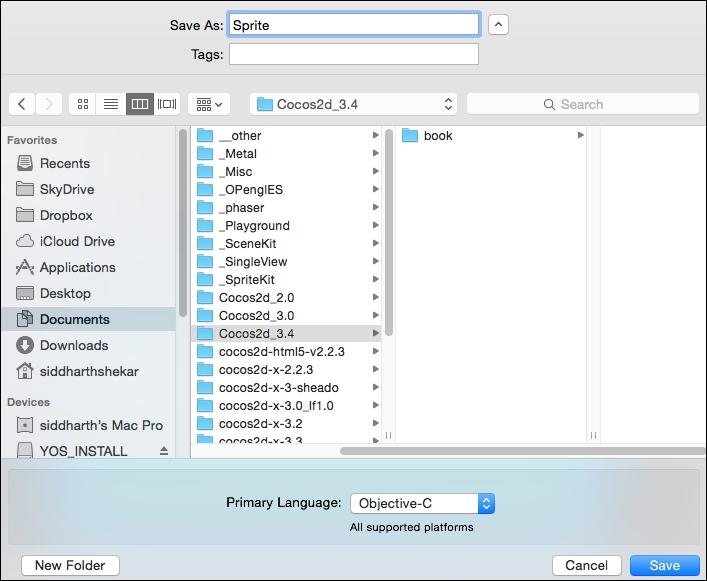
We will go through how to create a small project using SpriteBuilder later in the book. For now, we are ready to create a new project to work with. Navigate to File | New Project and select a location to create the project folder.
You can also select the primary language for coding. As we will use Objective-C, make sure that it is selected at the bottom.
Once you have selected the location for the project, in the Save As box at the top, give the project a name. Remember the name and the location of the project folder as we will need it to open the project in Xcode.
Next, we need to open the project in Xcode. We will first understand how to code using Xcode as it is essential to make more complex games. In later chapters, we will consider how to use SpriteBuilder to simplify our game development process.
You can close the SpriteBuilder project as it is not required anymore.
If you don't have Xcode, you can download it from the Mac App Store.

The installation process is very similar to any other app.


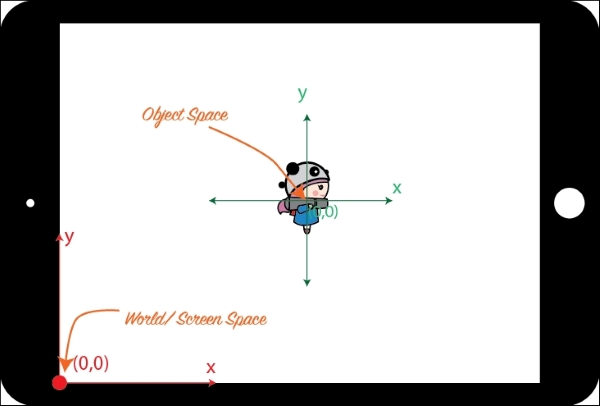
In case of 2D game development, we just have two coordinate systems to worry about. The first is the screen coordinate system, and the other is the object coordinate system.
In 2D, whenever we place an object on screen, we always think as to how far the object is from the lower-left part of the screen. This is because the lower-left part of the screen is the origin and not the center of the screen. That is why if you place a sprite without changing its position, it will be created in the lower-left part of the screen. The screen origin, or the (0,0) position, is in the lower-left part of the screen. If you want to place the sprite at the center of the screen, you need to set the position to half the width and the height of the position property. As everything is with respect to the lower-left part of the screen, this is called the screen coordinate system.
The object coordinate system refers to the sprite itself. The center of the sprite is at the center of the object, unlike the screen, which has its origin in the lower-left part. The center of the sprite is called the anchor point. When you rotate a sprite, it will rotate about its center because its origin is at its center. You can change the origin of the sprite by accessing the anchor point property of the sprite.
When you launch the application, the scene created in SpriteBuilder will load up by default. We will have to make some minor changes to get access to the MainScene file and load this as default instead.
As of now, both the MainScene.h and MainScene.m files have nothing in them. So, open them up and add the following code in them.
First, open up MainScene.h and add the following highlighted code:
@interface MainScene :CCNode{

CGSizewinSize;
}

+(CCScene*)scene;

@end
Next, in the MainScene.m file, add the following:
#import "MainScene.h
@implementation MainScene
+(CCScene*)scene{
return[[self alloc]init];
}
-(id)init{
if(self = [super init]){
winSize = [[CCDirectorsharedDirector]viewSize];
}
return self;
}
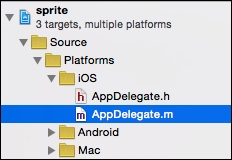
@endThen, navigate to the AppDelegate.m file, which is in the iOS group under Source/Platforms, as shown in the following screenshot:
Change the code in the startScene function as highlighted here:
- (CCScene*) startScene
{

  //Comment or delete line below as shown
  //return [CCBReaderloadAsScene:@"MainScene"];

  //add below line instead
  return [MainScene scene];
}
Now, we have a complete blank project to work with.
If you build and run the project now, you will see nothing but a black screen. To make sure that we are actually ready to draw something and that it will get displayed onscreen, let's add some basic code to change the background color.
Add the following code to the init function of the MainScene.m file:
-(id)init{

  if(self = [super init]){

    winSize = [[CCDirectorsharedDirector]viewSize];

    CGPoint center = CGPointMake(winSize.width/2,
      winSize.height/2);

    //Background
    CCNode* backgroundColorNode = [CCNodeColor
      nodeWithColor:[CCColor
      colorWithRed:0.0f
      green:1.0
      blue:0.0]];
    [selfaddChild:backgroundColorNode];


  }

  return self;
}
In the
init function, after initializing the super init file, we will first get the screen size of the current device. Then, we will have a helper CGPoint variable, which is used to calculate the center of the screen.
Then, we will create a new CCNode and call it backgroundColorNode and call the CCNodeColor class and the nodeWithColor function. In it, we will pass the red, green, and blue values. As I wanted a green background, I have the value of green as 1 and the rest are 0.
Then, we will add backgroundColorNode to the scene.

To display any image onscreen and manipulate it, you will need to add it to the scene using the CCSprite class. Unlike a regular image, a sprite has properties such as move, scale, rotate, and so on, which can be used to manipulate the image.
To add sprites to the scene, we will first import the background image in to our project.
Add the following code to the init function right below where we added backgroundColorNode:
//Basic CCSprite - Background Image

CCSprite* backgroundImage = [CCSpritespriteWithImageNamed:@"Bg.png"];

backgroundImage.position = CGPointMake(winSize.width/2,
  winSize.height/2);
[selfaddChild:backgroundImage];
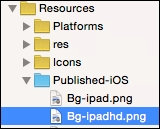
Here, we will take the Bg image and add it as a child to the current scene. From the Resources folder of the chapter, we will drag the Bg-ipad.png and Bg-ipadhd.png files into the Resources/Published-iOS folder of the project.
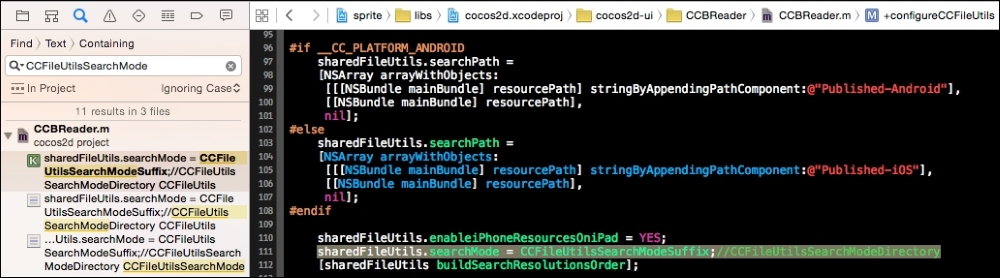
We still have to make a small change in the CCBReader.m file. In the Search inspector, search for the CCFileUtilsSearchMode text, and in place of CCFileUtilsSearchModeDirectory, make the text CCFileUtilsSearchModeSuffix.
This will change the searchmode file from the folder to suffix mode.

RenderTexture is used to create placeholder sprites that can be used to prototype a game. So, if you want to test your movement and jump code on a sprite but don't have access to a sprite, this is a quick and dirty way to create a sprite.
To create the RenderTexture sprite, we will create a new function, and this function will return a sprite when we provide the size and color of the sprite to be produced.
In the MainScene.h file, we will add the following highlighted line right under the scene function we created earlier:
+(CCScene*)scene;

-(CCSprite *)spriteWithColor:(ccColor4F)bgColor
textureWidth:(float)textureWidth
textureHeight:(float)textureHeight;

@end
This function will return CCSprite and take in the color, width, and height that the sprite should be of.
In the MainScene.m file, we will add the definition of the preceding function below the init function, as follows:
-(CCSprite *)spriteWithColor:(ccColor4F)bgColor
textureWidth:(float)textureWidth
textureHeight:(float)textureHeight {


  CCRenderTexture *rt =
    [CCRenderTexture
    renderTextureWithWidth:textureWidth
    height:textureHeight];

  [rtbeginWithClear:bgColor.r
    g:bgColor.g
    b:bgColor.b
    a:bgColor.a];

    [rt end];

  return [CCSpritespriteWithTexture:rt.sprite.texture];

}
In the function, we will create a new variable called rt of the CCRenderTexture type, and to it, we will pass the width and height that is passed to the function.
Then, we will clear RenderTexture with the color that is passed in. Then, we will call the end function on rt.
Next, we will create CCSprite by passing in the texture of the rt sprite. This is then returned by the function.
To use the RenderTexture function, we will add the following code right after where we added the background to the scene:
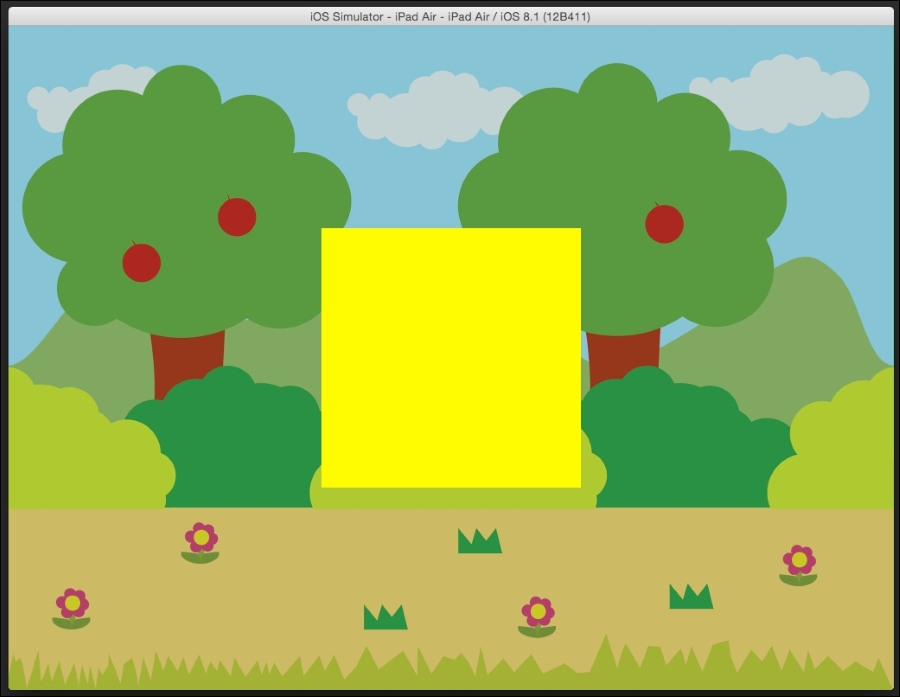
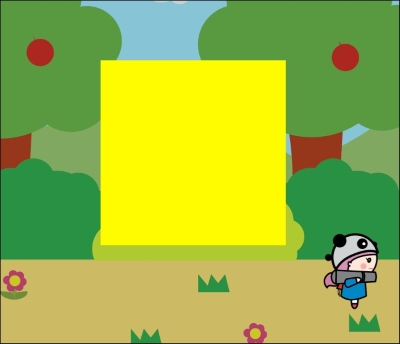
//rtSprite
CCSprite* rtSprite = [self spriteWithColor:ccc4f(1.0, 1.0, 0.0, 1.0) textureWidth:150textureHeight:150];
rtSprite.position = CGPointMake(winSize.width/2,
winSize.height/2);
[selfaddChild:rtSprite];
We will create a new variable called rtSprite of the CCSprite type and assign the sprite that will be created by calling our function to it.
While calling the function, we will create a color of the ccc4f type and pass in the r, g, b, and a values. For yellow, we will pass 1 for red and green. We will provide a width and height value of 150 each.
Then, the sprite will be positioned at the center and added to the scene. Run the scene to see the result.
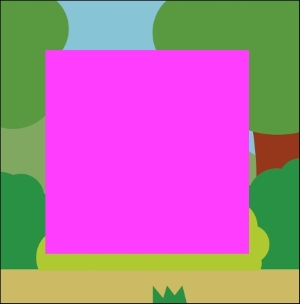
The color of the sprite can be changed by changing the rgba color value.
For example, here, I changed the value to (1.0, 0.0, 1.0, 1.0) for yellow, and you can see the result as follows:
//rtSprite
CCSprite* rtSprite = [self spriteWithColor:ccc4f(1.0, 0.0, 1.0, 1.0) textureWidth:150textureHeight:150];
rtSprite.position = CGPointMake(winSize.width/2, winSize.height/2);
[selfaddChild:rtSprite];
We just considered how to add a sprite to a scene; however, in the future, you may want a separate sprite class so that you can add your own behaviors to the class. In this section, we will discuss how to create our own custom sprite class by extending the base CCSprite class.
Let's take a look at how to create a custom sprite class so that it can have its own movement and update the function later.
For this, we will have to create new files.
Go to File | New | File. Under iOS | Source, select Cocoa Touch Class. Click on Next.

Next, we will give it a class name. We will select CCSprite as Subclass of and Objective–C as Language. Click on Next.

Next, we will click on Create to add the files to your projects.

Now that the files are created, let's make some changes to them so that it can take a string as the filename and create the sprite from the file.
In the Hero.h file, we make the following changes:
#import "CCSprite.h"

@interface Hero :CCSprite{

  CGSizewinSize;
}

-(id)initWithFilename:(NSString *) filename;

@end
Now, we will change the Hero.m file as follows:
#import "Hero.h"

@implementation Hero

-(id)initWithFilename:(NSString *)filename
{
  if (self = [super initWithImageNamed:filename]) {

  }

  return self;
}
@endTo create an instance of the newly created custom sprite class, we will go to MainScene.h, import the Hero.h file, and create a new instance of the Hero type called hero with the following code:
#import "Hero.h"

@interface MainScene :CCNode{

  CGSizewinSize;
  Hero* hero;

}
In the MainScene.m file, we will add the following code right after the place we added rtSprite:
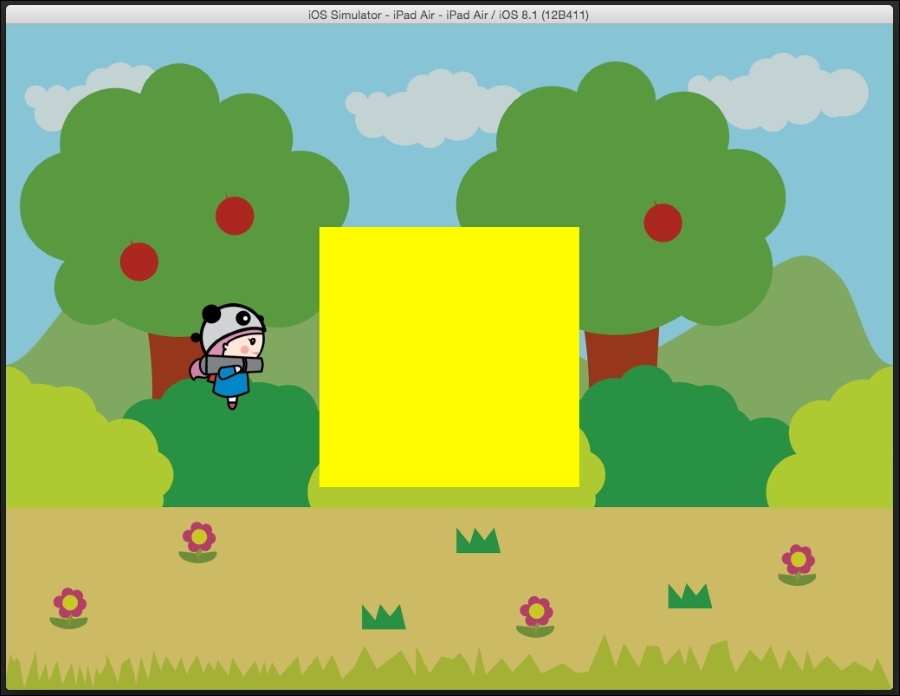
hero = [[Hero alloc]initWithFilename:@"hero.png"];
hero.position = CGPointMake(center.x - winSize.width/4, winSize.height/2);
[selfaddChild:hero];
Here, we initialized hero with the hero.png file. In the Resources folder, we have to import the hero-ipad.png and hero-ipadhd.png files into the project in a similar way to how we added the Bg image files.
We will place hero at one-quarter the width of the screen, to the left of the center of the screen, and place it at half the height of the screen. Lastly, we will add the hero object to the scene.
In this section, we will discuss how to animate a sprite. We will change our custom sprite class to make the character animate. This can be done by providing Cocos2d with a number of images and asking it to cycle through these images to create the animation.
To animate the sprites, we will add four frames of animation that we will apply to the hero sprite class and cycle through the images using the repeatForever action. In the next section, we will cover the actions in detail.
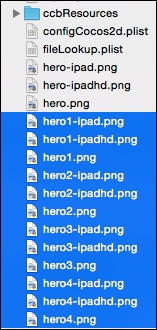
In the Resources folder for this chapter, there will be normal, ipad, and ipadhd versions of the frames for hero. We will import all the files into the project.
In the Hero.m file, we will change the initWithFilename function, as follows:
-(id)initWithFilename:(NSString *)filename
{
  if (self = [super initWithImageNamed:filename]) {


    NSMutableArray *animFramesArray = [NSMutableArray array];

    for (inti=1; i<=4; i++){

      [animFramesArrayaddObject:
        [CCSpriteFrameframeWithImageNamed:
        [NSStringstringWithFormat:@"hero%d.png",i ]]];

    }

    CCAnimation* animation =
      [CCAnimation
      animationWithSpriteFrames:animFramesArraydelay:0.3];

    CCActionInterval *animate=
      [CCActionAnimateactionWithAnimation:animation];

    CCAction* repeateAnimation =
      [CCActionRepeatForeveractionWithAction:animate];

    [selfrunAction:repeateAnimation];

  }

  return self;
}
@end
First, we will create a new variable called animFramesArray of the NSMutableArray type.
We will then create a for loop starting from index 1 and going to 4, as there are four images. We will save the frames in the array by passing in the names of the four images that we would like to loop through.
Next, we create a variable called animation of the CCAnimation type and pass it in the four frames; also add the delay with which the animation should be played with.
We will then create a variable called animate of the CCActionInterval type to create a loop through the animation. Then, in the next step, we will create CCAction and call the repeat forever action, which will loop through the animation forever.
Finally, we will run the action on the current class.

We already saw Actions in action while animating and repeating the player animation. However, there are a lot more additional actions that you can perform. Further, you can play these actions together in a sequence.
Let's first take a look at a simple action in which we will move the hero along the x axis by half the width of the screen, and move it down by one-quarter the height of the screen from the center in the y direction.
After we have added the hero to MainScene, we will add the following code:
CGPointfinalPos = CGPointMake(center.x + winSize.width/4, center.y - winSize.height/4);
CCActionFiniteTime* actionMove = [CCActionMoveToactionWithDuration:1.0position:finalPos];
[herorunAction:actionMove];
For convenience, I created a CGPoint called finalPos and stored the final position in it. Then, I created a variable called actionMove of the CCFiniteAction type, called the CCMoveTo function, gave it a duration of 1.0 seconds, and specified the position that I wanted to move the hero to. Finally, I called the runAction function on hero and passed in the action.
When you run the project, the hero will be to the left of the yellow render sprite and will slowly start moving towards the lower-right corner if the render sprite is over a period of 1 second. After 1 second, when the destination location is reached, the action will stop, and the hero will be stationary again.
Let's next create a more elaborate action and add a whole bunch of actions in a sequence and play them one after the other. Therefore, we will remove the previous code and add the following code instead:
//Actions

CGPointinitPos = hero.position;
CGPointfinalPos = CGPointMake(center.x + winSize.width/4, center.y - winSize.height/4);

CCActionFiniteTime* actionMove = [CCActionMoveToactionWithDuration:1.0position:finalPos];

CCAction *rotateBy = [CCActionRotateByactionWithDuration:2.0 angle: 180];

CCAction *tintTo=  [CCActionTintToactionWithDuration:1.0 color:[CCColorcolorWithRed:0.0fgreen:1.0blue:0.0]];

CCAction *delay = [CCActionDelayactionWithDuration:1.0];

CCAction *moveToInit = [CCActionMoveToactionWithDuration:1.0position:initPos];

CCAction *rotateBack = [CCActionRotateByactionWithDuration:2.0 angle: 180];

CCAction *tintBlue=  [CCActionTintToactionWithDuration:1.0 color:[CCColorcolorWithRed:0.0fgreen:0.0blue:1.0]];

CCAction *sequence = [CCActionSequenceactions:actionMove, rotateBy,tintTo, moveToInit, delay, rotateBack, tintBlue, nil];

[herorunAction:sequence];
Here, as I stored the final position in a variable, I will also store the initial position in a CGPoint variable called initPos, which we will use later.
The first action is the same moveTo action with which we will move the player.
Next, we will use the rotateBy action; here, we will give the duration and angle in degrees by which the object should be rotated.
After this, we will use the tintTo action, which will change the color of the object. Once again, we will give it the duration and color to which we want to the object to change. Here, we will change the color to green.
We will then call the delay action, which is used to perform an action after a delay. We will create a delay of 1 second.
Then, we will move the object back to its initial position, change the object color to blue, and rotate the object again by another 180 degrees.
We will create the CCSequence action and pass in all the actions in the order we want them to be played; at the end, we will add nil to say that is the end of the list.
At the end, we will call run the sequence action on hero.
Now, the hero will start at the initial position, but when he gets back, he will be blue in color.
The output of the code is as follows:

Cocos2d uses openGLES, which is a graphics library that enables objects to be displayed onscreen. In fact, all the drawing that we have done until now uses this library. Cocos2d also gives you basic access to glPrimitives, which can be used to create basic shapes, such as circles, squares, rectangles, and so on.
Let's take a look at a few of the examples now. We will begin by creating a simple circle.
Right after adding the hero node, we will add the following code:
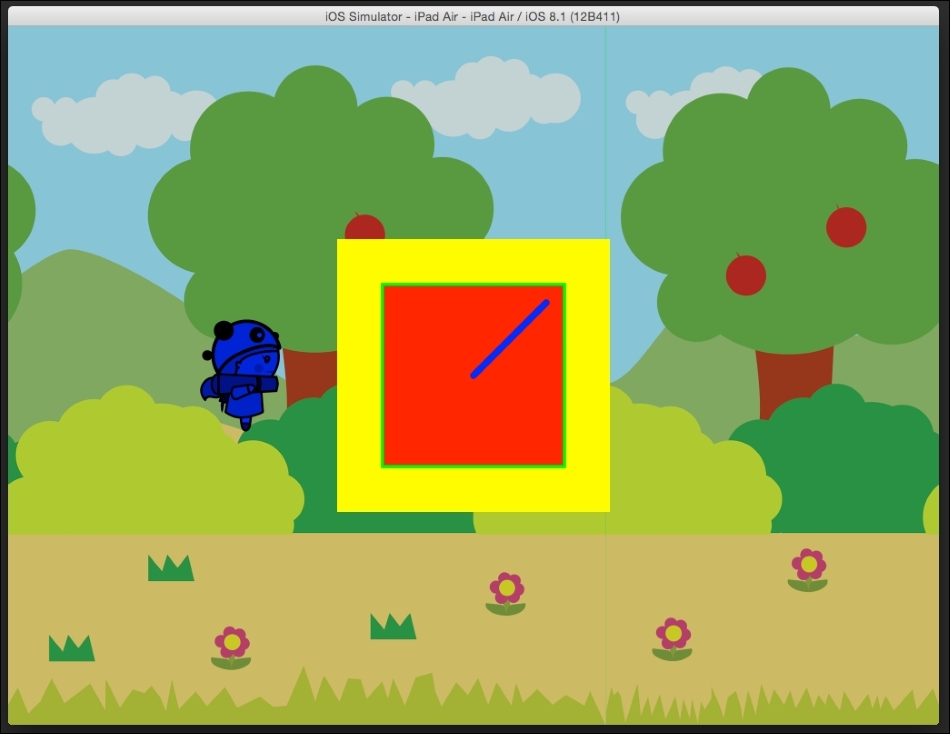
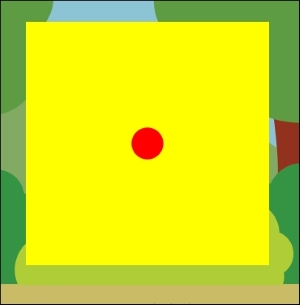
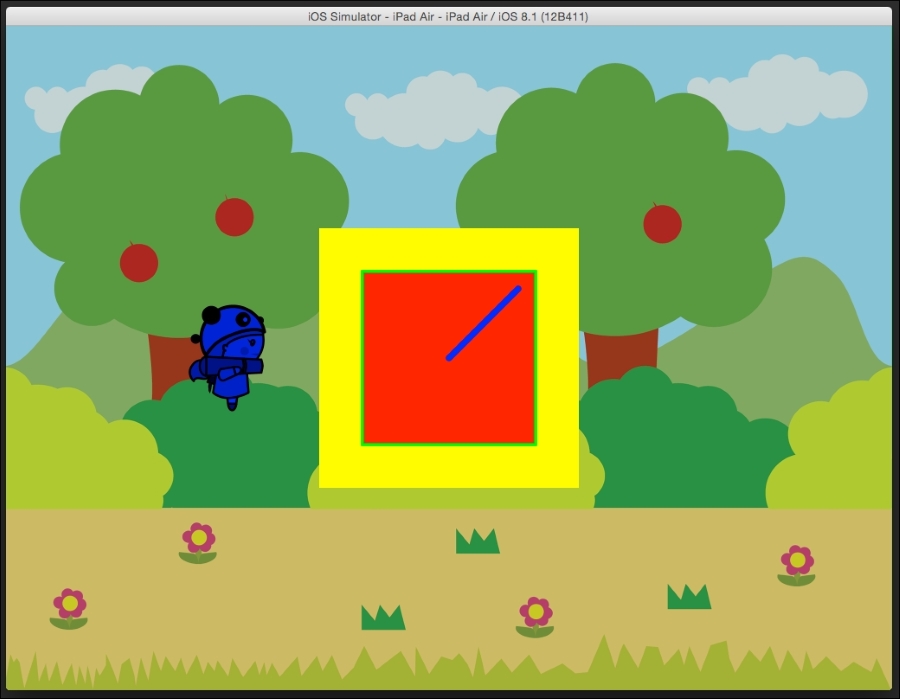
//drawDotNode
CCDrawNode* dotNode = [CCDrawNode node];
CCColor* red = [CCColorcolorWithRed:1.0fgreen:0.0fblue:0.0f];
[dotNodedrawDot:CGPointMake(winSize.width/2, winSize.height/2) radius: 10.0fcolor:red];
[selfaddChild:dotNode];
glPrimitives are created using the CCDrawNode class. Here, we will create a new instance of CCDrawNode and call it DotNode. We will create a new CCColor variable called red and assign the RGBA value of red.
We will then call the drawDot function on CCDrawNode and pass in the location where we would like to create the circle. We will also pass in the radius and color. In the end, we will add dotNode to the scene.
When you run the project, you will see a red dot at the center of the screen.
Here, as we provided the center of the circle and radius, Cocos2d creates the circle and paints the area inside this region with the color that you specified.
The circle is one example; there are other shapes that can also be created this way.
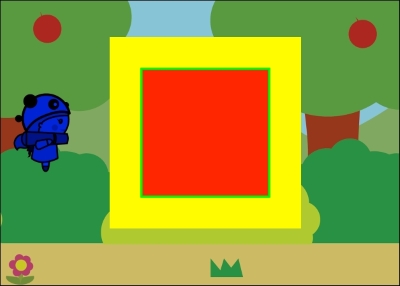
Next, we will take a look at how to create polygons of any shape with the drawWithPolyVert function of the CCDrawNode class. Add the following code and replace or comment the DrawDot node:
// DrawSquareNode
CCDrawNode *squareNode = [CCDrawNode node];

CGPointsquareVerts[4] =
{
  CGPointMake(center.x - 50, center.y - 50),

  CGPointMake(center.x - 50, center.y + 50),

  CGPointMake(center.x + 50, center.y + 50),

  CGPointMake(center.x + 50, center.y - 50)
};

CCColor* green = [CCColorcolorWithRed:0.0fgreen:1.0fblue:0.0f];

[squareNodedrawPolyWithVerts:squareVerts
  count:4
  fillColor:red
  borderWidth:1
  borderColor:green];

[selfaddChild:squareNode];
We will create a new node of the CCDrawNode type. Next, we will create an array of CGPoint by calling in squareVerts, which will take in the location of the vertices of the square. We will then create a new CCColor called green and assign it a green color using the RGBA value.
Then, we will call drawPolyLineWithVerts, pass in the vertices array, give the number of vertices to draw, pass in the fill color as red, and assign a border width of 1. In the end, we will pass in the border color as green, which we specified earlier.
Then, we will add squareNode to the scene.
We can simply run the project to see the final result.
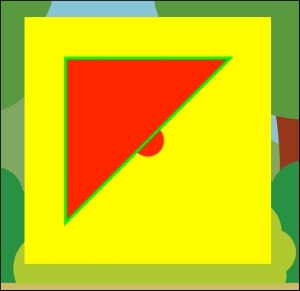
We can also make a triangle with the same code. Instead of drawing four nodes, if we just ask the function to draw three nodes, a triangle will be drawn instead of a square.
We can change the code as follows, in which we will change the count to 3 instead of 4. There is no need to change the verts array:
CCColor* green = [CCColorcolorWithRed:0.0fgreen:1.0fblue:0.0f];

[squareNodedrawPolyWithVerts:squareVerts
  count: 3
  fillColor:red
  borderWidth:1
  borderColor:green];

[selfaddChild:squareNode];
We will then run again to see the change:
Using the CCDrawNode class, we can also create line segments between two points.
For this, we will add the following code right after adding the polyline code:
//segment node
CCColor* blue = [CCColorcolorWithRed:0.0fgreen:0.0fblue:1.0f];

CCDrawNode* segmentNode = [CCDrawNode node];

[segmentNodedrawSegmentFrom:center
  to:CGPointMake(center.x + 40, center.y + 40)
  radius: 2.0
  color: blue];

[selfaddChild:segmentNode];
We will define a new CCColor called blue so that we can color the line blue. Next, we will create a new CCDrawNode class and call it segmentNode.
On segmentNode, we will call the drawSegment function and provide the center of the screen as the start point and the second point is 40 units in the x direction and 40 units in the y direction from the center. We will then pass in the radius, which is the thickness of the line, and the color blue.
The node is then added to the scene.
Note that in the following screenshot, I changed the polyline to draw a square instead of a triangle:
In this section, we will add a parallax or scrolling background. This is a very popular effect in games, in which the objects in the foreground move faster as compared to the objects in the background that move much slower, giving the illusion of depth and motion.
Recall the movies of yesteryear in which the hero or subject remains stationary and acts as if they are galloping on a horse, and the background is looped to give the illusion that the hero is actually moving forward in the scene.
We will implement a very simple parallax effect in which all the objects in the background, such as the trees, bushes, and grass, move at the same speed. So, we will just take the background image and make it move in a loop.
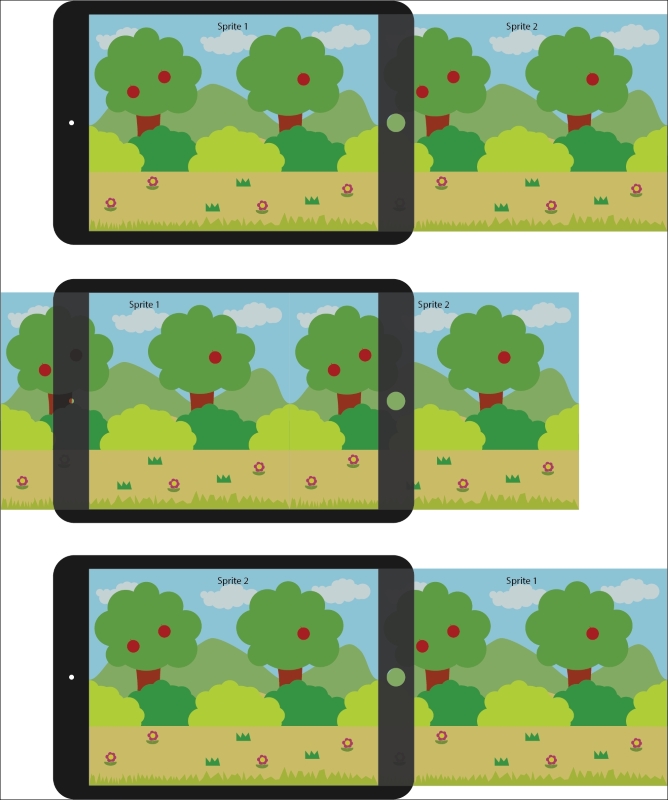
The parallax effect will be achieved thus: instead of a single sprite of the background image, we will use two sprites and place them adjacent to each other horizontally at the start of the game, as seen in the first preceding image. The first sprite will be visible, but the second sprite will be offscreen and won't be visible to the player initially.
When the game starts, both the sprites will be moved with a certain speed in the negative x direction—that is toward the left of the screen. Both the sprites will move at the same speed. So, once the game starts, sprite 1 will slowly go offscreen bit by bit, and the second sprite will start to get visible.
Once the first sprite goes completely offscreen, it is quickly moved to the end of the second sprite, which is at the same position that the second sprite was at the start of the game.
Thus, the process continues in a loop. Both the sprites always move toward the left of the screen. After each sprite goes off screen on the left-hand side, it is placed off screen on the right-hand side of the screen, and it continues to move left.
There are a couple of things that need to be kept in mind while creating assets for parallax scrolling and coding a parallax effect. The first is that when creating assets for a parallax effect, the art needs to be continuous. This means, for example, if you look at the second image in the preceding section, you will see that the mountains look like a continuous mountain range. Even though Sprite1 and Sprite2 are two different images, when put together, they appear as one single image. This can again be seen in the light green bush below the mountain. The left-hand part of the bush is in Sprite1, and the right-hand part is in Sprite2, yet when the two sprites are kept adjacent to each other, they give a seamless illusion of being part of a single bush.
The second aspect to keep in mind is image gap. Even if you make the images seamless and make the sprites move at the same speed, sometimes you might encounter gaps between the sprites. This is not a very common problem, but in some frameworks, this problem might exist. So, to counter this, you can either stretch the images just by a bit so that the sprites overlap each other and it is not very obvious to the player. The other method is to make sure that you manually place the sprites at the end of the onscreen sprite and also make necessary adjustments if required to bridge the gap between the sprites.
This is the main theory behind parallax scrolling. Let's take a look at it in practice in code in the next section.
In a similar way to how we created the Hero class, we will create a file of the CocosTouchClass type and name it ParallaxSprite.
Open the ParallaxSprite.h file and add the following code:
#import "CCSprite.h"

@interface ParallaxSprite :CCSprite{

  CGSize _winSize;
  CGPoint _center;
  CCSprite *_sprite1, *_sprite2;
  float _speed;
}


-(id)initWithFilename:(NSString *)filename Speed:(float)speed;
-(void)update:(CCTime)delta;

@end
We will create a few variables that we will use later, such as _winSize and _center, which will get the size of the screen resolution of the device that the game is running on and calculate the center of the screen.
We will create two sprite variables to hold the two images which will be cycled during the parallax effect.
We will also add a _speed variable. This is the speed with which we will move and loop the images.
In a similar way to the Hero class, we will create an initWithFilename function that will initiate the class with the filename provided. Additionally, we will also take a float, which will be the speed of the sprite.
We will also need an update function that will be called 60 times in a second and will update the position of the two sprites in the class.
This is all for the ParallaxSprite.h file. We will now move on to the ParallaxSprite.m file.
In the file, we will add the following code:
#import "ParallaxSprite.h"

@implementation ParallaxSprite

-(id)initWithFilename:(NSString *)filename Speed:(float)speed;{

  if(self = [super init]){

    NSLog(@"[parallaxSprite] (init) ");

    _winSize = [[CCDirectorsharedDirector]viewSize];

    _center = CGPointMake(_winSize.width/2, _winSize.height/2);

    _speed = speed;

    _sprite1 = [CCSpritespriteWithImageNamed:filename];
    _sprite1.position = _center;
    [selfaddChild:_sprite1];

    _sprite2 = [CCSpritespriteWithImageNamed:filename];
    _sprite2.position = CGPointMake(_sprite1.position.x + _winSize.width , _center.y);
    [selfaddChild:_sprite2];

  }
return self;
}
We will first add the initWithFilename function. In this, we will initialize the super class and get _winSize.
Next, we will calculate the center of the screen by dividing the width and height by two.
The speed value is assigned to the _speed variable classes.
We will then create the _sprite1 and _sprite2 variables. In spriteWithImageNames, we will pass the filename variable that will hold the string of the filename.
Note that _sprite1 is placed at the center of the screen, and _sprite2 is placed off screen by the width of the screen, but at the same height as _sprite1.
Both the sprites are then added to the class.
Next, we will add the update function, as follows:
-(void)update:(CCTime)delta{

  floatxPos1 = _sprite1.position.x - _speed;
  floatxPos2 = _sprite2.position.x - _speed;

  _sprite1.position = CGPointMake(xPos1, _sprite1.position.y);
  _sprite2.position = CGPointMake(xPos2, _sprite1.position.y);

  if(xPos1 + _winSize.width/2 <= 0){

    _sprite1.position = CGPointMake(_sprite2.position.x + _winSize.width, _center.y);

}else if(xPos2 + _winSize.width/2 <= 0){

    _sprite2.position = CGPointMake(_sprite1.position.x + _winSize.width, _center.y);

  }
}


@end
Here, we will calculate the new positions of the individual sprites in the x axis by getting the current x position of the sprites and then subtracting the speed. We will subtract because we want the sprites to move in the negative x direction in each update call.
In the next step, we will assign the x position calculated on both the sprites. We will use the same y position as the value does not change in the y direction.
Next, we will check whether the right-hand edge of the image is visible to the player any more and has gone beyond the left-hand side of the screen. If this is the case, we will place the sprite at the offscreen position, the width of the screen from the center of the other sprite, so that there are no gaps between the sprites.
We will use an "if else" statement here as only one sprite will go beyond the bounds on the left-hand side of the screen.
Let's take a look at how to implement this class now. In the MainScene.h class, we will import the ParallaxSprite.h file and create a new variable called pSprite of the ParallaxSprite type, as follows:
#import "Hero.h"
#import "ParallaxSprite.h"

@interface MainScene :CCNode{

CGSizewinSize;
    Hero* hero;
ParallaxSprite* pSprite;

}
Next, in the MainScene.m file, we will remove the code that was used to add the background sprite at the start of the chapter and replace it with the following code:
//Basic CCSprite - Background Image - REMOVE
//CCSprite* backgroundImage = [CCSpritespriteWithImageNamed:@"Bg.png"];
//backgroundImage.position = CGPointMake(winSize.width/2, winSize.height/2);
//[self addChild:backgroundImage];

//Parallax Background Sprite - ADD
pSprite = [[ParallaxSpritealloc]initWithFilename:@"Bg.png" Speed:5];
[selfaddChild:pSprite];
Here, we will assign the same Bg.png file as we did earlier; however, additionally, we will also provide a speed value of 5.
Note that we will not call the update function of the ParallaxSprite class as it is called automatically every frame. Further, you also don't have to schedule it as you did previously because the function is initialized automatically at the start.
And that is all! You can enjoy the parallax sprite effect now.