


Chapter 2: Adding Brushes to CSP
In this chapter, you will learn how to create a brush and gain a basic understanding of how to create a brush in CSP, for decoration and general work. This is so that you can focus more on the fun stuff, such as drawing, thinking about composition or the color palette of your piece… or whatever part of the process it is that you like doing.
And as a bonus, as your benevolent/evil lord/teacher, I will give you a little homework for creating and understanding the options of a workhorse brush.
It's always a little bit daunting starting with new software, because you will find a lot of new, strange brushes that you're unfamiliar with. A workhorse brush is just a good, reliable brush that you can use for everything while you learn the basics of the software or drawing in general.
This chapter will cover the following topics:
- Creating a brush
- Decoration and texture brushes
- Workhorse brush
Creating a brush
Ironically, before talking about brushes, I need to talk about grayscale and give you some basic knowledge about it. This is because when you create a brush tip, you need to do it in grayscale mode. CSP can use images as brush tips, so, for example, if you need to create a forest and you have some tree png cutouts, you can add them to a brush and it will copy stamp those exact trees. But, if those trees were registered as a brush tip in grayscale mode, everything on the black-pixels side will be converted to Main color and every white pixel will be converted to Sub color. This can give you a lot of freedom in creating brushes with textures and color variation. The first thing you need to do is go to the Sub Tool group. Before following the steps, I recommend that you create a folder inside your Materials folder called Brush Tips. To do this, just right-click on the Materials folder and click on New folder. In this way, you will have all your brush tips cleanly organized. If you deem it necessary, you can even create subfolders based on the brush tips, such as Watercolor or Painting:
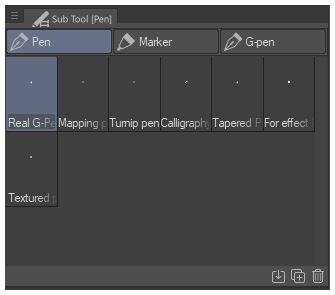
Figure 2.1 – The pen Sub Tool group
To create a new brush, follow these steps:
- Go to the Sub Tool window and click on the following button and it will create a copy of the brush you selected. Rename it, and there you have your new brush:

Figure 2.2 – Create a copy of currently selected Sub Tool icon
- Before changing our brush tip, we need to create one. The process is pretty straightforward. Create a new layer set by going to Expression color | Gray and drawing whatever you want.
- Go to Edit | Register Material | Image.
If you remember from the previous chapter, this will open this window:

Figure 2.3 – Material property window
- Give a name to your material, check the Use for brush tip shape box, select a folder location to save your material, and there you have it—your personal brush tip.
Now… how can you apply your brush tip?
- Go to the Tool property window and click on that little wrench in the bottom-right corner. This will give you access to all the brush options; go to Brush tip:

Figure 2.4 – The Tool property window
- Click on Material (if it isn't already selected), and after this, double-click on the area in which there is written Click here and add tip shape. Now you just need to select your brush tip. And voilà… you just applied your first brush tip!

Figure 2.5 – The brush tip shape lets you use two things: a circle or custom brush tip
- Now I have Ape sitting brush—I hope that you didn't follow me exactly and made something less silly…
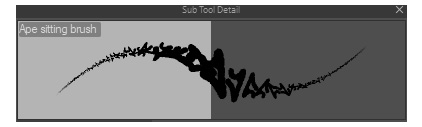
Figure 2.6 – The result of using a custom brush tip
Before moving further, there is just one extra little bit of information. In CSP, you can now change how your brush cursor looks by just going to File | Preferences | Cursor:
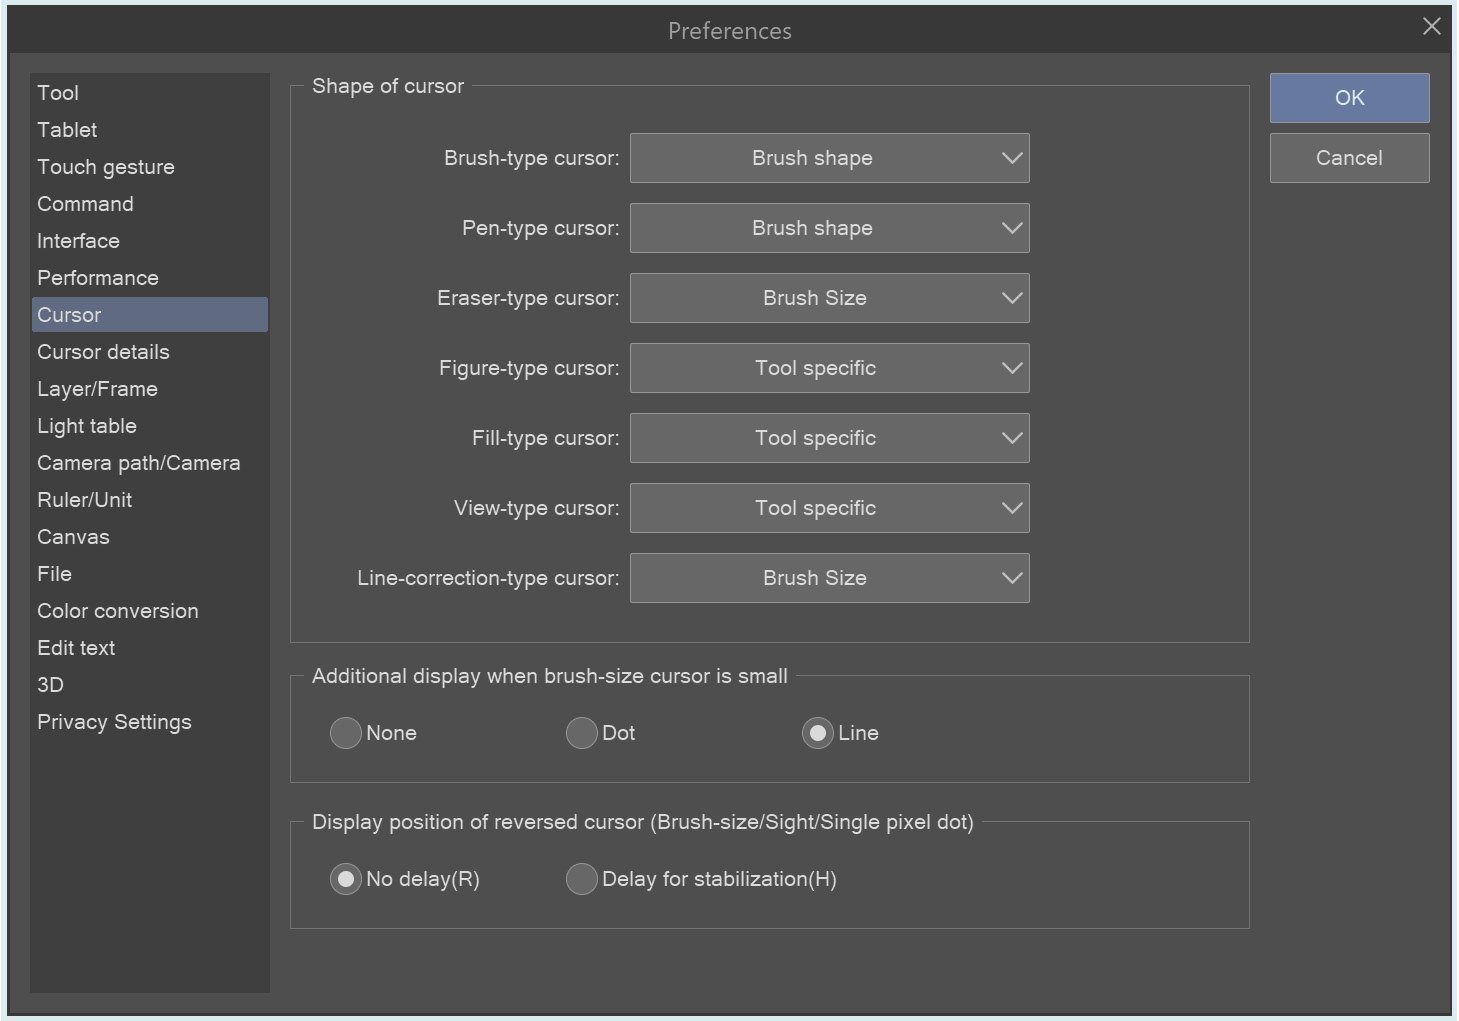
Figure 2.7 – Cursor shape options location
You have a pretty wide range of options for how your cursor will look while you work. Here's a list with some details:
- Tool specific: Your cursor will have the tool-like little symbol that you find in the Tool palette and the Sub Tool palette. An eraser will show a little eraser cursor—simple, no?
- None: You will have nothing, an invisible cursor. It's a strange feeling, to be honest. But if you can get used to it, it's the best option if you want to feel like you're painting in real life.
- Cross: You will have a little cross.
- Triangle: You will have a little triangle.
- Dot: You will have a little dot.
- Single pixel dot: You will have a very little dot, like, 1 px little.
- Sight: You will have a cross with a dot in the middle
- Brush size: This is the default mode for brush-related tools. You see your brush size as a circle that tells you the size of your brush.
- Brush shape: This is a new feature from the May 2021 update. You can have your cursor show your brush tips silhouettes, like in Photoshop. You can find your brush silhouette in the Sub Tool Detail palette, under the Brush Size section:
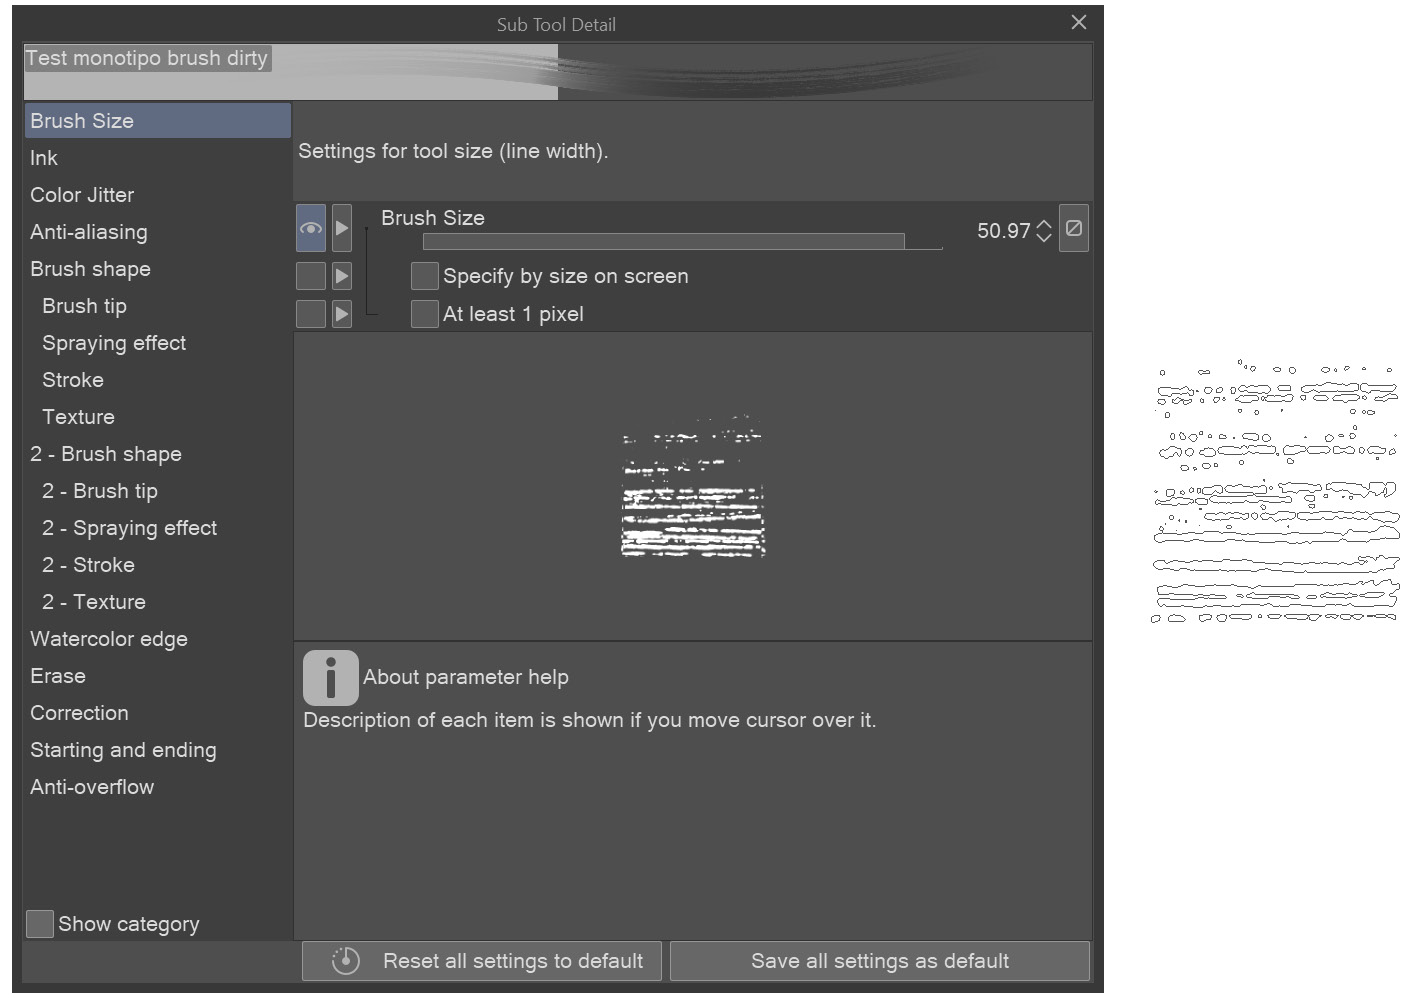
Figure 2.8 – Example of a brush silhouette and how it's seen on the canvas (right)
The other options are a combination of the groups I've just listed.
Little tips
If you feel like you're always cycling between the same brushes, thanks to the Brush shape cursor option, you can even remove the Sub Tool palette from your workspace. Just put every brush you need in a single group, bind a key to the shortcut for cycling between sub tools, and you can use the brush shape to recognize the brush you're using. You can find the shortcut under File | Shortcut Settings | Category: Options | Sub Tool palette.
And that is how you make a brush and change the look of your cursor. By using the same method that I showed you for creating a brush, you can create a decoration brush as well, as you will see in the next section.
Decoration and texture brushes
When I said "Your first brush tip" before, I was being serious, because you can apply more than one brush tip. The advantage of this is that you can create, as we will see in the dedicated chapter, a painting brush that doesn't rely on a texture, but only on the mark that makes on your canvas—just like a real brush. As a training ground, I will show how you can use this feature to create decoration and texture brushes that are randomized, giving you a different effect every time you draw.
Let's start with the basics, and ironically, we will start with tool options instead of brush tips. The following figure shows some flower decoration brush tips:

Figure 2.9 – Some book decorations
We will use these flower decoration brush tips as a base. Now, if we add them to the Brush tip tool option, this is what we will see in the brush preview:

Figure 2.10 – This line is a preview of what you will see when you will use the brush
That's absolutely not what we want. To create a distinguishable pattern, we need to go to Sub Tool Detail | Stroke, and we need to check the Ribbon option. This option will give us this effect:

Figure 2.11 – An example of the ribbon effect
The Ribbon option creates a seamless pattern using your brush tips. Now we have another problem… these brush tips will repeat themselves in the same combination over and over:
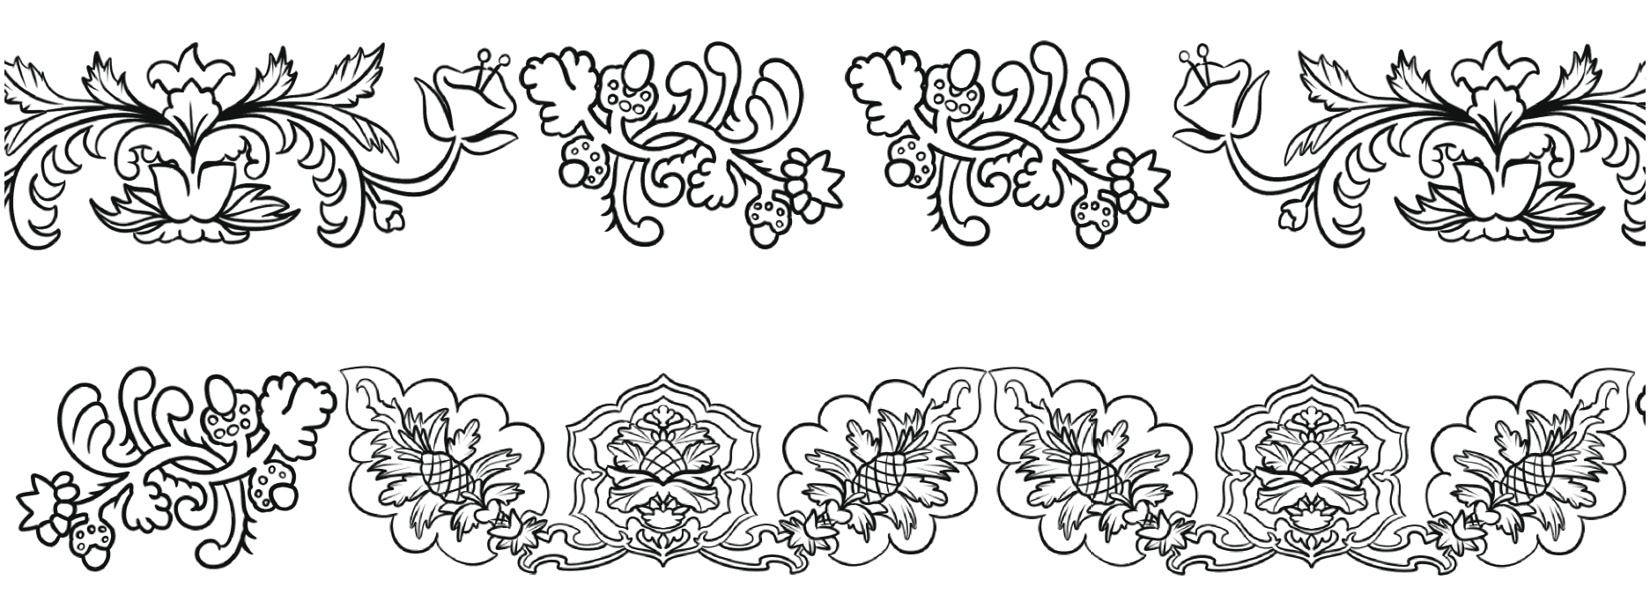
Figure 2.12 – As you can see, there is a clear repetition; if you want this effect, you're good to go
Fortunately, we can change this easily—just return to Stroke and go to Repeat method:
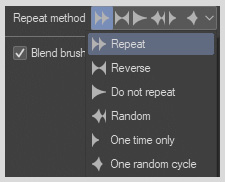
Figure 2.13 – The repeat methods you can choose from
We can change how these tips will repeat themselves. We will click on Random. This will mix your brush tips in a random pattern every time you draw.
Tip
If the brush tips are at the wrong angle, just go to Brush tip | Angle and change it there.
Now if we need a brush that has its size linked to the pen pressure, we just need to go to Brush size and click on this little button:

Figure 2.14 – Pen dynamic settings menu
This will open a menu in which we can link the brush size to the pen pressure, tilt of the pen, and velocity, or we can make it random.
Tip
Every time you see the pen dynamic settings button, it means that it is possible to link a value to a pen modifier. So, every time you see it, click on it and experiment with the possibilities.
To create a brush, all the options you need are here, in the Sub Tool Detail palette:
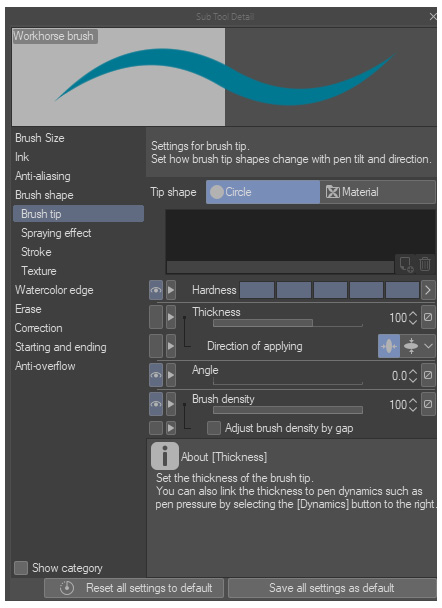
Figure 2.15 – Sub Tool Detail window
You will be surprised at how much you can do by only adding multiple brush tips and setting Repeat method to Random. I've created a lot of different brushes with only these two options.
But let's say we need to create a more complicated brush, such as a wood texture brush. For this wood texture brush, we need to create a seamless wood texture that randomizes itself every time. No problem, it is pretty straightforward and simple:
- Let's start by creating a simple 10x10 cm canvas; just go to File | New. Remember to change Basic expression color to Gray.
In this way, every time you create a new layer it will be in Gray mode. Now, just take a reference for creating some wood bark:
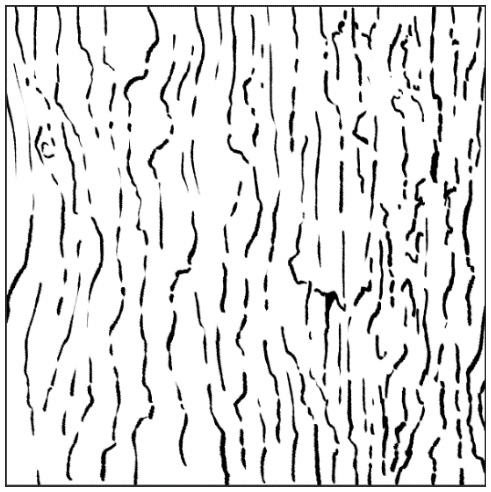
Figure 2.16 – The basic texture we have created
This is mine. We don't shade it because it would be more problematic to create a seamless pattern. And usually, you need those texture/decoration brushes to have a good base to work on, rather than focusing on the end product. Now we need to tile it.
- Right-click on the layer, and click on Convert layer | Type | Image material layer.
Now, if we go to Layer Property, we will find this:

Figure 2.17 – Object tool option menu
Click on the small cube, then go to Tool property and click on Tiling. This will repeat the pattern in all directions. Now, without changing tool, click on the pattern and move it around:
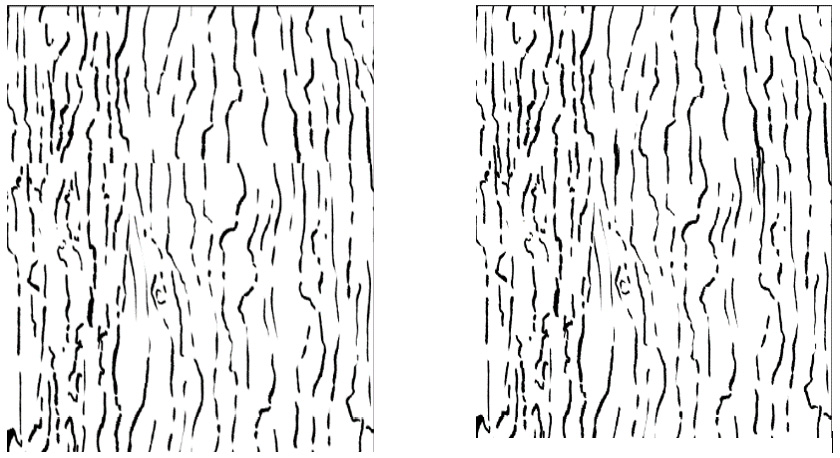
Figure 2.18 – On the left, we have the original image; on the right, the modified one
That's what happens when I move it—it's not seamless, and we can clearly see the cut of the repetition. But there is a pretty easy fix—just draw over it.
- Create a new layer and start drawing where we can see the cut. When you have finished, merge it with the layer below. The result of this fix can be seen in the right-hand example of the previous figure.
Now you just need to re-convert the layer and tile it again.
- After this, move it a little bit or scale it to see whether everything is OK. If everything is OK (usually it is), undo all your movement by pressing Ctrl + Z.
- After that, right-click on the layer window and click on Merge visible layers; check that Expression color in the Layer Option palette is still Gray, because sometimes when you merge the layers it will change to Color.
- Now, register the material as a brush tip and you have your first texture brush tip. Yep, I said first again. You will need to redo this at least 4-5 times…
Tip
The preceding method can be used to create a seamless texture based on a photo. But for that, you will need to use the Copy Stamp tool to mask the cut in the texture.The Copy Stamp tool looks something like this:

Figure 2.19 – The Copy Stamp tool
Once you've made 4-5 texture brush tips, you'll need to apply them somewhere, no? But wait—we will not use a brush this time, but the Straight line tool. Why? You will see soon:
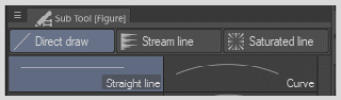
Figure 2.20 – The Sub Tool group for the figure drawing
If we go to Sub Tool Details for Straight line, we can see something familiar… Yes—we have the Brush tip setting; now redo the same thing you've done for the decoration brush. Now that you've done that, use it and create a straight line.
Tip
If you need a straight line when using a ruler or Direct draw tools, just press Shift.
Now, what will happen if we convert this line and tiling as we did before?
Instant random seamless wood texture…
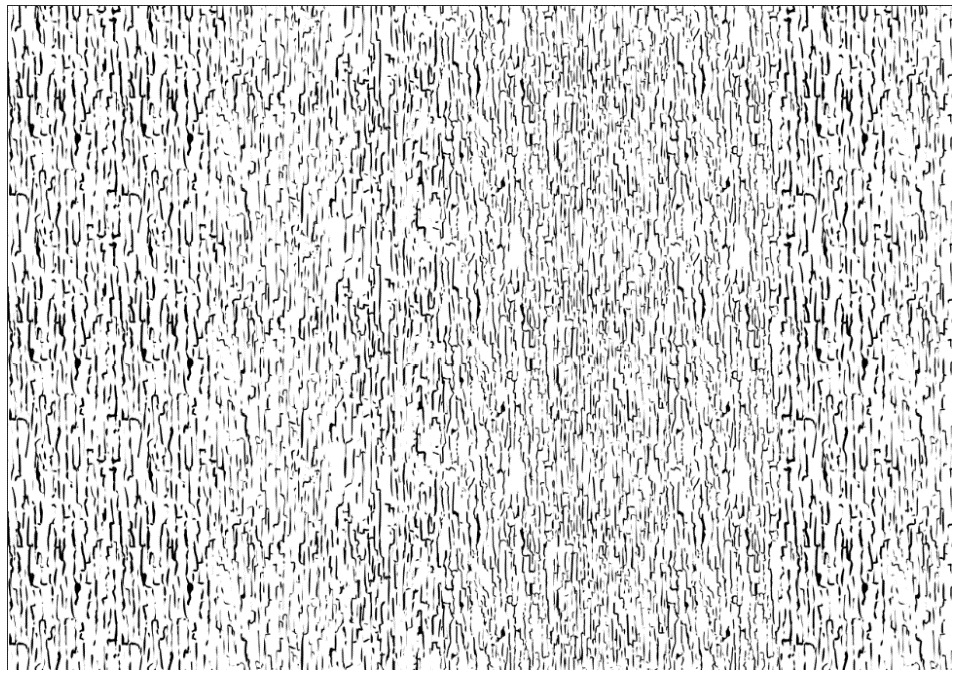
Figure 2.21 – Full-fledged random seamless texture
You can use this method to create practically anything that will require a seamless texture where you don't want obvious repetition in your texture. Examples of this could be seafoam, rocks, plaster, and so on.
Tip
Now, before continuing, I need you to think about this. A tool that is not directly a brush tool has brush tips, strokes, and spraying effect settings. So…
Every tool that draws a line, such as the Balloon tool or the Stream line tool, has Brush tip settings. Basically, you can personalize every tool that draws something.
A little exercise for you. Take the G-Pen tool properties, go to Ink, and look at Blending mode; now do the same with Hard eraser. Do you see anything strange?
Blending mode in Hard eraser is set to Cancel but for G-Pen it's set to Normal. This means that every brush tool is an eraser, just with a different blending mode. In Photoshop, the eraser and the brush tool are two different tools, but in CSP they are the same, only with different settings.
Another way to erase is using the transparent color; it is the little bar under Main color and Sub color:
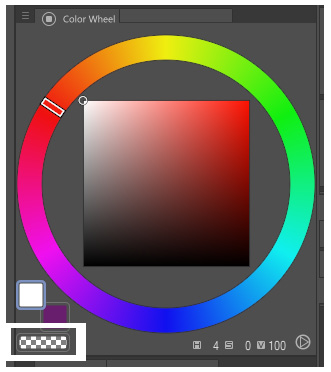
Figure 2.22 – Transparent color in the color wheel
The transparent color lets you transform every brush into an eraser in a quick way. You can select it in three ways:
- Selecting the icon in the color wheel.
- Color picking anywhere outside your canvas.
- Using a shortcut. You can bind a shortcut to the transparent color by going to File | Shortcut Settings | Options | Drawing Color.
In my opinion, I prefer to use the transparent color rather than an eraser. I find it a lot faster than switching tools and it gives a more organic feeling.
As you can see in the next section, if you master only a few brushes, you can have a brush for every occasion without even changing tool.
Workhorse brush
When you're just starting to work with CSP, you can sometimes be overwhelmed by the number of brushes. My advice is to create a workhorse brush and use that until you feel more confident in your basic skills.
Showing and hiding options
Now, we've had a taste of the options in the brush engine of CSP, but wait—there is a lot more we can do. One of those things is showing and hiding options in the Tool property palette:
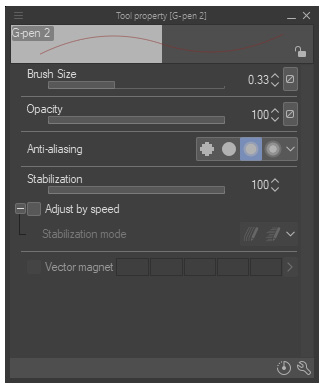
Figure 2.23 – Tool property window
For example, I don't want Vector magnet, because I don't usually use it. What do we need to do to hide it?
Click on that little wrench and go to Sub Tool Detail. Click on Correction, and now we can see a little eye icon over Vector magnet. We just need to click on that, and this will hide the Vector magnet option in the Tool property window:
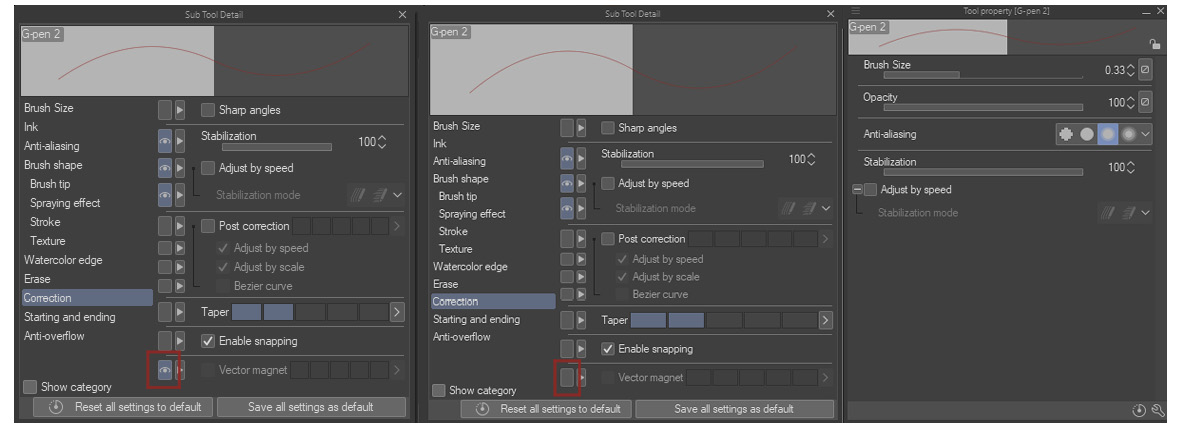
Figure 2.24 – We just hid Vector magnet from the Tool property window
This gives you a lot of flexibility regarding what you can change in a brush, without having to click on that little wrench icon every time.
Try it yourself
Now, as a little assignment, copy a basic circle-shaped brush, such as Milli pen. Navigate to Sub Tool Detail and try to show these options in the Tool property window of a new brush:
- Brush Size lets you choose the size of the brush.
- Opacity lets you chose the max alpha value of the color you can use while not removing the pen from the tablet.
- Blending mode lets you choose how the color reacts when you draw. For example, a Multiply blending mode will let you shift the color to black.
- Color mixing will activate the mixing of the color while you paint; these three options will control how it will mix:
a) Amount of paint
b) Density of paint
c) Color stretch
- Anti-aliasing lets you have a harder or softer edge to your brush.
- Brush shape lets you choose the shape of the brush.
- Angle lets you decide the angle of the brush tip.
- Brush density is similar to Opacity, but with the difference that it lets you decide the degree of color buildup while you paint without removing the pen from the tablet. If you want a painterly effect, go for this option and not Opacity.
- Stabilization is an in-built stabilization that lets you decide how much you want to smooth your stroke.
Remember that you can find all of those options in the Tool property palette:
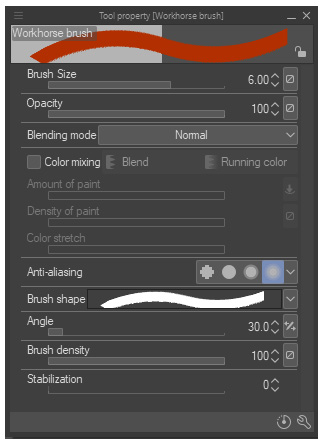
Figure 2.25 – Our Tool property window with all the options
Done? Good! Now, let's go to the next step.
Brush shape
Brush shape is a less-talked-about option in the CSP brush engine that can help you greatly, as it lets you save and load your brush options without going through your material brush tips and options.
Now, when using block colors or creating silhouettes, or if you want to have a certain degree of control when it comes to your shape edge, you need to toggle between some brushes. Usually, those are square, circle, and triangle brushes. With the Brush shape option, you can toggle between them with just a click:
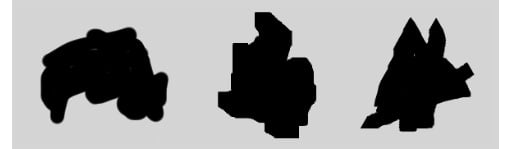
Figure 2.26 – From left to right, circle pen, square pen, and triangle pen
As you can see, those brushes give different characteristics to the edge of your shape. Which one to use is based completely on personal preferences… But how do we save and load the brush options? Let's take a look:
- First of all, create a square and a triangle brush tip. I recommend using the Polygon tool:

Figure 2.27 – Tool property of the Polygon tool—if you switch between these options, you can have a square and a triangle
- Now take your previously copied Milli pen and click on the usual little wrench icon, then go to the Brush shape option.
- Now click on Register to preset. After this, click on that other little wrench icon below the brush shapes to change the name and call it Round Brush:

Figure 2.28 – Brush shape option
- Now go to Brush tip and add your square brush tip as a material.
- Go to Brush shape, save it, and rename it Square Brush.
- Now do the same thing with the triangle brush and rename it Triangle Brush.
Now, every time you need to change your brush tip, you just need to click on Brush shape in Tool property and you can change it. Plus, you have all the options to modify the type of brush you're using. You can also switch easily between an inking brush and a painting brush with a single click:
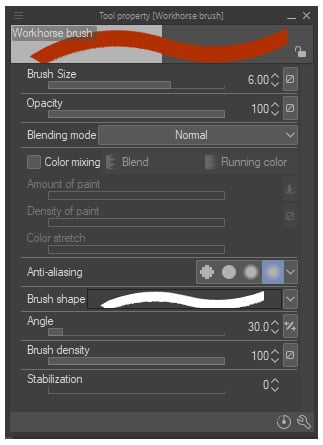
Figure 2.29 – Our workhorse tool property, as a reminder for the example
If you want to do this, it is a similar process to the steps previously followed. You just need to click on color mixing. And that's it, you have your painting brush.
Now, when I say "with a single click," I really mean it. You can link every window to a shortcut that will make that window appear under your pen.
To do so, you need to do the following:
- Go to File | Shortcut Settings.
- Click on Setting area and change it to Pop-up palette:

Figure 2.30 – Shortcut settings categories
- Now select Tool property and bind it to a shortcut.
Now every time you press that shortcut, Tool property will come up right under your pen. This works for every window you can think of, from Color Wheel to Layer. This is a pretty unique feature of CSP that lets you hide a lot of information from your monitor, without it being out of reach. For example, I don't need Color Wheel all the time, only when I need to change the color. This is really useful if you have a small monitor or a dual-monitor setup.
We will see how to use this little workhorse brush in Chapter 7, Making Your Own Illustration, Chapter 8, Creating Your Own Comic, and Chapter 9, Building Your Own Concept Art.
Summary
With this chapter, you're fully equipped to create your own personal brushes to help speed up your process.
You can create a brush with multiple brush tips that you can use for decorations, such as the pattern of a dress, and not only for that but even for creating a randomized seamless texture, giving you a ready-made base to use for your illustrations.
And finally, you now know how to create a workhorse brush that you can use for every situation without changing tools, giving you the opportunity to focus on the creative process without thinking about the technical stuff.
In the next chapter, we will learn how to create a 3D object to speed up our work.
