


In this chapter, you will learn the following recipes:
A simple single node Cassandra installation
Reading and writing test data using the command-line interface
Running multiple instances on a single machine
Scripting a multiple instance installation
Setting up a build and test environment for tasks in this book
Running the server in the foreground with full debugging
Calculating ideal Initial Tokens for use with Random Partitioner
Choosing Initial Tokens for use with Order Preserving Partitioners
Connecting to Cassandra with JConsole
Using JConsole to connect over a SOCKS proxy
Connecting to Cassandra with Java and Thrift
The Apache Cassandra Project develops a highly scalable second-generation distributed database, bringing together a fully distributed design and a ColumnFamily-based data model. The chapter contains recipes that allow users to hit the ground running with Cassandra. We show several recipes to set up Cassandra. These include cursory explanations of the key configuration files. It also contains recipes for connecting to Cassandra and executing commands both from the application programmer interface and the command-line interface. Also described are the Java profiling tools such as JConsole. The recipes in this chapter should help the user understand the basics of running and working with Cassandra.
Cassandra is a highly scalable distributed database. While it is designed to run on multiple production class servers, it can be installed on desktop computers for functional testing and experimentation. This recipe shows how to set up a single instance of Cassandra.
Visit http://cassandra.apache.org in your web browser and find a link to the latest binary release. New releases happen often. For reference, this recipe will assume apache-cassandra-0.7.2-bin.tar.gz was the name of the downloaded file.
Download a binary version of Cassandra:
$ mkdir $home/downloads
$ cd $home/downloads
$ wget <url_from_getting_ready>/apache-cassandra-0.7.2-bin.tar.
z
Choose a base directory that the user will run as he has read and write access to:
Note
Default Cassandra storage locations
Cassandra defaults to wanting to save data in
/var/lib/cassandraand logs in/var/log/cassandra. These locations will likely not exist and will require root-level privileges to create. To avoid permission issues, carry out the installation in user-writable directories.Create a
cassandradirectory in your home directory. Inside thecassandradirectory, createcommitlog,log,saved_caches, anddatasubdirectories:$ mkdir $HOME/cassandra/ $ mkdir $HOME/cassandra/{commitlog,log,data,saved_caches} $ cd $HOME/cassandra/ $ cp $HOME/downloads/apache-cassandra-0.7.2-bin.tar.gz . $ tar -xf apache-cassandra-0.7.2-bin.tar.gz
Use the
echocommand to display the path to your home directory. You will need this when editing the configuration file:$ echo $HOME /home/edward
This tar file extracts to
apache-cassandra-0.7.2directory. Open up theconf/cassandra.yamlfile inside in your text editor and make changes to the following sections:data_file_directories: - /home/edward/cassandra/data commitlog_directory: /home/edward/cassandra/commit saved_caches_directory: /home/edward/cassandra/saved_caches
Edit the
$HOME/apache-cassandra-0.7.2/conf/log4j-server.propertiesfile to change the directory where logs are written:log4j.appender.R.File=/home/edward/cassandra/log/system.log
Start the Cassandra instance and confirm it is running by connecting with
nodetool:$ $HOME/apache-cassandra-0.7.2/bin/cassandra
 INFO 17:59:26,699 Binding thrift service to /127.0.0.1:9160
 INFO 17:59:26,702 Using TFramedTransport with a max frame size of 15728640 bytes.
$ $HOME/apache-cassandra-0.7.2/bin/nodetool --host 127.0.0.1 ring
Address     Status   State   Load            Token
127.0.0.1      Up     Normal  385 bytes       398856952452...
Cassandra comes as a compiled Java application in a tar file. By default, it is configured to store data inside /var. By changing options in the cassandra.yaml configuration file, Cassandra uses specific directories created.
Note
YAML: YAML Ain't Markup Language
YAML™ (rhymes with "camel") is a human-friendly, cross-language, Unicode-based data serialization language designed around the common native data types of agile programming languages. It is broadly useful for programming needs ranging from configuration files and Internet messaging to object persistence and data auditing.
See http://www.yaml.org for more information.
After startup, Cassandra detaches from the console and runs as a daemon. It opens several ports, including the Thrift port 9160 and JMX port on 8080. For versions of Cassandra higher than 0.8.X, the default port is 7199. The nodetool program communicates with the JMX port to confirm that the server is alive.
Due to the distributed design, many of the features require multiple instances of Cassandra running to utilize. For example, you cannot experiment with Replication Factor, the setting that controls how many nodes data is stored on, larger than one. Replication Factor dictates what Consistency Level settings can be used for. With one node the highest Consistency Level is ONE.
The command-line interface (CLI) presents users with an interactive tool to communicate with the Cassandra server and execute the same operations that can be done from client server code. This recipe takes you through all the steps required to insert and read data.
Start the Cassandra CLI and connect to an instance:
$ <cassandra_home>/bin/cassandra-cli
[default@unknown] connect 127.0.0.1/9160;
Connected to: "Test Cluster" on 127.0.0.1/9160
New clusters do not have any preexisting keyspaces or column families. These need to be created so data can be stored in them:
[default@unknown] create keyspace testkeyspace
[default@testkeyspace] use testkeyspace;
Authenticated to keyspace: testkeyspace
[default@testkeyspace] create column family testcolumnfamily;
Insert and read back data using the
setandgetcommands:[default@testk..] set testcolumnfamily['thekey']['thecolumn']='avalue'; Value inserted. [default@testkeyspace] assume testcolumnfamily validator as ascii; [default@testkeyspace] assume testcolumnfamily comparator as ascii; [default@testkeyspace] get testcolumnfamily['thekey']; => (column=thecolumn, value=avalue, timestamp=1298580528208000)
The CLI is a helpful interactive facade on top of the Cassandra API. After connecting, users can carry out administrative or troubleshooting tasks.
Chapter 2, Command-line Interface is dedicated to CLI recipes defined in the preceding statements in greater detail.
Cassandra is typically deployed on clusters of multiple servers. While it can be run on a single node, simulating a production cluster of multiple nodes is best done by running multiple instances of Cassandra. This recipe is similar to A simple single node Cassandra installation earlier in this chapter. However in order to run multiple instances on a single machine, we create different sets of directories and modified configuration files for each node.
Ensure your system has proper loopback address support. Each system should have the entire range of 127.0.0.1-127.255.255.255 configured as localhost for loopback. Confirm this by pinging
127.0.0.1and127.0.0.2:$ ping -c 1 127.0.0.1 PING 127.0.0.1 (127.0.0.1) 56(84) bytes of data. 64 bytes from 127.0.0.1: icmp_req=1 ttl=64 time=0.051 ms $ ping -c 1 127.0.0.2 PING 127.0.0.2 (127.0.0.2) 56(84) bytes of data. 64 bytes from 127.0.0.2: icmp_req=1 ttl=64 time=0.083 ms
Use the
echocommand to display the path to your home directory. You will need this when editing the configuration file:$ echo $HOME /home/edward
Create a
hpcasdirectory in your home directory. Inside thecassandradirectory, createcommitlog,log,saved_caches, anddatasubdirectories:$ mkdir $HOME/hpcas/ $ mkdir $HOME/hpcas/{commitlog,log,data,saved_caches} $ cd $HOME/hpcas/ $ cp $HOME/downloads/apache-cassandra-0.7.2-bin.tar.gz . $ tar -xf apache-cassandra-0.7.2-bin.tar.gz
Download and extract a binary distribution of Cassandra. After extracting the binary, move/rename the directory by appending
'1'to the end of the filename.$ mv apache-cassandra-0.7.2 apache-cassandra-0.7.2-1 Open theapache-cassandra-0.7.2-1/conf/cassandra.yamlin a text editor. Change the default storage locations and IP addresses to accommodate our multiple instances on the same machine without clashing with each other:data_file_directories: - /home/edward/hpcas/data/1 commitlog_directory: /home/edward/hpcas/commitlog/1 saved_caches_directory: /home/edward/hpcas/saved_caches/1 listen_address: 127.0.0.1 rpc_address: 127.0.0.1Each instance will have a separate logfile. This will aid in troubleshooting. Edit
conf/log4j-server.properties:log4j.appender.R.File=/home/edward/hpcas/log/system1.log
Cassandra uses JMX (Java Management Extensions), which allows you to configure an explicit port but always binds to all interfaces on the system. As a result, each instance will require its own management port. Edit
cassandra-env.sh:JMX_PORT=8001
Start this instance:
$ ~/hpcas/apache-cassandra-0.7.2-1/bin/cassandraINFO 17:59:26,699 Binding thrift service to /127.0.0.101:9160 INFO 17:59:26,702 Using TFramedTransport with a max frame size of 15728640 bytes. $ bin/nodetool --host 127.0.0.1 --port 8001 ringAddress Status State Load Token 127.0.0.1 Up Normal 385 bytes 398856952452...
At this point your cluster is comprised of single node. To join other nodes to the cluster, carry out the preceding steps replacing
'1'with'2','3','4', and so on:$ mv apache-cassandra-0.7.2 apache-cassandra-0.7.2-2Open
~/hpcas/apache-cassandra-0.7.2-2/conf/cassandra.yamlin a text editor:data_file_directories: - /home/edward/hpcas/data/2 commitlog_directory: /home/edward/hpcas/commitlog/2 saved_caches_directory: /home/edward/hpcas/saved_caches/2 listen_address: 127.0.0.2 rpc_address: 127.0.0.2Edit
~/hpcas/apache-cassandra-0.7.2-2/conf/log4j-server.properties:log4j.appender.R.File=/home/edward/hpcas/log/system2.log
Edit
~/hpcas/apache-cassandra-0.7.2-2/conf/cassandra-env.sh:JMX_PORT=8002
Start this instance:
$ ~/hpcas/apache-cassandra-0.7.2-2/bin/cassandra
The Thrift port has to be the same for all instances in a cluster. Thus, it is impossible to run multiple nodes in the same cluster on one IP address. However, computers have multiple loopback addresses: 127.0.0.1, 127.0.0.2, and so on. These addresses do not usually need to be configured explicitly. Each instance also needs its own storage directories. Following this recipe you can run as many instances on your computer as you wish, or even multiple distinct clusters. You are only limited by resources such as memory, CPU time, and hard disk space.
Cassandra is an active open source project. Setting up a multiple-node test environment is not complex, but has several steps and smaller errors happen. Each time you wish to try a new release, the installation process will have to be repeated. This recipe achieves the same result of the Running multiple instances on a single machine recipe, but only involves running a single script.
Create a shell script
hpcbuild/scripts/ch1/multiple_instances.shwith this content:#!/bin/sh CASSANDRA_TAR=apache-cassandra-0.7.3-bin.tar.gz TAR_EXTRACTS_TO=apache-cassandra-0.7.3 HIGH_PERF_CAS=${HOME}/hpcas mkdir ${HIGH_PERF_CAS} mkdir ${HIGH_PERF_CAS}/commit/ mkdir ${HIGH_PERF_CAS}/data/mkdir ${HIGH_PERF_CAS}/saved_caches/Copy the tar to the base directory and then use
pushdto change to that directory. The body of this script runs five times:cp ${CASSANDRA_TAR} ${HIGH_PERF_CAS} pushd ${HIGH_PERF_CAS} for i in 1 2 3 4 5 ; do tar -xf ${CASSANDRA_TAR} mv ${TAR_EXTRACTS_TO} ${TAR_EXTRACTS_TO}-${i}Cassandra attempts to auto detect your memory settings based on your system memory. When running multiple instances on a single machine, the memory settings need to be lower:
   sed -i '1 i MAX_HEAP_SIZE="256M"' ${TAR_EXTRACTS_TO}-${i}/conf/cassandra-env.sh
  sed -i '1 i HEAP_NEWSIZE="100M"' ${TAR_EXTRACTS_TO}-${i}/conf/cassandra-env.sh
Replace
listen_addressandrpc_addresswith a specific IP, but do not change the seed from127.0.0.1:sed -i "/listen_address\|rpc_address/s/localhost/127.0.0.${i}/g" ${TAR_EXTRACTS_TO}-${i}/conf/cassandra.yamlSet the
data,commitlog, andsaved_cachesdirectory for this instance:sed -i "s|/var/lib/cassandra/data|${HIGH_PERF_CAS}/data/${i}|g" ${TAR_EXTRACTS_TO}-${i}/conf/cassandra.yaml sed -i "s|/var/lib/cassandra/commitlog|${HIGH_PERF_CAS}/commit/${i}|g" ${TAR_EXTRACTS_TO}-${i}/conf/cassandra.yaml sed -i "s|/var/lib/cassandra/saved_caches|${HIGH_PERF_CAS}/saved_caches/${i}|g" ${TAR_EXTRACTS_TO}-${i}/conf/cassandra.yamlChange the JMX port for each instance:
  sed -i "s|8080|800${i}|g" ${TAR_EXTRACTS_TO}-${i}/conf/cassandra-env.sh
done
popd
Change the mode of the script to executable and run it:
$ chmod a+x multiple_instances.sh
$ ./multiple_instances.sh
Cassandra does not have a standardized data access language such as SQL or XPATH. Access to Cassandra is done through the Application Programmer Interface (API). Cassandra has support for Thrift, which generates bindings for a variety of languages. Since Cassandra is written in Java, these bindings are well established, part of the Cassandra distribution, and stable. Thus, it makes sense to have a build environment capable of compiling and running Java applications to access Cassandra. This recipe shows you how to set up this environment. Other recipes in the book that involve coding will assume you have this environment setup.
You will need:
The apache-ant build tool (http://ant.apache.org)
Java SDK (http://www.oracle.com/technetwork/java/index.html)
JUnit jar (http://www.junit.org/)
Create a top-level folder and several sub folders for this project:
$ mkdir ~/hpcbuild
   $ cd ~/hpcbuild
   $ mkdir src/{java,test}
   $ mkdir lib
Copy JAR files from your Cassandra distribution into the
libdirectory:$ cp <cassandra-home>/lib/*.jar ~/hpcbuild/libFrom the JUnit installation, copy the
junit.jarinto your library path. Java applications can use JUnit tests for better code coverage:$ cp <junit-home>/junit*.jar ~/hpcbuild/libCreate a
build.xmlfile for use with Ant. Abuild.xmlfile is similar to a Makefile . By convention, properties that represent critical paths to the build are typically specified at the top of the file:<project name="hpcas" default="dist" basedir="."> <property name="src" location="src/java"/> <property name="test.src" location="src/test"/> <property name="build" location="build"/> <property name="build.classes" location="build/classes"/> <property name="test.build" location="build/test"/> <property name="dist" location="dist"/> <property name="lib" location="lib"/>
Ant has tags that help build paths. This is useful for a project that requires multiple JAR files in its
classpathto run:<path id="hpcas.classpath"> <pathelement location="${build.classes}"/> <fileset dir="${lib}" includes="*.jar"/> </path>We want to exclude test cases classes from the final JAR we produce. Create a separate source and build path for the test cases:
  <path id="hpcas.test.classpath">
    <pathelement location="${test.build}"/>
    <path refid="hpcas.classpath"/>
  </path>
An Ant target does a unit of work such as
compileorrun. Theinittarget creates directories that are used in other parts of the build:<target name="init"> <mkdir dir="${build}"/> <mkdir dir="${build.classes}"/> <mkdir dir="${test.build}"/> </target>The
compiletarget builds your code using thejavaccompiler. If you have any syntax errors, they will be reported at this stage:<target name="compile" depends="init"> <javac srcdir="${src}" destdir="${build.classes}"> <classpath refid="hpcas.classpath"/> </javac> </target> <target name="compile-test" depends="init"> <javac srcdir="${test.src}" destdir="${test.build}"> <classpath refid="hpcas.test.classpath"/> </javac> </target>The
testtarget looks for filenames that match certain naming conventions and executes them as a batch of JUnit tests. In this case, the convention is any file that starts withTestand ends in.class:<target name="test" depends="compile-test,compile" > <junit printsummary="yes" showoutput="true" > <classpath refid="hpcas.test.classpath" /> <batchtest> <fileset dir="${test.build}" includes="**/Test*.class" /> </batchtest> </junit> </target>If the build step succeeds, the
disttarget creates a final JARhpcas.jar:<target name="dist" depends="compile" > <mkdir dir="${dist}/lib"/> <jar jarfile="${dist}/lib/hpcas.jar" basedir="${build.classes}"/> </target>The
runtarget will allow us to execute classes we build:<target name="run" depends="dist"> <java classname="${classToRun}" > <classpath refid="hpcas.classpath"/> </java> </target>The
cleantarget is used to remove files left behind from older builds:<target name="clean" > <delete dir="${build}"/> <delete dir="${dist}"/> </target> </project>Now that the
build.xmlfile is constructed, we must verify it works as expected. Create small Java applications in both the build and test source paths. The first is a JUnit test insrc/test/Test.java:import junit.framework.*; public class Test extends TestCase { public void test() { assertEquals( "Equality Test", 0, 0 ); } }Next, write a simple
"yocassandra"programhpcbuild/src/java/A.java:public class A { public static void main(String [] args){ System.out.println("yo cassandra"); } }Call the
testtarget:$ ant testBuildfile: /home/edward/hpcbuild/build.xml ... [junit] Running Test [junit] Tests run: 1, Failures: 0, Errors: 0, Time elapsed: 0.012 sec BUILD SUCCESSFUL Total time: 5 secondsCall the
disttarget. This will compile source code and build a JAR file:$ ant dist compile: dist: [jar] Building jar: /home/edward/hpcbuild/dist/lib/hpcas.jar BUILD SUCCESSFUL Total time: 3 secondsThe
jarcommand will build empty JAR files with no indication that you had specified the wrong path. You can use the-tfarguments to verify that the JAR file holds the content you believe it should:$ jar -tf /home/edward/hpcbuild/dist/lib/hpcas.jarMETA-INF/ META-INF/MANIFEST.MF A.class
Use the
runtarget to run theAclass:$ ant -DclassToRun=A runrun: [java] yo cassandra BUILD SUCCESSFUL Total time: 2 seconds
Ant
is a build system popular with Java projects. An Ant script has one or more targets. A target can be a task such as compiling code, testing code, or producing a final JAR. Targets can depend on other targets. As a result, you do not have to run a list of targets sequentially; the dist target will run its dependents such as compile and init and their dependencies in proper order.
When working with new software or troubleshooting an issue, every piece of information can be valuable. Cassandra has the capability to both run in the foreground and to run with specific debugging levels. This recipe will show you how to run in the foreground with the highest possible debugging level.
Edit
conf/log4j-server.properties:log4j.rootLogger=DEBUG,stdout,R
Start the instance in the foreground using
–f:$ bin/cassandra -f
Without the -f option, Cassandra disassociates itself from the starting console and runs like a system daemon. With the -f option, Cassandra runs as a standard Java application.
Log4J has a concept of log levels DEBUG, INFO, WARN, ERROR, and FATAL. Cassandra normally runs at the INFO level.
Setting a global DEBUG level is only appropriate for testing and troubleshooting because of the overhead incurred by writing many events to a single file. If you have to enable debug in production, try to do it for the smallest set of classes possible, not all org.apache.cassandra classes.
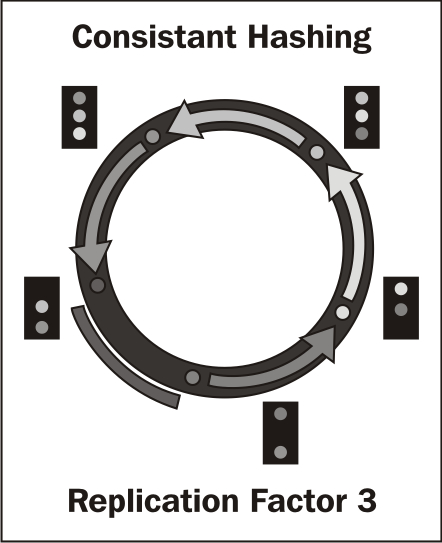
Cassandra uses a Consistent Hashing to divide data across the ring. Each node has an Initial Token which represents the node's logical position in the ring. Initial Tokens should divide the Keyspace evenly. Using the row key of data, the partitioner calculates a token. The node whose Initial Token is closest without being larger than the data's token is where the data is stored along with the other replicas.
Initial Tokens decide who is "responsible for" data.
The formula to calculate the ideal Initial Tokens is:
Initial_Token= Zero_Indexed_Node_Number * ((2^127) / Number_Of_Nodes)
For a five node cluster, the initial token for the 3rd node would be:
initial token=2 * ((2^127) / 5)
initial token=68056473384187692692674921486353642290
Initial Tokens can be very large numbers. For larger clusters of 20 or more nodes, determining the ideal Initial Token for each node in a cluster is a time consuming process. The following Java program calculates the Initial Tokens for each node in the cluster.
You can easily build and run this example following Setting up a build and test environment earlier in this chapter.
Create a file
src/hpcas/c01/InitialTokes.java:package hpcas.c01; import java.math.*; public class InitialTokens { public static void main (String [] args){ if (System.getenv("tokens")==null){ System.err.println("Usage: tokens=5 ant -DclassToRun=InitialTokens run"); System.exit(0); } int nodes = Integer.parseInt(System.getenv("tokens")); for (int i = 0 ;i <nodes;i++){ BigInteger hs = new BigInteger("2"); BigInteger res = hs.pow( 127 ); BigInteger div = res.divide( new BigInteger( nodes+"") ); BigInteger fin = div.multiply( new BigInteger(i+"") ); System.out.println(fin); } } }Set the environment variable
tokensto the number of nodes in the cluster. Then, call theruntarget, passing the full class namehpcas.c01.InitialTokensas a Java property:$ tokens=5 ant -DclassToRun=hpcas.c01.InitialTokens runrun: [java] 0 [java] 34028236692093846346337460743176821145 [java] 68056473384187692692674921486353642290 [java] 102084710076281539039012382229530463435 [java] 136112946768375385385349842972707284580
Generating numbers equidistant from each other helps keep the amount of data on each node in the cluster balanced. This also keeps the requests per nodes balanced. When initializing systems running the server for the first time, use these numbers in the initial_tokens field of the conf/cassandra.yaml file.
This technique for calculating Initial Tokens is ideal for the Random Partitioner, which is the default partitioner. When using the Order Preserving Partitioner, imbalances in key distribution may require adjustments to the Initial Tokens to balance out the load.
If a Cassandra node has already joined the cluster, see in Chapter 7, Administration, the recipe Nodetool Move: Move a node to a specific ring location to see how to move a node to an initial token.
Some partitioners in Cassandra preserve the ordering of keys. Examples of these partitioners include ByteOrderedPartitioner and OrderPreservingPartitioner. If the distribution of keys is uneven, some nodes will have more data than others. This recipe shows how to choose initial_tokens for a phonebook dataset while using OrderPreservingPartitioner.
In the conf/cassandra.yaml file, set the partitioner attribute.
org.apache.cassandra.dht.OrderPreservingPartitioner
Determine the approximate distribution of your keys. For names from a phonebook, some letters may be more common than others. Names such as Smith are very common while names such as Capriolo are very rare. For a cluster of eight nodes, choose initial tokens that will divide the list roughly evenly.
A, Ek, J, Mf, Nh, Sf, Su, Tf
Tip
Calculating Distributions
Information on calculating distributions using spreadsheets can be found online: http://www.wisc-online.com/objects/ViewObject.aspx?ID=TMH4604.
Partitioners that preserve order can range scan across keys and return data in a natural order. The trade off is that users and administrators have to plan for and track the distribution of data.
If a Cassandra node has already joined the cluster, see the recipe in Chapter 7, Administration, the recipe Nodetool Move: Move a node to a specific ring location to see how to move a node to an initial token.
The Java Virtual Machine has an integrated system to do interactive monitoring of JVM internals called JVM (Java Management Extensions). In addition to JVM internals, applications can maintain their own counters and provide operations that the user can trigger remotely. Cassandra has numerous counters and the ability to trigger operations such as clearing the Key Cache or disabling compaction over JMX. This recipe shows how to connect to Cassandra instances using JConsole .
JConsole comes with the Java Runtime Environment. It requires a windowing system such as X11 to run on the system you start JConsole from, not on the server it will connect to.


JConsole can connect to local processes running as your user without host and port information by selecting the process in the Local Process list. Connecting to processes on other machines requires you to enter host and port information in the Remote Process.
The recipe Connecting with JConsole over a SOCKS Proxy shows how to use JConsole with a host only reachable by SSH.
Chapter 12, Collecting and Analyzing Performance Statistics covers Java and Cassandra counters in great detail.
Often, you would like to run JConsole on your desktop and connect to a server on a remote network. JMX uses Remote Method Invocation (RMI) to communicate between systems. RMI has an initial connection port. However, the server allocates dynamic ports for further communication. Applications that use RMI typically have trouble running on more secure networks. This recipe shows how to create a dynamic proxy over SSH and how to have JConsole use the proxy instead of direct connections.
On your management system you will need an SSH client from OpenSSH . This comes standard with almost any Unix/Linux system. Windows users can try Cygwin to get an OpenSSH client.
Start an SSH tunnel to your login server, for example
login.domain.com. The -D option allocates the SOCKS proxy:$ ssh -f -D9998 edward@login.domain.com 'while true; do sleep 1; done'Start up JConsole by passing it command-line instructions to use the proxy you created in the last step:
$ jconsole -J-DsocksProxyHost=localhost -J-DsocksProxyPort=9998 \ service:jmx:rmi:///jndi/rmi://cas1.domain.com:8080/jmxrmi
A dynamic SOCKS proxy is opened up on the target server and tunneled to a local port on your workstation. JConsole is started up and configured to use this proxy. When JConsole attempts to open connections, they will happen through the proxy. Destination hosts will see the source of the traffic as your proxy system and not as your local desktop.
Cassandra clients communicate with servers through API classes generated by Thrift. The API allows clients to perform data manipulation operations as well as gain information about the cluster. This recipe shows how to connect from client to server and call methods that return cluster information.
This recipe is designed to work with the build environment from the recipe Setting up a build and test environment. You also need to have a system running Cassandra, as in the Simulating multiple node clusters recipe.
Create a file
src/hpcas/c01/ShowKeyspaces.java:package hpcas.c01; import org.apache.cassandra.thrift.*; import org.apache.thrift.protocol.*; import org.apache.thrift.transport.*; public class ShowKeyspaces { public static void main(String[] args) throws Exception { String host = System.getenv("host"); int port = Integer.parseInt(System.getenv("port"));The objective is to create a
Cassandra.Clientinstance that can communicate with Cassandra. The Thrift framework requires several steps to instantiate:TSocket socket = new TSocket(host, port); TTransport transport = new TFramedTransport(socket); TProtocol proto = new TBinaryProtocol(transport); transport.open(); Cassandra.Client client = new Cassandra.Client(proto);We call methods from the
Cassandra.Clientthat allow the user to inspect the server, such as describing the cluster name and the version:System.out.println("version "+client.describe_version()); System.out.println("partitioner" +client.describe_partitioner()); System.out.println("cluster name " +client.describe_cluster_name()); for ( String keyspace: client.describe_keyspaces() ){ System.out.println("keyspace " +keyspace); } transport.close(); } }Run this application by providing host and port environment variables:
# host=127.0.0.1 port=9160 ant -DclassToRun=hpcas.c01.ShowKeyspaces run
run:
     [java] version 10.0.0
     [java] partitioner org.apache.cassandra.dht.RandomPartitioner
     [java] cluster name Test Cluster
     [java] keyspace Keyspace1
     [java] keyspace system
Cassandra clusters are symmetric in that you can connect to any node in the cluster and perform operations. Thrift has a multi-step connection process. After choosing the correct transports and other connection settings, users can instantiate a Cassandra.Client instance. With an instance of the Cassandra.Client, users can call multiple methods without having to reconnect. We called some methods such as describe_cluster_name()
that show some information about the cluster and then disconnect.
In Chapter 5, Consistency, Availability, and Partition Tolerance with Cassandra, the recipe Working with the formula for strong consistency shows how to create a simple wrapper that reduces the repeated code when connecting to Cassandra.