This chapter is about setting up your development environment; understanding the similarities and differences between .NET Core, .NET Framework, .NET Standard, and .NET Native; and using various tools to create the simplest application possible with C# 7 and .NET Core.
Most people learn complex topics by imitation and repetition rather than reading a detailed explanation of theory. So, I will not explain every keyword and step. The idea is to get you to write some code, build an application, and see it run. You don't need to know the details of how it all works yet.
In the words of Samuel Johnson, author of the English dictionary of 1755, I have likely committed "a few wild blunders, and risible absurdities, from which no work of such multiplicity is free. "I take sole responsibility for these and hope you appreciate the challenge of my attempt to "lash the wind" by writing this book about .NET Core and its command-line tooling during its rocky birth during 2016 and 2017.
This chapter covers the following topics:
Choosing your development environment
Installing Microsoft Visual Studio 2017 for Windows
Installing Microsoft Visual Studio Code for Windows, macOS, or Linux
Understanding .NET
Writing and compiling code using the .NET Core CLI tool
Writing and compiling code using Microsoft Visual Studio 2017
Writing and compiling code using Microsoft Visual Studio Code
Managing source code with GitHub
Before you start programming, you will need to choose an Interactive Development Environment (IDE) that includes a code editor for C#.
The most mature and full-featured IDE to choose is Microsoft Visual Studio 2017, but it only runs on the Windows operating system.
The most modern and lightweight IDE to choose, and the only one from Microsoft that is cross-platform, is Microsoft Visual Studio Code, and it will run on all common operating systems, including Windows, macOS, and many varieties of Linux, such as Red Hat Enterprise Linux (RHEL) and Ubuntu.
Note
To help you decide if Visual Studio Code is right for you, I recommend that you watch the following video, Beginner's Guide to VS Code: Up and Running in Ten Minutes: https://channel9.msdn.com/Blogs/raw-tech/Beginners-Guide-to-VS-Code
To create apps for iOS (iPhone and iPad), tvOS, macOS, and watchOS, you must have OS X or macOS, and Xcode. Although you can use Visual Studio 2017 with its Xamarin extensions to write a cross-platform mobile app, you still need OS X or macOS, and Xcode to compile it. So, in Chapter 15, Building Mobile Apps Using Xamarin.Forms and ASP.NET Core Web API, I will show you how to use Visual Studio for Mac running on macOS to create a Xamarin cross-platform mobile app for iOS and Android that calls a web service hosted on ASP.NET Core.
The following table shows which IDE and operating systems can or must be used for each of the chapters in this book:

Tip
Good Practice
If you have the option, then I recommend you try all the coding exercises with both Visual Studio 2017 on Windows, and Visual Studio Code on macOS, Linux, or Windows. It will be good for you to get experience with C# 7 and .NET Core on a variety of operating systems and development tools.
To write the second edition of this book, I used the following listed software, as you can see in the following screenshot:
Visual Studio Code version 1.10.2 and Visual Studio for Mac Preview 4, on macOS Sierra version 10.12.3
Visual Studio 2017 on Windows 10 (in a virtual machine)
Visual Studio Code on Red Hat Enterprise Linux (in a virtual machine)

There are alternative IDEs for C#, for example, MonoDevelop and JetBrains Rider. You can install either of these two IDEs with the help of the following URLs:
For MonoDevelop IDE, visit http://www.monodevelop.com/
For JetBrains Rider, visit https://www.jetbrains.com/rider/
Cloud9 is a web browser-based IDE, so it's even more cross-platform than the others. It is growing in popularity. Here is the link:https://c9.io/web/sign-up/free.
Your choice of IDE and operating system for development does not limit where your code gets deployed. .NET Core currently supports the following platforms for deployment:
Windows 7 SP1, or later
Windows Server 2008 R2 SP1, or later
OS X El Capitan (version 10.11) and macOS Sierra (version 10.12)
Red Hat Enterprise Linux 7.2
Ubuntu 14.04 LTS, 16.04 LTS
Linux Mint 17
Debian 8.2
CentOS 7.1
Oracle Linux 7.1
Docker
Note
Docker and Linux OSes are popular server host platforms because they are relatively lightweight and more cost-effectively scalable when compared to operating system platforms that are more for end users, such as Windows and macOS.
In the next section, you will install Microsoft Visual Studio 2017 for Windows. If you prefer to use Microsoft Visual Studio Code, jump ahead to the section titled, Installing Microsoft Visual Studio Code for Windows, macOS, or Linux.
You can use Windows 7 SP1 or later to complete most of the chapters in this book, but you will have a better experience if you use Windows 10.
Since October 2014, Microsoft has made a professional-quality edition of Visual Studio available to everyone for free. It is called the Community Edition.
Note
Microsoft has combined all its free developer offerings in a program called Visual Studio Dev Essentials. This includes the Community Edition, the free level of Visual Studio Team Services, Azure credits for test and development, and free training from Pluralsight, Wintellect, and Xamarin.
Download and install Microsoft Visual Studio 2017 from the following link:https://www.visualstudio.com/downloads/
On the Workloads tab, choose the following, as partially shown in the following screenshot:
Universal Windows Platform development
.NET desktop development
ASP.NET and web development
Azure development
Mobile development with .NET
.NET Core cross-platform development

On the Individual components tab, choose the following additional components, as shown in the following screenshot:
Class Designer
PowerShell tools
Git for Windows
GitHub extension for Visual Studio

Click Install, and wait for the installer to acquire the selected software, and install it, as shown in the following screenshot:

When the installation is complete, click Launch.
The first time that you run Visual Studio 2017, you will be prompted to sign in. If you have a Microsoft account, for example, a Hotmail, MSN, Live, or Outlook e-mail address, you can use that account. If you don't, then register for a new one at the following link: https://signup.live.com/.
When starting Visual Studio 2017 for the first time, you will be prompted to configure your environment. For Development Settings, choose Visual C#. For color theme, I chose Blue, but you can choose whatever suits you, as shown in the following screenshot:

You will see the Microsoft Visual Studio user interface with the Start Page open in the central area. Like most Windows desktop applications, Visual Studio has a menu bar, a toolbar for common commands, and a status bar at the bottom. On the right is the Solution Explorer that will list your open projects:

Between June 2015 and March 2017, Microsoft released a new version of Visual Studio Code every month (except for December 2016 because even Microsoft employees deserve a break for Christmas). Visual Studio Code has rapidly improved, and has surprised Microsoft with its popularity. Even if you plan to use Visual Studio 2017 as your primary development tool, I recommend that you learn how to use Visual Studio Code and the .NET Core command-line tool as well.
You can download Visual Studio Code from https://code.visualstudio.com/.
In this book, I will show examples and screenshots of Visual Studio Code by using the version for macOS. The steps for doing the same with Visual Studio Code for Windows and variants of Linux is very similar, so I will not repeat the instructions for every platform.
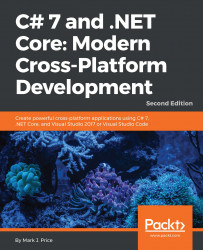
After downloading Visual Studio Code for macOS, drag and drop it to your Applications folder, as shown in the following screenshot:
You will now need to install the .NET Core SDK for macOS. The full instructions, including a video to watch, are described at the following link, and I have included the basic steps in this book for your convenience: https://www.microsoft.com/net/core#macos.
The first step is to install Homebrew (if you don't already have it).
Start macOS's Terminal app and enter the following command at the prompt:
/usr/bin/ruby -e "$(curl -fsSL
https://raw.githubusercontent.com/Homebrew/install/master/install)"
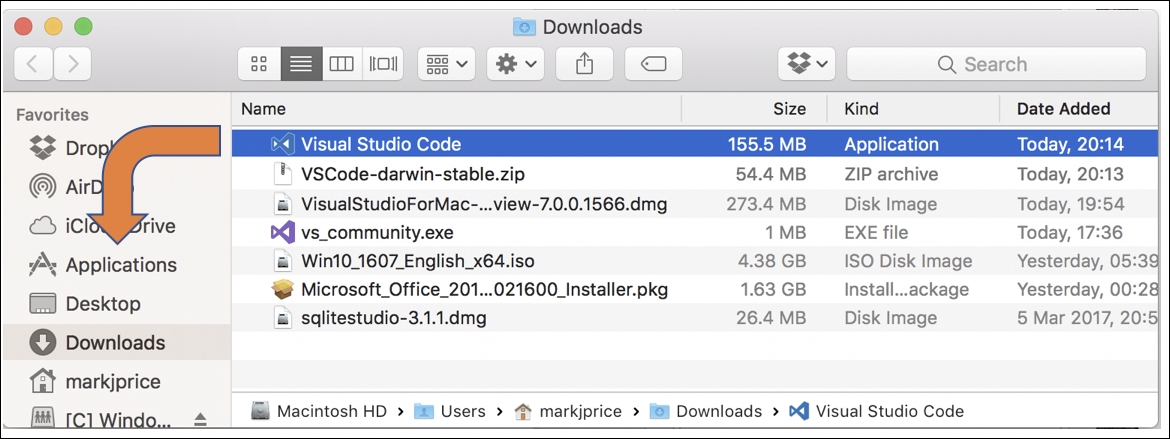
Terminal will prompt you to press RETURN to continue, and then prompt for your password, as shown in the following screenshot:

The second step is to use Homebrew to install OpenSSL, which is required by .NET Core.
At the prompt, enter the following commands:
brew update
brew install openssl
mkdir -p /usr/local/lib
ln -s /usr/local/opt/openssl/lib/libcrypto.1.0.0.dylib  /usr/local/lib/
ln -s /usr/local/opt/openssl/lib/libssl.1.0.0.dylib /usr/local/lib/
Terminal will output messages as shown in the following screenshot:
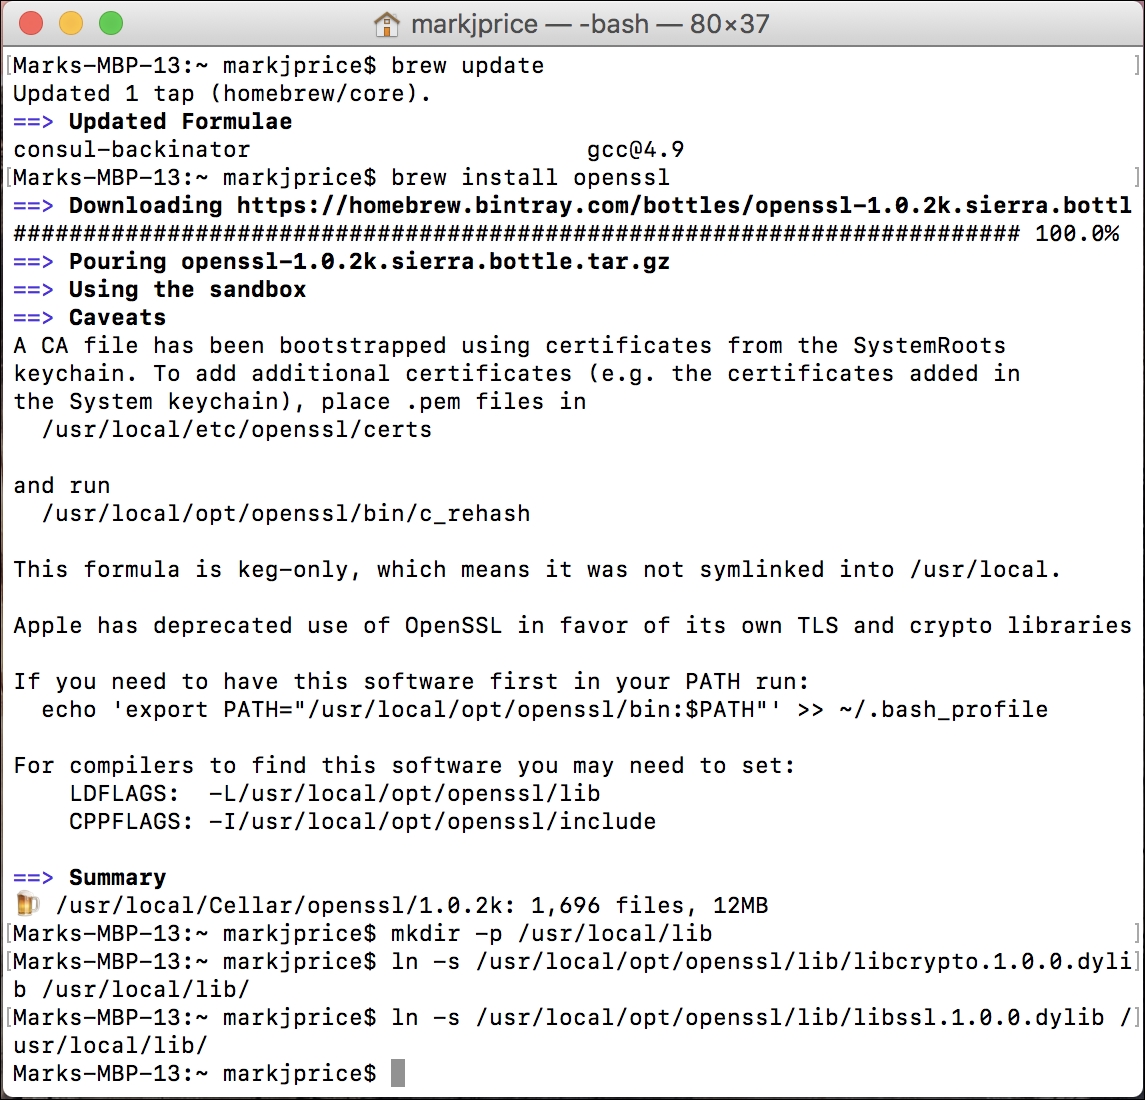
The third step is to download the .NET Core SDK installer for macOS (x64) from the following link: https://www.microsoft.com/net/download/core.
Note
The .NET Core SDK installer package installs .NET Core version 1.1.1 and the .NET Core Command Line Interface (CLI) tool version 1.0.1. Yes, the version numbers are confusing! A single CLI tool with its own version number is used for multiple versions of .NET Core runtime. .NET Core 1.1.1 is the Current branch and gets new features and bug fixes. .NET Core 1.0.4 is the Long Term Support (LTS) branch and only gets bug fixes. Both were released on March 7, 2017 with Visual Studio 2017.
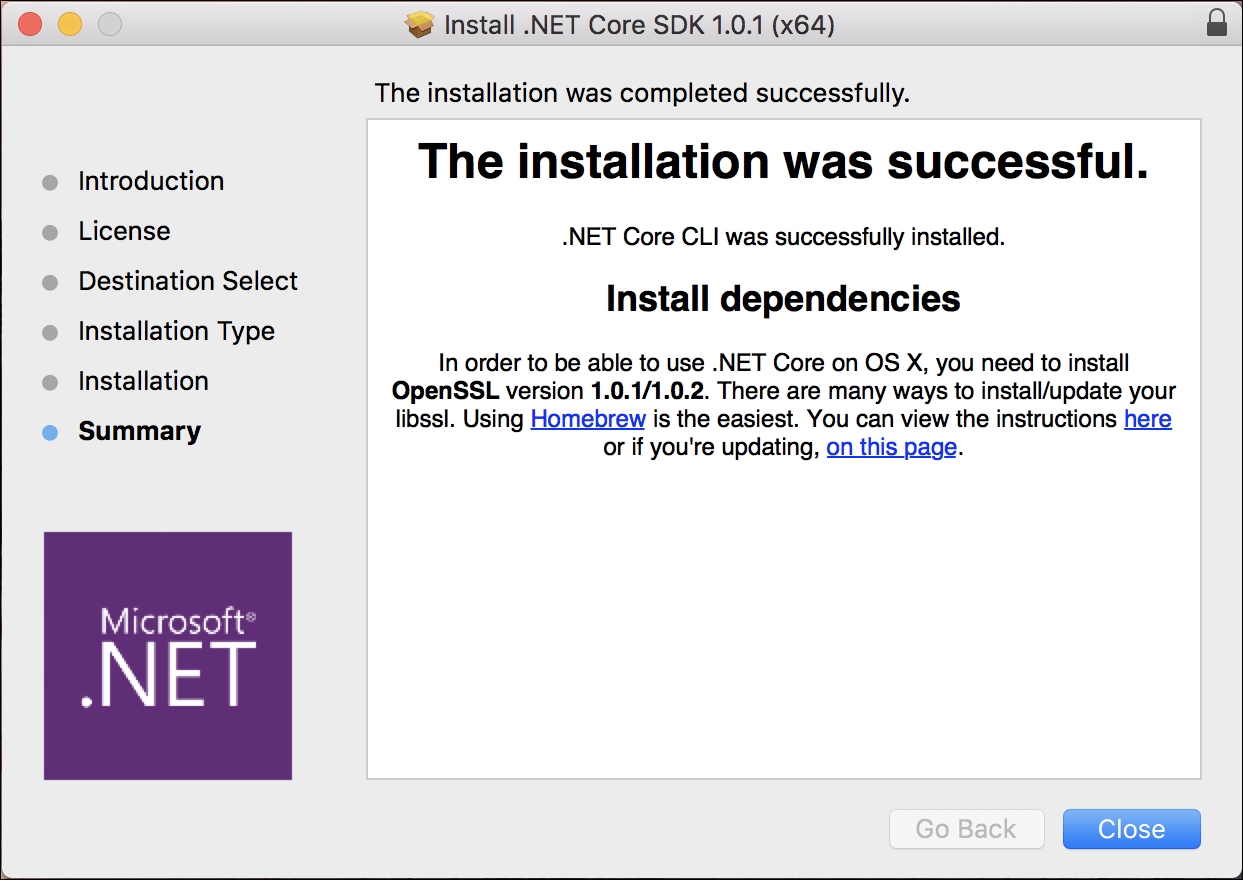
Run the dotnet-1.1.1-sdk-osx-x64.pkg installer package, as shown in the following screenshot:
Click Continue, accept the license agreement, click Install, and then, as shown in the next screenshot, click Close:
This extension is not necessary but it provides IntelliSense as you type, so it's very handy to install.
Launch Visual Studio Code and click the Extensions icon, or choose View | Extensions, or press Cmd + Shift + X .
C# is the most popular extension so you should see it at the top of the list, as shown in the following screenshot:
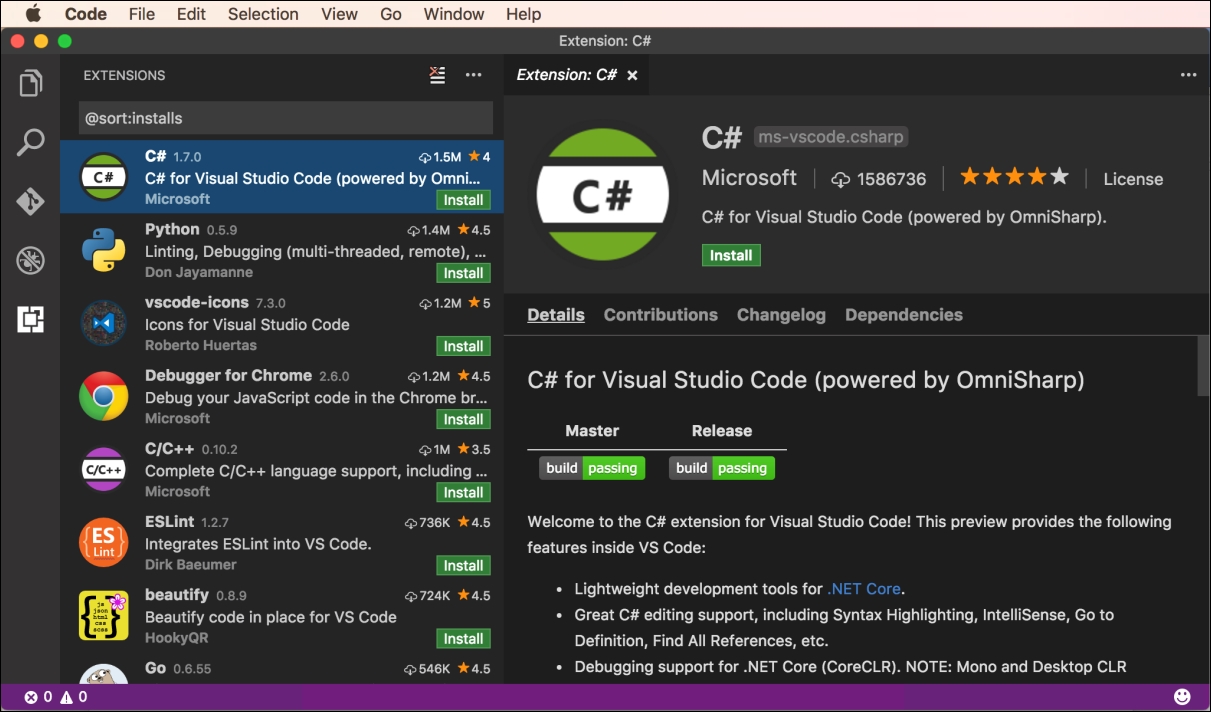
Click Install, and then click Reload, to reload the window and activate the extension.
Now that you have installed and set up your development environment, you will learn some background about .NET before diving in to writing code.
.NET Framework, .NET Core, .NET Standard, and .NET Native are related and overlapping platforms for developers to build applications and services upon.
Microsoft's .NET Framework is a development platform that includes a Common Language Runtime (CLR) that manages the execution of code, and provides a rich library of classes to build applications.
Microsoft designed .NET Framework to have the possibility of being cross-platform, but Microsoft put their implementation effort into making it work best with Windows.
Practically speaking, .NET Framework is Windows-only, and a legacy platform.
Third parties developed a .NET implementation named the Mono project that you can read more about here: http://www.mono-project.com/.
Mono is cross-platform, but it fell well behind the official implementation of .NET Framework. It has found a niche as the foundation of the Xamarin mobile platform.
Microsoft purchased Xamarin in 2016 and now gives away what used to be an expensive Xamarin extension for free with Visual Studio 2017. Microsoft renamed the Xamarin Studio development tool to Visual Studio for Mac and has given it the ability to create ASP.NET Core Web API services. Xamarin is targeted at mobile development and building cloud services to support mobile apps.
Note
You will use Visual Studio for Mac in Chapter 15 , Building Mobile Apps Using Xamarin.Forms and ASP.NET Core Web API to create a mobile app for iOS and Android that calls an ASP.NET Core Web API service.
Today, we live in a truly cross-platform world. Modern mobile and cloud development has made Windows a much less important operating system. So, Microsoft has been working on an effort to decouple .NET from its close ties with Windows.
While rewriting .NET to be truly cross-platform, Microsoft has taken the opportunity to refactor .NET to remove major parts that are no longer considered core.
This new product is branded as .NET Core, which includes a cross-platform implementation of the CLR known as CoreCLR, and a streamlined library of classes known as CoreFX.
Scott Hunter, Microsoft Partner Director Program Manager for .NET, says, "Forty percent of our .NET Core customers are brand-new developers to the platform, which is what we want with .NET Core. We want to bring new people in."
The following table shows when important versions of .NET Core were released, and Microsoft's schedule for the next major release:
|
Version |
Released |
|
.NET Core RC1 |
November 2015 |
|
.NET Core 1.0 |
June 2016 |
|
.NET Core 1.1 |
November 2016 |
|
.NET Core 1.0.4 (LTS) and .NET Core (Current) 1.1.1 |
March 2017 |
|
.NET Core 2.0 |
Scheduled for release in Q3 2017 |
Tip
Good Practice
If you need to work with .NET Core 1.0 and 1.1, then I recommend that you read the announcement for .NET Core 1.1, although the information at the following URL is useful for all .NET Core developers: https://blogs.msdn.microsoft.com/dotnet/2016/11/16/announcing-net-core-1-1/
.NET Core is much smaller than the current version of .NET Framework because a lot has been removed.
For example, Windows Forms and Windows Presentation Foundation (WPF) can be used to build graphical user interface (GUI) applications, but they are tightly bound to Windows, so they have been removed from .NET Core. The latest technology used to build Windows apps is the Universal Windows Platform (UWP), and UWP is built on a custom version of .NET Core. You will learn about it in Chapter 13, Building Universal Windows Platform Apps Using XAML.
ASP.NET Web Forms and Windows Communication Foundation (WCF) are old web application and service technologies that fewer developers choose to use for new development projects today, so they have also been removed from .NET Core. Instead, developers prefer to use ASP.NET MVC and ASP.NET Web API. These two technologies have been refactored and combined into a new product that runs on .NET Core named ASP.NET Core. You will learn about ASP.NET Core MVC in Chapter 14, Building Web Applications Using ASP.NET Core MVC, and ASP.NET Core Web API in Chapter 15, Building Mobile Apps Using Xamarin.Forms and ASP.NET Core Web API.
The Entity Framework (EF) 6.x is an object-relational mapping technology to work with data stored in relational databases such as Oracle and Microsoft SQL Server. It has gained baggage over the years, so the cross-platform version has been slimmed down and named Entity Framework Core. You will learn about it in Chapter 8, Working with Databases Using Entity Framework Core.
Some common but old data types in .NET Framework have been removed from .NET Core, such as HashTable and ArrayList in System.Collections, but can be added back using a separate class library or NuGet package. Some data types in .NET that are included with both .NET Framework and .NET Core have been simplified by removing some members. For example, in .NET Framework, the File class has both a Close and Dispose method, and either can be used to release the file resources. In .NET Core, there is only the Dispose method. This reduces the memory footprint of the assembly and simplifies the API you must learn.
As well as removing large pieces from .NET Framework to make .NET Core, Microsoft has componentized .NET Core into NuGet packages: small chunks of functionality that can be deployed independently.
Note
.NET Framework 4.6 is about 200 MB and must be deployed as a single unit. .NET Core 1.0 is about 11 MB. Eventually, .NET Core and all its NuGet packages may grow to hundreds of megabytes. Microsoft's primary goal is not to make .NET Core smaller than .NET Framework. The goal is to componentize .NET Core to support modern technologies and to have fewer dependencies so that deployment requires only those packages that your application needs.
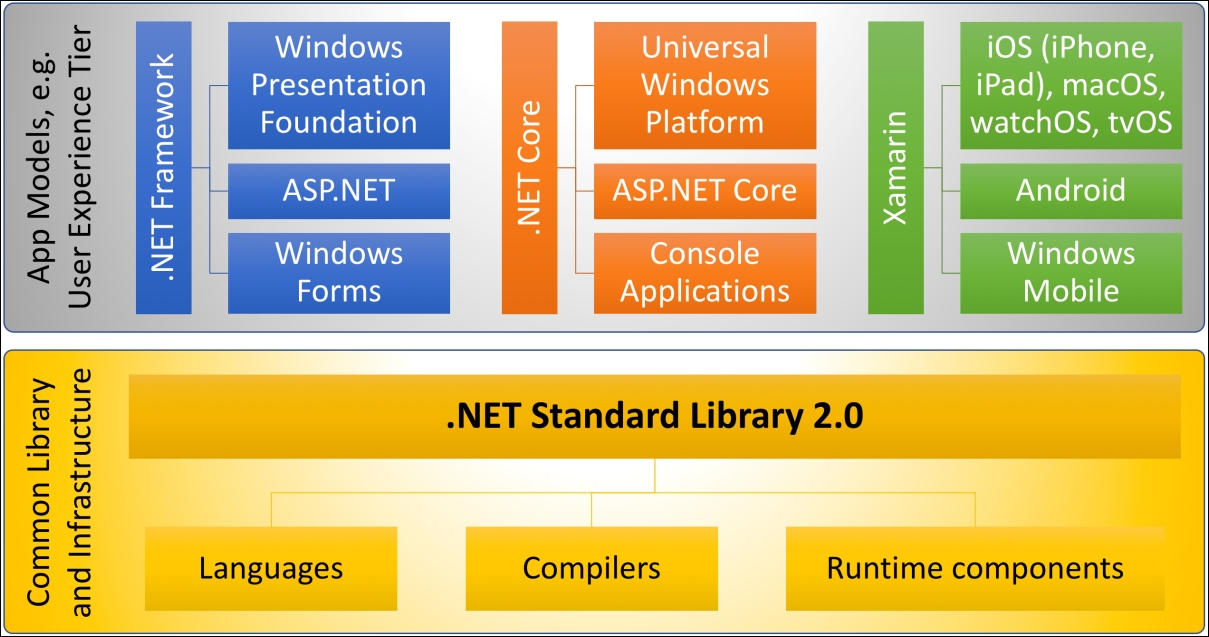
The situation with .NET today is that there are three forked .NET platforms, all controlled by Microsoft:
.NET Framework
Xamarin
.NET Core
Each have different strengths and weaknesses because they are designed for different scenarios. This has led to the problem that a developer must learn three platforms, each with annoying quirks and limitations.
So, Microsoft is working on defining .NET Standard 2.0: a set of APIs that all .NET platforms must implement. At the time that I write this, in March 2017, there is .NET Standard 1.6, but only .NET Core supports it; .NET Framework and Xamarin do not.
.NET Standard 2.0 will be implemented by .NET Framework, .NET Core, and Xamarin. For .NET Core, this will add many of the missing APIs that developers need to port old code written for .NET Framework to the cross-platform .NET Core. However, Microsoft warns that some APIs will be "implemented", but throw an exception to indicate to a developer that they should not actually be used! You will learn how to handle this in Chapter 2, Speaking C#.
.NET Standard 2.0 is the near future of .NET, and it will make it much easier for developers to share code between any flavor of .NET, but we are not there yet. Microsoft says .NET Standard 2.0, and .NET Core 2.0, are scheduled for release in Q3 2017. That could mean July 1, 2017, but based on previous experience, I think late September 2017 is more realistic.
The following diagram summarizes how the three variants of .NET (sometimes known as app models) will share the common .NET Standard 2.0 and infrastructure:
The first edition of this book focused on .NET Core, but used .NET Framework when important or useful features had not been implemented in .NET Core. Visual Studio 2015 was used for most examples, with Visual Studio Code shown only briefly.
The second edition has been purged of all .NET Framework code examples. It has been rewritten so that all code is pure .NET Core and can be written with either Visual Studio 2017 or Visual Studio Code on any supported operating system.
The only exceptions are in Chapter 13, Building Universal Windows Platform Apps Using XAML, that uses .NET Core for UWP and requires Visual Studio 2017 running on Windows 10, and in Chapter 15, Building Mobile Apps Using Xamarin.Forms and ASP.NET Core Web API, when we will write a Xamarin mobile app with Visual Studio for Mac.
Another .NET initiative is .NET Native. This compiles C# code to native CPU instructions ahead-of-time (AoT) rather than using the CLR to compile intermediate language (IL) code just-in-time (JIT) to native code later.
.NET Native improves execution speed and reduces the memory footprint for applications. It supports the following:
UWP apps for Windows 10, Windows 10 Mobile, Xbox One, HoloLens, and Internet of Things (IoT) devices such as Raspberry Pi
Server-side web development with ASP.NET Core
Console applications for use on the command line

When you install Visual Studio 2017, or the .NET Core SDK, a Command Line Interface (CLI) tool named dotnet is installed as well as the .NET Core runtime.
dotnet
has the following commands that all work on the project in the current folder:
dotnet new console: creates a new console application projectdotnet new classlib: creates a new assembly library projectdotnet new web: creates a new empty ASP.NET Core projectdotnet new mvc: creates a new ASP.NET Core MVC projectdotnet new webapi: creates a new ASP.NET Core Web API projectdotnet restore: downloads dependencies for the projectdotnet build: compiles the projectdotnet test: runs unit tests on the projectdotnet run: runs the projectdotnet migrate: migrates a .NET Core project created with the preview CLI tools to the current CLI tool MS Build formatdotnet pack: creates a NuGet package for the projectdotnet publish: compiles and publishes the project, either with dependencies or as a self-contained application
Note
You will learn how to build, package, publish, and deploy your .NET Core applications and assemblies in Chapter 16, Packaging and Deploying Your Code Cross-Platform.
Before we use CLI tools such as dotnet, we need to write some code!
If you are using Windows, start Notepad.
If you are using macOS, launch TextEdit. From the TextEdit menu, choose Preferences, clear the Smart quotes check box, and then close the dialog. From the Format menu, choose Make Plain Text.
Or run your favorite plain text editor.
Enter the following code:
    class MyApp { static void Main() {
    System.Console.WriteLine("Hello, C#!"); } }
Note
C# is case sensitive, meaning that you must type uppercase and lowercase characters exactly as shown in the preceding code. C# is not whitespace sensitive, meaning that it does not care if you use tabs, spaces, and carriage-returns to layout your code however you like.
You can type the code all in one line or spread it out over multiple lines and indent your lines. For example, the following code would also compile and have the same output:
    class
          MyApp      {
     static                   void
    Main          (){System.       Console.
        WriteLine(       "Hello, C#!");         }       }
Of course, it's best to write your code in a way that other programmers, and yourself months or years later, can clearly read!
In Notepad, from the File menu, choose Save As....
In the dialog box, change to drive C: (or any drive which you want to use to save your projects), click on the New folder button, and name the folder Code. Open the Code folder, and click the New folder button, and name the folder Chapter01. Open the Chapter01 folder, and click the New folder button, and name the folder Ch01_HelloCS. Open the Ch01_HelloCS folder.
In the Save as type field, select All Files from the drop-down list to avoid appending the .txt file extension, and enter the file name as MyApp.cs, as shown in the following screenshot:

Your code in Notepad should look something like the following screenshot:

In TextEdit, from the File menu, choose Save..., or press Cmd + S .
In the dialog box, change to your user folder (mine is named markjprice) or any directory in which you want to use to save your projects, click on the New Folder button, and name the folder Code. Open the Code folder, and click the New Folder button, and name the folder Chapter01. Open the Chapter01 folder, and click the New Folder button, and name the folder Ch01_HelloCS. Open the Ch01_HelloCS folder.
In the Plain Text Encoding field, select Unicode (UTF-8) from the drop-down list, uncheck the box for If no extension is provided, use ".txt" to avoid appending the .txt file extension, enter the filename as MyApp.cs, and click on Save, as shown in the following screenshot:

If you are using Windows, start Command Prompt.
If you are using macOS, launch Terminal.
At the prompt, enter the following command:
dotnet
You should see the following output describing the dotnet CLI tool:

Enter the following commands at the prompt to:
Change to the folder for the project
Create a new console application in the directory
List the files that the
dotnetcommand-line tool created
If you are using Windows, in Command Prompt, enter:
cd C:\Code\Chapter01\Ch01_HelloCS
dotnet new console
dir
If you are using macOS, in Terminal, enter:
cd Code/Chapter01/Ch01_HelloCS
dotnet new console
ls
Note
The first time that you execute a dotnet new command, your local package cache must be populated. This should only take a few moments.
You should see that the dotnet tool has created two new files for you:
Program.cs: source code for a simple console applicationCh01_HelloCS.csproj: a project file that lists dependencies and project-related configuration
For this example, we must delete the file named Program.cs since we have already created our own class called Program in the file named MyApp.cs.
If you are using Windows, in Command Prompt:
del Program.cs
If you are using macOS, in Terminal:
rm Program.cs
Note
In all future examples, we will use the Program.cs file generated by the tool rather than manually create our own.
At the prompt, enter the following commands:
dotnet restore
dotnet run
After a few seconds, all the packages needed by our code will be downloaded, the source code will be compiled, and your application will run, as shown in the following output on macOS:

Your source code, the file MyApp.cs, has been compiled into an assembly named Ch01_HelloCS.dll in the subfolder bin/Debug/netcoreapp1.1. For now, this assembly can only be executed by the dotnet run command. In Chapter 16, Packaging and Deploying Your Code Cross-Platform, you will learn how to package and publish assemblies for use on any operating system that supports .NET Core.
If the compiler displays errors, read them carefully, and fix them in your text editor. Save your changes and try again.
Note
At the prompt, you can press the up and down arrows on your keyboard to cycle through previous commands you have entered.
A typical error might be using the wrong case, a missing semicolon at the end of a line, or a mismatched pair of curly braces. For example, if you mistyped a lowercase m for the Main method, you would see the following error message:
error CS5001: Program does not contain a static 'Main' method
suitable for an entry point
The C# compiler (named Roslyn) used by the dotnet CLI tool converts your C# source code into intermediate language (IL) code and stores the IL in an assembly (a DLL or EXE file).
IL code statements are like assembly language instructions, but they are executed by .NET Core's virtual machine, known as the CoreCLR.
At runtime, the CoreCLR loads the IL code from the assembly, JIT (just-in-time) compiles it into native CPU instructions, and then it is executed by the CPU on your machine.
The benefit of this two-step compilation process is that Microsoft can create CLRs for Linux and macOS as well as for Windows. The same IL code runs everywhere because of the second compilation process that generates code for the native operating system and CPU instruction set.
Regardless of which language the source is written in, for example, C# or F#, all .NET applications use IL code for their instructions stored in an assembly. Microsoft and others provide disassembler tools that can open an assembly and reveal this IL code.
We will now recreate a similar application using Visual Studio 2017. If you have chosen to use Visual Studio Code, I still recommend that you review these instructions and screenshots because Visual Studio Code has similar, although not as extensive, features.
I have been training students to use Visual Studio for over a decade, and I am always surprised at how many programmers fail to use the tool to their advantage.
Over the next few pages, I will walk you through typing a line of code. It may seem redundant, but you will benefit from seeing what help and information Visual Studio provides as you enter your code. If you want to become a fast and accurate coder, letting Visual Studio write most of your code for you is a huge benefit!
Start Visual Studio 2017.
Navigate to File | New | Project... or press Ctrl + Shift + N.
From the Installed | Templates list on the left, expand Visual C#, and choose .NET Core. In the list at the center, choose Console App (.NET Core). Enter the name Ch01_WelcomeDotNetCore, set the location to C:\Code, enter Chapter01 as the solution name, and click on OK or press Enter, as shown in the following screenshot:

Note
Ignore the target set to .NET Framework 4.6.2. That drop-down list box does not affect .NET Core projects!
In the code editor, delete the statement on line 9 that says, Console.WriteLine("Hello World!");
Inside the Main method, type the letters sy, as shown in the following screenshot, and note the IntelliSense menu that appears:

IntelliSense shows a filtered list of keywords, namespaces, and types that contain the letters sy and highlights the one that starts with sy, which happens to be the namespace that we want---System.
Type a dot (also known as decimal point or full stop).
IntelliSense automatically completes the word System for you, enters the dot, and displays a list of types, such as AggregateException and Action, in the System namespace, as shown in the following screenshot:

Type the letters con, IntelliSense shows a list of matching types and namespaces, as shown in the following screenshot:

If the one you want is not selected, you can press the up and down arrows on your keyboard to highlight it. For now, Console is already selected, so just type a dot.
IntelliSense shows a list of the members of the Console class, as shown in the following screenshot:

Note
Members include properties (attributes of an object, such as BackgroundColor), methods (actions the object can perform, such as Beep), events, and other related things.
Type the letters wr. IntelliSense shows two matching members containing these letters, as shown in the following screenshot:

Use the down arrow to highlight WriteLine and then type an open parenthesis (.
IntelliSense autocompletes WriteLine and enters a pair of parentheses.
You will also see a tooltip telling you that the WriteLine method has 18 variations, as shown in the following screenshot:

Type a double quote ("). IntelliSense enters a pair of double quotes for you and leaves the keyboard cursor in between them.
Type the text Welcome, .NET Core!, as shown in the following screenshot:

The red squiggle at the end of the line indicates an error because every C# statement must end in a semicolon. Move the cursor to the end of the line and type a semicolon to fix the error.
From the Debug menu, choose Start Without Debugging or press Ctrl + F5.
Visual Studio's status bar tells us that Build started..., then Build succeeded, and then your console application runs in a command prompt window, as shown in the following screenshot:

To save space in this book and to make the output clearer, I will usually not include screenshots of output from console applications as I did in the previous screenshot. Instead, I will show the output like this:
Welcome, .NET Core!
Let's make two deliberate errors:
Change the
Mof theMainmethod to the lowercase letterm.Delete the
eat the end of the method name,WriteLine.
From the Debug menu, choose Start Without Debugging or press Ctrl + F5.
After a few seconds, the status bar tells us that Build failed and an error message appears, as shown in the following screenshot:

Click No.
The Error List becomes active, as shown in the following screenshot. You can also view the Error List by pressing Ctrl + W, E:

The list can be filtered to show Errors, Warnings, and Messages by clicking on the toggle buttons in the toolbar at the top of the Error List.
If an error shows a file and a line number, for example File: Program.cs and Line: 9, then you can double-click on the error to jump to that line causing the problem.
If it's a more general error, such as the missing Main method, the compiler can't tell you a useful line number. You might want a method named main as well as a method named Main (remember that C# is case sensitive, so you're allowed to do that). However, Visual Studio can also analyze your code and provide messages with suggestions for improvements, such as telling you that method names should begin with an uppercase character.
As shown in the preceding screenshot, fix the two errors, and rerun the application to ensure that it works before you continue. Note that the Error List updates to show no errors.
Earlier, you created a project using the dotnet CLI tool. Now that you have a solution in Visual Studio 2017, you might want to add the earlier project to the solution.
Navigate to File | Add | Existing Project..., browse to the folder C:\Code\Chapter01\Ch01_HelloCS, and select the file Ch01_HelloCS.csproj.
To be able to run this project, in the Solution Explorer, right-click Solution 'Chapter01' (2 projects), and choose Properties or press Alt + Enter.
For the Startup Project, click Current selection, and click OK.
In Solution Explorer, click on any file inside the Ch01_HelloCS project, and then press Ctrl + F5, or navigate to Debug | Start Without Debugging.
Code is easier to read and understand if it is consistently indented and spaced out.
If your code can compile, then Visual Studio 2017 can automatically format it, nicely spaced and indented for you.
In Solution Explorer, double-click the file named MyApp.cs, as shown in the following screenshot:

Navigate to Build | Build Ch01_HelloCS, or press Shift + F6 and wait for your code to build, and then navigate to Edit | Advanced | Format Document, or press Ctrl + E, D. Your code will be autoformatted, as shown in the following screenshot:

Although Visual Studio has always had an Immediate window with limited read-eval-print loop (REPL) support, Visual Studio 2017 includes an enhanced window with full IntelliSense and color syntax code named C# Interactive.
In Visual Studio 2017, from the View menu, choose Other Windows, and then C# Interactive.
We will write some interactive code to download the About page from Microsoft's public website.
At the C# Interactive prompt, we will enter commands to do the following:
Reference the
System.Net.HttpassemblyImport the
System.Net.HttpnamespaceDeclare and instantiate an HTTP client variable
Set the client's base address to Microsoft's website
Asynchronously wait for a response to a GET request for the About page
Read the status code returned by the web server
Read the content type header
Read the contents of the HTML page as a string
Type each of the following commands after the > prompt and then press Enter:
> #r "System.Net.Http"
> using System.Net.Http;
> var client = new HttpClient();
> client.BaseAddress = new Uri("http://www.microsoft.com/");
> var response = await client.GetAsync("about");
> response.StatusCode
OK
> response.Content.Headers.GetValues("Content-Type")
string[1] { "text/html" }
> await response.Content.ReadAsStringAsync()
"<!DOCTYPE html ><html
xmlns:mscom="http://schemas.microsoft.com/CMSvNext"
xmlns:md="http://schemas.microsoft.com/mscom-data" lang="en"
xmlns="http://www.w3.org/1999/xhtml"><head><meta http-equiv="X-UA-
Compatible" content="IE=edge" /><meta charset="utf-8" /><meta
name="viewport" content="width=device-width, initial-scale=1.0"
/><link rel="shortcut icon"
href="//www.microsoft.com/favicon.ico?v2" /><script
type="text/javascript"
src="http://ajax.aspnetcdn.com/ajax/jQuery/jquery-
1.7.2.min.js">\r\n // Third party scripts and code linked to
or referenced from this website are licensed to you by the parties
that own such code, not by Microsoft. See ASP.NET Ajax CDN Terms of
Use - http://www.asp.net/ajaxlibrary/CDN.ashx.\r\n
</script><script type="text/javascript"
language="javascript">/*<
Visual Studio 2017 has lots of other useful windows, including the following:
The Solution Explorer window for managing projects and files
The Team Explorer window for source code management tools
The Server Explorer window for managing database connections and resources to manage in Microsoft Azure
If you can't see a window you need, go to the View menu to make it reappear or learn its keyboard shortcut, some of which are shown in the following screenshot:

Note
If your keyboard shortcuts are different from the ones in the preceding screenshot, it is because you picked a different set when you installed Visual Studio. You can reset your keyboard shortcuts to match the ones used in this book by clicking on the Tools menu, then clicking on Import and Export Settings..., choosing Reset all settings, and then choosing to reset to the Visual C# settings collection.
The instructions and screenshots in this section are for macOS, but the same actions will work with Visual Studio Code on either Windows or Linux. The main differences will be native command-line actions such as deleting a file: both the command and the path are likely to be different. The dotnet CLI tool will be identical on all platforms.
Start Visual Studio Code.
Navigate to File | Open..., or press Cmd + O.
In the dialog box, open the Code folder, select the Chapter01 folder, click the New Folder button, enter the name Ch01_WelcomeDotNetCore, and click Create, as shown in the following screenshot:

Select the Ch01_WelcomeDotNetCore folder, and click Open or press Enter.
In Visual Studio Code, navigate to View | Integrated Terminal, or press Ctrl + `.
At the Terminal prompt, enter the following command:
dotnet new console
You will see that the dotnet command-line tool creates a new console application project for you in the current folder, and the Explorer window shows the two files created, as shown in the following screenshot:

In the Explorer window, click on the file named Program.cs to open it in the editor window.
Note
The first time that you do this, C# dependencies will be updated for your platform. This will take a few moments.
When you see the warnings about required assets and unresolved dependencies, click Restore and Yes, as shown in the following screenshot:

Modify the text that is being written to the console to say, Welcome, .NET Core!
On the File menu, choose Auto Save. This toggle will save the annoyance of remembering to save before rebuilding your application each time!
Navigate to View | Integrated Terminal or press Ctrl + ` and enter the following command:
dotnet run
The output in the Terminal will show the result of running your application, as shown in the following screenshot:

You now know how to create and build simple .NET Core applications for Windows and macOS (and Linux is just as easy).
You will be able to complete almost all the chapters in this book using either Visual Studio 2017 on Windows or using Visual Studio Code on macOS, Windows, or Linux.
Git is a commonly used source code management system. GitHub is a company, website, and desktop application that makes it easier to manage Git.
I used GitHub to store solutions to all the practical exercises at the end of each chapter at the following URL:
https://github.com/markjprice/cs7dotnetcore.
Visual Studio 2017 has built-in support for using Git with GitHub as well as Microsoft's own source code management system named Visual Studio Team Services.
In Visual Studio 2017, navigate to View | Team Explorer to see the Team Explorer window:

Although it is a good idea to sign up with an online source code management system provider, you can clone a GitHub repository without signing up for an account.
In the Team Explorer window, expand Local Git Repositories, click on the Clone menu, and then enter the following URL of a Git repository to clone it: https://github.com/markjprice/cs7dotnetcore.git.
Enter a path for the cloned Git repository:
C:\Code\Repos\cs7dotnetcore
Click on the Clone button.
Wait for the Git repository to clone locally.
You will now have a local copy of the complete solutions to all the hands-on practice exercises for this book.
Double-click on the cs7dotnetcore repo to open a detail view.
You can click on the options in the Project section to view Pull Requests and Issues and other aspects of a repository.
You can double-click on an entry in the Solutions section to open it in the Solution Explorer.
Visual Studio Code has support for Git, but it will use your OS's Git installation, so you must install Git 2.0 or later first before you get these features. You can install Git from here: https://git-scm.com/download.
Note
If you like to use a graphical user interface, you can download GitHub Desktop here: https://desktop.github.com.
Launch Terminal, and enter the following command to check your configuration:
git config --list
The output should include your username and e-mail address, because these will be used with every commit that you make:
...other congfiguration...
user.name=Mark J. Price
user.email=markjprice@gmail.com
If your user name and e-mail has not been set, to set your user name and email, enter the following commands, using your own name and e-mail, not mine:
git config --global user.name "Mark J. Price"
git config --global user.email markjprice@gmail.com
You can check an individual configuration setting like this:
git config user.name
Launch Visual Studio Code.
Navigate to View | Integrated Terminal or press Ctrl+ ` and enter the following commands:
cd Code
mkdir Repos
cd Repos
git clone https://github.com/markjprice/cs7dotnetcore.git
It will take a minute to clone all the solutions for all the chapters to your local drive, as shown in the following screenshot:

It is best to open one project folder at a time because the cs7dotnetcore repository does not include any dependencies, so you will need to restore them using the dotnet restore command, or wait for Visual Studio Code to prompt you after opening a folder.
For more information about source code version control with Visual Studio Code, visit: https://code.visualstudio.com/Docs/editor/versioncontrol.
Test your knowledge and understanding by answering some questions, get some hands-on practice, and explore with deeper research into the topics covered in this chapter.
Answer the following questions:
Why can a programmer use different languages, for example C# and F#, to write applications that run on .NET Core?
What do you type at the prompt to build and execute C# source code?
What is the Visual C# developer settings keyboard shortcut to save, compile, and run an application without attaching the debugger?
What is the Visual Studio Code keyboard shortcut to view the Integrated Terminal?
Is Visual Studio 2017 better than Visual Studio Code?
Is .NET Core better than .NET Framework?
How is .NET Native different from .NET Core?
What is .NET Standard and why is it important?
What is the difference between Git and GitHub?
What is the name of the entry-point method of a .NET console application and how should it be declared?
You do not need Visual Studio 2017 or Visual Studio Code to practice writing C#.
Go to one of the following websites and start coding:
.NET Fiddle: https://dotnetfiddle.net/
Cloud9: https://c9.io/web/sign-up/free
Use the following links to read more details about the topics covered in this chapter:
Welcome to .NET Core: http://dotnet.github.io
.NET Core Command Line Interface (CLI) tool: https://github.com/dotnet/cli
.NET Core runtime, CoreCLR: https://github.com/dotnet/coreclr/
.NET Core Roadmap: https://blogs.msdn.microsoft.com/dotnet/2016/07/15/net-core-roadmap/
.NET Standard FAQ: https://github.com/dotnet/standard/blob/master/docs/faq.md
Visual Studio Documentation: https://docs.microsoft.com/en-us/visualstudio/
Visual Studio Blog: https://blogs.msdn.microsoft.com/visualstudio/
Git and Team Services: https://www.visualstudio.com/en-us/docs/git/overview
The easiest way to connect to your GitHub repositories in Visual Studio: https://visualstudio.github.com/
In this chapter, we set up the development environment, used Windows' Command Prompt and macOS's Terminal to compile and run a console application, used Visual Studio 2017 and Visual Studio Code to create the same application, and discussed the differences between .NET Framework, .NET Core, .NET Standard, and .NET Native.
In the next chapter, you will learn to speak C#.