The first step to modifying Minecraft with the Bukkit API is to install a CraftBukkit server on your Windows PC. A multiplayer server is essentially the same as single-player Minecraft but allows for more customization and is not limited to only people in your home network. The CraftBukkit server will load all of the plugins that you create and use them to change how Minecraft operates. It contains all of the code that is included in the vanilla Minecraft server. Most of these classes, methods, and variables are renamed to help us understand their purpose and how to use them correctly.
craftbukkit.jar also includes additional code to aid plugin developers with completing certain tasks such as saving/loading data, listening for server events, and scheduling code to be executed. We will use this CraftBukkit server to test any plugins that you write. By the end of this chapter all your friends can log onto and play on your modified Minecraft server together.
Installing a CraftBukkit server
Understanding and modifying server settings
Using console and in-game Minecraft and Bukkit server commands
Port forwarding
CraftBukkit completely replaces the vanilla Minecraft server (mincraft-server.jar or minecraft-server.exe) which you may have downloaded from minecraft.net. The vanilla server is incapable of running Minecraft plugins. We will start from scratch to set up this new server. If you wish to use a preexisting world, you will be able to do this after creating a new CraftBukkit server. To start, let's create a new empty folder named Bukkit Server. We will run the CraftBukkit server from this newly created folder.
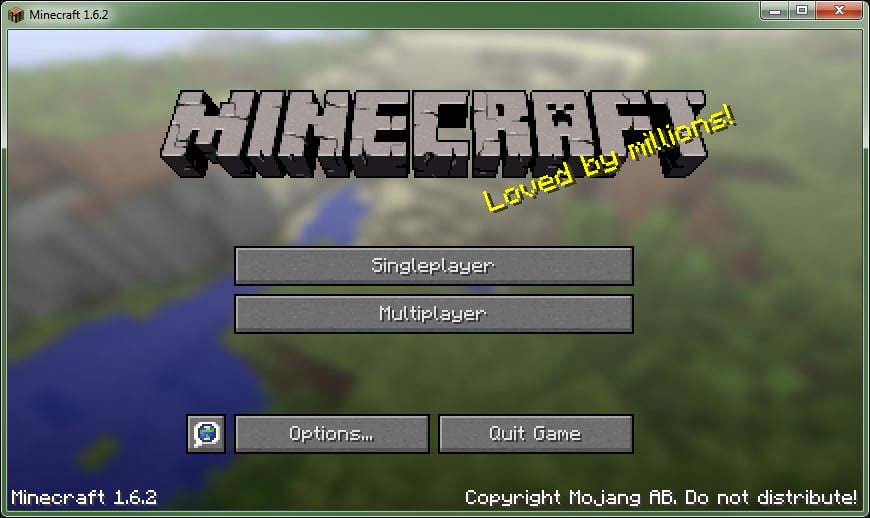
The main file that you will need to start your new server is craftbukkit.jar. A jar file is a Java-executable file. Minecraft, CraftBukkit, and any plugin that we will create are all written in Java and thus are run from a JAR file. The craftbukkit.jar file takes the place of minecraft_server.exe or minecraft_server.jar. The Bukkit team maintains the Bukkit project and releases the updates for the CraftBukkit server, as Minecraft itself is updated to newer versions. The newest version of CraftBukkit is always available for download at dl.bukkit.org/downloads/craftbukkit/. Go to the CraftBukkit download page and you will see the options Recommended Build, Beta Build, and Development Build. You should use Development Build only if another build is not yet available for your version of Minecraft. If you are unsure of your Minecraft version, it is displayed in the left corners of the Minecraft client. The client is the program that you use to play Minecraft, as shown in the following screenshot:
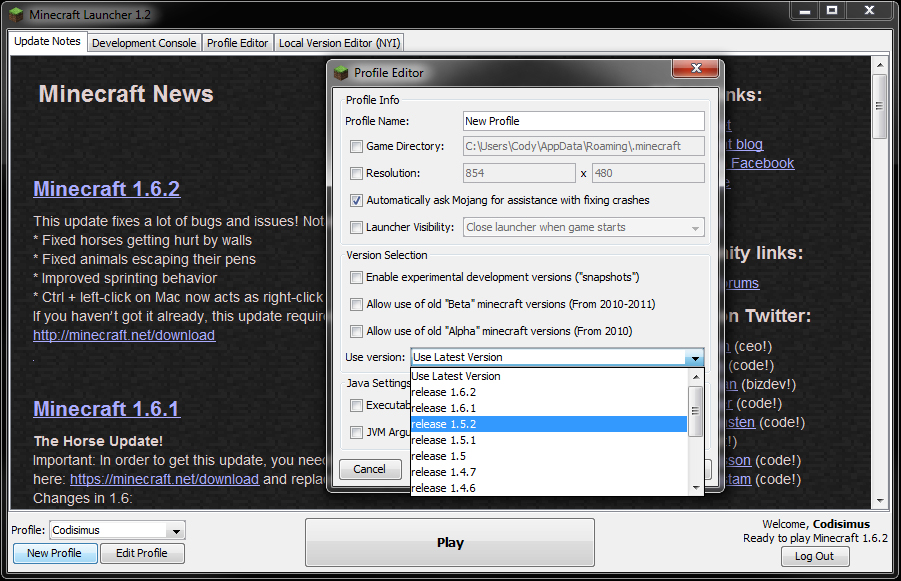
You can choose which version of Minecraft you play by creating a new profile in the Minecraft launcher, as shown in the following screenshot:
Download the craftbukkit JAR file and place it in the Bukkit Server folder. Its name may include a version number such as craftbukkit-1.6.2-R1.0.jar. For simplicity, we will rename the file to craftbukkit.jar.
Now we will create a batch file that we can double-click on every time we wish to start the server. In a new text document, type the following two lines:
java -Xms1024M -Xmx1024M -jar craftbukkit.jar
PAUSE
1024 tells how much of the computer's RAM the server will be allowed to use. You can change this number if you want the server to use more or less RAM. craftbukkit.jar is the name of your craftbukkit JAR file. If you did not rename the file earlier, then you will have to edit this batch file every time that you update your CraftBukkit version to ensure that the two names match. The rest of the previous lines will not concern you and should remain unchanged.
Save the text document as Start Server.bat, and be sure that it is in the same folder as craftbukkit.jar. Now you are able to run the server. Double-click on the batch file that you just created. It will then open up the command prompt and start creating the server files. It will look similar to the following screenshot:
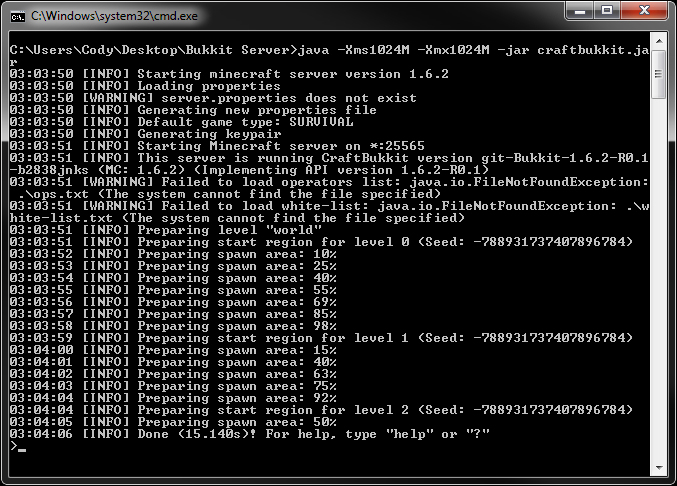
There is no need to worry about the warnings that are printed at this time, as they are expected when you first start a new server.
If a window like the previous screen does not appear, then make sure that your batch file is called Start Server.bat and not Start Server.bat.txt.
You will see the server folder populated with several files and folders. I will go over a few of them now, as shown in the following list, but most of these files will not concern you at this time:
The
pluginsfolder: This folder is where you will place all of the Bukkit plugins that you wish to use on your server.The folders that begin with
world(world,world_nether, and so on): These folders have been created that include all of the information for the new world of your server. If you already have a Minecraft world that you wish to use, then replace these new folders with your old world folders. Do not attempt to do this while the server is running, as it will cause problems.server.properties: This file holds several options which allow changing how a Minecraft server operates. You can open it with any text editor. There are many settings and most of them are pretty self explanatory. I will go over a few settings in the following list that you may want to modify. For a full list of property explanations, you can visit www.minecraftwiki.net/wiki/Server.properties.pvp=true: Thepvpproperty can be set to abooleanvalue. PvP stands for player vs. player and sets whether players can attack and harm each other. You will want to set this totrueorfalsedepending on whether you want PvP to be on or off, respectively.difficulty=1: The difficulty property can be set to a number0to3.0means Peaceful,1means Easy,2means Normal, and3means Hard. Everyone on the server will be playing at this difficulty.gamemode=0: This property determines which game mode players will start in.0means Survival,1means Creative, and2means Adventure.motd=A Minecraft Server: motd stands for Message of the day. This message will be displayed when viewing your server in the Minecraft multiplayer server list as shown in the following screenshot:
It is a good idea to set this to a short description of your server, for example,
Bukkit plugin testing.online-mode=true: This can be set tofalseto allow players to connect to the server while in offline mode. This can be useful if http://minecraft.net/ is unavailable or your computer is not connected to the Internet. Running your server in offline mode can cause security issues, such as other players logging in to your account.
bukkit.yml: This file contains many more server options. These are the options that a vanilla server does not offer and are only available through running a CraftBukkit server. You will notice that this file is a YMAL (.yml) file rather than a PROPERTIES (.properties) file. When you open it, you will see how the two file types are formatted differently. The first difference that you will notice is that certain lines are indented. You do not need to fully understand the YMAL formatting, as it will be explained further as we progress through making the Bukkit plugins. There are a few settings in this file that I will bring to your attention, as shown in the following list. For a full list of these Bukkit settings you can visit wiki.bukkit.org/Bukkit.yml:allow-end: true: A vanilla Minecraft server allows you to disable the nether world from functioning. A Bukkit server allows you to disable the end world as well. Set this tofalseto prevent players from traveling to the end.use-exact-login-location: false: Vanilla Minecraft contains a feature that will prevent players from spawning inside a block. The player will instead be spawned above the block, so they will not suffocate and die. This can easily be exploited to be able to climb onto blocks that a player could normally not reach. Bukkit can prevent this from occurring by spawning the player exactly where they logged out. Set this property totrueif you wish to prevent this exploit.spawn-limits: Bukkit allows a server admin to modify how many monsters and animals are allowed to spawn within any given chunk. If you are unfamiliar with the term chunk, it is a group of 16 x 16 blocks from bedrock to the highest point of the sky. The following is a picture of a single chunk in Minecraft:
If you feel that there are too many (or too few) mobs, then you will want to adjust these values accordingly.
ticks-per: autosave: 0: Unlike vanilla Minecraft, a Bukkit server will not periodically save your player/world data. Automatically saving may prevent the server from losing any changes that were made within the game if it were to crash or shut down for any reason (such as the computer losing power). Vanilla defaults this setting to6000. There are 20 ticks every second. We can determine how long 6000 ticks is with the following math: 6000 ticks / 20 ticks/second = 300 seconds and 300 seconds / 60 seconds/minute = 5 minutes. From the previous calculation you should be able to calculate an appropriate time period that you wish your server to autosave. If your server lags whenever it saves, then you may want to increase this number. A setting of72000would only cause lag once every hour; however, if the server crashes right before it saves, then you may lose any progress you have made in the past hour.
We now have all of our custom options set. Next, we are ready to log into the server and take a look at the in-game server commands.
To log into your server, you will need to know the IP address of your computer. Later in this chapter we will work through finding this essential information. However, I will assume that for now you will be playing Minecraft on the same machine that you are running your server on. In this case, for the IP of the server, simply type localhost. Once you are connected to your server, you will notice that the CraftBukkit server is essentially the same as a vanilla server. This is because you do not have any plugins installed yet. The first indication that the server is running Bukkit is that you will have a few extra commands.
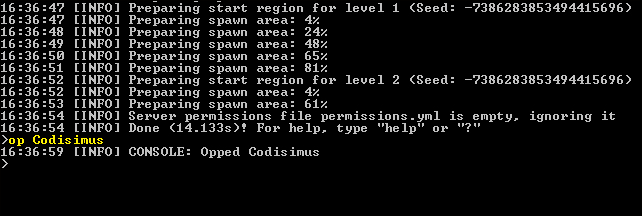
Bukkit inherits all of the Minecraft server commands. If you have ever played on a Minecraft server, then you have probably already used some of these commands. In case you have not, I will explain some of the more useful ones. These commands can be typed into the console or in-game. By console I am referring to the command prompt that is running your server. CraftBukkit has a built-in permissions system that limits players from using specific commands. They cannot use a command if they do not have the necessary permission. We will discuss this in further detail in a later chapter, but for now we will make your player an operator, or op for short. An operator automatically has all of the permissions, and will be able to execute all of the commands that will be presented. To make yourself an operator, we will issue the op command to the console:
# op <player>
Replace <player> with your player name. See the highlighted command in the following screenshot for an example:
Once you have been opped, you are ready to test some of the server commands in-game. In order to understand how to use commands properly, you must understand the command syntax. We will look at the gamemode command as an example:
gamemode <0 | 1 | 2> [player]
[ ]indicates that it is an optional parameter. For this command, if the player parameter is not included, then the game mode of your own player will be set.|is a known symbol for the word or. So<0 | 1 | 2>indicates that either 0, 1, or 2 can be entered. They represent survival, creative, and adventure, respectively.Parameters must always be typed in the same order in which they are displayed. Usually, if you enter an incorrect command, a help message will appear reminding you of how to use the command properly.
Take note that when you issue a command in-game, you must start with /, but when issuing a command from the console, / must be left out. A proper use of the gamemode command would be /gamemode 1, which will set your game mode to Creative, as shown in the following screenshot:
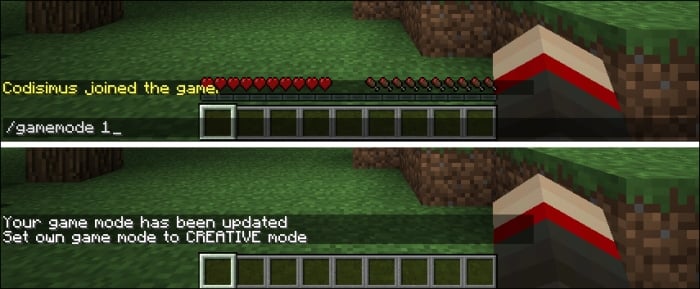
Another example of this command is /gamemode 2 Steve, which will find the player whose username is Steve and will change his game mode to adventure.
Now that you understand the basic syntax for commands, I will list some other useful server commands, as shown in the following list. Most of these commands are present in Vanilla Minecraft. Only a few of them are specific to Bukkit servers.
(For vanilla)
gamerule <rule> [true | false]The rule parameter can be set to any of the following:
(For vanilla)
give <player> <item> [amount [data]]For example,
/plugins or /pl, displays a list of all the plugins that are installed on your server
(For Bukkit)
reload(For vanilla)
spawnpoint [player] [x y z]For example,
/spawnpoint, sets you to spawn where you are standing, if you die
For example,
/stop, saves and shuts down the serverThis is how you should stop the server to be certain that all data is saved
You will lose data if you simply close out of the command prompt, by clicking on X
(For vanilla)
tell <player> <message>(For vanilla)
time set <day | night>(For vanilla)
toggledownfall(For vanilla)
tp [player] <targetplayer>
For more information regarding these and other commands please visit wiki.bukkit.org/CraftBukkit_commands. Both these commands and the property files mentioned earlier give you a lot of control over how your server functions.
Where's the fun in running your own Minecraft server when no one else can log into it? I will now explain how to allow your friends to connect to your server so that they can play with you. In order to do this, we must first find your IP address. Much like your place of residence has a street address, your computer has an address on the Internet. This is what your friends will type into their Minecraft client to find your server. To find this, simply search IP on Google. At the top of the results will be a line that states: Your public IP address is XX.XX.XXX.XX (the Xs will be replaced with numbers and its overall length may be different). You can also visit www.whatismyip.com to find your IP address.
Once you have your IP address, try using it to connect to your server rather than using localhost. If you are able to connect, then your friends will be able to, too. If not, you will have to take additional steps to allow other players to connect to your server. This will be the case if your computer is attached to a router. We must let the router know to point other Minecraft players towards your computer that is running the server. This process is called port forwarding and to do so, we will first need some additional information.
We need to know the IP address of your computer on your local network. This IP will be different from the address we obtained earlier. We will also need to know the IP of your router. To find these, we will open up a new command prompt window. The command prompt can be found at:
Start Menu/All Programs/Accessories/Command Prompt
You can also search cmd.exe to find it. Once the command prompt is open, type:
# ipconfig
Then, press Enter. A screen will be displayed similar to the one in the following screenshot:
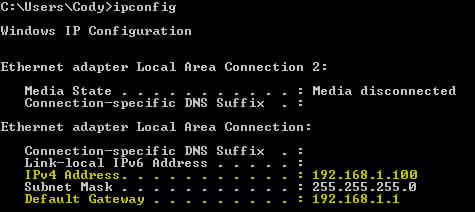
In the previous image I have highlighted the two IP addresses that you are looking for. The numbers will most likely be very similar to these sample numbers. IPv4 Address is the address of your computer, and Default Gateway is the address of your router. Take note of both of these IPs.
Next, we will log into your router. In any web browser, type the IP address of the router (192.168.1.100 in our example). If you did this correctly, then you will be prompted with a login form asking for a username and password. If you do not know this information, you can try admin for both. If that is unsuccessful, you will have to find the default username and password, which can be found in the paperwork that was provided with your router. This information can usually be found online as well, by searching the name of your router along with the terms default login.
Once we are logged into the router, we must find the area that includes the settings for port forwarding. There exist many brands and models of routers in the world and all of them present this option differently, so I cannot provide a specific walkthrough of how this page is found. However, you will want to look for a tab that says something along the lines: Forwarding, Port Forward, or Applications & Gaming. If you do not see any of these, then expand your search by exploring the advanced settings. Once you find the correct page, you will most likely see a table that looks like the following one:
|
Application Name |
External Port |
Internal Port |
Protocol |
IP Address |
|---|---|---|---|---|
|
Bukkit Server |
25565 |
25565 |
TCP and UDP |
192.168.1.100 |
Fill in the fields as it is shown in the previous table. Of course, the layout and formatting will differ depending on your router, but the important details are that you forward port 25565 to the IP address that you found earlier (192.168.1.100 in our example). Be sure to save these new settings. If you have done this correctly, then you should now be able to connect to your server using your public IP address.
You now have a CraftBukkit server running on your PC. You can inform your friends of your IP address so that they can play on your new server with you. You are now familiar with in-game commands and how to use them, and your server is ready to have Bukkit plugins installed onto it as soon as we program them. To prepare ourselves for programming these plugins, we will first become familiar with the Bukkit API, and how it can be used.


