


So, you're already familiar with WordPress and know how to use plugins, widgets, and themes? Your next step is to expand your existing WordPress website or blog with an online store? In that case you've come to the right place!
WooCommerce is a versatile plugin for WordPress, that gives the possibility for everyone with a little WordPress knowledge to start their own online store.
In case you are not familiar with WordPress at all, this book is not the first one you should read. No worries though, WordPress isn't that hard to learn and there are tons of online possibilities to learn about the WordPress solution very quickly. Or just turn to one of the many printed books on WordPress that are available.
These are the topics we'll be covering in this chapter:
Installing and activating WooCommerce
Learn everything about setting up WooCommerce correctly
Before we start, remember that it's only possible to install your own plugins if you're working in your own WordPress installation. This means that users running a website on WordPress.com will not be able to follow along. It's simply impossible in that environment to install plugins yourself.
Although installing WooCommerce on top of WordPress isn't difficult, we highly recommend that you set up a test environment first. Without going too much into depth, this is what you need to do:
Create a backup copy of your complete WordPress environment using FTP. Alternatively use a plugin to store a copy into your
Dropboxfolder automatically. There are tons of solutions available, just pick your own favorite. UpDraftPlus is one of the possibilities and delivers a complete backup solution: http://wordpress.org/plugins/updraftplus/.Don't forget to backup your WordPress database as well. You may do this using a tool like phpMyAdmin and create an export from there. But also in this case, there are plugins that make life easier. The UpDraftPlus plugin mentioned previously can perform this task as well.
Once your backups are complete, install XAMPP on a local (Windows) machine that can be downloaded from http://www.apachefriends.org. Although XAMPP is available for Mac users, MAMP is a widely used alternative for this group. MAMP can be downloaded from http://www.mamp.info/en/index.html. Restore your WordPress backup on your test server and start following the remaining part of this book in your new test environment.
Alternatively, install a copy of your WordPress website as a temporary subdomain at your hosting provider. For instance, if my website is
http://www.example.com, I could easily create a copy of my site in http://test.example.com. Possibilities may vary, depending on the package you have with your hosting provider.If in your situation it isn't needed to add WooCommerce to an existing WordPress site, of course you may also start from scratch. Just install WordPress on a local test server or install it at your hosting provider. To keep our instructions in this book as clear as possible we did just that. We created a fresh installation of WordPress Version 3.6. Next, you see a screenshot of our fresh WordPress installation:

Tip
Are these short instructions just too much for you at this moment? Do you need a more detailed step-by-step guide to create a test environment for your WordPress website? Look at the following tutorials:
For Max OSX users: http://wpmu.org/local-wordpress-test-environment-mamp-osx/
For Windows users: http://www.thegeekscope.com/how-to-copy-a-live-wordpress-website-to-local-windows-environment/
More tutorials will also be available on our website: http://www.joomblocks.com
Don't forget to sign up for the free Newsletter, that will bring you even more news and tutorials on WordPress, WooCommerce, and other open source software solutions!
Once ready, we'll be able to take the next step and install the WooCommerce plugin. Let's take a look at our WordPress backend. In our situation we can open this by browsing to http://localhost/wp36/wp-admin. Depending on the choices you made previously for your test environment, your URL could be different.
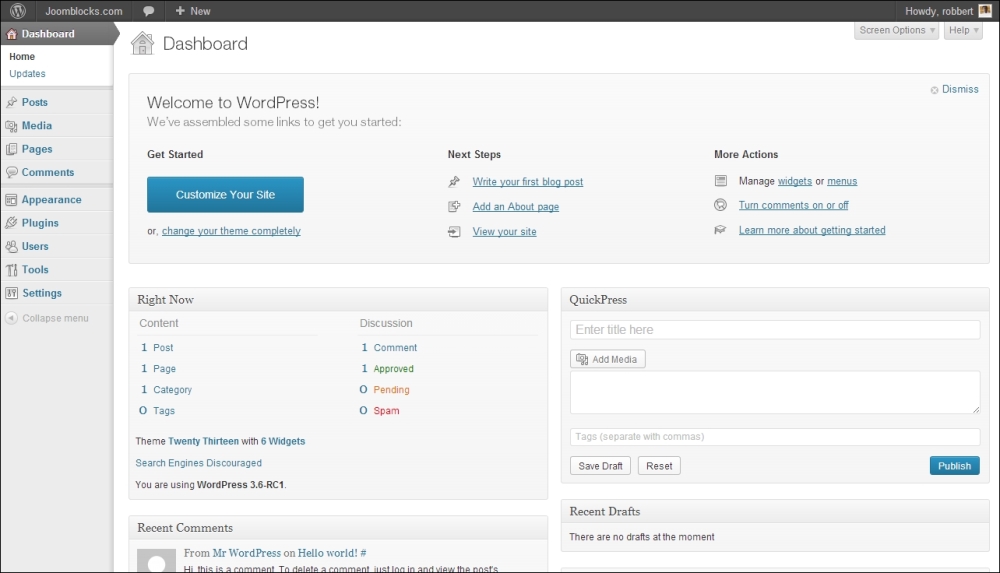
Well, this should all be pretty familiar for you already. Again, your situation might look different, depending on your theme or the number of plugins already active for your website.
Installing a plugin is a fairly simple task:
Click on Plugins in the menu on the left and click on Add New.
Next, simply enter
woocommercein the Search field and click on Search Plugins.
Verify if the correct plugin is shown on top and click on Install Now. Confirm the warning message that appears by clicking on OK.

Click on Activate Plugin. Note that in the following screenshot, we're installing Version 2.0.13 of WooCommerce. New versions will follow rather quickly, so you might already see a higher version number.

WooCommerce needs to have a number of specific WordPress pages, that it automatically will setup for you. Just click on the Install WooCommerce Pages button and make sure not to forget this step!

Tip
In our example project, we're installing the English version of WooCommerce. But you might need a different language. By default, WooCommerce is already delivered in a number of languages. This means the installation will automatically follow the language of your WordPress installation. If you need something else, just browse through the plugin directory on WordPress.org to find any additional translations.
Once we have created the necessary pages, the WooCommerce welcome screen will appear and you will see a new menu item has been added to the main menu on the left.

Meanwhile the plugin created the necessary pages, that you can access by clicking on Pages in the menu on the left.

Note that if you open a page that was automatically created by WooCommerce, you'll only see a shortcode, which is used to call the needed functionality. Do not delete the shortcodes, or WooCommerce might stop working. However, it's still possible to add your own content before or after the shortcode on these pages.
WooCommerce is already usable straight out of the box. But in this section we'll cover almost every setup parameter that you may use to control your online store. Going through all settings might be quite overwhelming in the beginning, but it will help you in exploring the possibilities of WooCommerce.
Click on WooCommerce in the left menu and then click on Settings. A new page holding different tabs with settings appears. The first one visible is the tab named General.
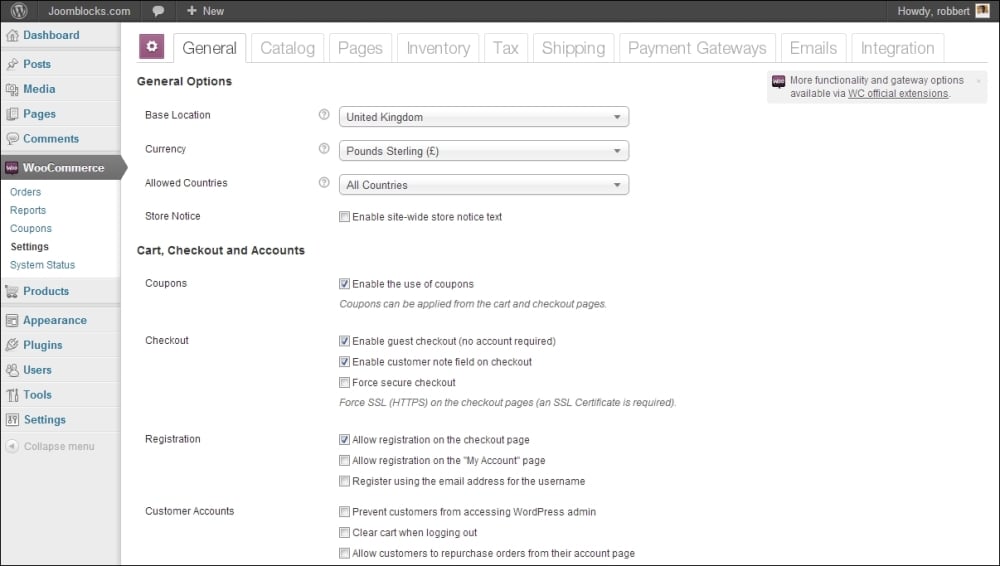
The Base Location field holds the country of your store. The default setting may vary, depending on the country and language settings of your WordPress environment. Just change it if needed. Note that if you're in the United States, you'll also have to choose the correct state. Note that the country field will be used as the default country for calculating taxes. It will also be used as the default country for customers checking out or creating an account.
Do the same for the Currency field, if necessary. Note that your WooCommerce online store by default can only handle one currency.
As we move along we'll have to make a lot of decisions. The first one is the countries that we want to allow. That is, will we export our products or will we just run our store for one single country? Set the correct value in the field Allowed Countries. If you want to limit your sales to specific countries, next also select those countries in the field Specific Countries.
If you immediately installed WooCommerce in a live website—which we don't recommend—you have the possibility to show a warning message to your visitors. By checking the field Store Notice, the field Store Notice Text becomes available, giving you an opportunity to write your own text that will be shown on top of your site.

When scrolling down a bit on the General tab, there are a number of settings on a higher level to control the behavior of WooCommerce. The first one is Enable Coupons, which is checked by default. If you're not planning to use discount coupons you can switch it off. You'll see that as soon as you have such a field available, customers almost expect to have a discount coupon and will start searching for it. Having a coupon field that is not actively used is therefore a real conversion killer.
Next, there are three fields to control your checkout process. First, do you want to force your customers to create an account in your store? We recommend to keep the default value if you're not sure. The second field gives the possibility to your customer to add a remark or question to the order. Finally, checking the last field forces a secure SSL connection during checkout. If you enable it, you'll need a SSL certificate for your website. You should not enable this on a local test environment.
Tip
Not sure what a SSL certificate is, and how to use for your website? The principle cannot be explained in just a few sentences, but by using a SSL certificate on your website, you'll be able to offer your visitors a safe connection during checkout. There are lots of companies that offer SSL certificates. Verizon (http://www.verizonenterprise.com/products/security/identity/ssl/) is a major player, but you may just as well ask your hosting provider for help. Especially if you need to be able to collect credit card information directly on your own website, using a SSL certificate is a must. In case you're using a Payment Service Provider you do not need one in most cases. More on payments will follow in Chapter 4, Payments, Shipping, and Coupons.

The Registration section gives the possibility to decide where your visitors can create an account. This can be done on the checkout page, on the My Account page, or both. Further on, it's possible to decide to use the e-mail address as a username, or let your customers choose their own username. We recommend to enable it, so that the e-mail address can be used to login.
The next section named Customer Accounts delivers the possibility to block your customers from your WordPress admin. Normally it isn't needed to have them there, so enable it. The next setting lets you clear the cart if the customer logs out. Keep it disabled. Finally you can give your customers the possibility to repurchase an existing order. Especially in business-to-business stores this often makes sense, so enable it if you do not have specific reasons to keep it switched off.
We're moving further to the Styles and Scripts section. This lets you control the default colors, but if you used WordPress more often, you'll know that this is normally controlled by your theme. For now, you may keep the defaults. We'll discuss the look and feel of your online store in Chapter 5, Working with WooCommerce Themes.
The last part of this tab covers Downloadable Products. Think about e-books, photos, movies, or other digital goods. If you're not planning to sell those, don't worry and skip this section. If you will sell downloadable products you might want to take a look at the settings. However, we'll discuss these kind of products more deeply in Chapter 3, Other Product Types.
Remember to click on Save at the bottom!
We're moving to the next tab, named Catalog. In this tab we are going to do some settings that will influence the presentation of our products We're starting with the Catalog Options.
First of all, using the Default Product Sorting field lets you decide how your products will be sorted. There are different possibilities, just choose what suits your situation. The default setting is nice, because it puts you in control. Using the default setting you have the possibility to control the sort order of items one by one.
Next, there are two settings that define what will be shown on your products page and category pages. By default they will show products only, which is fine in most circumstances.
Enabling the Redirect field to the cart page after successful addition is especially useful when you're only selling one (or a few) products, and chances are high that your customer will only buy one. In that case, you want to redirect them to the checkout as soon as possible. Enabling this field will help you to do just that.

The Product Data section lets you set some settings that are important for your product catalog. At first, we see four fields that are all enabled by default, giving you the maximum possibilities when creating new products. Note: SKU means Stock Keeping Unit, also referred to as Item code or Article number. However, if you won't sell products that require a weight or dimensions, you can disable these fields. Further on, it's possible to store weight and dimensions, without showing them to your visitors.
Next, define the Units of measure for your products. Just choose what is appropriate for the region you're selling to. Are you selling to different regions with different units of measure? Unfortunately that's not an option in WooCommerce, so in that case you'll still have to choose the best match.
Choose whether or not you want to work with Product Ratings and if yes, how you want to do that. We recommend to keep the defaults and leave these fields to enabled.
Scrolling down brings us to the section, Pricing Options. These settings will influence the way prices are shown to your users. Where do you want the currency character ($, €, and so on ) to appear? You should also check if the Thousand Separator and Decimal Separator are correct for your region. Further on, decide if you want to show decimals or not.

Setting Image Options is something you should probably skip at this moment. These fields will set the sizes of your product images will be shown in. However, before you set these, it's wise to first choose or build your WooCommerce theme and then come back here to do the correct settings. For now we keep the defaults. Note that it is important to come back here and check if you need to make changes before you are going to create all your products!
Remember to click on Save again at the bottom of the tab.
Tip
If you need to change the image sizes after your shop went live and when you already have lots of products available, there's a little problem. Your new settings will only affect new products, the existing ones remain unchanged. There is a solution for this: a plugin that can help you to recreate all thumbnails. The plugin is named Regenerate Thumbnails and can be found at: http://wordpress.org/plugins/regenerate-thumbnails/. More information on working with plugins follows in Chapter 8, More Possibilities Using Plugins.
The tab named Pages holds all references to the WordPress pages that were created after installation, as we mentioned earlier. We recommend not to change these if you do not have very specific reasons to do so. However, there's one field that doesn't have a value by default, Terms page ID. If you set this field your customers will be asked to confirm your terms when processing their order.
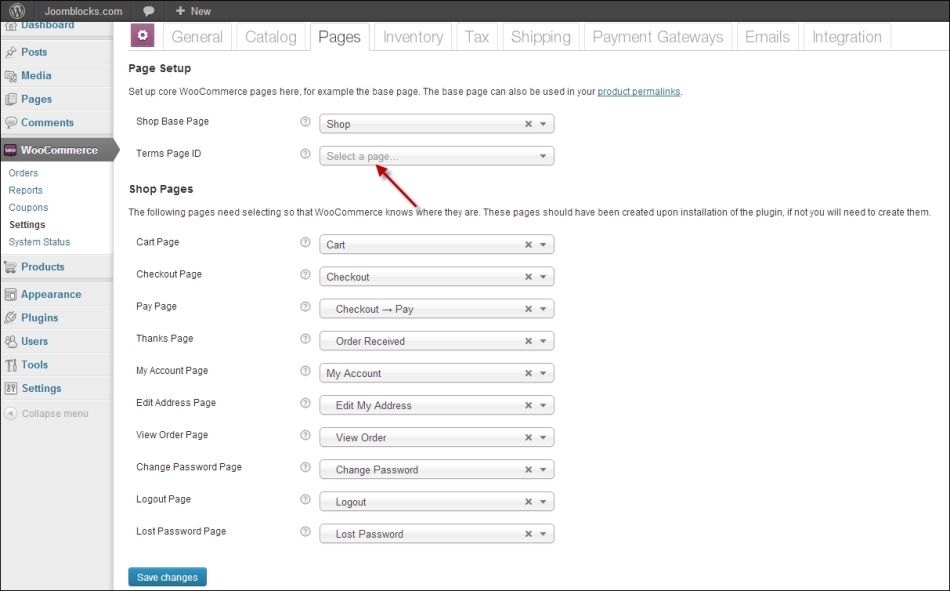
To use this function, of course you first have to create a page holding your terms by navigating to Pages | Add New in the left menu.
This tab only holds a couple of settings, that help to control your inventory levels.
First, decide if you want to track stock levels in your shop or not. Use the Enable stock management field, which is enabled by default. We can think of a few reasons why you would not want to do this:
When you're only selling downloadable or virtual products. More information on these product types can be found in Chapter 3, Other Product Types.
When you only sell a couple of items that will never run out of stock anyway.
The Hold Stock (minutes) setting sets the number of minutes the stock is reserved for a customer. As long as the order has not been paid for, the needed items are being reserved for that customer to make sure that the customer can safely do the checkout. Especially when you have limited stock levels, it's important to pay attention to this setting. If you do not want to hold any stock for your customers you can delete the existing value. A blank field will disable this function.
Next, it's possible to decide if you want to receive a warning message when one of your products is running low on stock, or is even completely sold out. You may also set the threshold levels for these warning messages. This means that you'll receive an e-mail as soon as the stock level reaches the threshold. It's not possible to set these fields on the product level, so if you have lots of different products that might be a problem.

Decide if you want to show or hide products from your customers if they are out of stock.
Use the Stock Display Format field to decide if you want to show your stock levels to your customers, hide them, or only show them if you're running low on stock. It's your choice, but from the conversion perspective showing a low stock level for certain products might increase the sense of urgency with your customer and thus increase sales.
The last tab that we'll discuss in this chapter is the Tax Settings tab. Of course there's no 'one size fits all' approach possible here. Tax laws and calculations differ from country to country and region to region. Besides that there's a large difference in handling taxes when selling goods to consumers or other businesses. So in here we'll just stick to the basics, by explaining the functionality that is available in WooCommerce. It's up to you to find out how tax calculations should be done for your specific situation.
First of all, decide if you want to Enable taxes and tax calculations. It's not always necessary to display taxes in your store to your customers. If you decide to disable it, you may ignore all other fields mentioned below this option.
Next, assuming that you enabled the field mentioned previously, decide if you want to enter your sales prices including or excluding tax in the Prices Entered With Tax field. Including tax is quite common in a consumer oriented store, but again, this differs per region.

Depending on the tax rules in your country, you need to set the Calculate Tax Based On field. Sometimes taxes should be calculated based on the shipping address of the customer. In our example, the base address of our store is used, which means that all customers will pay the same rate. By using the setting as shown the applied tax rate will only depend on the product, not on the address of the customer.
WooCommerce works with a "Standard tax rate" by default. It's not possible to delete this one. You can add additional rates if you need them by adding a description of your choice to the Additional Tax Classes field. The Reduced Rate and Zero Rate options have already been defined.
Once done, click on the Standard link at the top of the screen to set your default tax rate. Click on Insert Row. Just fill in the Rate % and set a Tax Name that makes sense for your customers. Note that it's possible to set rates per country, state, or even based on zip code. Note that this will only work if you've chosen to base the tax calculations on the address of your customer! By default your Tax rate will also be used for the shipping amount. Finally, using the Compound field it's possible to use multiple tax rates at once (tax on tax). Don't forget to click on the Save button!

Next, also set the other rates that you might need, such as Reduced Rate, Zero Rate, or any other rates that you added yourself.
Tip
Tax calculations can be pretty complex and overwhelming sometimes. Feel free to come back to this chapter once you created some products later on. This will make it easier for you to check if your tax setup has been done correctly. In some countries, such as the USA for instance, you could get a large table of calculations giving you a complex and bad performing result. During Chapter 8, More Possibilities Using Plugins, we'll get back on this topic and give you a couple of suggestions to support you in case the default functionality does not give you a satisfactory result.
You'll notice that we did not cover all tabs with settings yet. Feel free to have a look at these tabs now, but we'll discuss the setup of shipping and payment methods during Chapter 4, Payments, Shipping, and Coupons.
For now we've covered the most important settings and we're ready to move to the next step. We've learned:
How to set up a test environment and install WooCommerce
How to use the WooCommerce settings to set up our store in a way that fits our needs
In the next chapter we'll create our very first product.

