


Before we can recreate realistic lighting in any 3D application, we must first understand how color and light relate to each other and the world around them. The term "realistic lighting" doesn't just apply to natural light given off by the sun or moon—it also includes light given off by artificial sources including florescent lights, halogen lights, incandescent lights, and many other types of lights that are found in the world around us. It's important to understand not only how, but also why certain light sources behave as they do, so we can effectively apply the right lighting techniques to our 3D scenes.
To understand how light works, we're going to take a look at:
Basic color theory and color relationships
Color temperature
Various light sources
Chromatic adaptation
Lamp types in Blender
Components of a basic light rig
Various light rigs and their implementation in Blender
How Blender deals with shadows
To fully understand how light works, we need to have a basic understanding of what color is and how different colors interact with each other. The study of this phenomenon is known as color theory.
When light comes in contact with an object, the object absorbs a certain amount of that light. The rest is reflected into the eye of the viewer in the form of color. The easiest way to visualize colors and their relations is in the form of a color wheel.

There are millions of colors, but there are only three colors that cannot be created through color mixing—red, yellow, and blue. These colors are known as primary colors, which are used to create the other colors on the color wheel through a process known as color mixing. Through color mixing, we get other "sets" of colors, including secondary and tertiary colors.
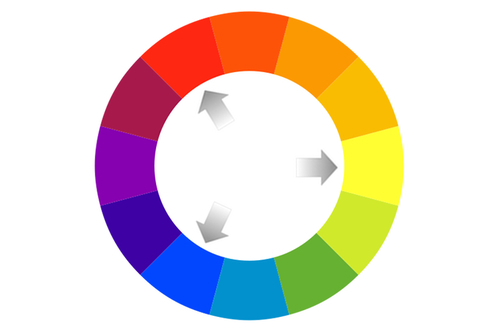
Secondary colors are created when two primary colors are mixed together. For example, mixing red and blue makes purple, red and yellow make orange, and blue and yellow make green.
It's natural to assume that, because mixing two primary colors creates a secondary color, mixing two secondary colors would create a tertiary color. Surprisingly, this isn't the case. A tertiary color is, in fact, the result of mixing a primary and secondary color together. This gives us the remainder of the color wheel:
Red-orange
Orange-yellow
Chartreuse
Turquoise
Indigo
Violet-red

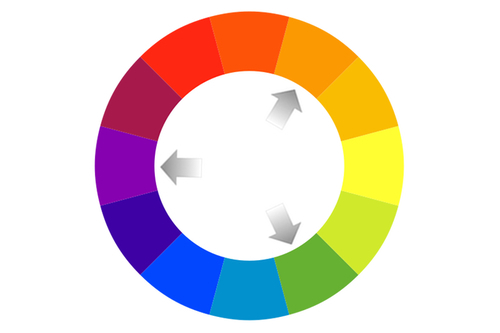
There are other relationships between colors that we should know about before we start using Blender. The first is complimentary colors. Complimentary colors are colors that are across from each other on the color wheel.
For example, red and green are compliments. Complimentary colors are especially useful for creating contrast in an image, because mixing them together darkens the hue. In a computer program, mixing perfect compliments together will result in black, but mixing compliments in a more traditional medium such as oil pastels results in more of a dark brown hue. In both situations, though, the compliments are used to create a darker value.
Tip
Be wary of using complimentary colors in computer graphics—if complimentary colors mix accidentally, it will result in black artifacts in images or animations.
The other color relationship that we should be aware of is analogous colors. Analogous colors are colors found next to each other on the color wheel. For example, red, red-orange, and orange are analogous. Here's the kicker—red, orange, and yellow can also be analogous as well. A good rule to follow is as long as you don't span more than one primary color on the color wheel, they're most likely considered analogous colors.
Understanding color temperature is an essential step in understanding how lights work—at the very least, it helps us understand why certain lights emit the colors they do. No light source emits a constant light wavelength. Even the sun, although considered a constant light source, is filtered by the atmosphere to various degrees based on the time of the day, changing its perceived color.
Color temperature is typically measured in degrees Kelvin (°K), and has a color range from a red to blue hue, like in the image below:
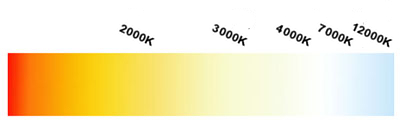
Every color in the temperature spectrum corresponds to a specific Kelvin value. Knowing this correlation will help us understand how real light sources work.
So how is color applicable beyond a two-dimensional color wheel? In the real world, our eyes perceive color because light from the sun—which contains all colors in the visible color spectrum—is reflected off of objects in our field of vision. As light hits an object, some wavelengths are absorbed, while the rest are reflected. Those reflected rays are what determine the color we perceive that particular object to be.
Of course, the sun isn't the only source of light we have. There are many different types of natural and artificial light sources, each with its own unique properties. The most common types of light sources we may try to simulate in Blender include:
Candlelight
Incandescent light
Florescent light
Sunlight
Skylight
Candlelight is a source of light as old as time. It has been used for thousands of years and is still used today in many cases. The color temperature of a candle's light is about 1500 K, giving it a warm red-orange hue. Candlelight also has a tendency to create really high contrast between lit areas and unlit areas in a room, which creates a very successful dramatic effect.
When most people hear the term "light bulb", the incandescent light bulb immediately comes to mind. It's also known as a tungsten-halogen light bulb. It's your typical household light bulb, burning at approximately 2800 K-3200 K. This color temperature value still allows it to fall within the orange-yellow part of the spectrum, but it is noticeably brighter than the light of a candle.
Florescent lights are an alternative to incandescent. Also known as mercury vapor lights, fluorescents burn at a color temperature range of 3500 K-5900 K, allowing them to emit a color anywhere between a yellow and a white hue. They're commonly used when lighting a large area effectively, such as a warehouse, school hallway, or even a conference room.
Now let's take a look at some natural sources of light! The most obvious example is the sun. The sun burns at a color temperature of approximately 5500 K, giving it its bright white color. We rarely use pure white as a light's color in 3D though—it makes your scene look too artificial. Instead, we may choose to use a color that best suits the scene at hand. For example, if we are lighting a desert scene, we may choose to use a beige color to simulate light bouncing off the sand. But even so, this still doesn't produce an entirely realistic effect. This is where the next source of light comes in—the sky.
The sky can produce an entire array of colors from deep purple to orange to bright blue. It produces a color temperature range of 6000 K-20,000 K. That's a huge range! We can really use this to our advantage in our 3D scenes—the color of the sky can have the final say in what the mood of your scene ends up being.
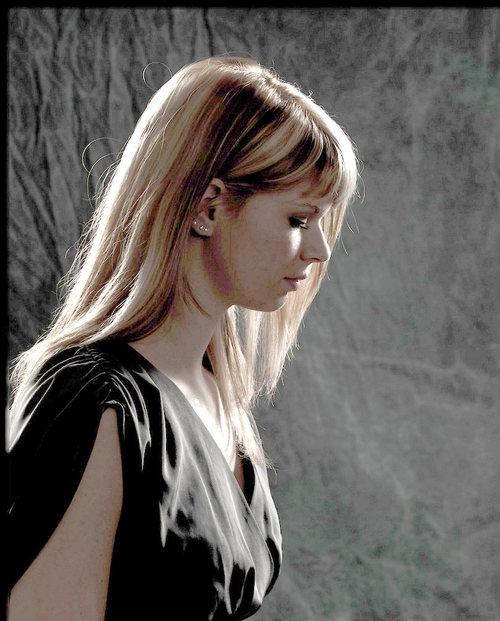
What is chromatic adaptation? We're all more familiar with this process than you may realize. As light changes, the color we perceive from the world around us changes. To accommodate for those changes, our eyes adjust what we see to something we're more familiar with (or what our brains would consider normal). When working in 3D you have to keep this in mind, because even though your 3D scene may be physically lit correctly, it may not look natural because the computer renders the final image objectively, without the chromatic adaptation that we, as humans, are used to.

Take this image for example. In the top image, the second card from the left appears to be a stronger shade of pink than the corresponding card in the bottom picture. Believe it or not, they are the exact same color, but because of the red hue of the second photo, our brains change how we perceive that image.
Now that we have a basic understanding of real-world light sources and color theory, we can start applying it to our 3D scenes. Let's take a look at the lamp types found in Blender, some basic lighting setups (or "rigs"), and how Blender deals with shadows.
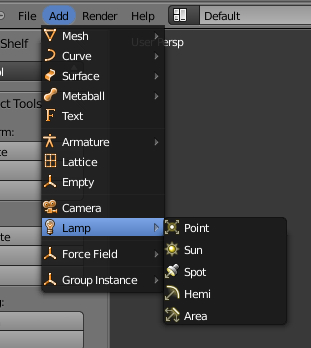
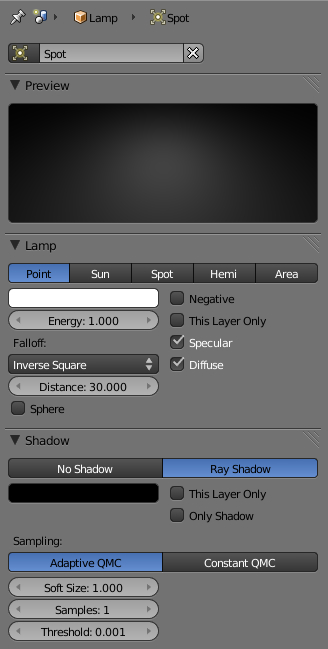
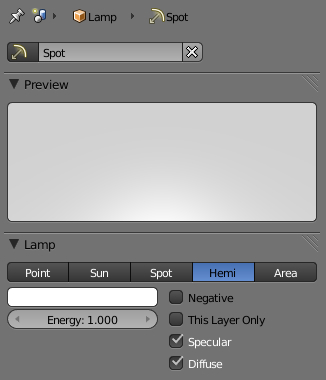
Blender provides us with five different types of lamps we can use to light our scenes:
Point
Sun
Spot
Hemi
Area
These lamps can be added to a scene through the Add menu.
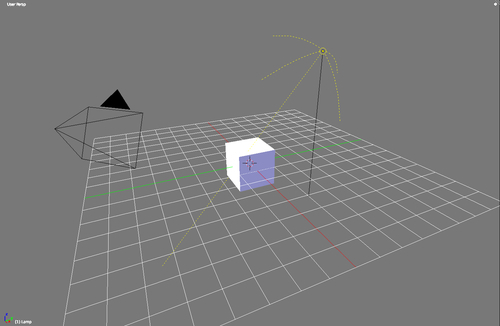
When we open Blender for the first time, the default scene includes a cube, a camera, and a Point lamp.

The Point lamp is an omni-directional light, meaning it emits light in all directions. There is, as with all other lamps in Blender, a fall-off factor, which means that as the distance between an object and the light source increases, the amount of light illuminating the object decreases.
The sun is so far away from earth that as light rays travel away from the sun, the angle between them grows closer and closer to 0. Because of this phenomenon, a convention in the CG industry is to simulate sunlight with a lamp that emits light in a single direction with parallel rays.
Other 3D programs refer to this lamp as a "direction light", but they all behave in the same fashion.

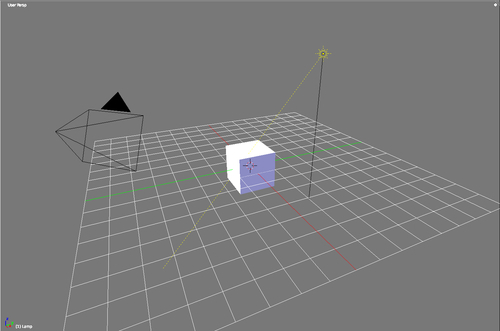
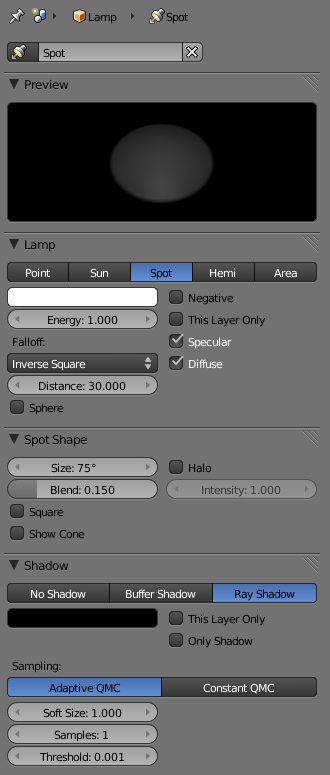
The Spot lamp acts in the same fashion a spot light would in the real world. When we break it down, the Spot lamp is a default lamp attached to a cone, restricting the light to the volume of the cone. The settings for the size and length of the cone can be edited manually to fit different needs.
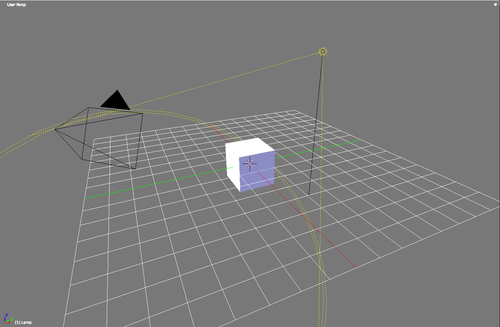
This lamp is especially useful for scenes that require large contrasts in light such as scenes using a 1-Point light rig (we will discuss this later). A nice feature that sets it apart from some of the other lights is that the Spot lamp supports both buffer and raytraced shadows—some of the other lamp types only support raytraced shadows. For more information on the difference between Blender's shadow algorithms, refer to the Shadows section at the end of this chapter.
The Hemi lamp directs light by emitting light in one direction from a hemispherical shape. Sounds confusing? It works in the same way the flash from an old camera would, used to simulate a cloudy (or otherwise uniform) sky.
Just like the Sun lamp, the direction of the Hemi lamp is only affected by the lamp's rotation, and not its position.
The Area lamp is an interesting lamp. All of the other lamps in Blender are single-point lamps, meaning they light a scene based on light rays emitted from a single point.

The Area lamp is different in that it's a multi-point light. This means that when it comes to render an image, Blender places a user-determined number of point lights within the boundaries of the Area lamp and then calculates the effect those lights have on the scene. This creates smoother shadows, and emulates the effect of bending light.
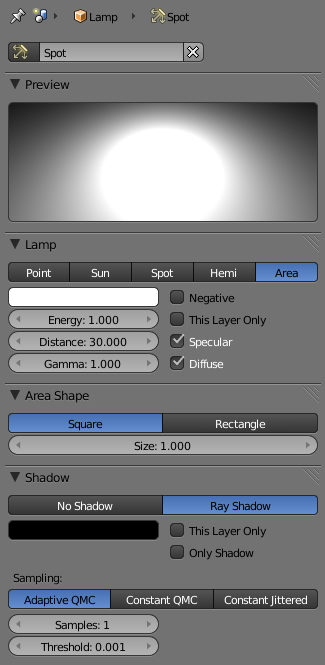
Of course, this algorithm does have some rendering consequences. The first, and most obvious one, is that the number of lamps used in the Area lamp multiplies the time it takes Blender to render the image. Secondly, some objects will not receive the full effect of the Area lamp due to other objects blocking the rays from some of the Blender-generated lights. Placing several lamps on a grid can create the same effect, but the Area lamp gives you more precise control over shadow settings and other parameters.
Now that we understand how lamps in Blender work, we can arrange them in our scenes in formations known as "light rigs". There are many ways to set up a rig, but the most commonly used rigs consist of three parts:
Key light
Fill light
Backlight
The key light is the main light source in a composition. More often than not, it's used to light most of the object (or objects) in question as well as define the overall color that light will produce in the scene.

Manish Bansal http://www.flickr.com/photos/bansal98/4082969879/
The fill light works with the key light, lighting some of the darker areas of the image created by the key light.

Anthony Kelly http://www.flickr.com/photos/62337512@N00/2419509840/
The backlight—also known as a rim light—is useful for distinguishing objects in the foreground from the background of the image. It creates a rim of light on the edges of objects, giving them another level of dimensionality.
Stephan Mantler http://www.flickr.com/photos/stepman/4323534986/
The first rig we'll take a look at is a 1-Point light rig. This is the simplest type of light rig, using only a single light, the key light, to illuminate a scene.
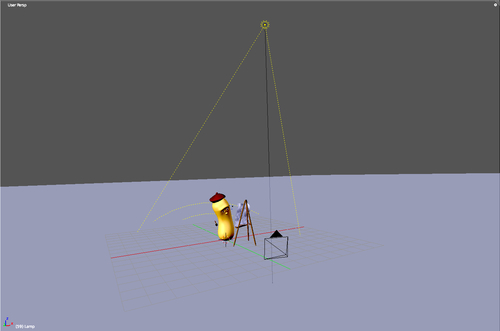
Many times, a Spot lamp is used with this rig, producing an image with sharp contrast between light and dark areas.

The next rig is a 2-Point light rig. Consisting of a key and fill light, this rig is typically used when you want to evenly illuminate a scene (mostly if there is no main focus). It's actually not uncommon for photography studios to use a tangible adaptation of this rig to light a product for a company.
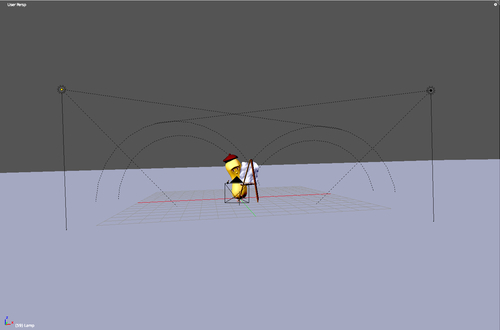
The key light and fill light are typically placed on opposite sides of the camera, slighting above the scene and oriented toward the object in question. This gives the even lighting this rig is known for.

The 3-Point light rig is one of the most commonly used templates for lighting scenes. The construction of this rig differs depending on who is constructing it, but there are two "standard templates" that appear often in CG lighting, namely, the Studio rig and the Standard rig.
The Studio rig consists of a key light and two fill lights. The fill lights are typically placed on the side of the scene opposite the key light, illuminating the object from behind.
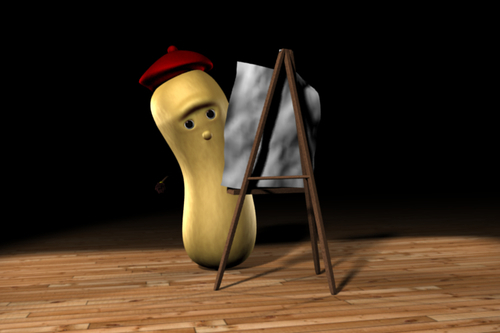

The Standard rig differs from studio to studio, but the overall idea remains the same. I personally set up a Standard rig with a key light, a backlight, and a sidelight. The key light, of course, is the brightest, positioned above, in front, and to the side of the object. The backlight is less intense as compared to the key light and is positioned closer to the ground behind the object. The fill light is off to the side, opposite the key light.
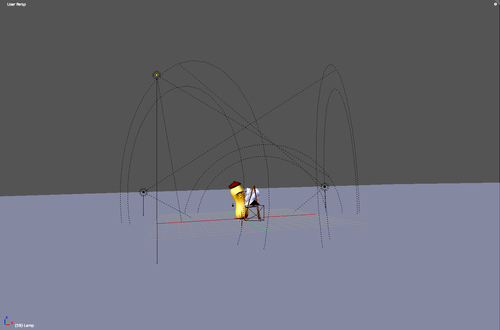
The last type of lighting rig we are going to look at is the 4-Point lighting rig.
This rig provides a good simulation of outside lighting—it's basically a hybrid of the Studio and Standard 3-Point lighting rigs. A key light illuminates the scene with the help of two fill lights off to each side. A backlight helps distinguish the background from the foreground.
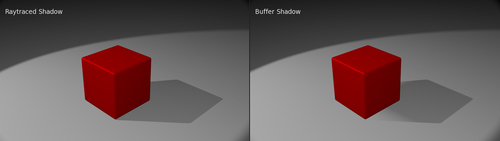
Blender approaches shadows in two ways. The first is with raytracing. Raytraced shadows are mathematically correct, but they take longer to render. They're calculated by projecting rays of "light" from a light source and using the direction of those rays to create the shadow. The other type of shadow in Blender is called a buffer shadow. Buffer shadows are rendered much faster than raytraced shadows, but at the cost of quality and buffer memory.
We've learned a lot about real-world light sources and their properties. We've also taken a look at color theory—both of these subjects are going to prove essential to the rest of this book. In addition, we've taken a look at Blender's native light types and how to arrange them to effectively achieve various results within our 3D scene. Let's take a look at what we've covered so far:
Color is the light reflected off objects
Color temperature is the "temperature" of the perceived light in degrees Kelvin
There are many different kinds of natural and artificial lights, each with their own distinct characteristics
Blender has many internal light types, each with its own unique properties
To effectively light a 3D scene, you can employ various light "rigs", including 1, 2, 3, and 4-Point lighting rigs
Blender deals with shadows in various ways—depending on your scene or budget, you may choose one technique over the other