In this chapter, we will cover:
Using magic strings and the
ViewDatadictionaryCreating a strongly typed view
Decoupling a strongly typed view with a View Model
Centralizing display logic with templated helpers
Using a partial view to segment view code
Rendering a child view with
Html.RenderActionBuilding a view from the database with NVelocity
Consuming a JSON view with jQuery
In this chapter, we will take a look at the easiest part of the whole ASP.NET MVC framework—the View. We will get started by looking at how data is passed out to the view in the simplest of ways using the ViewData dictionary and magic strings. From there, we will work towards better ways of getting data in and out of the view. Then we will take a look at some of the other view engines that you have at your disposal, which can easily be plugged into the ASP.NET MVC framework. Finally, we will take a look at other things that you can do with the view.
In our examples, we will be working with the basic concept of products and categories as though we were building a simple e-commerce site. We will be using an open source product called NBuilder to fake our data access layer. NBuilder will be used to quickly generate some product and category data for us to use in our views.
Note
NBuilder is a great open source product that can be used to quickly generate test instances of a particular .NET class. This works great when knocking together your views such as we are doing in this chapter. You can find more data about NBuilder at NBuilder.org. I also wrote a tutorial on how to get NBuilder running on DotNetSlackers.com at dotnetslackers.com/articles/aspnet/Using-NBuilder-to-mock-up-a-data-driven-UI-Part1.aspx.
The most basic way to pass data from the controller into the view is through the use of magic strings and a convenient dictionary called ViewData. In this recipe, we will see how to use this easy, but dangerous, duo to shuttle data out to the far edges of our presentation layer. We will then take a quick look at why the use of magic strings and the ViewData container put us in a fragile state and should be kept away from, if at all possible.
Note
Magic Strings? A magic string is a string that represents an object or a block of code within your source. An example of this is when referencing an action or controller name in a link. As the name of the action is string-based, refactoring the action method name might get missed in the string references. This is usually thought to be a brittle way of pointing at your code. For that reason, not using magic strings, when possible, is considered to be a more stable manner of programming in MVC (or any other framework for that matter).
The most important part of any of these recipes is to create an ASP.NET MVC 2 web application. Once that is created, we will need to do two more things—create a Product class, and get NBuilder up and running.
The Product class will be quite simple. We will create a new Product.cs file and place it in the Models folder of your MVC application.
Models/Product.cs:
public class Product
{
public string Sku { get; set; }
public string ProductName { get; set; }
public string Description { get; set; }
public double Cost { get; set; }
}
Getting NBuilder installed is almost as simple as the creation of the Product class. Go to NBuilder.org/Download and download the latest version of NBuilder (I am using 2.1.9 currently). Then extract the FizzWare.NBuilder.dll into your MVC application's bin directory. Then add a reference to that DLL (right-click on the project, add reference, browse, and locate the FizzWare.NBuilder.dll file in the bin directory). That's it!
1. The first step for us to get a product displayed on a page is to create a new view page. To do this, open the
Viewsfolder and then open thehomefolder. Right-click on thehomefolder and select Add | View. When the Add View window pops up, enter Product in the View name box. Then click on Add.
2. Once we have our new view page in place, we need to open the Home controller and add a new
Productaction so that we can handle requests for ourProductview. To do this, open theControllersfolder and then open theHomeController.csfile. Just inside the class, you can create your newProductaction method.Controllers/HomeController.cs:
public class HomeController : Controller
{
public ActionResult Product()
{
return View();
}
public ActionResult Index()
{
ViewData["Message"] = "Welcome to ASP.NET MVC!";
return View();
}
...
}
3. Now hit F5 to verify that your
Productaction is correctly wired to yourProductview.If you see the Debugging Not Enabled pop-up, go ahead and click on OK!

4. Then add
Home/Productto the end of the URL. Your URL should look something like this:http://localhost:63241/Home/Product.Note
The port number in your URL is most likely different from the one you see here, as they are dynamically generated by default.

5. Now let's quickly wire up a product and throw it out to the view. To start, you can close the browser window. Click on the square icon in Visual Studio to stop the debugging process. Then go back to your home controller and
Productaction. Add theseusingstatements to the top of yourHomeController.csfile.Controllers/HomeController.cs:
using FizzWare.NBuilder;
using WorkingWithTheView.Models ; WorkingWithTheView.Models;
6. Then in your
Productaction you can add this line.Controllers/HomeController.cs:
public ActionResult Product()
{
ViewData["ProductName"] = Builder<Product>
.CreateNew()
.Build()
.ProductName;
return View();
}
7. With this code in place you can now switch to your
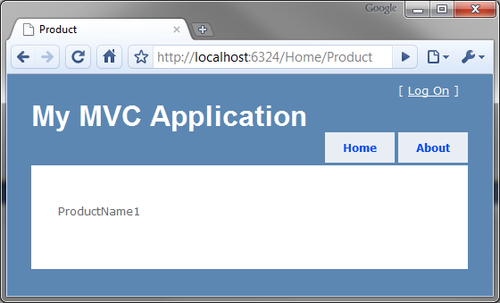
Views/Home/Product.aspxfile. In here, all you need to do is render theProductNameto the view. Add this code to your view.... <h2>Product</h2> <%= ViewData["ProductName"] %> ...8. Now you should be able to hit F5 again and see the generated product name rendered in the view.

In this recipe, we created a Product view that renders a Products name. This was done by adding a new product view file to the Views/Home folder. We then added a corresponding Product action to the Home controller. The MVC framework automatically maps any requests to /Home/Product to a Product action on the Home controller, which then routes the user to a Product view if no other view is specified. With that completed, we used NBuilder to generate an instance of a Product. The Name property of this Product instance is used to populate the ViewData dictionary. The ViewData dictionary is provided by the MVC framework as a mechanism to pass data from the controller down to the view. In the view, we were then able to access the data and render it in one fell swoop by using the shorthand for Response.Write <%= %>.
In the beginning of this section, I had mentioned that we would use magic strings and ViewData to shuttle data from the controller to the view. As we saw earlier, the ViewData dictionary is a collection that is used as a sort of data-transfer object to shuttle data between an action in a controller down to the view. However, you may still be wondering what a magic string is. A magic string is not really magic. This is more a name that says by using this string (ProductName, for example) I expect you to go off and figure out what I really want. This is not magical in any way.
And this is where the fragility part of the conversation comes into play. If you reference something like Product.ProductName in all sorts of ViewData dictionary calls, you will find that everything works magically as expected. But then one day you will need to use a cool tool such as ReSharper to refactor Product.ProductName to just Product.Name. Refactoring tools don't always parse magic strings (though some do). While the tool that you used to refactor the ProductName property to just Name will pick up all strongly typed instances of that property, it may not find the magic strings. This will effectively break your code in such a way that you might end up with a handful of runtime errors that can be quite difficult to locate. We will cover the solution to this problem in the Creating a strongly typed view recipe.
Now that we have looked at how to pass data around in your view using the ViewData dictionary, we can take a look at how to pass data around without the ViewData dictionary. Specifically, we want to take a look at how to do this using a strongly typed view.
This recipe will use the Product class that we created in the last recipe. It will also use NBuilder to generate Product data in the same way that we did earlier. You can copy the last project over for this recipe and build from where you left off in the last recipe (or start a new project and grab what you need from the previous recipe as we go).
1. The first thing that we need to do is open the
Views/Homefolder and then open theProduct.aspxfile.2. Now we will modify the
Inheritspage attribute. We need to change our view so that it inherits fromSystem.Web.Mvc.ViewPage<Product>. By doing this we are telling the view that it will be working with an instance ofProduct. In order for us to gain access to thisProductinstance, the MVC framework will provide us with aModelproperty that exposes theProductinstance, which is passed down to the view by the controller.Views/Home/Product.aspx:
<%@ Page Title="" Language="C#" MasterPageFile="~/Views/Shared/Site.Master" Inherits="System.Web.Mvc.ViewPage<Product>" %>
<%@ Import Namespace="{project name}.Models" %>
Also notice that the previous listing has an
Importstatement to reference ourProductclass.3. Now you can go to your
HomeController. In theProductaction we will change from passing aProductinstance intoViewDataand theViewDataout to the view. Instead, we will just pass thatProductinstance directly to the view. Do this by creating aProductvariable (p) and remove the property reference toProductName.Controllers/HomeController.cs:
public ActionResult Product()
{
Product p = Builder<Product>
.CreateNew()
.Build();
//remove the reference to the ProductName here!
return View(p);
}
4. With that completed, you can switch back to your
Product.aspxview. We now need to change the way we refer to the data that is passed to the view by the controller. Instead of using the built-inViewDatadictionary directly, we will now reference theModelproperty that is exposed by a strongly typed view.Views/Home/Product.aspx:
<h2>Product</h2>
<%= Model.ProductName %>
When typing this you should now have full blown IntelliSense to the specified
Modelof your strongly typed view.
5. You should now be able to hit F5 and build and run your site. It should look identical to the previous recipe.

What we did here was to remove our dependence on magic strings. We told the view to expect a Product to be passed in by inheriting from generic ViewPage of type Product. This doesn't mean that the ViewData will stop working. It can still be used. However, not only do you have IntelliSense, you now also have strongly typed code that can be refactored without worry.
Now, while this is better than the first recipe where we used the ViewData dictionary to pass data around, this method still has some issues. In this case, we have a strongly typed reference to our domain model. This means that when our domain model changes by way of a good refactoring, our view will also need to change. This sounds like a good thing at first pass. However, this should scream to you: "Houston, we have a problem!". Our View should not know so much about our domain model that a small change in our object structure somehow forces our presentation layer to also undergo a code refactor.
There is another reason that using our domain directly from the model isn't that great. The view's Model can only be one object referenced by the generic type passed into the view base class from which the view is inheriting. If you want to expand your current view from showing just one product to showing the product, the category that the product is in, and the user that is currently logged in, you can't (or shouldn't) pass that data through your Product class. For these reasons, we will take a look at yet another way to pass data down to our view that will allow us to be strongly typed, easily refactorable, and allow our presentation layer (the view) to be fairly decoupled from our application layer. And the view model method will also allow us to move more than one type of data out to our view.
Now that we have seen how to work with the ViewData dictionary and strongly typed views and have learned the shortcomings of each method, let's take a look at another approach. We will now use what is called a view model to pass our data from our controller to our view.
This recipe will build on the code from the last recipe. In this case, we will use the Product class, as well as NBuilder, to generate some Product data for us. In this recipe, we also want to pass a Category object to our view. To do this, we will need to add one more layer of abstraction between our business layer (currently our controller) and the presentation layer (the view) using a new view model class that can hold the current Category and a Product from that Category.
1. The first thing we are going to do is create a simple
Categoryclass in theModelsdirectory.Models/Category.cs:
public class Category
{
public string Name { get; set; }
public int Id { get; set; }
}
2. Next we need to create a view model. Generally, a view model is named for the view that uses it. In this case, we will be passing the view model out to our
Productview, so we will call this view model theProductView(or we can call itProductViewModel). It will be responsible for carrying ourProductandCategoryobjects. Create a newProductViewclass in theModelsdirectory.Models/ProductView.cs:
public class ProductView
{
public Product CurrentProduct { get; set; }
public Category CurrentCategory { get; set; }
}
3. With these two new classes created, we can open up our
Product.aspxview page. We need to update it so that the view page inherits from theSystem.Web.Mvc.ViewPage<ProductView>.Views/Home/Product.aspx:
<%@ Page Title="" Language="C#" MasterPageFile="~/Views/Shared/Site.Master" Inherits="System.Web.Mvc.ViewPage<ProductView>" %>
<%@ Import Namespace="{project name}.Models" %>
4. Next, we need to update our
Product.aspxview so that, instead of trying to display theProductNamedirectly off of the view's Model, we instead call theProductclass in the Model and then theProductName. Then we can output the current category's name too.Views/Home/Product.aspx:
<h2><%= Model.CurrentCategory.Name %></h2>
<%= Model.CurrentProduct.ProductName %>
5. Finally, we need to wire up the data that will be passed from our
HomeControllerto our view. Do this by opening up theHomeController.csfile. Then add code to instantiate a newCategory. After this, add the newCategoryandProductto a new instance of aProductViewobject and return thatProductViewinstance to the view.Controllers/HomeController.cs:
public ActionResult Product()
{
Product p = Builder<Product>
.CreateNew()
.Build();
Category c = Builder<Category>
.CreateNew()
.Build();
ProductView pv = new ProductView();
pv.CurrentCategory = c;
pv.CurrentProduct = p;
return View(pv);
}
6. Now you can hit F5 and see your site open up and display the current category and current product.

This recipe wasn't so much about how something specifically worked, but more about explaining a specific design pattern that allows you to decouple your presentation layer away from knowing too much about your domain. Generally speaking, I would pass only view-specific objects to my view. For the most part, there is never a need for the view to know everything about a specific domain object.
Take a real life product for example; it would have name, price, and description—sure. Those are normal properties to expose to the view. But your business layer would also need to know the product's cost, weight, vendor, amount in stock, and so on. None of this information ever needs to make it out to your public site.
Also, if the view knows too much about specific domain knowledge, you will run into an issue—in that when you go to refactor your domain, you will be required to update any code referencing it. Generally speaking, you don't want information to leak across your layers (separation of concerns).
ViewModel is not really a new pattern. You may have also heard of a Data Transfer Object or DTO. The idea of a DTO object's purpose in life is to shuttle data from one layer to another. Think of this as a contract between two layers. As long as the contract doesn't need to change, code in a specific layer can be refactored all day long with limited ripple effect throughout your code.
In this recipe, we are going to look at how we can get some reuse out of our display code by using templated helpers.
To continue our e-commerce example, we are going to look at how to control the format of bits of our Product class from the previous recipe. Specifically, we will take a look at how to centralize the display of our product's cost.
1. First, we need to go into the
Views/Homefolder and create a new folder calledDisplayTemplates.2. Next, we need to create a partial view that will hold the display logic for the product's
costproperty. Right-click on theDisplayTemplatesfolder in theViews/Homefolder and select Add View.3. Name your view
Product.Costand then select the Create a partial view (.ascx) checkbox.4. Now open up your new partial view and add some code to format the cost of a product (a
Double). The Model reference in this code will be whatever value you feed this snippet later.Views/Home/DisplayTemplates/Product.Cost.ascx:
<%@ Control Language="C#" Inherits="System.Web.Mvc.ViewUserControl" %>
<%= String.Format("{0:C}", Model)%>
5. Now open up your
Product.aspxview page. Under the place where theProductNameis currently displayed, we will display theCostproperty and specify with a hint which template we want to use.Views/Home/Product.aspx:
<h2><%= Model.CurrentCategory.Name %></h2>
<%= Model.CurrentProduct.ProductName %>
<%= Html.DisplayFor(Double=>Model.CurrentProduct.Cost, "Product.Cost") %>
6. Hit F5 and see your
costproperty formatted appropriately!
The rendering engine noticed your hint of Product.Cost. It then looked in the DisplayTemplates folder to see if there were any templates with the same name as the Product.Cost hint. When it found the Product.Cost.ascx partial view, the call to Html.DisplayFor used the partial view to render the property.
Notice that in the DisplayFor method we used a lambda expression to pass only the Cost property (a Double) to the partial view. This is the only sticky part of how these templates work. The caller needs to know what the partial view expects.
There are a few other things to know about templated helpers. Rather than using hints to specify how you want to render things, you could instead build templates based purely on data types. Also, you don't have to put the DisplayTemplates folder in the Home view subdirectory. You could instead create a template for usage by a view in any of the view folders. And if you did want to use hints but didn't want to specify them in the presentation code, that can be done too!
Templated helpers, by default, can be based on the data type that is passed into the Html.DisplayFor method. If you were to create a Double.ascx partial view and place it in the DisplayTemplates folder and you then passed in the Cost property to the DisplayFor method, it would have worked just as well. Expand this thought to creating a template for the Product type and this can quickly simplify the creation of a website!
The DisplayTemplates folder can be in both a specific view folder or in the shared folder. The DisplayFor method will first look in the current controller's corresponding view folder for any appropriate DisplayTemplates folder. If it doesn't find an appropriate partial view for the current rendering, it will look to the shared folder for an appropriate display template.
To utilize this method, the mechanics of using the Html.DisplayFor and the creation of the partial view in a DisplayTemplates folder are identical as mentioned earlier. The only thing different here is that you would specify a UIHint attribute on the Product class like this:
[UIHint("Product.Cost")]
public Double Cost { get; set; }
I am not a big fan of this particular method though; I think that it puts concerns in the wrong places (formatting code shouldn't be specified with your business objects). You could use this method on your ViewModel though, depending on where you specify it.
Oftentimes, you will encounter a scenario where your view starts to get a bit overwhelming. This might happen in the case of a shopping cart where you are displaying the items in a customer's cart, along with suggested products, products from their wish list, and various other items pertaining to a customer's order. In order to simplify a complex view of this nature, you might choose to put individual concerns of the larger view into separate partial views to keep the code of your view segments nice and small. You can then reassemble the partial views into one complex view.
2. Then we will create a quick (simple) object model that will contain a
Cart, Address, Product, Account, OrderHeader, andLineItem, which we will use to populate a cart display page.Models/Cart.cs:
public class Cart
{
public OrderHeader Header { get; set; }
public List<LineItem> Items { get; set; }
public double Total
{
get { return Items.Sum(i => i.SubTotal); }
}
}
Models/Address.cs:
public class Address
{
public string Street1 { get; set; }
public string Street2 { get; set; }
public string City { get; set; }
public int Zip { get; set; }
public string State { get; set; }
}
Models/Product.cs:
public class Product
{
public double Price { get; set; }
public string Name { get; set; }
public double Tax { get; set; }
}
Models/Account.cs:
public class Account
{
public string Username { get; set; }
public string Email { get; set; }
public string FirstName { get; set; }
public string LastName { get; set; }
}
Models/OrderHeader.cs:
public class OrderHeader
{
public Account Account { get; set; }
public Address Billing { get; set; }
public Address Shipping { get; set; }
}
Models/LineItem.cs:
public class LineItem
{
public Product Product { get; set; }
public int Quantity { get; set; }
public double SubTotal
{
get
{
return ((Product.Price * Product.Tax) + Product.Price) * Quantity;
}
}
}
3. With this model created, we are now ready to create some fake data. We will do this by creating a
CartFactoryclass, which we will use to generate the data and create a fully populated instance of ourCartobject. We will create aGetCartmethod where we will create an instance of all the classes that we need to display in our cart.Models/CartFactory.cs:
public Cart GetCart()
{
Cart c = new Cart();
c.Header = new OrderHeader();
c.Header.Account = new Account()
{
Email = "asiemer@hotmail.com",
FirstName = "Andrew",
LastName = "Siemer",
Username = "asiemer"
};
c.Header.Billing = new Address()
{
City = "Lancaster",
State = "CA",
Street1 = "Some Street",
Street2 = "Apt 2",
Zip = 93536
};
c.Header.Shipping = new Address()
{
City = "Fresno",
State = "CA",
Street1 = "This street",
Street2 = "Front step",
Zip = 93536
};
List<LineItem> items = new List<LineItem>();
for (int i = 0; i < 10; i++)
{
Product p = new Product();
p.Name = "Product " + i;
p.Price = 2*i;
p.Tax = .0875;
LineItem li = new LineItem();
li.Product = p;
li.Quantity = i;
items.Add(li);
}
c.Items = items;
return c;
}
4. Now that we have our model and a factory class to generate the data that we need, we are ready to start creating the partial views we need. While we could manually create views for each of our objects, there is a much quicker way—we can create actions in our
HomeControllerthat returns an instance of an object from which we can generate a View. By doing this, we can quickly generate the markup that is required to display each of ourCartclasses. To do this, open up theHomeControllerand add anAddress() ActionResult. In this method, we will return a new instance ofAddress.Controllers/HomeController.cs:
public ActionResult Address()
{
return View(new Address());
}
5. Then we can generate a new partial
Addressdetails view that is strongly typed, based on theAddressmodel.Views/Home/Address.ascx:
<fieldset>
<legend><%: ViewData["AddressType"] %></legend>
<div class="display-label">Street1</div>
<div class="display-field"><%: Model.Street1 %></div>
<div class="display-label">Street2</div>
<div class="display-field"><%: Model.Street2 %></div>
<div class="display-label">City</div>
<div class="display-field"><%: Model.City %></div>
<div class="display-label">State</div>
<div class="display-field"><%: Model.State %></div>
<div class="display-label">Zip</div>
<div class="display-field"><%: Model.Zip %></div>
</fieldset>
6. Now we can do the same thing for a list of
Cartitems. We will add an action calledItemsin theHomeControllerthat returns aList<LineItem>.Controllers/HomeController.cs:
public ActionResult Items()
{
return View(new List<LineItem>());
}
7. Then we can generate another strongly typed partial view called
Itemsthat will be based on an enumerable list ofLineItem. We will also add a couple of columns to the generated view to display the name and price.Views/Home/Items.aspx:
<table style="width:600px;">
<tr>
<th></th>
<th>
Name
</th>
<th>
Price
</th>
<th>
Quantity
</th>
<th>
Sub Total
</th>
</tr>
<% foreach (var item in Model) { %>
<tr>
<td>
Delete
</td>
<td>
<%: item.Product.Name %>
</td>
<td>
<%: String.Format("{0:C}", item.Product.Price) %>
</td>
<td>
<%: item.Quantity %>
</td>
<td>
<%: String.Format("{0:C}", item.SubTotal) %>
</td>
</tr>
<% } %>
</table>
8. With our partial views created and the ability to get a populated
Cartclass, we are now ready to display our shopping cart and all of its complexity. We will start by adding anotherActionResultcalledDisplayCart. This result will return a new instance of aCart, which we will get from our CartFactory class that we created earlier.Controllers/HomeController.cs:
public ActionResult DisplayCart()
{
Cart c = new CartFactory().GetCart();
return View(c);
}
9. Then we can generate a strongly typed empty view called
DisplayCart. Inside of this view we will display the user's first and last name, as well as their e-mail address. We will then load theAddresspartial view and pass in thebillingaddress. Next we will load theAddresspartial view and pass in the shipping address. The last view we will load is theItemspartial view, which we will pass in the collection ofLineItems. At the end of this view, we will display the total cost of the shopping cart.Views/Home/DisplayCart.aspx:
<h2>Display Cart</h2>
<div>
<%: Model.Header.Account.FirstName %>
<%: Model.Header.Account.LastName %><br />
<%: Model.Header.Account.Email %>
</div><br />
<table style="width:600px">
<tr>
<td>
<% Html.RenderPartial("Address", Model.Header.Billing, new ViewDataDictionary() {new KeyValuePair<string, object>("AddressType", "Billing")}); %>
</td>
<td>
<% Html.RenderPartial("Address", Model.Header.Shipping, new ViewDataDictionary() {new KeyValuePair<string, object>("AddressType", "Shipping")}); %>
</td>
</tr>
</table>
<% Html.RenderPartial("Items", Model.Items); %>
<br />
<div>
<b>Total:</b> <%: String.Format("{0:C}", Model.Total ) %>
<div>
10. You are now ready to run the application. You can then navigate to the
/Home/DisplayCartview, where you should see something of this nature:
While this recipe appears to be complex at first, it really isn't. I had to create some complexity to be able to appropriately demonstrate how and why we would use the RenderPartial method. As you can see, moving the complexity of our display logic into partial views not only allows us to reduce the amount of code we maintain in one file, but it also provides us with the opportunity to reuse our code (as seen by using the Address partial view for two different address instances).
In the previous recipe, we took a look at how you can split up the view code into multiple partial views to make managing presentation code easier and more reusable. In most cases, this is exactly what you will need, as a view usually has a view model that is specially built just for it. In our previous recipe, we took pieces of the overall view's model and pushed bits of it off to the partial views.
In other cases though you may have totally separate models that are displayed by separate views. Sometimes they may even be handled by different actions in different controllers. In this case, you might try to render an action directly and put the result of that view into another view. In this way, we won't have to worry about cross-pollinating models and views from various controllers.
1. Create a new MVC application.
2. Then we will create a quick model to play with. We need two distinctly different models to be able to demonstrate why we would need to render one action from within another. We will create a
Postclass to represent some blog posts. And we will create aProductclass to represent a list of suggested products, which we will display next to our blog posts.Models/Post.cs:
public class Post
{
public DateTime Created { get; set; }
public string Title { get; set; }
public string Body { get; set; }
}
Models/Product.cs:
public class Product
{
public string Name { get; set; }
public string Description { get; set; }
public double Cost { get; set; }
}
3. Then we need to create a couple of service classes from which we will generate a list of our new object models. We will create a
ProductServiceclass and aBlogServiceclass. Each of these classes will haveGetmethods on them to get a list of the specific objects we need.Models/BlogService.cs:
public class BlogService
{
public List<Post> GetPosts(int count)
{
List<Post> result = new List<Post>();
for (int i = 0; i < count; i++)
{
Post p = new Post();
p.Created = DateTime.Now;
p.Title = "A really great post";
p.Body = @"Lorem ipsum dolor sit amet, ...";
result.Add(p);
}
return result;
}
}
Models/ProductService.cs:
public class ProductService
{
public List<Product> GetProducts(int count)
{
List<Product> result = new List<Product>();
Random r = new Random();
for (int i = 0; i < count; i++)
{
Product p = new Product();
p.Cost = r.Next(5, 50);
p.Name = "Really great product";
p.Description = @"Lorem ipsum ...";
result.Add(p);
}
return result;
}
}
4. Now that we have the ability to generate a list of working data, we can next turn our attention to creating two controllers to handle views for each of our two object types. We will create a
BlogControllerand aProductController. TheBlogControllerwill expose anIndexaction to show a list of recent blog posts. TheProductControllerwill have aSuggestedProductsaction that will return a list of products.Models/BlogController.cs:
public class BlogController : Controller
{
public ActionResult Index()
{
return View(new BlogService().GetPosts(5));
}
}
Models/ProductController.cs:
public class ProductController : Controller
{
public ActionResult SuggestedProducts()
{
return View(new ProductService().GetProducts(7));
}
}
5. The next thing for us to do is to generate a view for each of our controllers. We will start with the
ProductController, as its view is the easiest. For this controller, we will generate a strongly typed partial view based on aProductusing the details view. Once the view is generated, we have to change the model from a single instance ofProductto a List ofProduct. Then we need to wrap the details view that was generated with a loop.Views/Product/SuggestedProducts.aspx:
<%@ Page Title="" Language="C#" Inherits= "System.Web.Mvc.ViewPage<List<MvcApplication1.Models.Product>>" %>
<%@ Import Namespace="MvcApplication1.Models" %>
<fieldset>
<legend>Suggested Products</legend>
<% foreach (Product p in Model) { %>
<div class="display-field"><b><%: p.Name%></b></div>
<div class="display-field">
<i><%: String.Format("{0:C}", p.Cost)%></i>
</div>
<div class="display-field"><%: p.Description%></div>
<% } %>
</fieldset>
6. Now we need to generate our primary view, which will be responsible for showing a list of blog posts. In addition to displaying blog posts, we will also render the list of suggested products. Similar to our previous view, we will start by generating the view from the
Indexaction of theBlogController. This will be a strongly typed details view based on thePostclass. Once it is generated, we will need to wrap the generated view code with a table so that the list of blog posts can sit next to a list of suggested products. I also added a bit of styling to get things to line up a bit better.Views/Blog/Index.aspx:
<h2>My Blog</h2>
<table style="width:800px;">
<tr>
<td style="width:200px;vertical-align:top;">
<!-- Suggested products... -->
</td>
<td style="vertical-align:top;">
<fieldset>
<legend>Recent Posts</legend>
<%
foreach (Post p in Model)
{ %>
<div class="display-field"><b><%: p.Title%></b></div>
<div class="display-field"><i>
<%: String.Format("{0:g}", p.Created)%></i></div>
<div class="display-field"><%= p.Body%></div>
<% } %>
</fieldset>
</td>
</tr>
</table>
7. Now that we have our primary view created, we can turn our attention to rendering a list of suggested products. All that we need to do is add a call to
Html.RenderActionwhere we currently have this comment<!-- Suggested products...-->. In order to make this call, we only need to specify the name of the action and the controller that we want to render.Note
If, while rendering this recipe, you see two master pages, then the odds are that you didn't generate a partial view for your
SuggestedProductsview!Views/Blog/Index.aspx:
...
<td style="width:200px;vertical-align:top;">
<% Html.RenderAction("SuggestedProducts", "Product"); %>
</td>
...
8. Now you can run the application. Navigate to
/Blog/Indexand you should see a list of blog posts. Next to that you should also see a list of suggested products. Notice that our blog controller didn't have to know anything about products in order for it to use theSuggestedProductsview. This is the power of theRenderActionhelper method.
In this recipe, we saw how we can separate the logic that views require into multiple controllers while still being able to use those views together. This functionality is built into the MVC framework and exposed through the HtmlHelper class.
Be aware that using this method has one gotcha. If you want to use output caching on the rendered view—don't. It won't work (at the time of this writing). You can put an OutputCache attribute on the SuggestedProducts view, but when you render the SuggestedProducts partial view from within the product's Index, the OutputCache attribute is simply ignored from the parent view. Check out the chapter on caching and you will find a workaround to this issue!
In this recipe, we will take a look at a different view engine for the ASP.NET MVC framework called NVelocity. NVelocity is a very stable templating engine that has been around longer than the MVC framework has. It plugs into, and works quite nicely with, the ASP.NET MVC framework (as we will see). In this particular recipe, we will use NVelocity in a slightly different manner than just wiring in a different view engine. We will use NVelocity to render views directly from a database. This gives us templating abilities for rendering dynamic views, but this could also be used to render the contents of an e-mail, or any other template-driven blob of text.
As in the other recipes, we will start off with the ViewModel recipe, discussed earlier. Next, we need to grab a copy of the NVelocity library at http://www.castleproject.org/castle/projects.html. (I also put the library in the dependencies folder). You will need to have SQL Server Express installed to follow along with this recipe.
1. The first step to this project could be a number of things! Let's get started by adding a reference to the NVelocity library (
NVelocity.dll) in the dependencies folder.2. Next we need to set up a quick database to use in the steps ahead. Do this by right-clicking on the
App_Datafolder in your project and select Add a new item. Choose a SQL Server database. I named my databaseTemplates.3. Now in your Server Explorer window you should see under the Data Connections section a
Templates.mdfentry. Expand that entry. Right-click on thetablesfolder and add a new table.Set the first column of this table, to be called
TemplateID, with a data type ofint. Set this column to be a primary key (by clicking on the key icon above). And then set the identity specification (Is Identity) to be Yes.Then add another column, called TemplateContent, with a data type of
VarChar(MAX).Add one more column called ViewName. This will be a
VarChar(100)field. Save this table and call itTemplates.
4. Then we will add LINQ to SQL to our project. Do this by right-clicking on the
Modelsfolder and select Add new item. Select the LINQ to SQL Classes entry and name itTemplate.dbml.5. When the design surface opens, drag your
Templatetable from the server explorer onto the design surface. Save that file and close it. Then build your project (this builds theTemplateDataContextclass for you, which we will need in the following steps).6. Right-click on the
Templates.mdfentry in the server explorer and select Properties. In the Properties window, select and copy the entire connection string entry. It should look something like this:Data Source=.\SQLEXPRESS;AttachDbFilename={driveLetter}:\{pathToFile}\Templates.mdf;Integrated Security=True;User Instance=True7. Now create a new class in the
Modelsdirectory calledTemplateRepository.cs. In this class, we will create a method calledGetTemplateByViewName, which will be responsible for getting a template from the database by the template's name.Models/TemplateRepository.cs:
public class TemplateRepository
{
public string GetTemplateByViewName(string ViewName)
{
string connectionString = @"Data Source=.\SQLEXPRESS;AttachDbFilename= {FilePathToDataBase}\Templates.mdf;Integrated Security= True;User Instance=True";
string result = "";
using(TemplateDataContext dc = new TemplateDataContext(connectionString))
{
Template template = (from t in dc.Templates where t.ViewName == ViewName select t).FirstOrDefault();
result = template != null ? template.TemplateContent : "The requested template was not found for view " + ViewName;
}
return result;
}
}
8. Now we can create a class that will work with NVelocity to parse our template. Right-click on the
Modelsfolder and add a new class calledTemplateService.cs. This class will have a method calledParseTemplateByViewName. This method will be responsible for interacting with the NVelocity view engine to parse a passed in template.Models/TemplateService.cs:
public class TemplateService
{
public string ParseTemplateByViewName(string template, Dictionary<string,object> viewParams)
{
VelocityContext vc = new VelocityContext();
foreach (var v in viewParams)
{
vc.Put(v.Key, v.Value);
}
//create the engine
VelocityEngine ve = new VelocityEngine();
ve.Init();
//the output stream
StringBuilder sb = new StringBuilder();
StringWriter sw = new StringWriter(sb);
//merge the template
ve.Evaluate(vc, sw, string.Empty, template);
return sb.ToString();
}
}
9. Now we need to add some code to our
HomeController. Let's start by creating a new action calledAnotherProduct(). Inside this action, we will still utilize the creation of aProductand aCategory. And we will use ourViewModelas our transport object, which will carry theProductandCategoryinstance for us. Then we need to create a dictionary that will take the variables we used in the parsing of our template. Lastly, we will call ourTemplateServiceto parse out the template that theTemplateRepositorylocates for us.Controllers/HomeController.cs:
public ActionResult AnotherProduct()
{
Product p = Builder<Product>
.CreateNew()
.Build();
Category c = Builder<Category>
.CreateNew()
.Build();
ProductView pv = new ProductView();
pv.CurrentCategory = c;
pv.CurrentProduct = p;
//define the variable context
Dictionary<string, object> variableParams = new Dictionary<string,object>();
variableParams.Add("ProductView", pv);
ViewData["content"] = new TemplateService()
.ParseTemplateByViewName(new TemplateRepository().GetTemplateByViewName("AnotherProduct"), variableParams);
return View();
}
10. Then you can create the
AnotherViewview. This will be an empty view that simply renders the content from withinViewData.Views/Home/AnotherProduct.aspx:
<%@ Page Language="C#" Inherits="System.Web.Mvc.ViewPage" %>
<%= ViewData["content"] %>
11. Lastly, before anything will actually come together, we need to add an entry into our database. The
TemplateContententry will look like this:<html><head><title>$ProductView.CurrentProduct.ProductName</title></head><body><h2>$ProductView.CurrentProduct.ProductName</h2>Hello world from an NVelocity template!</body></html>
The
ViewNamewill beAnotherProductto match ourAnotherProductaction.12. Now you can start debugging by hitting F5 and see the results of our database-driven view.

This is a simple modification to the way that NVelocity would normally work. In most cases, you would store your NVelocity templates on the file system or in the resource files. These are then read by a file-based template reader and parsed similarly to the fashion defined earlier. All that we did differently was grabbed our content from the database.
We have still piggybacked our implementation of NVelocity on top of the MVC framework and most importantly on top of the WebForms view engine. This means that we could use regular views for most of our pages, while templates from the database could be scattered about where we may want to have user-generated or easily administered content.
Some people might complain about the choice to piggyback the NVelocity view engine on the back of the MVC framework and the WebForms view engine. However, think of the flexibility that you would have with this option when pulling your dynamic-view content from the database.
By using the WebForm's view engine on top of the MVC framework, you get all sorts of built-in features such as a master page, templated helpers, scaffolding support, and so on. Using the NVelocity engine you can then define the remainder of your content from the database. This means that rather than having a statically defined Product partial view that all of the products in your shopping cart catalog use, you could instead have a different Product layout for every product. Expand this thought a bit further so that you could call and parse many templates from the database for one view, allowing you to define NVelocity partial templates, such as a common Product header and footer, attributes layout, and so on. And now that all of this layout logic is persisted to the database, it can all be edited from the Web.
Note
What about performance? In a site with heavy load, the odds are that you would cache your database calls, page compilations, and so on. Only the output would ever actually be hit by every visitor of your site. No worries!
If you are interested in replacing the default view engine (WebForms view engine) with NVelocity, have a look at the MVC Contrib (codeplex.com/MVCContrib) project. The guys at Headspring (headspringsystems.com) currently have various classes created that will allow you to override the MVC framework to use NVelocity as the primary view engine in the MvcContrib.ViewEngines.NVelocity.dll (currently).
While researching this particular recipe, I came across all sorts of ways to work with NVelocity. One demo went that extra step to show multiple ways to load templates in a very clean fashion. I put this demo in the code directory (included with the source of this book). You can find the original posting here: http://mihkeltt.blogspot.com/2009/12/nvelocity-template-engine-sample.html.
Javier Lozano has been putting together a product called MVC Turbine. One of its goals is to allow you to host content from many view engines at once (among many other cool things). Take a look here for more on that topic: lozanotek.com/blog/archive/2009/10/05/Multiple_View_Engines_with_MVC_Turbine.aspx.
In this recipe, we will see how to consume JSON using jQuery. We will continue to use our Product and Category concepts to be displayed in our view. We will still depend on our ProductView view model object to pass data to our view (we will just be using JavaScript to do it this time).
We will be starting from our ViewModel recipe discussed earlier. But before we get to coding, we need to go grab a copy of jQuery (you may have a copy in the Scripts folder already), which you can get from here: http://docs.jquery.com/Downloading_jQuery. Then we need to grab a copy of JSON.NET to help us quickly serialize our C# objects. You can get a copy of this here: json.codeplex.com/releases/view/37810.
Note
This recipe uses JSON.NET as it is a quick and easy way to generate JSON from your C# classes in any context. If for some reason you are not able to use JSON.NET, or prefer to stay away from open source, you can just as easily use the JavaScriptSerializer found in the .NET framework (http://msdn.microsoft.com/en-us/library/system.web.script.serialization.javascriptserializer.aspx) in an MVC project, you can simply use the JsonResult (covered in another recipe later) to serialize an instance of a class for you.
1. First, make sure you have a good copy of the JSON.NET libraries in the dependencies folder. Then add a reference to it from your project.
2. Then open up your
HomeController. Add an action calledProductJson. This method will generate some JSON for you, using your existingProductandCategorydata. Then enter the following code (notice that this is almost identical to the previous recipes except for the highlightedJsonConvertcall).Controllers/HomeController.cs:
public ActionResult ProductJson()
{
Product p = Builder<Product>
.CreateNew()
.Build();
Category c = Builder<Category>
.CreateNew()
.Build();
ProductView pv = new ProductView();
pv.CurrentCategory = c;
pv.CurrentProduct = p;
ViewData["ProductView"] = JsonConvert.SerializeObject(pv);
return View();
}
3. Now you need to add a new view in the
Views/Homefolder that this action will pass its data down to. Name this viewProductJson.aspxto correspond to the action that you just created.4. Open up the new view and then add a call into the
ViewDatafor theProductViewJSON that you just created.Views/Home/ProductJson.aspx:
<%= ViewData["ProductView"] %>
5. Next you need to make sure that you have a reference to jQuery in your master page. Open the
Views/Site.Masterfile. Then locate thejquery scriptfile in theScriptsdirectory, and drag it into the head of your master page.6. Now, focus on the rendering side of this problem. Open up the
Product.aspxview—in there you will need to add a newdivtag to output your JSON to. Then you will need to add some JavaScript to make a request for yourProductViewJSON and output it to thedivtag.Views/Home/Product.aspx:
<asp:Content ID="Content2" ContentPlaceHolderID="MainContent" runat="server">
<div id="result"></div>
<script>
$(document).ready(
$.getJSON('http://localhost:6324/home/productjson', function (data) {
$('#result').html('<p>' + data.CurrentProduct.ProductName + '</p>');
}
)
);
</script>
</asp:Content>
7. Hit F5 and see the result!
And if you navigate to /Home/ProductJson you should see the following.
 |
For the most part, the logic is the same as our other recipes, in that we used NBuilder to generate some fake data for us. Instead of passing that generated data directly down to our view though, we used some jQuery functions to request the data after the client's Product view page loaded. We used the getJSON method that takes the URL of the JSON and a callback method to perform operations on the result of the method call. In this case, our callback was defined directly in the initial function call.
We also used JSON.NET to help us with the serialization of our ProductView class. We will cover more of this when we discuss actions and controllers and how to expose JSON directly from the action itself.
Obviously, this has quite a bit of power. The use of AJAX and jQuery in particular has reached out and touched just about every web application on the net in some way or the other. Using this method of data retrieval means that the pain of the post back and whole-page rendering doesn't need to be felt by the viewer nearly as often as before.