


In this chapter, we will cover:
Creating default text for TextBoxes
Auto focus on the first TextBox and tab on Enter key
Disallowing cut/copy/paste operations on a TextBox
Highlighting text in a TextBox and copying to the clipboard
Displaying selected items of a CheckBoxList
Selecting/deselecting all items in CheckBoxList
Getting selected text and value from DropDownList
Appending items at runtime to DropDownList
Creating 'Back to Top' ASP.NET Hyperlink
Updating URL of ASP.NET Hyperlink at runtime
jQuery is the most widely used JavaScript library in web applications today. Developed by John Resig in 2006, it is supported by an active community of developers apart from the core jQuery team. It is designed to be lightweight, cross browser, and CSS3 compliant. It simplifies the way DOM elements are selected, making it easier to navigate a page. The library has powerful Ajax capabilities, event handling, and animation effects, thus enabling rapid web application development. By allowing the creation of plugins, it enables developers to build powerful capabilities on top of the core jQuery library.
jQuery can be interfaced with numerous web platforms such as ASP, PHP, .NET, and Java. With the official support of Microsoft, it is now distributed with Visual Studio (Version 2010 onwards). Microsoft is also committed to contributing to the library and its jQuery Templates, Data Link, and Globalization plugins are now accepted as official jQuery plugins.
In this chapter, we will be specifically exploring how jQuery can be used in various ways to manipulate ASP.NET controls, the result being a better interactive experience for the web user without causing additional server-side overhead.
jQuery is available from http://jQuery.com in different types of builds based on the requirements of the application:
Minified version: This version is preferred for production environments. It has a smaller file size requiring shorter time to download.
Packed version: This is the compressed version of jQuery. Though it has a smaller file size compared to the minified version, it requires non-trivial time to unpack when downloaded by the browser.
Uncompressed version: This version is preferred for development environments. It has a larger file size compared to the minified and packed versions, but is suited for debugging in the development phase.
There are two ways of including the jQuery library on the web page:
Using publicly hosted copies from CDNs (Community Development Networks) such as Google and Microsoft
Downloading and using a local copy
Both methods are widely used today, the trend being more towards using CDNs. CDNs have performance benefit in terms of improving caching and parallelism. However, in applications deployed on the intranet or applications that have limited or no Internet access, it might be better to host a local copy on the web server or the local file system.
But where exactly does jQuery fit in an ASPX form? To answer that, let's take a look at the basic structure of an ASPX page:
<%@ Page Language="C#" AutoEventWireup="true" CodeFile="Sample.aspx.cs" Inherits="Sample" %>
<!DOCTYPE html PUBLIC "-//W3C//DTD XHTML 1.0 Transitional//EN" "http://www.w3.org/TR/xhtml1/DTD/xhtml1-transitional.dtd">
<html xmlns="http://www.w3.org/1999/xhtml">
<head runat="server">
<title>RECIPE TITLE</title>
    <script src="js/jquery-1.4.1.js" type="text/javascript"></script>
    <script type="text/javascript">
        /* INCLUDE JQUERY MARKUP HERE */
    </script>
</head>
<body>
    <form id="form1" runat="server">
       <!—-INCLUDE ASPX MARKUP HERE-- >
    </form>
</body>
</html>
From the above sample ASPX form, note the following:
The jQuery library is included in the page header using <script> tags as follows:
<script src="js/jquery-1.4.1.js" type="text/javascript"></script>
The actual jQuery magic is applied in another script block in the page header:
<script type="text/javascript">
        /* INCLUDE JQUERY MARKUP HERE */
    </script>
The web form with the required ASPX markup is included in the page body as follows:
<body>
    <form id="form1" runat="server">
       <!—-INCLUDE ASPX MARKUP HERE-- >
    </form>
</body>
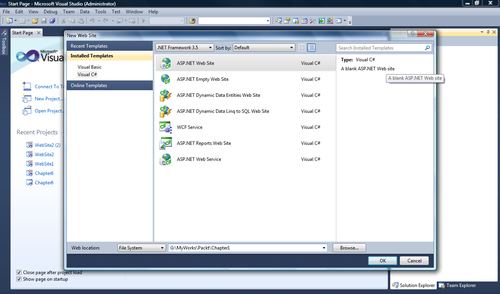

Create a new ASP.NET website
Chapter1in Visual Studio 2008 as shown below: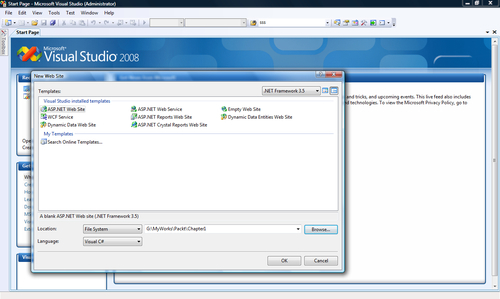
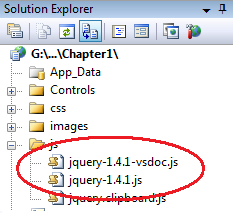
Download the jQuery library from http://code.jquery.com/jquery-1.4.1.js and save to a local folder.
Download the Visual Studio 2008 intellisense hint file from http://code.jquery.com/jquery-1.4.1-vsdoc.js.
Ensure that the naming prefix of the intellisense hint file matches that of the jQuery library as shown below:
Note
To enable jQuery intellisense in Visual Studio 2008, ensure that you have upgraded VS2008 to Service Pack 1 and applied the hotfix KB958502 http://archive.msdn.microsoft.com/KB958502.
Create a test form in the project and drag-and-drop the jQuery source file on the form. Visual Studio will automatically add the following code to the ASPX file:
<script src="js/jquery-1.4.1.js" type="text/javascript"></script>
The page is now enabled for using jQuery. We can now include the required jQuery markup in the script block as follows:
<script type="text/javascript">
$(document).ready(function() {
……………….
……………….
});
</ script>
All the jQuery markup on the page should be included in the $(document).ready() function. This function is executed as soon as the DOM is loaded and before the page contents are rendered.
Now, with this information, let's move on to the recipes where we will solve specific web development problems using jQuery. We have focused on the jQuery scripting required for solving the given problem. The ASP.NET code-behind logic is left to the reader to implement as required.
Note
The recipes in this book have been tested with IE 8, Mozilla Firefox 3.6, and Chrome 9.0. The complete source code for all chapters is included with the book.
When using the provided source code, update the namespace in the Page directive of the ASPX files <%@ Page Language="C#" AutoEventWireup="true" CodeFile="Recipe1.aspx.cs" Inherits="Recipe1" %> to your own local namespaces.
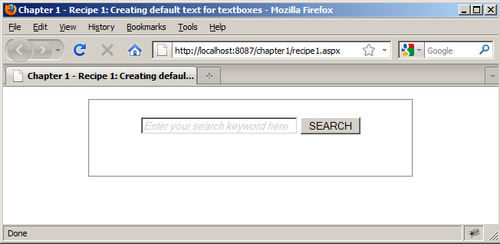
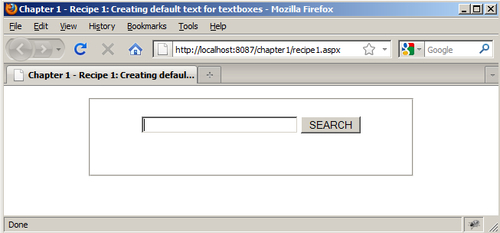
In this recipe, let's see how to create a search box in ASP.NET with some default information text. The text is displayed only when the search box is out of focus.
Add a new web form
Recipe1.aspxto the current project.Add a TextBox field with a Search button to the form as below:
<form id="form1" runat="server">
    <p></p>
    <div align="center">
       <fieldset style="width:400px;height:80px;">
        <p><asp:TextBox ID="TextBox1" width="200px" CssClass="defaultText" ToolTip="Enter your search keyword here" runat="server"></asp:TextBox>
        <asp:Button ID="btnSubmit" Text="SEARCH" runat="server" /></p>
       </fieldset>
    </div>
    </form>
The CSS class
defaultTextattached to the TextBox is defined as below:.defaultText { font-style:italic; color:#CCCCCC; }Thus on loading, the page displays the search form as shown in the following screen:
We will now use jQuery to display the default text when the search box is out of focus.
In the
document.ready()function, retrieve the TextBox control using itsClientIDand save in a local variable:var searchBox = $('#<%=TextBox1.ClientID%>') ;On the
focusevent, check if it contains the default text:searchBox.focus( function() { if (searchBox.val() == this.title) {If yes, then remove the
defaultTextcss style:searchBox.removeClass("defaultText");Also clear the search field:
searchBox.val(""); } });On the
blurevent, check if the TextBox is empty:searchBox.blur( function() { if (searchBox.val() == "") {If yes, then attach the
"defaultText"css style:searchBox.addClass("defaultText");Add the default information text to the search field:
searchBox.val(this.title); } });Call the
blurevent on page load so that the TextBox is initially out of focus:
Thus, the complete jQuery solution is as follows:
<script type="text/javascript">
$(document).ready(function() {
var searchBox = $('#<%=TextBox1.ClientID%>');
searchBox.focus( function() {
                if (searchBox.val() == this.title) {
searchBox.removeClass("defaultText");
                    searchBox.val("");
                }
            });
searchBox.blur( function() {
                if (searchBox.val() == "") {
searchBox.addClass("defaultText");
                    searchBox.val(this.title);
                }
            });
searchBox.blur();
});
</script>Note
ClientID is a unique server control identifier generated by ASP.NET to avoid duplicate IDs when controls are repeated; say, for example, in a Repeater control. It is generated by concatenating the ID of the control with the UniqueID of its parent control. Underscore character (_) is used to separate each part of the generated ID.
When keying in data in a lengthy form, at times web users prefer to tab to the next box by pressing the Enter key. In this recipe, we will see how we can achieve this tabbing effect.
Create a new web form
Recipe2.aspxin the current project.Add a few TextBox controls to create a simple data entry form to capture users' profile information as follows:
<form id="form1" runat="server">
    <div align="center">
    <fieldset style="width:400px;height:200px;">
    <table cellpadding="3" cellspacing="3" border="0">
    <tr><td>
    <asp:Label ID="lblName" Text="Name: " runat="server"></asp:Label></td>
    <td><asp:TextBox ID="txtName" Width="200px" runat="server"></asp:TextBox></td></tr>
    <tr><td><asp:Label ID="lblAddress" Text="Address: " runat="server"></asp:Label></td>
    <td><asp:TextBox ID="txtAddress" Width="200px" runat="server"></asp:TextBox></td></tr>
    <tr><td><asp:Label ID="lblContact" Text="Contact Number: " runat="server"></asp:Label></td>
    <td><asp:TextBox ID="txtContact" Width="200px" runat="server"></asp:TextBox></td></tr>
    <tr><td><asp:Label ID="lblEmail" Text="Email: " runat="server"></asp:Label></td>
    <td><asp:TextBox ID="txtEmail" Width="200px" runat="server"></asp:TextBox></td></tr>
    <tr><td></td><td><asp:Button ID="btnSubmit" Text="SUBMIT" runat="server" />
    <asp:Button ID="btnReset" Text="RESET" runat="server" />
    </td></tr>
    </table>
    </fieldset>
    </div>
    </form>
The page displays the form as shown in the following screen:

In the
document.ready()function in the jQuery script block, use$('input:text:first')selector to retrieve a handle to the first ASP.NET TextBox. Call thefocusevent on this TextBox:$('input:text:first').focus();Use
bindto attach an event handler for"keydown"event on all the TextBoxes in the form:$('input:text').bind("keydown", function(e) {Check if the Enter key is pressed:
if (e.which == 13) {If the Enter key is pressed, prevent default form submission:
e.preventDefault();
Increment the index of the current TextBox by 1 to retrieve the handle to the immediately next TextBox on the form:
var nextIndex = $('input:text').index(this) + 1;Focus on the next TextBox:
$('input:text')[nextIndex].focus();
}
});
Add reset functionality to the
Resetbutton by adding a reset function to the form object on itsclickevent:$('#btnReset').click( function() { $('form')[0].reset(); });
Thus, the complete jQuery solution is as follows:
<script type="text/javascript">
$(document).ready(function() {
$('input:text:first').focus();
$('input:text').bind("keydown", function(e) {
if (e.which == 13) { //Enter key
e.preventDefault(); //to skip default behavior of the enter key
var nextIndex = $('input:text').index(this) + 1;
$('input:text')[nextIndex].focus();
}
});
$('#btnReset').click(
                 function() {
                     $('form')[0].reset();
                 });
});
</script>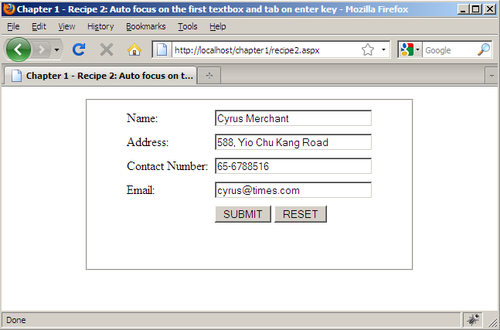
In this recipe, let's see how to disable cut/copy/paste operations on an ASP.NET Textbox. When requesting sensitive information from the end user such as passwords, credit card details, and transaction pin numbers used in Internet banking, etc. it is preferred that the web user keys in the characters manually rather than pasting from the clipboard.
Create a simple password change form:
<form id="form1" runat="server">
    <div align="center">
    <fieldset style="width:400px;height:180px;">
    <table cellpadding="3" cellspacing="3" border="0">
    <tr><td colspan="2" class="header">CHANGE PASSWORD</td></tr>
    <tr><td> <asp:Label id="lblCurrentPwd" Text="Current Password: " runat="server"/></td>
    <td> <asp:TextBox ID="txtCurrentPwd" Width="200px" runat="server" TextMode="Password"></asp:TextBox></td></tr>
    <tr><td><asp:Label id="lblNewPwd" Text="New Password:" runat="server"/></td>
    <td><asp:TextBox ID="txtNewPwd" Width="200px" runat="server" TextMode="Password"></asp:TextBox></td></tr>
    <tr><td><label id="lblConfirmNewPwd" runat="server">Confirm New Password:</label></td>
    <td><asp:TextBox ID="txtConfirmNewPwd" Width="200px" runat="server" TextMode="Password"></asp:TextBox></td></tr>
    <tr><td></td><td><asp:Button ID="btnSubmit" runat="server" Text="SUBMIT" />
    <asp:Button ID="btnReset" runat="server" Text="RESET" /></td></tr>
    </table>
    </fieldset>
    </div>
    </form>
The page displays the form as shown in the screen below:

In the
document.ready()function in the jQuery script block, usebindto attach the required event handler forcut,copy, andpasteevents for theNew PasswordTextBox:$('#<%=txtNewPwd.ClientID%>').bind('cut copy paste', function(e) {Override the default cut/copy/paste behavior:
e.preventDefault();
Display an information message:
alert("Cut / Copy / Paste disabled in this textbox");
});
Repeat the above for the
Confirm New PasswordTextBox:$('#<%=txtConfirmNewPwd.ClientID%>').bind('cut copy paste', function(e) { e.preventDefault(); alert("Cut / Copy / Paste disabled in this textbox too!"); });
Thus, the complete jQuery solution is as follows:
<script type="text/javascript">
$(document).ready(function() {
$('#<%=txtNewPwd.ClientID%>').bind('cut copy paste', function(e) {
e.preventDefault();
alert("Cut / Copy / Paste disabled in this textbox");
});
$('#<%=txtConfirmNewPwd.ClientID%>').bind('cut copy paste', function(e) {
                e.preventDefault();
                alert("Cut / Copy / Paste disabled in this textbox too!");
            });
});
</script>
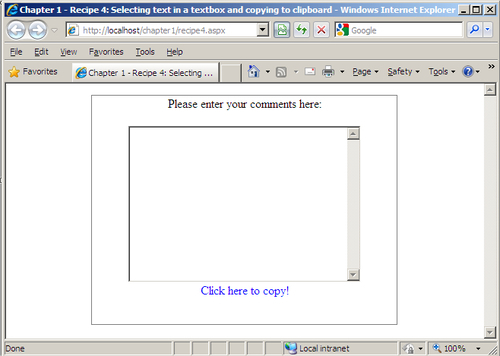
In this recipe, we will see how to highlight text in a multiline TextBox control and copy to the clipboard.
Note
Due to the limitation of the jQuery clipboard plugin, this recipe is applicable to IE browsers only.
Create a new web form
Recipe4.aspxto the current project.Add a multiline TextBox with a hyperlink control to the form as shown below:
<form id="form1" runat="server">
    <div align="center">
       <fieldset style="width:400px;height:300px;">
       <p>Please enter your comments here:</p>
        <asp:TextBox ID="TextBox1" TextMode="MultiLine" Rows="5" Width="300" Height="200" runat="server"></asp:TextBox>
       <br />
       <asp:HyperLink ID="lnkHighlight" Text="Click here to copy!" runat="server"></asp:HyperLink>
    </fieldset>
    </div>
    </form>
The page displays the form as shown in the following screen:
Add css style for highlighted text using
::selectionCSS3 selector:Add the following css style for the hyperlink:
a
    {
      cursor:hand;
      color:#0000FF;
    }
Download the jQuery clipboard plugin from http://plugins.jquery.com/project/clipboard.
Include the clipboard plugin on the page along with the jQuery library:
<script src="js/jquery-1.4.1.js" type="text/javascript"></script>
<script src="js/jquery.clipboard.js" type="text/javascript"></script>
In the
document.ready()function, use theclipboardReady()function of the plugin:$.clipboardReady(function() {Trigger the
copy to clipboardaction on the click event of the hyperlink:$("a").click(function() {Highlight the text in the TextBox Control:
$('#<%=TextBox1.ClientID%>').select();Copy the contents of the TextBox into the clipboard using the clipboard plugin:
$.clipboard($('#<%=TextBox1.ClientID%>').val());
});
        });
The complete jQuery solution is as follows:
Run the web page. Enter some text in the multiline TextBox field and click the hyperlink. The text will be highlighted as shown below:
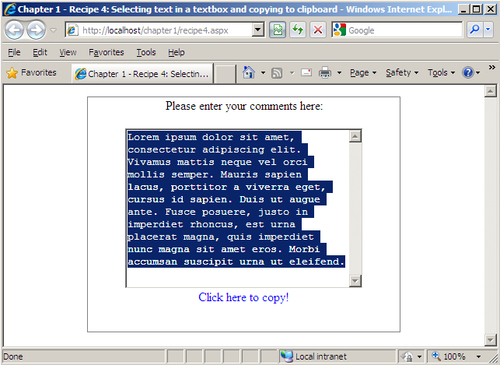
Launch any text editor and press Ctrl+V to paste the text copied from the TextBox.
To implement this functionality in non-IE browsers, an alternative to the clipboard plugin such as Zero Clip Board can be used. Zero Clip Board actually uses a flash file and a JavaScript interface. More information on Zero Clip Board can be found at http://code.google.com/p/zeroclipboard/.
In this recipe, we will retrieve the selected items of an ASP.NET CheckBoxList.
Create a new form
Recipe5.aspxin the current project. Add a CheckBoxList control to the form. Also add a div area to display the selected items of the CheckBoxList at runtime:<form id="form1" runat="server"> <div align="left"> <fieldset style="width:400px;height:150px;"> <p>Different types of packages available:</p> <asp:CheckBoxList ID="CheckBoxList1" runat="server"> <asp:ListItem Text="Standard" Value="1"></asp:ListItem> <asp:ListItem Text="Silver" Value="2"></asp:ListItem> <asp:ListItem Text="Gold" Value="3"></asp:ListItem> <asp:ListItem Text="Premier" Value="4"></asp:ListItem> </asp:CheckBoxList> </fieldset> <br /> <div id="message"></div> </div> </form>The page will display the CheckBoxList as shown below:

In the
document.ready()function, define the click function of the CheckBoxList:$('#<%=CheckBoxList1.ClientID%>').click(function() {Create a local string variable and initialize to an empty string:
var str = "";
Apply a jQuery selector to retrieve the checked boxes and apply the
eachfunction to each element returned:$('#<%=CheckBoxList1.ClientID%> input[type=checkbox]:checked').each(function() {Retrieve the text of the selected CheckBox and append to the local string:
str = str + " " + $(this).next().text();
Note
Each of the checkbox elements is rendered as a
<input type="checkbox">and<label>pair. The label holds the text of the element. Hence, when retrieving the description of the element, we have used$(this).next().text(), where$(this)refers to the current checkbox element andnext()refers to the consecutive<label>element.After the execution of the
each()function, display the local string in the div area'message':$('#message').text(str); });
The complete jQuery solution is as follows:
<script type="text/javascript">
$(document).ready(function() {
$('#<%=CheckBoxList1.ClientID%>').click(
function() {
var str = "";
$('#<%=CheckBoxList1.ClientID%> input[type=checkbox]:checked').each(function() {
str = str + " " + $(this).next().text();
});
$('#message').text(str);
});
});
</script>
In this recipe, we will see how to select/deselect all items in an ASP.NET CheckBoxList using a Select All CheckBox Control.
Create a new web form
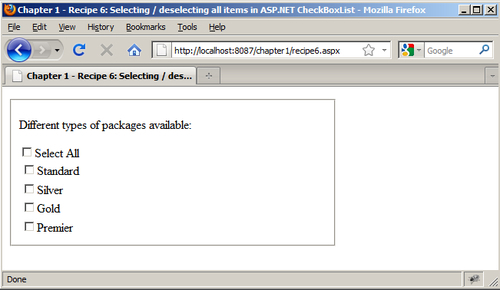
Recipe6.aspxin the current project.Add a CheckBoxList to the form as well as a Select All CheckBox control on the form:
<form id="form1" runat="server">
    <div align="left">
       <fieldset style="width:400px;height:170px;">
       <p>Different types of packages available:</p>
    <asp:CheckBox ID="chkSelectAll" runat="server" Text="Select All" />
    <asp:CheckBoxList ID="chkList" runat="server">
        <asp:ListItem Text="Standard" Value="1"></asp:ListItem>
        <asp:ListItem Text="Silver" Value="2"></asp:ListItem>
        <asp:ListItem Text="Gold" Value="3"></asp:ListItem>
        <asp:ListItem Text="Premier" Value="4"></asp:ListItem>
    </asp:CheckBoxList>
    </fieldset>
    </div>
    </form>
The page will display the form as shown in the screen below:
In the
document.ready()function in the jQuery script block, add the required handler for the click event of the Select All CheckBox:Use the jQuery selector to retrieve all checkboxes from the CheckBoxList and toggle the
'checked'attribute:$("#<%=chkList.ClientID%> input[type='checkbox']").attr('checked', $('#chkSelectAll').is(':checked')); }
The complete jQuery solution is as follows:
<script type="text/javascript">
$(document).ready(function() {
$('#chkSelectAll').click(function() {
$("#<%=chkList.ClientID%> input[type='checkbox']").attr('checked', $('#chkSelectAll').is(':checked'));
}
);
});
</script>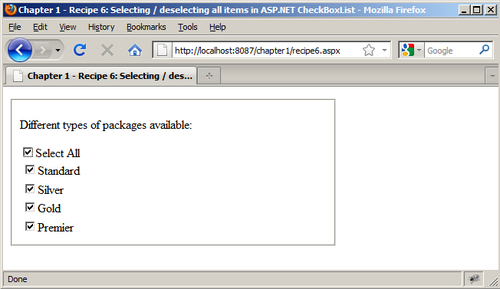
In this recipe, we will retrieve the Text/Value pair of an ASP.NET DropDownList using jQuery.
Create a new web form
Recipe7.aspxin the current project.Add a DropDownList to the form. Include a div area to the form to display the selected text from the DropDownList:
    <form id="form1" runat="server">
    <div align="center">
       <fieldset style="width:400px;height:80px;">
       <p>Different types of packages available:</p>
    <asp:DropDownList ID="DropDownList1" runat="server">
    <asp:ListItem Text="--Please Select--" Value=""></asp:ListItem>
    <asp:ListItem Text="Standard" Value="1"></asp:ListItem>
    <asp:ListItem Text="Silver" Value="2"></asp:ListItem>
    <asp:ListItem Text="Gold" Value="3"></asp:ListItem>
    <asp:ListItem Text="Platinum" Value="4"></asp:ListItem>
    </asp:DropDownList>
    </fieldset>
    </div>
    <br />
    <div align="center" id="message"></div>
    </form>
The page displays the DropDownList as shown below:

In the
document.ready()function in the jQuery script block, usebind()to attach a handler to thekeyupandchangeevents:$('select[id$=<%=DropDownList1.ClientID%>]').bind("keyup change", function() {Check if the selected value of the DropDownList is empty:
if ($(this).val() != "")
Retrieve the Text/Value pair and display in the div area
'message':$('#message').text("Text: " + $(this).find(":selected").text() + ' Value: ' + $(this).val());If, however, the DropDownList is empty, clear the div area:
else $('#message').text(""); });
The complete jQuery solution is as follows:
<script type="text/javascript">
$(document).ready(function() {
$('select[id$=<%=DropDownList1.ClientID%>]').bind("keyup change", function() {
if ($(this).val() != "")
$('#message').text("Text: " + $(this).find(":selected").text()
                    + ' Value: ' + $(this).val());
else

$('#message').text("");
});
});
</script>
In web applications, there is often a need to populate a DropDownList dynamically based on the events triggered on other controls on the page. In this recipe, we will see how to create a cascading dropdown where the contents of the second DropDownList are populated based on the selected elements of the first DropDownList.
Create a new web form
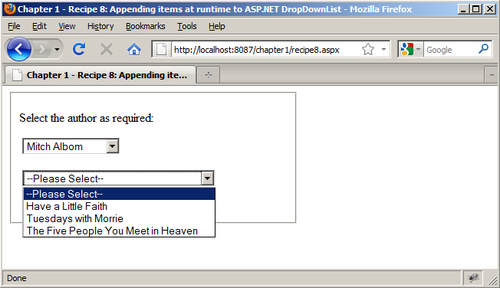
Recipe8.aspxin the current project.Drag-and-drop two DropDownList from the ToolBox on the form. Populate the first DropDownList as shown below:
<form id="form1" runat="server"> <div align="left"> <fieldset style="width:350px;height:150px;"> <div id="contentArea"> <p>Select the author as required:</p> <table cellpadding="0" cellspacing="0" border="0"> <tr><td> </td> <td> <asp:DropDownList ID="DropDownList1" runat="server"> <asp:ListItem Value="" Text="--Please Select--"></asp:ListItem> <asp:ListItem Value="MA" Text="Mitch Albom"></asp:ListItem> <asp:ListItem Value="PC" Text="Paulo Coelho"></asp:ListItem> <asp:ListItem Value="JA" Text="Jane Austen"></asp:ListItem> </asp:DropDownList> </td></tr> <tr><td colspan="2"> </td></tr> <tr><td> </td> <td> <asp:DropDownList ID="DropDownList2" runat="server"> <asp:ListItem Value="" Text="--Please Select--"></asp:ListItem> </asp:DropDownList> </td></tr> </table> </div> </fieldset> </div> </form>The page displays the controls as shown in the screen below:

Clear the second DropDownList:
$("select[id$=DropDownList2] option").remove();Append a default item in the second DropDownList:
$("select[id$=DropDownList2]").append("<option value=''>--Please Select--</option>");Check the selected value of the first DropDownList and populate the required data in the second DropDownList:
if ($(this).val() == "MA") {

$("select[id$=DropDownList2]").append("<option value='MA1'>Have a Little Faith</option>");
                    $("select[id$=DropDownList2]").append("<option value='MA2'>Tuesdays with Morrie</option>");
                    $("select[id$=DropDownList2]").append("<option value='MA3'>The Five People You Meet in Heaven</option>");
                               }
                if ($(this).val() == "PC") {

$("select[id$=DropDownList2]").append("<option value='PC1'>The Alchemist</option>");
                    $("select[id$=DropDownList2]").append("<option value='PC2'>By the River Piedra I Sat Down and Wept</option>");
                    $("select[id$=DropDownList2]").append("<option value='PC3'>The Pilgrimage</option>");
                }
                if ($(this).val() == "JA") {

$("select[id$=DropDownList2]").append("<option value='JA1'>Pride and Prejudice</option>");
                    $("select[id$=DropDownList2]").append("<option value='JA2'>Emma</option>");
                    $("select[id$=DropDownList2]").append("<option value='JA3'>Mansfield Park</option>");
                }
});
The complete jQuery solution is as follows:
<script type="text/javascript">
        $(document).ready(function() {
        $("select[id$=DropDownList1]").bind("change", function() {
        $("select[id$=DropDownList2] option").remove();
        $("select[id$=DropDownList2]").append("<option value=''>--Please Select--</option>");
                if ($(this).val() == "MA") {

                    $("select[id$=DropDownList2]").append("<option value='MA1'>Have a Little Faith</option>");
                    $("select[id$=DropDownList2]").append("<option value='MA2'>Tuesdays with Morrie</option>");
                    $("select[id$=DropDownList2]").append("<option value='MA3'>The Five People You Meet in Heaven</option>");
                                    }
                if ($(this).val() == "PC") {

                    $("select[id$=DropDownList2]").append("<option value='PC1'>The Alchemist</option>");
                    $("select[id$=DropDownList2]").append("<option value='PC2'>By the River Piedra I Sat Down and Wept</option>");
                    $("select[id$=DropDownList2]").append("<option value='PC3'>The Pilgrimage</option>");
                }
                if ($(this).val() == "JA") {

                    $("select[id$=DropDownList2]").append("<option value='JA1'>Pride and Prejudice</option>");
                    $("select[id$=DropDownList2]").append("<option value='JA2'>Emma</option>");
                    $("select[id$=DropDownList2]").append("<option value='JA3'>Mansfield Park</option>");
                }
            });
        });
</script>Run the web page. Select any item from the first DropDownList. On "change" event, the jQuery script checks for the value of the selected element and accordingly populates the second DropDownList as shown below:
An alternative way of appending items to the DropDownList is as follows:
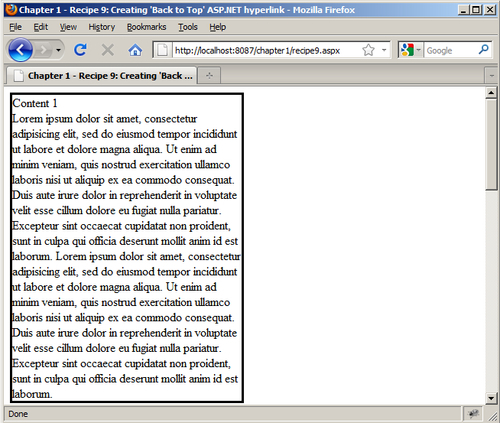
$("select[id$=DropDownList2]").append($("<option></option>").val("MA3").html("The Five People You Meet in Heaven")); In this recipe, we will create 'Back to Top' ASP.NET links to scroll up to the top of the page. These links are useful when the user needs to scroll the page in case the content is more than one screenful.
Create a new web form
Recipe9.aspxin the current project. Add a few div areas with some text content in the form. Also add hyperlinks below each div area as below:<form id="form1" runat="server"> <div> <asp:HyperLink ID="Top" runat="server"></asp:HyperLink> <div style="width:300px;border:solid;"> Content 1 <br /> Lorem ipsum dolor sit amet, consectetur adipisicing elit, sed do eiusmod tempor incididunt ut labore et dolore magna aliqua. Ut enim ad minim veniam, quis nostrud exercitation ullamco laboris nisi ut aliquip ex ea commodo consequat. Duis aute irure dolor in reprehenderit in voluptate velit esse cillum dolore eu fugiat nulla pariatur. Excepteur sint occaecat cupidatat non proident, sunt in culpa qui officia deserunt mollit anim id est laborum. Lorem ipsum dolor sit amet, consectetur adipisicing elit, sed do eiusmod tempor incididunt ut labore et dolore magna aliqua. Ut enim ad minim veniam, quis nostrud exercitation ullamco laboris nisi ut aliquip ex ea commodo consequat. Duis aute irure dolor in reprehenderit in voluptate velit esse cillum dolore eu fugiat nulla pariatur. Excepteur sint occaecat cupidatat non proident, sunt in culpa qui officia deserunt mollit anim id est laborum. </div> <asp:HyperLink ID="HyperLink1" runat="server" CssClass="backtotoplink"></asp:HyperLink> <div style="width:300px;border:solid;"> Content 2 <br /> Lorem ipsum dolor sit amet, consectetur adipisicing elit, sed do eiusmod tempor incididunt ut labore et dolore magna aliqua. Ut enim ad minim veniam, quis nostrud exercitation ullamco laboris nisi ut aliquip ex ea commodo consequat. Duis aute irure dolor in reprehenderit in voluptate velit esse cillum dolore eu fugiat nulla pariatur. Excepteur sint occaecat cupidatat non proident, sunt in culpa qui officia deserunt mollit anim id est laborum. Lorem ipsum dolor sit amet, consectetur adipisicing elit, sed do eiusmod tempor incididunt ut labore et dolore magna aliqua. Ut enim ad minim veniam, quis nostrud exercitation ullamco laboris nisi ut aliquip ex ea commodo consequat. Duis aute irure dolor in reprehenderit in voluptate velit esse cillum dolore eu fugiat nulla pariatur. Excepteur sint occaecat cupidatat non proident, sunt in culpa qui officia deserunt mollit anim id est laborum. </div> <asp:HyperLink ID="HyperLink2" runat="server" CssClass="backtotoplink"></asp:HyperLink> <div style="width:300px;border:solid;"> Content 3 <br /> Lorem ipsum dolor sit amet, consectetur adipisicing elit, sed do eiusmod tempor incididunt ut labore et dolore magna aliqua. Ut enim ad minim veniam, quis nostrud exercitation ullamco laboris nisi ut aliquip ex ea commodo consequat. Duis aute irure dolor in reprehenderit in voluptate velit esse cillum dolore eu fugiat nulla pariatur. Excepteur sint occaecat cupidatat non proident, sunt in culpa qui officia deserunt mollit anim id est laborum. Lorem ipsum dolor sit amet, consectetur adipisicing elit, sed do eiusmod tempor incididunt ut labore et dolore magna aliqua. Ut enim ad minim veniam, quis nostrud exercitation ullamco laboris nisi ut aliquip ex ea commodo consequat. Duis aute irure dolor in reprehenderit in voluptate velit esse cillum dolore eu fugiat nulla pariatur. Excepteur sint occaecat cupidatat non proident, sunt in culpa qui officia deserunt mollit anim id est laborum. </div> <asp:HyperLink ID="HyperLink3" runat="server" CssClass="backtotoplink"></asp:HyperLink> </div> </form>Define the css style for the hyperlinks as below:
.backtotoplink
    {
     color:#00FF00;
     cursor:hand;
    }
The page displays the content as shown below:
In the
document.ready()function in the jQuery script block, add theinnerHTMLattribute to the hyperlink:$(".backtotoplink").attr("innerHTML", "Back to Top");Add the
titleattribute:$(".backtotoplink").attr("title", "Back to Top");Add the
hrefattribute:$(".backtotoplink").attr("href", "#Top");Note
ASP.NET Hyperlinks are rendered as
<a>tags on the web page. By manipulating thehrefattribute of anchor tags via jQuery, we can set the ASP.NET hyperlink to point to the top of the page.
The complete jQuery solution is as follows:
<script type="text/javascript">
        $(document).ready(function() {
            $(".backtotoplink").attr("innerHTML", "Back to Top");
            $(".backtotoplink").attr("title", "Back to Top");
            $(".backtotoplink").attr("href", "#Top");
        });
    </script>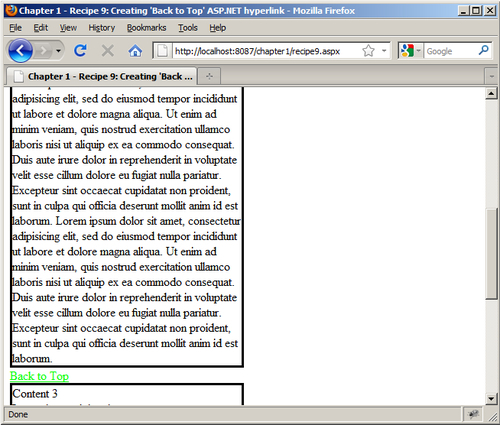
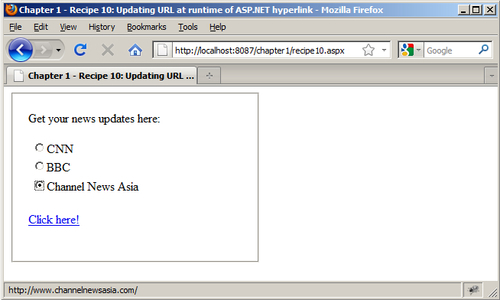
In this recipe, we will update the target URL of an ASP.NET hyperlink control dynamically based on events triggered by other controls.
Create a new web form
Recipe10.aspxin the current project. Add an ASP.NET hyperlink control on the page. Also add a RadioButtonList to the form as follows:<form id="form1" runat="server"> <div align="left"> <fieldset style="width:300px;height:200px;"> <table cellpadding="0" cellspacing="0" border="0"> <tr><td width="10px"></td> <td> <p>Get your news updates here:</p> <asp:RadioButtonList ID="RadioButtonList1" runat="server"> <asp:ListItem Text="CNN" Value="http://www.cnn.com"></asp:ListItem> <asp:ListItem Text="BBC" Value="http://www.bbc.co.uk"></asp:ListItem> <asp:ListItem Text="Channel News Asia" Value="http://www.channelnewsasia.com"></asp:ListItem> </asp:RadioButtonList> <br /> <asp:HyperLink ID="HyperLink1" runat="server">Click here!</asp:HyperLink> </td></tr> </table> </fieldset> </div> </form>The page will display the content as shown in the screen below:

In the
document.ready()function, use thebind()function to add the handler for the"change"event of the RadioButtonList:$("input[type=radio]").bind("change", function() {Set the
"href"value of the Hyperlink control to the value of the selected radio button:$("a").attr("href",$(this).val()); });
The complete jQuery solution is as shown below:
<script type="text/javascript">
$(document).ready(function() {
$("input[type=radio]").bind("change", function() {
$("a").attr("href",$(this).val());
});
});
</script>Run the web page. Select any required option of the RadioButtonList. The URL of the Click here! hyperlink will update as per your selection.
In addition to the bind() function, jQuery also provides live() function to tie events to controls. So, the same recipe, can be implemented using live() as follows:
$("input[type=radio]").live("change", function() {
                $("a").attr("href",$(this).val());
            });
Note
The live() function attaches event handlers to elements that match the selector now and in the future. The bind() function, on the other hand, only attaches event handlers to controls that are added when the DOM is initially loaded.
Thus, bind() is suited for pages with static controls while live() is suited for pages with dynamic controls.
