


 Download code from GitHub
ASP.NET Core MVC is a web framework, built on top of the core .NET framework, specifically made for building efficient web applications and APIs that will be able to be reached by a massive range of clients including web browsers, mobile devices, smart TVs, web-based home automation tools, and more.
Angular 2 is the second major installment of AngularJS, a world-renowned development framework born with the idea of giving the coder the toolbox needed to build reactive, cross-platform web-based apps, which are optimized for desktop and mobile: it features a structure-rich templating approach which is based upon a natural, easy-to-write, and readable syntax.
These two frameworks were put together with the same assumption in mind: the HTTP protocol is not limited to serving web pages, it can be also used as a viable platform to build web-based APIs to effectively send and receive data. This theory has slowly made its way through the first 20 years of the World Wide Web and is now an undeniable, widely acknowledged statement, and also a fundamental pillar of almost every modern web development approach.
As for the reasons behind this perspective switch, there are plenty of good reasons for it, the most important of them being related to the intrinsic characteristics of the HTTP protocol. It is simple to use, flexible enough to match most development needs in the always-changing environment which the World Wide Web happens to be, not to mention how universal it has become nowadays, almost any platform that you can think of has an HTTP library, so HTTP services can reach a broad range of clients, including browsers, mobile devices, and traditional desktop applications.
From the perspective of a fully-functional web-based application, we could say that the Web API interface provided with the ASP.NET Core framework is a programmatic set of server-side handlers used by the server to expose a number of hooks and/or endpoints to a defined request-response message system, typically expressed in structured markup languages such as JSON or XML. This "exposition" is provided using the HTTP protocol thanks to a publicly available web server (typically IIS). Similarly, Angular can be described as a modern, feature-rich client-side library that gives the browser the ability to bind input and/or output parts of an HTML web page to a flexible, reusable, and easily testable JavaScript model.
These assumptions allow us to answer a simple, yet inevitable question: can we put together the server-side strengths of ASP.NET Core's Web API capabilities with the frontend capabilities of the Angular library in order to build a modern, feature-rich, and production-ready web application?
The answer, in short, is yes. In the following chapters, we'll see how we can do that by analyzing all the fundamental aspects of a well-written, properly designed web-based product and how ASP.NET Core and/or Angular can be used to handle each one of them.
The new major version of Angular is a complete rewrite of the previous one, entirely based upon TypeScript and ECMAScript 6 specifications. The choice of not making it backward compatible with the previous installment clearly demonstrates the intention of the authors to adopt a completely new approach, any developer who already knows AngularJS will undoubtedly face a huge number of breaking changes, not only in the code syntax but also in the way of thinking and designing your client app. Angular 2 is highly modular, entirely component-based, features a new and improved dependency injection model and has the main goal of being able to easily integrate with other server-side and client-side frameworks.
However, the most important reason why we're picking Angular 2 over other excellent JS libraries such as ReactJS and EmberJS is the fact that it arrives with a huge stack of features out of the box, making it way simpler to use than the aforementioned competitors. If we combine that with the consistency given by TypeScript language we could very well say that, despite being the youngster, Angular 2 has embraced the framework approach more convincingly than the others. That's a great reason to invest in it, hoping it will keep up with these compelling promises.
Summarizing what has happened in the ASP.NET world within the last year is not an easy task, in short, we could say that we're undoubtedly facing the most important series of changes in the .NET Framework since the year it came to life. ASP.NET Core is a complete re-implementation of ASP.NET, which unites all the previous web application technologies such as MVC, Web API and Web Pages into a single programming module, formerly known as MVC6. The new framework introduces a fully featured cross-platform component, also known as .NET Core, shipped with a brand new open source .NET Compiler Platform (currently known as Roslyn), a cross-platform runtime (known as CoreCLR), and an improved x64 Just-In-Time compiler (RyuJIT).
Note
You might be wondering what happened to ASP.NET 5 and Web API 2, as these used to be quite popular names until mid-2016.
ASP.NET 5 was the original name of ASP.NET Core, before the developers chose to rename it to emphasize the fact that it is a complete rewrite. The reasons for that, together with the Microsoft vision about the new product, are further explained in the following blog post from Scott Hanselman that anticipated the changes on January 16, 2016:
http://www.hanselman.com/blog/ASPNET5IsDeadIntroducingASPNETCore10AndNETCore10.aspx
For those who don't know, Scott Hanselman has been the outreach and community manager for .NET/ASP.NET/IIS/Azure and Visual Studio since 2007.
Additional information regarding the perspective switch is also available in the following article by the senior Microsoft developer (and NuGet Program Manager) Jeffrey T. Fritz: https://blogs.msdn.microsoft.com/webdev/2016/02/01/an-update-on-asp-net-core-and-net-core/
As for Web API 2, it was a dedicated framework for building HTTP services returning pure JSON or XML data instead of web pages. Initially born as an alternative to the MVC platform, it has been merged with the latter into the new, general-purpose web application framework known as MVC6, which is now shipped as a separate module of ASP.NET Core.
In order to demonstrate how ASP.NET Core and Angular 2 can work together to their full extent, we couldn't think of anything better than building a single-page application project. The reason for that is quite obvious: although neither ASP.NET Core nor Angular came into being with the specific purpose of building a SPA, there is no better approach for showcasing some of the best features they have to offer nowadays: we're talking about HTML5 pushState API, webhooks, data transport-based requests, dynamic web components, UI data bindings, and a stateless, AJAX-driven architecture capable of flawlessly encompassing all of these.
If you have never worked on building single-page applications, you need to know what you'll be facing. If you already have, feel free to skip to the following paragraph, unless you don't mind taking another look at the key features provided by any competitive SPA:
No server-side round-trips: A competitive SPA is able to redraw any part of the client UI without requiring a full server-side round-trip to retrieve a full HTML page. This is mostly achieved by implementing a separation of concerns design principle, meaning that the data will be separated from the presentation of data by using a model layer that will handle the former, and a view layer that reads from the latter.
Efficient routing: A competitive SPA is able to keep track of the user current state and location during his whole navigation experience using organized, JavaScript-based routers. This is usually accomplished in one of two ways: the Hashbang technique and HTML5 History API usage. We'll talk about both of them in Chapter 2, ASP.NET Controllers and Server-side Routes.
Performance and flexibility: A competitive SPA usually transfers all of its UI to the client thanks to its JavaScript SDK of choice (Angular, JQuery, Bootstrap, and so on). This is often good for network performance, as increasing client-side rendering and offline processing reduces the UI impact over the network. But the real deal brought about by this approach is the flexibility granted to the UI, as the developer will be able to completely rewrite the application's frontend with little to no impact on the server, aside from a few static resource files.
The list could easily grow, as these are only some of the major advantages of a properly designed, competitive SPA. These aspects play a major role nowadays, as many business websites and services are switching from their traditional multi-page application (also known as MPA) mindset to fully committed or hybrid single-page application based approaches. The latter have become increasingly popular since 2015 and are commonly called Native Web Applications (NWAs) because they tend to implement a number of small-scale, single-page modules bound together upon a multi-page skeleton rather than building a single, monolithic SPA.
Furthermore, there are also a lot of enterprise level single-page applications and NWAs flawlessly serving thousands of users everyday, examples include WhatsApp Web, Teleport Web, and Flickr, plus a wide amount of Google web services including Gmail, Contacts, Spreadsheet, Maps, and more. Most of these services are not there, thanks to the heat of the moment; they were intentionally built that way years ago, and they are meant to stay.
One the most interesting, yet underrated, concepts brought out by many modern agile software development frameworks such as SCRUM is the importance given to the meanings and definitions of roles. Among these, there's nothing as important as the product owner, also known as the customer inExtreme Programming methodology, or customer representative elsewhere. In case you don't know, he's the guy that brings the expectations you'll struggle to satisfy to the development table. He will tell you what's most important to deliver and when; he will prioritize your work based on its manifest business value rather than its underlying architectural value; he'll be entitled by the management to take decisions and make tough calls, sometimes these are great, sometimes not so, that will often have a significant impact on your development schedule. In short, he's the one in charge of the project, that's why, in order to deliver a web application matching his expectancies, you'll need to understand his vision and feel it as if it were yours.
This is always true, even if your project's product owner is your dad, wife, or best friend; even if he happens to be you.
Now that we've made that clear, let's take a look to some of the most common product owner's expectations for a typical web-based single-page application project, we ought to see if the choice of using ASP.NET Core and Angular is good enough to fulfill each one of them:
Early release(s ): No matter whether you're selling a bunch of salad or web-based services, the customer will always want to see what he's buying. If you're using SCRUM, you'll have to release a potentially-shippable product at the end of each sprint; in a Waterfall-based approach you'll have Milestones, and so on. One thing is for sure, the best thing you can do in order to efficiently organize your development is to adopt an iterative and/or modular-oriented approach. ASP.NET Core and Angular, along with the strong separation of concerns granted by their underlying MVC or MVVM based patterns, will gracefully push you into the mindset needed to do just that.
GUI over backend: You'll often be asked to work on the GUI and frontend functionalities because they will be the only real viewable and measurable thing for the customer. This basically means that you'll have to mock up the data model and start to work on the frontend as soon as possible, delaying everything that goes on under the hood, even if that means leaving it empty, we could say that the hood is what you need the most. Please notice that this kind of approach is not necessarily bad, by all means, we're not tying up the donkey where the (product) owner wants. On the other hand, the choice of using ASP.NET Core together with Angular will grant you the chance of easily decoupling the presentation layer and the data layer implementing the first and mocking the latter, which is a great thing to do. You'll be able to see where you're going before wasting valuable time or being forced to make potentially wrong decisions. ASP.NET Core's Web API interface will provide the proper tools to do that by allowing you to create a sample web application skeleton in a matter of seconds using Visual Studio Controller templates and in-memory data contexts powered by the Entity Framework 6, which you will be able to access using entity models and code-first. As soon as you do that, you'll be able to switch to the GUI design using the Angular 2 presentation layer toolbox as often as you want until you reach the desired results. Once you are satisfied, you'll just need to properly implement the web API controller interfaces and hook up the actual data.
Fast completion: None of them will work unless you also manage to get everything done in a reasonable time span. This is one of the key reasons for choosing to adopt a server-side framework and a client-side framework working together with ease. ASP.NET Core and Angular 2 are the tools of choice not only because they're both built on solid, consistent ground, but also because they're meant to do precisely that: get the job done on their respective side and provide a usable interface to the other partner.
Adaptability: As stated by the Agile manifesto, being able to respond to change requests is more important than following a plan. This is especially true in software development, where we could even claim that anything that cannot handle change is a failed project. That's another great reason to embrace the separation of concerns enforced by our two frameworks of choice, as this grants the developer the ability to manage, and even welcome, to some extent, most of the layout or structural changes that will be expected during the development phase.
That's about it. Notice that we didn't cover everything here, as it would be impossible without undertaking an actual assignment. We just tried to give an extensive answer to the following general questions. If we were to build SPA, would ASP.NET Core and Angular 2 be an appropriate choice? The answer is undoubtedly yes, especially when used together. Does it mean that we're done already? Not a chance, as we have no intention of taking this assumption for granted. Conversely, it's time for us to demonstrate it by ceasing to speak in general terms and starting to put things in motion.
What we need now is to conceive a suitable test-case scenario similar to the ones we will eventually have to deal with: a fully featured, production-ready single-page application project complete with all the core aspects you would expect from a potentially shippable product.
In order to do this, the first thing we need to do is to become our own customer for a minute and come up with an idea, a vision to share with our own other self. We'll then be able to put our developer shoes back on and split our abstract plan into a list of items we'll need to implement: these will be the core requirements of our own project. Finally, we'll set up our workstation by getting the required packages, adding the resource files, and configuring both the ASP.NET Core and Angular 2 frameworks into the Visual Studio 2015 IDE.
If we're going to demonstrate the key features of ASP.NET Core and Angular we can't really take into consideration the number of presentation-oriented websites such as demos, product galleries, corporate or marketing showcases, photo/video/media reels, and so on, as we need something that can show the asynchronous and parallel request processing capabilities of both frameworks to their full extent. In order to fulfill these expectations, we would instead need something similar to a blog engine, a content-management system, and/or a groupware platform such as a community forum or a wiki.
The latter seems to be the most appropriate, as it will mean going through a number of implementation challenges including account management, login/session handling, search-based navigation, full-text search queries, titles and contents indexing, multi-language support, markup syntax rendering, dynamic media handling and a not-so-trivial data model on top of an ever-growing, potentially huge amount of data.
The application we are going to build won't be just a shallow demonstration; we won't throw some working code here and there and expect the reader to connect the dots. Our objective is to create a solid, realistic application using our frameworks of choice while following the current development best practices. Each chapter will be dedicated to a single core aspect and if you feel like you already know your way there, feel free to skip to the next one. Conversely, if you're willing to follow us through the whole loop, you'll have a great journey through the most useful aspects of ASP.NET Core and Angular 2 and how they can work together to deliver the most common and useful web development tasks, from the most trivial ones to the more complex beasts. It's an investment that will pay dividends, as it will leave you with a maintainable, extensible, and well-structured project, plus the knowledge needed to build your own.
To avoid making things too boring, we'll pick an enjoyable, enticing theme from the entertainment industry: a collaborative, wiki-enabled database of open-source video games, where registered users will be able to add/modify entries.
We'll call it OpenGameList, also known as opengamelist.com. Luckily enough, the domain was still available at the time of writing this book. If you go there now, you'll be able to see what we're going to build from scratch (don't do that if you don't like spoilers, as it could ruin some of your fun).
Our application will follow a rather classic approach: our users will be able to browse the latest entries and navigate through the wiki using internal wiki links or via simple or complex search queries. If they're authenticated, they'll also be allowed to switch to edit mode to modify an item or add a new one, otherwise, they'll be prompted to enter their credentials via a classic login or registration form. On top of all that, we'll also add an administration area where we can do our management stuff such as deleting entries, editing/disabling/deleting users, running maintenance tasks, and so on.
Let's break down these requirements to a list of development topics:
Routing: The app will be able to properly respond to client requests, that is to say, routing them accordingly to what they're up to.
Data model: We'll definitely adopt a database engine to store our entries and the proper tools to access it in a modern, fashionable way. In order do so, we need to define our data architecture by setting up Data Repositories and Domain Entities that will be handled by the server and hooked to Angular 2 through ASP.NET Core's Web API controller interfaces.
Web API controllers: From an MVC-based architectural perspective, one of the main differences between multi-page and single-page applications is that the former's controllers are designed to return views, while the latter ones, also known as API controllers, return serialized data. These are what we will need to implement to put Angular 2 components in charge of the presentation layer.
Angular components: Switching to client-side, we will need to define a set of components to handle UI elements and state changes. As you probably already know, components are the most fundamental elements in Angular 2, replacing Angular 1's controllers and scopes. We'll get to know more about them soon enough.
Authentication: Soon enough we'll have the need to empower our application with a membership context, that way we'll be able to restrict CRUD operations to authenticated users only, keep track of each user actions, prepare the administration layer, and so on.
These will be our main development challenges: if we don't know how to properly handle them, we won't be able to succeed.
The following chapters will address each one of them: we'll also cover other important aspects such as SEO, security, and deployment, as they will be very important when you are ready to publish your application.
The first thing we have to do is to set up our workstation: it won't be difficult because we only need a small set of essential tools. These include Visual Studio 2015, the web platform installer, .NET Framework 4.5 or higher, a web server such as IIS or IIS Express, and a decent source code control system such as Git, Mercurial, or Team Foundation, which we will take for granted as you most likely already have them in place. Just make sure you're all set with these before going further.
Note
IMPORTANT
If you haven't already, be sure to download and install Visual Studio 2015 Update 3 and the .NET Core for Visual Studio Tools Preview 2. These are the latest updates at the time of writing, but will be updated in the near future.
These updates will address some important issues for web development tools, as well as adding improved support for TypeScript, NPM, and other components that we'll be using later on:
Visual Studio 2015 Update 3: http://go.microsoft.com/fwlink/?LinkId=691129
.NET Core for Visual Studio Tools Preview 2.0.1: https://go.microsoft.com/fwlink/?LinkID=824849
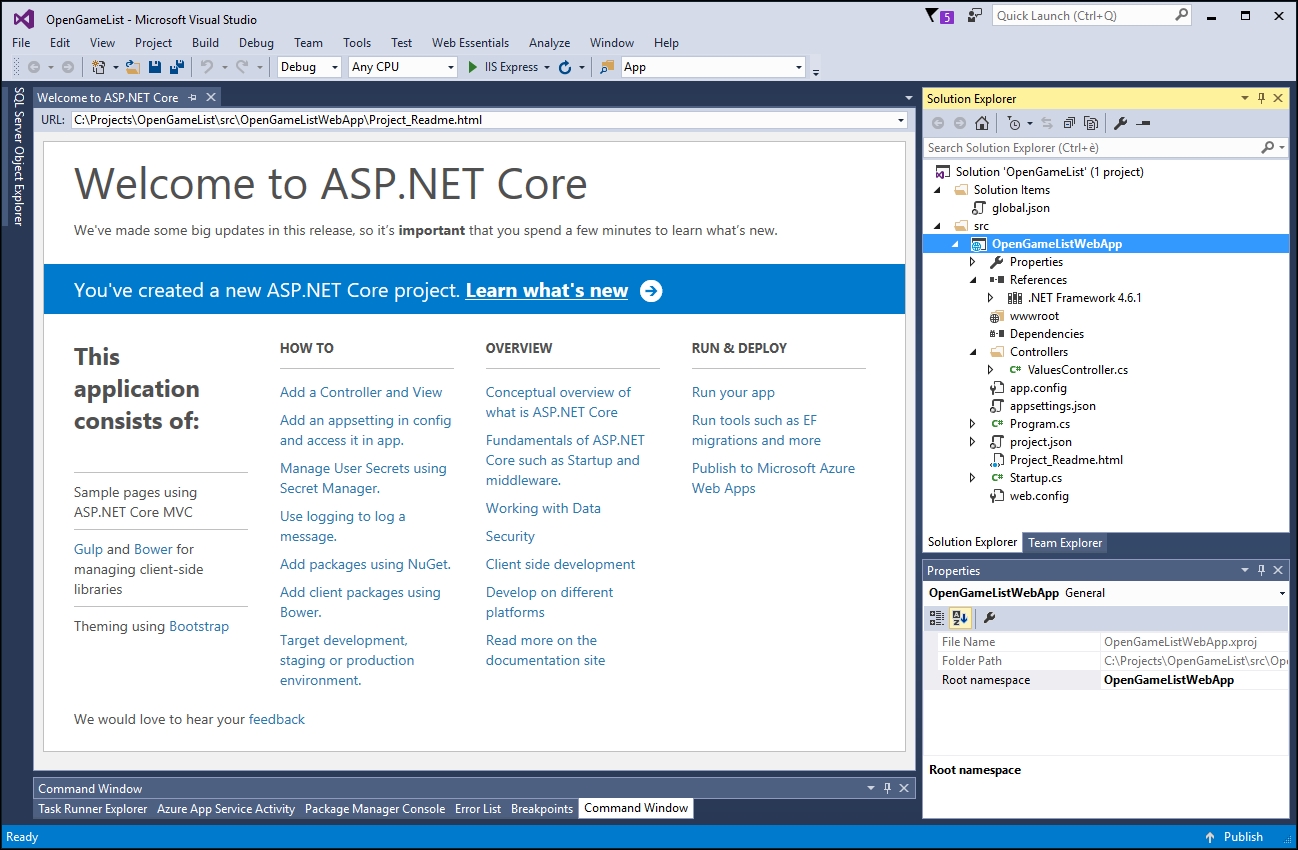
The first thing we need to do is to create a new ASP.NET Core web application project:
Fire up Visual Studio 2015 and, from the File menu, expand New and select Project to open a new project modal window.
From the Templates tree, expand the Visual C# node and select the Web subfolder: the right section of the modal window will be populated by a number of available project templates. Among these, there are two choices for creating an ASP.NET Core web application project: the first one, optimized for cross-platform deployment, entirely relies upon the new .NET Core Framework; the other one, ideal for a Windows environment, is based upon the latest .NET Framework version (4.6.1 at the time of writing).

The good thing here is that, thanks to the ASP.NET Core versatility, we are free to choose the approach we like the most, as both frameworks are mature enough to support almost everything we will use within this book. The only relevant downside of the .NET Core choice is the lack of compatibility with some NuGet packages that haven't been ported there yet: that's why, at least for our example, we'll be choosing to stick with the full-scale .NET Framework. In order to do that, select the ASP.NET Core Web Application (.NET Framework) template and fill in the relevant Name, Location, and Solution name fields. We'll name the solution OpenGameList, while the project will be called OpenGameListWebApp,as shown in the previous screenshot. Once done, click OK to continue.
In the next modal window, we can further customize our template by choosing the default contents to include in our project (Empty, Web API, or Web Application) and the authentication mechanism, should we want to use one. Choose Web API and No authentication, then click the OK button to create the project.

If you're used to the Visual Studio Web Application Project templates from previous ASP.NET versions you may be tempted to choose Empty instead, thus avoiding the insane amount of sample classes, folders, and components, including a number of potentially outdated versions of various client-side frameworks such as Bootstrap, KnockoutJS, JQuery, and more. Luckily, these new ASP.NET Core project templates are extremely lightweight - the one we did choose comes with nothing more than a
/Controller/folder, aValuesController.cssample, and some useful references in theStartup.csfile.
Now that our project has been created, it's time to add the resources we're going to use. As we already mentioned, the layout of a standard ASP.NET Core solution is quite different from what it used to be. The main differences are:
The solution's projects are now created in a
/src/folder by default. This is just a convention, though, as they can be placed anywhere.There is a brand-new
wwwrootfolder, which will contain the compiled, ready-to-publish contents of our application, while everything else will be the project source code.
Other things worth noting are a Controller folder, containing a sample ValueController.cs class, a Startup.cs file containing the application class and a couple of other files we'll address in a while.
The first thing we need to do is to add a folder called Scripts to the root of our project. We'll use this folder to place all of our JavaScript files, and then we'll combine and minify these using a JavaScript Task Runner such as Gulp, this way we'll make sure that the resulting file will be added to the wwwroot folder automatically after each build.
Now it's time to make a good use of the three package managers natively supported by ASP.NET, namely NuGet, NPM, and Bower. These tools will allow you to gather all the resources you need to build your application: they will download all the resources and their dependencies automatically, so you needn't do it manually, thus saving a lot of time. In case you're wondering why we need three of them, it can be useful to briefly recap their scope:
NuGet: This will take care of all the .NET native and third-party packages such as Entity Framework, ASP.NET MVC, and so on. The full package list is stored in the
project.jsonfile so they can be retrieved and/or checked for updates at any time.NPM: This was the default package manager for the JavaScript runtime environment known as Node.js. Over the last few years, though, it has also been used to host a number of projects, libraries, and frameworks of any kind, including Angular 2. The package list is stored in the
package.jsonfile.Bower: Another package management system for client-side programming, created by Twitter and maintained on GitHub, specifically designed for frontend development such as jQuery, Bootstrap, and AngularJS. It depends on Node.js and NPM and works under
git. Its configuration file is calledbower.json. Notice that, since the Angular 2 team is pushing their code using NPM rather than Bower, we won't be using it in our project.
ASP.NET Core gives us at least four different ways to add NuGet packages to our project:
Using the Visual Studio powered GUI, accessible by right-clicking the project and choosing Manage NuGet Packages.
Using the Package Manager Console, with the well-renowned
Install-Packagecommand followed by the package name and build version.Using the on-screen helper tools provided by Intellisense, limited to the native .NET modules/libraries.
Directly adding the package reference to the project's NPM configuration file, also known as
project.json.
The first three methods, although being absolutely viable, are basically shortcuts for populating the fourth one; the latter has the advantage of being the less opaque one, so we'll just use it.
Open the project.json file, find the dependencies section and add the following packages to the list (new lines are highlighted):
  "dependencies": {
    "Microsoft.AspNetCore.Mvc": "1.0.0",
    "Microsoft.AspNetCore.Server.IISIntegration": "1.0.0",
    "Microsoft.AspNetCore.Server.Kestrel": "1.0.0",
    "Microsoft.Extensions.Configuration.EnvironmentVariables": "1.0.0",
    "Microsoft.Extensions.Configuration.FileExtensions": "1.0.0",
    "Microsoft.Extensions.Configuration.Json": "1.0.0",
    "Microsoft.Extensions.Logging": "1.0.0",
    "Microsoft.Extensions.Logging.Console": "1.0.0",
    "Microsoft.Extensions.Logging.Debug": "1.0.0",
    "Microsoft.Extensions.Options.ConfigurationExtensions": "1.0.0",
    "Microsoft.AspNetCore.Diagnostics": "1.0.0",

    "Microsoft.AspNetCore.Routing": "1.0.0",

    "Microsoft.AspNetCore.Authentication.JwtBearer": "1.0.0",

    "Microsoft.AspNetCore.StaticFiles": "1.0.0",

    "Microsoft.VisualStudio.Web.BrowserLink.Loader": "14.0.0"
  }
We have added a space to visually separate the default dependencies required by all ASP.NET Core projects from our newly added ones.
Tip
The listed builds are the latest at the time of writing, but they won't last forever: as soon as ASP.NET Core passes its initial release (1.0.0 at the time of writing), these numbers will gradually increase over time, whenever a new version comes out. To check the latest version of each package, just place the cursor between the quotes and delete the version number, a dynamic drop-down list will be shown containing all the latest versions for that given module.
While we're here, it can be useful to check which version of the .NET Framework we are targeting by looking at the frameworks key. Since we choose the .NET Framework template, we should find something like this:
  "frameworks": {
    "net461": { }
  },
This will most likely change in the future, so be sure to target a version compatible with the packages you want to use. For the purpose of this book, the .NET Framework 4.6.1 will do the job.
As soon as we save the project.json file, Visual Studio will start to retrieve the missing packages from the web. Wait for it to finish, then proceed with opening the Startup.cs file, which is also in the project root.
If you're a seasoned .NET developer you might already be familiar with the Startup.cs file, introduced in OWIN-based applications to replace most of the tasks previously handled by the good old Global.asax file. In ASP.NET Core, the Startup.cs file serves the same purpose as the OWIN startup class, being nothing less than the application main entry point, it is the place where we can add services, choose which application modules and middleware functions to load, handle dependency injection tasks, and configure the pipeline.
However, the similarities end here, the class has been completely rewritten to be as pluggable and lightweight as possible, meaning that it will include and load only what's strictly necessary to fulfill our application's tasks.
To better understand this, let's take a look at the following lines taken from the Startup.cs source code shipped with the ASP.NET Core Web API project template we chose:
// This method gets called by the runtime. Use this method to configure the HTTP request pipeline.
public void Configure(IApplicationBuilder app, IHostingEnvironment env, ILoggerFactory loggerFactory)
{
    loggerFactory.AddConsole(Configuration.GetSection("Logging"));
    loggerFactory.AddDebug();

    app.UseMvc();
}
Notice how empty our application's HTTP request pipeline is, it won't ever serve static files, since there is nothing telling it to do so. To better understand it, let's perform a quick test before proceeding.
In order to check that the ASP.NET pipeline is properly working, click on the Start Debugging option in the Debug menu, or just hit the
F5
hotkey. If everything is OK, your default web browser will open pointing to the following URL: http://localhost:14600/api/values.
The page content will show the following:
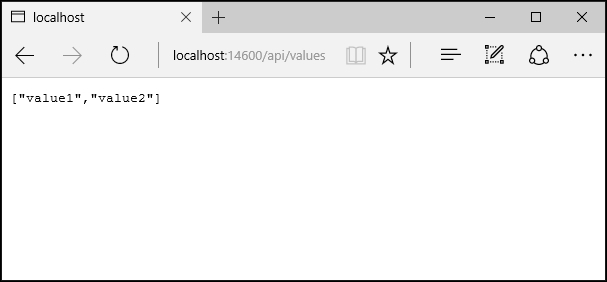
If we're seeing the preceding screenshot, it means that the request pipeline is working fine, the MVC module has been added within the Startup.cs file and it's working as expected. That's because there's a sample ValueController.cs class in the /Controllers/ folder, conveniently added by the Web API project template we chose a while ago, that behaves exactly like this.
Now let's try to request the static Project_Readme.html file, also added by our chosen template in the project root. In order to reach it, we need to move it inside the /wwwroot/ folder. Once done, it should be reachable by pointing at the following URL: http://localhost:14600/Project_Readme.html.
However, if we try to do that, and then issue that request using the same browser we used before, we would get the following response:
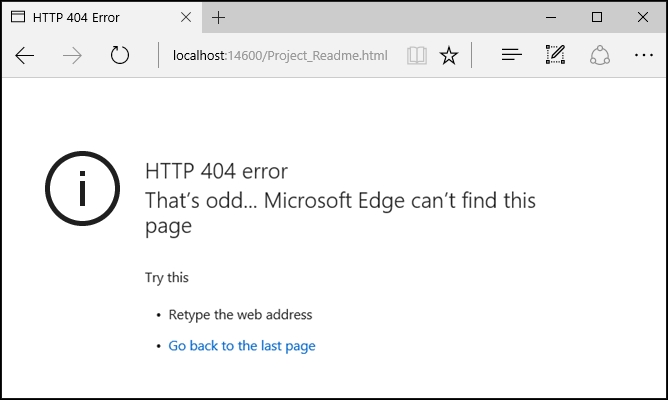
This HTTP 404 error clearly demonstrates what we've just said, the HTTP request pipeline won't serve static files, simply because we didn't tell it to. However, we can easily fix that behavior by adding them to the pipeline within the Startup.cs file (new lines highlighted):
// This method gets called by the runtime. Use this method to configure the HTTP request pipeline.
public void Configure(IApplicationBuilder app, IHostingEnvironment env, ILoggerFactory loggerFactory)
{
    loggerFactory.AddConsole(Configuration.GetSection("Logging"));
    loggerFactory.AddDebug();

    // Configure a rewrite rule to auto-lookup for standard default files such as index.html.
    app.UseDefaultFiles();

    // Serve static files (html, css, js, images & more). See also the following URL:

    // https://docs.asp.net/en/latest/fundamentals/static-files.html for further reference.

    app.UseStaticFiles();

    // Add MVC to the pipeline
    app.UseMvc();
}
While we are here, we also added the following:
A rewrite rule to enable support for the most common default files (such as
index.htm,index.html, and so on), which will be automatically served without the user having to fully qualify the URI.A series of comments to better clarify the meaning of each module, including a reference link to the official ASP.NET Core documentation.
If we run our application again, we should now be welcomed with the following:
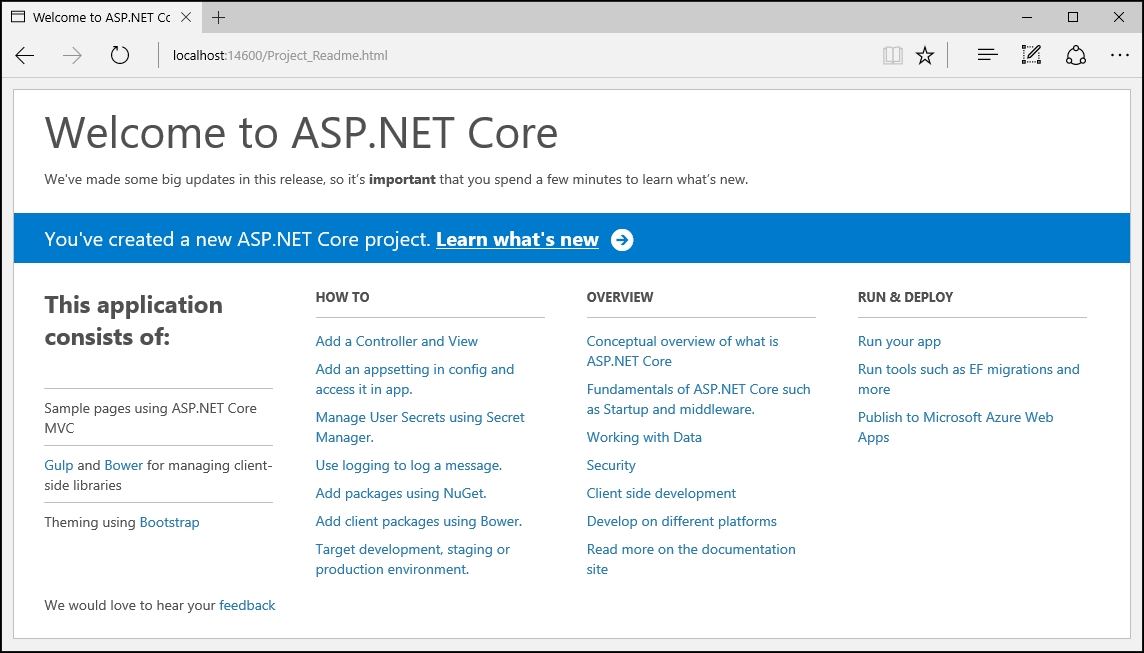
That's it. We have enabled static file support, so that we'll be able to serve not only HTML but also CSS, JS files, and so on. Delete the Project_Readme.html and get ready to install an important third-party NuGet package that we'll be using a lot in the following chapters.
If you're working with ASP.NET and you've never heard about Newtonsoft.Json (formerly Json.NET), you've almost certainly missed something that could've eased your job, big time. We're talking about one of the finest libraries - and most useful tools, ever developed for .NET, at least for the writer. It's a very efficient (and thus very popular), high-performance JSON serializer, deserializer, and all-around framework for .NET, which also happens to be completely open source.
We won't dig into it anymore here, as we'll be using it soon enough. For now, let's just install it by right-clicking on our solution's node in the Solution Explorer, then choosing Manage NuGet Packages for this Solution... to open up the following panel:
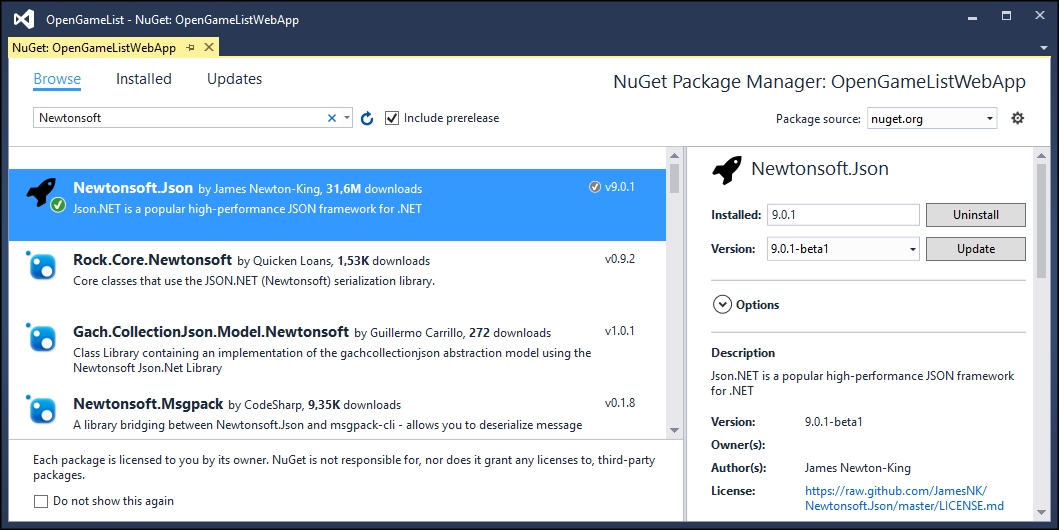
Search for Newtonsoft.Json to make it appear if it isn't there already, then left-click to select it. Ensure to select the latest stable version (9.0.1 at the time of writing), click on Install, and then wait for the installer to complete its job.
That's it for now: if we open the project.json file now, we can see that the Newtonsoft.Json package reference has been added at the end of the dependencies section, together with the other project-specific dependencies we've manually added before. We'll be installing other packages using the GUI in the following chapters, as soon as we need them, now that we know how easy it is to do that.
Now it's time to choose the client programming language to adopt. Given the fact we're planning to use Angular 2, our choices are basically the following three: good old JavaScript, its Microsoft superset known as TypeScript, or the Google growing beast known as Dart.
In this project, we're going to use TypeScript for a number of good reasons, the most important of them are as follows:
TypeScript has a number of features that JavaScript doesn't, such as static typing, classes, and interfaces. Using it in Visual Studio also gives us the chance to benefit from the built-in IntelliSense, which, together with its distinctive features, will allow us to spot most programming errors as we type the code, potentially saving a great amount of time.
For a large client-side project, TypeScript will allow us to produce a more robust code, which will also be fully deployable anywhere a plain JavaScript file would run. As a matter of fact, since TypeScript is a superset of JavaScript it can be used alongside any JavaScript code without problems.
Dart is a wonderful newcomer, and it will probably surpass its ECMA script-rivals soon. Currently though, it is still quite immature in terms of available third-party libraries, documentation, development support, and overall community knowledge.
We're not the only ones praising TypeScript: it's something acknowledged by the Angular team itself, considering the fact that the Angular 2 source code has been written using TypeScript, as proudly announced by Microsoft in the following MDSN blog post: https://blogs.msdn.microsoft.com/typescript/2015/03/05/angular-2-built-on-typescript/.
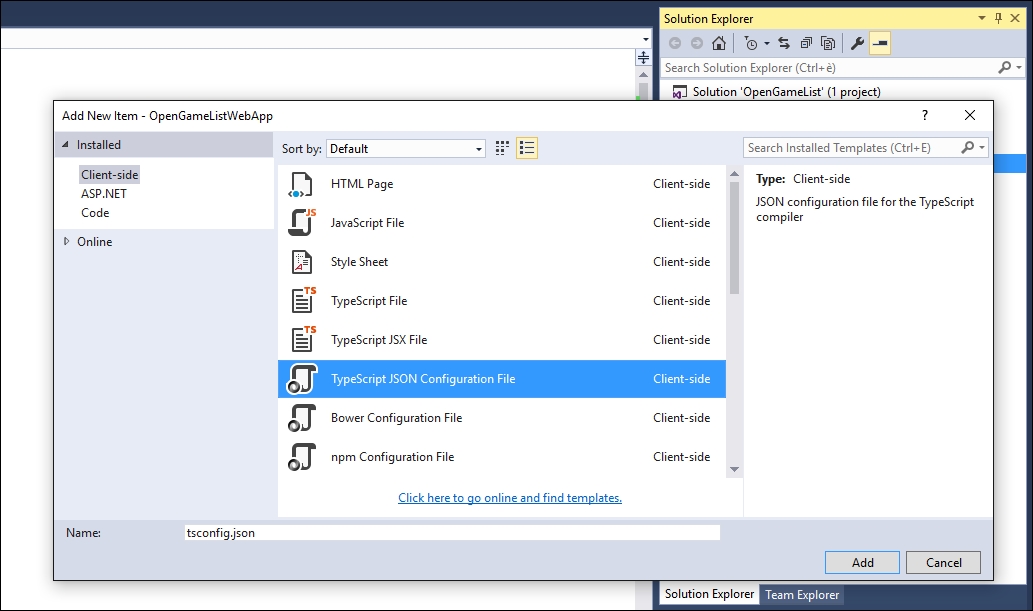
The first thing we hav to do to set up TypeScript is to add a tsconfig.json file to our root project.
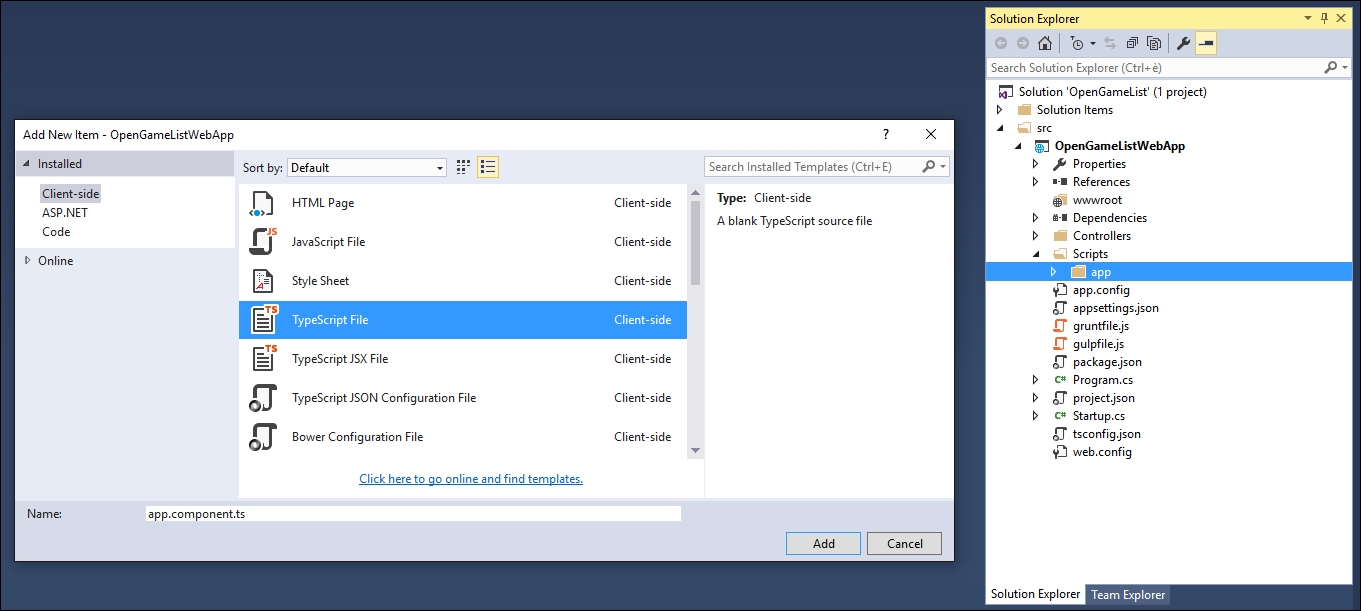
In the e to do to set up TypeScript is to add a tsconfig.json file to our root project. In the Solution Explorer, right-click on the root project node and select Add, then New Item; switch to the client-side from the top left tree view, then select TypeScript Configuration File, and add the tsconfig.json file to the project root.
The tsconfig.json file will be generated with its default set of options, which are good for most scenarios but not ideal for what we're going to do. That's why we need to add/change some settings until it will look like the following:
{
  "compileOnSave": false,
  "compilerOptions": {
    "emitDecoratorMetadata": true,
    "experimentalDecorators": true,
    "module": "system",
    "moduleResolution": "node",
    "noImplicitAny": false,
    "noEmitOnError": false,
    "removeComments": false,
    "target": "es5"
  },
  "exclude": [
    "node_modules",
    "wwwroot"
  ]
}
These instructions will influence how Intellisense and our external TypeScript compiler will work; two things that will help us, big time.
Wait a minute, did we just say external TypeScript compiler? What about the built-in, integrated TypeScript compile feature provided by the Visual Studio IDE?
Well, we just said that one of TypeScript's biggest advantages is that we can use it anywhere a plain JavaScript file would run, that's because any .ts file can be compiled into a .js file without any problem. The compile task is handled by the TypeScript compiler itself, also known as tsc, which can be run directly from the Visual Studio IDE with the help of the tsconfig.json we added in the preceding paragraph. That file, as we've just seen, contains a wide set of compiling options such as creating source maps, creating definition files, concatenating everything into a single output file, and so on. Looking great, isn't it?
Unfortunately, not so much. Although Visual Studio 2015 does a pretty decent job of acting as a bridge between our TypeScript sources and tsc, it still lacks an important key feature, it doesn't give the option to minify/uglify the resulting JS files, thus leaving them uncompressed after the compile task.
Such feature can be trivial during development, yet it happens to be quite important in production because we'll definitely want to cloak our source code before publishing it. That's why the best thing we can do is to stop the Visual Studio IDE from compiling TypeScript files and implement a custom alternative that does support minify/uglify.
Note
In case you're wondering about what the terms minify and/or uglify actually mean, we strongly suggest that you read the following Wikipedia page: https://en.wikipedia.org/wiki/Minification_(programming).
Luckily, we're going to use something we would need anyway, a dedicated, streamlined, and modern task runner that goes by the name of Gulp. In order to install it, though, we need to set up the appropriate package manager.
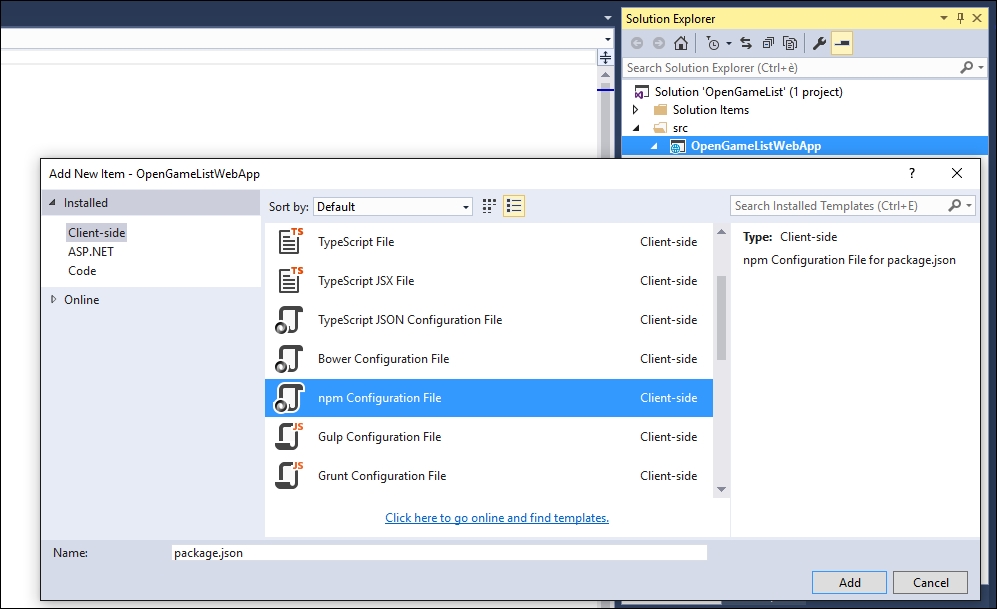
NPM is the tool we will use to add some important packages to our project, the most relevant ones being Gulp and Angular 2. To install it, do the following:
Go to the Solution Explorer.
Right-click on the root project node.
Select Add, then New Item.
Switch to Client-side from the top left tree view, then select NPM Configuration File, and add the
package.jsonfile to the project root.
Change the contents of the automatically-generated package.json file to match the following:
{
  "version": "1.0.0",
  "name": "opengamelistwebapp",
  "private": true,
  "dependencies": {
  },
  "devDependencies": {
    "gulp": "^3.9.1",
    "gulp-clean": "^0.3.2",
    "gulp-concat": "^2.6.0",
    "gulp-sourcemaps": "^1.6.0",
    "gulp-typescript": "^2.13.6",
    "gulp-uglify": "^2.0.0",
    "typescript": "^1.8.10"
  }
}
Please notice that, at the time of writing, Gulp 3.9.1 is the latest version. You can check the most recent build by checking the Visual Studio Intellisense, which is able to perform impressive real-time update checks upon each package's latest build just like it does within the project.json file:
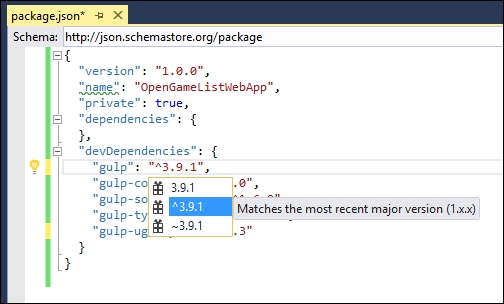
As an alternative, you can always visit the Gulp project NPM page at https://www.npmjs.com/package/gulp and change the build version numbers accordingly.
Notice that you aren't forced to input precise build numbers, as you can also use the standard npmjs syntax to specify auto-update rules bound to custom version ranges using the supported prefixes, such as the following:
The Tilde (~): ~1.1.4 will match all 1.1.x versions, excluding 1.2.0, 1.0.x and so on.
The Caret (^): ^1.1.4 will match everything above 1.1.4, excluding 2.0.0 and above.
This is another scenario where Intellisense will come in handy, as it will also suggest how to do it.
Note
For an extensive list of available npmjs commands and prefixes, you can also check out the official npmjs documentation at https://docs.npmjs.com/files/package.json.
As you most likely already know, Gulp is a powerful task runner toolkit that we will use to automate some time-consuming tasks in our development workflow. If you never worked with a task runner, think of it as a batch file or, even better, a PowerShell script powered with some useful web development tools such as file concatenation, js/css shrinking, and more.
You will notice that, together with Gulp, we're also installing some Gulp-related plugins:
gulp-clean: This deletes the contents of the destination foldersgulp-concat: This merges multiple files into onegulp-sourcemaps: This generates the Source Mapsgulp-typescript: This compiles TypeScript files into JSgulp-uglify: This minifies JavaScript files
Configuring Gulp is as simple as adding the Gulp Configuration file to your project. You can do that just like you did with the NPM Configuration file, right-click on the root project node in the Solution Explorer and select Add, then New Item. From the client-side tree panel, locate and select the Gulp Configuration file and add a gulpfile.js file to the project root.
The Gulp configuration file, generally known as Gulpfile, is basically a list of tasks and commands that Gulp will execute, written using a mostly readable JavaScript syntax. Working with it can be tricky at first, especially if you want to use it to handle complex tasks. Digging too much into it would take us out of the scope of this book, so we'll just see how we can tell it to do a rather simple set of jobs, merge all the JavaScript files in the /Scripts/ folder, minus those in a directory for third-party scripts/libraries, into a single, minified all.min.js file which will be generated into the wwwroot folder. This can be obtained with the following code:
var gulp = require('gulp'),
    gp_clean = require('gulp-clean'),
    gp_concat = require('gulp-concat'),
    gp_sourcemaps = require('gulp-sourcemaps'),
    gp_typescript = require('gulp-typescript'),
    gp_uglify = require('gulp-uglify');

/// Define paths
var srcPaths = {
    app: ['Scripts/app/main.ts', 'Scripts/app/**/*.ts'],
    js: ['Scripts/js/**/*.js']
};

var destPaths = {
    app: 'wwwroot/app/',
    js: 'wwwroot/js/'
};
// Compile, minify and create sourcemaps all TypeScript files and place them to wwwroot/app, together with their js.map files.
gulp.task('app', function () {
    return gulp.src(srcPaths.app)
        .pipe(gp_sourcemaps.init())
        .pipe(gp_typescript(require('./tsconfig.json').compilerOptions))
        .pipe(gp_uglify({ mangle: false }))
        .pipe(gp_sourcemaps.write('/'))
        .pipe(gulp.dest(destPaths.app));
});

// Delete wwwroot/app contents
gulp.task('app_clean', function () {
    return gulp.src(destPaths.app + "*", { read: false })
        .pipe(gp_clean({ force: true }));
});

// Copy all JS files from external libraries to wwwroot/js
gulp.task('js', function () {
    return gulp.src(srcPaths.js)
        // .pipe(gp_uglify({ mangle: false })) // disable uglify
        // .pipe(gp_concat('all-js.min.js')) // disable concat
        .pipe(gulp.dest(destPaths.js));
});

// Delete wwwroot/js contents
gulp.task('js_clean', function () {
    return gulp.src(destPaths.js + "*", { read: false })
    .pipe(gp_clean({ force: true }));
});

// Watch specified files and define what to do upon file changes
gulp.task('watch', function () {
    gulp.watch([srcPaths.app, srcPaths.js], ['app', 'js']);
});
// Global cleanup task
gulp.task('cleanup', ['app_clean', 'js_clean']);

// Define the default task so it will launch all other tasks
gulp.task('default', ['app', 'js', 'watch']);
Here's a brief explanation of what these commands actually do:
In lines 1-6, we set up Gulp and the required plugins. Notice that every one of them will be initialized into a variable, as that's the way Gulp works.
In lines 8-17,we define the file paths we will use. Doing that here will allow us to write them only once, thus making the Gulp file easier to maintain. Notice that we're splitting the source and the destination paths into two distinct objects, this will mentally help us to keep the development environment separated from the production one.
In lines 19-27, we have the
apptask, which is the most important and complex one. This task makes use of three different plugins: sourcemaps, typescript, and uglify. Notice how each line is bound to a specific plugin action, which takes care of a single job, following the "It should do one thing" paradigm Gulp is all about. Line 21 defines the source files, line 22 initializes the sourcemaps plugin, line 23 instructs the plugin to fetch the TypeScript compiler options from thetsconfig.jsonfile, and so on.In lines 29-33, we have the
app_cleantask, which will erase every file and subfolder within thewwwroot/apptarget path.In lines 35-39, we define the
jstask, which is meant to publish external JavaScript libraries manually added to the project. This is a rather simple task, as it performs a mere copy of the.jsfiles from a source folder into its production counterpart. Notice how we could easily choose to also minify and/or concatenate the source files into a single one by uncommenting a few lines of code. However, since this task is meant to handle third-party JavaScript libraries, it would be wise not to manipulate their code.In lines 43-47, there's the
js_cleantask that will erase everything within thewwwroot/jstarget path.In lines 49-52, we have the
watchtask. This is basically a file watcher/monitoring task that will execute theappandjstasks if one or more of their source files will change.In lines 54-55, we created a
cleanuptask that will erase the content of all destination paths by launching theapp_cleanandjs_cleantasks. It can be useful to reset these folders to their initial state.Last but not least, in lines 57-58, we define the
defaulttask that will execute all the other tasks, includingwatch, within a single call. This is the one we will launch.
Note
It's worth noting that the uglify plugin requires the mangle option to be set to false: this is a workaround for a bug in the Angular 2 RC5 that will hopefully be fixed in future releases. For more info regarding this topic, check out the following URL from the official Angular 2 GitHub repository:
https://github.com/angular/angular/issues/10618.
To execute the Gulp file, right-click on it from the Solution Explorer and choose Task Runner Explorer, or open it manually by selecting it from File, Other Windows in the Visual Studio 2015 main menu bar. Once opened, click the refresh button, then right-click the default task and select Run to activate it.
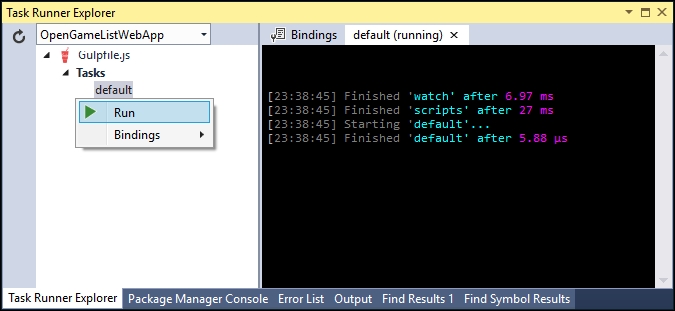
Once you do that, the watch task we just created will silently run in background, keeping tracks of our changes and act accordingly. Notice the default (running) word within the tab label, which will remind us that there is still an ongoing task: closing that console window will immediately shut it down.
That's everything we'll ever need from Gulp for this project; there's no need for us to go further. If you want to learn more about Gulp and its configuration file syntax, you will find a lot of resources and documentation, together with a lot of useful samples, in the official website at the following address: http://gulpjs.com/.
Since we're going to do a lot of modifications to the files contained in the /Scripts/app/ folder within the following chapters, it would be great if the app_clean task could run automatically before the app task: such behavior would ensure that we'll always get rid of outdated and orphaned files without having to manually perform the cleanup. Luckily enough, Gulp allows us to easily do that by passing an optional array of dependent tasks that will be launched before the main one.
Let's go back to the line where we defined the app task and add the following (updated code are highlighted):
gulp.task('app', ['app_clean'], function () {
That's it. From now on the app task will launch the app_clean dependent task and wait for its completion before executing itself, meaning that the /wwwroot/app/ folder contents will be erased before the arrival of the new file, this is precisely what we wanted.
Before Gulp was widely welcomed by the web application development community, Grunt used to be the king of the hill. Does that mean the former killed the latter? Well, most certainly not. Grunt is still an excellent tool and can be a great alternative to Gulp, especially if you already know how to use it. Unless you do, though, we suggest starting with Gulp because we think that it has a fair edge on code flexibility, and also a more streamlined approach. However, if you don't feel like using it, sticking to Grunt and its renowned plugins is just as good, you won't ever get fired for such a choice.
Using Grunt instead of Gulp is as easy as doing the following:
In NPM's
package.jsonfile, replace the Gulp references - together with the relevant plugins, with the Grunt packages.In the Solution Explorer, add a
gruntfile.jsfile instead of agulpfile.js.In the
gruntfile.js, rewrite the same tasks defined previously using the Grunt syntax.
This is a good example of the Grunt-powered package.json:
{
  "version": "1.0.0",
  "name": "opengamelistwebapp",
  "private": true,
  "dependencies": {
  },
  "devDependencies": {
    "grunt": "^0.4.5",
    "grunt-contrib-clean": "^1.0.0",
    "grunt-contrib-copy": "^1.0.0",
    "grunt-contrib-uglify": "^1.0.0",
    "grunt-contrib-watch": "^0.6.1",
    "grunt-ts": "^5.3.2",
  }
}
And this is how the gruntfile.js would look after porting all the Gulp tasks defined previously to Grunt syntax:
module.exports = function (grunt) {
    grunt.loadNpmTasks('grunt-contrib-clean');
    grunt.loadNpmTasks('grunt-contrib-copy');
    grunt.loadNpmTasks('grunt-contrib-uglify');
    grunt.loadNpmTasks('grunt-contrib-watch');
    grunt.loadNpmTasks('grunt-ts');

    grunt.initConfig({
        clean: [
            'Scripts/app/*',
            'Scripts/js/*'
        ],
        ts: {
            base: {
                src: [
                    'Scripts/app/main.ts',
                    'Scripts/app/**/*.ts'
                    ],
                outDir: 'wwwroot/ app',
                tsconfig: './tsconfig.json'
            }
        },

        uglify: {
            my_target: {
                files: [{
                    expand: true,
                    cwd: 'wwwroot/ app',
                    src: ['**/*.js'],
                    dest: 'wwwroot/ app'
                }]
            },
            options: {
                sourceMap: true
            }
        },

        // Copy all JS files from external libraries and required NPM packages to wwwroot/js
        copy: {
            main: {
                files: [{
                    expand: true,
                    flatten: true,
                    src: [
                        'Scripts/js/**/*.js'
                    ],
                    dest: 'wwwroot/js/',
                    filter: 'isFile'
                }]
            }
        },

        // Watch specified files and define what to do upon file changes
        watch: {
            scripts: {
                files: [
                    'Scripts/**/*.ts',
                    'Scripts/**/*.js',
                    ],
                tasks: ['clean', 'ts
', 'uglify', 'copy']
            }
        }
    });

    // Global cleanup task
    grunt.registerTask('cleanup', ['clean']);

    // Define the default task so it will launch all other tasks
    grunt.registerTask('default', ['clean', 'ts', 'uglify', 'copy', 'watch']);
};
As we can see, the syntax is very different but the underlying logic and features are quite similar, we still have a bunch of dedicated tasks to handle TypeScript files, minify actions, copy operations, and monitor content change, and then the default one to wrap everything up. Notice how, just like we did with Gulp, the TypeScript compiler options are fetched from the tsconfig.json file so we don't have to write them a second time.
Note
To learn more about Grunt and its configuration file syntax you can visit the official website at the following address: http://gruntjs.com/.
That's basically all we need to know about task runners. Too bad we don't yet have any TS and/or JS files to properly test what we just did! Don't worry, though, we'll get there soon enough. Before that, let's finish our NPM journey by bringing the last (but not least) of our players into the loop.
There are basically two ways to get Angular 2, both with their pros and cons, using NPM, which implies fetching the latest build and hosting the code within our project, or by a dedicated set of links to a suitable CDN.
To install Angular 2 using NPM we need to open the package.json file and add a bunch of packages under the dependencies node. This is how the file should look like at the end (Angular lines are highlighted):
{
  "version": "1.0.0",
  "name": "OpenGameListWebApp",
  "private": true,
  "dependencies": {
    "@angular/common": "2.0.0-rc.5",

    "@angular/compiler": "2.0.0-rc.5",

    "@angular/core": "2.0.0-rc.5",

    "@angular/http": "2.0.0-rc.5",

    "@angular/platform-browser": "2.0.0-rc.5",

    "@angular/platform-browser-dynamic": "2.0.0-rc.5",

    "@angular/upgrade": "2.0.0-rc.5",

    "core-js": "^2.4.1",

    "reflect-metadata": "^0.1.3",

    "rxjs": "5.0.0-beta.6",

    "systemjs": "^0.19.37",

    "zone.js": "^0.6.12"
  },
  "devDependencies": {
    "gulp": "^3.9.1",
    "gulp-clean": "^0.3.2",
    "gulp-concat": "^2.6.0",
    "gulp-sourcemaps": "^1.6.0",
    "gulp-typescript": "^2.13.6",
    "gulp-uglify": "^2.0.0",
    "typescript": "^1.8.10"
  }
}
The packages starting with the @ symbol are part of the Angular 2 bundle, which, at the time of writing, reached its Release Candidate 5 (RC5) development stage. The other ones are a set of ES6 shims (core-js), polyfills (reflect-metadata), loading libraries (systemjs), dependencies (rxjs), and helper tools (zone.js).
All of these packages are required for a number of good reasons:
They ensure backward-compatibility between the new ECMAScript v6 (ES6) language features - used by most Angular 2 packages, and ECMAScript v5 (ES5), which will be our compilation target.
They make our code compatible with the most common/used web browsers, including older ones.
They adopt a modern, module-based loading API to handle the required JS dependencies in an efficient way.
They use Angular 2 features to their full extent.
Note
All this information can be quite confusing, especially for old-school JavaScript developers, but don't worry, we're going to come back to these topics later on.
As usual, all of these packages will be downloaded in the background by the IDE as soon as you Save the file. Eventually, you will have a local instance of Angular 2 available under the following folder:
<project_root>/node_modules/@angular/
It's worth noting that we have also added a new script node that will execute a post-install command against the typings package we just added.
Now we need to move these files to the wwwroot folder. We can achieve this by adding a dedicated task to our Gulp configuration file as follows (new lines are highlighted):
/*
This file in the main entry point for defining Gulp tasks and using Gulp plugins.
Click here to learn more. http://go.microsoft.com/fwlink/?LinkId=518007
*/
var gulp = require('gulp'),
    gp_clean = require('gulp-clean),
    gp_concat = require('gulp-concat'),
    gp_sourcemaps = require('gulp-sourcemaps'),
    gp_typescript = require('gulp-typescript'),
    gp_uglify = require('gulp-uglify');

/// Define paths
var srcPaths = {
    app: ['Scripts/app/main.ts', 'Scripts/app/**/*.ts'],
    js: [
        'Scripts/js/**/*.js',
        'node_modules/core-js/client/shim.min.js',

        'node_modules/zone.js/dist/zone.js',

        'node_modules/reflect-metadata/Reflect.js',

        'node_modules/systemjs/dist/system.src.js',

        'node_modules/typescript/lib/typescript.js'

    ],

    js_angular: [

        'node_modules/@angular/**'

    ],

    js_rxjs: [

        'node_modules/rxjs/**'

    ]
};

var destPaths = {
    app: 'wwwroot/app/',
    js: 'wwwroot/js/',
    js_angular: 'wwwroot/js/@angular/',

    js_rxjs: 'wwwroot/js/rxjs/'
};

// Compile, minify and create sourcemaps all TypeScript files and place them to wwwroot/app, together with their js.map files.
gulp.task('app', ['app_clean'], function () {
    return gulp.src(srcPaths.app)
        .pipe(gp_sourcemaps.init())
        .pipe(gp_typescript(require('./tsconfig.json').compilerOptions))
        .pipe(gp_uglify({ mangle: false }))
         .pipe(gp_sourcemaps.write('/'))
        .pipe(gulp.dest(destPaths.app));
});

// Delete wwwroot/app contents
gulp.task('app_clean', function () {
    return gulp.src(destPaths.app + "*", { read: false })
        .pipe(gp_clean({ force: true }));
});

// Copy all JS files from external libraries to wwwroot/js
gulp.task('js', function () {
    gulp.src(srcPaths.js_angular)

        .pipe(gulp.dest(destPaths.js_angular));

    gulp.src(srcPaths.js_rxjs)

        .pipe(gulp.dest(destPaths.js_rxjs));
    return gulp.src(srcPaths.js)
        // .pipe(gp_uglify({ mangle: false })) // disable uglify
        // .pipe(gp_concat('all-js.min.js')) // disable concat
        .pipe(gulp.dest(destPaths.js));
});

// Delete wwwroot/js contents
gulp.task('js_clean', function () {
    return gulp.src(destPaths.js + "*", { read: false })
    .pipe(gp_clean({ force: true }));
});

// Watch specified files and define what to do upon file changes
gulp.task('watch', function () {
    gulp.watch([srcPaths.app, srcPaths.js], ['app', 'js']);
});

// Global cleanup task
gulp.task('cleanup', ['app_clean', 'js_clean']);

// Define the default task so it will launch all other tasks
gulp.task('default', ['app', 'js', 'watch']);
As you can see, it hasn't changed much, we just added a bunch of JS files that we need to copy from the /node_modules/ folder into the wwwroot/js/ folder, the same one we were already using to host third-party libraries. There's nothing odd there, NPM package files are external libraries, after all. For this very reason, it is also preferable to restrain ourselves from uglifying and/or concatenating them. It's also worth noting that we defined a separate, dedicated folder for Angular 2 and Rxjs packages, since both of them are spanned into multiple files.
Before moving forward, there is another thing we need to take care of. Since we plan to transpile our TypeScript code into ECMAScript5, we have added the core-js NPM module into our package.json file. In case you've never heard of it, let's just say that it happens to be a standard JavaScript library providing a great set of polyfills for ES6, which is precisely what we need.
Note
If you would like to know more about the core-js, here's the URL to the project's official GitHub repository:
https://github.com/zloirock/core-js.
The only problem is that it doesn't come with a proper TypeScript definition file, meaning that both of our TypeScript compilers, either Visual Studio's or Gulp's, won't be aware of its existence, thus throwing a fair amount of TS2304 (type not found) exceptions upon each build attempt.
The best thing we can do in order to fix that is to add the proper type definitions to our project. To do that, open the package.json file again and add the following (new lines are highlighted):
{
  "version": "1.0.0",
  "name": "opengamelistwebapp",
  "private": true,
  "dependencies": {
    "@angular/common": "2.0.0-rc.5",
    "@angular/compiler": "2.0.0-rc.5",
    "@angular/core": "2.0.0-rc.5",
    "@angular/http": "2.0.0-rc.5",
    "@angular/platform-browser": "2.0.0-rc.5",
    "@angular/platform-browser-dynamic": "2.0.0-rc.5",
    "@angular/upgrade": "2.0.0-rc.5",

    "core-js": "^2.4.1",
    "reflect-metadata": "^0.1.8",
    "rxjs": "5.0.0-beta.6",
    "systemjs": "^0.19.37",
    "typings": "^1.3.2",
    "zone.js": "^0.6.12"
  },
  "devDependencies": {
    "gulp": "^3.9.1",
    "gulp-concat": "^2.6.0",
    "gulp-sourcemaps": "^1.6.0",
    "gulp-typescript": "^2.13.6",
    "gulp-uglify": "^2.0.0",
    "typescript": "^1.8.10"
  },
  "scripts": {

    "postinstall": "typings install dt~core-js --global"

  }
}
We can see that there are two new things here:
A new NPM package called
typings, which is a TypeScript type definition manager. In other words, a tool we can use to retrieve type definitions from the web.A whole new
scriptkey containing a small command that will be executed during the post-install phase. This basically means that the script will trigger every time we change something within thepackage.jsonfile, right after all the NPM modules are retrieved and installed (or removed).
As soon as we Save our package.json file, a new typings folder will be added to our OpenGameListWebApp project's root, containing the type definition file we need.
Tip
If typings didn't install successfully during the Save, try to use the Restore Package option by right-clicking on the project's Dependencies node. Another way is to use the command line to install the typings explicitly. To do this, navigate to the root folder of your app and press CTRL+SHIFT, then select Open command window here. In the command line, type the following command: > npm run typings install That should do the trick.
At the time of writing, adding Angular 2 via NPM would produce the following TypeScript compilation error:
Invalid module name in augmentation, module '../../Observable' cannot be found.
This is due to a known bug in the TypeScript version currently shipped with Visual Studio 2015. The most effective way to fix that is to replace this local VS2015 file:
C:\Program Files (x86)\Microsoft Visual Studio 14.0\Common7\IDE\CommonExtensions
\Microsoft\TypeScript\typescriptServices.js
.
With the following remote file:
https://raw.githubusercontent.com/Microsoft/TypeScript/Fix8518/lib/typescriptServices.js.
Doing that will also fix a couple more errors we will most likely get in Chapter 3, Angular 2 Components and Client-Side Routing. Needless to say, it's highly advisable to make a backup of the original file before replacing it.
Additional information regarding the bug is available through the following URLs: https://github.com/Microsoft/TypeScript/issues/8518 and https://github.com/Microsoft/TypeScript/pull/7507.
It's time to lay down the first bricks of our app, a working skeleton, used as a starting point for what we're going to do in the next chapters. It will consist of:
An Angular 2 component file:
Scripts/app/app.component.tsAn Angular 2 module file:
Scripts/app/app.module.tsAn Angular 2 bootstrap file:
Scripts/app/main.tsA module loader configuration file:
wwwroot/systemjs.config.jsAn HTML file to wrap everything up:
wwwroot/index.html
The component is the most basic and fundamental concept in Angular 2. Think of it like a class that controls a specific piece of a web page where we can either display some data to each user and/or respond to their feedbacks. We can say that our Angular 2 app will be almost entirely built upon multiple Components serving specific purposes-most of them will be reusable, others will be only used once. They can also either be as small as a few lines or they can result in a ridiculously long piece of code.
Luckily, our first component is quite simple. In the Solution Explorer, right-click on the /Scripts/app/ folder and add a new app.component.ts file:
Once created, feed it with the following code:
import {Component} from "@angular/core";

@Component({
    selector: "opengamelist",
    template: `<h1>OpenGameList</h1><div>Work in progress...</div>`
})

export class AppComponent { }
That's it. Let's see what we just did here in detail:
In line 1, we're importing the Component function from the Angular 2 main library, which is
@angular/core. The Component function is what we need to define a Component's metadata for a class, which basically means being able to make Components, this is a required step for what we'll do next.In line 3-6, we're creating our first Component by applying the Component function to the class. In TypeScript, we do that by prefixing it with the
@symbol and invoking it just above the component class. In other words, the@Componentinstruction tells Angular that this class is an Angular component. Notice that theselectorandtemplatefields are passed as a configuration object, as we will analyze them soon enough.In line 8, we're defining the
AppComponentclass. Notice theexportkeyword, which will allow us toimportit from other components. The act of exporting makes ourapp.component.jsfile a module.
Angular 2 is a modular framework: this means that Angular 2 apps are also modular, as they consist of many files dedicated to a specific purpose. Typically, most application files export a single Componentclass, which is a class bundled with component metadata. Our app.component.js file, for example, exports the AppComponent class decorated with its component metadata, thus being a Module file exporting a Component class. We could also say that the Component is the content, while the Module is the file itself. We'll see how to import Components in the next chapter.
Angular Modules, also known as NgModules, have been introduced in Angular 2 RC5, which is the latest version at the time of writing, and are a great and powerful way to organize and bootstrap any Angular 2 application. They help developers to consolidate their own set of components, directives, and pipes into reusable blocks.
Note
If you've already played with previous versions of Angular 2, you will find the following URL useful to understand the transition by checking out the following URL:
Every Angular 2 application since RC5 must have at least one module, which is conventionally called the root module and given the AppModule class name.
From the Solution Explorer, right-click on the /Scripts/app/ folder, add a new app.module.ts file, and fill it with the following code:
///<reference path="../../typings/index.d.ts"/>
import {NgModule} from "@angular/core";
import {BrowserModule} from "@angular/platform-browser";
import {HttpModule} from "@angular/http";
import "rxjs/Rx";

import {AppComponent} from "./app.component";

@NgModule({
    // directives, components, and pipes
    declarations: [
        AppComponent
    ],
    // modules
    imports: [
        BrowserModule,
        HttpModule
    ],
    // providers
    providers: [
    ],
    bootstrap: [
        AppComponent
    ]
})
export class AppModule { }
Again, let's take a look at what we just wrote:
In line 1, we added a reference to the type definitions we fetched during the previous section to ensure our TypeScript compiler(s) could find it. Notice that, if we're using a CDN or a pre-compiled version of Angular 2, we could (and should) definitely remove this line.
In lines 2-4, we import the basic Angular 2 modules that we will need right from the start.
In line 5, we import the
rxjslibrary definition file(s), which will be useful to compile the Angular 2 libraries.In line 7, right after the first empty line, we import the application root component that we just wrote.
In line 9, we declare our root
NgModule. As we can see it consists in an array of named arrays, each one containing a set of Angular 2 objects that serves a common purpose: directives, components, pipes, modules, and providers. The last one of them contains the component(s) we want to bootstrap, which in our case is theAppComponentone.
Working with the root module only is a very viable approach until the Angular 2 app grows to a certain size. When it becomes bigger, it will be more practical to refactor it into a number of feature modules, each one of them grouping together a set of related tasks.
Now that we have our root module, we need to bootstrap it. From the Solution Explorer, right-click on the /Scripts/app/ folder and add a new main.ts file, then fill it with the following code:
import {platformBrowserDynamic} from "@angular/platform-browser-dynamic";
import {AppModule} from "./app.module";

platformBrowserDynamic().bootstrapModule(AppModule);
Now we're just missing an entry point to load with the browser. Let's add it right now.
In this application, we're going to use the SystemJS module loader library to load our application and all the required Angular 2 modules and dependencies. In order to do that, we have to add a systemjs.config.js file to the wwwroot folder and define a number of configuration rules within it, as follows:
(function (global) {
    // map tells the System loader where to look for things
    var map = {
        'app': 'app', // our application files
        '@angular': 'js/@angular', // angular2 packages
        'rxjs': 'js/rxjs' // Rxjs package
    };

    // packages tells the System loader which filename and/or extensions to look for by default (when none are specified)
    var packages = {
        'app': { main: 'main.js', defaultExtension: 'js' },
        'rxjs': { defaultExtension: 'js' }
    };

    // configure @angular packages
    var ngPackageNames = [
      'common',
      'compiler',
      'core',
      'http',
      'platform-browser',
      'platform-browser-dynamic',
      'upgrade',
    ];

    function packIndex(pkgName) {
        packages['@angular/' + pkgName] = { main: 'index.js', defaultExtension: 'js' };
    }

    function packUmd(pkgName) {
        packages['@angular/' + pkgName] = { main: '/bundles/' + pkgName + '.umd.js', defaultExtension: 'js' };
    };

    var setPackageConfig = System.packageWithIndex ? packIndex : packUmd;
    ngPackageNames.forEach(setPackageConfig);
    var config = {
        map: map,
        packages: packages
    }
    System.config(config);
})(this);
The code is pretty much self-documented with inline comments, yet it could be useful to highlight the most relevant tasks:
The map variable will host the three dynamic packages we're using SystemJS for, all of them relative to
/wwwroot/:appfor our application;js/@angularfor Angular 2 andjs/rxjsfor Rxjs.The packages variable will set the default filename and/or extension values for each package. These will be used whenever we define an
importstatement without specifying them.The rest of the file is dedicated to dynamically loading the Angular 2 built-in packages.
If we want to use a CDN instead of relying upon the local JS folder, we only need to perform a minor update within the previous code, in the map section, as follows:
    var map = {
        'app': 'app', // our application files
        '@angular': 'js/@angular', // angular2 packages
        'rxjs': 'https://npmcdn.com/rxjs@5.0.0-beta.6' // Rxjs package (CDN)
    };
And also within the two module loader functions:
    function packIndex(pkgName) {
        packages['https://npmcdn.com/' + pkgName] = { main: 'index.js', defaultExtension: 'js' };
    }
    function packUmd(pkgName) {
        packages['https://npmcdn.com/' + pkgName] = { main: '/bundles/' + pkgName + '.umd.js', defaultExtension: 'js' };
    };
Note
For further info regarding SystemJS and its Configuration API, including advanced options, we strongly suggest reading the official documentation on the project's GitHub page:
https://github.com/systemjs/systemjs and https://github.com/systemjs/systemjs/blob/master/docs/config-api.md.
Before going further, it might be useful to explain why we worked so hard with a module loader instead of adding all the relevant JS files into the index.html file right from the start.
To keep it simple, we did it because it's the only way to efficiently handle any modern JavaScript modular system such as Angular 2, Rxjs and also all applications based upon them, including the one we're working on right now.
What's a modular system exactly? It's nothing more than a package, library, or application split into a series of smaller files which depend on each other using reference statements such as import, require, and so on. ASP.NET, Java, Python, and most compilation-based languages have it. That's not the case with script-based languages such as PHP and JavaScript: they that are doomed to pre-load everything in the memory before being able to determine whether they'll be using it or not. All of these changes, with the introduction of ECMAScript 6 (ES6), bring a fully-featured module and dependency management solution for JavaScript. SystemJS basically acts as an ES6-polyfill for browsers that don't support it already, allowing us to get that module system working in modern browsers. Since both Angular 2 and Rxjs leverage that dynamic-loading approach, implementing it within our project will result in a huge performance gain.
The HTML file serves two main purposes: being an entry point for the browser so it can load the client-script files and execute the application, and laying out the DOM structure used by Angular 2 to display it. In the Solution Explorer, right-click on the wwwroot folder and add a new index.html file, then fill it with the following code:
<!DOCTYPE html>
<html>
<head>
    <base href="/">
    <title>OpenGameList</title>
    <meta name="viewport" content="width=device-width, initial-scale=1">

    <!-- Step 1. Load libraries -->
    <!-- Polyfill(s) for older browsers -->
    <script src="js/shim.min.js"></script>
    <script src="js/zone.js"></script>
    <script src="js/Reflect.js"></script>
    <script src="js/system.src.js"></script>

    <!-- Step 2. Configure SystemJS -->
    <script src="systemjs.config.js"></script>
    <script>
      System.import('app').catch(function(err){ console.error(err); });
    </script>
</head>

<!-- Step 3. Display the application -->
<body>
    <!-- Application PlaceHolder -->
    <opengamelist>Loading...</opengamelist>
</body>
</html>
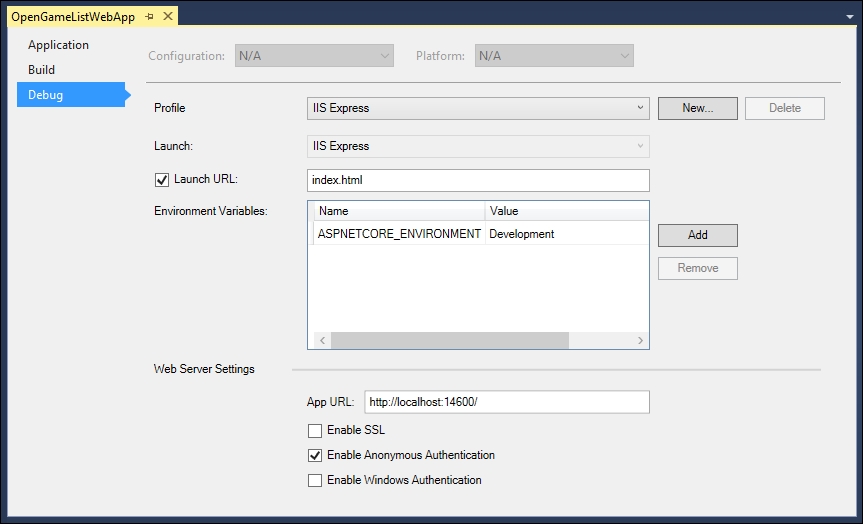
After adding the index.html file, we need to set it as the main entry point when executing our app in the Debug mode. In the Solution Explorer, right-click on the project node and select Properties, then switch to the Debug tab and change the Launch URL parameter accordingly.
Note
While we're here, we might also take the chance to set the HTTP port that will be used by the local web server during development by changing the numeric part of the App URL textbox value. As we can see in the preceding screenshot, we're going to use 14600 throughout the whole book.
If we want to use a CDN instead of local JS files, we can replace the <script> elements right below the Step 1 comment with the following:
    <script src="https://cdnjs.cloudflare.com/ajax/libs/core-js/2.4.1/shim.min.js"></script>
    <script src="https://npmcdn.com/zone.js@0.6.12"></script>
    <script src="https://npmcdn.com/reflect-metadata@0.1.3"></script>
    <script src="https://cdnjs.cloudflare.com/ajax/ libs/systemjs/0.19.37/system.js"></script>
These are the latest versions at the time of writing. Be sure to replace them with the most recent Angular 2-compatible versions.
Now that we've set everything up, it's time to take a look at where we're doing. The first thing we should do is to turn our task runner on:
Expand the root node, right-click to the default task, and hit Run.
From the Solution Explorer, right-click on your
gulpfile.jsfile and select Task Runner Explorer.If you did everything correctly, the Task Runner will silently execute its tasks, keeping the one named
watchactive in background.
Right after that we can hit F5 (or left-click the Start Debugging button) and test our still rather minimalistic, yet fully functional, home screen.

If things are working as they should, we will see something very close to the preceding image. That's pretty good. Before going further, let's check if our task runner and its plugins are also working as they should.
Back in Visual Studio, open the /Scripts/app/app.component.ts file and change the <div> content with the highlighted text as follows:
import {Component} from "@angular/core";

@Component({
    selector: "opengamelist",
    template: `<h1>OpenGameList</h1><div>...the best is yet to come!</div>`
})

export class AppComponent { }
After you're done, hit CTRL + S or Save, then move back to the browser and issue a page refresh by hitting F5 to see if the task runner did its job. If it did, you should see something like the following:

So far so good, we have just set up a working skeleton of what's about to come.
If you're not seeing this, and the page is still showing the Work in progress..., phrase, chances are that you have caching issues. This is quite a common issue, since our client code relies upon static files (such as index.html) which are served by default with a set of cache-control HTTP headers to ensure a proper client-side cache. This is usually great for production, but it can be quite annoying while our app is in the development stage. If we want to fix it, we need to change the default caching behavior for static files.
If we were developing an ASP.NET 4 web application, we could do that by adding some lines to our main application's web.config file such as the following:
    <caching enabled="false" />
    <staticContent>
      <clientCache cacheControlMode="DisableCache" />
    </staticContent>
    <httpProtocol>
      <customHeaders>
        <add name="Cache-Control" value="no-cache, no-store" />
        <add name="Pragma" value="no-cache" />
        <add name="Expires" value="-1" />
      </customHeaders>
    </httpProtocol>
And that should be it.
However, that's not the case. The new ASP.NET Core's configuration system has been re-architected from scratch and is now quite different from the previous versions. The most important consequence of this is that XML configuration files such as web.config , together with the whole System.Configuration namespace, are not part of the new pattern and shouldn't be used anymore.
The new configuration model is based upon key/value settings that can be retrieved from a wide variety of sources, including, and mostly being, Json files. Once retrieved, they can be accessed within our code in a strongly-typed fashion. We can take a look at the new pattern by watching a couple of lines contained within the Startup class constructor, which is contained in the Startup.cs file (relevant lines are highlighted):
public Startup(IHostingEnvironment env)
{
    var builder = new ConfigurationBuilder()
        .SetBasePath(env.ContentRootPath)
        .AddJsonFile("appsettings.json", optional: true, reloadOnChange: true)

        .AddJsonFile($"appsettings.{env.EnvironmentName}.json", optional: true)
        .AddEnvironmentVariables();
    Configuration = builder.Build();
}
And also the appsettings.json file they refer to:
{
  "Logging": {
    "IncludeScopes": false,
    "LogLevel": {
      "Default": "Debug",
      "System": "Information",
      "Microsoft": "Information"
    }
  }
}
Now that we understand the basics, let's see how we can solve that caching issue by taking advantage of the new configuration model.
The first thing to do is to understand how we can modify the default HTTP headers for static files. As a matter of fact, we can do that by adding a custom set of options to the app.UseDefaultFiles() method we added to the Startup class earlier. In order to do that, open the Startup.cs and change that part of code in the following way (new/modified lines are highlighted):
// Configure a rewrite rule to auto-lookup for standard default files such as index.html.
app.UseDefaultFiles();

// Serve static files (html, css, js, images & more). See also the following URL:
// https://docs.asp.net/en/latest/fundamentals/static-files.html for further reference.
app.UseStaticFiles(new StaticFileOptions()
{

    OnPrepareResponse = (context) =>

    {

        // Disable caching for all static files.

        context.Context.Response.Headers["Cache-Control"] = "no-cache, no-store";

        context.Context.Response.Headers["Pragma"] = "no-cache";

        context.Context.Response.Headers["Expires"] = "-1";

    }
});
That wasn't hard at all. However, we're not done yet, now that we've learned how to change the default behavior, we just need to change these static values with some convenient references pointing to the appsettings.json file.
To do that, we can add the following key/value section to the appsettings.json file in the following way (new lines are highlighted):
{
  "Logging": {
    "IncludeScopes": false,
    "LogLevel": {
      "Default": "Debug",
      "System": "Information",
      "Microsoft": "Information"
    }
  },

  "StaticFiles": {

    "Headers": {

      "Cache-Control": "no-cache, no-store",

      "Pragma": "no-cache",

      "Expires": "-1"

    }

  }
}
And then change the preceding Startup.cs code accordingly (modified lines are highlighted):
// Configure a rewrite rule to auto-lookup for standard default files such as index.html.
app.UseDefaultFiles();

// Serve static files (html, css, js, images & more). See also the following URL:
// https://docs.asp.net/en/latest/fundamentals/static-files.html for further reference.
app.UseStaticFiles(new StaticFileOptions()
{

    OnPrepareResponse = (context) =>

    {

        // Disable caching for all static files.

        context.Context.Response.Headers["Cache-Control"] =
        Configuration["StaticFiles:Headers:Cache-Control"];

        context.Context.Response.Headers["Pragma"] =
        Configuration["StaticFiles:Headers:Pragma"];

        context.Context.Response.Headers["Expires"] =
        Configuration["StaticFiles:Headers:Expires"];

    }
});
That's about it. Learning how to use this pattern is strongly advisable, as it's a great and effective way to properly configure our application's settings.
In the latest few paragraphs, we basically built our very own server-side and client-side environment by configuring everything manually. Truth be told, what we just did is neither the quickest nor the most effective way to start a project involving a client-side framework such as Angular 2, as a matter of fact, we could achieve the same results in a fraction of the time we just spent by using the ASP.NET Core project scaffolding tools such as Yeoman, which are available through NPM, together with a proper generator template such as aspnetcore-spa.
Not only will these tools generate a fully-functional ASP.NET Core and Angular 2 boilerplate, much like the one we just made, they'll also take care of a number of issues beforehand that we would otherwise have to manually set up later. These include server-side pre-rendering, efficient cache management, optimized production builds, and much more. On top of that, they can be easily enhanced with other helper packages such as WebPack and JavaScriptServices, a great set of tools and middlewares for building SPA projects with ASP.NET Core and Angular 2.
All of this sounds so exciting that we may well ask ourselves why in the world didn't we go for that?
The reason is simple, what we just made, together with a lot of things we'll assemble during the course of the following chapters, is also part of our learning process. In other words, this is why we're reading this book instead of just copying some working samples from a bunch of web pages, or GitHub projects, and putting them together. This doesn't mean we don't have to use Yeoman, as a matter of fact, we will be using it, together with a lot of other great tools that will speed up our development and help us to write better code. Eventually, just not on our first run, that's for sure. We don't want our journey to be spoiled, do we?
However, it's also true that taking a look at these tools, and eventually being able to properly use them, can easily be seen as part of our learning process. If you want to do that, you need to have Node.js installed, unless you prefer to use what's bundled with Visual Studio 2015.
Open a command prompt with administrative rights and navigate through theNode.js installation folder. If you're using the one shipped with VS2015 it should be something like the following:
C:\Program Files (x86)\Microsoft Visual Studio 14.0\Web\External.
If you went for a new install, it should be the following (for x64 architectures):
C:\Program Files\Nodejs.
Once there, type the following command and execute it to update NPM to the latest version:
npm install npm -g
Then type and execute the following to install Yeoman together with the aspnetcore-spa generator:
npm install -g yo generator-aspnetcore-spa
Finally, type and execute the following commands to create your application's entry point:
cd C:\Projects\Your-SPA-folder\
yo aspnetcore-spa
That's about it. For further reference regarding how to use Yeoman, it's strongly advisable to take a look at the official documentation at the following URL: http://yeoman.io/learning/.
If you're bold enough to also install WebPack and JavaScriptServices, you should definitely read the ASP.NET Core JavaScript Services official documentation, written by Steve Sanderson, who is the author of the JavaScriptServices project and the KnockoutJs library, as well as being a Microsoft employee: https://github.com/aspnet/JavaScriptServices#javascriptservices.
Note
Before moving forward, it's very important to understand the fact that we will not cover these packages throughout the book. We will take it for granted that we don't have these features available, so we will often spend some time designing and building our own implementation. That's why we don't suggest that you do that during the first reading.
So far, so good, we have just set up a working skeleton of what's about to come. Before moving further, let's quickly recap what we just did in this first chapter.
We briefly described our platforms of choice, ASP.NET Core and Angular 2, and acknowledged their combined potential in the process of building a modern web application. Then we chose a NWA with a single-page application approach as the ideal field of choice for testing what our frameworks are able to do (and how to do it).
In an attempt to reproduce a realistic production-case scenario, we also went through the most common SPA features: first from a technical point of view, then by putting us in the shoes of a typical product owner and trying to enumerate his expectations. We also made a quick list of everything we need to put together a potentially shippable product featuring all the expected goodies.
Eventually, we spent an appropriate amount of time setting up our development environment. This included installing package managers, choosing a suitable client-side framework, introducing task runners and configuring both ASP.NET Core and Angular 2.
Finally, we performed a quick test to see that all the bricks we'd lain were in place and ready to hold their ground against what's coming next, setting up a request-response cycle, building our very first controller, defining efficient routing strategies, and more.

