


Let's get you up and running with Storyline! This chapter provides all you need to know about getting started with your e-learning project.
In this chapter, we will discuss the following topics:
Introducing Articulate Storyline 2
Getting started with Articulate Storyline
Navigating the Storyline interface
Adding new scenes and slides
Working from templates
Importing content
Saving your story file
Alright! You've installed Articulate Storyline 2, and you are either testing out the trial version or you're interested in using Storyline and want to find out how easy (or hard) it's going to be. Don't fear; I'll make things super easy for you! I can assure you that Storyline is a powerful tool that will likely address all of your e-learning development needs.
So, what is Storyline? Storyline is an authoring tool that allows you to challenge your creativity to produce high-quality, interactive e-learning in a very easy manner! With a user-friendly interface and an incredibly active online community, you can create just about anything your imagination drums up (or reach out to the community if you run into a Storyline situation you're not quite sure how to handle). Having worked with many other authoring tools, I can confidently say that Articulate Storyline is one of my favorite products to author e-learning projects, largely because it is the easiest and most efficient tool I've used, so I think it will quickly become your favorite tool too!
There are some primary differences between Storyline 1 and Storyline 2, which are mentioned here:
New, flat interface
Enhanced text editing
Dockable panels
Toggling between slide and form views
Autorecovery
Slider interactions
Animation painter
Motion paths
Question importing
If you've been working in Storyline 1, you should definitely check out Storyline 2 by downloading the trial version; you can run both programs independently, so you don't need to choose between one or the other. The trial will put you in the driver's seat and allow you enough time (30 days) to try out the new features, in an effort to help you determine whether Storyline 2 is right for you!
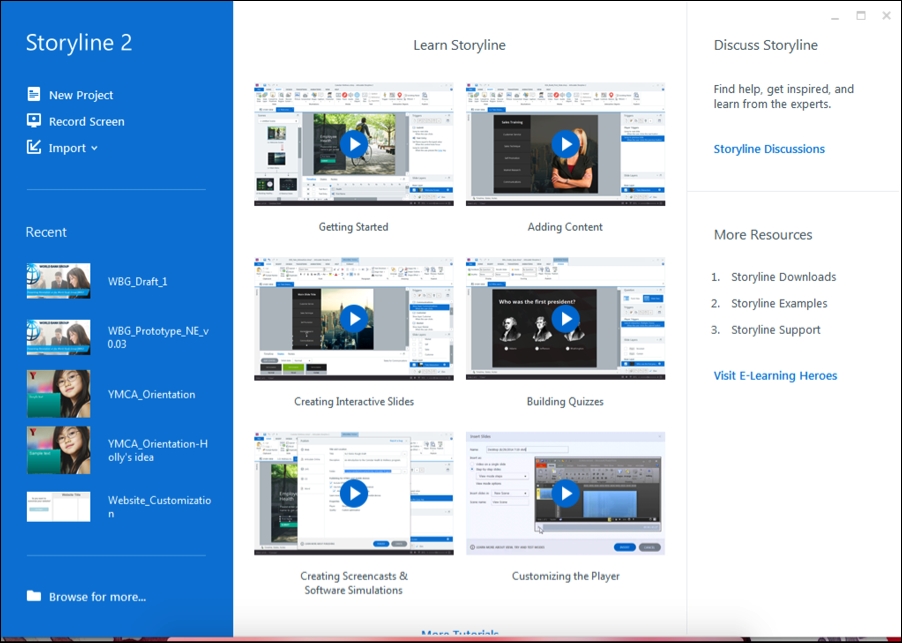
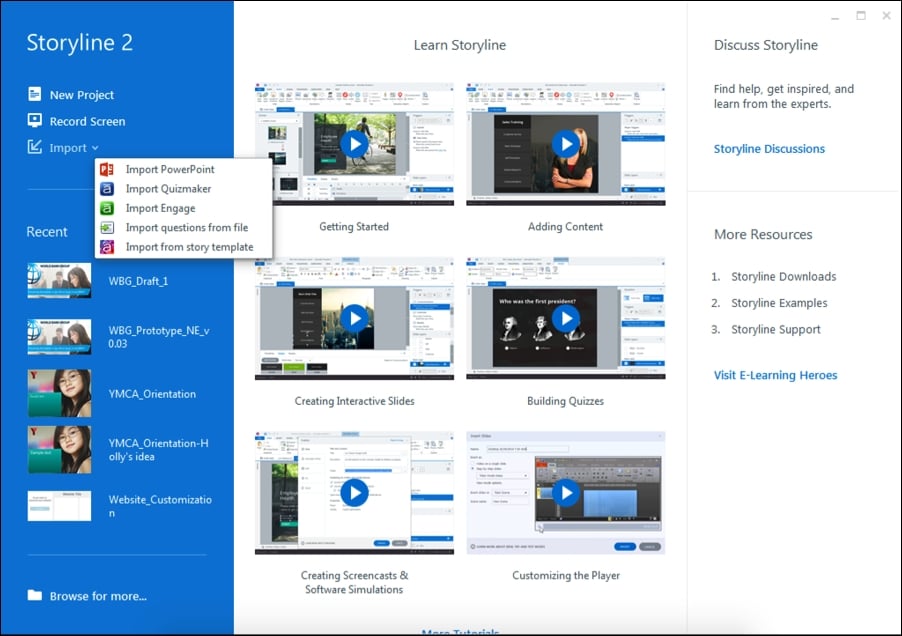
Whenever you open Storyline 2, you're presented with a start screen. This screen provides you with access to tutorials and downloads, in addition to providing options to create new projects and open recent projects.
Note
When you're feeling stumped on the way ahead for your project, keep the tutorials and free download options on the start screen in mind; they will likely provide a solution or help you along by providing inspiration. The start screens for both Storyline 1 and Storyline 2 include links to helpful tutorials and free templates/graphics that can be used by course developers.
The following screenshot shows the start screen:
Your options to create a new project include the following:
New Project: This option allows you to start with a blank canvas and autopopulates a starting scene and blank slide.
Record Screen: This option allows you to record screen content and integrate it into a new story.
Import: When you select this option, you will be provided with the following five options:
Import PowerPoint: This option allows you to import content or templates previously developed in Microsoft PowerPoint.
Import Quizmaker: This option allows you to import content previously developed in Articulate Quizmaker.
Import Engage: This option allows you to import content previously developed in Articulate Engage.
Import questions from file: This option is only available in Storyline 2 and allows you to import questions from text files (
.txt) or Microsoft Excel. Importing questions from files will be discussed in Chapter 6, Testing Your Learners.Import from Storyline template: This option allows you to import a previously developed Storyline project template (
.storytemplate). You can also use this option to import Storyline content saved with a.storyextension.
Note
To import Articulate Engage or Articulate Storyline content in Storyline 1, you will need to select File (the Articulate logo), Import, and either the Engage option or Storyline icon, depending on the content you wish to import.
Storyline gives you tons of options to start your project, so determine the best option for your needs and make your selection to get started!
Story View is one of my favorite features of Storyline. It provides an overall view of your project, making it extremely easy to organize your scenes and slides, and I like to use it to chunk my project in a logical manner. Alternatively, Story View can be a great way to create a visual guide for your project template, allowing your colleagues or clients to see what each screen style will look like—it is great for prototyping!
Story View also allows you to easily see the flow of your project by illustrating triggers (using lines and arrows), which, when hovered over, will reveal the assigned trigger or path. From Story View, you can easily see which slides or scenes are branching to other slides or scenes, and it helps streamline the overall development by taking the guesswork out of structuring your course.
Note
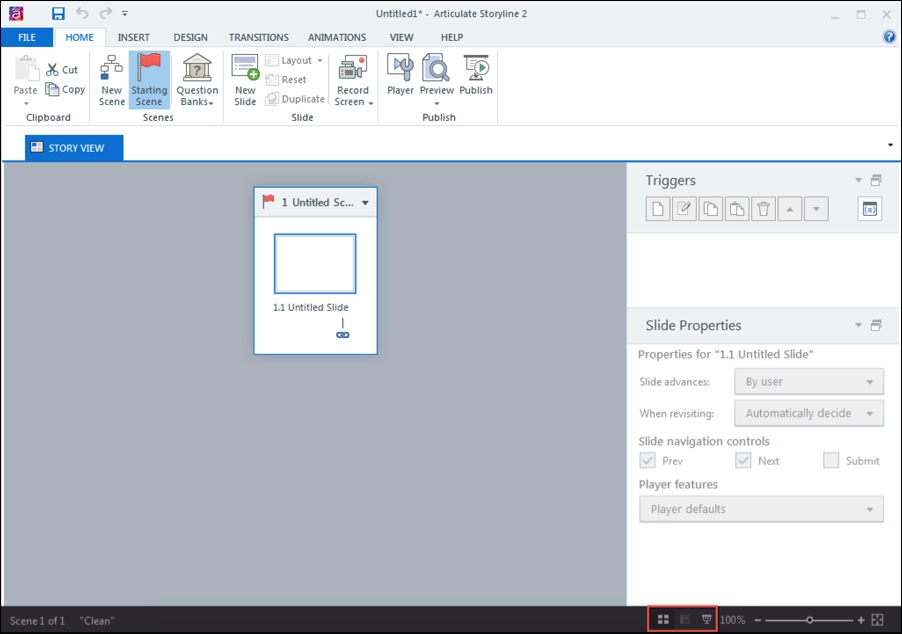
The easiest way to switch to Slide View is to double-click on a slide; however, you can also select the Slide View button. In Storyline 2, you can quickly toggle back to Story View by selecting the Story View tab when you are in Slide View.
The following screenshot shows the buttons to toggle between different views:
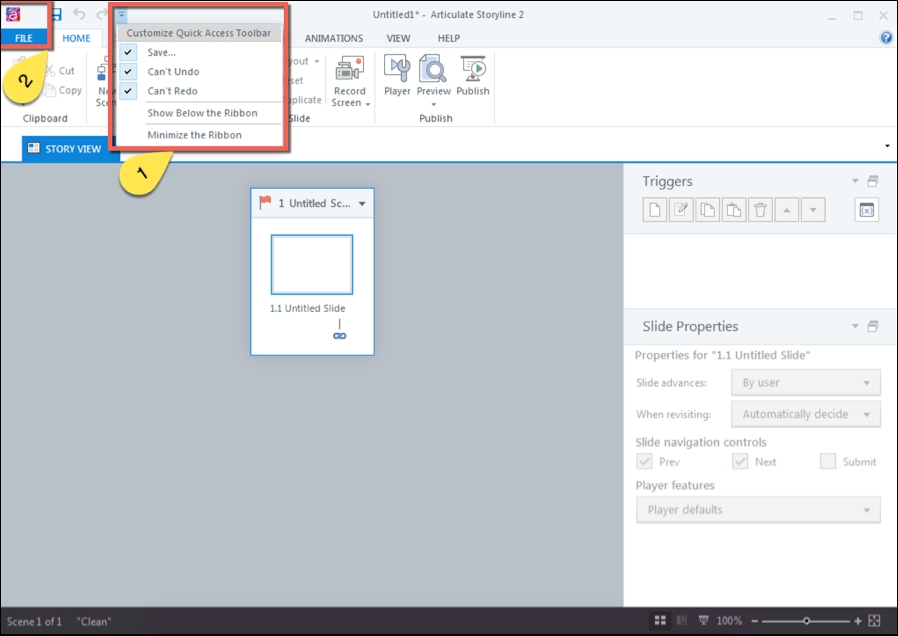
The Storyline interface predominantly uses ribbons and tabs to access various functions, similar to PowerPoint. Each tab opens up a ribbon that contains the options within that tab. You also have a quick access toolbar (1) and a File button (2), which is indicated by the Articulate logo:
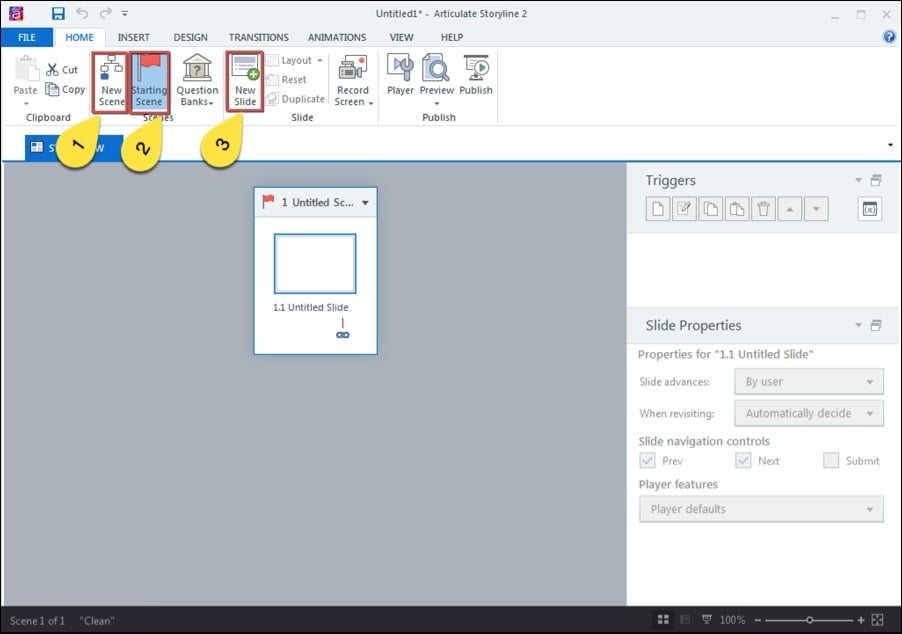
Adding new scenes and slides is very easy. To add a new scene, select the New Scene (1) icon from the Home tab.
Note
When adding a new scene, consider whether you need to move your starting scene (the first scene that will display in your course). To do this, select the scene that you want as the starting scene and select the Starting Scene (2) icon from the Home tab.
To add a new slide, simply select the New Slide (3) icon from the Home tab in either Story or Slide View. When in Story View, make sure you first select the scene in which you want to add the new slide.
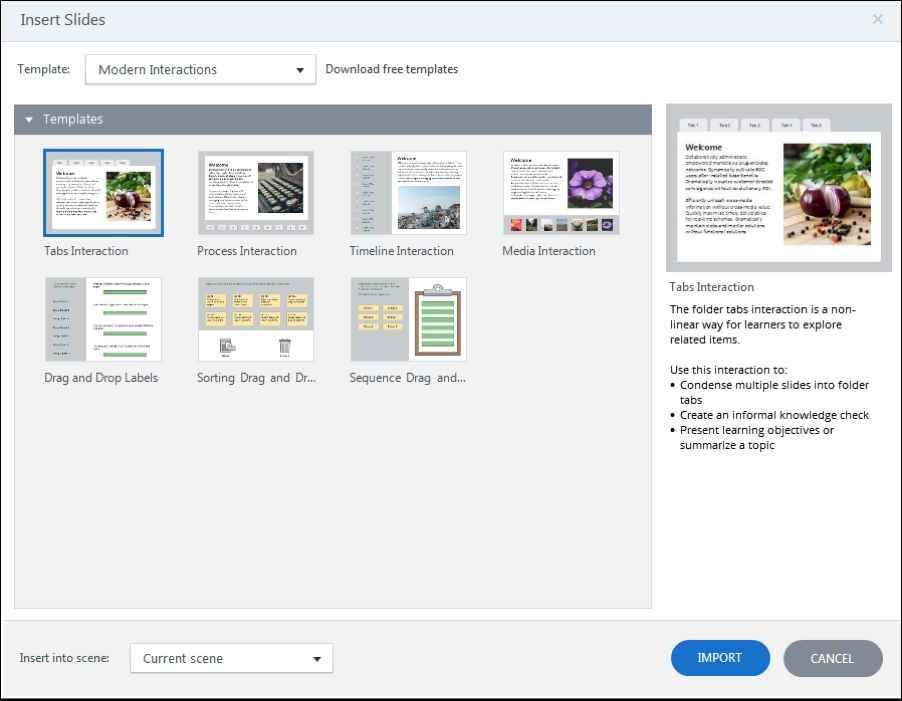
Now, I'm probably not going to be the first to tell you that if there's a way of making your life easier, occasionally, you should take the opportunity presented. Templates are one of those opportunities! Templates can make your day that much better when you're working on a large project that needs a little streamlining. The built-in templates within Storyline can also be a great starting point for inspiration; they're easily modifiable, and with all of the free downloads kicking around, you can really leverage your project design with minimal effort.
There are a few ways you can work from a Storyline template; they are as follows:

On the start screen, there are five options to import content: Import PowerPoint, Import Quizmaker, Import Engage, Import from story template, and Import questions from file.
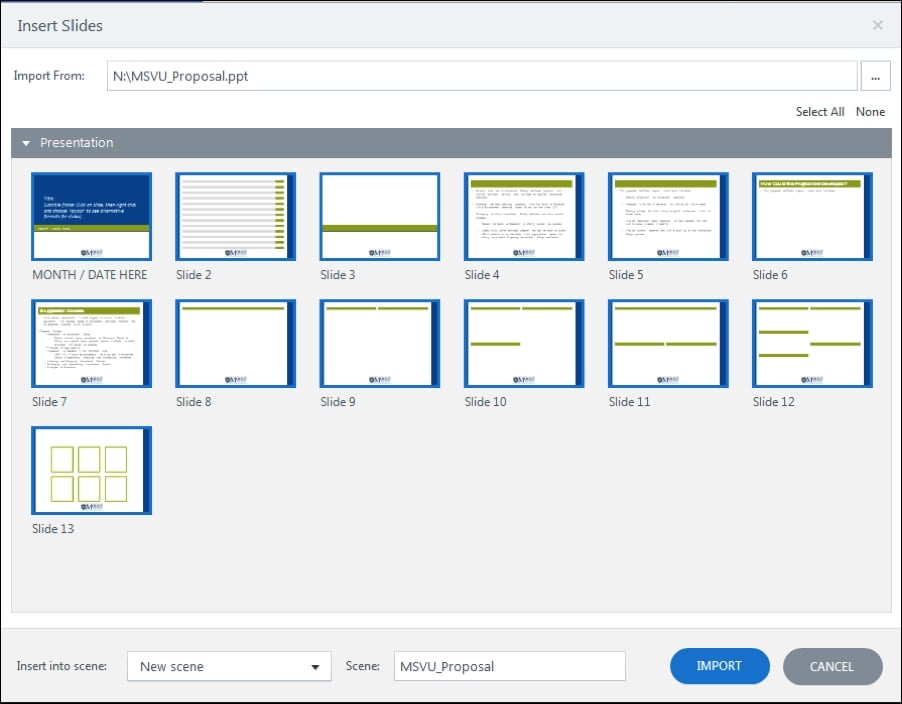
To import content from PowerPoint, select Import PowerPoint, browse for the PowerPoint file you wish to import, and select Import. You will be presented with a series of slides (those contained within the selected PowerPoint file), and you can either import all of them or select those you wish to import. From the drop-down menu, choose which scene you want to import the slides to and then select the IMPORT button. All the selected PowerPoint slides will then be imported into the scene you specified.
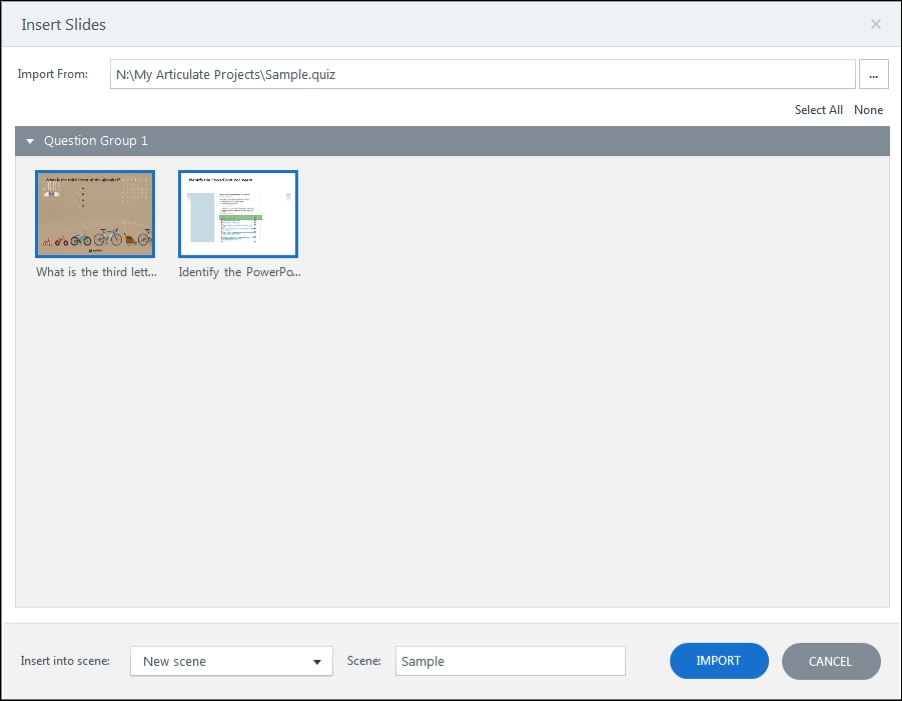
To import content from Quizmaker, select Import Quizmaker, browse for the .quiz file you wish to import, and select Import. You will be presented with a series of slides (those contained within the selected Quizmaker file), and you can either import all or select those you wish to import. From the drop-down menu, choose which scene you want to import the slides to and then select the IMPORT button. All the selected Quizmaker slides will then be imported into the scene you specified.
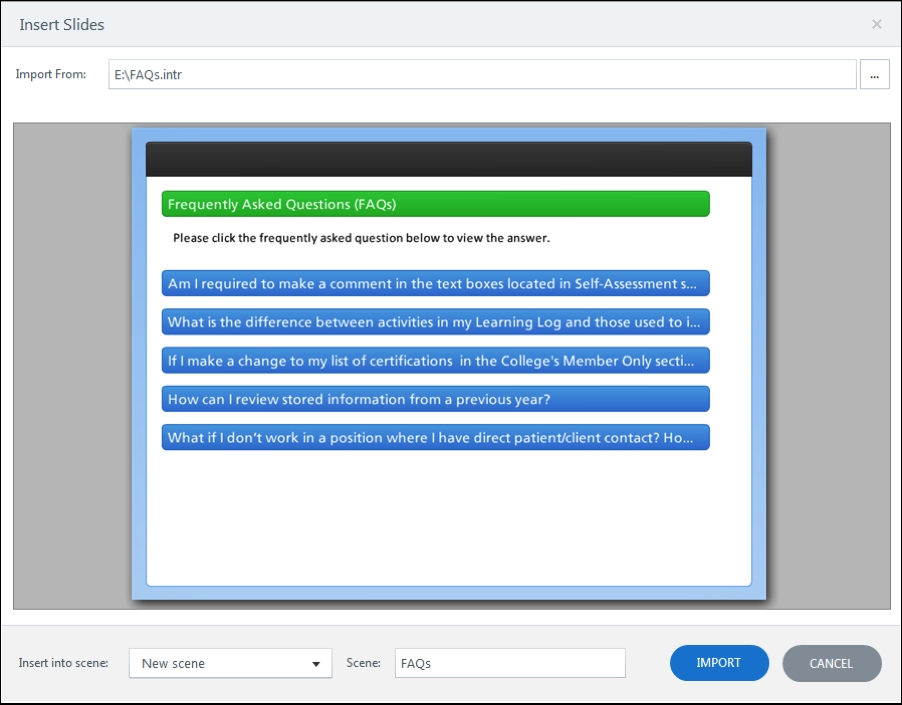
To import content from Storyline, select Import from story template, browse for the story file you wish to import, and select Import. You will be presented with a series of slides (those contained within the selected Storyline file), and you can either import all or select those you wish to import. From the drop-down menu, choose which scene you want to import the slides to, and then select the IMPORT button. All selected Storyline slides will then be imported into the scene you specified.
To import content from Articulate Engage, select Import Engage, browse for the Engage file you wish to import, and select Import. You will be presented with the Engage interactions contained within the Engage file, and you can either import all of them or select those you wish to import. From the drop-down menu, choose which scene you want to import the slides to and then select the IMPORT button. All the selected Engage interactions will then be imported into the scene you specified.
Saving your story is a critical factor—trust me, you don't want to spend hours (or days) on a project without saving it, only to have Storyline crash when you're publishing…or sooner. Storyline 2 has an autosave feature; however, Storyline 1 does not, and you really don't want to be nearing the end of a critical deadline having to replicate the last 30 hours of work. We've all been there, and it's an awful feeling.
The moral of this story is save your story, and save it often!
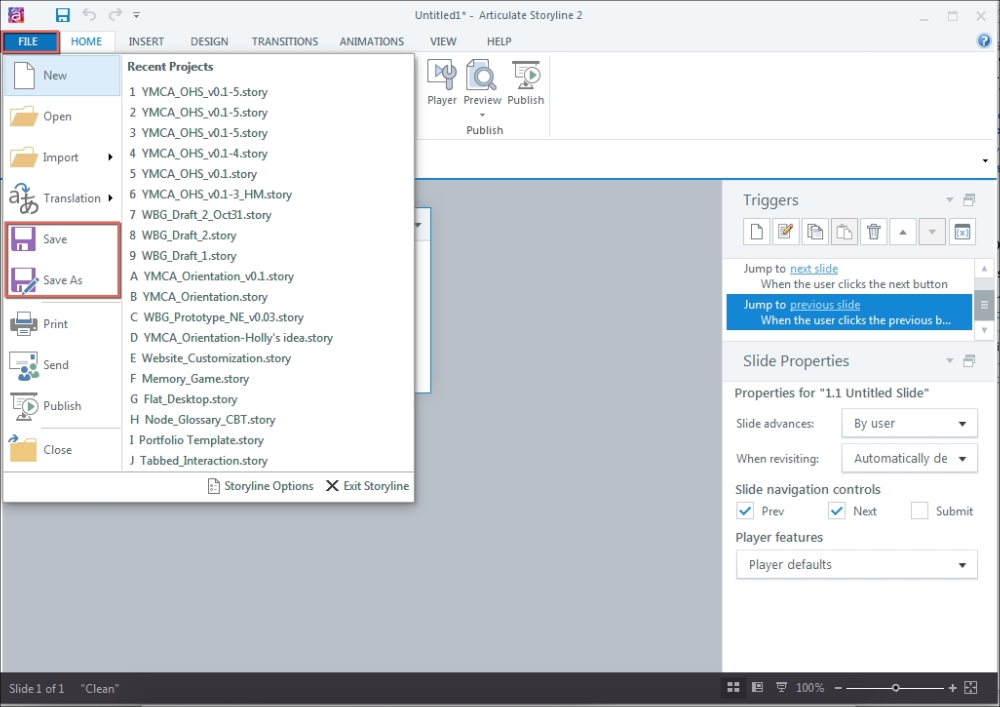
To save your story, you can use the keyboard shortcut Ctrl + S, or you can navigate to the File tab and select either Save or Save As:
This chapter introduced you to Articulate Storyline 2, some of the main differences between Storyline 1 and Storyline 2, and some key concepts to get started with a new project in Storyline. You should now be able to easily create a new project using blank scenes and slides; create a project from a template; or import content from PowerPoint, Articulate Engage, or Articulate Quizmaker to create a new project.
Now that you have the basics out of the way, you should be ready to get started and let your storytelling abilities grow! In the next chapter, I will show you how to use content to tell your story. You'll discover how to add and format text, insert images, and add characters—it might seem basic, but these elements will be critical to effectively telling your story!
