


 Download code from GitHub
In this chapter, we will cover:
- Downloading and installing the JDK
- Downloading and installing IntelliJ
- Downloading and installing Spark
- Configuring IntelliJ to work with Spark and run Spark ML sample codes
- Running a sample ML code from Spark
- Identifying data sources for practical machine learning
- Running your first program using Apache Spark 2.0 with the IntelliJ IDE
- How to add graphics to your Spark program
With the recent advancements in cluster computing coupled with the rise of big data, the field of machine learning has been pushed to the forefront of computing. The need for an interactive platform that enables data science at scale has long been a dream that is now a reality.
The following three areas together have enabled and accelerated interactive data science at scale:
- Apache Spark: A unified technology for data science that combines a fast compute engine and fault-tolerant data structures into a well-designed and integrated offering
- Machine learning: A field of artificial intelligence enables machines to mimic some of the tasks originally reserved exclusively for the human brain
- Scala: A modern JVM-based language that on traditional languages, but unites functional and object-oriented concepts without the verboseness of other languages
First, we need to set up the development environment, which will consist of the following components:
- Spark
- IntelliJ community edition IDE
- Scala
The recipes in this chapter will give you detailed instructions for installing and configuring the IntelliJ IDE, Scala plugin, and Spark. After the development environment is set up, we'll proceed to run one of the Spark ML sample codes to test the setup.
Apache Spark is as the de facto platform and trade for big data analytics and as a complement to the Hadoop paradigm. Spark enables a data scientist to work in the manner that is most conducive to their workflow right out of the box. Spark's approach is to process the workload in a completely distributed manner without the need for MapReduce (MR) or repeated writing of the intermediate results to a disk.
Spark provides an easy-to-use distributed framework in a unified technology stack, which has made it the platform of choice for data science projects, which more often than not require an iterative algorithm that eventually merges toward a solution. These algorithms, due to their inner workings, generate a large amount of intermediate results that need to go from one stage to the next during the intermediate steps. The need for an interactive tool with a robust native distributed machine learning library (MLlib) rules out a disk-based for most of the data science projects.
Spark has a different approach toward cluster computing. It solves the problem as a technology stack rather than as an ecosystem. A large number of centrally managed libraries combined with a lightning-fast compute engine that can support fault-tolerant data structures has poised Spark to take over Hadoop as the preferred big data platform for analytics.
Spark has a modular approach, as depicted in the following diagram:

The aim of learning is to produce machines and devices that can mimic human intelligence and automate some of the tasks that have been traditionally reserved for a human brain. Machine learning algorithms are designed to go through very large data sets in a relatively short time and approximate answers that would have taken a human much longer to process.
The field of machine learning can be classified into many forms and at a high level, it can be classified as supervised and unsupervised learning. Supervised learning algorithms are a class of ML algorithms that use a training set (that is, labeled data) to compute a probabilistic distribution or graphical model that in turn allows them to classify the new data points without further human intervention. Unsupervised learning is a type of machine learning algorithm used to draw inferences from datasets consisting of input data without labeled responses.
Out of the box, Spark offers a rich set of ML algorithms that can be deployed on large datasets without any further coding. The following figure depicts Spark's MLlib as a mind map. Spark's MLlib is designed to take advantage of parallelism while having fault-tolerant distributed data structures. Spark refers to such data structures as Resilient Distributed Datasets or RDDs:

Scala is a modern language that is emerging as an alternative to traditional programming languages such as Java and C++. Scala is a JVM-based language not only offers a concise syntax without the traditional boilerplate code, but also incorporates both object-oriented and programming into an extremely crisp and extraordinarily powerful type-safe language.
Scala takes a flexible and expressive approach, which makes it perfect for interacting with Spark's MLlib. The fact that Spark itself is written in Scala provides a strong evidence that the Scala language is a full-service programming language that can be used to create sophisticated system code with heavy performance needs.
Scala builds on Java's tradition by addressing some of its shortcomings, while avoiding an all-or-nothing approach. Scala code compiles into Java bytecode, which in turn makes it possible to coexist with rich Java libraries interchangeably. The ability to use Java libraries with Scala and vice versa provides continuity and a rich environment for software engineers to build modern and complex machine learning systems without being fully disconnected from the Java tradition and code base.
Scala fully supports a feature-rich functional programming paradigm with standard support for lambda, currying, type interface, immutability, lazy evaluation, and a pattern-matching paradigm reminiscent of Perl without the cryptic syntax. Scala is an excellent match for machine learning programming due to its support for algebra-friendly data types, anonymous functions, covariance, contra-variance, and higher-order functions.
Here's a hello world program in Scala:
object HelloWorld extends App {
   println("Hello World!")
 }
Compiling and running HelloWorld in Scala looks like this:

The Apache Spark Machine Learning Cookbook takes a practical approach by offering a multi-disciplinary view with the developer in mind. This book focuses on the interactions and cohesiveness of machine learning, Apache Spark, and Scala. We also take an extra step and teach you how to set up and run a comprehensive development environment familiar to a developer and provide code snippets that you have to run in an interactive shell without the modern facilities that an IDE provides:

The following table a detailed list of versions and libraries used in this book. If you follow the installation instructions covered in this chapter, it will include most of the items listed here. Any other JAR or library files that may be required for specific recipes are covered via additional installation instructions in the respective recipes:
Core systems | Version |
Spark | 2.0.0 |
Java | 1.8 |
IntelliJ IDEA | 2016.2.4 |
Scala-sdk | 2.11.8 |
Miscellaneous JARs that will be required are as follows:
Miscellaneous JARs | Version |
| 3.0.19 |
| 0.12 |
| 1.5.0 |
| 2.2.0 |
| 1.0.23 |
| 1.0.19 |
| 6.0.0 |
| 6.0.0 |
| 3.3.0 |
| 2.0.0 |
| 2.0.0 |
We have additionally tested all the recipes in this book on Spark 2.1.1 and found that the programs executed as expected. It is recommended for learning purposes you use the software versions and libraries listed in these tables.
To stay current with the rapidly changing Spark landscape and documentation, the API links to the Spark documentation mentioned throughout this book point to the latest version of Spark 2.x.x, but the API references in the recipes are explicitly for Spark 2.0.0.
All the documentation links provided in this book will point to the latest documentation on Spark's website. If you prefer to look for documentation for a specific version of Spark (for example, Spark 2.0.0), look for relevant documentation on the Spark website using the following URL:
https://spark.apache.org/documentation.html
We've made the code as simple as possible for clarity purposes rather than demonstrating the advanced features of Scala.
The first step is to download the development environment that is required Scala/Spark development.
When you are ready to download and the JDK, access the following link:
http://www.oracle.com/technetwork/java/javase/downloads/index.html
IntelliJ Community Edition is a IDE for Java SE, Groovy, Scala, and Kotlin development. To complete setting up your machine learning with the Spark environment, the IntelliJ IDE needs to be installed.
When you are ready to and install IntelliJ, access the following link:
At the time of writing, we are using IntelliJ version 15.x or later (for example, version 2016.2.4) to test the examples in the book, but feel free to download the latest version. Once the installation file is downloaded, double-click on the downloaded file (.exe) and begin to install the IDE. Leave all the installation options at the default settings if you do not want to make any changes. Follow the on-screen instructions to complete the installation:

We proceed to and install Spark.
When you are ready to download and install Spark, access the Apache website at this link:
http://spark.apache.org/downloads.html

We need to run some to ensure that the project settings are correct before being able to run the samples that are provided by Spark or any of the listed this book.
We need to be particularly careful when configuring the project structure and global libraries. After we set everything up, we proceed to run the sample ML code provided by the Spark team to verify the setup. Sample code can be found under the Spark directory or can be obtained by downloading the Spark source code with samples.
The following are the steps for configuring IntelliJ to work with Spark MLlib and for running the sample ML code provided by Spark in the examples directory. The examples directory can be found in your home directory for Spark. Use the Scala samples to proceed:
- Click on the
Project Structure...option, as shown in the following screenshot, to configure project settings:

- Verify the settings:

- Configure
Global Libraries. SelectScala SDKas your global library:

- Select the JARs for the new Scala SDK and let the download complete:

- Select the project name:

- Verify the settings and additional libraries:

- Add dependency JARs. Select modules under the
Project Settingsin the left-hand pane and click on dependencies to choose the required JARs, as shown in the following screenshot:

- Select the JAR files provided by Spark. Choose Spark's default installation directory and then select the
libdirectory:

- We then select the JAR files for examples that are provided for Spark out of the box.

- Add required JARs by verifying that you selected and imported all the JARs listed under
External Librariesin the the left-hand pane:

- Spark 2.0 uses Scala 2.11. Two new streaming JARs, Flume and Kafka, are needed to run the examples, and can be downloaded from the following URLs:
The next step is to download and install the Flume and Kafka JARs. For the purposes of this book, we have used the Maven repo:

- Download and install the Kafka assembly:

- Download and install the Flume assembly:

- After the download is complete, move the downloaded JAR files to the
libdirectory of Spark. We used theCdrive when we installed Spark:

- Open your IDE and verify that all the JARs under the
External Librariesfolder on the left, as shown in the following screenshot, are present in your setup:

- Build the example projects in Spark to verify the setup:

- Verify that the build was successful:

Prior to Spark 2.0, we needed library from called Guava for facilitating I/O and for providing a set of rich methods of defining tables and then letting Spark broadcast them across the cluster. Due to dependency issues that were hard to work around, Spark 2.0 no longer uses the Guava library. Make sure you use the Guava library if you are using Spark versions prior to 2.0 (required in version 1.5.2). The library can be accessed at the following URL:
https://github.com/google/guava/wiki
You may want to use Guava version 15.0, which can be found here:
https://mvnrepository.com/artifact/com.google.guava/guava/15.0
If you are using installation instructions from previous blogs, make sure to exclude the Guava library from the installation set.
If there are other third-party libraries or JARs required for the completion of the Spark installation, you can find those in the following repository:
We can verify the setup by simply the sample code from the source tree and importing it into IntelliJ to make sure it runs.
We will first run the logistic regression code from the samples to verify installation. In the next section, we proceed to write our own version of the same program and examine the output in order to understand how it works.
- Go to the source directory and pick one of the ML sample code files to run. We've selected the logistic regression example.
Note
If you cannot find the source code in your directory, you can always download the Spark source, unzip, and then extract the examples directory accordingly.
- After selecting the example, select
Edit Configurations..., as shown in the following screenshot:

- In the
Configurationstab, define the following options:VM options: The choice shown allows you to run a standalone Spark clusterProgram arguments: What we are supposed to pass into the program

- Run the logistic regression by going to
Run 'LogisticRegressionExample', as shown in the following screenshot:

- Verify the exit code and make sure it is as shown in the following screenshot:

Getting data for machine learning projects a challenge in the past. However, now there is a rich set of public data sources specifically suitable for machine learning.
In addition to the university and government sources, there are many other open sources of data that can be used to learn and code your own examples and projects. We will list the data sources and show you how to best obtain and download data for each chapter.
The following is a list of open source data worth exploring if you would like to develop applications in this field:
- UCI machine learning repository: This is an extensive library with search functionality. At the time of writing, there were more than 350 datasets. You can click on the https://archive.ics.uci.edu/ml/index.html link to see all the datasets or look for a specific set using a simple search (Ctrl + F).
- Kaggle datasets: You need to create an account, but you can download any sets for learning as well as for competing in machine learning competitions. The https://www.kaggle.com/competitions link provides details for exploring and learning more about Kaggle, and the inner workings of machine learning competitions.
- MLdata.org: A public site open to all with a repository of datasets for machine learning enthusiasts.
- Google Trends: You can find statistics on search volume (as a proportion of total search) for any given term since 2004 on http://www.google.com/trends/explore.
- The CIA World Factbook: The https://www.cia.gov/library/publications/the-world-factbook/ link provides information on the history, population, economy, government, infrastructure, and military of 267 countries.
Other sources for learning data:
- SMS spam data: http://www.dt.fee.unicamp.br/~tiago/smsspamcollection/
- Financial dataset from Lending Club https://www.lendingclub.com/info/download-data.action
- Research data from Yahoo http://webscope.sandbox.yahoo.com/index.php
- Amazon AWS public dataset http://aws.amazon.com/public-data-sets/
- Labeled visual data from Image Net http://www.image-net.org
- Census datasets http://www.census.gov
- Compiled YouTube dataset http://netsg.cs.sfu.ca/youtubedata/
- Collected rating data from the MovieLens site http://grouplens.org/datasets/movielens/
- Enron dataset available to the public http://www.cs.cmu.edu/~enron/
- Dataset for the classic book elements of statistical learning http://statweb.stanford.edu/~tibs/ElemStatLearn/data.htmlIMDB
- Movie dataset http://www.imdb.com/interfaces
- Million Song dataset http://labrosa.ee.columbia.edu/millionsong/
- Dataset for speech and audio http://labrosa.ee.columbia.edu/projects/
- Face recognition data http://www.face-rec.org/databases/
- Social science data http://www.icpsr.umich.edu/icpsrweb/ICPSR/studies
- Bulk datasets from Cornell University http://arxiv.org/help/bulk_data_s3
- Project Guttenberg datasets http://www.gutenberg.org/wiki/Gutenberg:Offline_Catalogs
- Datasets from World Bank http://data.worldbank.org
- Lexical database from World Net http://wordnet.princeton.edu
- Collision data from NYPD http://nypd.openscrape.com/#/
- Dataset for congressional row calls and others http://voteview.com/dwnl.htm
- Large graph datasets from Stanford http://snap.stanford.edu/data/index.html
- Rich set of data from datahub https://datahub.io/dataset
- Yelp's academic dataset https://www.yelp.com/academic_dataset
- Source of data from GitHub https://github.com/caesar0301/awesome-public-datasets
- Dataset archives from Reddit https://www.reddit.com/r/datasets/
There are some datasets (for example, text analytics in Spanish, and gene and IMF data) that might be of some interest to you:
- Datasets from Colombia (in Spanish): http://www.datos.gov.co/frm/buscador/frmBuscador.aspx
- Dataset from cancer studies http://www.broadinstitute.org/cgi-bin/cancer/datasets.cgi
- Research data from Pew http://www.pewinternet.org/datasets/
- Data from the state of Illinois/USA https://data.illinois.gov
- Data from freebase.com http://www.freebase.com
- Datasets from the UN and its associated agencies http://data.un.org
- International Monetary Fund datasets http://www.imf.org/external/data.htm
- UK government data https://data.gov.uk
- Open data from Estonia http://pub.stat.ee/px-web.2001/Dialog/statfile1.asp
- Many ML libraries in R containing data that can be exported as CSV https://www.r-project.org
- Gene expression datasets http://www.ncbi.nlm.nih.gov/geo/
The purpose of this is to get you comfortable with compiling and running a recipe using the Spark 2.0 development environment you just set up. We will explore the components and steps in later chapters.
We are going to write our own version of the Spark 2.0.0 program and examine the output so we can understand how it works. To emphasize, this short recipe is only a simple RDD program with Scala sugar syntax to make sure you have set up your environment correctly before starting to work more complicated recipes.
- Start a new project in IntelliJ or in an IDE of your choice. Make sure that the necessary JAR files are included.
- Download the sample code for the book, find the
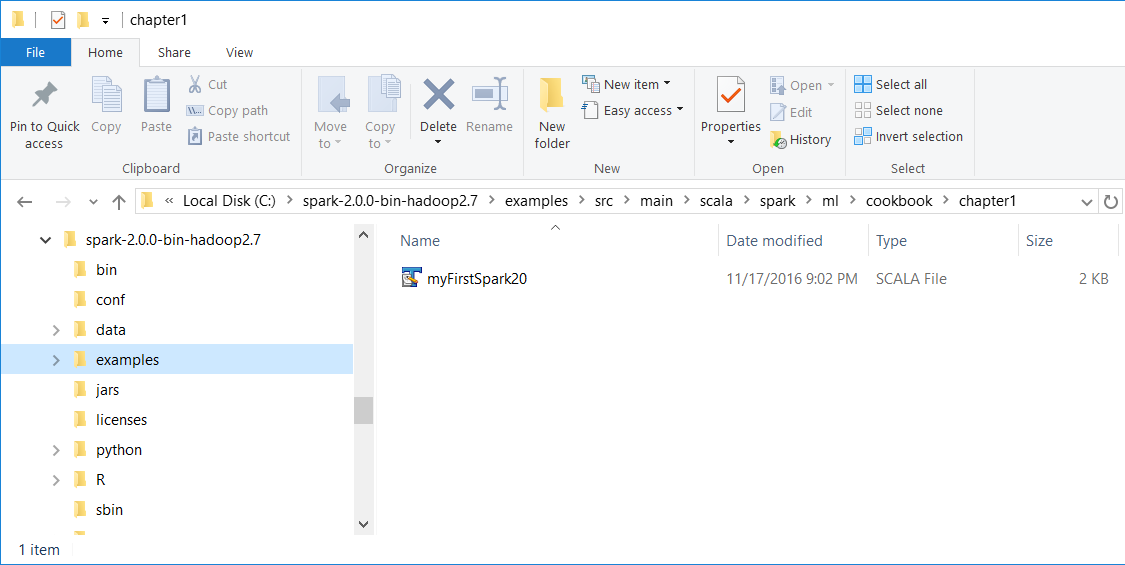
myFirstSpark20.scalafile, and place the code in the following directory.
We installed Spark 2.0 in the C:\spark-2.0.0-bin-hadoop2.7\ directory on a Windows machine.
- Place the
myFirstSpark20.scalafile in theC:\spark-2.0.0-bin-hadoop2.7\examples\src\main\scala\spark\ml\cookbook\chapter1directory:
Mac users note that we installed Spark 2.0 in the /Users/USERNAME/spark/spark-2.0.0-bin-hadoop2.7/ directory on a Mac machine.
Place the myFirstSpark20.scala file in the /Users/USERNAME/spark/spark-2.0.0-bin-hadoop2.7/examples/src/main/scala/spark/ml/cookbook/chapter1 directory.
- Set up the package location where the program will reside:
package spark.ml.cookbook.chapter1
- Import the necessary packages for the Spark session to gain access to the cluster and
log4j.Loggerto reduce the amount of output produced by Spark:
import org.apache.spark.sql.SparkSession
import org.apache.log4j.Logger
import org.apache.log4j.Level
- Set output level to
ERRORto reduce Spark's logging output:
Logger.getLogger("org").setLevel(Level.ERROR) - Initialize a Spark session by specifying configurations with the builder pattern, thus making an entry point available for the Spark cluster:
val spark = SparkSession
.builder
.master("local[*]")
 .appName("myFirstSpark20")
.config("spark.sql.warehouse.dir", ".")
.getOrCreate()
The myFirstSpark20 object will run in local mode. The previous code block is a typical way to start creating a SparkSession object.
- We then create two array variables:
val x = Array(1.0,5.0,8.0,10.0,15.0,21.0,27.0,30.0,38.0,45.0,50.0,64.0)
val y = Array(5.0,1.0,4.0,11.0,25.0,18.0,33.0,20.0,30.0,43.0,55.0,57.0)
- We then let Spark create two RDDs based on the array created before:
val xRDD = spark.sparkContext.parallelize(x)
val yRDD = spark.sparkContext.parallelize(y)
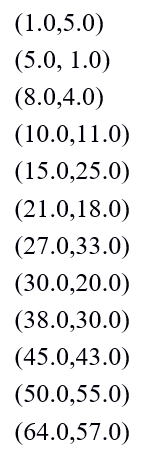
- Next, we let Spark operate on the
RDD; thezip()function will create a newRDDfrom the two RDDs mentioned before:
val zipedRDD = xRDD.zip(yRDD)
zipedRDD.collect().foreach(println)
In the console output at runtime (more details on how to run the program in the IntelliJ IDE in the following steps), you will see this:
- Now, we sum up the value for
xRDDandyRDDand calculate the newzipedRDDsum value. We also calculate the item count forzipedRDD:
val xSum = zipedRDD.map(_._1).sum()
val ySum = zipedRDD.map(_._2).sum()
val xySum= zipedRDD.map(c => c._1 * c._2).sum()
val n= zipedRDD.count()
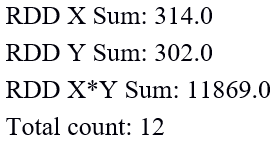
- We print out the value calculated previously in the console:
println("RDD X Sum: " +xSum)
println("RDD Y Sum: " +ySum)
println("RDD X*Y Sum: "+xySum)
println("Total count: "+n)
Here's the console output:
- We close the program by stopping the Spark session:
spark.stop()
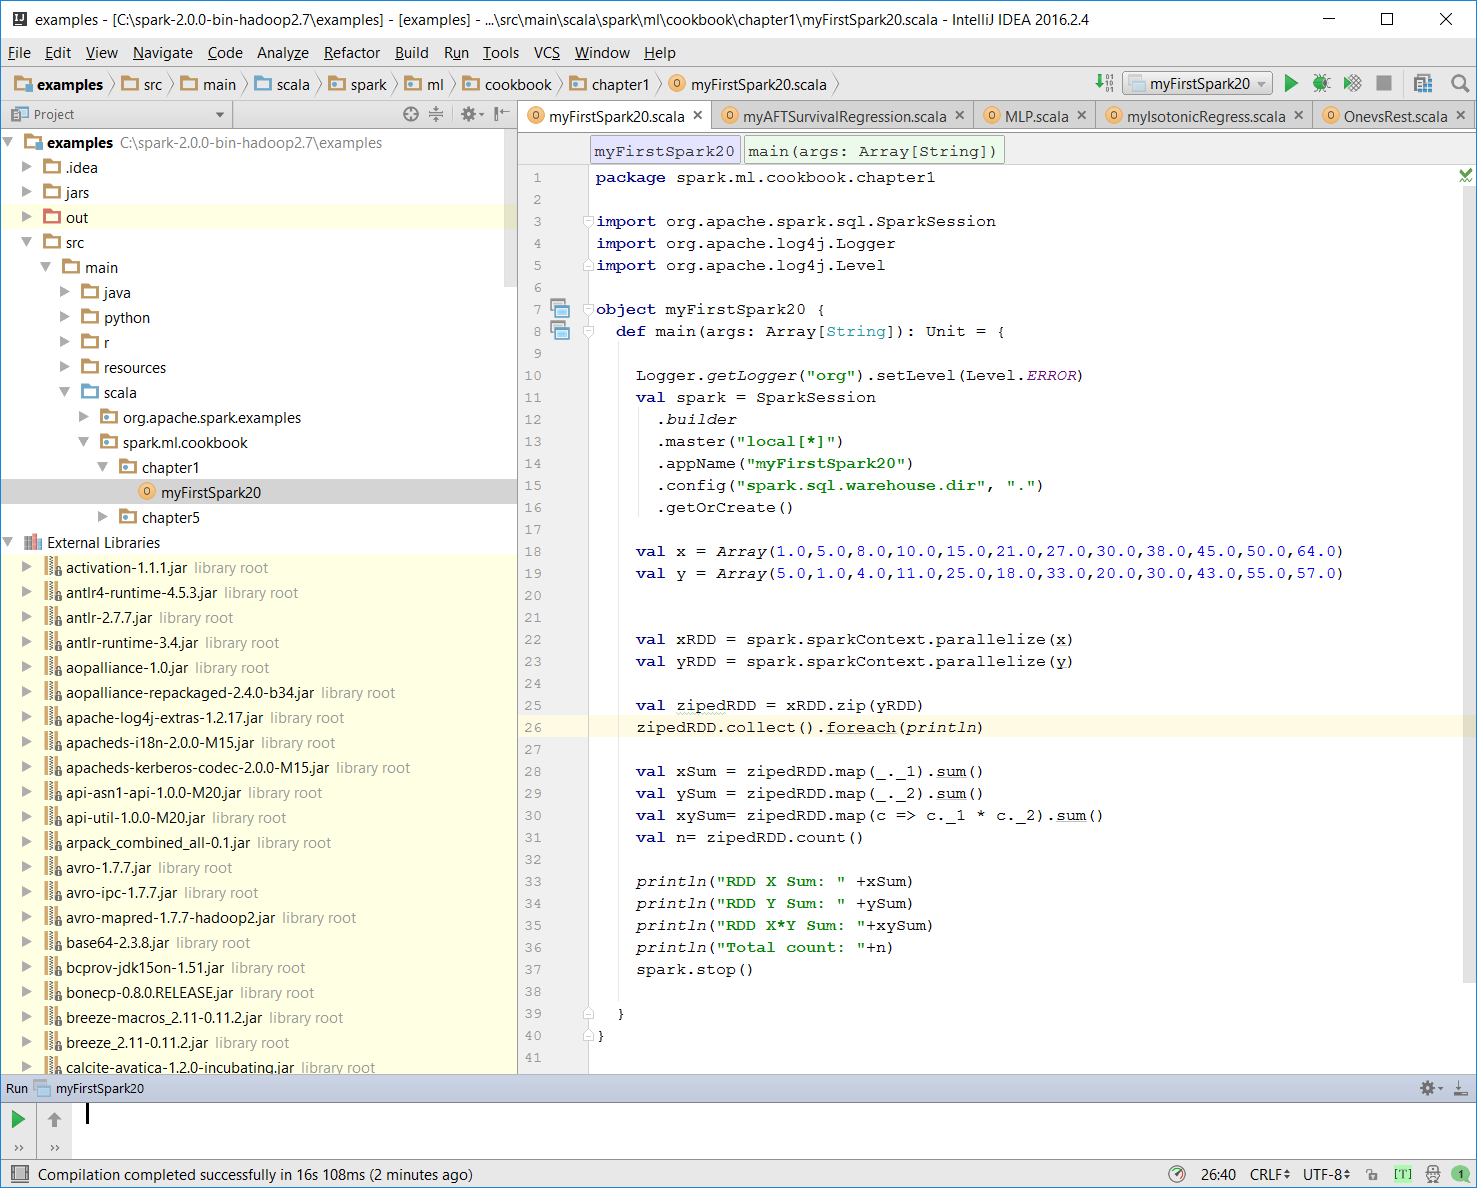
- Once the program is complete, the layout of
myFirstSpark20.scalain the IntelliJ project explorer will look like the following:
- Make sure there is no compiling error. You can test this by rebuilding the project:
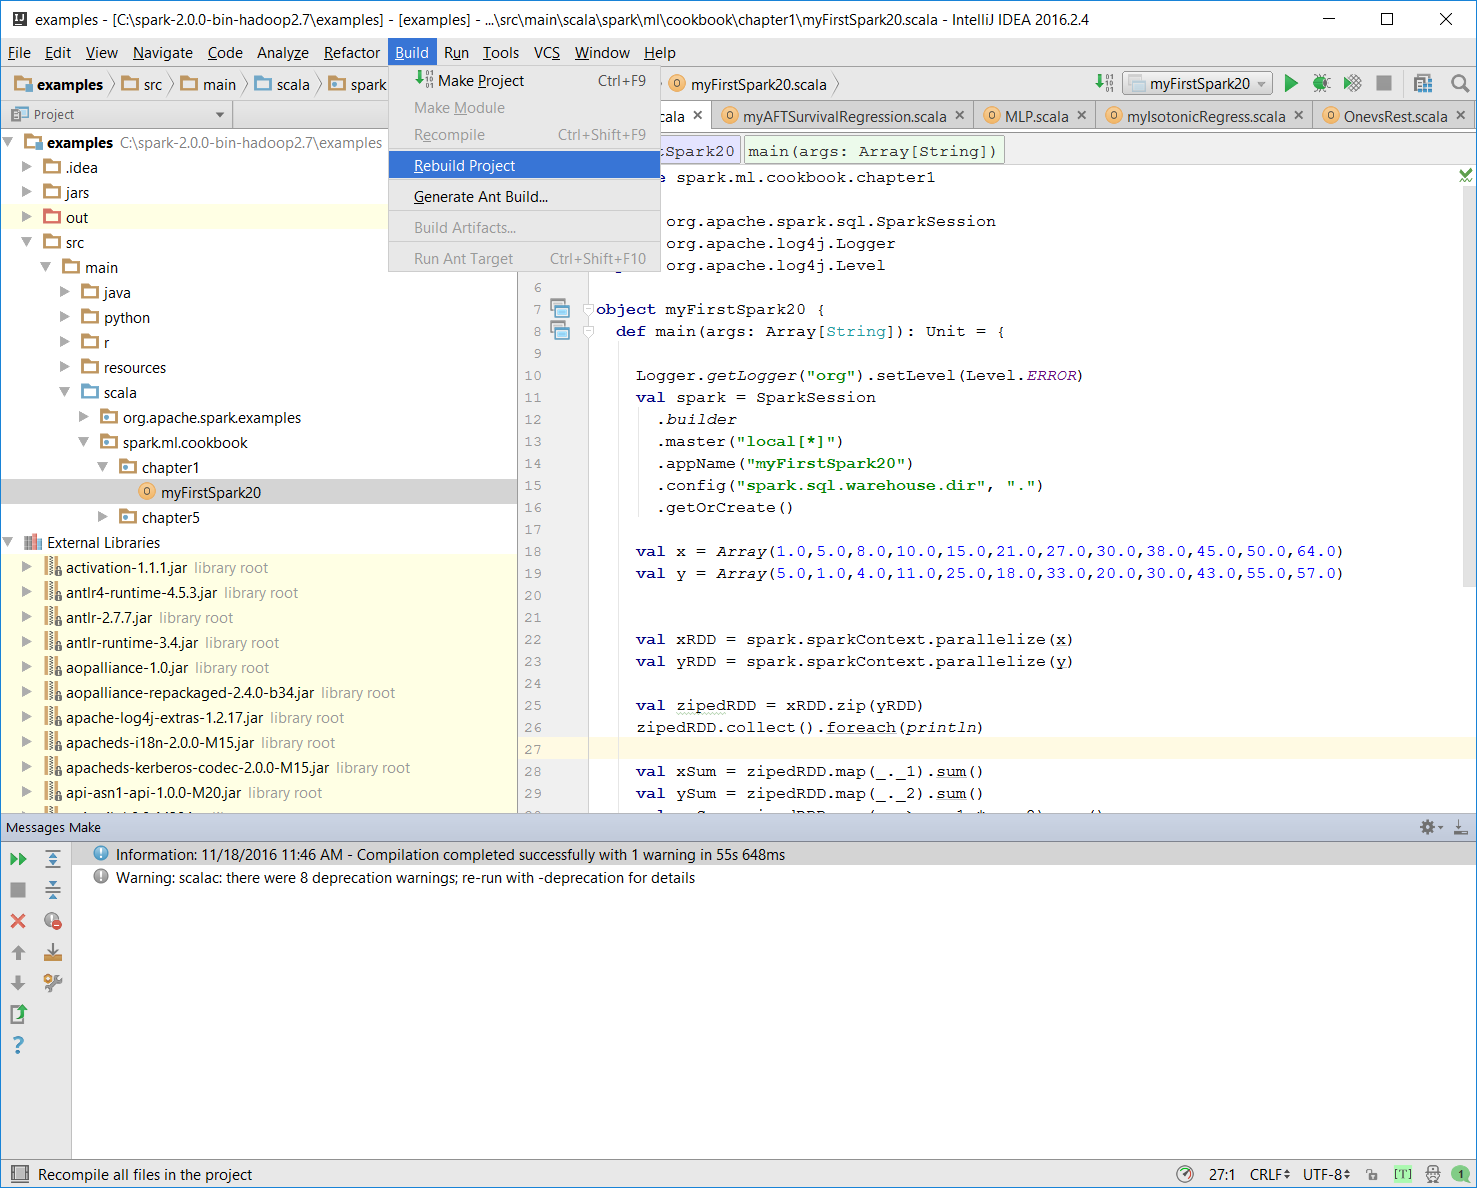
Once the rebuild is complete, there should be a build completed message on the console:
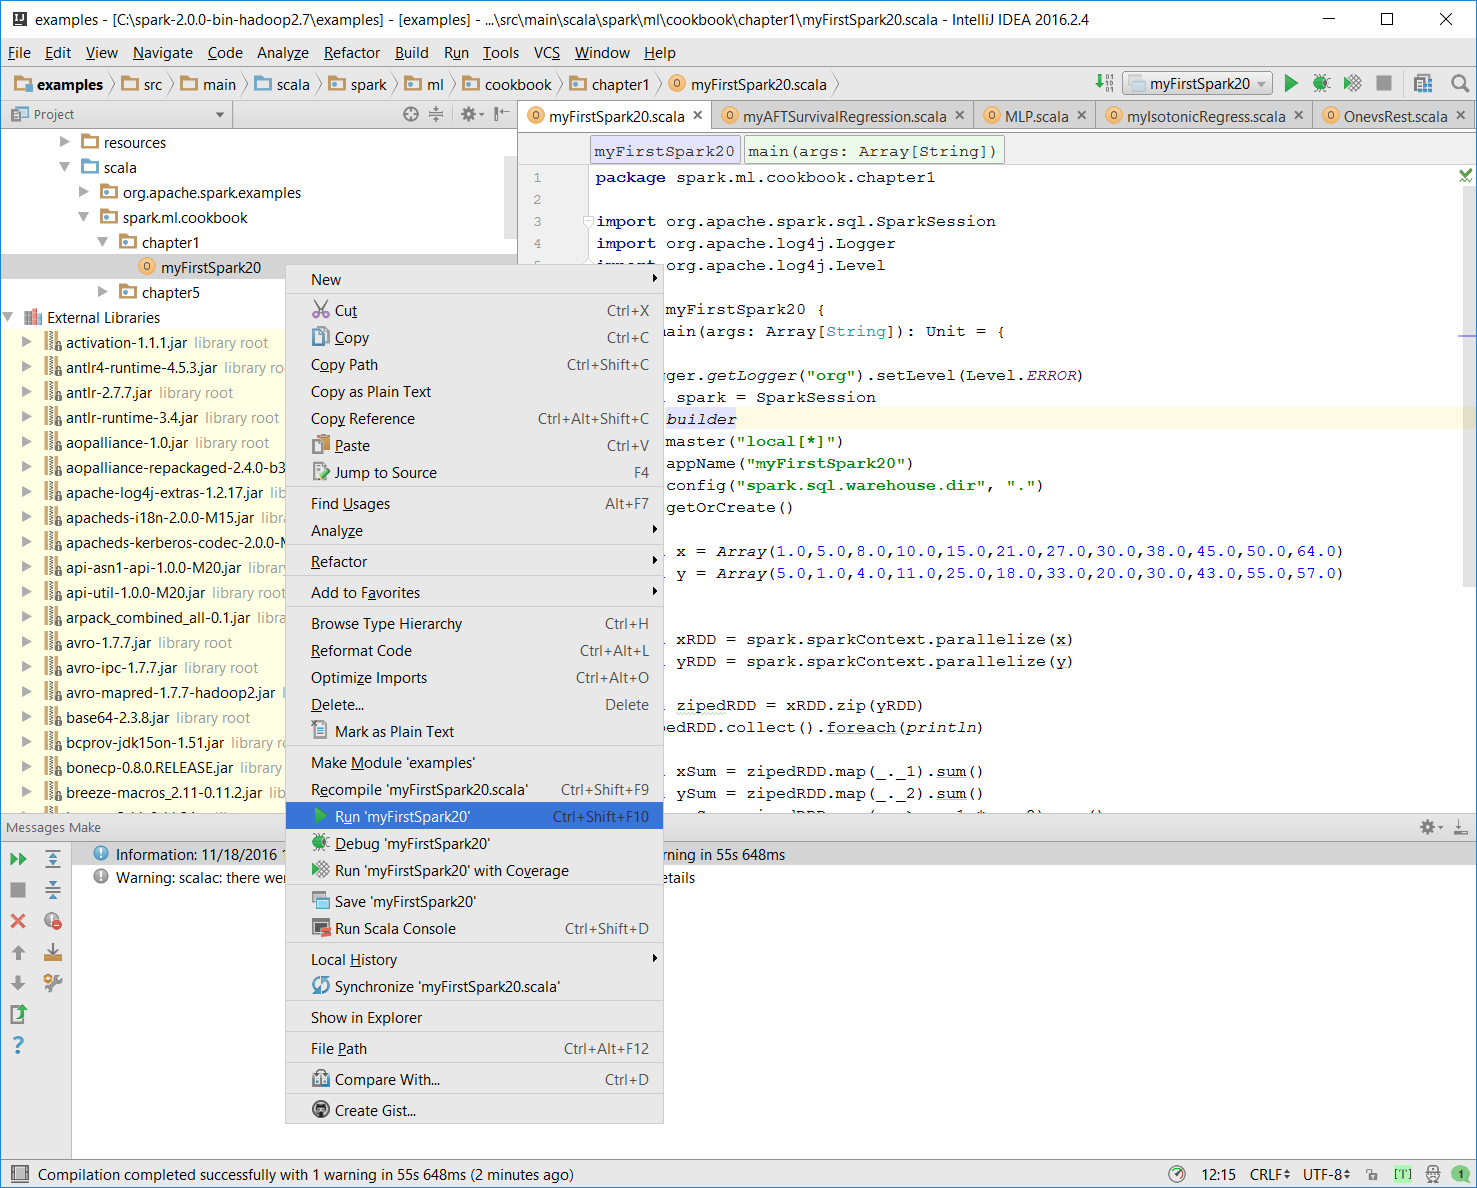
Information: November 18, 2016, 11:46 AM - Compilation completed successfully with 1 warning in 55s 648ms- You can run the previous program by right-clicking on
the myFirstSpark20object in the project explorer and selecting the context menu option (shown in the next screenshot) calledRun myFirstSpark20.
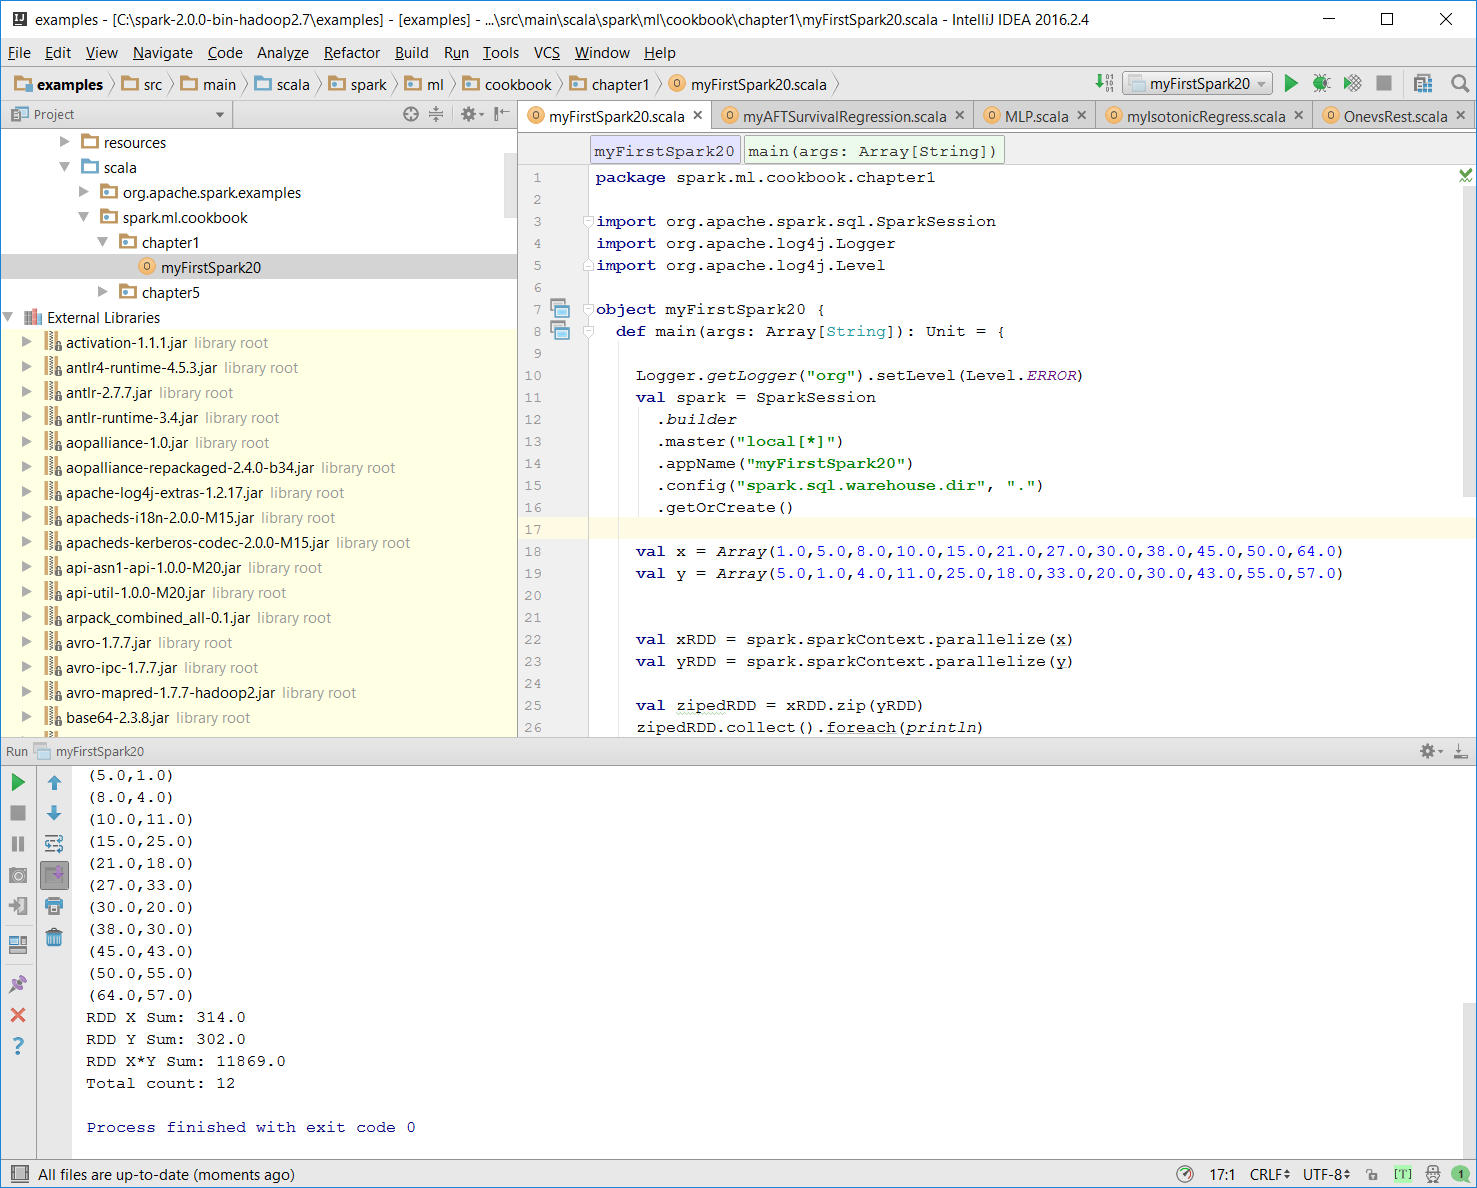
- Once the program is successfully executed, you will see the following message:
Process finished with exit code 0This is also shown in the following screenshot:
- Mac users with IntelliJ will be able to perform this action using the same context menu.
In this example, we wrote our first Scala program, myFirstSpark20.scala, and displayed the steps to execute the program in IntelliJ. We placed the code in the path described in the steps for both Windows and Mac.
In the myFirstSpark20 code, we saw a typical way to create a SparkSession object and how to configure it to run in local mode using the master() function. We created two RDDs out of the array objects and used a simple zip() function to create a new RDD.
We also did a simple sum calculation on the RDDs that were created and then displayed the result in the console. Finally, we exited and released the resource by calling spark.stop().
can be downloaded from http://spark.apache.org/downloads.html.
Documentation for Spark 2.0 related to RDD can be found at http://spark.apache.org/docs/latest/programming-guide.html#rdd-operations.
- More information about JetBrain IntelliJ can be found at https://www.jetbrains.com/idea/.
In this recipe, we discuss to use JFreeChart to add a chart to your Spark 2.0.0 program.
- Set up the JFreeChart library. JFreeChart JARs can be downloaded from the https://sourceforge.net/projects/jfreechart/files/ site.
- The JFreeChart version we have covered in this book is JFreeChart 1.0.19, as can be seen in the following screenshot. It can be downloaded from the https://sourceforge.net/projects/jfreechart/files/1.%20JFreeChart/1.0.19/jfreechart-1.0.19.zip/download site:

- Once the ZIP file is downloaded, extract it. We extracted the ZIP file under
C:\for a Windows machine, then proceed to find thelibdirectory under the extracted destination directory. - We then find the two libraries we need (JFreeChart requires JCommon),
JFreeChart-1.0.19.jarandJCommon-1.0.23:

- Now we copy the two previously mentioned JARs into the
C:\spark-2.0.0-bin-hadoop2.7\examples\jars\directory.
- This directory, as mentioned in the previous setup section, is in the classpath for the IntelliJ IDE project setting:

Note
In macOS, you need to place the previous two JARs in the /Users/USERNAME/spark/spark-2.0.0-bin-hadoop2.7/examples\jars\ directory.
- Start a new project in IntelliJ or in an IDE of your choice. Make sure that the necessary JAR files are included.
- Download the sample code for the book, find
MyChart.scala, and place the code in the following directory. - We installed Spark 2.0 in the
C:\spark-2.0.0-bin-hadoop2.7\directory in Windows. PlaceMyChart.scalain theC:\spark-2.0.0-bin-hadoop2.7\examples\src\main\scala\spark\ml\cookbook\chapter1directory. - Set up the package location where the program will reside:
package spark.ml.cookbook.chapter1
- Import the necessary packages for the Spark session to gain access to the cluster and
log4j.Loggerto reduce the amount of output produced by Spark. - Import necessary JFreeChart packages for the graphics:
import java.awt.Color
import org.apache.log4j.{Level, Logger}
import org.apache.spark.sql.SparkSession
import org.jfree.chart.plot.{PlotOrientation, XYPlot}
import org.jfree.chart.{ChartFactory, ChartFrame, JFreeChart}
import org.jfree.data.xy.{XYSeries, XYSeriesCollection}
import scala.util.Random - Set the output level to
ERRORto reduce Spark's logging output:
Logger.getLogger("org").setLevel(Level.ERROR) - Initialize a Spark session specifying configurations with the builder pattern, thus making an entry point available for the Spark cluster:
val spark = SparkSession
  .builder
  .master("local[*]")
  .appName("myChart")
  .config("spark.sql.warehouse.dir", ".")
.getOrCreate() - The
myChartobject will run in local mode. The previous code block is a typical start to creating aSparkSessionobject. - We then create an RDD using a random number and ZIP the number with its index:
val data = spark.sparkContext.parallelize(Random.shuffle(1 to 15).zipWithIndex)
- We print out the RDD in the console:
data.foreach(println)
Here is the console output:

- We then create a data series for JFreeChart to display:
val xy = new XYSeries("")
data.collect().foreach{ case (y: Int, x: Int) => xy.add(x,y) }
val dataset = new XYSeriesCollection(xy) - Next, we create a chart object from JFreeChart's
ChartFactoryand set up the basic configurations:
val chart = ChartFactory.createXYLineChart(
  "MyChart",  // chart title
  "x",               // x axis label
  "y",                   // y axis label
  dataset,                   // data
  PlotOrientation.VERTICAL,
  false,                    // include legend
  true,                     // tooltips
  false                     // urls
)
- We get the plot object from the chart and prepare it to display graphics:
val plot = chart.getXYPlot()
- We configure the plot first:
configurePlot(plot)
- The
configurePlotfunction is defined as follows; it sets up some basic color schema for the graphical part:
def configurePlot(plot: XYPlot): Unit = {
  plot.setBackgroundPaint(Color.WHITE)
  plot.setDomainGridlinePaint(Color.BLACK)
  plot.setRangeGridlinePaint(Color.BLACK)
  plot.setOutlineVisible(false)
} - We now show the
chart:
show(chart)
- The
show()function is defined as follows. It is a very standard frame-based graphic-displaying function:
def show(chart: JFreeChart) {
  val frame = new ChartFrame("plot", chart)
  frame.pack()
  frame.setVisible(true)
}- Once
show(chart)is executed successfully, the following frame will pop up:

- We close the program by stopping the Spark session:
spark.stop()
In this example, we wrote MyChart.scala and saw the steps for executing the program in IntelliJ. We placed code in the path described in the steps for both Windows and Mac.
In the code, we saw a typical way to create the SparkSession object and how to use the master() function. We created an RDD out of an array of random integers in the range of 1 to 15 and zipped it with the Index.
We then used JFreeChart to compose a basic chart that contains a simple x and y axis, and supplied the chart with the dataset we generated from the original RDD in the previous steps.
We set up the schema for the chart and called the show() function in JFreeChart to show a Frame with the x and y axes displayed as a linear graphical chart.
Finally, we exited and released the resource by calling spark.stop().
More about JFreeChart can be found here:
Additional examples about the features and capabilities of JFreeChart can be found at the following website: