


In the world of Android, an Activity is the point at which you make contact with your users. It's a screen where you capture and present information to the user. You can construct your Activity screens by using either: XML layout files or hard-coded Java.
To begin our tour of Android user interfaces, we need a user interface to start with. In this chapter, we will begin with a simple Activity. We will:
Create a new Android project
Build the
Activitylayout in an application resource fileTie the resource file to an
ActivityclassDynamically populate the
Activitywith a series of multiple-choice questions
For our first example, we're going to write a multiple-choice question and answer Activity. We could use it for applications such as "Who wants to be a millionaire?", or "What type of a monkey are you?". This example will pose questions in order to answer a very important question: "What should I have to eat?" As the user answers the questions, this application will filter a database of food ideas. The user can exit the process at any time to view a list of suggested meals, or just wait until the application runs out of questions to ask them.
Since it's a user interface example, we'll skip building filters and recipe databases. We'll just ask our user food preference-related questions. For each question, we have a list of preset answers which the user can select from (that is, multiple-choice questions). Each answer they give will allow us to narrow the list of suitable recipes.
Before we can start writing code, we need a project structure. An Android project is made up of far more than just its Java code—there are also manifest files, resources, icons, and more. In order to keep things easy, we use the default Android toolset and project structure.
You can download the latest version of the Android SDK for your favorite operating system from http://developer.android.com. A single Android SDK may be used to develop against any number of target Android versions. You will need to follow the installation instructions on the website at http://developer.android.com/sdk/installing.html to install the latest SDK "starter package" and one or more platform targets. Most of the examples in this book will work on Android 1.5 and higher. The Android website also maintains a very useful chart where you can see what the most popular versions of Android are.
Once you have downloaded the Android SDK archive for your operating system, you'll need to install it and then download at least one Android Platform package. Open a command-line or console and complete the following steps:
Extract the Android SDK archive.
Change directory to the root of the unpackaged Android SDK.
Change directory to the
toolsdirectory of the Android SDK.Update the SDK by running the following command:
android update sdkCreate a new Virtual Device by going to the Virtual Devices screen and clicking on the New button. Name the new Virtual Device default.
Specify its target as the most recent version of Android downloaded by the SDK. Set the size of the SD Card to 4096 MiB. Click on the Create AVD button.
The above command tells the new Android SDK installation to look for available packages and install them. This includes installing a Platform Package. Each Platform Package that you install can be used to create an Android Virtual Device (AVD). Each AVD you create is much like buying a new device on which tests can be performed, each with its own configuration and data. These are virtual machines that the Android emulator will run your software on when you wish to test.
The Android SDK provides a handy command-line tool named android which can be used to generate the skeleton of a new project. You'll find it under the tools directory of your Android SDK. It's capable of creating a basic directory structure and a build.xml file (for Apache Ant) to help get you started with your Android application development. You will need to make sure that the tools directory is in your executable path for this to work. Open a command-line or console.
Create a new directory in your home directory or desktop named
AndroidUIExamples. You should use this directory for each of the examples in this book.Change the directory to the new
AndroidUIExamples.Run the following command:
android create project -n KitchenDroid -p KitchenDroid -k com.packtpub.kitchendroid -a QuestionActivity -t 3
We just created a skeleton project. In the preceding command line, we used the following options to specify the structure of the new project:
|
Option |
Description |
|---|---|
|
Gives the project a name, in our case, | |
|
Gives the base directory for the project. In this case use the same name as that of the project. The | |
|
Specifies the root Java package for the application. This is a fairly important concept since it defines our unique namespace on the Android client devices. | |
|
Gives the tool a name for a "main" |
If you run the command android list targets and it presents you with an empty list of possible targets, then you have not downloaded any of the Android Platform packages. You can generally run the android tool by itself and use its graphical interface to download and install Android Platform packages. The previous example uses API Level 3 which corresponds to Android Platform version 1.5.
A typical Android project has almost as many directories and files as an enterprise Java project. Android is as much of a framework as it is an operating environment. In some ways, you can think of Android as an application container designed for running on phones and other limited devices.
As part of the new project structure, you will have the following important files and directories:
|
Folder name |
Description |
|---|---|
|
Your binary files will be placed in this directory by the compiler. | |
|
Source code generated by various Android tools. | |
|
Application resources go here, to be compiled and packaged with your application. | |
|
The default Java source code directory, where the | |
|
Your application descriptor, similar to a |
Tip
Resource Types and Files
Most types of application resources (placed in the
res directory) receive special handling by the Android application packager. This means these files consume less space than they usually would (since XML is compiled into a binary format instead of being left as plain text). You access resources in various ways, but always through an Android API (which decodes them into their original form for you).
Each subdirectory of res indicates a different file format. Therefore, you cannot put files directly into the root res directory since the package tool won't know how to handle it (and you'll get a compile error). If you need to access a file in its raw state, put it in the res/raw directory. Files in the raw directory are copied byte-for-byte into your application package.
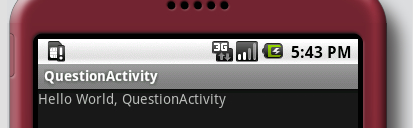
The android tool has given us a minimal example of an Android project, basically a "Hello World" application.
In your console or command-line, change directory to
KitchenDroid.To build and sign the project, run:
ant debugYou will need to start the emulator with the
defaultAVD you created earlier:emulator -avd defaultNow install your application in the emulator:
ant installIn the emulator, open the Android menu and, you should see an icon named QuestionActivity in the menu. Click on this icon.
The Android emulator is a full hardware emulator including the ARM CPU, hosting the entire Android operating system stack. This means software running under the emulator will run exactly how it will on bare-metal hardware (although the speed may vary).
When you use Ant to deploy your Android applications, you will need to use the install Ant target. The
install Ant target looks for a running emulator and then installs the application archive on its virtual memory. It's useful to note that Ant will not start the emulator for you. Instead, it will emit an error and the build will fail.
Tip
Application Signatures
Every Android application package is digitally signed. The signature is used to identify you as a developer of the application, and establish permissions for the application. It's also used to establish permissions between applications.
You will generally use a self-signed certificate, since Android doesn't require that you use a certificate authority. However, all applications must be signed in order for them to be run by the Android system.
While Android allows you to create a screen layout in either Java code, or by declaring the layout in an XML file, we will declare the screen layout in an XML file. This is an important decision for several reasons. The first is that, using the Android widgets in Java code requires several lines of code for each widget (a declaration/construction line, several lines invoking setters, and finally adding the widget to its parent), while a widget declared in XML takes up only one XML tag.
The second reason for keeping layouts as XML is that it's compacted into a special Android XML format when it's stored in the APK file. Therefore your application uses less space on the device, takes less time to download, and its in-memory size is also smaller since less byte code needs to be loaded. The XML is also validated by the Android resource packing tool during compilation, and so is subject to the same type safety as Java code.
The third reason XML layouts are a "good idea" is that they are subject to the same resource selection process as all the other external resources. This means that a layout can be varied based on any of the defined properties, such as language, screen orientation and size, and even the time of day. This means that you can add new variations on the same layout in the future, simply by adding new XML files, and without the need to change any of your Java code.
All XML layout files must be placed in the /res/layout directory of your Android project in order for the Android packaging tools to find them. Each XML file will result in a resource variable of the same name. For example, if we name our file /res/layout/main.xml, then we can access it in Java as R.layout.main.
Since we are building the screen layout as a resource file, it will be loaded by the application resource loader (having been compiled by the resource compiler). A resource is subject to a selection process, so while there is only one resource that the application loads, there may be multiple possible versions of the same resource available in the application package. This selection process is also what Android internationalization is built on top of.
If we wanted to build a different version of the user interface layout for several different types of touchscreens, Android defines three different types of touchscreen properties for us: notouch, stylus, and finger. This roughly translates to: no touchscreen, resistive touchscreen, and capacitive touchscreen. If we wanted to define a more keyboard-driven user interface for devices without a touchscreen (notouch), we write a new layout XML file named /res/layout-notouch/main.xml. When we load the resource in our Activity code, the resource selector will pick the notouch version of the screen if the device we're running on doesn't have a touchscreen.
Here is a list of commonly used qualifiers (property names) that will be taken into account when Android selects a resource file to load. This table is ordered by precedence, with the most important properties at the top.
To kick things off we're going to be working with Android's simplest layout called: LinearLayout. Unlike Java AWT or Swing, Android layout managers are defined as specific container types. Thus a LinearLayout is much like a Panel with a built-in LayoutManager. If you've worked with GWT, you'll be quite familiar with this concept. We'll lay out the screen in a simple top-to-bottom structure (which LinearLayout is perfect for).
Open the file in the
/res/layoutdirectory of your project namedmain.xmlin you favorite IDE or text editor.Delete any template XML code.
Copy the following XML code into the file:
<?xml version="1.0" encoding="UTF-8"?>

<LinearLayout
    xmlns:android="http://schemas.android.com/apk/res/android"
    android:orientation="vertical"
    android:layout_width="fill_parent"
    android:layout_height="wrap_content">

</LinearLayout>
We just removed the "Hello World" example, and put in an entirely empty layout structure which will serve as the platform for us to build the rest of the user interface upon. As you can see, Android has a special XML namespace for its resources.
We declare our root element as LinearLayout. This element corresponds directly to the class android.widget.LinearLayout. Each element or attribute prefixed with the Android namespace corresponds to an attribute that is interpreted by the Android resource compiler.
The AAPT (Android Asset Packaging Tool) will generate an R.java file into your root (or primary) package. This file contains all of the Java variables used to reference your various application resources. In our case, we have the main.xml package in the /res/layout directory. This file becomes an R.layout.main variable with a constant value assigned as its identification.
A widget in Android is called a
View, while a container (such as LinearLayout) is a ViewGroup. We have an empty ViewGroup now, but we need to start populating it in order to build up our user interface. While it is possible to nest a ViewGroup inside another ViewGroup object, an Activity has only one root View—so a layout XML file may have only one root View.
In order to ask our user a question, you will need to add a TextView to the top of your layout. A TextView is a bit like a Label or JLabel. It's also the base class for many other Android View widgets that display text. We want it to take up all of the available horizontal space, but only enough vertical space for our question to fit. We populate the TextView with Please wait... as its default text. Later, on we will replace this with a dynamically selected question.
Go back to your
main.xmlfile.Between the
<LinearLayout...>and</LinearLayout>create a<TextView />element, ending it with the empty element/>syntax since elements representingViewobjects are not allowed to have child elements.Give the
TextViewelement an ID attribute:android:id="@+id/question"
Change the layout width and height attributes to
fill_parentandwrap_contentrespectively (the same as theLinearLayoutelement):android:layout_width="fill_parent" android:layout_height="wrap_content"
Give the
TextViewsome placeholder text so we can see it on the screen:android:text="Please wait..."
Reinstall the application using Apache Ant from your project root folder:
ant install
Run the application again in the emulator and it should look like the following screenshot:
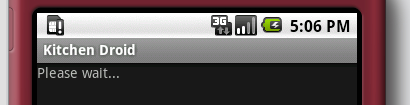
The code for the TextView should end up looking something like this:
<TextView android:id="@+id/question"
android:text="Please wait..."
android:layout_width="fill_parent"
android:layout_height="wrap_content"/>
In the preceding example, we used fill_parent and wrap_content as values for the layout width and height attributes. The fill_parent value is a special value that is always equal to the parent size. If it's used as the value for the android:layout_width attribute (as in our example), then it's the width of the parent view. If it's used in the android:layout_height attribute, it would be equal to the height of the parent view instead.
The value wrap_content can be used much like a preferred size in Java AWT or Swing. It says to the View object, "Take as much space as you need to, but no more". The only valid place to use these special attribute values is in the android:layout_width and android:layout_height attributes. Anywhere else will result in a compiler error.
We will need to access this TextView in our Java code later, in order to invoke its setText method (which directly corresponds to the android:text attribute we used for the placeholder text). A Java reference to a resource variable is created by assigning the resource an ID. In this example, the ID is declared here as @+id/question. The AAPT will generate an int value as an identifier for each resource of id as part of your R class. The ID attribute is also needed for accessing resources from another resource file.
While posing a question to the user is all very fine and well, we need to give them some way to answer that question. We have several possibilities at our disposal: We could use a RadioGroup with a RadioButton for each possible answer, or a ListView with an item for each answer. However, to minimize the required interaction, and make things as clear as possible, we use one Button for each possible answer. However, this complicates things slightly, since you can't declare a variable number of Button objects in your layout XML file. Instead, we will declare a new LinearLayout and populate it with Button objects in the Java code.
Under the
TextViewwhere we pose our question, you will need to add a<LinearLayout />element. While this element would normally have child elements, in our case, the number of possible answers is varied, so we leave it as an empty element.By default, a
LinearLayoutwill place its childViewobjects horizontally alongside each other. However, we want each childViewto be vertically below each other, so you'll need to set theorientationattribute of theLinearLayout:android:orientation="vertical"
We will need to populate the new
ViewGroup(LinearLayout) later in our Java code, so give it an ID:answers:android:id="@+id/answers"
Like our
TextViewand rootLinearLayout, make the widthfill_parent:android:layout_width="fill_parent"
Make the height
wrap_contentso that it doesn't take up more space than all the buttons it will be populated with:android:layout_height="wrap_content"
The resulting code should look like this:
<LinearLayout android:id="@+id/answers"
              android:orientation="vertical"
              android:layout_width="fill_parent"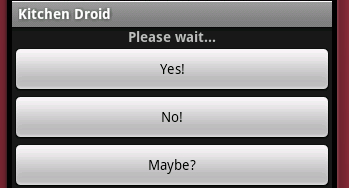
android:layout_height="wrap_content"/>You may have noticed that for this example, we have no content in our new LinearLayout. This may seem a little unusual, but in this case, we want to populate it with a variable number of buttons—one for each possible answer to our multiple-choice questions. However, for the next part of the example we need some simple content Button widgets in this LinearLayout so that we can see the entire screen layout in action. Use the following code in your layout resource file to add Yes!, No!, and Maybe? Button widgets to the LinearLayout:
<LinearLayout android:id="@+id/answers"
            android:orientation="vertical"
            android:layout_width="fill_parent"
            android:layout_height="wrap_content">

    <Button android:id="@+id/yes"
            android:text="Yes!"
            android:layout_width="fill_parent"
            android:layout_height="wrap_content" />

    <Button android:id="@+id/no"
            android:text="No!"
            android:layout_width="fill_parent"
            android:layout_height="wrap_content" />

    <Button android:id="@+id/maybe"
            android:text="Maybe?"
            android:layout_width="fill_parent"
            android:layout_height="wrap_content" />
</LinearLayout>
In Android XML layout resources, any View classes extending from the ViewGroup class are considered containers. Adding widgets to them is as simple as nesting those View elements inside the element of your ViewGroup (as opposed to closing it with no child XML elements).
The following is a screenshot of the preceding Yes!, No!, Maybe? options:
We have two additional buttons to add to the screen layout. One will allow the user to skip the current question; the other will allow them to look at the short list of meals that we have filtered through so far (based on the questions they have already answered).
Start by creating an empty
<Button />element below our answersViewGroup <LinearLayout />(but still within the rootLinearLayoutelement). Assign it the IDskip, so that we can reference it in Java:android:id="@+id/skip"
Create some padding between the answers and the new button by using a margin:
android:layout_marginTop="12sp"
Give it the display label Skip Question:
android:text="Skip Question"
Like all of the previous widgets, the width should be
fill_parentand the height should bewrap_content:android:layout_width="fill_parent" android:layout_height="wrap_content"
Now create another empty
<Button />element below the Skip Question buttonThe ID for the new button should be
view:android:id="@+id/view"
We want this button to display the text: Feed Me!:
android:text="Feed Me!"
Again, put a little space between the Skip Question button, and the new Feed Me! button:
android:layout_marginTop="12sp"
Finally, set the width and height of the Feed Me! button as with the other elements we've created so far:
android:layout_width="fill_parent"
android:layout_height="wrap_content"
When you've completed these two buttons, your layout XML file should now end with:
<Button android:id="@+id/skip"
android:text="Skip Question"
android:layout_marginTop="12sp"
android:layout_width="fill_parent"
android:layout_height="wrap_content"/>
<Button android:id="@+id/view"
android:text="Feed Me!"
android:layout_marginTop="12sp"
android:layout_width="fill_parent"
android:layout_height="wrap_content"/>
</LinearLayout>Separation of unrelated user interface objects is a very important part of user interface design. Groups of items can be separated by whitespace, a border, or a box. In our case, we chose to use whitespace, as space also helps make the user interface feel cleaner.
We created our whitespace by using a margin above each of the buttons. Margins and padding work exactly the same way as they (should) do in CSS. A margin is spacing outside of the widget, while padding is spacing inside the widget. In Android, a margin is the concern of the ViewGroup, and so its attribute name is prefixed with layout_. Because padding is the responsibility of a View object, the padding attribute has no such prefix:
<Button android:id="@+id/view"
        android:text="Feed Me!"
        android:padding="25sp"
        android:layout_marginTop="12sp"
        android:layout_width="fill_parent"
        android:layout_height="wrap_content"/>
The previous code would create extra space between the edge of the Button and the text in the middle of it, as well as retaining the margin above the button.
All of the measurements in the preceding example are specified in the sp unit, which is short for "scale independent pixels". Much like CSS, you suffix your measurement numbers with the unit of size that you are specifying the measurement in. Android recognizes the following measurements:
|
Unit suffix |
Full name |
Description and uses |
|---|---|---|
|
|
Pixel |
Exactly one pixel of the device screen. This unit is the most common when writing desktop applications, but with the wide variety of phone screen sizes, it becomes much harder to use. |
|
|
Inch |
One inch (or the closest approximation). This is based on the physical size of the screen. This is great if you need to work with real world measurements, but again, because of the variations in the size of a device screen, it is not always very useful. |
|
|
Millimeters |
Another real world measurement, made to the closest approximation. This is just a metric version of inches: 25.4 millimeters in 1 inch. |
|
|
Points |
Points are 1/72 of an inch in size. Much like millimeters and inches, they are very useful for sizing things against real-world sizes. They are also commonly used for sizing fonts, and so work well relative to font sizes. |
|
|
Density-independent-pixels |
A single DP is the same size as a single pixel is for a 160 dpi screen. This size is not always a direct ratio, not always precise, but is a best approximation for the current screen. |
|
|
Scale-independent pixels |
Much like the |
Android also allows you to define your own dimension values as resource constants (note: dimensions, not measurements). This can be useful when you want several view widgets to be the same size, or to define a common font size. Files containing dimension declarations are placed in the /res/values directory in your project. While the actual file name isn't significant, a common name is dimens.xml. Dimensions can technically be included with other value types (that is, strings), but this is not recommended since it makes it harder to trace the dimension that are being applied at runtime.
One advantage of having your dimensions in their own file as opposed to being declared inline) is that you can then localize them based on the size of the screen. This makes screen-resolution-significant scales (such as pixels) much more useful. For example, you can place a dimens.xml file with different values into /res/values-320x240 and another version of the same dimensions into /res/values-640x480.
A dimensions resource file is a simple values file (much like strings.xml), but dimensions are defined with the <dimen> tag:
<resources>
    <dimen name="half_width">160px</dimen>
</resources>
To access this as a size in a layout XML file, you use a resource reference (much the same way as you access a resource string):
<TextView layout_width="@dimen/half_width" />
Building a list of common dimensions comes in handy when you want to build complex layouts that will look good on many different screens since it avoids the need to build several different layout XML files.
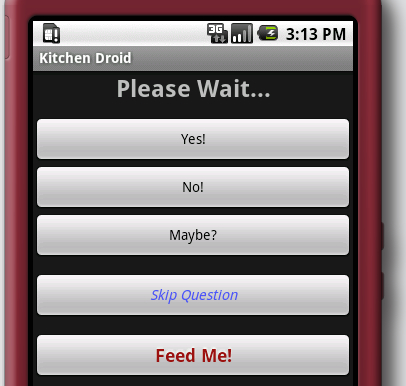
Now we have the most basic structure for this user interface, but it doesn't really look too great. Other than the margins between the answer buttons, and the Skip Question and Feed Me! buttons, you can't really tell them apart. We need to let the user know that these buttons all do different things. We also need to draw more attention to the question, especially if they don't have a lot of time to squint at their screen. You may need the Android documentation, which can be found online at http://developer.android.com/reference/.
We have a question at the top of our screen, but as you can see in the previous screenshots, it doesn't stand out much. Therefore, it's not really very clear to the user what they need to do (especially the first time they use the application).
Try making the following styling changes to the question TextView at the top of our screen. These will only require you to add some attributes to its XML element:
Center the text.
Make the text bold.
Change the text size to
24sp.Add
12spspacing between the bottom of the question and the answer buttons
The Feed Me! button is also very important. This is the button that gives the user access to the list of suggested recipes that the application has filtered based on their answers, so it should look good.
The following styling should help the Feed Me! button to stand out nicely (hint: Button extends TextView):
Make the text size
18sp.Change the text color to a nice red
#9d1111.Style the text as bold.
Add a text shadow:
x=0,y=-3,radius=1.5, andcolor=white("#fff").
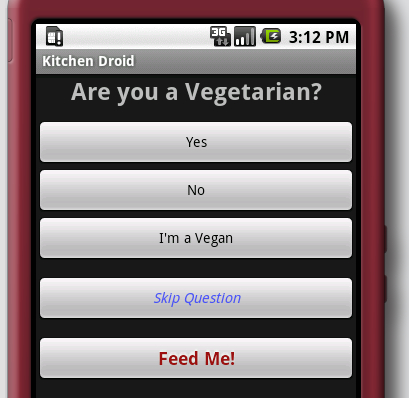
When you've finished styling the screen, it should look like the following screenshot:
One of the most obvious limitations of the layout XML format is that you can't dynamically populate part of the Activity based on external variables—there are no loops or methods in the XML file.
In our example, this limitation shows itself in the form of our empty LinearLayout. Because each question has any number of possible answers, we need a varying number of buttons in the group. For our purposes, we will create the Button objects and put them into the LinearLayout as part of the Java code.
The other place the XML layout format falls down is dynamically referencing external resources. This can be seen in our example, where we put placeholder text in the android:text attribute on the TextView element—question. We could have referenced an external string using the following syntax:
<TextView android:id="@+id/question"
          android:text="@string/question"
          android:gravity="center"
          android:textStyle="bold"
          android:layout_width="fill_parent"
          android:layout_height="wrap_content"/>
This will effectively reference a static variable from the strings.xml file. It's not suitable for a dynamically selected question, which will change each time we initialize the Activity.
What reason do you have for writing your layouts in XML instead of in pure Java code?
a. Android can read the layout file externally for optimization.
b. The layout becomes part of the resource selection process.
c. Your users could download new layouts from the App Store.
d. The layout can have custom themes applied to it.
How would we make the text of the Next Question button bold?
a. Use the
android:typefaceattribute.b. Create a custom
Buttonimplementation.c. Add a CSS attribute:
style="font-weight: bold".d. Use the
android:textStyleattribute.What would happen if we changed the
LinearLayoutfromverticalorientation, tohorizontal?a. The layout would turn on its side.
b. All of the widgets would be squashed together on the screen.
c. Only the question
TextViewwould be visible on the screen.d. The question, and possibly some other
Viewobjects may be visible on the screen depending on the number of pixels available.e. The layout would overflow, causing the widgets to appear next to each other, over several lines.
We have a basic user interface, but right now, it's static. We may want to ask our user many different questions, each of which have different answers. We may also want to vary which questions we ask in some way or another. In short, we need some Java code to populate the layout with a question and some possible answers. Our questions are made up of two parts:
The question
A list of possible answers
In this example, we will make use of string array resources to store all of the question and answer data. We will use one string array to list the question identifiers, and then one string array for each question and its answers. The advantages of this approach are very similar to the advantages of using a layout XML file instead of hard-coding it. The res/values directory of your project will have an auto-generated strings.xml file. This file contains string and string-array resources that you want your application to use. Here is the start of our strings.xml file, with two questions to ask the user:
<?xml version="1.0" encoding="UTF-8"?>

<resources>
    <string name="app_name">Kitchen Droid</string>

    <string-array name="questions">
        <item>vegetarian</item>
        <item>size</item>
    </string-array>

    <string-array name="vegetarian">
        <item>Are you a Vegetarian?</item>
        <item>Yes</item>
        <item>No</item>
        <item>I\'m a vegan</item>
    </string-array>

    <string-array name="size">
        <item>How much do you feel like eating?</item>
        <item>A large meal</item>
        <item>Just a nice single serving of food</item>
        <item>Some finger foods</item>
        <item>Just a snack</item>
    </string-array>
</resources>
The first item of each question array (vegetarian and size) is the question itself, while each following item is an answer.
Import the Android
Resourcesclass below the package declaration:import android.content.res.Resources;
In order to start asking the questions from your
strings.xmlfile, you'll need a method to look in thequestions <string-array>and find the name of the array that contains the current question. This is not normally something you need to do with application resources—their identifiers are generally known to you through theRclass. In this case however, we want to work in the order defined in thequestions <string-array>, making things a little bit more difficult:private int getQuestionID(Resources res, int index) {We can now look at the
questionsstring-array, which contains the identifying name of each question (our index string-array):String[] questions = res.getStringArray(R.array.questions);
We have the array of questions, and we need to find the identifier value. This is much like using
R.array.vegetarianfor thevegetarianquestion, except that it's a dynamic lookup, and therefore much slower than normal. In general, the following line is not recommended, but in our case it's very useful:return res.getIdentifier( questions[index], "array", "com.packtpub.kitchendroid");The
QuestionActivityclass will display several questions to the user. We want the application to "play nice" with the phone and its environment. For that reason, each question will be posed in a new instance ofQuestionActivity(allowing the device to control the display of ourActivity). However, this method raises an important question: How do we know the index of the question to pose to the user? The answer: OurIntent. AnActivityis started with anIntentobject, and eachIntentobject may carry any amount of "extra" information (similar to request attributes in theHttpServletRequestinterface) for theActivityto use, sort of like arguments to amainmethod. So, anIntentis also like aHashMap, containing special data for theActivityto use. In our case we use an integer property namedKitchenDroid.Question:private int getQuestionIndex() { return getIntent().getIntExtra("KitchenDroid.Question", 0); }
These two methods form the basis for populating our question screen and navigating our way through a defined list of questions. When complete, they should look like this:
private static int getQuestionID(
final Resources res,
final int index) {
final String[] questions = res.getStringArray(R.array.questions);
return res.getIdentifier(
        questions[index],
        "array",
        "com.packtpub.kitchendroid");
}
private int getQuestionIndex() {
    return getIntent().getIntExtra("KitchenDroid.Question", 0);
}The getQuestionID method is pretty straight forward. In our code we use R.array.questions to access the <string-array> which identifies all of the questions we are going to ask the user. Each question has a name in the form of a String, and a corresponding resource identification number in the form of an int.
In the getQuestionID method, we make use of the Resources.getIdentifier method, which looks for the resource identifier (the integer value) for a given resource name. The second parameter of the method is the type of resource to look up. This parameter is normally an inner class to the generated R class. Finally, we pass the base package that the resource is found in. Instead of all three of these parameters, you could also look up the resource by its full resource name:
return res.getIdentifier(
        "com.packtpub.kitchendroid:array/" + questions[index],
        null,
null);The getQuestionIndex method tells us where in the questions <string-array> we currently are, and thus, which question to ask the user. This is based on the "extra" information in the Intent that triggered the Activity. The getIntent() method provides you with access to the Intent that triggered your Activity. Each Intent may have any amount of "extra" data, and that data may be any "primitive" or "serializable" type. Here we fetch the KitchenDroid.Question extra integer value from our Intent, substituting a value of 0 if it has not been set (that is, the default value). If the user taps our icon in the menu, Android won't have specified that value, so we start from the first question.
Up to this point we've only used the layout XML file to populate our screen. In some cases, this is just not enough. In this simple example, we want the user to have a list of buttons that they can touch to answer the questions posed to them. We could pre-create some buttons and name them button1, button2, and so on, but that means limiting the number of possible answers.
In order to create buttons from our <string-array> resources, we need to do it in Java. We created a ViewGroup earlier (in the form of the LinearLayout that we named answers). This is where we will add our dynamically created buttons.
Your application now knows where to find the questions to ask, and knows which question it should be asking. Now it needs to put the question on the screen, and allow the user to select an answer.
Open the
main.xmlfile in your editor or IDE.Remove the Yes!, No!, and Maybe?
Buttonelements from the layout resource.Open the
QuestionActivity.javafile in an editor or IDE.We will need a new class field to hold the dynamically-created
Buttonobjects (for reference):private Button[] buttons;
In order to keep things neat, create a new
privatemethod to put the questions on the screen:initQuestionScreen:private void initQuestionScreen() {In this method, we assume that the layout XML file has already been loaded into the
Activityscreen (that is, it will be invoked after wesetContentViewinonCreate). This means that we can look up parts of the layout as Java objects. We'll need both theTextViewnamedquestionand theLinearLayoutnamedanswers:TextView question = (TextView)findViewById(R.id.question); ViewGroup answers = (ViewGroup)findViewById(R.id.answers);
These two variables need to be populated with the question and its possible answers. For that we need the
<string-array>(from ourstrings.xmlfile) which contains that data, so we need to know the resource identifier for the current question. Then we can fetch the actual array of data:int questionID = getQuestionID(resources, getQuestionIndex()); String[] quesionData = resources.getStringArray(questionID);
The first element of a
questionstring array is the question to pose to the user. The followingsetTextcall is exactly the same as specifying anandroid:textattribute in your layout XML file:question.setText(quesionData[0]);
We then need to create an empty array to store references to our
Buttonobjects:int answerCount = quesionData.length – 1; buttons = new Button[answerCount];
Now we're ready to populate the screen. A
forloop over each of the answer values indexed according to our arrays:for(int i = 0; i < answerCount; i++) {Get each answer from the array, skipping the question string at index zero:
String answer = quesionData[i + 1];
Create a
Buttonobject for the answer and set its label:Button button = new Button(this); button.setText(answer);
Finally, we add the new
Buttonto our answers object (ViewGroup), and reference it in ourbuttonsarray (where we'll need it later):answers.addView(button); buttons[i] = button;
Having done that, just after the
setContentViewcalls inonCreate, we need to invoke our newinitQuestionScreenmethod.
The findViewById method traverses the tree of View objects looking for a specific identifying integer value. By default, any resource declared with an android:id attribute in its resource file will have an associated ID. You could also assign an ID by hand using the View.setId method.
Unlike many other user interface APIs, the Android user interface API is geared towards XML development than pure Java development. A perfect example of this fact is that the View subclasses have three different constructors, two of which are designed for use with the XML parsing API. Instead of being able to populate the Button label in a constructor (as with most other UI APIs), we are forced to first construct the object, and then use setText to define its label.
What you do pass into the constructor of every View object is a Context object. In the preceding example you pass the Activity object into the constructor of the answer Button objects as this. The Activity class inherits from the Context class. The Context object is used by the View and ViewGroup objects to load the application resources and services that they require in order to function correctly.
You can now try running the application, in which case you'll be greeted with the following screen. You may have noticed that there is additional styling in this screenshot. If you don't have this, you may want to backtrack a little to the previous Have a go hero section.
Android user interface events work in much the same way as a Swing event-listener or a GWT event-handler. Depending on the type of event you wish to receive, you implement an interface and pass an instance to the widget you wish to receive events from. In our case we have Bu
tton widgets that fire click-events when they are touched by the user.
The event-listener interfaces are declared in many of the Android classes, so there isn't a single place you can go look for them. Also, unlike most event-listener systems, many widgets may only have one of any given event-listeners. You can identify an event-listener interface by the fact that their class names are prefixed with On (much like HTML event attributes). In order to listen for click-events on a widget, you would set its OnClickListener using the V
iew.setOnClickListener method.
The following code snippet shows how a click-listener might be added to a Button object to show a Toast. A Toast is a small pop-up box which is displayed briefly to give the user some information:
button.setOnClickListener(new View.OnClickListener() {
    public void onClick(View clicked) {
        Toast.makeText(this, "Button Clicked!", Toast.LENGTH_SHORT).
             show();
    }
});
The preceding event-listener is declared as an anonymous inner class, which is okay when you are passing similar event-listeners to many different widgets. However, most of the time you'll want to be listening for events on widgets you've declared in an XML layout resource. In these cases it's better to either have your Activity class implement the required interfaces, or create specialized classes for different event-driven actions. While Android devices are very powerful, they are still limited when compared to a desktop computer or laptop. Therefore, you should avoid creating unnecessary objects in order to conserve memory. By placing as many event-listener methods in objects that will already be created, you lower the overhead required.
When you declare an object in a layout XML file, how do you retrieve its Java object?
a. The object will be declared in the
Rclass.b. Using the
Activity.findViewByIdmethod.c. By using the
Resources.getLayoutmethod.d. The object will be injected into a field in the
Activityclass.What is the "best" way of listening for events in an Android application?
a. Declaring the listeners as anonymous inner classes.
b. Create a separate event listener class for each
Activity.c. Implement the event-listening interfaces in the
Activityclass.Why do you pass
this Activityinto the constructors ofViewobjects (that is,new Button(this)).a. It defines the
Activityscreen they will be displayed on.b. It's where event messages will be sent to.
c. It's how the
Viewwill reference its operating environment.
Android comes with some great tools to create and test applications, even if you don't have an Android device handy. That said, there's no replacement for actually touching your application. It's part of what makes Android such a compelling platform, the way it feels and responds (and the emulator just doesn't convey that).
One of the most important tools in an Android developer's arsenal is the resource selection system. With it you can build highly dynamic applications that respond to changes in the devices, and thus, the user environment. Changing the screen layout based on the orientation of the device, or when the user slides out the phone's QWERTY keyboard, lets them know that you've taken their preferences into account when building your application.
When building user interfaces in Android, it's strongly recommended to build at least the layout structure in an XML file. The XML layout files are not only considered as application resources, but Android also strongly favors building XML user interfaces over writing Java code. Sometimes, however, a layout XML file isn't enough, and you need to build parts of the user interface in Java. In this case it's a good idea to define at least a skeleton layout as XML (if possible), and then place the dynamically created View objects into the layout by using marker IDs and containers (much like dynamically adding to an HTML document in JavaScript).
When building a user interface, think carefully about the look and feel of the outcome. In our example, we use Button objects for the answers to questions. We could have used RadioButton objects instead, but then the user would have needed to select an option, and then touch a Next Question button, requiring two touches. We could also have used a List (which interacts nicely with the fact that it needs to be dynamically populated), however, a List doesn't indicate an "action" to the user quite the way a Button does.
When coding layouts, be careful with the measurement units that you use. It's strongly recommend that you stick to using sp for most purposes—if you can't use one of the special fill_parent or wrap_content values. Other values are highly dependent on the size of screen, and won't respond to the user preferences. You can make use of the resource selection process to build different screen designs for small, medium, or large screens. You could also define your own measurement unit and base it on the screen size.
Always think about how your user will interact with your application, and how much (or little) time they are likely to have with it. Keeping each screen simple and responsive keeps your users happy.
Now that we've learned how to create a skeleton Android project, and a simple Activiy, we can focus on the more subtle problems and solutions of Android user interface design. In the next chapter, we will focus on working with data-driven widgets. Android has several widgets designed specifically for displaying and selecting from more complex data structures. These widgets form the basis of data-driven applications such as an address book or a calendar application.

