


The new and official Google IDE, Android Studio, with all its varied features, is ready to be explored. Would you like to make your own Android applications and make these applications available to other users on Google Play Store? Can you do this easily? How can you achieve this?
This chapter will show you how to prepare your new Android Studio installation, and help you take your first steps in the new environment. We will begin by preparing the system for the installation and downloading the required files. Then we will see the welcome screen that prompts when running Android Studio for the first time, and accordingly, we will configure the Android software development kit (SDK) properly so that we have everything ready to create our first application.
These are the topics that we will cover in this chapter:
Installing Android Studio
Running Android Studio for the first time
Configuring the Android SDK
A prerequisite to start working with Android Studio is to have Java installed on your system. The system must also be able to find the Java installation. This can be achieved by installing the Java Development Kit (JDK) on your system and then setting an environment variable named JAVA_HOME, which points to the SDK folder in your system. Check this environment variable to avoid issues during the installation of Android Studio.
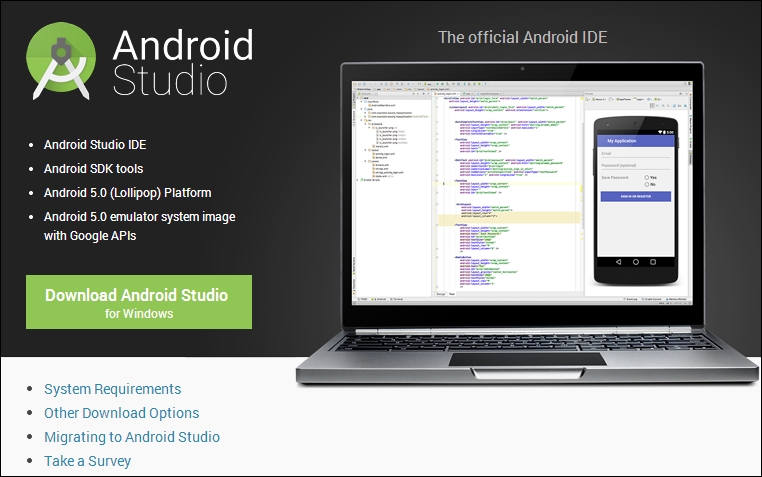
The Android Studio package can be downloaded from the Android developer tools web page, at http://developer.android.com/sdk/index.html, by clicking on the download button, as is shown in the next screenshot. This package is an EXE file for Windows systems, a DMG file for Mac OS X systems, and a TGZ file for Linux systems.
In Windows, launch the EXE file. The default installation directory is \Users\<your_user_name>\AppData\Local\Android\android-studio. The AppData directory is usually a hidden directory.
In Mac OS X, open the DMG file and drop Android Studio into your Applications folder. The default installation directory is /Applications/Android\ Studio.app.
In Linux systems, unzip the TGZ file and execute the studio.sh script located in the android-studio/bin/ directory.
If you have any problem in the installation process or in the following steps, you can get help on this and on other known issues by checking out Appendix, Getting Help.
Execute Android Studio and wait until it loads completely. This may take a few minutes on the first time. The first time you execute Android Studio, you will be prompted by a welcome screen. As shown in the following screenshot, the welcome screen includes a section to open recent projects and the Quick Start section. The Quick Start section provides options to start a new project, open a project, import a project, and even perform more advanced actions such as checking out from a version control system and modifying the configuration options.
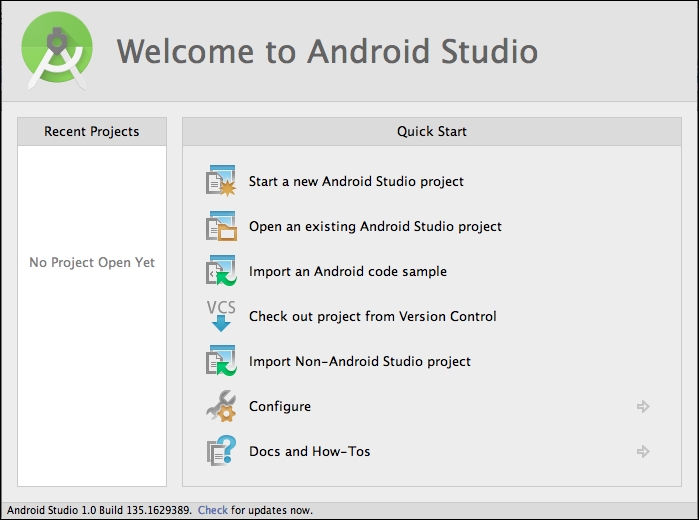
Let's take a look at the various options available in the Quick Start section:
Start a new Android Studio project: This creates a new Android project from scratch.
Open an existing Android Studio Project: This opens an existing project.
Import an Android code sample: This imports a project containing Google code samples from GitHub.
Check out project from Version Control: This creates a new project by importing existing sources from a version control system.
Import Non-Android Studio project: This creates a new project by importing existing sources from your system.
Configure: This opens the configuration menu. The configuration menu has the following options:
SDK Manager: This opens the Android SDK tool, which will be explained in Chapter 6, Tools.
Settings: This opens the Android Studio preferences.
Plugins: This opens the plugins manager for Android Studio.
Import Settings: This imports the settings from a file (
.jar).Export Settings: This exports the settings to a file (
.jar).Project Defaults: This opens the project defaults settings menu.
Settings: This opens the template project's settings. These settings are also reachable through the Android Studio settings (by navigating to Configure | Settings).
Project Structure: This opens the project and platform settings.
Run Configurations: This opens the run and debug settings.
Docs and How-Tos: This opens the help menu, which contains the following options:
Read Help: This opens the Android Studio help, an online version
Tips of the Day: This opens a dialog with the tip of the day
Default Keymap Reference: This opens an online PDF file containing the default keymap
JetBrains TV: This opens a JetBrains website containing video tutorials
Plugin Development: This opens a JetBrains website containing information for plugin developers
The essential feature that needs to be configured correctly is the Android SDK. Although Android Studio automatically installs the latest Android SDK available, you should have everything you need beforehand to create your first application. It is important to check it and to learn how we can change it.
In the Android Studio welcome screen, navigate to Configure | Project Defaults | Project Structure. In SDK Location, you should have a selected Android SDK location, as shown in the next screenshot. This selected SDK location is the default location that will be used in our Android projects. However, we can change it later for specific projects that require special settings.
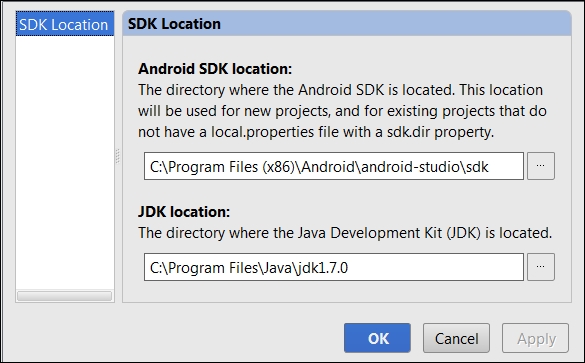
If you don't have any Android SDK configured in Android Studio, then you have to add it manually.
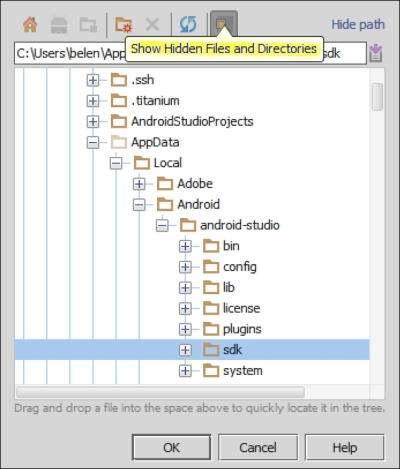
To accomplish this task, click on the ellipsis button to add an Android SDK, and then select the home directory for the SDK. Check whether you have it in your system by navigating to your Android Studio installation directory. You should find a folder named sdk. It contains the Android SDK and its tools. The Android Studio installation directory might be in a hidden folder, so click on the button highlighted in the following screenshot to show hidden files and directories:
If you wish to use another Android SDK location that is different from the location included with Android Studio, select this instead. For example, if you previously used the Android Development Tools (ADT) plugin for Eclipse, you already have an Android SDK installed in your system.
We successfully prepared the system for Android Studio and installed our Android Studio instance. We ran the Studio for the first time, and now we know the options available on the welcome screen. Also, you learned how to configure your Android SDK and install it manually in case you wish to use a different version. Completing these tasks will leave our system with Android Studio running and configured to create our first project.
In the next chapter, we will learn about the concept of a project and how it includes everything the application requires, from classes to libraries. We will also create our first project and discuss the different kinds of activities available in the wizard.