


Chapter 1: Overview of the Dynamics 365 Business Central Administration Center
Hey everyone! Many of you know how to manage on-premises Dynamics NAV and Business Central environments with Server Administration Tool, but how to do it when your environment is somewhere in the cloud? Do you need to ask your Microsoft Partner, or even Microsoft itself, to create a new sandbox, restore a backup, or restart the environment?
Meet the Admin Center, a tool to rule all of your Dynamics 365 Business Central SaaS environments.
This chapter contains common information on how to start your work with the Dynamics 365 Business Central Admin Center. You will learn how to get access to the center in different ways and assign Business Central licenses. In addition, you will get details about environment types, limits, and the planning of your free space.
In this chapter, we are going to cover the following main topics:
- The Admin Center main page
- Required roles
- Environment types and limits
By the end of this chapter, you will be able to set up the required permissions and get access to the Admin Center.
Technical requirements
To have access to the Dynamics 365 Business Central Admin Center, you must be one of the following user types:
- An internal user with a Global administrator or Dynamics 365 administrator role
- A delegated administrator from the assigned partner with an Administrator Agent or Helpdesk Agent role
We will learn how to assign these roles in the next sections.
The Admin Center main page
What is the Admin Center? It is not an application you need to install on your laptop. It lives directly in your internet browser as a website. You need to open it and sign in with a Microsoft account assigned with the required role.
You can open the Admin Center main page using either of these three ways:
- From the Dynamics 365 Business Central web client
- Using a direct URL
- From the Microsoft Partner Center
Accessing the Admin Center from the web client
- Open your Dynamics 365 Business Central environment and click on the Settings icon in the top-right corner. The Settings window will open and you will see the Admin Center link:

Figure 1.1 – Admin Center in Settings
Important Note
If you cannot see the Admin Center link from the web client, this means that you don't have the required permissions described previously.
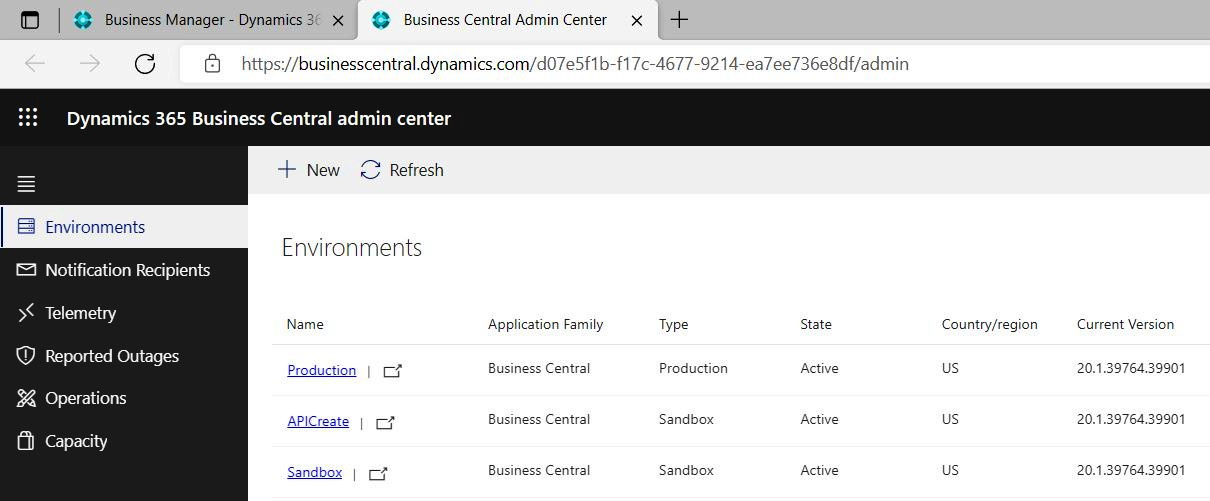
Figure 1.2 – Admin Center home page
Accessing the Admin Center through a direct URL
This is my most-used way of accessing the Admin Center, especially if you have several tenants. You can create and save the Admin Center's URL for each customer's tenant.
Let's look at the center's URL:

Figure 1.3 – Admin Center URL with the tenant ID
The URL consists of this construction: https://businesscentral.dynamics.com/<<Tenant ID>>/admin.
Here, <<Tenant ID>> is your tenant ID. So, if you know the ID, you can easily create the Admin Center URL and open it without entering the web client.
The tenant ID is hidden under the Help & Support menu. To open it, click on the Help icon in the top-right corner and choose the Help & Support link:
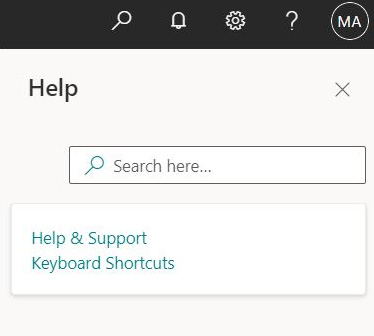
Figure 1.4 – Help menu
At the end of the Report a problem section, you will find the tenant ID:
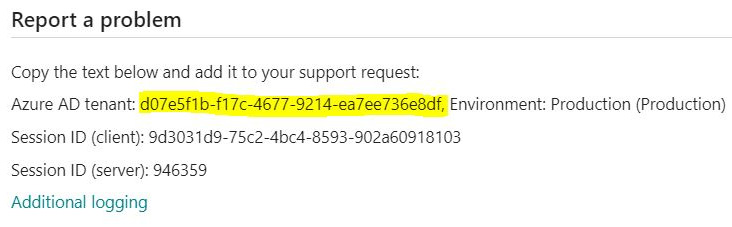
Figure 1.5 – Report a problem section
This way, my tenant Admin Center URL will be https://businesscentral.dynamics.com/d07e5f1b-f17c-4677-9214-ea7ee736e8df/admin.
However, tenant IDs look weird for the typical user and it's close to impossible to remember it and reproduce it somewhere. Therefore, we can replace the tenant ID with the tenant company's domain and it will work!
If you are an internal user, check your account, for example, John.Doe@mycompany.com.
The Admin Center's URL will be https://businesscentral.dynamics.com/mycompany.com/admin.
If you are a delegated administrator from an assigned partner, then you need to know your customer's domain to replace the tenant ID. For my demonstration environment, I can access the Admin Center like this:
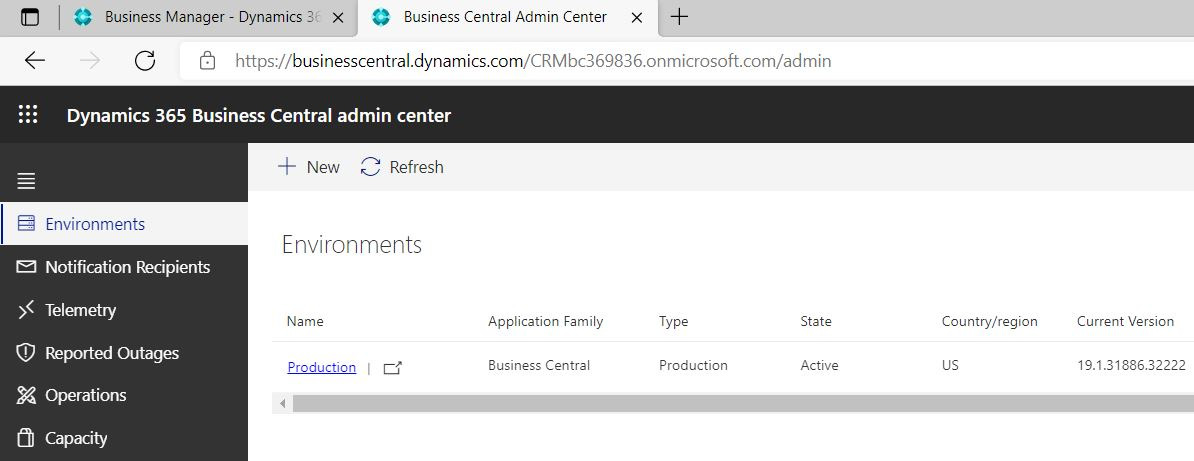
Figure 1.6 – Admin Center URL with domain
Accessing the Admin Center through the Partner Center
If you are a Microsoft Partner who manages customer's environments, then you can access the Admin Center from the Partner Center at https://partner.microsoft.com/:
- Click on CSP, then choose Customers.
- Select the relevant customer and click on Service management.
- Then, choose Dynamics 365 Business Central under Administer services:
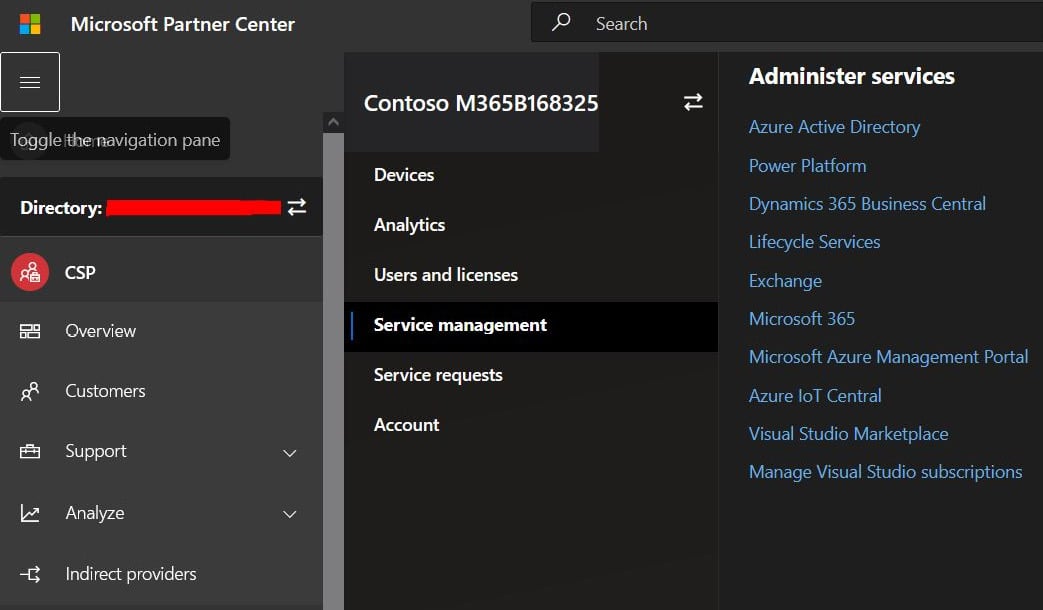
Figure 1.7 – Admin center access from Partner center
This URL will open the customer's Admin Center. This way is useful when you do not know the exact URLs that customers use for their environment.
But, what if you get an Unauthorized error (as shown in Figure 1.8) after signing in to the Admin Center?
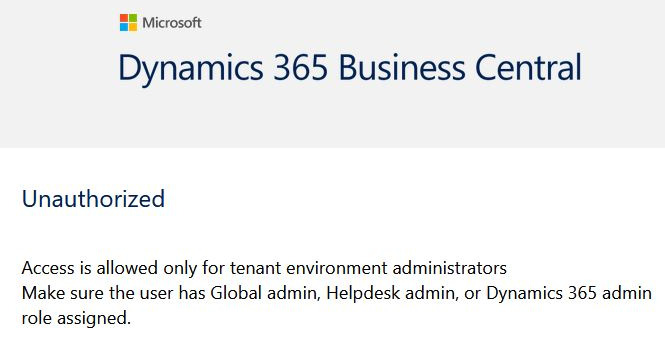
Figure 1.8 – Unauthorized error
In the next section, we will check which roles you need to assign to your account to get access to the Admin Center.
Required roles
You could be from the Partner or the customer side, I don't know. Not every employee can enter the Admin Center. In this section, we will look at both user types and at the roles that they need to have.
Internal users
For internal users, you must be one of the following to enter:
- Global administrator
- Dynamics 365 administrator
If you just need to manage Business Central environments, you can use the Dynamics 365 administrator role.
However, in most cases, the person who manages your Business Central infrastructure also creates users and assigns licenses for them, so this way, it is better to have a Global administrator role.
In the next screenshot, you can see how the roles assignment looks from the Azure portal side:
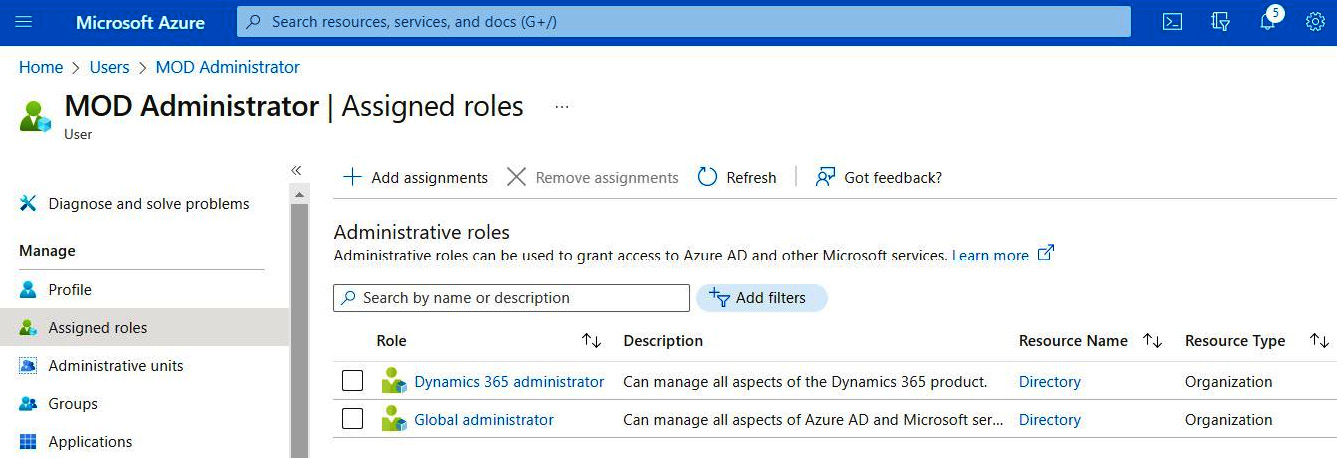
Figure 1.9 – Azure Active Directory roles assignment
In addition, you do not need a Dynamics 365 Business Central license to access the Admin Center or even Business Central itself, but without the license, you will have read-only access.
To assign a license to a user, your Global administrator should complete these steps:
- Open the Licenses page in Azure Active Directory, select All products and choose your Dynamics 365 Business Central license, Essentials or Premium, depending on what type of environment you have. You can see how many licenses you have and how many of them are currently in use and available to use:
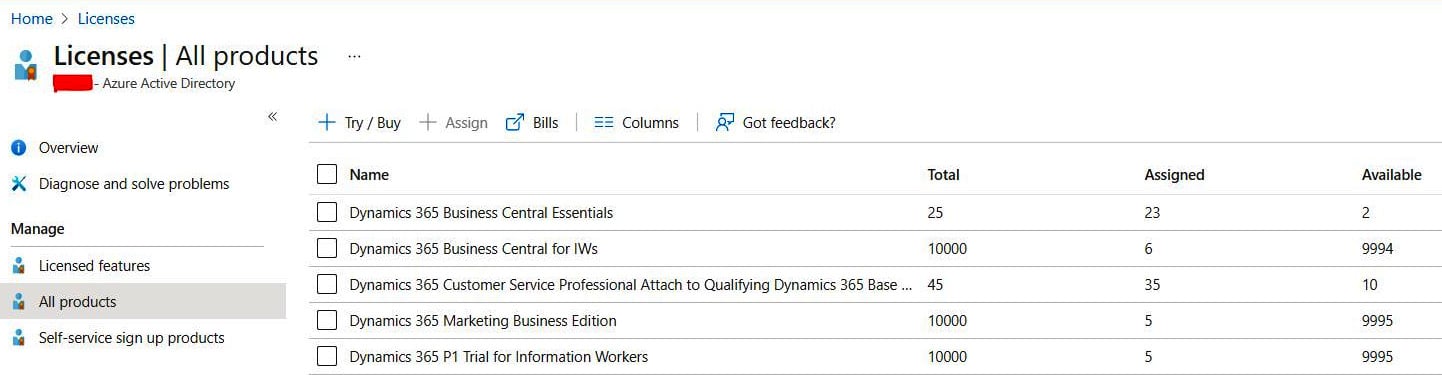
Figure 1.10 – License list
- Next, you will see your assigned users list. Then, click + Assign:
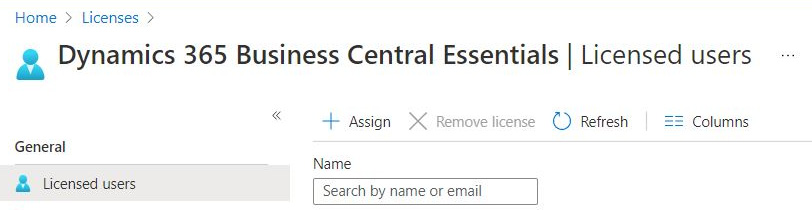
Figure 1.11 – License assignment 1
- In the final step, click on + Add users and groups to choose the users you want to assign. You can select several users or even user groups:
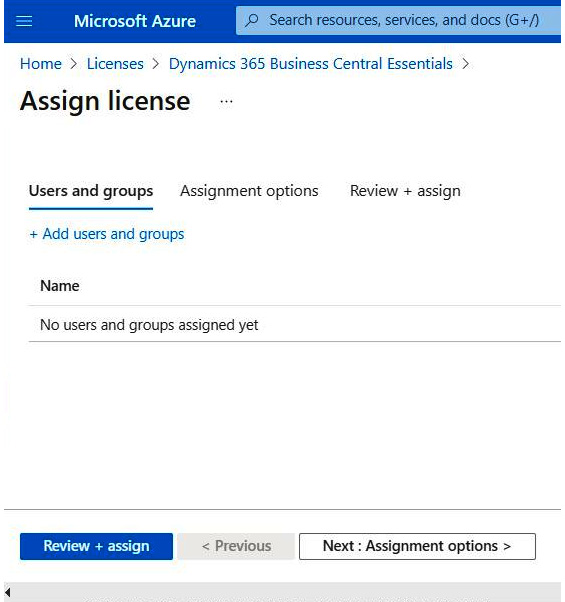
Figure 1.12 – License assignment 2
Delegated admins
A delegated admin is a reselling partner's account that has access to the customer's Dynamics 365 Business Central environment and Admin Center with administrator permissions. This account does not count in Business Central licenses usage, is not visible in the customer's Azure Active Directory, and the customer cannot manage this account, but the customer can remove delegated admin privileges from the partner.
If you are a partner, first of all, the customer must grant you administrator permissions through the relationship request. For this, you need to perform the next actions:
- Open the Partner Center.
- Open the CSP | Customers menu.
- Click on Request a reseller relationship:
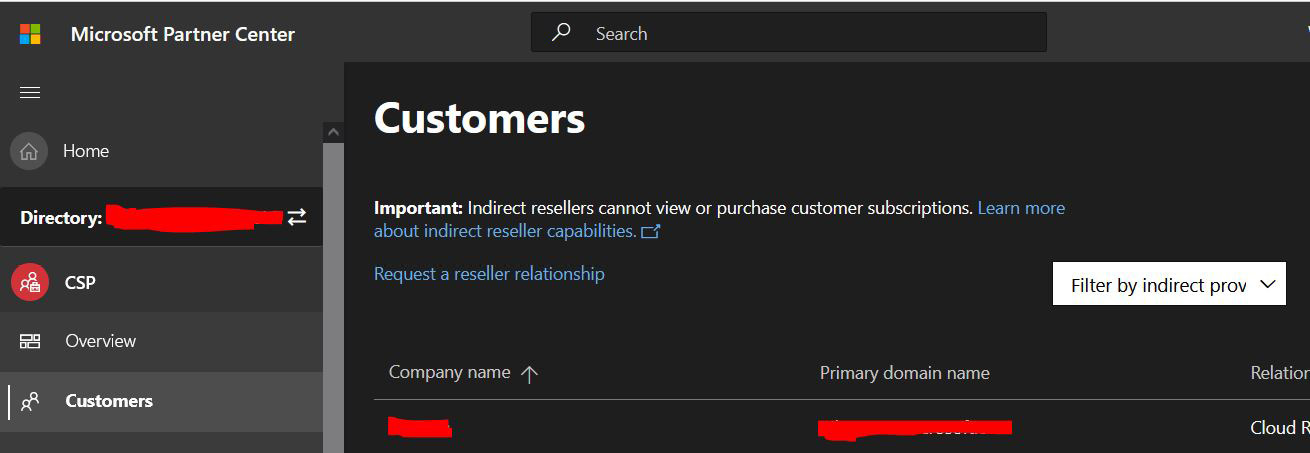
Figure 1.13 – Request a reseller relationship
- Choose your customer from the list, make sure that the Include delegated administration privileges for Azure Active Directory and Office 365 box is checked, and send the invitation by clicking the Done button:
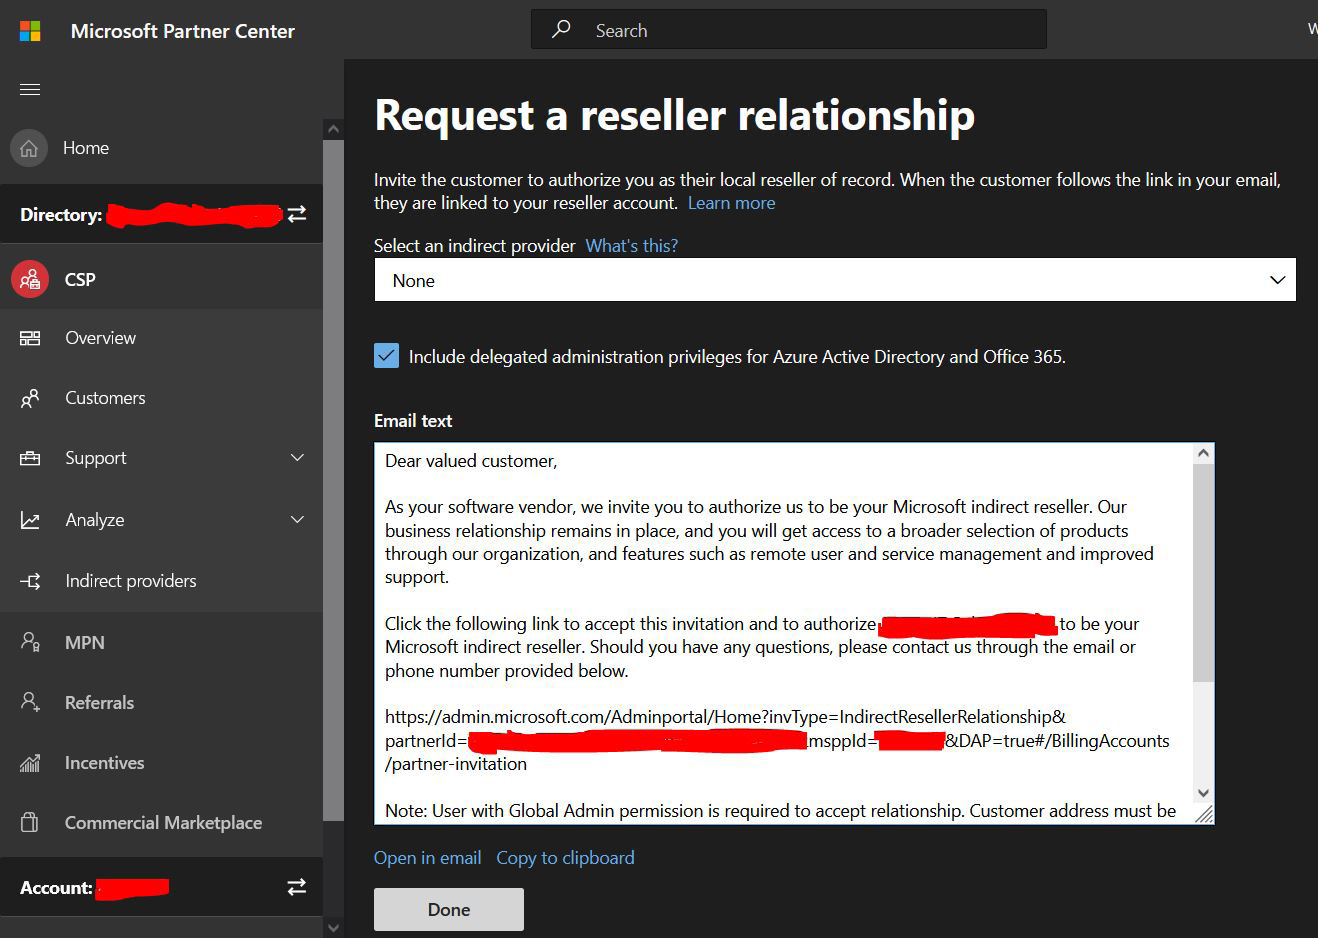
Figure 1.14 – Relationship invitation
After that, you need to be included in one of these two groups:
- Admin Agents – These will be Global administrators
- Helpdesk Agents – These will be Helpdesk administrators.
Both roles will have access to the Admin Center. The customer could remove this permission from a partner from the Microsoft 365 Admin Center: https://admin.microsoft.com/AdminPortal/Home#/partners/.
Environment types and limits
When you work with Dynamics 365 Business Central, you usually need to check some new features and new setup. Developers need to test their code somewhere. For these actions, you need a test environment, a sandbox. In this section, we will look at the production and sandbox environment types and see how many of these environments you can have.
Overview
Let's look at the Admin Center main window:

Figure 1.15 – Admin center overview
Here, you can see your Environments list with additional information:
- Name
- Application Family
- Type
- State
- Country/region
- Current Version
- Available Update Version
- Scheduled Update Date
- Security Group
Environments limitations
There are two types of environments:
- Production
- Sandbox
Typically, customers have one production environment; but, for example, if you have companies in different countries with different localization, you might want to have more production environments.
The sandbox environment has a number of differences from the production one. Here are the most important:
- Performance is lower because sandboxes are running on different hardware.
- You cannot export the database for the sandbox environment.
- In the sandbox, you can activate the Premium user experience and test the manufacturing and service functionalities.
- You can use the Designer page in the sandbox environment.
- You can publish your apps from Visual Studio Code directly to the sandbox, but they will be unpublished after each cumulative update.
- You can debug user sessions in the sandbox.
You can have one production environment and three sandbox environments without additional costs. These are the environments that you can create by yourself. You will see this warning when you try to create a new environment by clicking on the + New action:
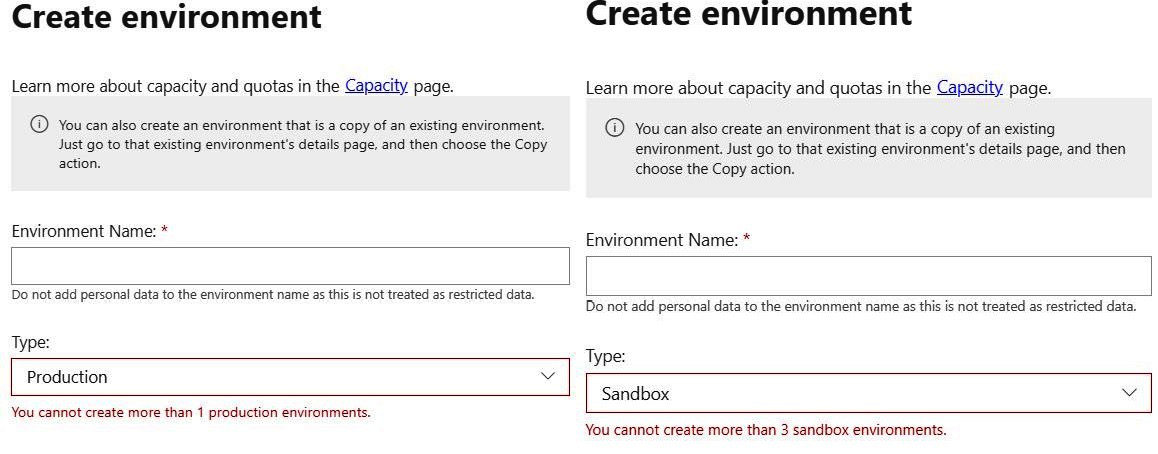
Figure 1.16 – New environment creation
However, you can increase this quota in two ways:
- Ask your CSP provider to create more production environments and pay a fee. Each production environment will give you three extra sandboxes.
- Migrate existing environments from other tenants. For example, you have several Azure tenants and decided to merge them. Or your Dynamics 365 Business Central environment from earlier has been created in the wrong tenant and you need to move it to your normal tenant. For this action, you must create a Support request to Microsoft from the Power Platform Admin Center:
https://admin.powerplatform.microsoft.com/account/login/<<Tenant ID>>.
You can read an explanation of the migration process here: https://docs.microsoft.com/en-us/dynamics365/business-central/dev-itpro/administration/tenant-admin-center-environments-move.
Capacity limitations
Until July 2021, we had a strict capacity limitation – 80 GB per tenant, not depending on environment numbers. This was like a stopper for even middle-sized customers. Just imagine that you have a 30 GB production database and you want to create a copy of the production environment to test some new scenarios with production data.
This copy would also take 30 GB of capacity and you would only have 20 GB left. If you need an extra sandbox for development, you cannot create a copy of the production environment without buying a capacity add-on.
For now, we have the next capacity calculation:
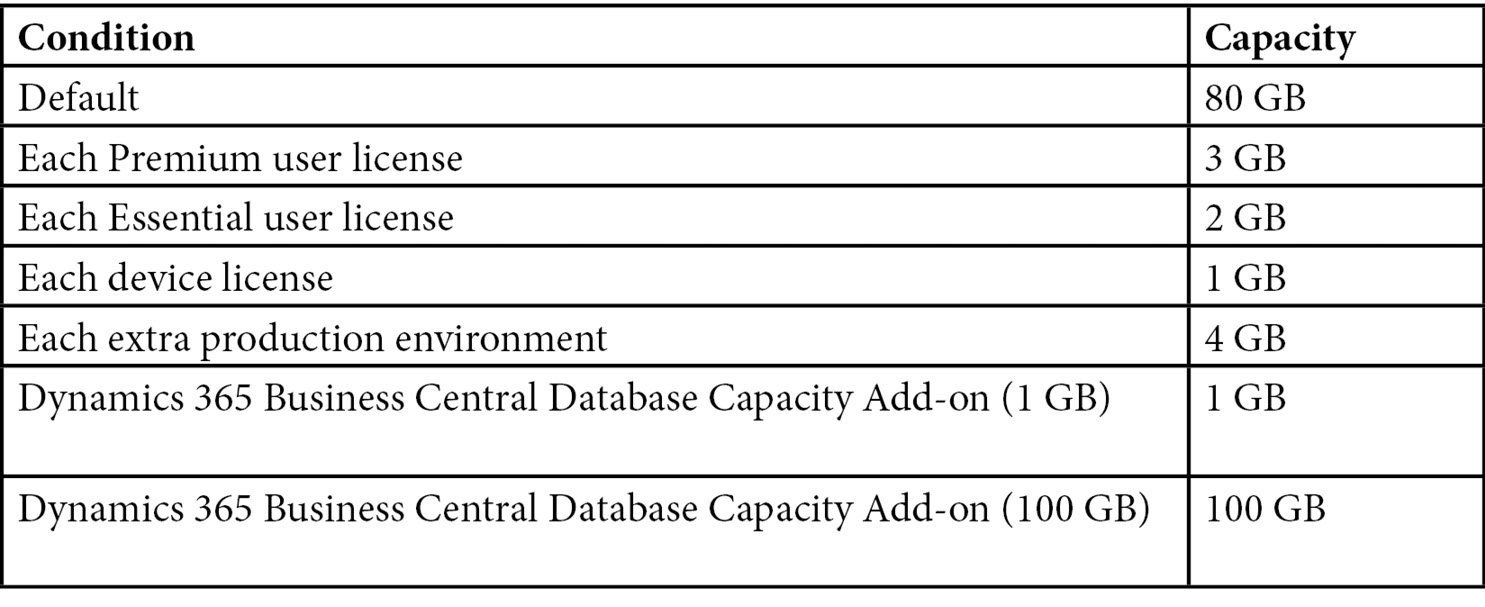
So, for example, if you have one typical production environment (Essential) with 25 users, you will have an 80-GB default capacity plus a 25 2-GB license capacity, which equals 130 GB of total capacity. That's much more interesting!
Important Note
Each user with a Dynamics 365 Business Central license has access to all tenant environments.
If your environments become out of capacity, this does not mean that all your operations in Business Central will be blocked. You only will not be able to create (or copy) new environments until you get free capacity or buy the capacity add-on.
Summary
You are now able to get access to the Admin Center and if your access is restricted, you know which permissions you require and what actions you need to do. You know how many environments you could create in your tenant and can already plan your future with Business Central SaaS.
In the next chapter, we will get closer to Dynamics 365 environments.