


Delving into the FL Studio Mindset and Workflow
I’d like to congratulate you on buying this book, for it is a manifestation of your dedication to taking an important step in mastering your skill set as it relates to leveraging FL Studio. It has been said that when the student is ready, the master will appear. In everything you pursue in life, be it related to professional or personal development, you can only build as high as your foundation is deep. This book will provide you with that strong foundation on which you may build. I hope that once you have completed its lessons, you will use it to continue your growth as an FL Studio user, and ultimately, reach the level of a masterful power user.
I hope you are excited to take this journey with me, as I’m excited to share with you the key aspects of its software system, which I have learned over almost two decades, and the experiences it brought to me. I will discuss these topics briefly in the following pages, but I need you to be willing to learn and willing to take action and understand that it is your why that will drive your motivation to take action on its contents.
Although this is a book of technical frameworks of the how to use FL Studio to create records that work within a Billboard charting framework, we need to ascertain the why of your desire to master FL Studio before I can impart the secrets of its formulas to you.
I have broken this book into three parts that represent the keystones in mastering FL Studio. The first part of this book will impart upon you the first key philosophy that must be addressed. This is the most important framework that will set the tone of what you will do with this book, and that is the mindset, or the reason why you want to master FL Studio. In the second and third parts of this book, I will teach you the how. With the proper mental framework coupled with the technical know-how, only then will you be ready to become a true power user. Ask yourself, is record production simply a hobby you enjoy in your downtime, or is becoming a world-renowned record producer a dream you have a burning desire for? This is a question you must contemplate in your own time.
The how is about the actual technical aspects of using FL Studio to get the most out of its powerful work systems.
From my perspective, and the perspective shared with me by some of the most legendary producers in the industry, if you are to truly master FL Studio, you need to have a strong why – without this, this book will still impart practical knowledge, but I fear you may not use it to its full potential.
This chapter will focus on sharing my own experiences using FL Studio in the music industry to help you to capture the mindset and absorption of knowledge required to master the software program. You will benefit from the stories and personal experiences I have had using the program, learn about practical frameworks for absorbing knowledge, and how I leverage the software capabilities to complete productions that are selected and used by major recording artists. You will also be introduced to the basic concepts within FL Studio and how they relate to creating an optimal workflow framework within the software UI. You will be introduced to how you should use the foregoing skillsets in sequence when using FL Studio to create productions in an advanced framework.
In this chapter, we will cover the following topics:
- Perfect practice makes practice perfect
- Mindset and using FL Studio
- Making hits that work for the masses
- Using and organizing the Browser and Channel Rack
- Understanding the Arrangement tool (the Playlist)
- FL Studio’s Mixer and plugins
Perfect practice makes practice perfect
When I started producing music, I had no musical theory knowledge, no technical mixing expertise, and no real background in software-based production platforms. I didn’t know how; I only had my why I wanted to learn, and it was simple – I wanted to be one of the greatest producers of my generation when I started. This goal made me take action and learn the how as I went on, day in and day out. I gained my experience and eventual mastery of FL Studio through daily repetition and trial and error. There were no “how-to” guides at the time, no videos showing tips and shortcuts, and no guru in my ear to tell me the how. I learned these processes over almost two decades spent working with the software.
Quite simply, even though you have access to this book, you need to start creating daily habits in FL Studio that will allow you to program your mind to become so familiar with it that it becomes a part of your everyday schedule. You must be teachable and open-minded to grasp the concepts. To be teachable, you must not only be motivated to read this book and act immediately after each chapter but also ask yourself, “What am I willing to give up to learn about these frameworks?”. If you are motivated to read and apply this knowledge but not willing to change your life to make time for its contents, then you aren’t teachable. This is a key point – teachability is where willingness to learn and willingness to sacrifice come together.
I intend to help guide you through a system framework that will lessen your own trial and error (although some trial and error is good for creative experimentation). In this book, I will walk you through each step in leveraging FL Studio’s robust system to give you a framework of how successful industry producers make records that work in the marketplace. Although this book is full of tips and tricks on how to maximize your output when using FL Studio, the key point in truly benefiting from this book is that becoming a master of any skill set requires mastering the basics.
Over the last 17 years, I have charted on American and Canadian billboard charts over 12 times, and dozens of times more globally. I have achieved the pinnacle of recognition in our industry with awards and nominations (including a JUNO nomination – the Canadian Grammy equivalent) and have led a career that allowed me to work with some of the most influential artists, songwriters, and producers of all time. This is a direct result of my dedication and “perfect practice” of FL Studio. FL Studio is one of the best digital audio workstations (DAWs) ever created, and if you can truly grasp the concepts I’m about to share with you, you are well on your way to becoming a master of FL Studio.
I say this humbly, but I say this to make a specific point as it relates to “perfect practice.” A concept I was introduced to very early in my career is, “Listen to those who have been where you are and have achieved what you desire.” If you wish to work with legendary artists, chart on billboards, receive awards and recognition from your peers, and be respected as a top creative, then you have come to the right place. In the modern era, there are many “gurus” who teach tips and tricks in their respective fields, yet they have never actually achieved the success they advise on. If you are to truly learn the concepts that work, you need to understand that the saying “practice makes perfect” is a misnomer, for it’s “perfect practice that makes perfect.” Therefore, this book will be your guide on what practical information you need to create “perfect practice.”
I would suggest that if you are to benefit from the framework presented in this book, you should read and reread the book until you fully grasp the concepts. Every time you read the book, you will be at a new place and have a new perspective, as in the case of ingestion of new knowledge, a reader rarely fully grasps all the meta points in a single read. This section is dedicated to setting the mindset that will help you get the most out of what I’m about to share with you. I want to introduce you to a concept that I didn’t invent but stumbled upon early on in my career, which helped me take steps in truly mastering FL Studio. That concept is “the four steps of learning.”
There are four steps of learning that every person goes through when ingesting a new skill set:
- Unconscious incompetence – the stage where you don’t know what you don’t know.
- Conscious incompetence – the stage where you are aware you don’t know what you don’t know.
- Conscious competence – the stage where you are conscious that you must consciously input effort to achieve results.
- Unconscious competence – the stage where all masters of skill sets live. You are unconsciously competent and performing the task as if you could perform that skill set while not having to think it through.
Masters of FL Studio utilize it as an extension of their creative arm. So, it is vital that if you are to gain the full benefits of this book, you must practice each step until you have fully grasped each concept to be able to perform the process of record creation unconsciously competently. This is easier said than done – in fact, you should note that you never truly become a master, as you are constantly mastering your skill set. Perfection is but an idea, and it’s subjective in nature. It is the practicing of the correct frameworks that enables you to truly ascend toward the ever-elusive “perfection.”
In addition, these mental framework concepts take five minutes to learn but a lifetime to master (no pun intended). You should know that a master is simply someone who has mastered the basics and continues to build upon their solid foundation upward. It is not that one great record you will create that will enable you to have a career in the music industry, but rather the catalog of work that you will create that will define your accomplishments using FL Studio.
When approaching production in FL Studio, it should be noted that there is, technically speaking, no right or wrong way to create records. Some producers will take a purely technical approach while some may take a totally unorthodox approach, but all arrive at the promised land. Ultimately, music is subjective – its beauty is in the eye of the beholder. The framework I will share with you is what enabled me to have success using my creative approach, but it will be your own creativity coupled with this framework that will drive yours.
Now that we have discussed the concept of perfect practice makes perfect, we will now dig further into the power user’s mindset by discussing what makes the correct mindset and how it will lay the foundation for your technical efforts.
Mindset and using FL Studio
This section will focus on sharing personal experiences and information shared with me by some of the world’s greatest producers, songwriters, and mixing engineers, which are related to staying disciplined and motivated to continue to be teachable when absorbing new information, and about the mindset commonalities successful producers use when executing productions with FL Studio. This section will also include introducing you to the concept of affirmations and how to create and conceptualize them, and ultimately, you will be prompted to create your own affirmations in the Exercise section.
Making hits that work for the masses
I started at the same place as most of you reading this book – I had no money and no experience, just FL Studio and a dream. When I ventured out into the wonderous world of Los Angeles and I had finally managed to get around big producers, engineers, and songwriters, I took the approach of listening and learning before I did anything else.
First, FL Studio is an extremely versatile software tool that must be mastered to create great workflows and workflow habits. Most of FL Studio’s theory comes from trial and error, but there are lessons in what I shall impart to you that I learned from observing other masters at work. There are two concepts called the two pillars of practice, which are as follows:
The pillar of mindset rules the pillar of action. Without the correct mindset, your actions are fruitless.
The pillar of mindset shows that the following applies to each master I learned from:
- They had a chief objective
- They believed that the objective was possible, even if it was farfetched and outrageous
- They programmed their minds to focus obsessively on their goal by thinking about it daily
- They took daily action toward the goal
- They understood that discipline trumps motivation, for motivation gets you going but discipline keeps you going
- They had a ferocious appetite for learning everything they could about FL Studio
- They experimented creatively and technically
- They aren’t afraid to take risks in creation
- They are perfectionists in their own right
Before I share with you the first key lessons that will set the tone of this book, we need to focus on the concept of affirmations, or narrowing down your why.
Successful musicians, producers, engineers, songwriters, and the like all use affirmations to train their subconscious minds to set in motion the action and discipline they will need to start and complete the objective they wish to attain. Think of affirmations as your destination and the technical frameworks of this book as the directions. Affirmations should be recited regularly and updated as goals change. The truth is your subconscious mind doesn’t know whether you are capable of achieving a goal or not. That’s why it is important to affirm within yourself that you can and will attain your goals.
For the purpose of this book, we will focus on affirmations that are related to your skill set as a producer or composer, and the goals someone in this profession may have. It’s important to write down your affirmations and verbalize them in private regularly. I say this because most people who don’t share the same mindset of setting goals will think you are crazy! If your goals aren’t crazy, they aren’t big enough. It’s important when writing affirmations that you frame them when you write them as something that has already been accomplished. When writing an affirmation, you want to write it as if you have already achieved the goal, not as if you want to achieve the goal. We want to affirm that you are heading there, not simply dreaming of heading there.
For example, a bad affirmation would be, “I want to be the best music producer ever.” The reason this affirmation isn’t powerful is because it implies you want to be, not that you are. An example of a good affirmation to the contrary would be, “I’m excited and happy knowing I’m the best music producer ever.” This implies you already are, and not simply wishing you are.
This is very important! So please, take note and practice writing goals and objectives correctly – it absolutely matters, and whether through coincidence or serendipity, you will see your goals unfold if you internalize these objectives through repetition. I want to make it clear, there are a lot of books and seminars that purport simply wishing your goals into existence; this is a misnomer. When you have identified a goal, it must be followed by these:
- A genuine internal feeling of excitement
- Consistent action toward achieving that goal
Without these two components, you are simply just writing words on a page, and it won’t help you internalize the techniques taught in this book. If you are writing goals and affirmations and you feel doubt, negativity, or frustration, that just simply means you need to dial back and focus on the next logical step instead of the objective you feel doubt over. This is important as when you feel doubt, you internally don’t believe you will get the goal, and you won’t! On the contrary, if you feel motivated, positive, and accelerated when you write a goal down, you’re in the sweet spot and you need to follow through with taking action.
Again, let’s simplify the concept of affirmations by following these steps:
- Write your objective down as if you have already achieved it.
- Consciously repeat it to yourself every day.
- Feel excited and motivated when you repeat it.
- Take ruthless action until it is achieved.
Remember, objectives are moving targets – you can only go as far as you can see, and when you get there, you will be able to see a little further. Let’s look at some further affirmation examples you can use or modify as they relate to this book:
- I’m thrilled and excited that I have mastered FL Studio and have worked with some of the biggest artists and songwriters in the industry
- I’m grateful that I have earned Grammy Awards and nominations using FL Studio in my genre
- I’m humbled that I’ve been able to create a career using FL Studio that allows me to earn a fantastic living for myself and my family
Now that we have explored the concept of affirmations and the art of setting goals, we will discuss the concept of viewing growth through the lens of what I call the mental balance scale.
The mental balance scale
Mental balance is simply the idea of taking action on your goals, objectives, and clearly defined affirmations that you must be balanced in your approach to both the how and the why. Although this sounds simple in nature, the truth is (and this may go over your head), the most important part of mental balance is actually your why. The conscious mind nourishes the subconscious, which in turn exerts its influence on your actions and thoughts within your reality.
As we discussed in the Perfect practice makes practice perfect section, without a strong why, you won’t put in the required effort to learn the how. The concept of mental balance is a “conventional thought” or “conventional wisdom.” To be super successful, I need you to start thinking outside of the box, outside of conventional wisdom. Your status as a producer, composer, or arranger using FL Studio is a culmination of all of the thoughts and habits you have created to date. If you continue to think and do what you always thought and done, you will continue to get what you have always got!
All of the most notable producers I have worked with in the business know this, and they continue to be teachable even after all of the success they achieve. They continue to set new goals, they go as far as they can see, and when they get there, they know they can see a little farther. The art of goal setting is knowing that there will always be another step, another aim, another objective once you complete an affirmation. The most successful producers I have worked with, in most cases, aren’t musical geniuses, they weren’t Mozart when they started, but they dreamed big. They had a powerful why that drove them to learn the how as they progressed in their careers.
The truth is with FL Studio, you don’t need to be an expert in musical theory, playing instruments, or composing when you start. FL Studio is a powerful tool that gives you everything you need to make your ideas come to life. It is practicing with the correct mindset that will enable you to master the software and become a great musical theory expert, instrument player, and composer.
Now that we have covered the basics of mindset as it relates to becoming a true power user, I’m going to show you the how.
Using and organizing the Browser and Channel Rack
In this section, you will learn what the Browser and Channel Rack are and how to use them efficiently to create optimum workflow capabilities.
The Browser represents the organization and sound selection palette. This contains all of the FL Studio stock sounds and menu options and will contain the custom workflow folders we will create in this section. The Channel Rack is the tool you will use to plug in sound files (kicks, snares, hi hats, and sound design) to then create rhythmic patterns. The two are intimately connected, as sound files in the Browser will ultimately go into the Channel Rack.
We will now explore both the Browser and Channel Rack in detail in the next sections.
Exploring the Browser tool
This figure is a screenshot of the FL Studio software system:
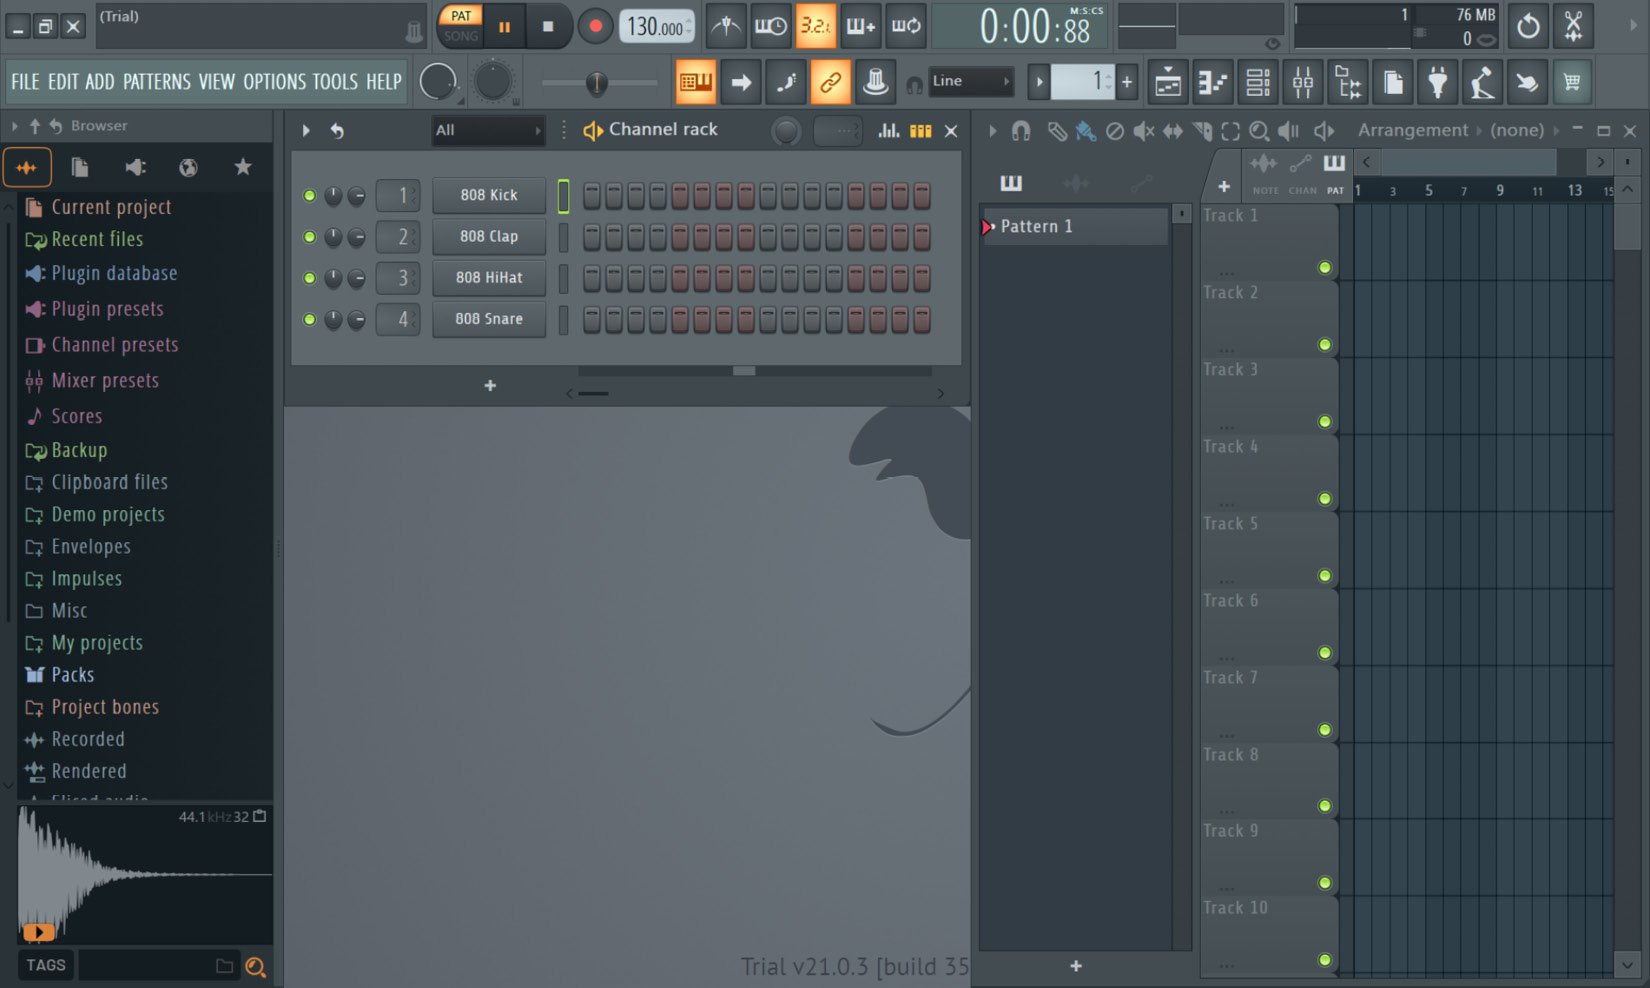
Figure 1.1: On the left, you will see the Browser, and in the middle, you will see the Channel Rack
The Browser on the left side window is the library to all of your sound kits. Organizing the Browser from the Windows folder externally is key to setting up an optimum workflow. The objective of organizing the Browser is to find the location of your go-to sounds and sound kits that you can begin to memorize through your workflow to create “clicking” habits through repetition, and to organize your go-to sounds into custom folders, which saves you time searching FL’s robust sound kit sections each time you want to start a new production.
For this book, I will be focusing on using the stock sound kits that FL Studio provides, but as you grow as a producer, you will likely purchase or create your own sound design that you will incorporate into your FL Studio workstation folder.
Now, let’s start our journey of learning how to master FL Studio by following these steps:
- When you open FL Studio, you will see an option selection on the left side of the window, as seen here:
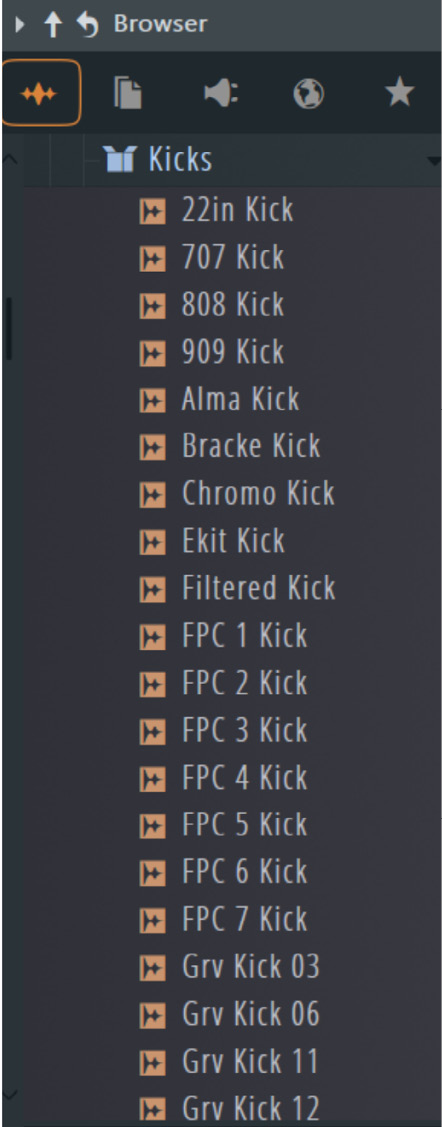
Figure 1.2: Packs folder within the FL Studio Browser
Clicking the Packs tab will open up FL Studios’ stock selection of sounds, which you can use to start making the bare bones of how your production will sound.
- To create your own folders that generate tabs in FL Studio, right-click on Packs and click Open to start using the Windows Explorer tab externally from the software in the location you have installed FL Studio, under the
Image-Linefolder. Then, you will be able to access thePatchesfolder, as seen here:
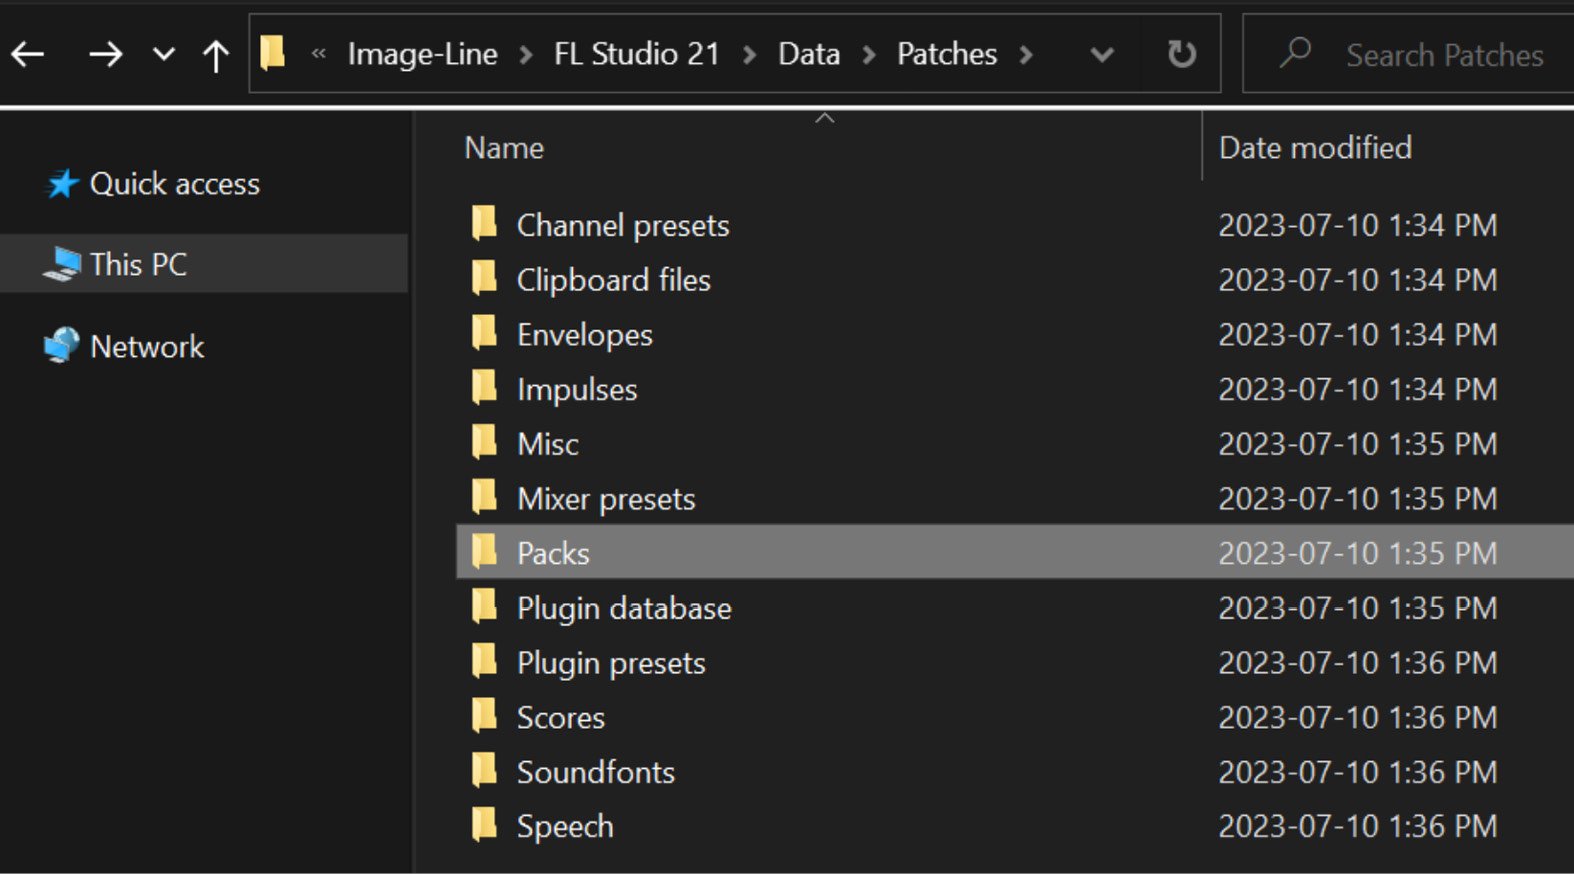
Figure 1.3: Windows Explorer folder, Packs
Note
In Windows 10, the application formerly known as Windows Explorer underwent a transformation and is now referred to as File Explorer. Please note that the terminology and naming may vary depending on the specific version of Windows being used.
By default, FL Studio gets installed in your main drive, under the Image-Line folder. You will then click through the FL Studio 20 | Data | Patches folders. This is where all of your sound kits will be installed and ready for organization.
- Once you have accessed the
Patchesfolder, you can create your own folders from within to start organizing the sounds we will create in later chapters. For this example, I’ve chosen to name the new folderPower UsersDrum Kit:
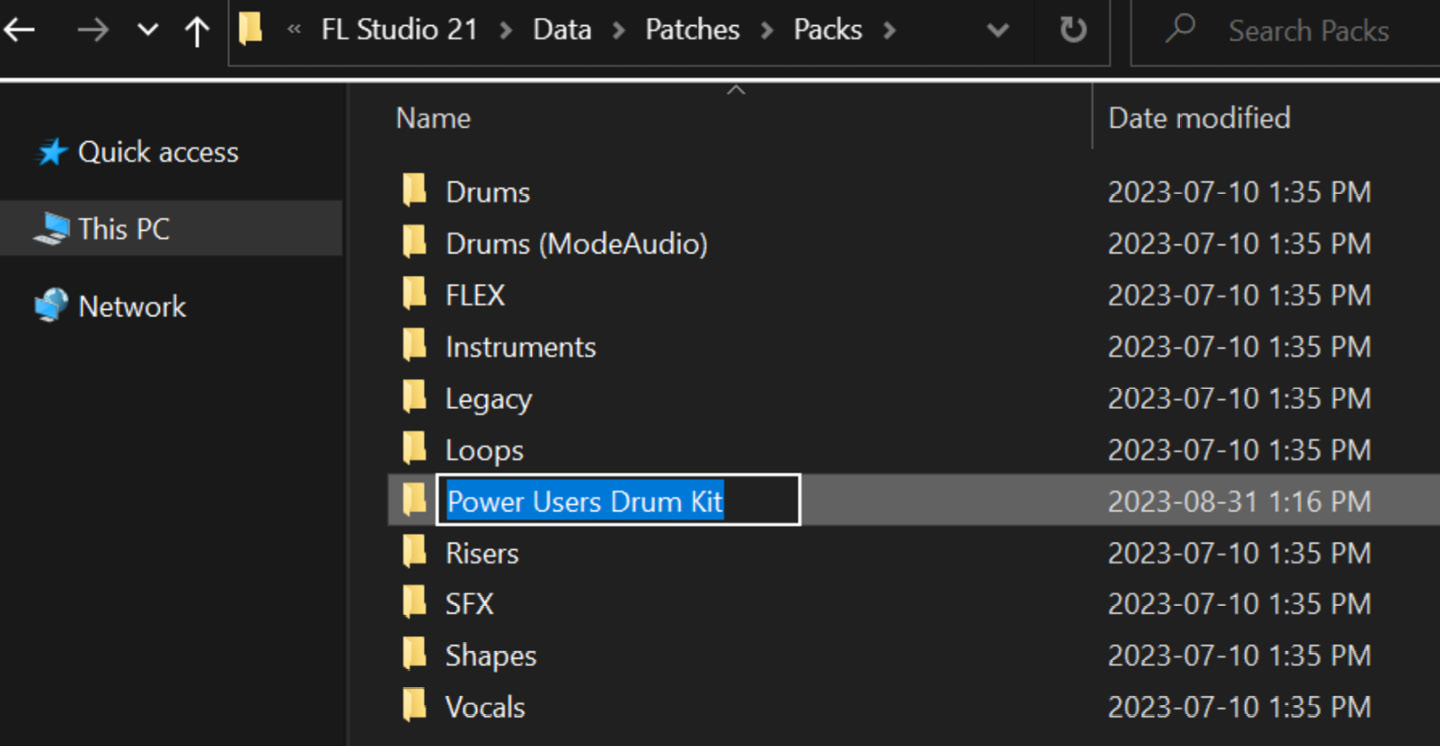
Figure 1.4: Power Users Drum Kit folder within the Image-Line install folder
The potential is limitless for how you want to organize your Browser – you may only have one or two folders, or you may have many – it’s up to you what makes sense in your own toolkit and preference.
- Once you create the folder, you will now see it populate within FL Studio under the Packs tab in the Browser:
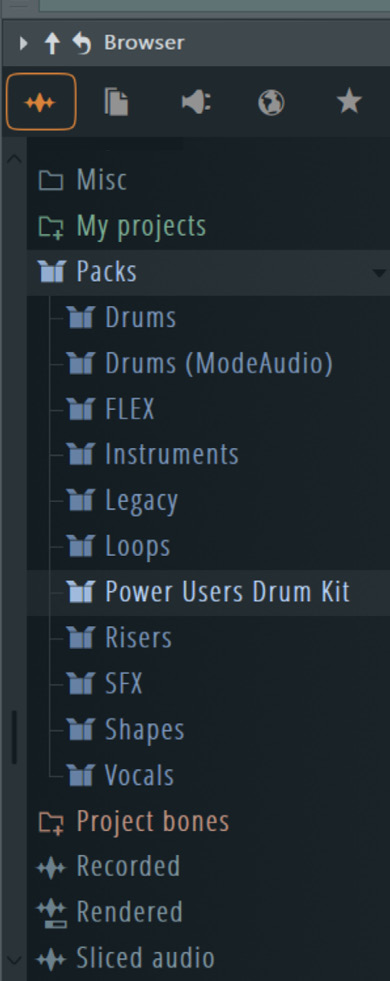
Figure 1.5: Power Users Drum Kit within the Browser
In Chapter 4, we will create drums and WAV sounds so that you can begin to formulate your own unique sound, and ultimately, revisit strengthening your workflow templates to include drums, VSTs, and mixing plugins. For now, we are simply getting you used to organizing the Browser to fit this specific workflow habit.
In addition to creating custom sound design, you may find specific sounds you already have or ones that are within FL Studio and are your favorite – you can simply copy and paste these files into your custom folder to shorten the workflow by “clicking” within the DAW, as I have done here:
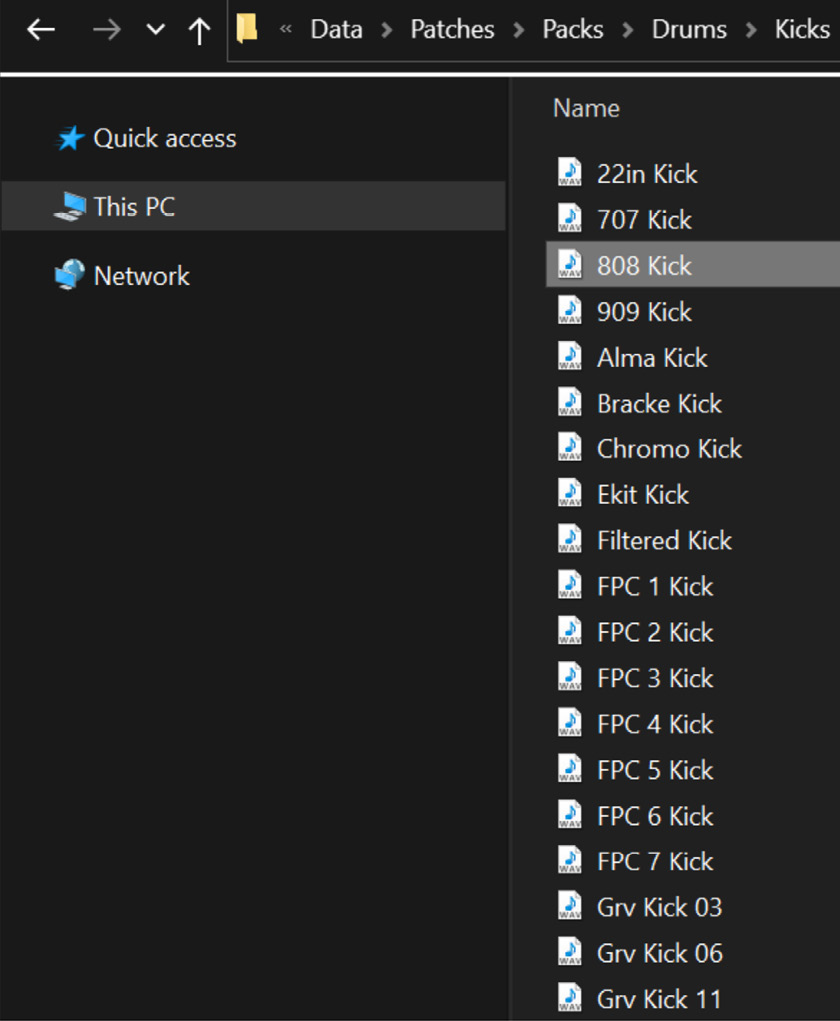
Figure 1.6: Windows Explorer | FL Studio 20 | Data | Patches | Packs | Drums | Kicks
In Figure 1.7, we will locate the 808 kick contained in Data | Patches | Packs | Power Users Drum Kit:

Figure 1.7: Windows Explorer folder | FL Studio 20 | Data | Packs | Power Users Drum Kit | 808 Kick
The reality is you do not need a million different kick sounds to create great records. In fact, most of the high-level producers I know typically only use a small number of drum sounds in every record they create (although they mix them according to what type of feel and vibe the record permits – we will discuss this in Chapter 4).
- You can start adding your go-to sounds in your custom folder by locating your sound file in the specific FL Studio stock folder, copying the file, and simply pasting it into your own custom folder – this will populate the file in your FL Studio Browser under the Packs tab:
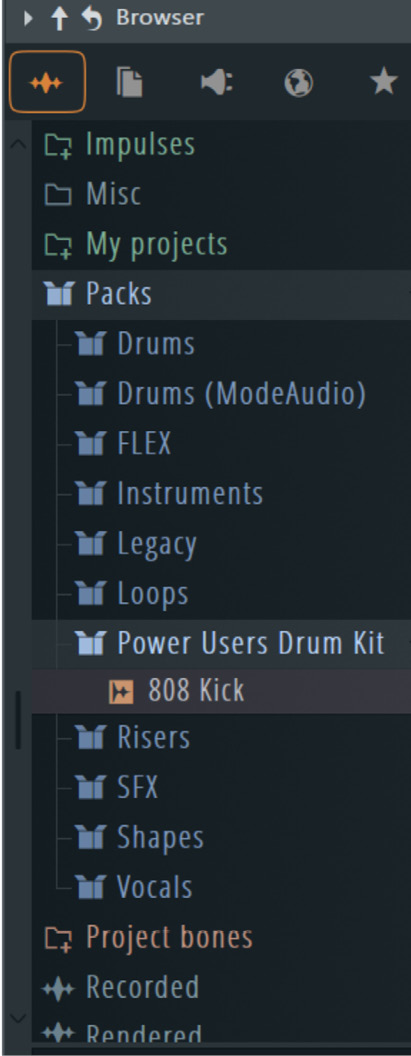
Figure 1.8: The Power Users Drum Kit within the Packs folder within the FL Studio Browser
Viola! You have now created your first workflow benefit by moving your favorite kick into your first custom folder. This allows you to avoid going through each pack in the Browser to find it the next time you wish to use it in a production.
Important note
In Chapter 2, we will delve into utilizing the Piano Roll for crafting custom sound designs and enhancing your workflow practices.
Exploring the Channel Rack
The Channel Rack is one of the most important tools within FL Studio that you can master – it is where you will add your VST’s instruments, and where you will add drum sounds. I use the Channel Rack to create the backbone of my drum sequencing, and ultimately, the foundation for what the track can become. To begin optimizing the workflow and using it efficiently, we need to create a preloaded template with your go-to sound already loaded. This will save you time when you are experimenting with new ideas or just want to explore your creativity.
The following figure shows the Channel Rack. This is located in the main window when you open FL Studio and, by default, populates the center of the screen:
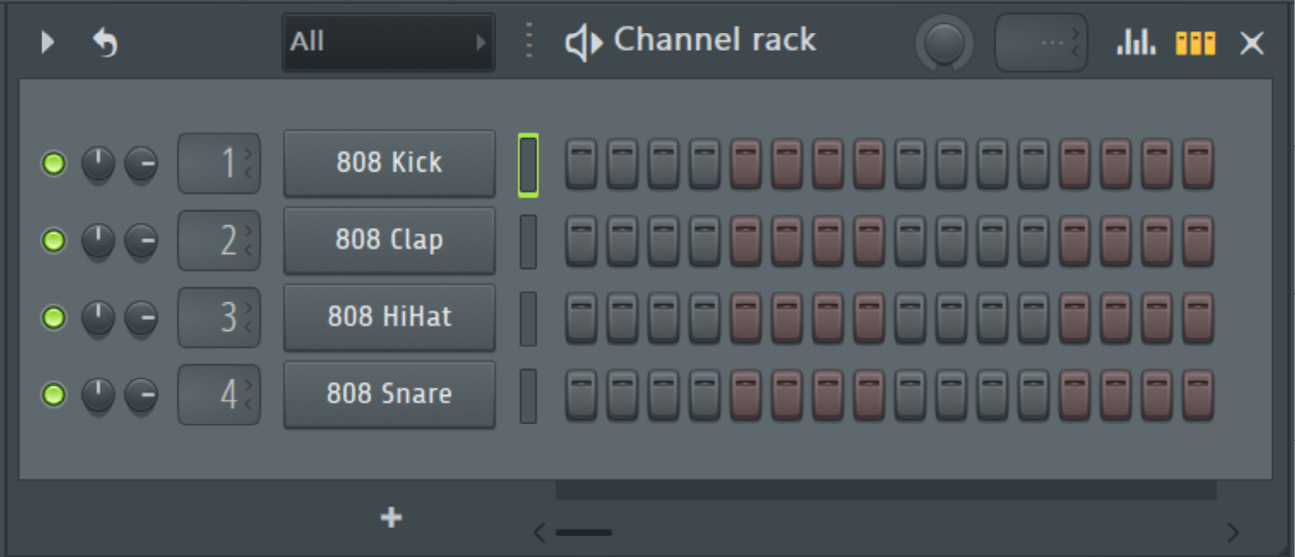
Figure 1.9: The Channel Rack within the FL Studio Browser
To start loading sounds into the Channel Rack, simply right-click the desired sound in the Browser and click Open in new channel, as seen here:
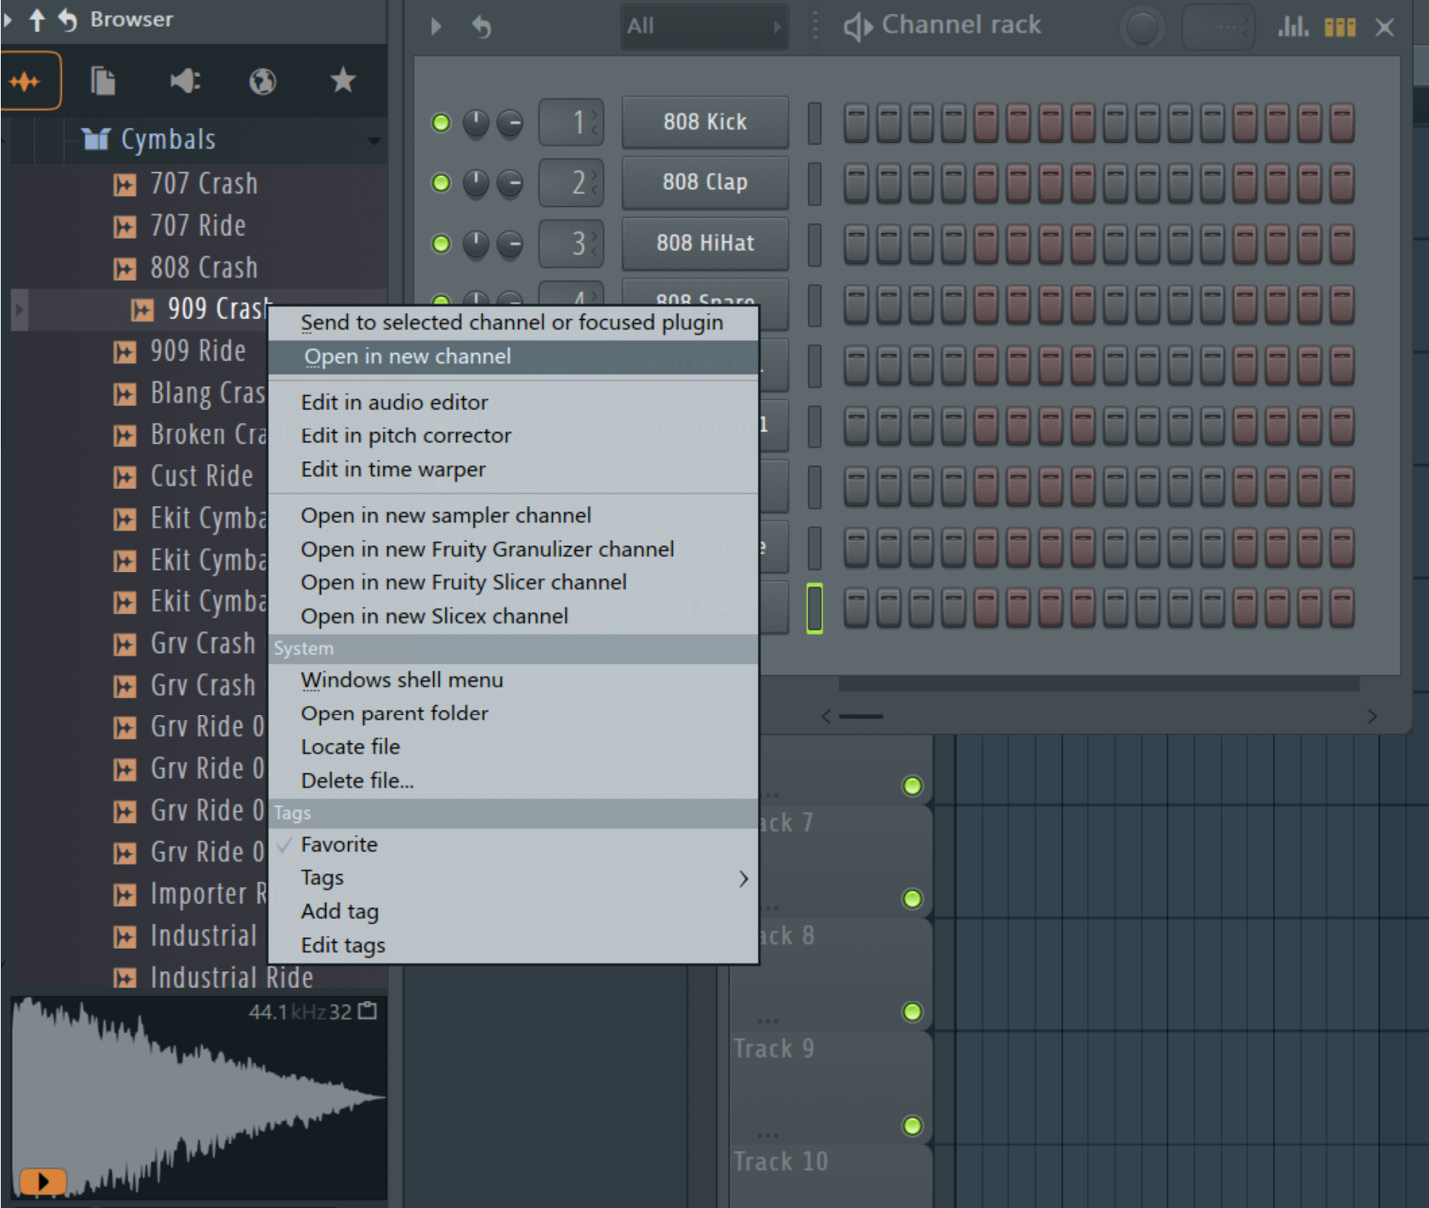
Figure 1.10: The Open in new channel selection
You may ask, if we are organizing files in the Browser, why don’t we just preload everything into a channel rack template? To avoid confusion, understand that a channel rack template is a basic foundational template, and we just want to have our basic sounds loaded – your custom folders may end up having hundreds of different sounds contained within them as you grow your sound design library. So, this is to keep your setup simple and give you the best place to start a new record.
To create a template, we are going to simply add the desired sounds into the Channel Rack. This will import the sound into the Channel Rack. You can do this for as many sounds as you like. Once you have added the desired sounds into the Channel Rack, click FILE | Save as…:

Figure 1.11: Clicking FILE | Save as… within the FL Studio main page window
This will bring up the project folder within the FL Studio Window Explorer. Name your template to your liking, and save the template FLP file. This will now act as your go-to workflow template. Clicking Save will add this FLP file to your Projects folder, and it can now be used for future projects:
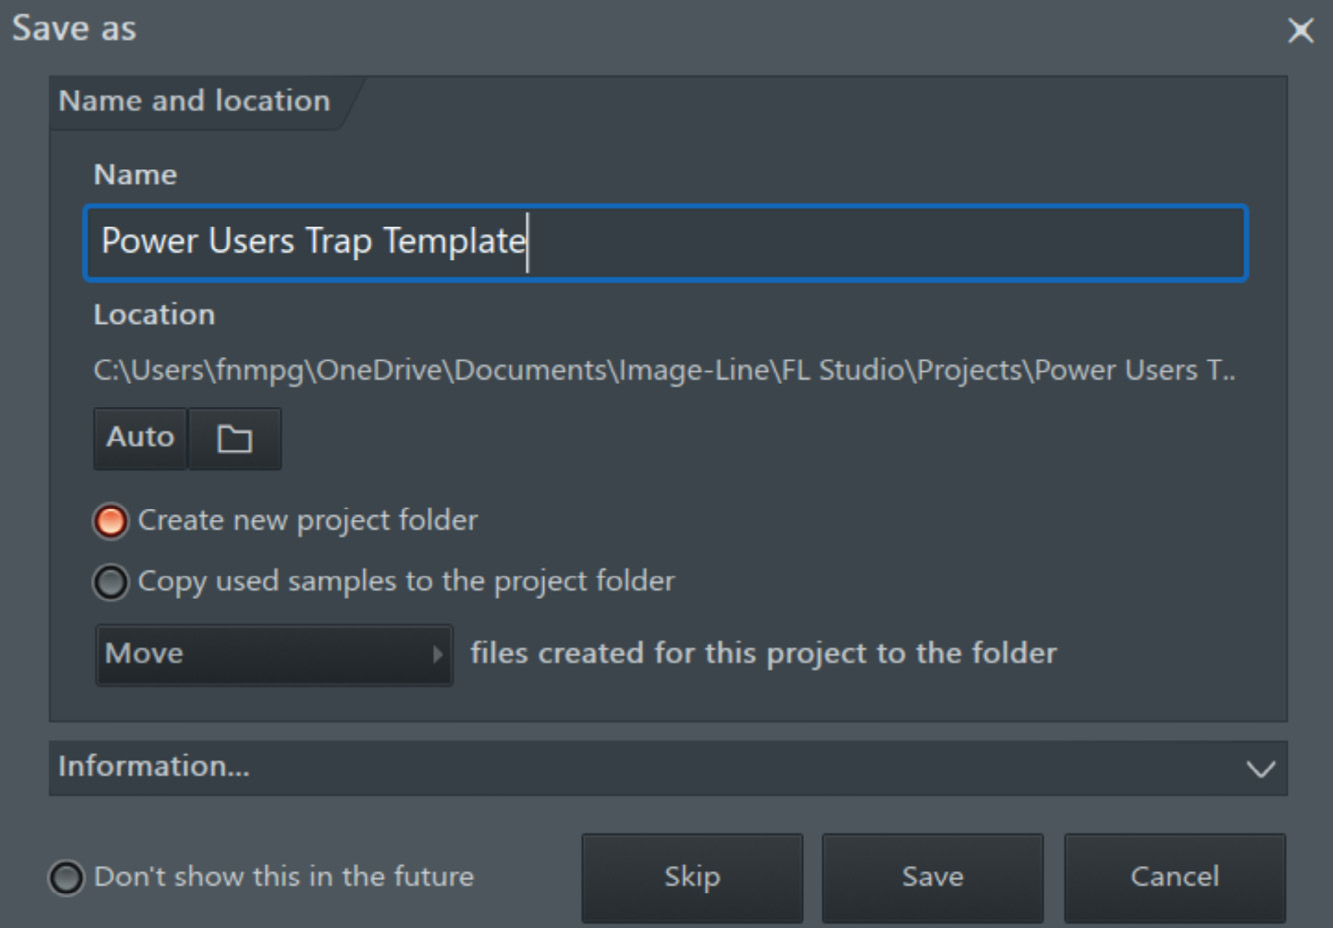
Figure 1.12: FILE | Save As, creating a template name
You can get creative with the different templates you want to use. For example, you may wish to create a hip hop template, or a trap template that only preloads specific sounds for those types of productions. I recommend keeping it simple and adding to your templates as you become more comfortable with your production skill set. For example, I have named this template Power Users - Hip Hop Template:
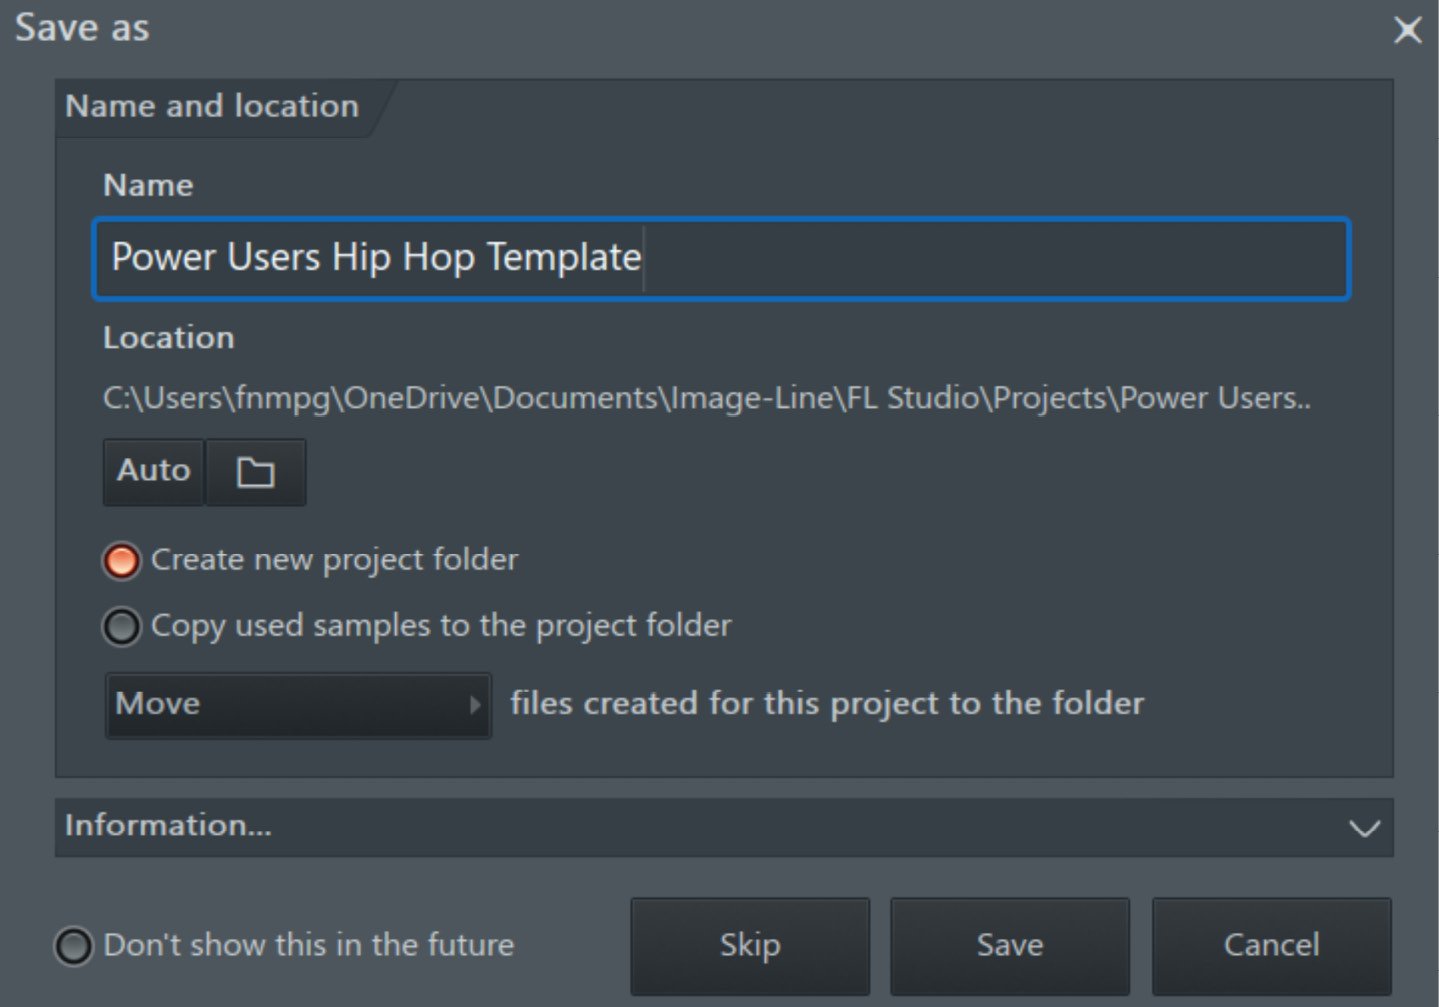
Figure 1.13: FILE | FL Studio | Projects | Save As | File name
Now, let’s talk about how the Playlist tool works, and what we can do with it to create full productions!
Understanding the Arrangement tool (the Playlist)
The Playlist tool is where we will create the arrangement for your production. Accordingly, FL Studio’s arrangement tool is essentially the function that enables you to combine all the various elements of your song into a unified framework. Organizing the pieces of a puzzle to create a complete image comes to mind. You can drag and drop your different patterns (such as your drums, bass line, melody, etc.) into a timeline that represents the duration of your song using the Playlist tool. From there, you can easily edit and arrange the various components of your song to produce a full track that flows smoothly from beginning to end. In other words, the Playlist tool is essential for transforming your unique musical ideas into a finished, polished piece of music. In Chapter 6, I will show you how we set up templates that the pros use to structure songs within the Playlist tool. For now, let’s dive into the basics of how it works.
The Playlist tool is located on the right-hand side of the FL Studio window. The playlist tool shows a grid with the option to place different channel rack loops into a “track” segment.
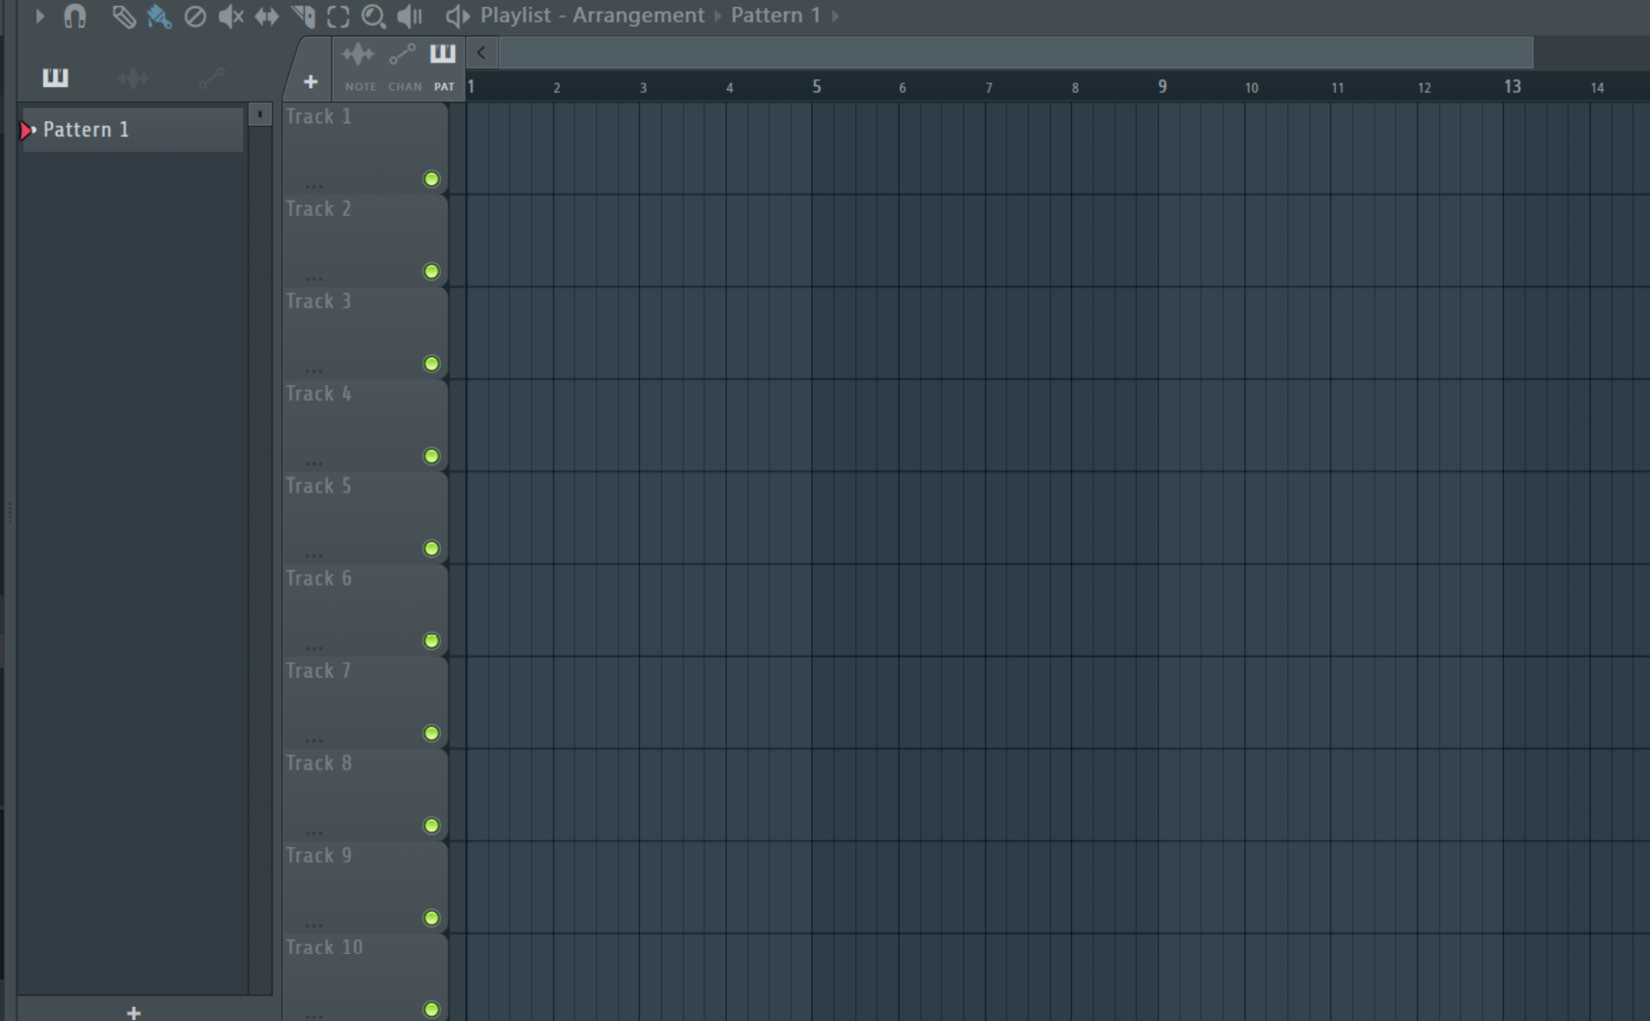
Figure 1.14: Arrangement window
When you use the FL Studio Playlist tool, we typically create patterns for each element of your production, such as your drums, bass line, and melody. Once you have your patterns created, you simply drag and drop them into the Playlist tool window. From there, you can arrange the different patterns in the timeline, using the mouse to move them around and adjust their lengths as needed.
Within the Playlist tool, you can also add different automation clips to control things such as volume, panning, and effects, and use the Mixer window to adjust the levels of each individual element in your song. It may take a little practice to get the hang of it, but with a little bit of patience and experimentation, you should be able to create a fully arranged track that sounds great.
The reason we create templates for workflow optimization is to ease the burden of creating arrangements from scratch each time we start a new project in FL Studio. It can be complex, and a formula should be followed.
To get the most out of the FL Studio Playlist tool and maximize the workflow in it, it’s important to take some time to really plan out your song structure ahead of time; this is why, in Chapter 6, I will give you the exact templates to have your workflow maximized for the greatest return on time and input.
A great working template will help you to organize your ideas and create a cohesive flow that keeps your listener engaged. When you have the basic idea of your song structure, you can start experimenting with different patterns and sounds to find the ones that work best together.
As an example, and as we will discuss in Chapter 6, the new formula is 4-bar intro – 12-bar verse – 8-bar hook – 12-bar verse – 8-bar hook. In Figure 1.15, this will appear as such in the Playlist tool.
In Chapter 6, we will create a modern pop/billboard formula arrangement template that is time-tested and works. As a quick example, let’s use this bar framework to input blank blocks into the playlist tool. The finished arrangement using this formula will appear as follows:
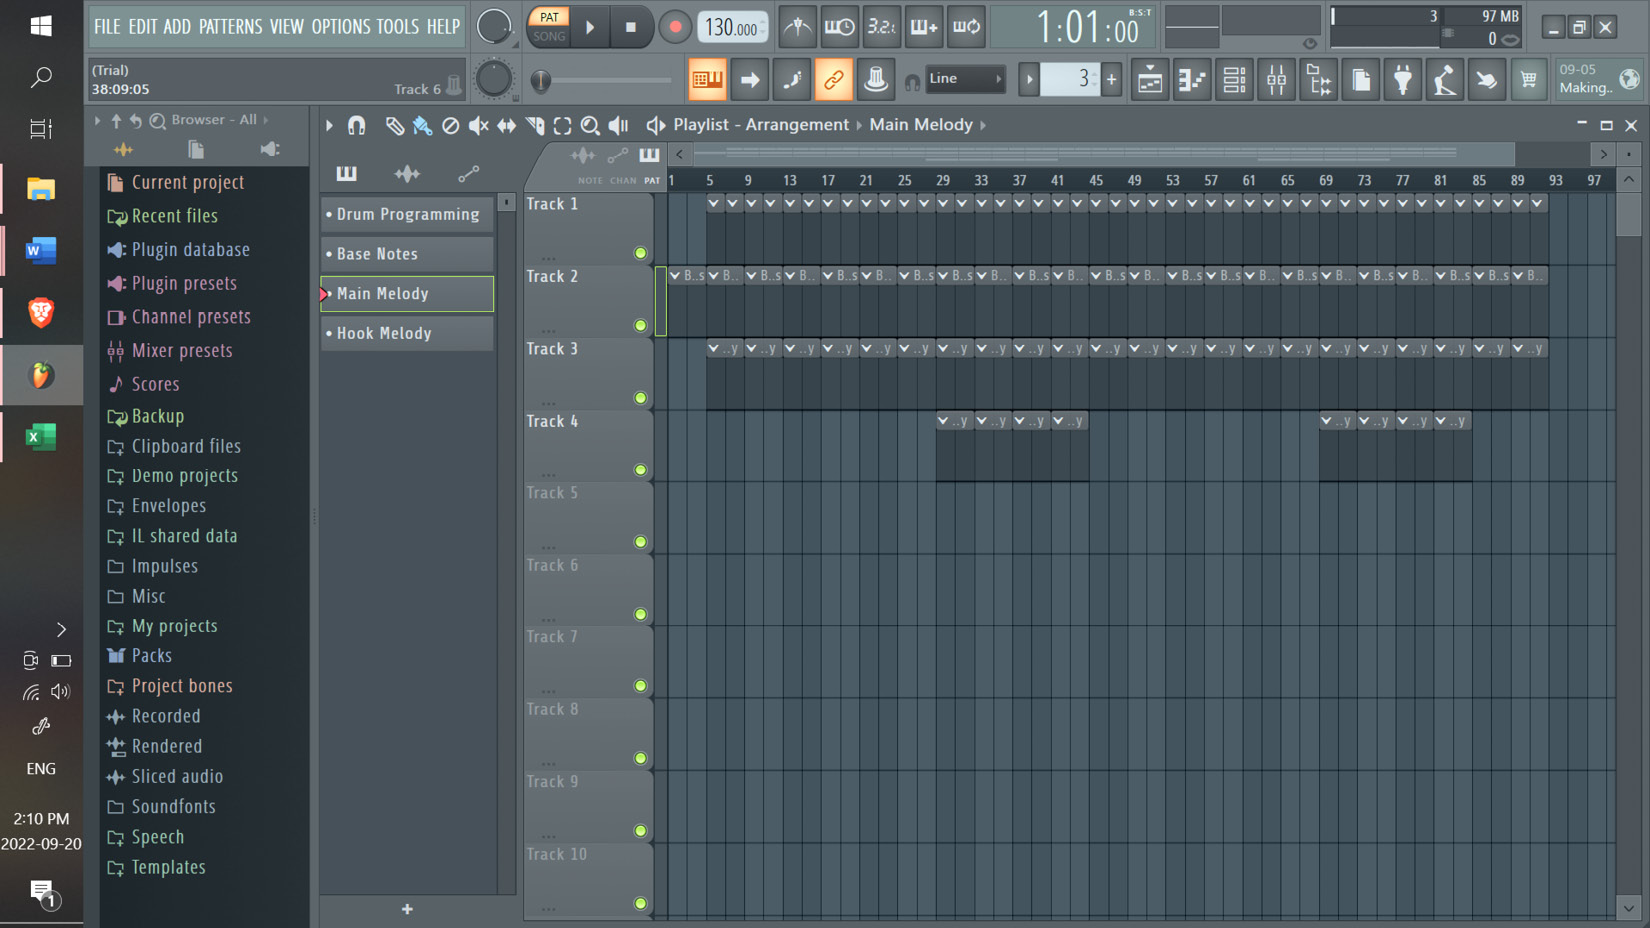
Figure 1.15: Playlist tool | full song arrangement
Creating working templates as saved project files will make it easy to start manufacturing records like clockwork. The key here is to establish workflow habits that allow you to focus primarily on being creative and filling each of the blocks in the playlist with catchy chords, hypnotic melodies, and funky bass lines.
Now, let’s talk about the FL Studio Mixer and its mixing plugins. These are the tools that you will use to get the most out of your sonic crafting; whether we are adding things such as reverb to create space, or delay to add rhythmic echoes, these tools are your bread and butter for crafting unique sound design with FL Studio’s key plugins.
FL Studio’s Mixer and plugins
The FL Studio Mixer is the equivalent of your Solid State Logic (SSL) board in the classic studio setup – this is where you will load all of your sound kits and VSTs to start mixing and mastering sounds. In addition, this is where you can get creative with stacking mixing plugins, such as reverb and delays, to create unique sounding tracks and sound designs. Let’s walk through getting your mixer template set up.
Setting up a mixing template
First, look in the top-right corner of the software toolbar, as shown here:
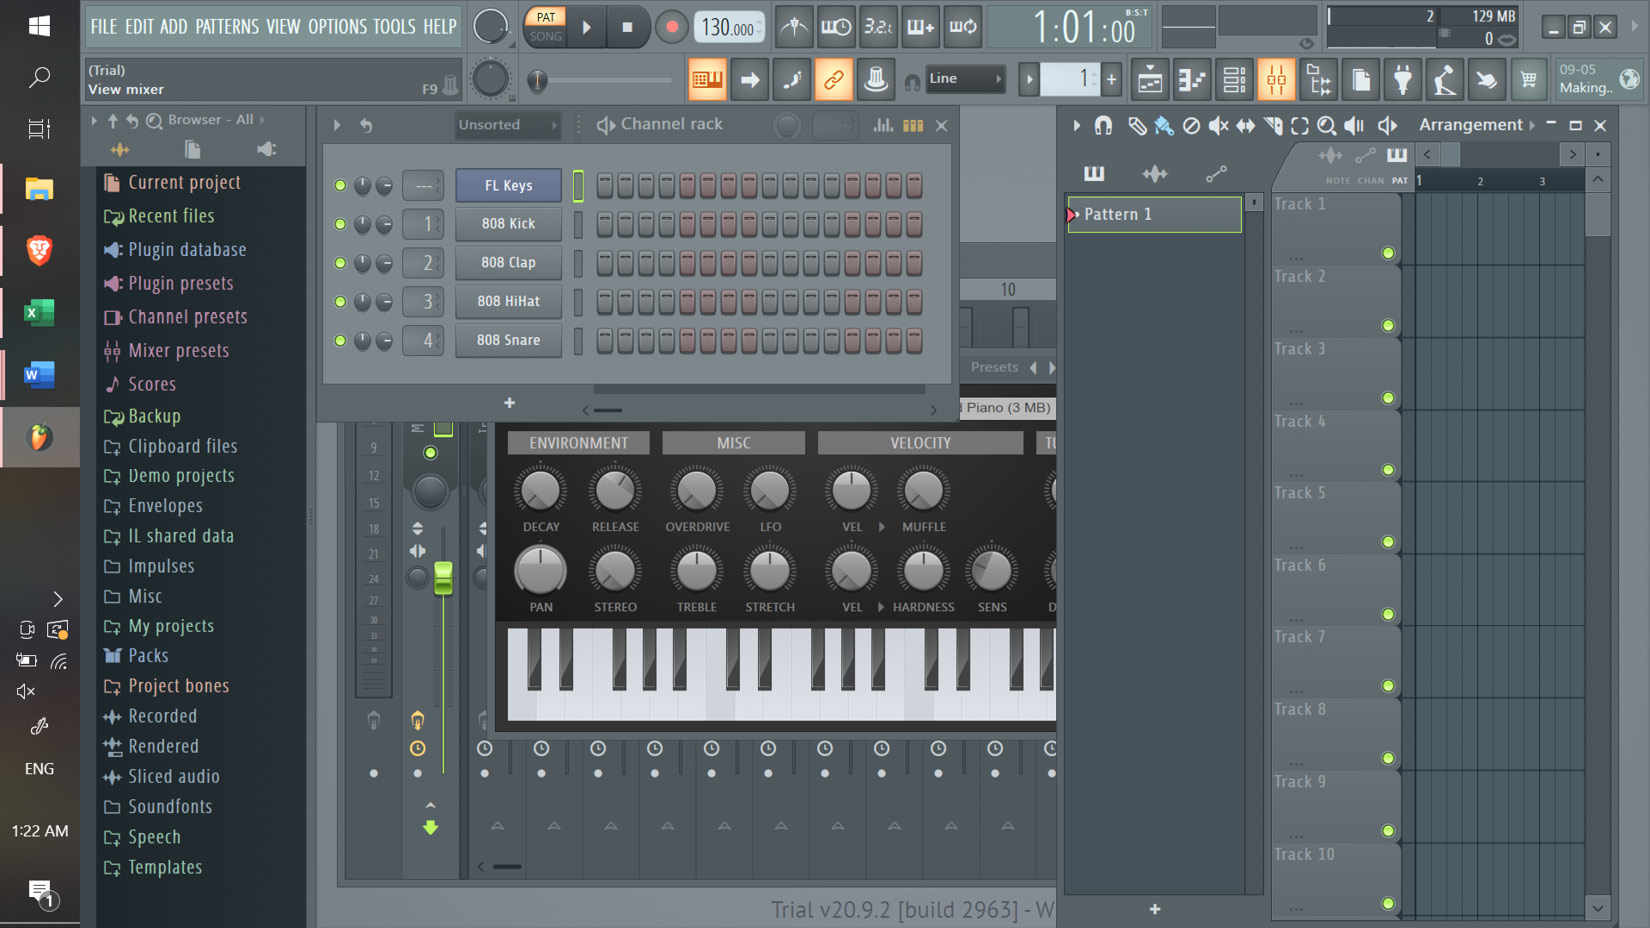
Figure 1.16: Software toolbar | Mixer tool in yellow
Click the highlighted button on the toolbar to open the mixer:
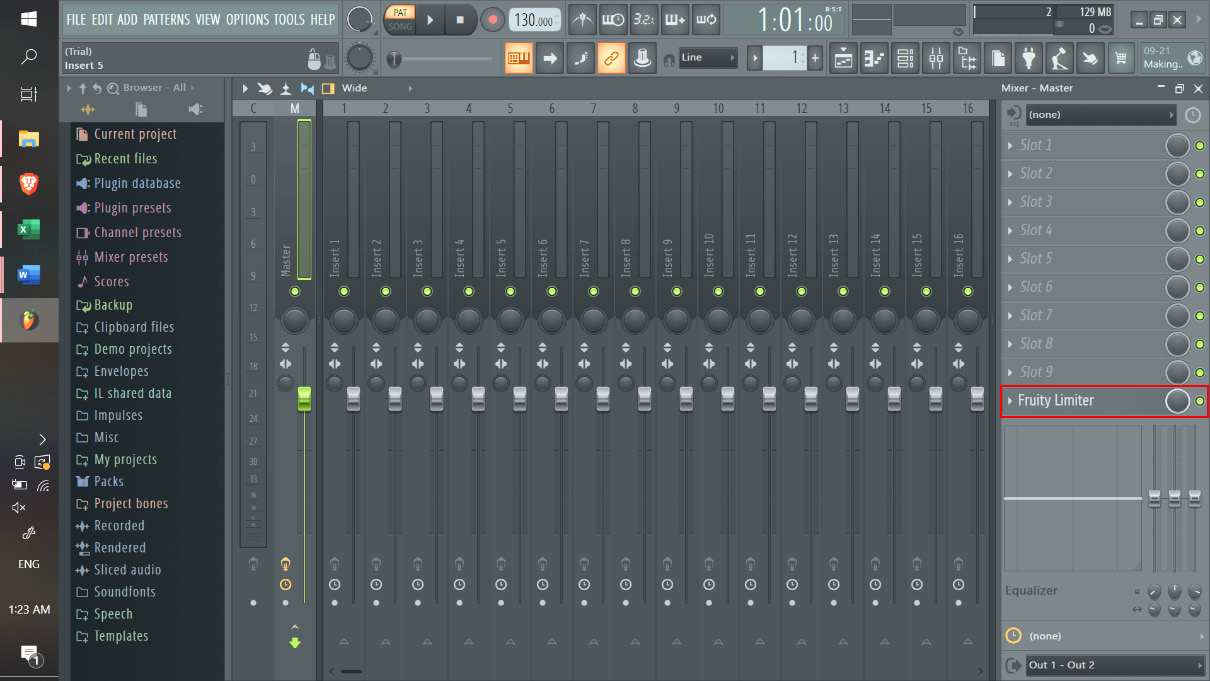
Figure 1.17: The mixer
Now that we have the mixer open, I’m going to share the first hack, and it’s a hack because it goes against conventional wisdom. In the Master channel, you will see (in Figure 1.17) that FL Studio automatically loads up the Fruity Limiter plugin (highlighted in red in Figure 1.17). This plugin limits the volume of the overall Master track. Although you may end up experimenting in your mixing with this as an overall mastering plugin, when crafting ideas, it’s a good idea to turn it off or delete it totally. The reason is when you are sound designing your draft production, you may want the kick and snare to go above 0 in the volume mixer to get that heavy feel, as it can get in the way of letting those sounds really shine. Just click the circle button next to the plugin, and it will turn it off.
Let’s click the input button off, as seen in Figure 1.18 in the highlighted red circle:
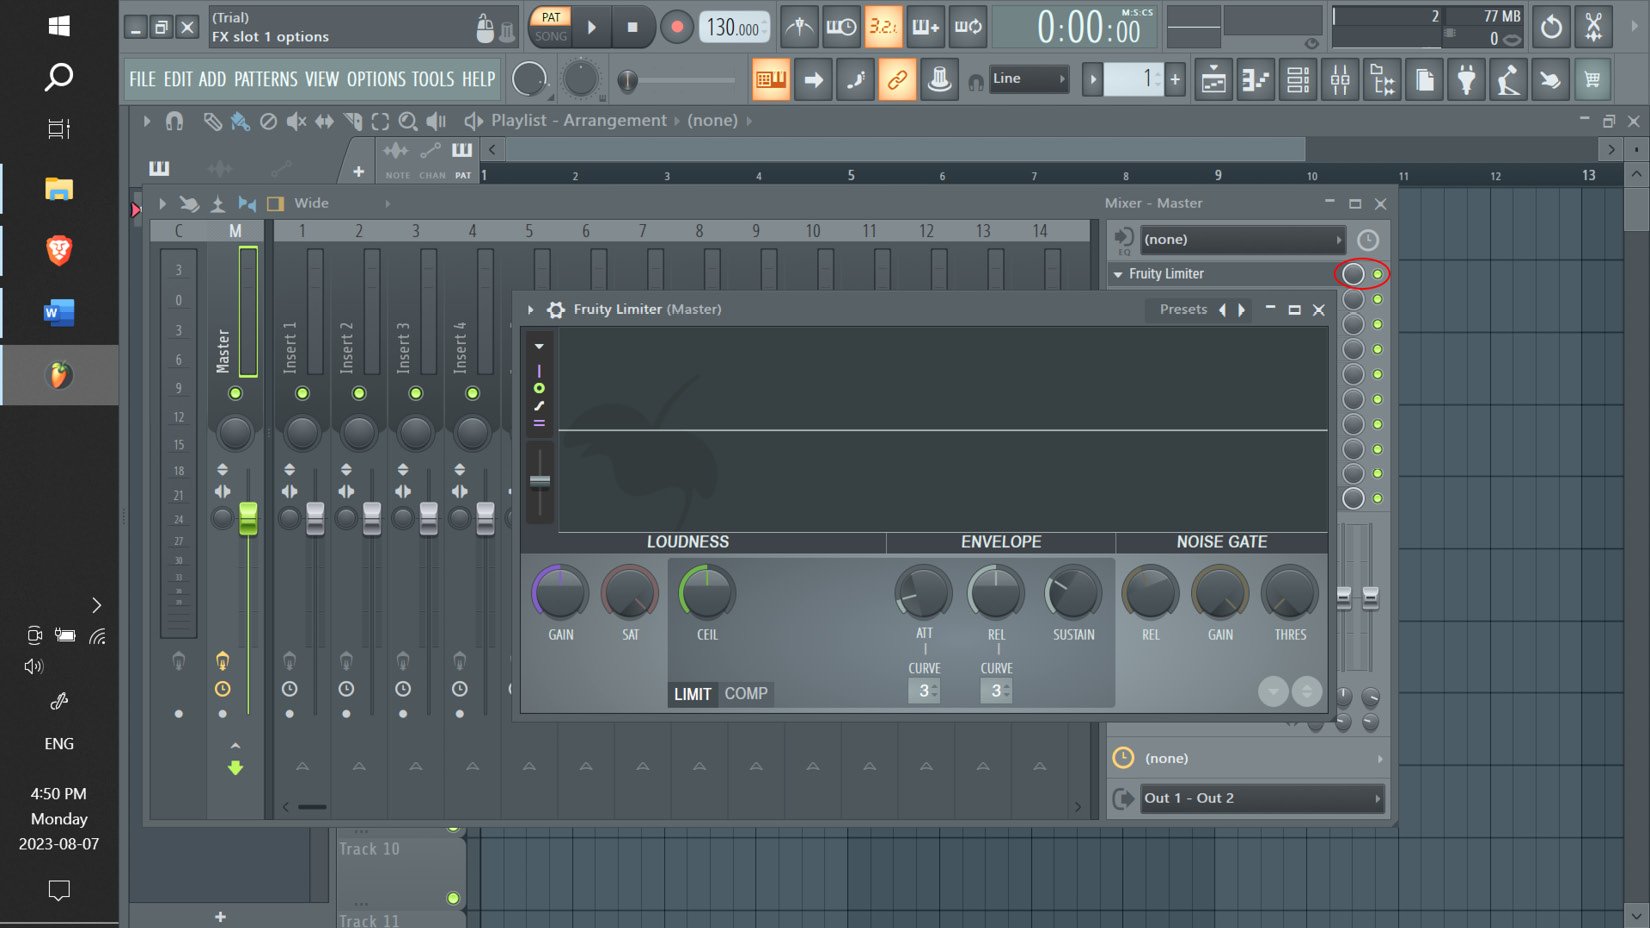
Figure 1.18: The mixer’s Fruity Limiter plugin
Now that we have a “clean” mixer, let’s walk through the mixer settings from a basic view:
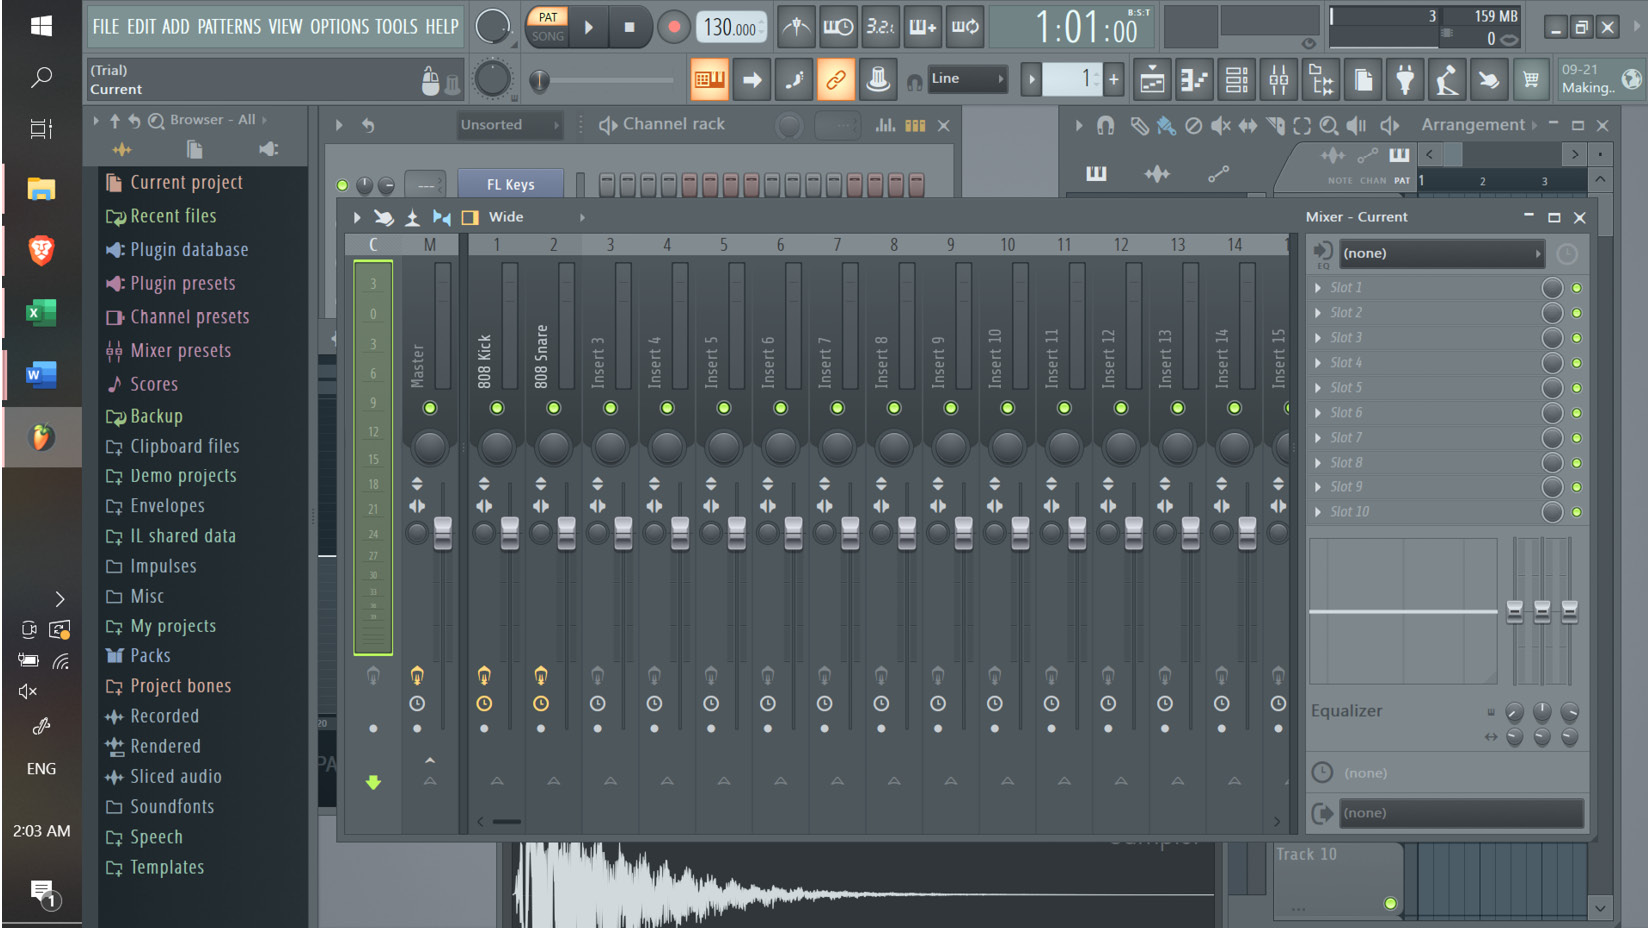
Figure 1.19: The mixer’s current channel selection
Let’s walk through each of the Mixer applications as seen in Figure 1.19. These are all of the tools contained within the mixer and how they function:
- Current channel: This is the highlighted section in Figure 1.19, which allows you to add and insert specific plugins into the section you have selected.
- Master channel: The Master channel is where you will add plugins to affect the entire track. This is used for mastering the finished product and adds the desired plugin to all tracks in the mixer. I don’t recommend adding plugins to this when you are simply drafting productions for the purposes of creativity.
- Inserts: Inserting plugins into a channel on the mixer will add the desired plugin to the selected sample sound. For example, the Reverb or Delay plugin will be added to the sample.
- Mute and Solo feature: When you add plugins to a specific channel, you can mute and unmute the effect by clicking this button.
- Panning feature: As suggested, this allows you to pan the inserted sample sound left or right.
- Reverse polarity: This can be used to change the frequency of the selected sample sound. Reversing polarity is a technique that lets us flip the phase of an audio signal. It’s like turning the waveform upside down, and a cool way to experiment with your sound and create interesting effects.
- Swap left and right channels: This will allow you to swap sample channels left and right.
- Stereo separation: Select Mono or Stereo for the selected sample sound.
- Volume: This is used for adjusting the sample sound volume up or down.
Now that we have gone over each of the high-level functions of the Mixer, it’s important to recognize that these will come in handy when we are practicing the mixing techniques discussed in Chapter 7. For now, get familiar with them inside FL Studio, and feel free to experiment with how they work.
Next, let’s discuss adding sounds to the Mixer so we can start to craft the sonics of each individual sound layer using the FL Studio plugins and tools.
Adding sounds to the mixer
Let’s talk about how we can start adding sounds to the mixer. First, click on the desired sound you want to load into the mixer. For this example, I have chosen to use an 808 Kick sample. Now, right-click on the selected channel you want to load into the mixer and right-click the channel to bring up the drop-down menu. Then, click Route selected channels to this track:
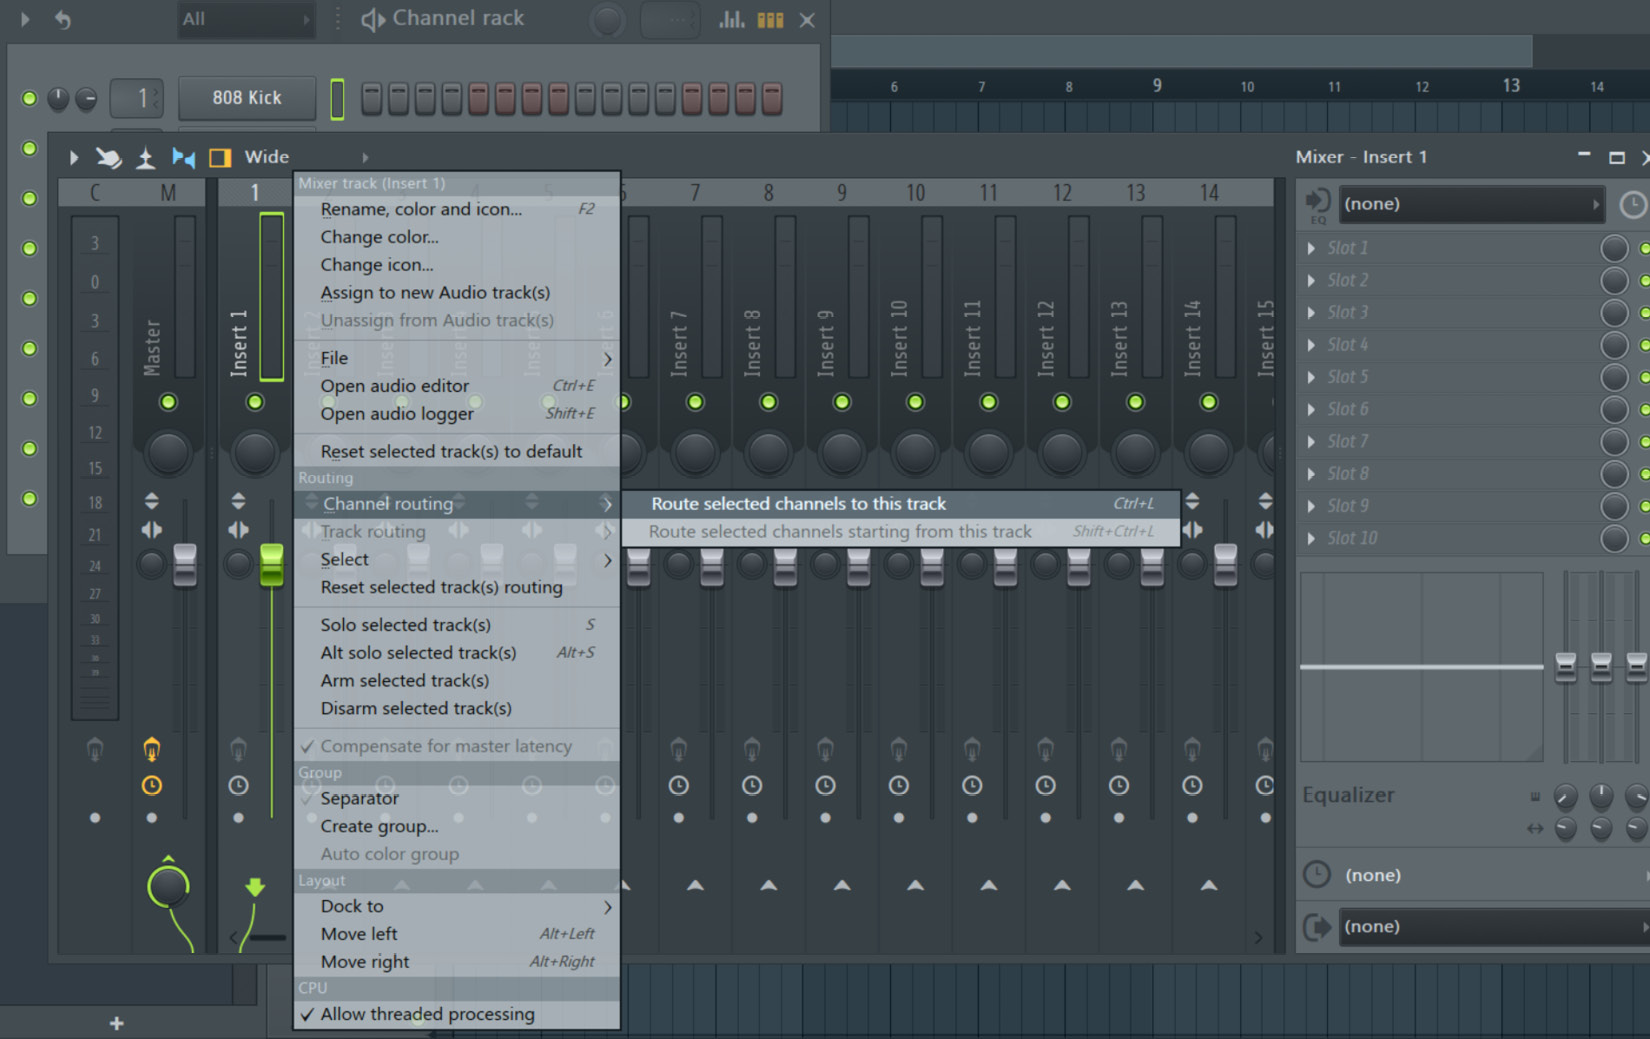
Figure 1.20: Mixer, channel selection, 808 Kick
Once we have loaded the kick sample into the mixer, let’s explore how to add plugins to it to start getting our mixing template ready for sound design and overall mixing. This drop-down menu will show you a selection of preinstalled FL Studio mixer plugins:
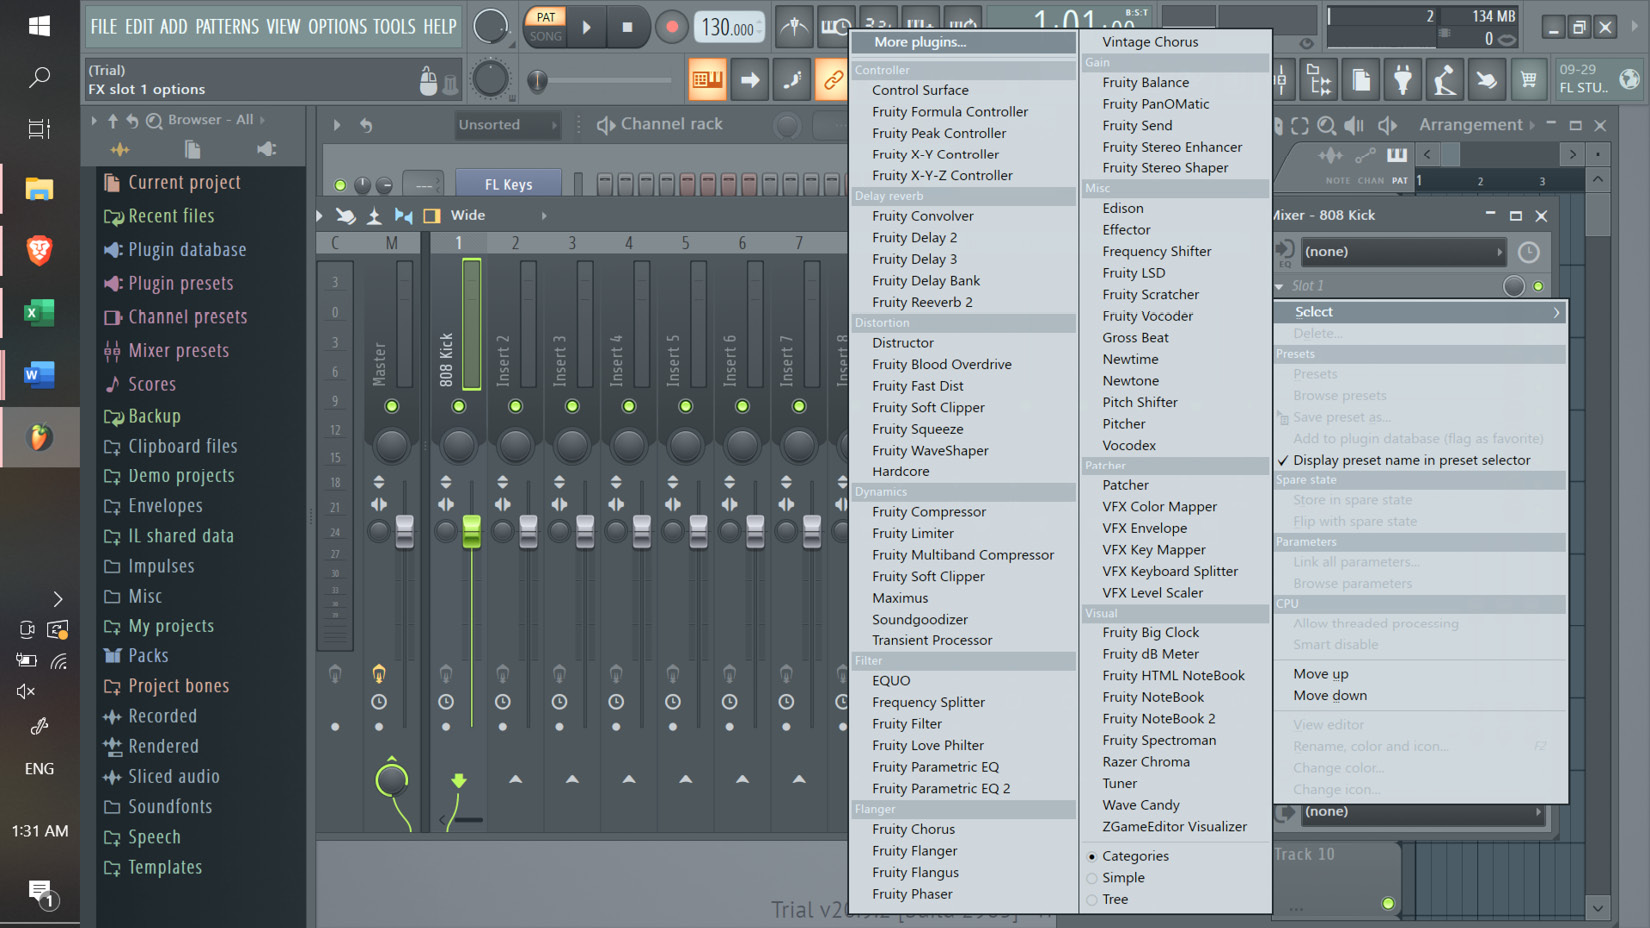
Figure 1.21: The mixer, channel selection, 808 Kick, plugin input
There are a few key mixer plugins we are going to add to our workflow template; these are referenced in the FL Studio key plugins section.
For kick samples, the main plugin we want to load is Fruity parametric EQ 2. This will allow us to stretch the kick sound to give it the heavy feel we are looking for when making pop or rap records:
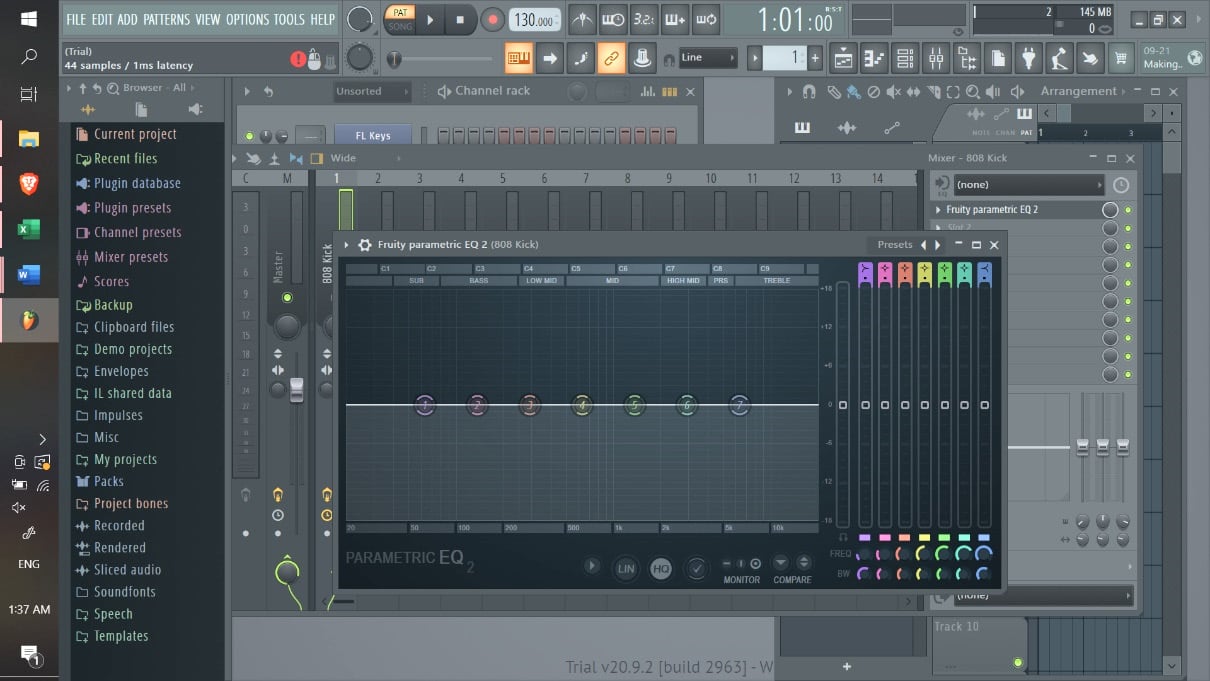
Figure 1.22: EQ 2 plugin as loaded in the mixer
When it comes to kick samples, don’t overcomplicate their mixer plugins. The key is that the kick is simply the driving sound in the track that keeps the rhythm section intact. As a general hack, making kicks “heavy” with the EQ 2 plugin is as simple as moving the number 2 filter slider to 74 Hertz (Hz) in a general direction. Each kick sample sound you use will have a different natural feel to it, and you will want to slide it around to find the punchiest spot for it to fit in the overall track, but as a point of general direction, this is where it should be:
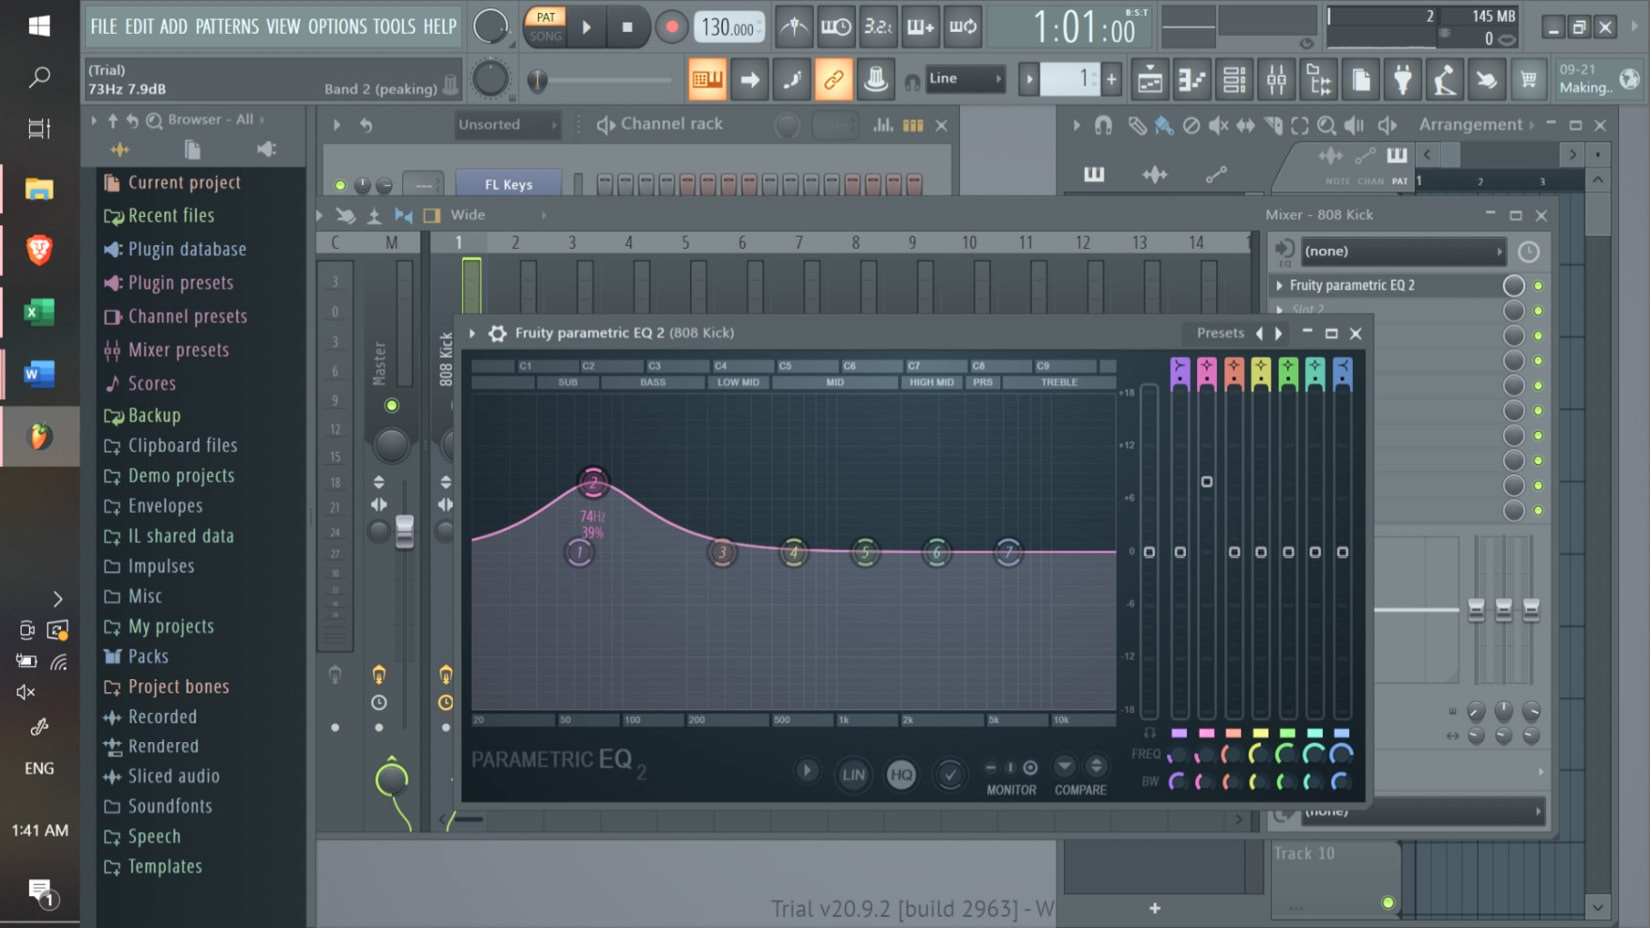
Figure 1.23: EQ 2 plugin
Now, let’s load up our snare sample into the mixer. Once we have loaded it into the mixer channel, the two key plugins we want to add to its mixer stack are Fruity parametric EQ 2 and Fruity Reeverb 2:
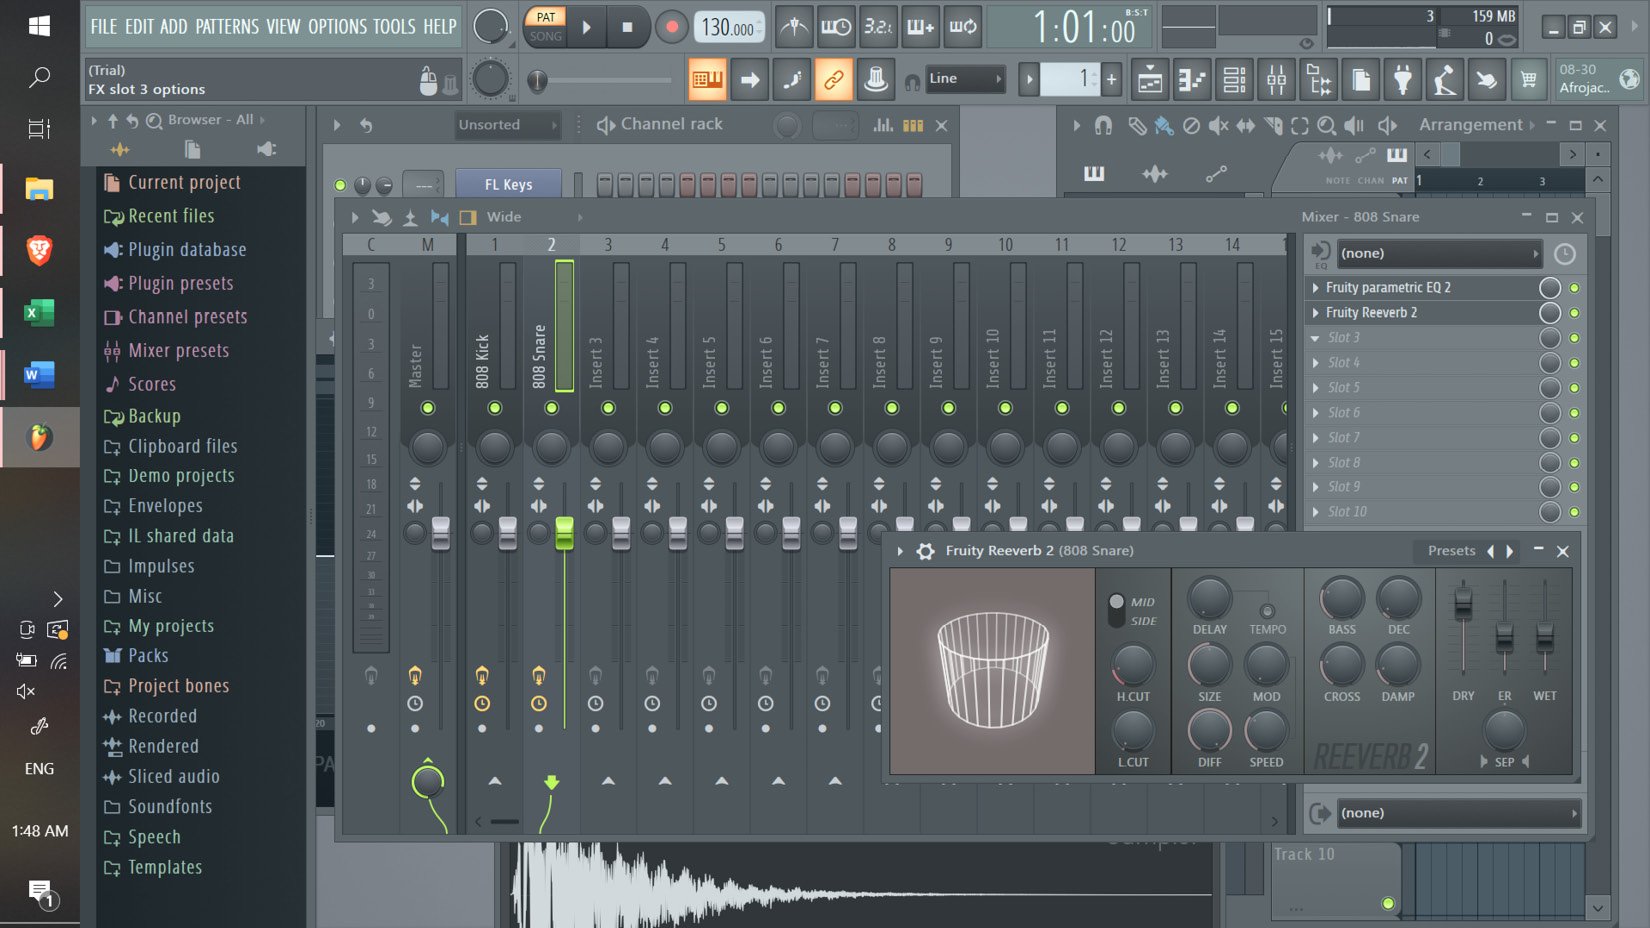
Figure 1.24: Mixer, slot channel input for plugin tools
I will walk you through more on specific plugins in the sound design and creating a signature sound in Chapter 4 – for now, let’s get familiar with the amazing stock plugins that FL Studio gives you from the outset.
FL Studio key plugins
FL Studio has a lot of base plugins. These are the plugins you should learn, experiment with, and get familiar with. The truth, and the overall high-level knowledge of my framework, is to keep things simple. Even today, I have an onslaught of third-party software plugins, but I still use these FL Studio stock plugins in every one of my productions. These seven plugins are the keystone in my stack.
Each one of these can be used to get creative with chords, melodies, and drum sounds – each of these is the base for sound designing in FL Studio:
- Gross Beat – This is used primarily in rap and hip hop productions to augment chords, melodies, and leads to create unique sound design and rhythmic outputs. Used by almost all of the most successful producers who use FL Studio, it’s a great tool for accessing sidechaining, slowing samples to half-time, gating, and more.
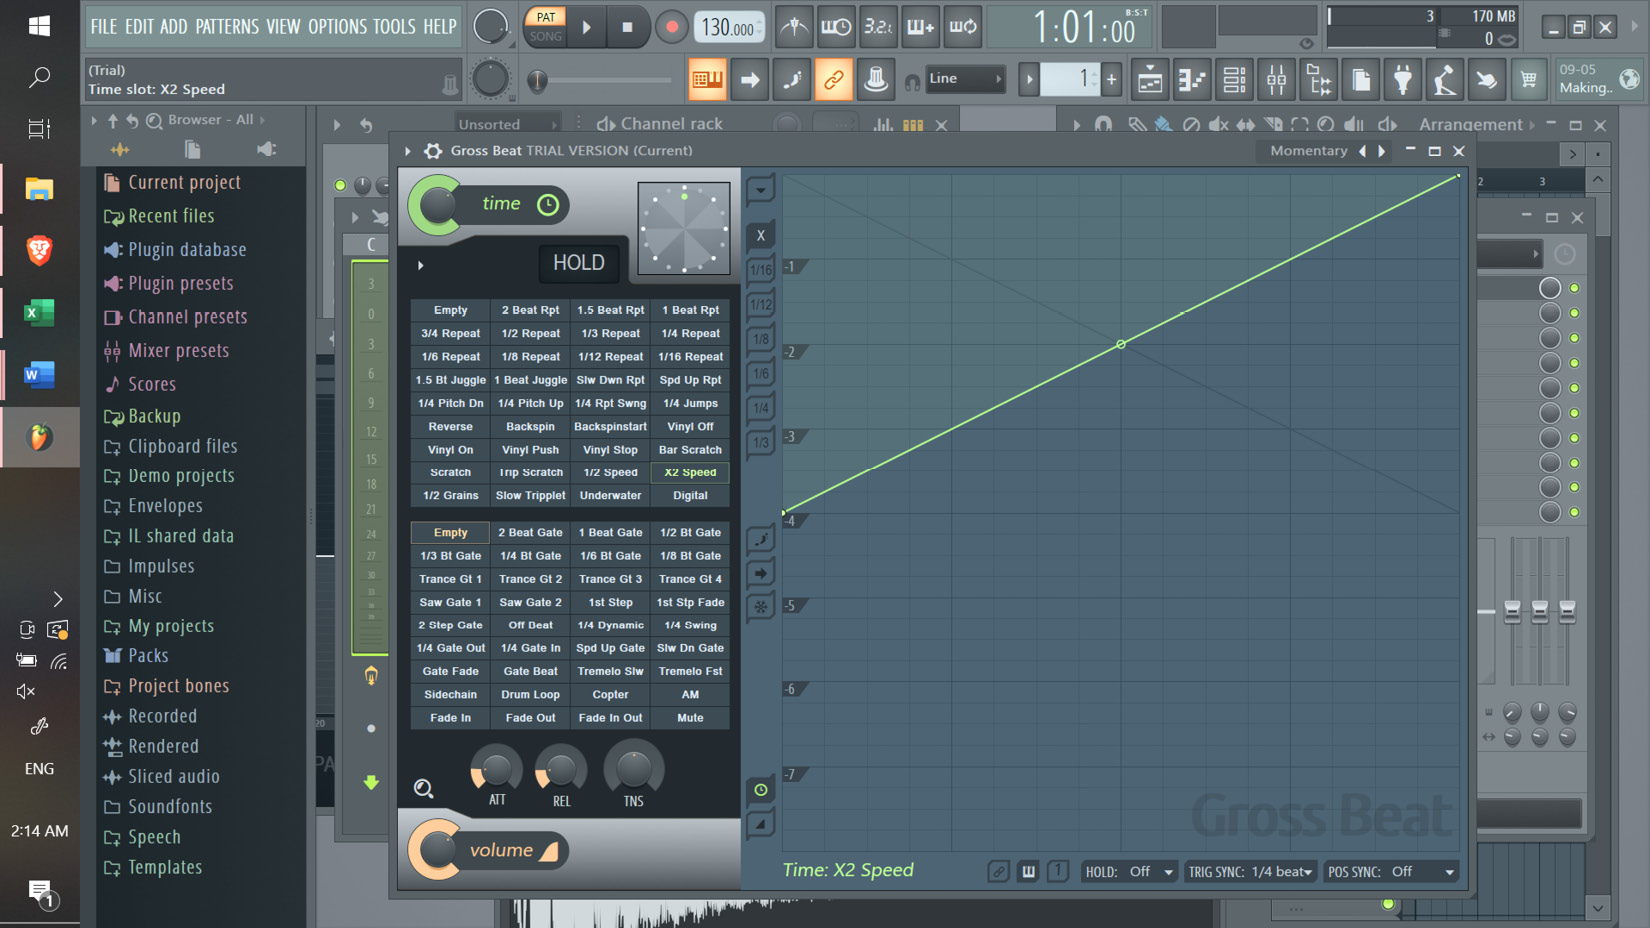
Figure 1.25: Gross Beat VST
- Fruity Delay 3 – FL Studio has a few different Delay plugins. This is by far the best and most flexible plugin they have for delay effects.
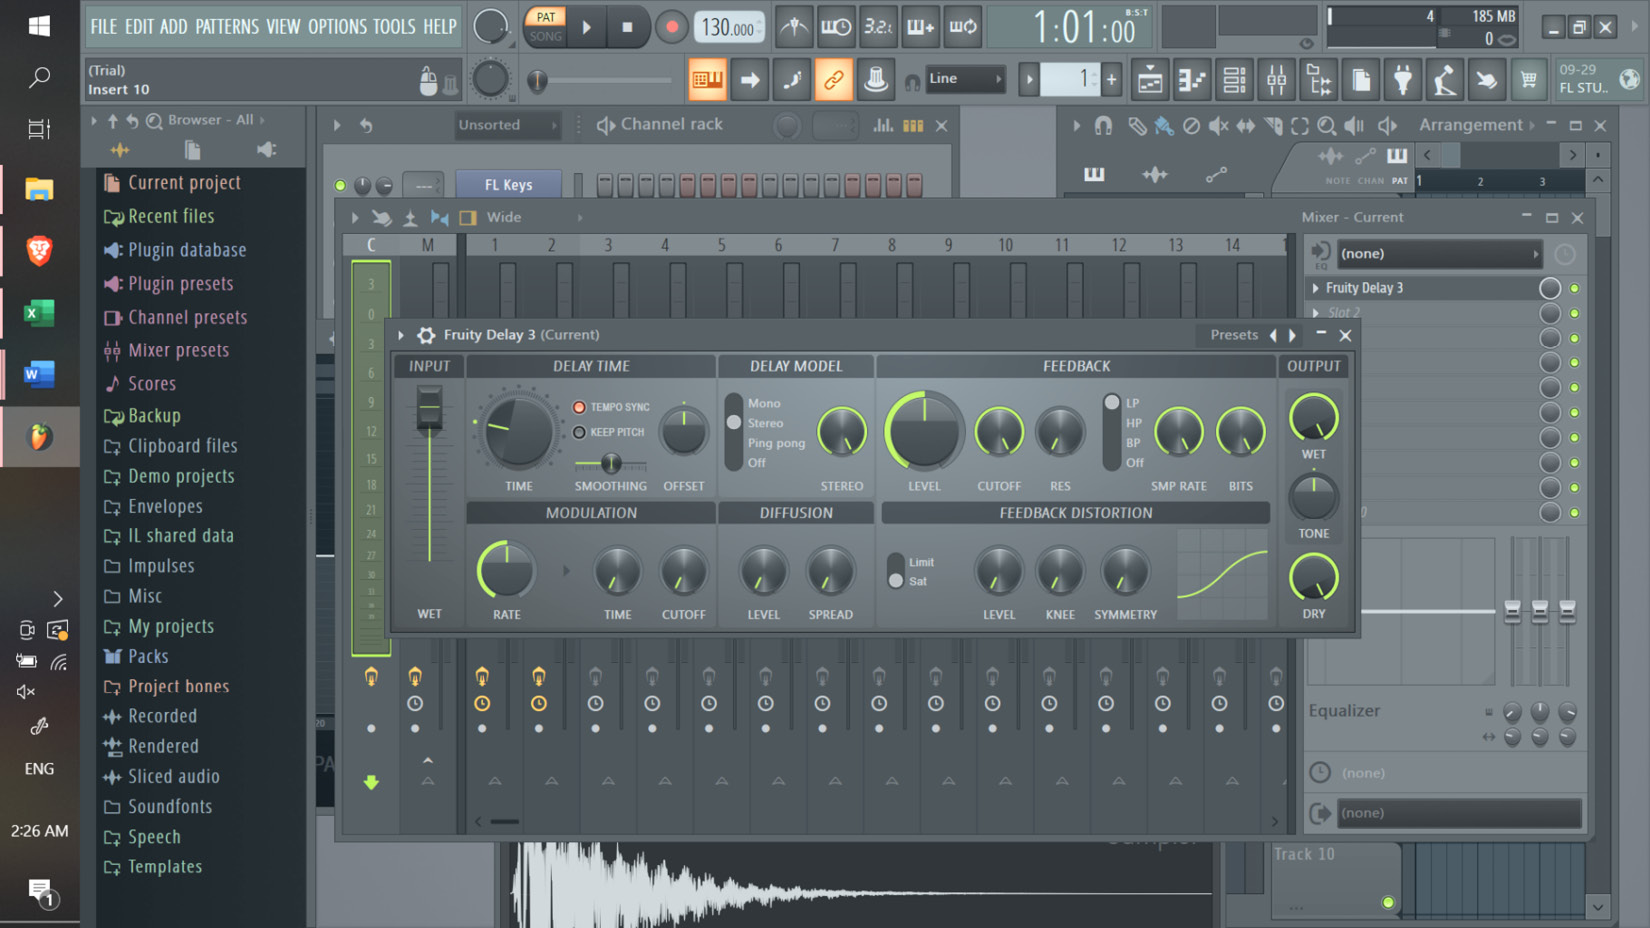
Figure 1.26: Fruity Delay 3 VST
- Fruity Reeverb 2 – This is the better, more flexible, and more advanced version of its sister, Fruity Reeverb. This will allow you to add reverb on your samples loaded into the Channel Rack, and I use it all the time to this day.
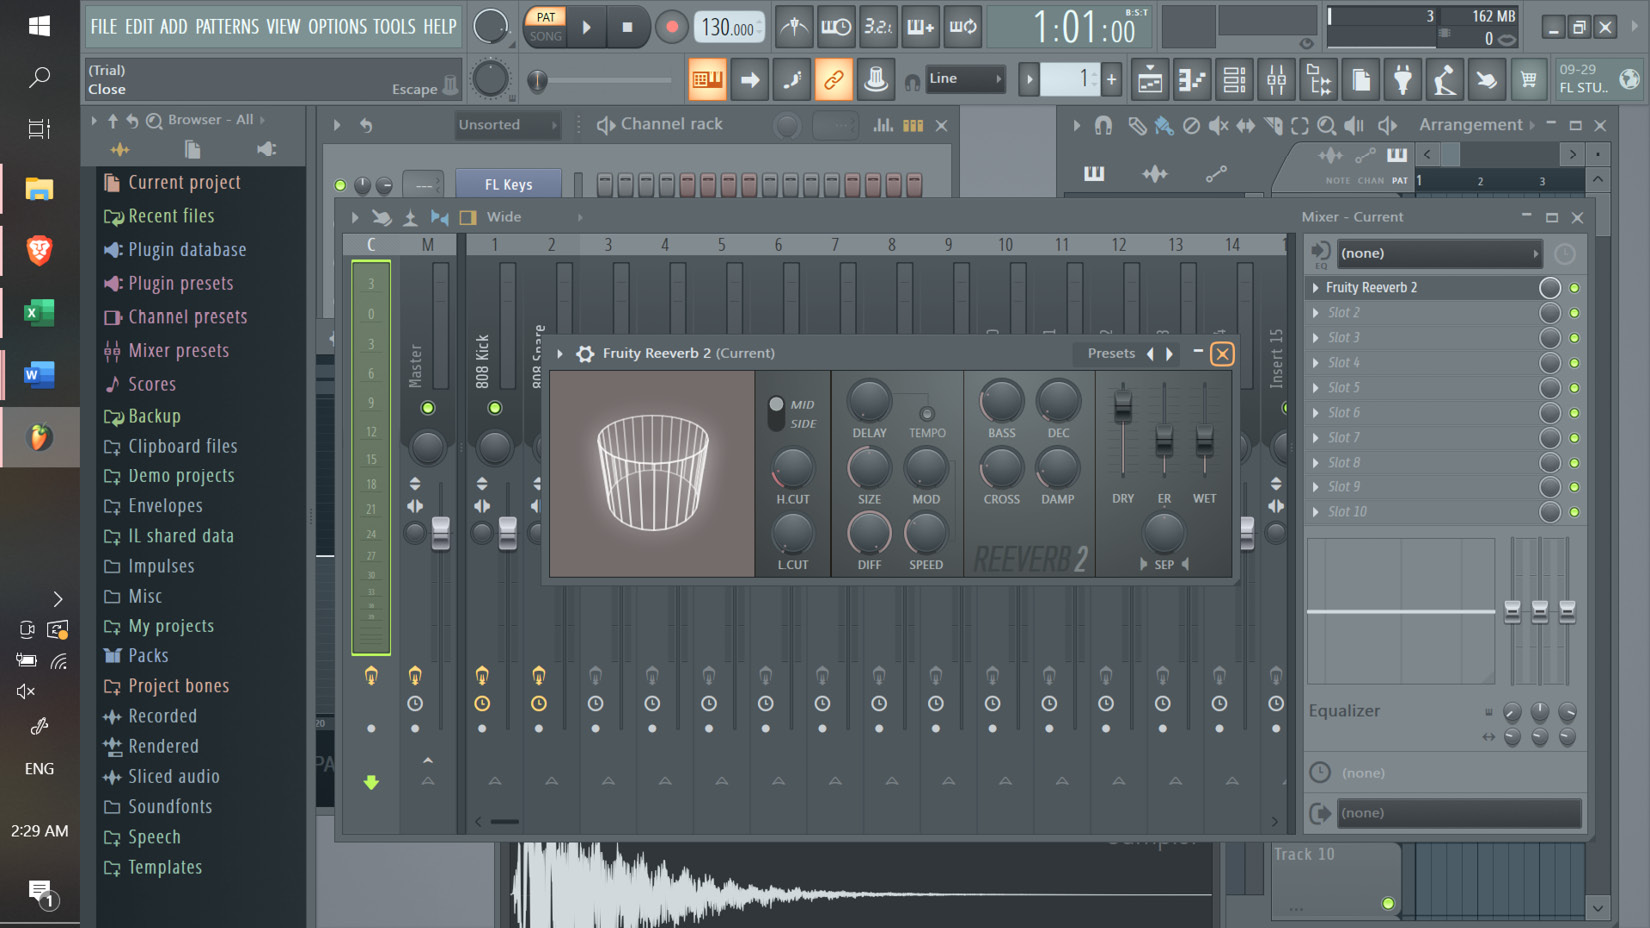
Figure 1.27: Fruity Reeverb 2 VST
- Maximus – This is an interesting plugin that acts as a limiter but can be used in a non-conventional way to add bass to 808s, guitars, and drum sounds.

c
Figure 1.28: Maximus VST
- Fruity Love Philter – This is by far the best and most versatile filter plugin in FL Studio. This allows you to get creative with filter effects and augmenting samples.
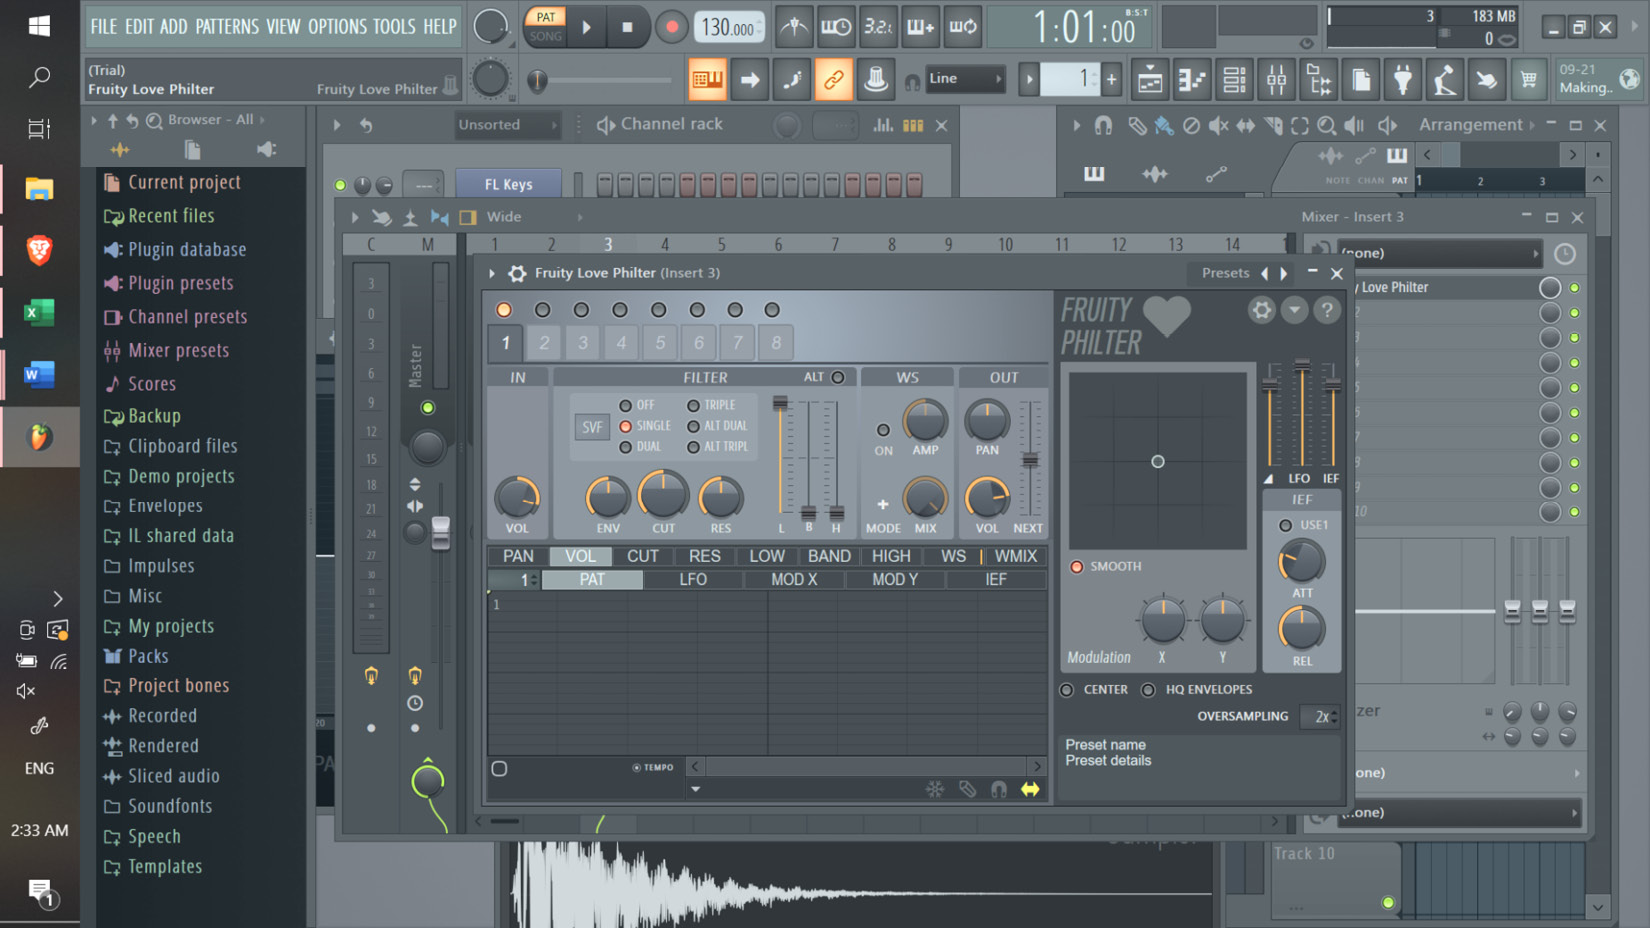
Figure 1.29: Fruity Love Philter VST
- Fruity Parametric EQ 2 – This is the only EQ I use today, and I have used it since I started producing back in the mid-2000s. Other third-party EQ software exists that other producers may prefer, but I really like this plugin for its simple UI and straightforward mixing usability. For example, each frequency range can be easily mixed and augmented using the visualizer, whereas using hardware-based EQ tools requires a greater sensitivity to ear and pitch.
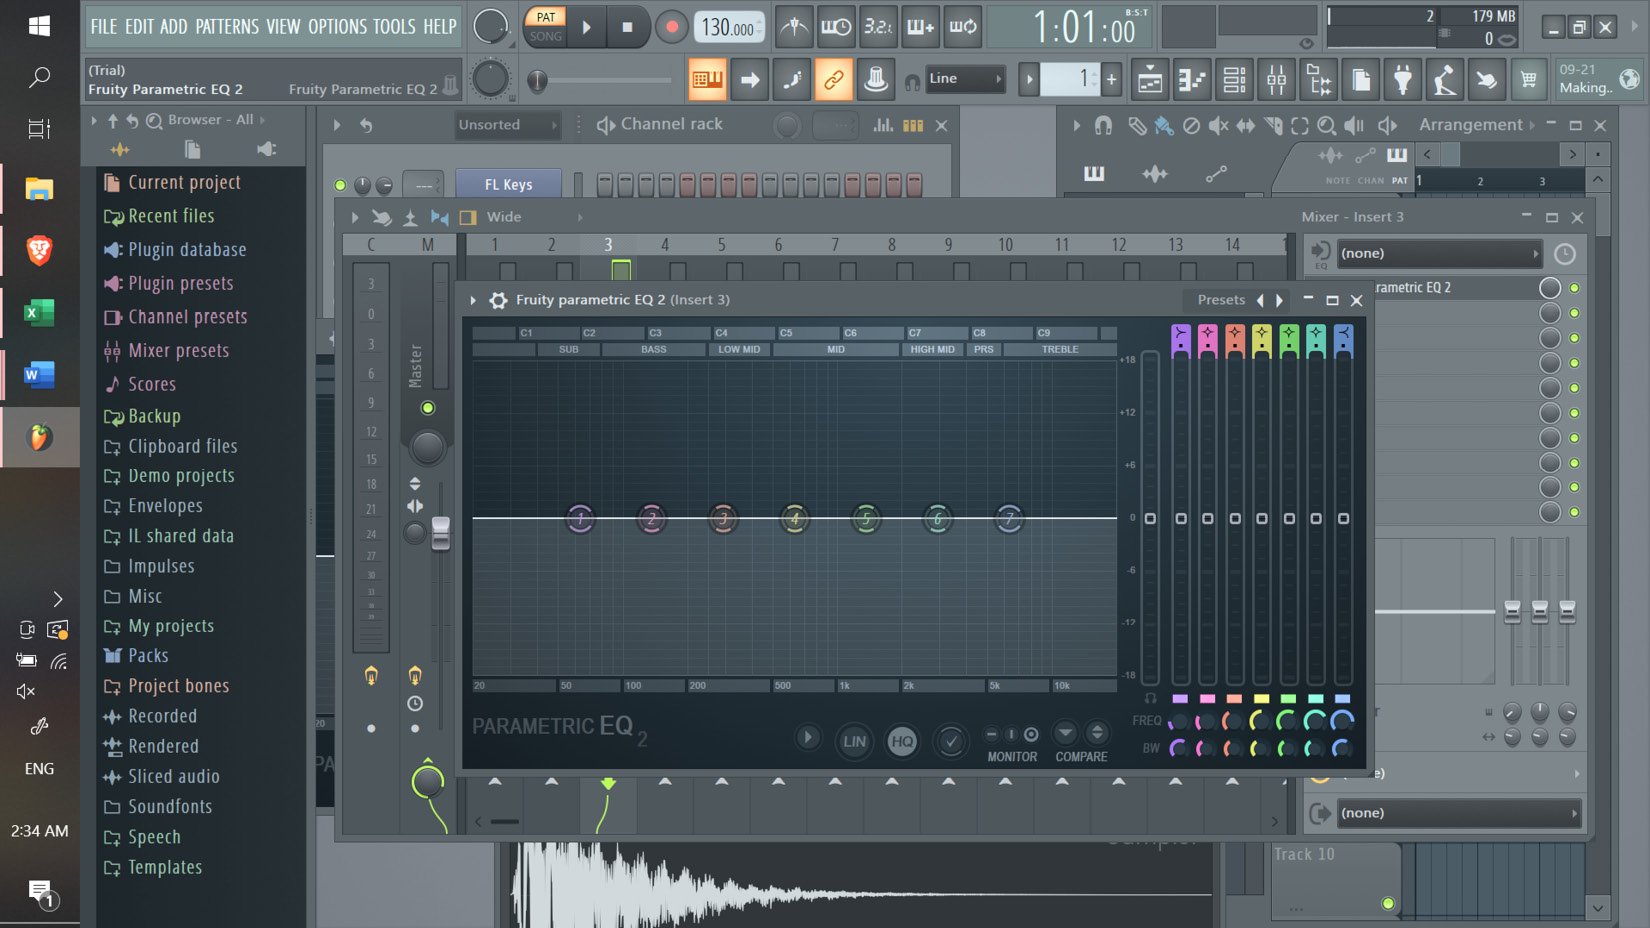
Figure 1.30: Fruity Parametric EQ 2 VST
- Fruity Flangus – This is a Flanger plugin that allows you to add a flanger effect to your samples and VSTs. I use this on chords, snares, hi hats, and bass sounds for added effect.
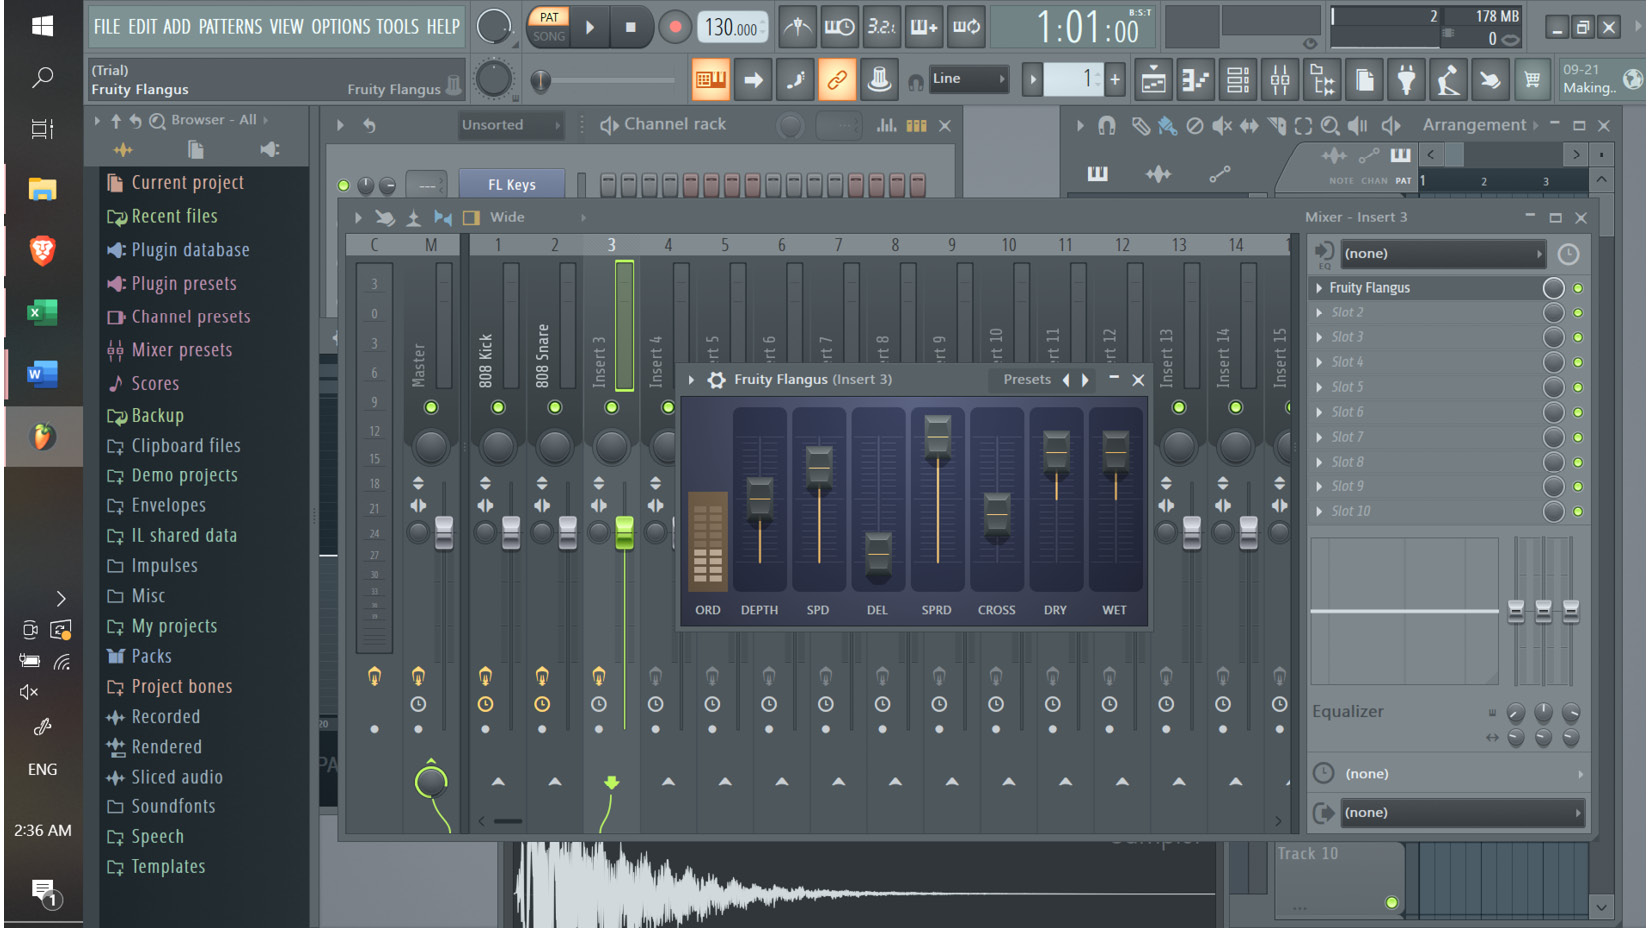
Figure 1.31: Fruity Flangus VST
FL Studio offers a plethora of plugins and mixing tools you may want to explore further as you become more proficient in using the software system. But as I have said before, keep your production workflow simple – most of the modern-day pop music that is created stems from really cool and hypnotic scoring and mixing that creates the feel of a record. Mastering these specific plugins will give you all you really need to start creating records that will work in the marketplace and lead you on your journey to becoming a true power user of FL Studio.
Summary
Throughout my journey of learning music production and mastering FL Studio, which has spanned almost two decades, I have come to realize the importance of daily habits and repetition in becoming a true master of any skill. In my experience, teachability requires not only the motivation to learn but also the willingness to make sacrifices. I have developed a framework for learning that consists of four stages: unconscious incompetence, conscious incompetence, conscious competence, and unconscious competence. It’s crucial to master the basics and engage in perfect practice to achieve success in music production.
I would advise anyone looking to learn to read and reread this book until they fully grasp the concepts. Additionally, I have introduced a concept called “the four steps of learning,” which can help streamline the learning process.
We also learned how to use the Browser tool and Channel Rack, learned about the basics of the Playlist tool, workflow techniques, and frameworks, and worked through FL Studio’s mixer and plugins. These concepts act as the foundation for the frameworks I’m going to share in Chapter 2, and I’m excited to start sharing some very specific technical frameworks.
We can now move on to Chapter 2, where I will share with you the secrets of how I make records work within the marketplace using creative approaches to sound design and score techniques – the real secrets!
Exercise
Exercise A. I challenge you to write down your own affirmations; take the examples from this chapter or create totally new ones as, without direction, you’re just driving to nowhere. Always have a destination, a goal, a reason why you want to learn something if you are serious about it.
Exercise B. I challenge you to create a series of custom sounds using the techniques described in this chapter and create a folder within your own Browser to start developing a signature sound.
Exercise C. I challenge you to create a mixing template using your custom drum sounds with the plugins mentioned in FL Studio’s Mixer and plugins section.