


Robots are beginning to infiltrate our world. They come in all shapes and sizes, with a wide range of capabilities. And, just like the evolution of the personal computer before them, much of what is happening in the robot development world is coming from hobbyists and do-it-yourselfers that are using a new generation of inexpensive hardware and free, open source software to build machines with all kinds of amazing capabilities. In this book, you will learn how to build robots by building a robot, a four-legged quadruped with sensor and vision capabilities. The skills you will learn, however, can also be used on a wide variety of walking, rolling, swimming, or flying robots.
In this chapter, you'll learn:
How to configure your Raspberry Pi, the control center of your robot, with the Raspbian operating system
How to set up a remote development environment so you can program your robot
Basic programming skills in both Python and C so you can both create and edit the programs your robot will need to do all those amazing things
One of the most important parts of your robot is the processor system you use to control all the different hardware. In this book, you'll learn how to use Raspberry Pi, a small, inexpensive, easy-to-use processor system. Raspberry Pi comes in several flavors – the original A and B model, and the new and improved A+ and B+ model. The B+ flavor is the most popular and comes with additional input/output capability, four USB connections, more memory, and will be the flavor we'll focus on in this book.
Here are the items you'll need to set up an initial Raspberry Pi development environment:
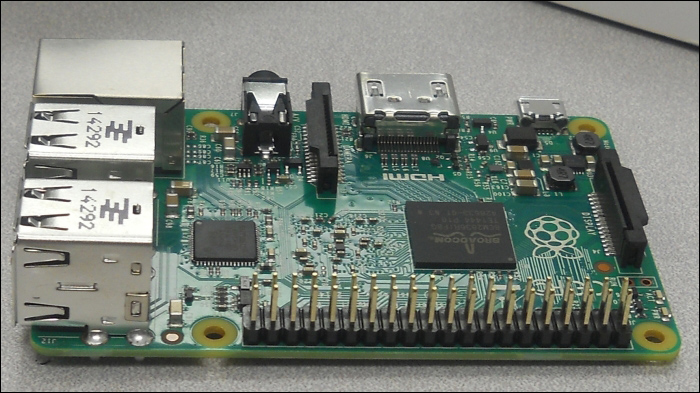
A Raspberry Pi, Model B 2. There are three other Raspberry Pi models, the B+, the B, and the A. These are models with less processing power and different hardware configurations. In this book, we'll focus on the Raspberry Pi Model B 2; it has the best processing power and the most useful input/output access. However, many of the items in this book will also work with the Raspberry Pi B+ and A versions, perhaps with some additional hardware.
The USB cable to provide power to the board.
A microSD card — at least 4 GB.
A microSD card writer.
Another computer that is connected to the Internet.
An Internet connection for the board — for the initial configuration steps, you'll need a LAN cable and wired LAN connection.
A wireless LAN device.
Here is what the Raspberry Pi B 2 board looks like:
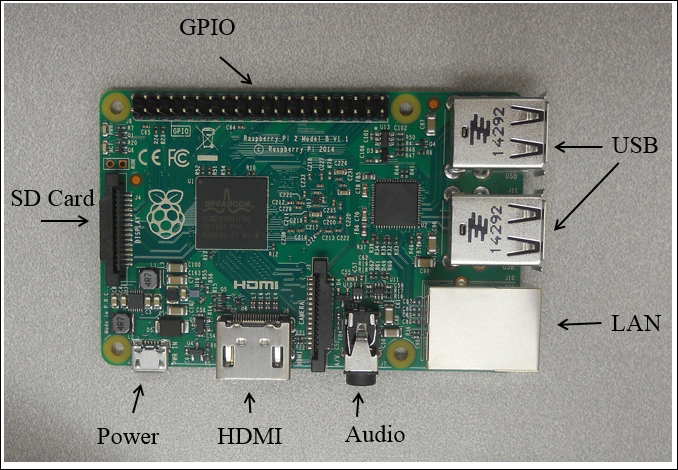
You should also acquaint yourself with the different connections on the board. Here they are on the B 2, labelled for your information:
Before you get started, you'll need to download and create a card with the Raspbian operating system. You are going to install Raspbian, an open source version of the Debian version of Linux, on your Raspberry Pi.
There are two approaches to getting Raspbian on your board. The board is getting popular enough that you can now buy an SD card that already has Rasbpian installed, or you can download it onto your personal computer and then install it on the card. If you are going to download a distribution, you need to decide if you are going to use a Windows computer to download and create an SD card, or a Linux machine.
No matter which machine you are going to use, you'll need to download an image. Open a browser window. Go to the Raspberry Pi site, www.raspberrypi.org, and select Downloads from the top of the page. This will give you a variety of download choices. Go to the Raspbian section and select the .zip file just to the right of the image identifier. This will download an archived file that has the image for your Raspbian operating system. Note the default username and password; you'll need those later.
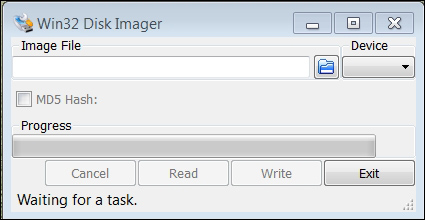
If you're using Windows, you'll need to unzip the file using an archiving program like 7-Zip. This will leave you with a file that has the .img extension, a file that can be imaged on your card. Next, you'll need a program that can write the image to the card. Use Image Writer if you are going to create your card using a Windows machine. You can find a link to this program at the top of the download section on the www.raspberrypi.org website. Plug your card into the PC, run this program, and you should see this:
Select the correct card and image; it should look something like this:
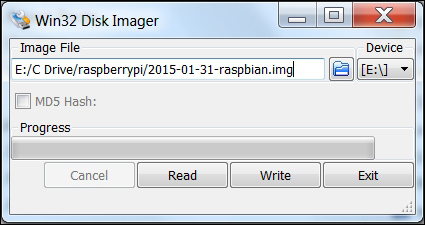
Then select Write. This will take some time, but when it is complete, eject the card from the PC.
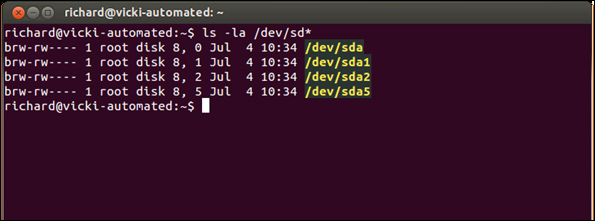
If you are using Linux, you'll need to unarchive the file and then write it to the card. You can do all of this with one command. However, you do need to find the /dev device label for your card. You can do this with the ls -la /dev/sd* command. If you run this before you plug in your card, you might see something like the following:
After plugging in your card, you might see something like the following:
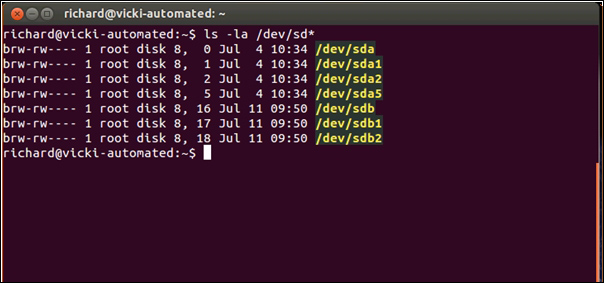
Note that your card is sdb. Now, go to the directory where you downloaded the archived image file and issue the following command:
sudo dd if=2015-01-31-raspbian.img of=/dev/sdX
The 2015-01-31-raspbian.img command will be replaced with the image file that you downloaded, and /dev/sdX will be replaced with your card ID; in this example, /dev/sdb.
Once your card image has been created, install it on the Raspberry Pi. You'll also need to plug your Raspberry Pi into the LAN cable, and the LAN cable into your wired LAN network.
Note
If you don't have a wired connection, you can complete the following steps by connecting your Raspberry Pi directly to a monitor, keyboard, and mouse.
Power the device. The POWER LED should light and your device should boot from the card. To configure the card, you'll need to access it remotely. To do this, you'll now need to connect to the device via SSH, a secure protocol that allows you to control one computer remotely from another computer.
One of the challenges of accessing the system remotely is that you need to know the IP address of your board. There is a way to discover this by using an IP scanner application. There are several scanners available for free; on Windows, a possible choice is Advanced IP Scanner, which is available from http://www.advanced-ip-scanner.com/. Here is what the program looks like when it is run:
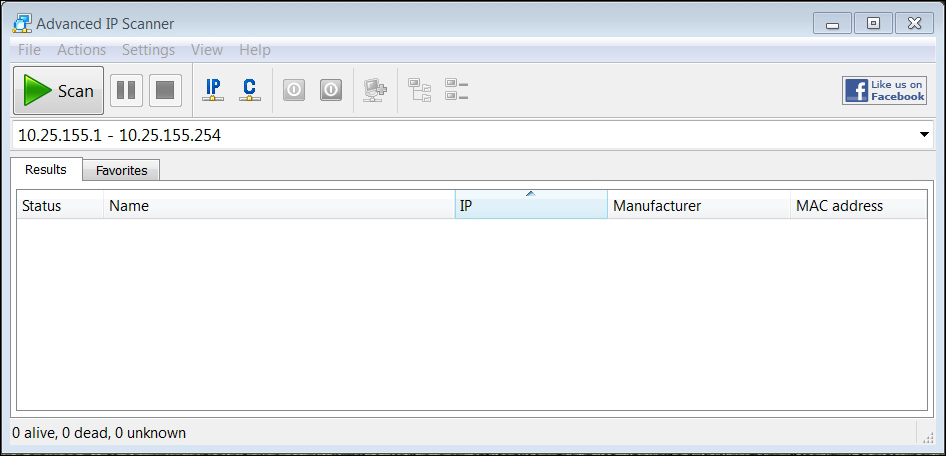
Clicking on the Scan selector scans for all the devices connected to the network. You can also do this in Linux; one application for IP scanning in Linux is called Nmap. To install Nmap, type in sudo apt-get install nmap. To run Nmap, type in sudo nmap -sP 10.25.155.1/154 and the scanner will scan the addresses from 10.25.155.1 to 10.25.155.154.
These scanners can let you know which addresses are being used, and this should then let you find your Raspberry Pi IP address. Since you are going to access your device via SSH, you'll also need an SSH terminal program running on your remote computer. If you are running Microsoft Windows, you can download such an application. One simple and easy choice is Putty. It is free and does a very good job of allowing you to save your configuration so you don't have to type it in each time. This program is available at www.putty.org.
Download Putty on your Microsoft Windows machine. Then run putty.exe. You should see a configuration window. It will look something like the following screenshot:

Type in the inet addr from the IP Scanner in the Host Name space and make sure that the SSH is selected. You may want to save this configuration under Raspberry Pi so you can reload it each time.
When you click on Open, the system will try to open a terminal window onto your Raspberry Pi via the LAN connection. The first time you do this, you will get a warning about an RSA key, as the two computers don't know about each other; so Windows is complaining that a computer it doesn't know is about to be connected in a fairly intimate way. Simply click on OK, and you should get a terminal with a login prompt, like the following screenshot:
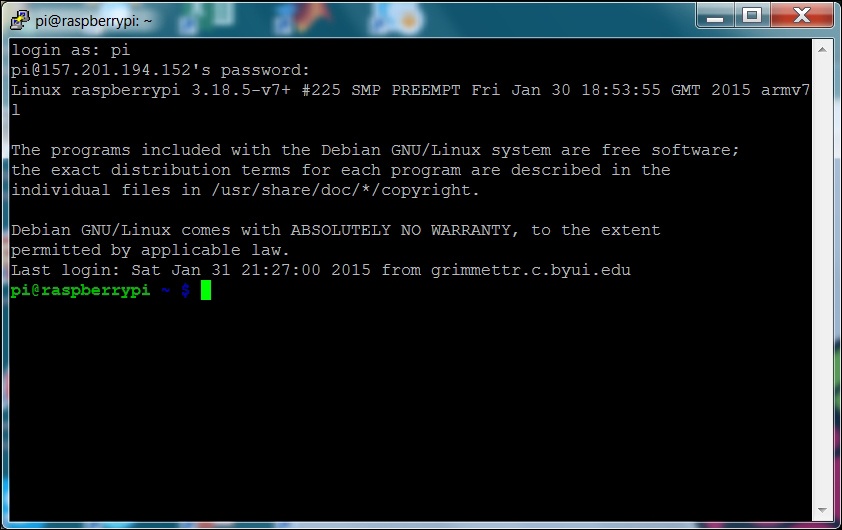
Now you can log in and issue commands to your Raspberry Pi. If you'd like to do this from a Linux machine, the process is even simpler. Bring up a terminal window and then type in ssh pi@xxx.xxx.xxx.xxx –p 22, where xxx.xxx.xxx.xxx is the inet addr of your device. This will then bring you to the login screen of your Raspberry Pi, which should look similar to the previous screenshot.
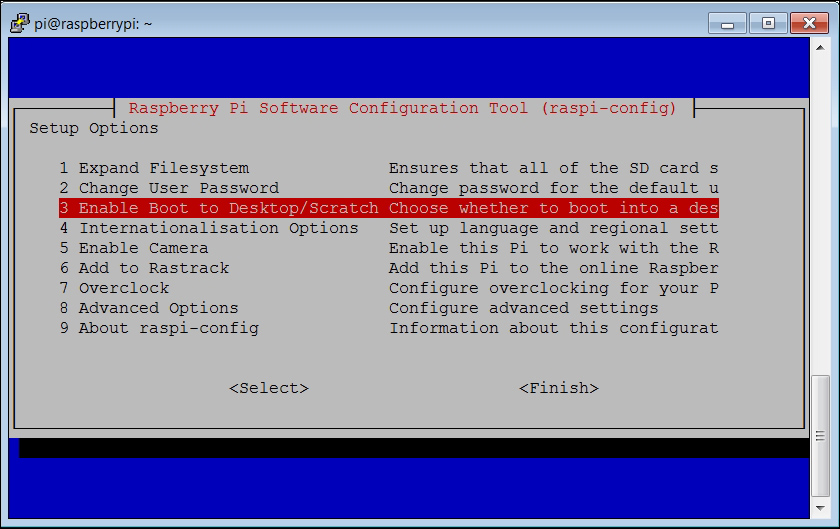
After your log in, you should get a screen that looks like the following:
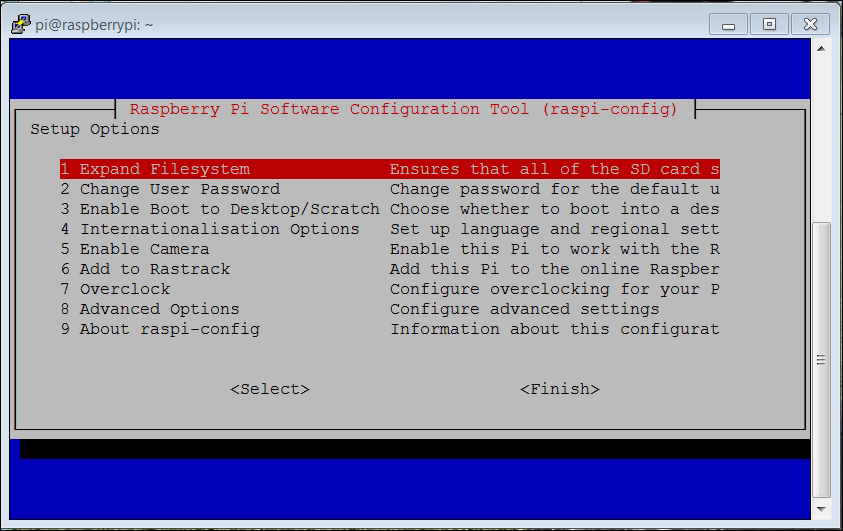
First, you'll want to expand the file system to take up the entire card. So, hit the Enter key, and you'll see the following screen:
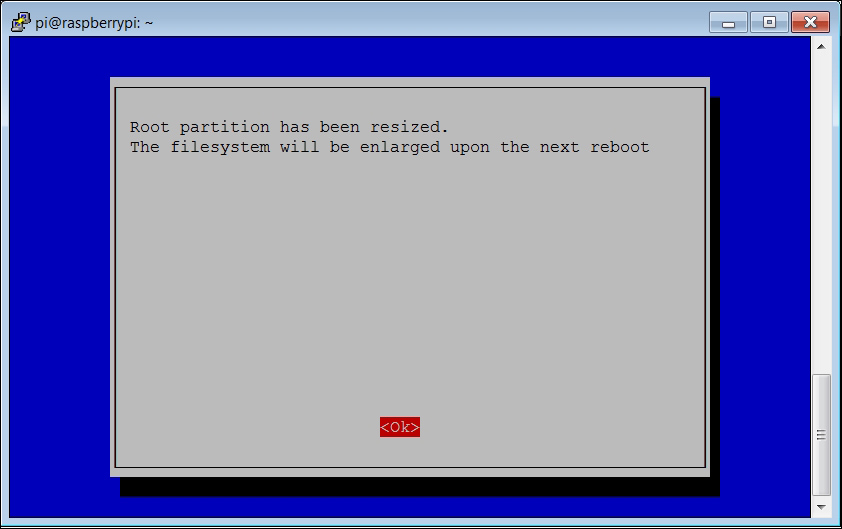
Hit Enter once again and you'll go back to the main configuration screen. Now, select the Enable Boot to Desktop/Scratch option.
When you hit Enter, you'll see the following screen:
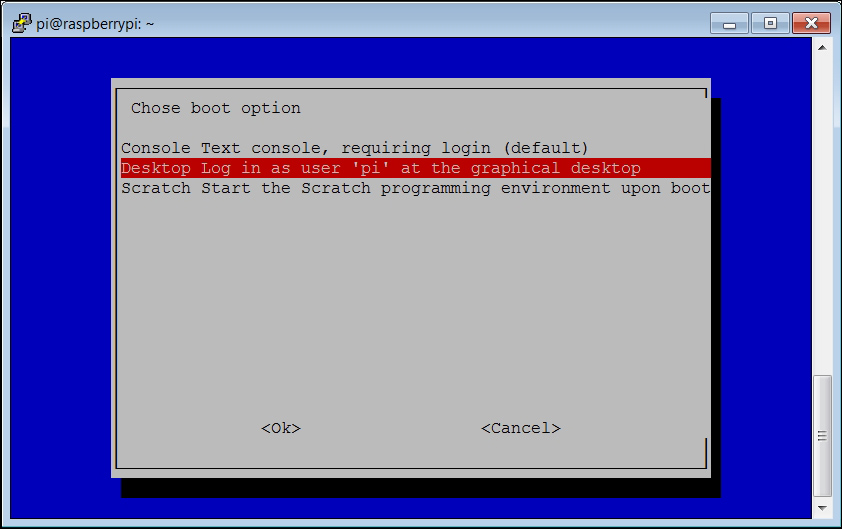
You can also choose to overclock your device. This is a way for you to get higher performance from your system. However, there is a risk that you can end up with a system that has reliability problems.
Once you are done and are back at the main configuration menu, hit the Tab key until you are positioned over the <Finish> selection, then hit Enter. Then, hit Enter again so that you can reboot your Raspberry Pi. This time, when you log in, you will not see any configuration selections. However, if you ever want to change your configuration choices, you can run the configuration tool by typing in raspi-config at the command prompt.
For some steps in your robot build, you will need a graphical look at your system. You can get this on your Raspberry Pi using an application called vncserver. You'll need to install a version of this on your Raspberry Pi by typing in sudo apt-get install tightvncserver in a terminal window on your Raspberry Pi.
Tightvncserver is an application that will allow you to remotely view your complete graphical desktop. Once you have it installed, you can do the following:
You'll need to start the server by typing in
vncserverin a terminal window on the Raspberry Pi.You will then be prompted for a password, prompted to verify the password, and then asked if you'd like to have a view only password. Remember the password you entered; you'll need it to remotely log in via a VNC viewer.
You'll need a VNC viewer application for your remote computer; a good choice is Real VNC, available from http://www.realvnc.com/download/viewer/. When you run it, you should see this:

Enter the VNC server address, which is the IP address of your Raspberry Pi, and click on Connect. You will get a warning about an unencrypted connection; select Continue and you will get this pop-up window:

Type in the password you just entered while starting the vncserver, and you should then get a graphical view of your Raspberry Pi, which looks like the following screenshot:

You can now access all the capabilities of your system, albeit they may be slower if you are doing a graphics-intense data transfer. To avoid having to type in vncserver each time you boot your Raspberry Pi, use the instructions at http://www.havetheknowhow.com/Configure-the-server/Run-VNC-on-boot.html.
Vncserver is also available via Linux. You can use an application called Remote Desktop Viewer to view the remote Raspberry Pi Windows system. If you have not installed this application, install it using the updated software application based on the type of Linux system you have. Once you have the software, do the following:
Run the application, and you should see the following screenshot:

Make sure that vncserver is running on the Raspberry Pi; the easiest way to do this is to log in using SSH and run vncserver at the prompt. Now, click on Connect on the Remote Desktop Viewer. Fill in the screen as follows. Under the Protocol selection, choose VNC, and you should see the following screenshot:

Now, enter the Host inet address—make sure to include
:1at the end, and then click on Connect. You'll need to enter the vncserver password you set up, like the following screenshot:
You should now see the graphical screen of the Raspberry Pi. You are ready to start interacting with the system!
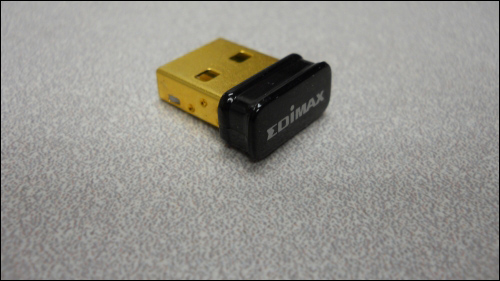
Now that your system is configured, the next step is to connect your Raspberry Pi to your remote computer using wireless. To do this, you'll add a wireless USB device and configure it. See http://elinux.org/RPi_USB_Wi-Fi_Adapters to identify wireless devices that have been verified to work with Raspberry Pi. Here is one available at many online electronics outlets:
To connect to your wireless LAN, boot the system and edit the network file by typing in sudo nano /etc/network/interfaces. Then, edit the file to look like this:
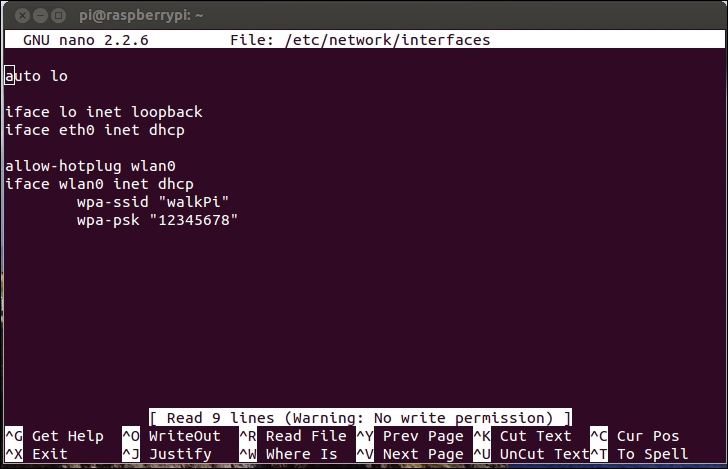
Reboot your device and it should now be connected to your wireless network.
Note
If you are using a US keyboard, you may need to edit the keyboard file for your keyboard to use nano effectively. To do this, type in sudo nano /etc/default/keyboard and change XKBLAYOUT="gb" to XKBLAYOUT="us".
Your system has lots of capabilities. Feel free to play with the system, which will give you an understanding of what is already there and what you'll want to add from a software perspective.
One last bit of introduction. You'll need some basic programming skills to be successful on your project. This section will touch a little on Python and C programming on the Raspberry Pi.
You'll be using Python for two reasons. First, it is a simple language that is intuitive and very easy to use. Second, a lot of open source functionality in the robotics world is available in Python. To work the examples in this section, you'll need a version of Python installed. Fortunately, the basic Raspbian system has a version already installed, so you are ready to begin.
Note
If you are new to programming, there are a number of different websites that provide interactive tutorials. If you'd like to practice some of the basic programming concepts in Python using these tools, go to www.codeacademy.com or http://www.learnpython.org/ and give it a try.
But, to get you started, let's first cover how to create and run a Python file. It turns out that Python is an interactive language, so you could run Python and then type in commands one at a time. However, you want to use Python to create programs, so you are going to create Python programs and then run these programs from the command line by invoking Python.
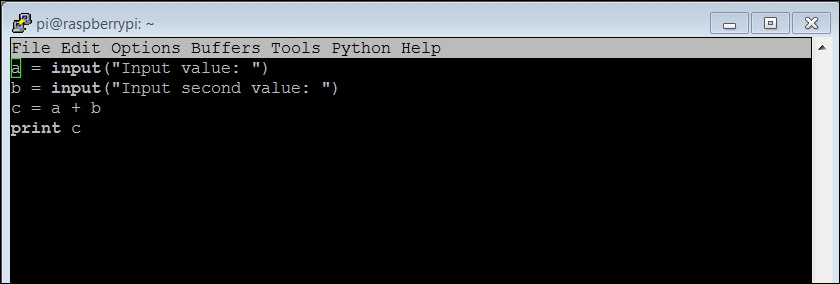
Open an example Python file by typing in emacs example.py. Now, put some code in the file. Start with the lines shown in the following screenshot:
Note
Your code may be color coded. I have removed the color coding here so that it is easier to read.
Let's go through the code to see what is happening:
a = input("Input value: "): One of the basic needs of a program is to get input from the user. Theraw_inputpart allows us to do that. The data will be input by the user and stored ina. The prompt"Input value:"will be shown to the user.b = input("Input second value: "): This data will also be input by the user and stored inb. The prompt"Input second value:"will be shown to the user.c = a + b: This is an example of something you can do with the data; in this example, you can addaandb.print c: Another basic need of our program is to print out results. The print command prints out the value ofc.
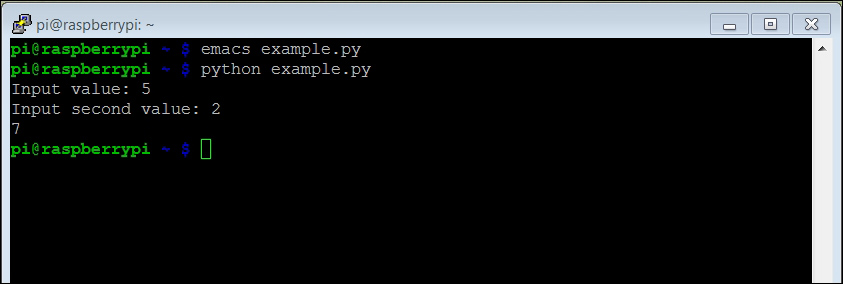
Once you have created your program, save it (using ctrl-x ctrl-s) and quit emacs (using ctrl-x ctrl-c). Now, from the command line, run your program by typing in python example.py. You should see something similar to the following screenshot:
You can also run the program right from the command line without typing in python example.py by adding one line to the program. Now, the program should look like the following screenshot:
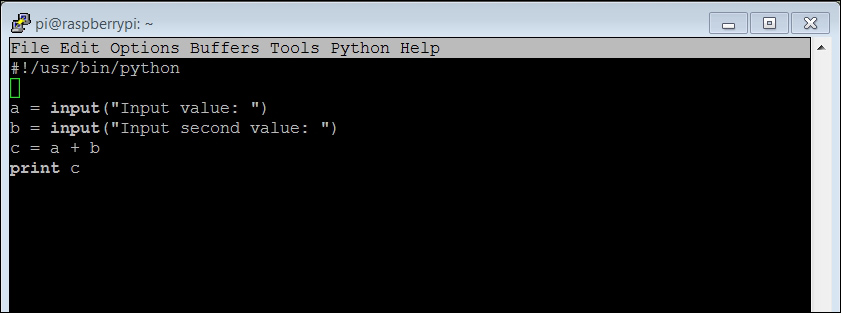
Adding #!/usr/bin/python as the first line simply makes this file available for us to execute from the command line. Once you have saved the file and exited emacs, type in chmod +x example.py. This will change the file's execution permissions, so the computer will now believe it and execute it. You should be able to simply type in ./example.py and the program should run, as shown in the following screenshot:

Note that if you simply type in example.py, the system will not find the executable file. In this case, the file has not been registered with the system, so you have to give it a path to the file. In this case, ./ is the current directory.
Now that you've been introduced to a simple programming language in Python, you'll also need a bit of exposure to a more complex, but powerful, language called C. C is the original language of Linux and has been around for many decades, but is still widely used by open source developers. It is similar to Python, but is also a bit different, and since you may need to understand and make changes to C code, you should be familiar with it and know how it is used.
As with Python, you will need to have access to the language capabilities. These come in the form of a compiler and build system, which turns your text files into ones that contain programs to machine code that the processor can actually execute. To do this, type in sudo apt-get install build-essential. This will install the programs you need to turn your code into executables for the system.
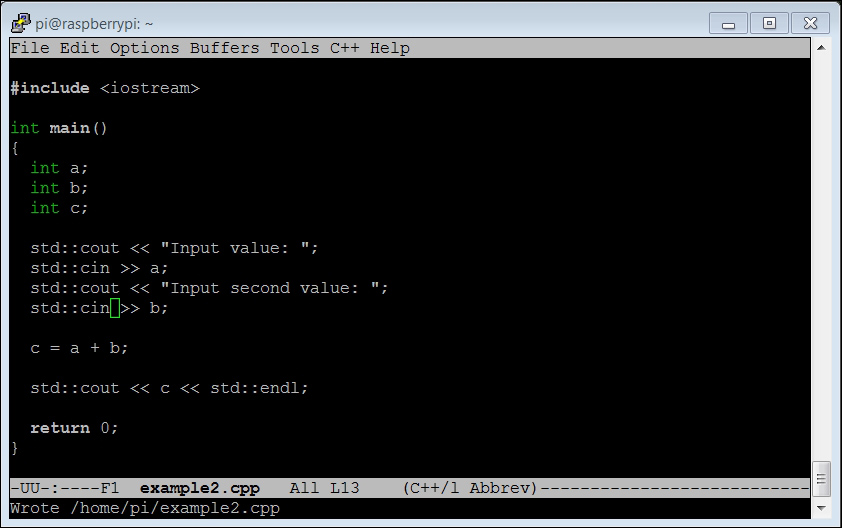
Now that the tools are installed, let's walk through some simple examples. Here is the first C/C++ code example:
The following is an explanation of the code:
#include <iostream>: This is a library that is included so that your program can input data from the keyboard and output information to the screen.int main(): As with Python, we can put functions and classes in the file, but you will always want to start execution at a known point; C defines this as themainfunction.int a;: This defines a variable nameda, of typeint. C is what we call a strongly typed language, which means that we need to declare the type of the variable we are defining. The normal types areint, a number that has no decimal points;float, a number that requires decimal points;char, a character of text, andbool, atrueorfalsevalue. Also note that every line in C ends with the;character.int b;: This defines a variable namedb, of typeint.int c;: This defines a variable namedc, of typeint.std::cout << "Input value: ";: This will display the string"Input value: "on the screen.std::cin >> a;: The input that the user types will go into the variablea.std::cout << "Input second value: ";: This will display the string"Input second value: "on the screen.std::cin >> b;: The input that the user types will go into the variableb.c = a + b: The statement is a simple addition of two values.std::cout << c << std::endl;: Thecoutcommand prints out the value ofc. Theendlcommand at the end prints out a carriage return so that the next character appears on the next line.return 0;: The main function ends and returns0.
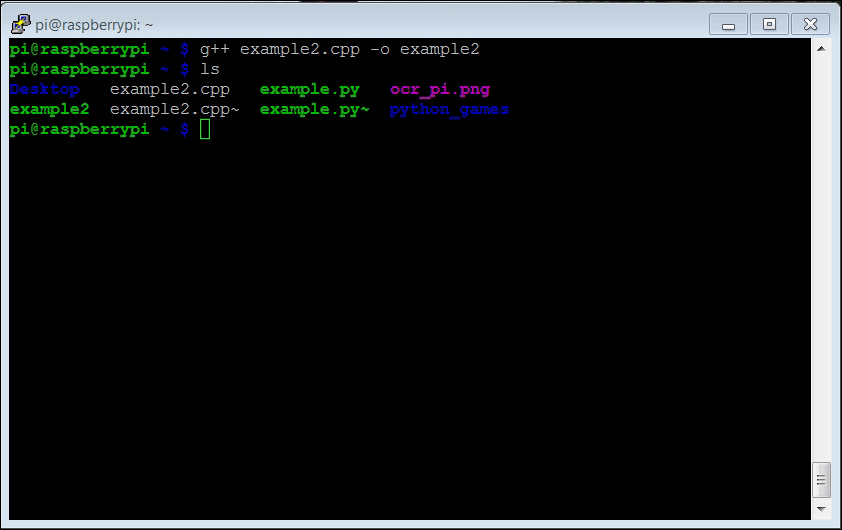
To run this program, you'll need to run a compile process to turn it into an executable program that you can run. To do this, after you have created the program, type in g++ example2.cpp –o example2. This will then process your program, turning it into a file that the computer can execute. The name of the executable program will be example2 (as specified by the name after the –o option).
If you run an ls on your directory after you have compiled this, you should see the example2 file in your directory, as shown in the following screenshot:
If you run into a problem, the compiler will try to help you figure out the problem. If, for example, you forgot the int before a in the expression int a, you would get the following error when you try to compile:
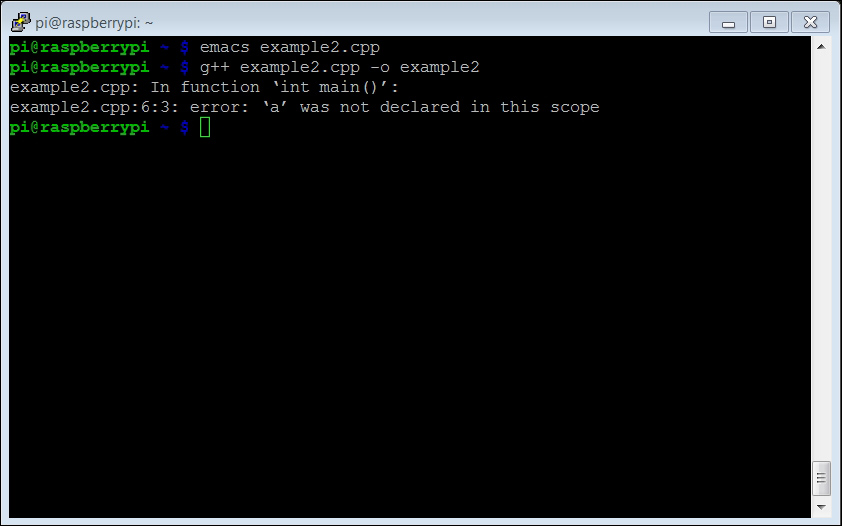
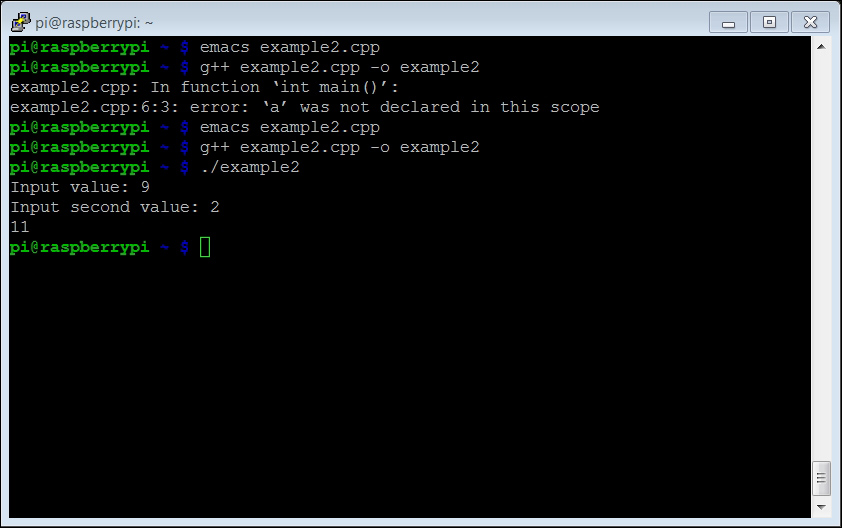
The error message indicates a problem in the int main() function and tells you that the variable a was not successfully declared. Once you have the file compiled, to run the executable, type in ./example2, and you should be able to create the following result:
Note
If you are interested in learning more about C programming, there are several good tutorials out on the Internet that can help-for example, at http://www.cprogramming.com/tutorial/c-tutorial.html and http://thenewboston.org/list.php?cat=14.
There is one more aspect of C you will need to know about. The compile process that you just encountered seemed fairly straightforward. However, if you have your functionality distributed between a lot of files or need lots of libraries, the command-line approach to executing a compile can get unwieldy.
The C development environment provides a way to automate this process; it is called the make process. When using this, you create a text program named makefile that defines the files you want to include and compile, and then, instead of typing a long command or set of commands, you simply type in make and the system will execute a compile based on the definitions in the makefile program. There are several good tutorials that talk more about this system-for example, http://www.cs.colby.edu/maxwell/courses/tutorials/maketutor/ or http://mrbook.org/tutorials/make/.
Now you are equipped to edit and create your own programming files. The next chapters will provide you with lots of opportunities to practice your skills as you translate lines of code into cool robotic capabilities.