Search icon CANCEL
Subscription
0
Cart icon
Your Cart (0 item)
Close icon
You have no products in your basket yet
Save more on your purchases now! discount-offer-chevron-icon
Savings automatically calculated. No voucher code required.
Arrow left icon
Explore Products
Best Sellers
New Releases
Books
Videos
Audiobooks
Learning Hub
Conferences
Free Learning
Arrow right icon
Test-Driven iOS Development with Swift 4

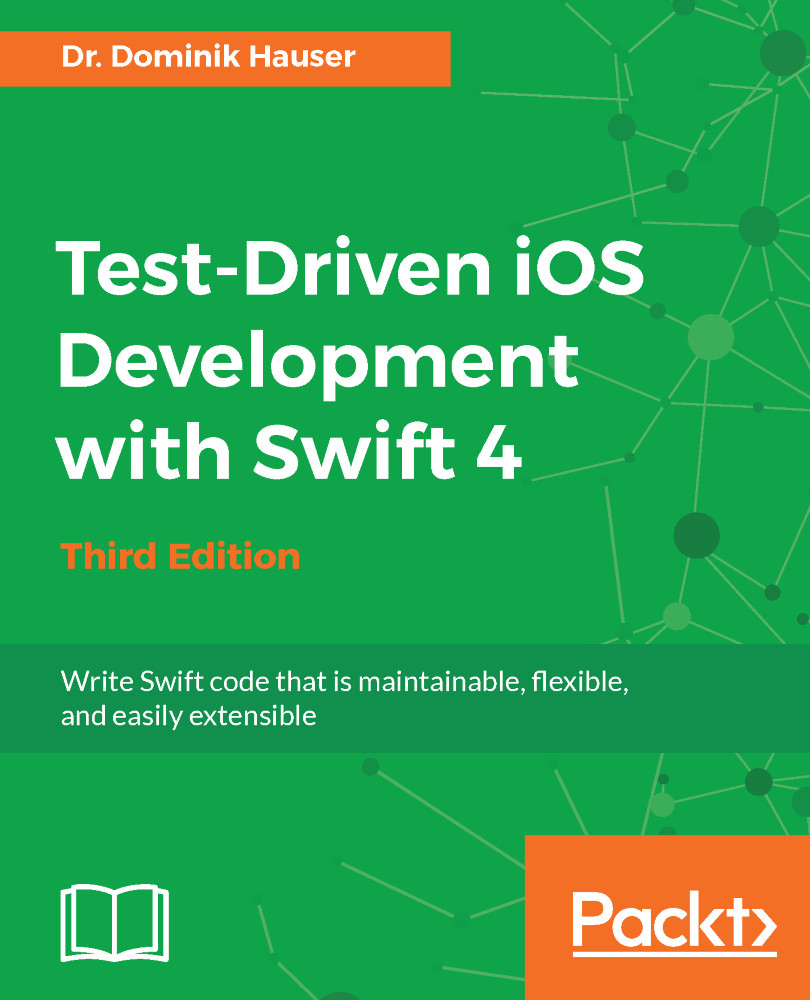
Test-Driven iOS Development with Swift 4: Write Swift code that is maintainable, flexible, and easily extensible , Third Edition

Arrow left icon
Profile Icon Dr. Dominik Hauser
Arrow right icon
$43.99
Paperback Oct 2017 222 pages 3rd Edition
eBook
$24.99 $35.99
Paperback
$43.99
Subscription
Free Trial
Renews at $19.99p/m
Arrow left icon
Profile Icon Dr. Dominik Hauser
Arrow right icon
$43.99
Paperback Oct 2017 222 pages 3rd Edition
eBook
$24.99 $35.99
Paperback
$43.99
Subscription
Free Trial
Renews at $19.99p/m
eBook
$24.99 $35.99
Paperback
$43.99
Subscription
Free Trial
Renews at $19.99p/m

What do you get with Print?

Product feature icon Instant access to your digital eBook copy whilst your Print order is Shipped
Product feature icon Paperback book shipped to your preferred address
Product feature icon Download this book in EPUB and PDF formats
Product feature icon Access this title in our online reader with advanced features
Product feature icon DRM FREE - Read whenever, wherever and however you want
Table of content icon View table of contents Preview book icon Preview Book

Test-Driven iOS Development with Swift 4

Your First Unit Tests

When the iPhone platform was first introduced, applications were small and focused only on one feature. It was easy to make money with an app that only did just one thing (for example, a flashlight app that only showed a white screen). The code for these apps only had a few hundred lines and could easily be tested by tapping the screen for a few minutes.

Since then, the App Store has changed a lot. Even now, there are small apps with a clear focus in the App Store, but it's much harder to make money from them. A common app is complicated and feature-rich, but still needs to be easy to use. There are companies with several developers per platform working on one app all the time. These apps sometimes have a feature set that is normally found in desktop applications. It is very difficult and time consuming to test all the features on such apps by hand.

One reason for this is that manual testing needs to be done through a user interface, and it takes time to load the app to be tested. In addition to this, human beings are very slow compared to the capabilities of computers. Most of the time, a computer waits for the user's next input. If we could let a computer insert values, testing could be drastically accelerated. Additionally, the computer could test the features of the app without loading the user interface; thus, the complete app could be tested within seconds. This is exactly what unit tests are all about.

Writing unit tests is hard at first because it is a new concept. This chapter is aimed at helping you to get started with unit tests and how they are used in Xcode. We will also discuss Test-Driven Development (TDD), in which the tests are written before the implementation code. We will see how TDD is done in Xcode, and we will discuss its advantages and disadvantages.

We will cover the following topics in this chapter:

  • Building your first automatic unit test
  • Understanding TDD
  • TDD in Xcode
  • The advantages of TDD
  • The disadvantages of TDD

Building your first automatic unit test

If you have done some iOS development (or application development in general) already, the following example might seem familiar to you.

You are planning to build an app. You start collecting features, drawing some sketches, or your project manager hands the requirements to you. At some point, you start coding. After you have set up the project, you start implementing the required features of the app.

Let's say an app is an input form, and the values the user puts in have to be validated before the data can be sent to the server. The validation checks, for example, whether the email address looks like it's supposed to and the phone number has a valid format. You implement the form and check whether everything works. But before you can test, you need to write code that presents the form on the screen. Then, you build and run your app in the iOS simulator. The form is somewhere deep in the view hierarchy. So, you navigate to this view and put the values into the form. It doesn't work. Next, you go back to the code and try to fix the problem. Sometimes, this also means that you need to run the debugger, and build and run to check whether the code still has errors.

Eventually, the validation works for the test data you put in. Normally, you would need to test for all possible values to make sure that the validation not only works for your name and your data, but also for all valid data. But there is this long list of requirements on your desk, and you are already running late. The navigation to the form takes three taps in the simulator, and putting in all the different values just takes too long. You are a coder after all.

If only a robot could perform this testing for you.

What are unit tests?

Automatic unit tests act like this robot for you. They execute code, but without the need of navigating to the screen with the feature to test. Instead of running the app over and over again, you write tests with different input data and let the computer test your code in the blink of an eye. Let's see how this works in a simple example.

Implementing a unit test example

Open Xcode and go to File | New | Project. Navigate to iOS | Application | Single View App, and click on Next. Put in the name FirstDemo, select the language Swift, and check Include Unit Tests. Uncheck Use Core Data and Include UI Tests, and click on Next. The following screenshot shows the options in Xcode:

Xcode sets up a project ready for development in addition to a test target for your unit tests. Open the FirstDemoTests folder in the Project Navigator. Within the folder, there are two files: FirstDemoTests.swift and Info.plist. Select FirstDemoTests.swift to open it in the editor.

What you see here is a test case. A test case is a class comprising several tests. In the beginning, it's good practice to have a test case for each class in the main target.

Let's go through this file step by step:

import XCTest 
@testable import FirstDemo 

Every test case needs to import the XCTest framework. It defines the XCTestCase class and the test assertions that you will see later in this chapter.

The second line imports the module FirstDemo. All the code you write for the app will be in this module. By default, classes, structs, enums, and their methods are defined as internal. This means that they can be accessed within the module. But the test code lives outside of the module. To be able to write tests for your code, you need to import the module with the @testable keyword. This keyword makes the internal elements of the module accessible to the test case.

Next, we'll take a look at the class declaration:

class FirstDemoTests: XCTestCase { 

Nothing special here. This defines the FirstDemoTests class as a subclass of XCTestCase.

The first two methods in the class are as follows:

  override func setUp() { 
    super.setUp() 
    // Put setup code here. This method is called ... 
  } 
   

override func tearDown() { // Put teardown code here. This method is called ... super.tearDown() }

The setUp() method is called before the invocation of each test method in the class. Here, you can insert the code that should run before each test. You will see an example of this later in this chapter.

The opposite of setUp() is tearDown(). This method is called after the invocation of each test method in the class. If you need to clean up after your tests, put the necessary code in this method.

There are two test methods in the template provided by Apple:

  func testExample() { 
    // This is an example of a functional test case. 
    // Use XCTAssert and related functions to verify your ... 
  } 
   

func testPerformanceExample() { // This is an example of a performance test case. self.measure { // Put the code you want to measure the time of here. } } }

The first method is a normal test. You will use this kind of test a lot in the course of this book.

The second method is a performance test. It is used to test methods or functions that perform time-critical computations. The code you put into the measure closure is called 10 times, and the average duration is measured. Performance tests can be useful when implementing or improving complex algorithms and to make sure that their performance does not decline. We will not use performance tests in this book.

All the test methods that you write have to have the test prefix; otherwise, the test runner can't find and run them. This behavior allows easy disabling of tests--just remove the test prefix of the method name. Later, you will take a look at other possibilities to disable some tests without renaming or removing them.

Now, let's implement our first test. Let's assume that you have a method that counts the vowels of a string. A possible implementation looks like this:

func numberOfVowels(in string: String) -> Int {
let vowels: [Character] = ["a", "e", "i", "o", "u",
"A", "E", "I", "O", "U"]


var numberOfVowels = 0
for character in string {
if vowels.contains(character) {
numberOfVowels += 1
}
}


return numberOfVowels
}

Add this method to the ViewController class in ViewController.swift.

This method does the following things:

  1. First, an array of characters is defined containing all the vowels in the English alphabet.
Without the [Character] type declaration right after the name of the constant, this would be created as an array of strings, but we need an array of characters here.
  1. Next, we define a variable to store the number of vowels. The counting is done by looping over the characters of the string. If the current character is contained in the vowels array, numberOfVowels is increased by one.
  2. Finally, numberOfVowels is returned.

Open FirstDemoTests.swift methods (the methods with the test prefix). Add the following method to it:

func test_NumberOfVowels_WhenPassedDominik_ReturnsThree() { 
  let viewController = ViewController() 
   

let string = "Dominik"

let numberOfVowels = viewController.numberOfVowels(in: string)

XCTAssertEqual(numberOfVowels, 3, "should find 3 vowels in Dominik") }
Downloading the example code
You can download the example code files for all Packt books you have purchased from your account at http://www.packtpub.com. If you have purchased this book from elsewhere, you can visit http://www.packtpub.com/support and register to have the files emailed directly to you.

This test creates an instance of ViewController and assigns it to the viewController constant. It defines a string to use in the test. Then, it calls the function that we want to test and assigns the result to a constant. Finally, the test method calls the XCTAssertEqual(_, _) function to check whether the result is what we expected.

To run the tests, go to Product | Test, or use the command + U shortcut. Xcode compiles the project and runs the test. You will see something similar to what is shown in this screenshot:

The green diamond with a checkmark on the left-hand side of the editor indicates that the test passed. So, this is it. This is your first unit test. Step back for a moment and celebrate. This could be the beginning of a new development paradigm for you.

Now that we have a test that proves that the method does what we intended, we are going to improve the implementation. The method looks like it has been translated from Objective-C. But this is Swift. We can do better. Open ViewController.swift, and replace the numberOfVowels(in:) method with this swifter implementation:

func numberOfVowels(in string: String) -> Int { 
  let vowels: [Character] = ["a", "e", "i", "o", "u", 
                             "A", "E", "I", "O", "U"] 
   

return string.characters.reduce(0) { $0 + (vowels.contains($1) ? 1 : 0) } }

Here, we make use of the reduce function, which is defined in the array type. Run the tests again (command + U), to make sure that this implementation works the same as the one earlier.

Before we move on, let's recap what we have seen so far. First, you learned that you could easily write code that tests your code. Secondly, you saw that a test helped improve the code because now you don't have to worry about breaking the feature when changing the implementation.

To check whether the result of the method is as we expected, we used XCTAssertEqual(_, _). This is one of many XCTAssert functions that are defined in the XCTest framework. The next section shows the most important ones.

Important built-in assert functions

Each test needs to assert some expected behavior. The use of the XCTAssert functions tells Xcode what is expected.

A test method without a XCTAssert function will always pass as long as it compiles.

The most important assert functions are:

  • XCTAssertTrue(_:_:file:line:): This asserts that an expression is true
  • XCTAssertFalse(_:_:file:line:): This asserts that an expression is false
  • XCTAssertEqual(_:_:_:file:line:): This asserts that two expressions are equal
  • XCTAssertEqualWithAccuracy(_:_:accuracy:_:file:line:): This asserts that two expressions are the same, taking into account the accuracy defined in the accuracy parameter
  • XCTAssertNotEqual(_:_:_:file:line:): This asserts that two expressions are not equal
  • XCTAssertNil(_:_:file:line:): This asserts that an expression is a nil
  • XCTAssertNotNil(_:_:file:line:): This asserts that an expression is not nil
  • XCTFail(_:file:line:): This always fails
To take a look at the full list of the available XCTAssert functions, press Ctrl, and click on the XCTAssertEqual word in the test that you have just written. Then, select Jump to Definition in the pop-up menu.

Note that all the XCTAssert functions could be written using XCTAssertTrue(_:_:file:line:). For example, these two lines of code are equivalent to each other:

// This assertion is equivalent to... 
XCTAssertEqual(2, 1+1, "2 should be the same as 1+1") 

// ...this assertion XCTAssertTrue(2 == 1+1, "2 should be the same as 1+1")

But you should use the more precise assertions whenever possible. The reason is, the log output of the more precise assertion methods tells you exactly what happened in case of a failure. For example, look at the log output of the following two assertions:

XCTAssertEqual(2, 1, "foo")
// Output:
// XCTAssertEqual failed: ("2") is not equal to ("1") - foo


XCTAssertTrue
(2 == 1, "bar")
// Output:
// XCTAssertTrue failed - bar

In the first case, you don't need to look at the test to understand what happened. The log tells you exactly what went wrong.

In all the XCTAssert functions, the last three parameters are optional. To take a look at an example for the use of all the parameters, let's check out what a failing test looks like in Xcode. Open FirstDemoTests.swift, and change the expected number of vowels from 3 to 4:

XCTAssertEqual(numberOfVowels, 4, 
               "should find 4 vowels in Dominik") 

Now, run the tests. The test fails. You will see something like this:

Xcode tells you that something went wrong with this test. Next, to the test function in the preceding screenshot, there is a red diamond with an x on line number 24. The same symbol is in the line that actually failed. On the right is the explanation of what actually went wrong, followed by the string you provided in the XCTAssertEqual function. In this case, the first parameter, numberOfVowels, is 3; and the second parameter is 4. As 3 is not equal to 4, the test fails.

As mentioned earlier, XCTAssertEqual(...) has two more parameters--file and line. These parameters allow you to alter what is printed in the debug console in case of a test failure. Navigate to View | Debug Area | Activate Console and open the debug console. If the debug area is split in half, click on the second right-most button in the bottom-right corner to hide the variables' view:

We have only one test at the moment, and the debug output is already kind of messy. Later in this chapter, we will learn that there is a better UI for the same information in Xcode.

There is one line in the output that shows the failing test:

/Users/dom/Documents/TDD_book/edition_03/code/FirstDemo/FirstDemoTests/FirstDemoTests.swift:31: error: -[FirstDemoTests.FirstDemoTests test_NumberOfVowels_WhenPassedDominik_ReturnsThree] : XCTAssertEqual failed: ("3") is not equal to ("4") - should find 4 vowels in Dominik

The output starts with the file and line where the failing tests are located. With the file and line parameter of the XCTAssert functions, we can alter what is printed there. Go back to the test method, and replace the assertion with this:

XCTAssertEqual(numberOfVowels, 4, 
               "should find 4 vowels in Dominik", 
               file: "FirstDemoTests.swift", line: 24) 

The test method starts at line number 24.

With this change, the output is as follows:

FirstDemoTests.swift:24: error: -[FirstDemoTests.FirstDemoTests test_NumberOfVowels_WhenPassedDominik_ReturnsThree] : XCTAssertEqual failed: ("3") is not equal to ("4") - should find 4 vowels in Dominik

The debug output of the test now shows the filename and line number that we specified in the assertion function. This doesn't sound like a useful feature, but later in the book, you will see an example where this really shines.

As I mentioned earlier, in all the XCTAssert functions, the last three parameters are optional. In cases where you don't need the message because the used assertion function makes clear what the failure is, you can omit it.

Before we move on with the introduction to TDD, change the test so that it passes again.

Understanding TDD

Now that we have seen what unit tests are and how they can help in development, we are going to learn about TDD.

In 1996, Kent Beck introduced a new software development methodology called Extreme Programming. The word Extreme indicates that the concepts behind Extreme Programming are totally different from the concepts used in software development back then. For many people, these concepts sound extreme even today.

The methodology is based on 12 rules or practices. One of the rules states that developers have to write unit tests and all parts of the software have to be thoroughly tested. All tests have to pass before the software (or a new feature) can be released to customers. The tests should be written before the production code that they test.

This so-called test-first programming led to TDD. As the name suggests, in TDD, tests drive the development. This means that the developer writes code only because there is a test that fails. The tests dictate whether the code has to be written, and they also provide a measure when a feature is "done"--it is done when all tests for this feature pass.

Robert C. Martin (known as Uncle Bob) has come up with three simple rules for TDD:

  • You are not allowed to write any production code unless it is to pass a failing unit test
  • You are not allowed to write any more of a unit test that is sufficient to fail, and compilation failures are failures
  • You are not allowed to write any more production code that is sufficient to pass the one failing unit test

These rules sound kind of silly because when you start with a feature that uses a new class or method that is not declared yet, the test will fail immediately, and you have to add some code just to be able to finish writing the test. But by following these rules, you will only write code that is actually needed to implement the features. And you will only write test code that is needed as well. All the code you write will either end up being part of the final product or it will be a part of your test suite.

Because of the focus on just one feature at a time, you will have a working piece of software almost all the time. So, when your boss enters your office and asks you for a demonstration of the current status of the project, you are only a few minutes away from a presentable (that is, compiling), and a thoroughly tested piece of software.

The TDD workflow - red, green, and refactor

The normal workflow of TDD comprises three steps--the red, green, and refactor steps, respectively. The following sections describe these steps in detail.

Red

You start by writing a failing test. It needs to test a required feature of the software product that is not already implemented or an edge case that you want to make sure is covered. The name red comes from the way most IDEs indicate a failing test. Xcode uses a red diamond with a white x on it.

It is very important that the test you write in this step initially fails. Otherwise, you can't ensure that the test works and really tests the feature that you want to implement. It could be that you have written a test that always passes and is, therefore, useless. Or, it is possible that the feature is already implemented. Either way, you gain insight into your code.

Green

In the green step, you write the simplest code that makes the test pass. It doesn't matter whether the code you write is good and clean. The code can also be silly and even wrong. It is enough when all the tests pass. The name green refers to how most IDEs indicate a passing test. Xcode uses a green diamond with a white check mark.

It is very important that you try to write the simplest code that makes the tests pass. By doing so, you only write code that you actually need and that is the simplest implementation possible. When I say simple, I mean that it should be easy to read, understand, and change. The code should always be easy to understand.

Often the simplest implementation will not be enough for the feature you try to implement, but still enough to make all the tests pass. This just means that you need another failing test to further drive the development of that feature.

Refactor

During the green step, you write just enough code to make all the tests pass again. As I just mentioned, it doesn't matter what the code looks like in the green step. In the refactor step, you should improve the code. You remove duplication, extract common values, and so on. Do what is needed to make the code as good as possible. The tests help you to not break already implemented features while refactoring.

Don't skip this step. Always try to think how you can improve the code after you have implemented a feature. Doing so helps to keep the code clean and maintainable. This ensures that it is always in good shape.

As you have written only a few lines of code since the last refactor step, the changes needed to make the code clean shouldn't take much time.

TDD in Xcode

In 1998, the Swiss company Sen:te developed OCUnit, a testing framework for Objective-C (hence, the OC prefix). OCUnit was a port of SUnit, a testing framework that Kent Beck had written for Smalltalk in 1994.

With Xcode 2.1, Apple added OCUnit to Xcode. One reason for this step was that they used it to develop Core Data at the same time that they developed Tiger, the OS with which Core Data was shipped. Bill Bumgarner, an Apple engineer, wrote this later in a blog post:

"Core Data 1.0 is not perfect, but it is a rock solid product that I'm damned proud of. The quality and performance achieved could not have been done without the use of unit testing. Furthermore, we were able to perform highly disruptive operations to the codebase very late in the development cycle. The end result was a vast increase in performance, a much cleaner codebase, and rock solid release."

Apple realized how valuable unit tests can be when developing complex systems in a changing environment. They wanted third-party developers to benefit from unit tests as well. OCUnit could be (and has been) added to Xcode by hand before version 2.1. But by including it into the IDE, the investment in time that was needed to start unit testing was reduced a lot, and as a result, more people started to write tests.

In 2008, OCUnit was integrated into the iPhone SDK 2.2 to allow unit testing of iPhone apps.

Finally, in 2013, unit testing became a first-class citizen in Xcode 5 with the introduction of XCTest. With XCTest, Apple added specific user interface elements to Xcode that helped with testing, which allowed running specific tests, finding failing tests quickly, and getting an overview of all the tests. We will go over the testing user interface in Xcode later in this chapter. But, first, we will take a look at TDD using Xcode in action.

An example of TDD

For this TDD example, we are going to use the same project we created at the beginning of this chapter. Open the FirstDemo project in Xcode, and run the tests by hitting command + U. The one existing test should pass.

Let's say we are building an app for a blogging platform. When writing a new post, the user puts in a headline for the post. All the words in the headline should start with an uppercase letter.

To start the TDD workflow, we need a failing test. The following questions need to be considered when writing the test:

  • Precondition: What is the state of the system before we invoke the method?
  • Invocation: How should the signature of the method look? What are the input parameters (if any) of the method?
  • Assertion: What is the expected result of the method invocation?

For our blogging app example, here are some possible answers to these questions:

  • Precondition: None.
  • Invocation: The method should take a string and it should return a string. A possible name for that method is makeHeadline.
  • Assertion: The resulting string should be the same, but all the words should start with an uppercase letter.

This is enough to get us started. Enter the red step.

Red - example 1

Open FirstDemoTests.swift, and add the following code to the FirstDemoTests class:

func test_MakeHeadline_ReturnsStringWithEachWordStartCapital() { 
  let viewController = ViewController() 
   

  let string = "this is A test headline" 
   

  let headline = viewController.makeHeadline(from: string) 
} 

This isn't a complete test method yet because we aren't really testing anything. The assertion is missing. But we have to stop writing the test at this point because the compiler complains that Value of type 'ViewController' has no member 'makeHeadline'.

Following the TDD workflow, we need to add code until the compiler stops printing errors. Remember that code does not compile within a test means the test is failing. And a failing test means we need to write code until the test does not fail anymore.

Open ViewController.swift, and add the following method to the ViewController class:

func makeHeadline(from string: String) { 
   
} 

The error still remains. The reason for this is that we need to compile to make the test target aware of this change. Run the tests to check whether this change is enough to make the test green again. The test is indeed green, but sometimes the error is still shown. The reason is that Xcode sometimes "forgets" to remove old errors.

Now we get a warning that the headline constant isn't used, and we should change it to _. So, let's use it. Add the following assert function at the end of the test:

XCTAssertEqual(headline, "This Is A Test Headline") 

This results in another compiler error:

Argument type '()' does not conform to expected type 'Equatable'

The reason for this error is that the makeHeadline(from:) method at the moment returns Void or (). But XCTAssertEqual can only be used if both expressions conform to the protocol Equatable and are of the same type. This makes sense as two expressions of different types can't be equal to each other.

Go back to ViewController, and change makeHeadline(from:) to this:

func makeHeadline(from string: String) -> String { 
  return "" 
} 

Green - example 1

Now, the method returns an empty string. This should be enough to make the test compile. Run the test. The test fails. But this time, it's not because the code we've written does not compile, but due to the failed assertion instead. This is not a surprise because an empty string isn't equal to "This Is A Test Headline". Following the TDD workflow, we need to go back to the implementation and add the simplest code that makes the test pass.

In ViewController, change makeHeadline(from:) to read as follows:

func makeHeadline(from string: String) -> String { 
  return "This Is A Test Headline" 
} 

This code is stupid and wrong, but it is the simplest code that makes the test pass. Run the tests to make sure that this is actually the case.

Even though the code we just wrote is useless for the feature we are trying to implement, it still has value for us, the developers. It tells us that we need another test.

Refactor - example 1

Before writing more tests, we need to refactor the existing ones. In the production code, there is nothing to refactor. This code couldn't be simpler or more elegant. In the test case, we now have two test methods. Both start by creating an instance of ViewController. This is a repetition of code and a good candidate for refactoring.

Add the following property at the beginning of the FirstDemoTests class:

var viewController: ViewController! 

Remember that the setUp() method is called before each test is executed. So, it is the perfect place to initialize the viewController property:

override func setUp() { 
  super.setUp() 
  viewController = ViewController() 
} 

Now, we can remove this let viewController = ViewController() line of code from each test.

Red - example 2

As mentioned in the preceding section, we need another test because the production code we have written to make the previous test pass only works for one specific headline. But the feature we want to implement has to work for all possible headlines. Add the following test to FirstDemoTests:

func test_MakeHeadline_ReturnsStringWithEachWordStartCapital2() { 
  let string = "Here is another Example" 
   

  let headline = viewController.makeHeadline(from: string) 
   

  XCTAssertEqual(headline, "Here Is Another Example") 
} 

Run the test. This new test obviously fails. Let's make the tests green.

Green - example 2

Open ViewController.swift, and replace the implementation of makeHeadline(from:) with the following lines of code:

func makeHeadline(from string: String) -> String { 
  let words = string.components(separatedBy: " ") 
   

  var headline = "" 
  for var word in words { 
    let firstCharacter = word.remove(at: word.startIndex) 
    headline += "\(String(firstCharacter).uppercased())\(word) " 
  } 
   
  headline.remove(at: headline.index(before: headline.endIndex)) 
  return headline 
} 

Let's go through this implementation step by step:

  1. Split the string into words.
  2. Iterate over the words, and remove the first character and change it to uppercase. Add the changed character to the beginning of the word. Add this word with a trailing space to the headline string.
  3. Remove the last space and return the string.

Run the tests. All the tests pass. The next thing to perform in the TDD workflow is refactoring.

Do not skip refactoring. This step is as important as the red and the green step. You are not done until there is nothing to refactor anymore.

Refactor - example 2

Look at the two tests you have for this feature. They are hard to read. The relevant information for the tests is kind of unstructured. We are going to clean it up.

Replace the two tests with the following code:

func test_MakeHeadline_ReturnsStringWithEachWordStartCapital() { 
  let input           = "this is A test headline" 
  let expectedOutput  = "This Is A Test Headline" 
   

  let headline = viewController.makeHeadline(from: input) 
   

  XCTAssertEqual(headline, expectedOutput) 
} 
 
func test_MakeHeadline_ReturnsStringWithEachWordStartCapital2() { 
  let input           = "Here is another Example" 
  let expectedOutput  = "Here Is Another Example" 
   

  let headline = viewController.makeHeadline(from: input) 
   

  XCTAssertEqual(headline, expectedOutput) 
} 

Now, the tests are easy to read and understand. They follow a logical structure: precondition, invocation, and assertion.

Run the tests. All the tests should still pass. But how do we know whether the tests still test the same thing as they did earlier? In most cases, the changes we'll make while refactoring the tests don't need to be tested themselves. But, sometimes (such as in this case), it is good to make sure that the tests still work. This means that we need a failing test again. Go to makeHeadline(from:) and comment out (by adding // at the beginning) the line:

headline.remove(at: headline.index(before: headline.endIndex)) 

Run the tests again. Eureka! Both tests fail.

As you can see here, a failing test does not stop the tests in general. But you can change this behavior by setting continueAfterFailure to false in setUp().

Remove the comment symbols again to make the test pass again. Now, we need to refactor the implementation code. The implementation we have right now looks like it was translated from Objective-C to Swift (if you haven't used Objective-C yet, you have to trust me on this). But Swift is different and has many concepts that make it possible to write less code that is easier to read. Let's make the implementation more swiftly. Replace makeHeadline(from:) with the following code:

func makeHeadline(from string: String) -> String { 
  let words = string.components(separatedBy: " ") 
   

  let headlineWords = words.map { (word) -> String in 
    var mutableWord = word 
    let first = mutableWord.remove(at: mutableWord.startIndex) 

    return String(first).uppercased() + mutableWord 
    } 
   

  return headlineWords.joined(separator: " ") 
} 

In this implementation, we use the map function to iterate the words array and return another array containing the same words, but starting with uppercase letters. The result is then transformed into a string by joining the words using a space as the separator.

Run the tests again to make sure we didn't break anything with the refactoring. All the tests should still pass.

A recap

In this section, we have added a feature to our project using the TDD workflow. We started with a failing test. We made the test pass. And, finally, we refactored the code to be clean. The steps you have seen here seem so simple and stupid that you may think that you could skip some of the tests and still be good. But then, it's not TDD anymore. The beauty of TDD is that the steps are so easy that you do not have to think about them. You just have to remember what the next step is.

Because the steps and the rules are so easy, you don't have to waste your brainpower thinking about what the steps actually mean. The only thing you have to remember is red, green, and refactor. As a result, you can concentrate on the difficult part: writing tests, making them pass, and improving code.

Finding information about tests in Xcode

With Xcode 5 and the introduction of XCTest, unit testing became tightly integrated into Xcode. Apple added many UI elements to navigate to tests, run specific tests, and find information about failing tests. One key element here is the Test Navigator.

Test Navigator

To open the Test Navigator, click on the diamond with a minus sign (-) in the navigator panel:

The Test Navigator shows all the tests. In the preceding screenshot, you can see the Test Navigator for our demo project. In the project, there is one test target. For complex apps, it can be useful to have more than one test target, but this is beyond the scope of this book. The number of tests is shown right behind the name of the test target. In our case, there are three tests in the target.

The demo project has only one test case with three tests.

At the bottom of the navigator is a filter control with which you can filter the shown tests. As soon as you start typing, the shown tests are filtered using fuzzy matching. There's a button in the control showing a diamond with an x:

If this button is clicked on, only the failing tests are shown in the list.

Tests overview

Xcode also has a test overview where all the results of the tests are collected in one place. To open it, select the Result Navigator in the navigator panel, and select the last test in the list:

You can also select other tests in the list if you want to compare test runs with each other. In the editor on the right-hand side, an overview of all the tests from the selected test run is shown:

When you hover over one of the tests with the mouse pointer, a circle with an arrow to the right appears. If you click on the arrow, Xcode opens the test in the editor.

In the overview, there is also the Logs tab. It shows all the tests in a tree-like structure. Here is an example of what this looks like:

The logs show the test cases (in this example, one test case) and the tests within the test cases (in this example, two failing and one passing test). And in addition to this, the time each test case and even each test need to execute.

In TDD, it is important for the tests to execute quickly. You want to be able to execute the whole test suite in less than a second. Otherwise, the whole workflow is dominated by test execution and testing can distract your focus and concentration. You should never be tempted to switch to another application (such as Safari) because the tests will take half a minute.

If you notice that the test suite takes too long to be practical, open the logs and search for the tests that slow down testing and try to make the tests faster.

Running tests

Xcode provides many different ways to execute tests. You have already seen two ways to execute all the tests in the test suite--go to the Project | Test menu item and use the command + U keyboard shortcut.

Running one specific test

In TDD, you normally want to run all the tests as often as possible. Running the tests gives you confidence that the code does what you intended when you wrote the tests. In addition to this, you want immediate feedback (that is, a failing test) whenever new code breaks a seemingly unrelated feature. Immediate feedback means that your memory of the changes that broke the feature is fresh, and the fix is made quickly.

Nevertheless, sometimes, you need to run one specific test, but don't let it become a habit.

To run one specific test, you can click on the diamond visible next to the test method:

When you click on it, the production code is compiled and launched in the simulator or on the device, and the test is executed.

There is another way to execute exactly one specific test. When you open the Test Navigator and hover over one test, a circle with a play icon is shown next to the test method name:

Again, if you click on this test, it is run exclusively.

The test framework identifies tests by the prefix of the method name. If you want to run all tests but one, remove the test prefix from the beginning of this test method name.

Running all tests in a test case

In the same way as running one specific test, you can run all the tests of a specific test case. Click on the diamond next to the definition of the test case, or click on the Play button that appears when you hover over the test case name in the Test Navigator.

Running a group of tests

You can choose to run a group of tests by editing the build scheme. To edit the build scheme, click on the scheme in the toolbar in Xcode, and then click on Edit Scheme...:

Then, select Test, and expand the test suite by clicking on the small triangle. On the right-hand side, there is a column called Test:

The selected scheme only runs the tests that are checked. By default, all the tests are checked, but you can uncheck some tests if you need to. But don't forget to check all the tests again when you are finished.

As an alternative, you can add a build scheme for a group of tests that you want to run regularly without running all tests.

But as mentioned earlier, you should run the complete test suite as often as possible.

The setUp() and tearDown() methods

We have already seen the setUp() and tearDown() instance methods earlier in this chapter. The code in the setUp() instance method is run before each test invocation. In our example, we used setUp() to initialize ViewController that we wanted to test. As it was run before each test invocation, each test used its own instance of ViewController. The changes we made to this particular instance in one test didn't affect the other test. The tests executed independently of each other.

The tearDown() instance method is run after each test invocation. Use tearDown() to perform the necessary cleanup.

In addition to the instance methods, there are also the setUp() and tearDown() class methods. These are run before and after all the tests of a test case, respectively.

Debugging tests

Sometimes, but usually, rarely, you may need to debug your tests. As with normal code, you can set breakpoints in test code. The debugger then stops the execution of the code at a breakpoint. You can also set breakpoints in the code that will be tested to check whether you have missed something or whether the code you'd like to test is actually executed.

To get a feeling of how this works, let's add an error to a test in the preceding example and debug it. Open FirstDemoTests.swift, and replace the test_MakeHeadline_ReturnsStringWithEachWordStartCapital2() test method with this code:

func test_MakeHeadline_ReturnsStringWithEachWordStartCapital2() { 
  let input           = "Here is another Example" 
  let expectedOutput  = "Here iS Another Example" 
   

  let headline = viewController.makeHeadline(from: input) 
   

  XCTAssertEqual(headline, expectedOutput) 
} 

Have you seen the error that we have introduced? The value of the string expectedOutput has a typo. The letter s in iS is an uppercase letter, and the letter i is a lowercase letter. Run the tests. The test fails and Xcode tells you what the problem is. But for the sake of this exercise, let's set a breakpoint in the line with the XCTAssertEqual() function. Click on the area on the left-hand side of the line where you want to set a breakpoint. You have to click on the area next to the red diamond.

As a result, your editor will look similar to what is shown here:

Run the tests again. The execution of the tests stops at the breakpoint. Open the debug console if it is not already open (go to View | Debug Area | Activate Console). In the console, some test output is visible. The last line starts with (lldb) and a blinking cursor. Put in po expectedOutput and hit return. po is the "print object" command. As the name suggests, it prints a representation of the object:

(lldb) po expectedOutput 
"Here iS Another Example" 

Now, print the value of the result:

(lldb) po headline 
"Here Is Another Example" 

So, with the help of the debugger, you can find out what is happening.

To learn more about the debugger, search for lldb in the Apple documentation.

For now, keep the typo in expectedOutput as it is, but remove the breakpoint by dragging it with the mouse from the area to the left of the editor.

Breakpoint that breaks on test failure

Xcode has a built-in breakpoint that breaks on test failures. When this breakpoint is set, the execution of the tests is stopped, and a debug session is started whenever a test fails.

Usually, this is not what you want because in TDD failing tests are normal, and you don't need a debugger to find out what's going on. You explicitly wrote the test to fail at the beginning of the TDD workflow cycle.

But in case you need to debug one or more failing tests, it's good to know how this breakpoint is activated. Open the Debug Navigator:

At the bottom of the navigator view is a button with a plus sign (+). Click on it, and select Test Failure Breakpoint:

As the name suggests, this breakpoint stops the execution of the tests whenever a test fails. We still have a failing test in our example. Run the tests to see the breakpoint in action.

The debugger stops at the line with the assertion because the tests fail. Like in the preceding example, you get a debug session so that you can put in LLDB commands to find out why the test failed.

Remove the breakpoint again because it's not very practical while performing TDD.

The test again feature

Now, let's fix the error in the tests and learn how to run the previous test again. Open FirstDemoTests.swift, and run only the failing test by clicking on the diamond symbol next to the test method. The test still fails. Fix it by changing iS to Is in expectedOutput. Then, go to Product | Perform Action | Test "test_MakeHeadline_ReturnsStringWithEachWordStartCapital2()" Again, or use the shortcut ctrl + option + command + G to run just the previous test again. The shortcut is especially useful when you are working on one specific feature, and you need to test whether the implementation is already enough.

The advantages of TDD

TDD comes with advantages and disadvantages. These are the main advantages:

  • You only write code that is needed: Following the rules, you have to stop writing production code when all your tests pass. If your project needs another feature, you need a test to drive the implementation of that feature. The code you write is the simplest code possible. So, all the code ending up in the product is actually needed to implement the features.
  • More modular design: In TDD, you concentrate on one micro feature at a time. And as you write the test first, the code automatically becomes easy to test. Code that is easy to test has a clear interface. This results in a modular design for your application.
  • Easier to maintain: As the different parts of your application are decoupled from each other and have clear interfaces, the code becomes easier to maintain. You can exchange the implementation of a micro feature with a better implementation without affecting another module. You could even keep the tests and rewrite the complete application. When all the tests pass, you are done.
  • Easier to refactor: Every feature is thoroughly tested. You don't need to be afraid to make drastic changes because if all the tests still pass, everything is fine. This point is very important because you, as a developer, improve your skills each and every day. If you open the project after six months of working on something else, most probably, you'll have many ideas on how to improve the code. But your memory about all the different parts and how they fit together isn't fresh anymore. So, making changes can be dangerous. With a complete test suite, you can easily improve the code without the fear of breaking your application.
  • High test coverage: There is a test for every feature. This results in high test coverage. High test coverage helps you gain confidence in your code.
  • Tests document the code: The test code shows you how your code is meant to be used. As such, it documents your code. The test code is sample code that shows what the code does and how the interface has to be used.
  • Less debugging: How often have you wasted a day to find a nasty bug? How often have you copied an error message from Xcode and searched for it on the internet? With TDD, you write fewer bugs because the tests tell you early on whether you've made a mistake. And the bugs you write are found much earlier. You can concentrate on fixing the bug when your memory about what the code is supposed to do and how it does it.

The disadvantages of TDD

Just like everything else in the world, TDD has some disadvantages. The main ones are here:

  • No silver bullet: Tests help to find bugs, but they can't find bugs that you introduce in the test code and in implementation code. If you haven't understood the problem you need to solve, writing tests most probably won't help.
  • It seems slower at the beginning: If you start TDD, you will get the feeling that it takes longer to make easy implementations. You need to think about the interfaces, write the test code, and run the tests before you can finally start writing the code.
  • All the members of a team need to do it: As TDD influences the design of code, it is recommended that either all the members of a team use TDD or no one at all. In addition to this, it's sometimes difficult to justify TDD to the management because they often have the feeling that the implementation of new features takes longer if developers write code that won't end up in the product half of the time. It helps if the whole team agrees on the importance of unit tests.
  • Tests need to be maintained when requirements change: Probably, the strongest argument against TDD is that the tests have to be maintained as the code has to. Whenever requirements change, you need to change the code and tests. But you are working with TDD. This means that you need to change the tests first, and then make the tests pass. So, in reality, tests help you to understand the new requirements and implement the code without breaking other features.

What to test

What should be tested? When using TDD and following the rules mentioned in the previous sections, the answer is easy--everything. You only write code because there is a failing test.

In practice, it's not that easy. For example, should the position and color of a button be tested? Should the view hierarchy be tested? Probably not; the color and exact position of the button is not important for the functioning of an app. In the early stages of development, these kinds of things tend to change. With the auto layout and different localizations of the app, the exact position of buttons and labels depend on many parameters.

In general, you should test the features that make the app useful for a user and those that need to work. The user doesn't care whether the button is exactly 20 points from the rightmost edge of the screen. All the user is interested in is that the button does what they expect it to and the app looks good.

In addition to this, you should not test the whole application in total using unit tests. Unit tests are meant to test small units of computation. They need to be fast and reliable. Things, such as database access and networking, should be tested using integration tests, where the tests drive the real finished application. Integration tests are allowed to be slow because they are run a lot less often than unit tests. Usually, they are run at the end of the development before the application is released, or they are run with the help of a continuous integration system each night on a server, where it doesn't matter that the complete test suite takes several minutes (or even hours) to execute.

Summary

In this chapter, we saw unit tests in action and how they are set up in Xcode. You learned what TDD is and why it can help build better apps. With the help of TDD, we implemented a feature of a demo app to get used to the workflow. We saw many different possibilities to run tests and how we can find bugs in our tests using LLDB, the debugger integrated into Xcode. Finally, we discussed the advantages and disadvantages of TDD and what should be tested with unit tests.

In the next chapter, we will take a look at an app that we will build together using TDD.

Left arrow icon Right arrow icon
Download code icon Download Code

Key benefits

  • A practical guide to writing effective, organized, and clean code that works well
  • Learn test-driven principles to help you build better-designed apps with fewer bugs
  • A comprehensive overview of the techniques available for TDD in Swift

Description

Test-driven development (TDD) is a proven way to find software bugs early. Writing tests before you code improves the structure and maintainability of your apps. Using TDD, in combination with Swift 4's improved syntax, means there is no longer any excuse for writing bad code. This book will help you understand the process of TDD and how to apply it to your apps written in Swift. Through practical, real-world examples, you’ll learn how to implement TDD in context. You will begin with an overview of the TDD workflow and then delve into unit-testing concepts and code cycles. You will also plan and structure your test-driven iOS app, and write tests to drive the development of view controllers and helper classes. Next, you’ll learn how to write tests for network code and explore how the test-driven approach—in combination with stubs—helps you write network code even before the backend component is finished. Finally, the book will guide you through the next steps to becoming a testing expert by discussing integration tests, Behavior Driven Development (BDD), open source testing frameworks, and UI Tests (introduced in Xcode 9).

Who is this book for?

To get the most out of this book, you will need some prior experience with Swift application development. You may have already heard about Test-Driven Development (TDD) but you don't need any prior experience of applying it to Swift applications.

What you will learn

  • Implement TDD in Swift application development
  • Find bugs before you enter code using the TDD approach
  • Use TDD to build models, view controllers, and views
  • Test network code with asynchronous tests and stubs
  • Write code that is a joy to read and maintain
  • Develop functional tests to ensure the app works as planned
Estimated delivery fee Deliver to South Africa

Standard delivery 10 - 13 business days

$12.95

Premium delivery 3 - 6 business days

$34.95
(Includes tracking information)

Product Details

Country selected
Publication date, Length, Edition, Language, ISBN-13
Publication date : Oct 30, 2017
Length: 222 pages
Edition : 3rd
Language : English
ISBN-13 : 9781788475709
Vendor :
Apple
Languages :
Tools :

What do you get with Print?

Product feature icon Instant access to your digital eBook copy whilst your Print order is Shipped
Product feature icon Paperback book shipped to your preferred address
Product feature icon Download this book in EPUB and PDF formats
Product feature icon Access this title in our online reader with advanced features
Product feature icon DRM FREE - Read whenever, wherever and however you want
Estimated delivery fee Deliver to South Africa

Standard delivery 10 - 13 business days

$12.95

Premium delivery 3 - 6 business days

$34.95
(Includes tracking information)

Product Details

Publication date : Oct 30, 2017
Length: 222 pages
Edition : 3rd
Language : English
ISBN-13 : 9781788475709
Vendor :
Apple
Languages :
Tools :

Packt Subscriptions

See our plans and pricing
Modal Close icon
$19.99 billed monthly
Feature tick icon Unlimited access to Packt's library of 7,000+ practical books and videos
Feature tick icon Constantly refreshed with 50+ new titles a month
Feature tick icon Exclusive Early access to books as they're written
Feature tick icon Solve problems while you work with advanced search and reference features
Feature tick icon Offline reading on the mobile app
Feature tick icon Simple pricing, no contract
$199.99 billed annually
Feature tick icon Unlimited access to Packt's library of 7,000+ practical books and videos
Feature tick icon Constantly refreshed with 50+ new titles a month
Feature tick icon Exclusive Early access to books as they're written
Feature tick icon Solve problems while you work with advanced search and reference features
Feature tick icon Offline reading on the mobile app
Feature tick icon Choose a DRM-free eBook or Video every month to keep
Feature tick icon PLUS own as many other DRM-free eBooks or Videos as you like for just $5 each
Feature tick icon Exclusive print discounts
$279.99 billed in 18 months
Feature tick icon Unlimited access to Packt's library of 7,000+ practical books and videos
Feature tick icon Constantly refreshed with 50+ new titles a month
Feature tick icon Exclusive Early access to books as they're written
Feature tick icon Solve problems while you work with advanced search and reference features
Feature tick icon Offline reading on the mobile app
Feature tick icon Choose a DRM-free eBook or Video every month to keep
Feature tick icon PLUS own as many other DRM-free eBooks or Videos as you like for just $5 each
Feature tick icon Exclusive print discounts

Frequently bought together


Stars icon
Total $ 136.97
Swift 4 Programming Cookbook
$48.99
Test-Driven iOS Development with Swift 4
$43.99
Swift 4 Protocol-Oriented Programming
$43.99
Total $ 136.97 Stars icon

Table of Contents

8 Chapters
Your First Unit Tests Chevron down icon Chevron up icon
Planning and Structuring Your Test-Driven iOS App Chevron down icon Chevron up icon
A Test-Driven Data Model Chevron down icon Chevron up icon
A Test-Driven View Controller Chevron down icon Chevron up icon
Testing Network Code Chevron down icon Chevron up icon
Putting It All Together Chevron down icon Chevron up icon
Code Coverage Chevron down icon Chevron up icon
Where to Go from Here Chevron down icon Chevron up icon
Get free access to Packt library with over 7500+ books and video courses for 7 days!
Start Free Trial

FAQs

What is the delivery time and cost of print book? Chevron down icon Chevron up icon

Shipping Details

USA:

'

Economy: Delivery to most addresses in the US within 10-15 business days

Premium: Trackable Delivery to most addresses in the US within 3-8 business days

UK:

Economy: Delivery to most addresses in the U.K. within 7-9 business days.
Shipments are not trackable

Premium: Trackable delivery to most addresses in the U.K. within 3-4 business days!
Add one extra business day for deliveries to Northern Ireland and Scottish Highlands and islands

EU:

Premium: Trackable delivery to most EU destinations within 4-9 business days.

Australia:

Economy: Can deliver to P. O. Boxes and private residences.
Trackable service with delivery to addresses in Australia only.
Delivery time ranges from 7-9 business days for VIC and 8-10 business days for Interstate metro
Delivery time is up to 15 business days for remote areas of WA, NT & QLD.

Premium: Delivery to addresses in Australia only
Trackable delivery to most P. O. Boxes and private residences in Australia within 4-5 days based on the distance to a destination following dispatch.

India:

Premium: Delivery to most Indian addresses within 5-6 business days

Rest of the World:

Premium: Countries in the American continent: Trackable delivery to most countries within 4-7 business days

Asia:

Premium: Delivery to most Asian addresses within 5-9 business days

Disclaimer:
All orders received before 5 PM U.K time would start printing from the next business day. So the estimated delivery times start from the next day as well. Orders received after 5 PM U.K time (in our internal systems) on a business day or anytime on the weekend will begin printing the second to next business day. For example, an order placed at 11 AM today will begin printing tomorrow, whereas an order placed at 9 PM tonight will begin printing the day after tomorrow.


Unfortunately, due to several restrictions, we are unable to ship to the following countries:

  1. Afghanistan
  2. American Samoa
  3. Belarus
  4. Brunei Darussalam
  5. Central African Republic
  6. The Democratic Republic of Congo
  7. Eritrea
  8. Guinea-bissau
  9. Iran
  10. Lebanon
  11. Libiya Arab Jamahriya
  12. Somalia
  13. Sudan
  14. Russian Federation
  15. Syrian Arab Republic
  16. Ukraine
  17. Venezuela
What is custom duty/charge? Chevron down icon Chevron up icon

Customs duty are charges levied on goods when they cross international borders. It is a tax that is imposed on imported goods. These duties are charged by special authorities and bodies created by local governments and are meant to protect local industries, economies, and businesses.

Do I have to pay customs charges for the print book order? Chevron down icon Chevron up icon

The orders shipped to the countries that are listed under EU27 will not bear custom charges. They are paid by Packt as part of the order.

List of EU27 countries: www.gov.uk/eu-eea:

A custom duty or localized taxes may be applicable on the shipment and would be charged by the recipient country outside of the EU27 which should be paid by the customer and these duties are not included in the shipping charges been charged on the order.

How do I know my custom duty charges? Chevron down icon Chevron up icon

The amount of duty payable varies greatly depending on the imported goods, the country of origin and several other factors like the total invoice amount or dimensions like weight, and other such criteria applicable in your country.

For example:

  • If you live in Mexico, and the declared value of your ordered items is over $ 50, for you to receive a package, you will have to pay additional import tax of 19% which will be $ 9.50 to the courier service.
  • Whereas if you live in Turkey, and the declared value of your ordered items is over € 22, for you to receive a package, you will have to pay additional import tax of 18% which will be € 3.96 to the courier service.
How can I cancel my order? Chevron down icon Chevron up icon

Cancellation Policy for Published Printed Books:

You can cancel any order within 1 hour of placing the order. Simply contact customercare@packt.com with your order details or payment transaction id. If your order has already started the shipment process, we will do our best to stop it. However, if it is already on the way to you then when you receive it, you can contact us at customercare@packt.com using the returns and refund process.

Please understand that Packt Publishing cannot provide refunds or cancel any order except for the cases described in our Return Policy (i.e. Packt Publishing agrees to replace your printed book because it arrives damaged or material defect in book), Packt Publishing will not accept returns.

What is your returns and refunds policy? Chevron down icon Chevron up icon </