Populating Your Tables
Once the table has been created, the next logical step is to insert values into the table. To do this, SQL provides the INSERT statement. Let's try adding a row of data to the Student table of the studentdemo database that we created previously.
Here is the SQL statement to achieve this. First, switch to the studentdemo database and enter the following query:
USE studentdemo;
INSERT INTO Student (StudentID, StudentName, grade, age, course) VALUES ('S001', 'Prashanth Jayaram', 'A', 36, 'Computer Science');
If you check the contents of the database after running this query, you should see something like this:
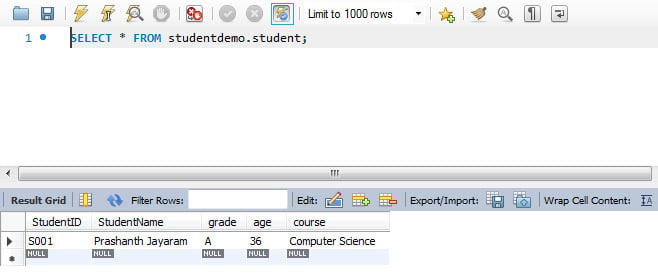
Figure 1.14: Values inserted into the database
Note
To see the contents of this database, follow the process you used in the earlier exercises. Right-click the table and choose Select Rows - Limit 1000.
Adding single rows like this in multiple queries will be time-consuming. We can add multiple rows by writing a query like the following one:
INSERT INTO Student (StudentID, StudentName, grade, age, course) VALUES ('S002', 'Frank Solomon', 'B', 35, 'Physics'), ('S003', 'Rachana Karia', 'B', 36, 'Electronics'), ('S004', 'Ambika Prashanth', 'C', 35, 'Mathematics');
The preceding query looks like this on the Query tab.

Figure 1.15: Adding multiple rows in an INSERT query
When you run the query, all three rows will be added with a single query:
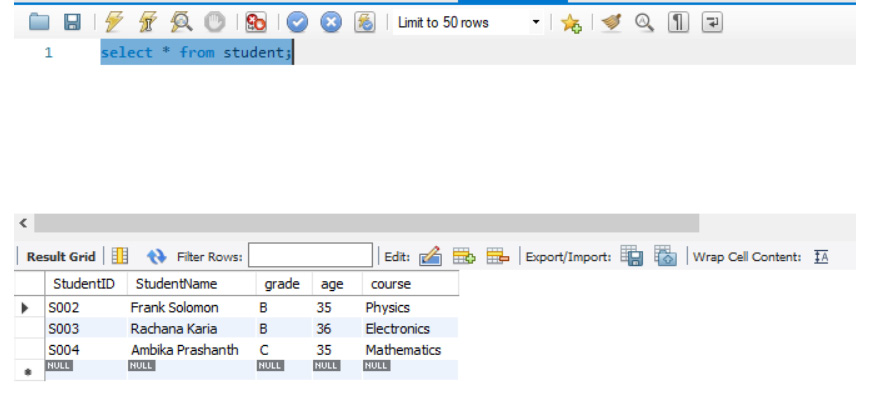
Figure 1.16: Output of multiple row insertion
Exercise 1.02: Inserting Values into the Customers Table of the PACKT_ONLINE_SHOP Database
Now that we have the Customers table ready, let's insert values into the table using a single query. We have the data from an already existing Excel spreadsheet. We will be using that data to write our query. Here is what the Excel file looks like:
Figure 1.17: Source data in an Excel spreadsheet
Note
You can find the csv format of the file here: https://packt.live/369ytTu.
To move this data into the database, we will need to perform the following steps:
- Switch to the
PACKT_ONLINE_SHOPdatabase:use PACKT_ONLINE_SHOP;
- Insert the values based on the Excel spreadsheet provided wherever we have blank data. We will use
NULLto do this:INSERT INTO Customers (FirstName, MiddleName, LastName, HomeAddress, Email, Phone, Notes) VALUES('Joe', 'Greg', 'Smith', '2356 Elm St.', 'joesmith@sfghwert.com', '(310) 555-1212', 'Always gets products home delivered'), ('Grace', 'Murray', 'Hopper', '123 Compilation Street', 'gmhopper@ftyuw46.com', '(818) 555-3678', 'Compiler pioneer'), ('Ada', NULL, 'Lovelace', '22 Algorithm Way', 'adalovelace@fgjw54af.gov', '(717) 555-3457', 'First software engineer'), ('Joseph', 'Force', 'Crater', '1313 Mockingbird Lane', 'judgecrater@ev56gfwrty.com', '(212) 555-5678', 'Works everyday'), ('Jacqueline', 'Jackie', 'Cochran', '1701 Flightspeed Avenue', 'jackiecochrane@jryuwp8qe4w.gov', '(717) 555-3457', 'Researcher'), (NULL, 'Paul', 'Jones', '126 Bonhomme Richard Ave.', 'jpjones@bonhommerichard.edu', '(216) 555-6232', 'Admiral'); - When you execute the query and check the contents of the
Customerstable, you should see the following output.
Figure 1.18: The Customers table after inserting the values from the excel sheet
With this, you have successfully populated the Customers table.
Activity 1.01: Inserting Values into the Products Table in the PACKT_ONLINE_SHOP Database
Now that we've migrated the customer's data into the database, the next step is to migrate the product data from the Excel spreadsheet to the database. The data to be entered into the database can be found at https://packt.live/2ZnJiyZ.
Here is a screenshot of the Excel spreadsheet:

Figure 1.19: Source data in an Excel spreadsheet
- Create a table called
Productsin thePackt_Online_Shopdatabase. - Create the columns as present in the Excel sheet.
- Use the
INSERTstatement to input the required data into the table.Note
The solution for this activity can be found via this link.