Reader small image

You're reading from  Django 4 By Example - Fourth Edition

Product typeBook
Published inAug 2022
Reading LevelBeginner
PublisherPackt
ISBN-139781801813051
Edition4th Edition
Languages
Tools
Right arrow
Author (1)
Antonio Melé
Antonio Melé
author image
Antonio Melé

Antonio Melé has been crafting Django projects since 2006, for clients spanning multiple industries. He is Engineering Director at Backbase, a leading global fintech firm dedicated to facilitating the digital transformation of financial institutions. He co-founded Nucoro, a digital wealth management platform. In 2009 Antonio founded Zenx IT, a company specialized in developing digital products. He has been working as CTO and consultant for several tech-centric startups. He has also managed development teams building projects for large enterprise clients. He has an MSc in Computer Science from Universidad Pontificia Comillas and completed the Advanced Management Program at MIT Sloan. His father inspired his passion for computers and coding.
Read more about Antonio Melé

Right arrow

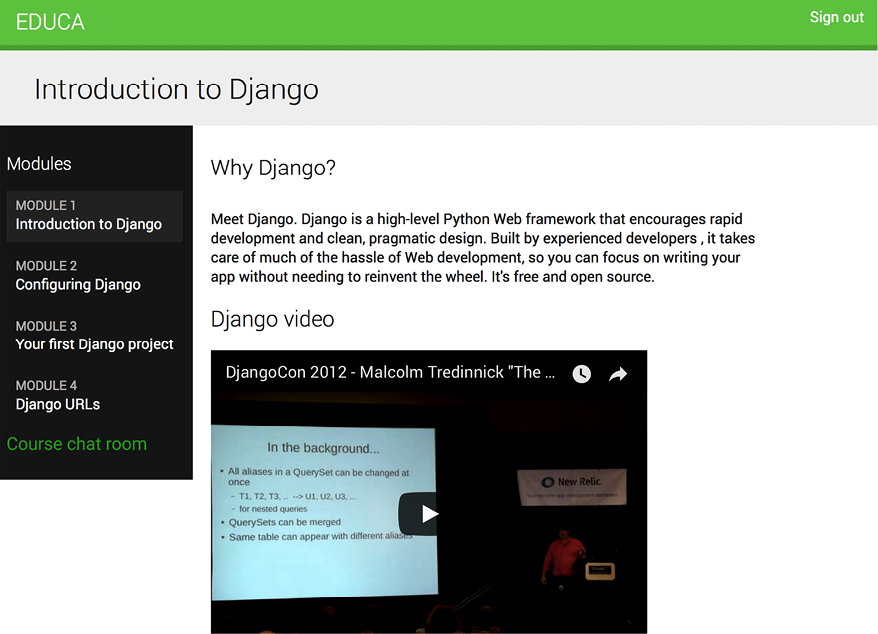
Building a Chat Server

In the previous chapter, you created a RESTful API for your project. In this chapter, you will build a chat server for students using Django Channels. Students will be able to access a different chat room for each course they are enrolled on. To create the chat server, you will learn how to serve your Django project through Asynchronous Server Gateway Interface (ASGI), and you will implement asynchronous communication.

In this chapter, you will:

  • Add Channels to your project
  • Build a WebSocket consumer and appropriate routing
  • Implement a WebSocket client
  • Enable a channel layer with Redis
  • Make your consumer fully asynchronous

The source code for this chapter can be found at https://github.com/PacktPublishing/Django-4-by-example/tree/main/Chapter16.

All Python modules used in this chapter are included in the requirements.txt file in the source code that comes along with this chapter. You can follow the instructions...

Creating a chat application

You are going to implement a chat server to provide students with a chat room for each course. Students enrolled on a course will be able to access the course chat room and exchange messages in real time. You will use Channels to build this functionality. Channels is a Django application that extends Django to handle protocols that require long-running connections, such as WebSockets, chatbots, or MQTT (a lightweight publish/subscribe message transport commonly used in Internet of Things (IoT) projects).

Using Channels, you can easily implement real-time or asynchronous functionalities into your project in addition to your standard HTTP synchronous views. You will start by adding a new application to your project. The new application will contain the logic for the chat server.

You can the documentation for Django Channels at https://channels.readthedocs.io/.

Let’s start implementing the chat server. Run the following command from the...

Real-time Django with Channels

You are building a chat server to provide students with a chat room for each course. Students enrolled on a course will be able to access the course chat room and exchange messages. This functionality requires real-time communication between the server and the client. The client should be able to connect to the chat and send or receive data at any time. There are several ways you could implement this feature, using AJAX polling or long polling in combination with storing the messages in your database or Redis. However, there is no efficient way to implement a chat server using a standard synchronous web application. You are going to build a chat server using asynchronous communication through ASGI.

Asynchronous applications using ASGI

Django is usually deployed using Web Server Gateway Interface (WSGI), which is the standard interface for Python applications to handle HTTP requests. However, to work with asynchronous applications, you need to...

Installing Channels

You are going to add Channels to your project and set up the required basic ASGI application routing for it to manage HTTP requests.

Install Channels in your virtual environment with the following command:

pip install channels==3.0.5

Edit the settings.py file of the educa project and add channels to the INSTALLED_APPS setting as follows:

INSTALLED_APPS = [
    # ...
    'channels',
]

The channels application is now activated in your project.

Channels expects you to define a single root application that will be executed for all requests. You can define the root application by adding the ASGI_APPLICATION setting to your project. This is similar to the ROOT_URLCONF setting that points to the base URL patterns of your project. You can place the root application anywhere in your project, but it is recommended to put it in a project-level file. You can add your root routing configuration to the asgi.py file directly, where the ASGI...

Writing a consumer

Consumers are the equivalent of Django views for asynchronous applications. As mentioned, they handle WebSockets in a very similar way to how traditional views handle HTTP requests. Consumers are ASGI applications that can handle messages, notifications, and other things. Unlike Django views, consumers are built for long-running communication. URLs are mapped to consumers through routing classes that allow you to combine and stack consumers.

Let’s implement a basic consumer that can accept WebSocket connections and echoes every message it receives from the WebSocket back to it. This initial functionality will allow the student to send messages to the consumer and receive back the messages it sends.

Create a new file inside the chat application directory and name it consumers.py. Add the following code to it:

import json
from channels.generic.websocket import WebsocketConsumer
class ChatConsumer(WebsocketConsumer):
    def connect(self):
     ...

Routing

You need to define a URL to route connections to the ChatConsumer consumer you have implemented. Channels provides routing classes that allow you to combine and stack consumers to dispatch based on what the connection is. You can think of them as the URL routing system of Django for asynchronous applications.

Create a new file inside the chat application directory and name it routing.py. Add the following code to it:

from django.urls import re_path
from . import consumers
websocket_urlpatterns = [
    re_path(r'ws/chat/room/(?P<course_id>\d+)/$', 
            consumers.ChatConsumer.as_asgi()),
]

In this code, you map a URL pattern with the ChatConsumer class that you defined in the chat/consumers.py file. You use Django’s re_path to define the path with regular expressions. You use the re_path function instead of the common path function because of the limitations of Channels’ URL routing. The URL includes an integer parameter called...

Implementing the WebSocket client

So far, you have created the course_chat_room view and its corresponding template for students to access the course chat room. You have implemented a WebSocket consumer for the chat server and tied it with URL routing. Now, you need to build a WebSocket client to establish a connection with the WebSocket in the course chat room template and be able to send/receive messages.

You are going to implement the WebSocket client with JavaScript to open and maintain a connection in the browser. You will interact with the Document Object Model (DOM) using JavaScript.

Edit the chat/room.html template of the chat application and modify the include_js and domready blocks, as follows:

{% block include_js %}
  {{ course.id|json_script:"course-id" }}
{% endblock %}
{% block domready %}
  const courseId = JSON.parse(
    document.getElementById('course-id').textContent
  );
  const url = 'ws://' + window.location.host +
...

Enabling a channel layer

Channel layers allow you to communicate between different instances of an application. A channel layer is the transport mechanism that allows multiple consumer instances to communicate with each other and with other parts of Django.

In your chat server, you plan to have multiple instances of the ChatConsumer consumer for the same course chat room. Each student who joins the chat room will instantiate the WebSocket client in their browser, and that will open a connection with an instance of the WebSocket consumer. You need a common channel layer to distribute messages between consumers.

Channels and groups

Channel layers provide two abstractions to manage communications: channels and groups:

  • Channel: You can think of a channel as an inbox where messages can be sent to or as a task queue. Each channel has a name. Messages are sent to a channel by anyone who knows the channel name and then given to consumers listening on that channel.
  • ...

Modifying the consumer to be fully asynchronous

The ChatConsumer you have implemented inherits from the base WebsocketConsumer class, which is synchronous. Synchronous consumers are convenient for accessing Django models and calling regular synchronous I/O functions. However, asynchronous consumers perform better, since they don’t require additional threads when handling requests. Since you are using the asynchronous channel layer functions, you can easily rewrite the ChatConsumer class to be asynchronous.

Edit the consumers.py file of the chat application and implement the following changes:

import json
from channels.generic.websocket import AsyncWebsocketConsumer
from asgiref.sync import async_to_sync
from django.utils import timezone
class ChatConsumer(AsyncWebsocketConsumer):
    async def connect(self):
        self.user = self.scope['user']
        self.id = self.scope['url_route']['kwargs']['course_id']
        self.room_group_name...

Integrating the chat application with existing views

The chat server is now fully implemented, and students enrolled on a course can communicate with each other. Let’s add a link for students to join the chat room for each course.

Edit the students/course/detail.html template of the students application and add the following <h3> HTML element code at the bottom of the <div class="contents"> element:

<div class="contents">
  ...
  <h3>
    <a href="{% url "chat:course_chat_room" object.id %}">
      Course chat room
    </a>
  </h3>
</div>

Open the browser and access any course that the student is enrolled on to view the course contents. The sidebar will now contain a Course chat room link that points to the course chat room view. If you click on it, you will enter the chat room:

Figure 16.8: The course detail page, including a link to the course chat room

Congratulations...

Additional resources

The following resources provide additional information related to the topics covered in this chapter:

Summary

In this chapter, you learned how to create a chat server using Channels. You implemented a WebSocket consumer and client. You also enabled communication between consumers using a channel layer with Redis and modified the consumer to be fully asynchronous.

The next chapter will teach you how to build a production environment for your Django project using NGINX, uWSGI, and Daphne with Docker Compose. You will also learn how to implement custom middleware and create custom management commands.

lock icon
The rest of the chapter is locked
You have been reading a chapter from
Django 4 By Example - Fourth Edition
Published in: Aug 2022Publisher: PacktISBN-13: 9781801813051
Register for a free Packt account to unlock a world of extra content!
A free Packt account unlocks extra newsletters, articles, discounted offers, and much more. Start advancing your knowledge today.
undefined
Unlock this book and the full library FREE for 7 days
Get unlimited access to 7000+ expert-authored eBooks and videos courses covering every tech area you can think of
Renews at $15.99/month. Cancel anytime

Author (1)

author image
Antonio Melé

Antonio Melé has been crafting Django projects since 2006, for clients spanning multiple industries. He is Engineering Director at Backbase, a leading global fintech firm dedicated to facilitating the digital transformation of financial institutions. He co-founded Nucoro, a digital wealth management platform. In 2009 Antonio founded Zenx IT, a company specialized in developing digital products. He has been working as CTO and consultant for several tech-centric startups. He has also managed development teams building projects for large enterprise clients. He has an MSc in Computer Science from Universidad Pontificia Comillas and completed the Advanced Management Program at MIT Sloan. His father inspired his passion for computers and coding.
Read more about Antonio Melé