


Hands-on exercise – creating a single-stack VNet in Azure
In this exercise, we will create a single-stack IPv4 network for a fictional organization called CharisTech, which is in the process of migrating some on-premises applications to Azure. We will implement two VNets and subnets to support workloads that will be migrated. Here are the tasks that we will complete in this exercise:
- Task 1: Creating the CharisTech resource group
- Task 2: Creating the CoreServicesVNet VNet and subnets
- Task 3: Verifying the creation of VNets and subnets
Figure 1.15 shows the outcome that we’ll get to at the end of the tasks:
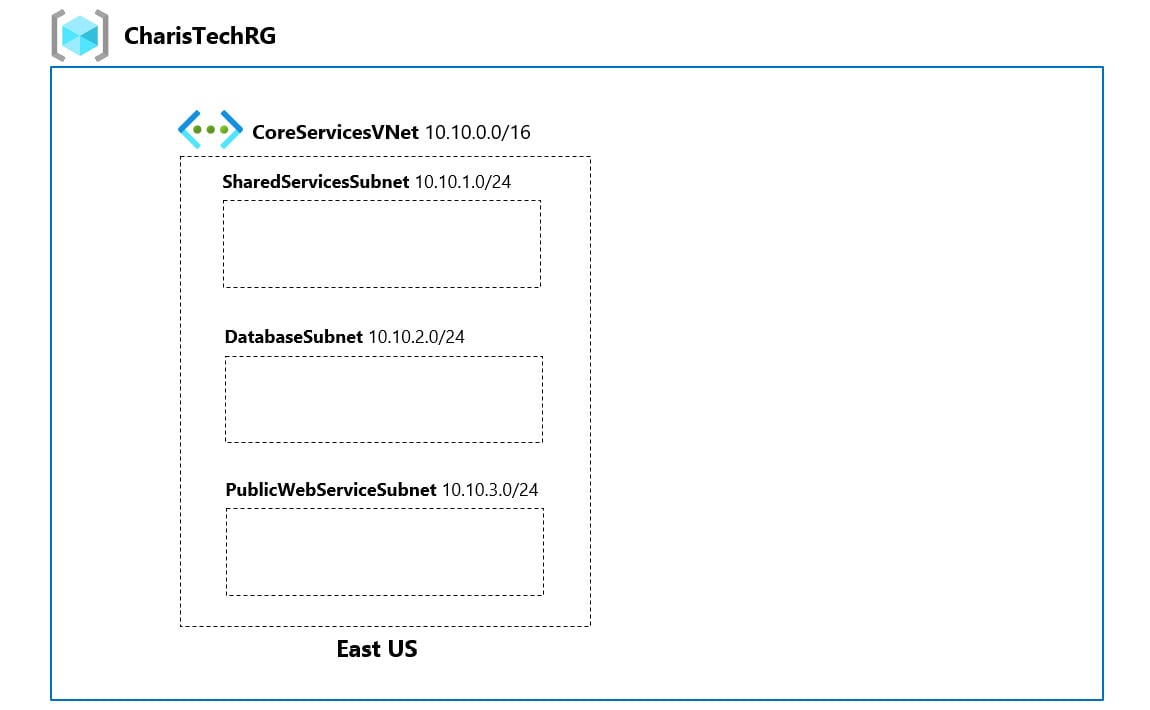
Figure 1.15 – CharisTech Azure VNets and subnets
Task 1 – creating the CharisTech resource group
A resource group is a logical container for managing related Azure resources. In this task, we will create a resource group called CharisTechRG that will hold the networking resources that we will create in other tasks:
- Open a web browser and browse to https://portal.azure.com.
- On the left-hand side, click on the portal menu icon, then click on Create a resource:

Figure 1.16 – Create a resource
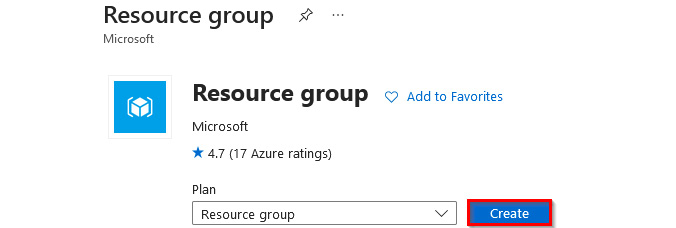
Figure 1.17 – Create a resource group
- In the Basics tab, enter the following values:
- Subscription: Select your Azure subscription (1)
- Resource group:
CharisTechRG(2) - Region: East US (3)
Then, select Review + create (4):
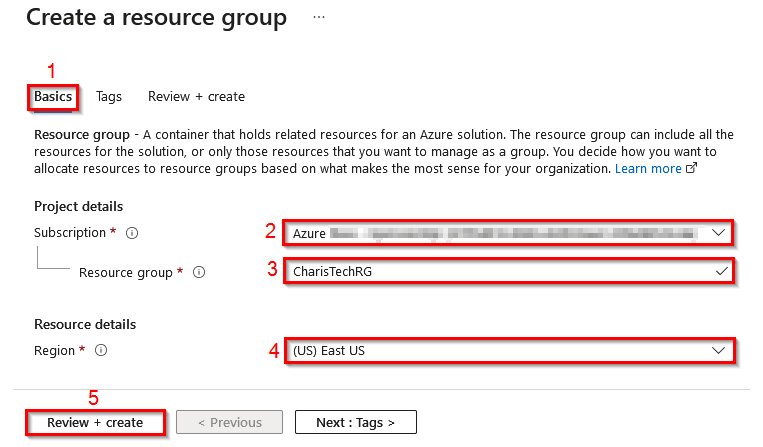
Figure 1.18 – Creating a resource group
- Select Create. It should only take a few seconds to create the resource group.
- In the top-right corner of the window, select the notification icon (the bell icon). Then, select Go to resource group to open the newly created resource group:
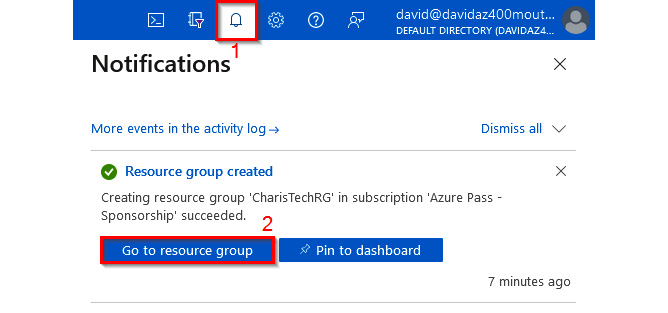
Figure 1.19 – Opening the newly created resource group
Leave this window open for the next task. Now that we have a resource group that we can use as a management container, let us proceed to create the VNets and subnets.
Task 2 – creating the CoreServicesVNet VNet and subnets
The first network that we will create is the CoreServicesVNet VNet (Figure 1.15). The network will be deployed in the East US region. It will be segmented into three subnets that will host the following workloads:
- Public web services (PublicWebServiceSubnet)
- Databases (DatabaseSubnet)
- Shared services that are key to the operations of the business, such as domain controllers (SharedServicesSubnet)
Let’s get started:
- In the CharisTechRG window, select + Create. In the search box, enter
Virtual Network. Select Virtual Network in the search results:
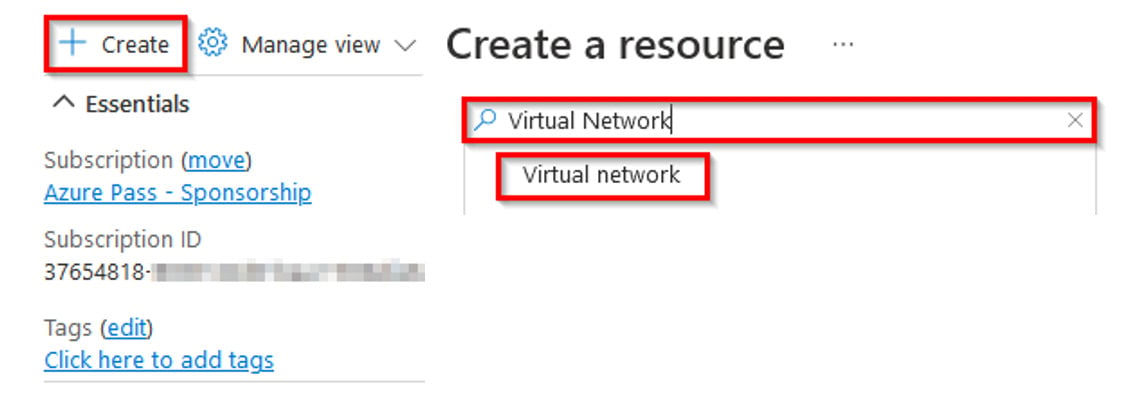
Figure 1.20 – Creating a resource
- On the Virtual Network page, select Create.
- On the Create virtual network window, in the Basics tab, enter the following values:
- Subscription: Select your Azure subscription
- Resource group:
CharisTechRG - Name:
CoreServicesVNet - Region: East US
Then, click Next: IP Addresses >:
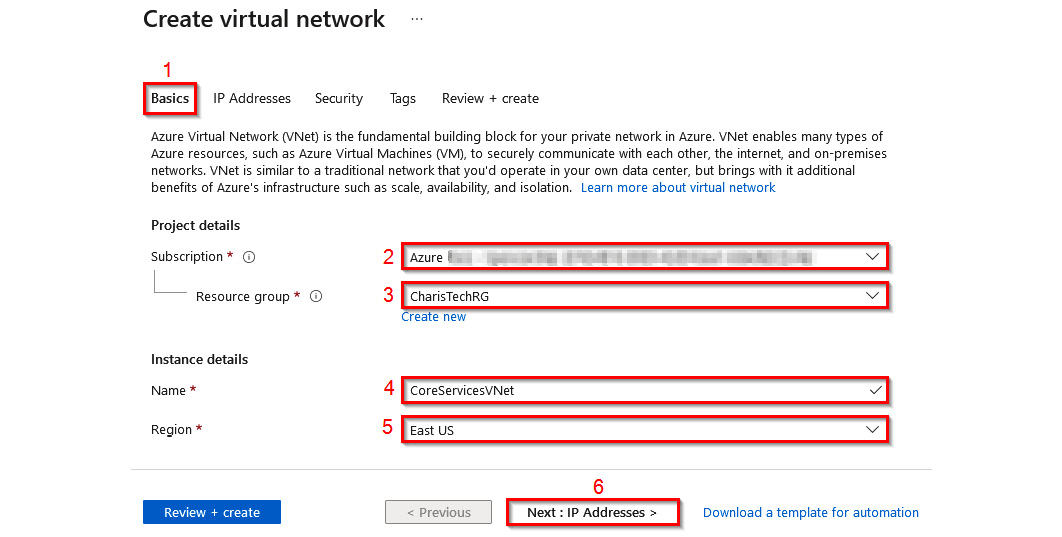
Figure 1.21 – Creating the VNet
- In the IP Addresses tab, change the default IP address space to
10.10.0.0/16. Then, select + Add subnet:
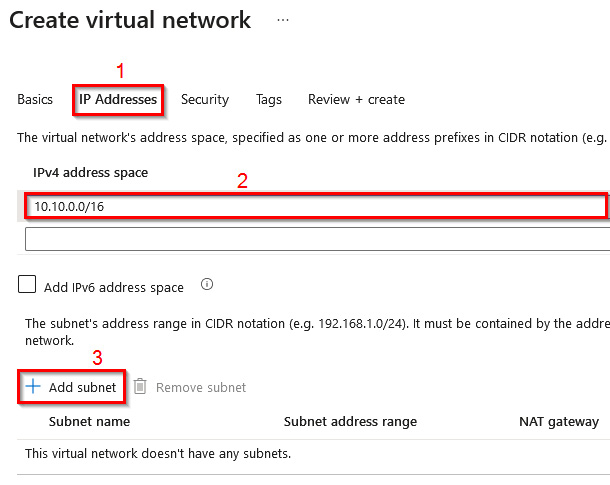
Figure 1.22 – Setting the IP address
- In the Add subnet window, configure the following:
- Subnet name:
SharedServicesSubnet - Subnet address range:
10.10.1.0/24 - NAT gateway: None
- Service endpoint: 0 selected
- Subnet name:
Then, click Add:
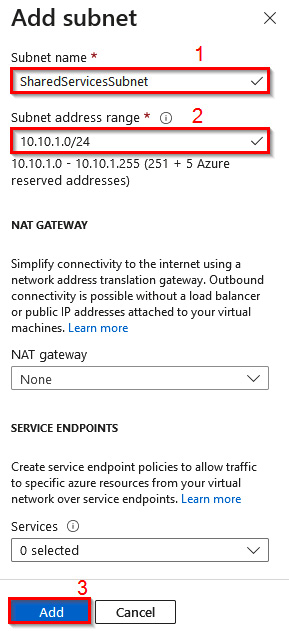
Figure 1.23 – Adding a subnet
|
Subnet |
Configuration option |
Configuration value |
|
DatabaseSubnet |
Subnet name |
DatabaseSubnet |
|
Subnet address range |
10.10.2.0/24 |
|
|
PublicWebServiceSubnet |
Subnet name |
PublicWebServiceSubnet |
|
Subnet address range |
10.10.3.0/24 |
Table 1.1 – Subnet configuration details
7. The configuration should look like Figure 1.24. Click on Review + create:
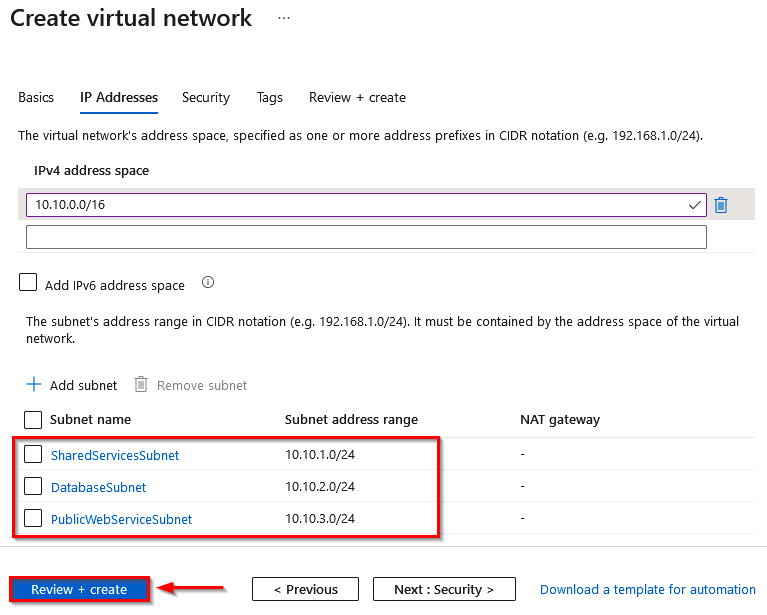
Figure 1.24 – Subnets added to the VNet configuration
8. Select Create. It should only take a few seconds to create the VNet and subnets.
Awesome! After the deployment completes, let us review what has been created.
Task 3 – verifying the creation of the VNet and subnets
In this task, we will review the resources created in the last task:
- Click on Go to resource to open the newly created VNet:
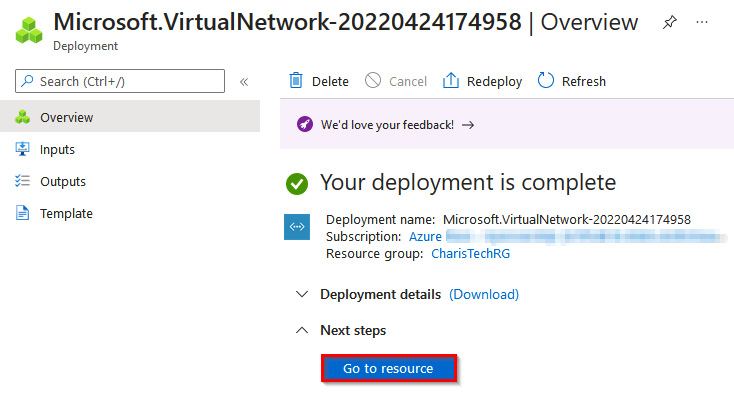
Figure 1.25 –Microsoft VNet overview
- In the CoreServicesVNet virtual network blade, in the Settings section, click on Subnets to review the subnets that were created:
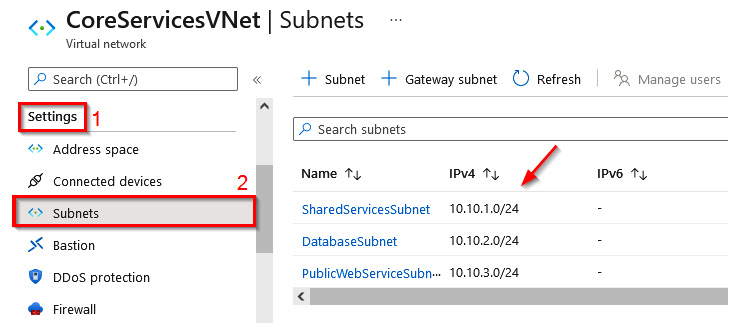
Figure 1.26 – Reviewing the subnets
You can leave this window open for the next task. Now that we have a resource group that we can use as a management container, let us proceed to create the VNets and subnets.


