


Setting up a Snowflake database with users and roles
In this section, you will be guided through creating your own Snowflake account so that you can experiment with the SQL commands from the previous section and use it with dbt in the next chapters.
Once you have created your account, we will help you through a quick setup of users and roles that will be useful throughout this book and in your later projects.
Creating your Snowflake account
To sign up for a 30-day free trial of Snowflake, you can go to https://signup.snowflake.com/ or look for the Start for free button on the Snowflake home page.
On the Snowflake site, go through the following steps:
- Fill in the registration form with your data and click CONTINUE.
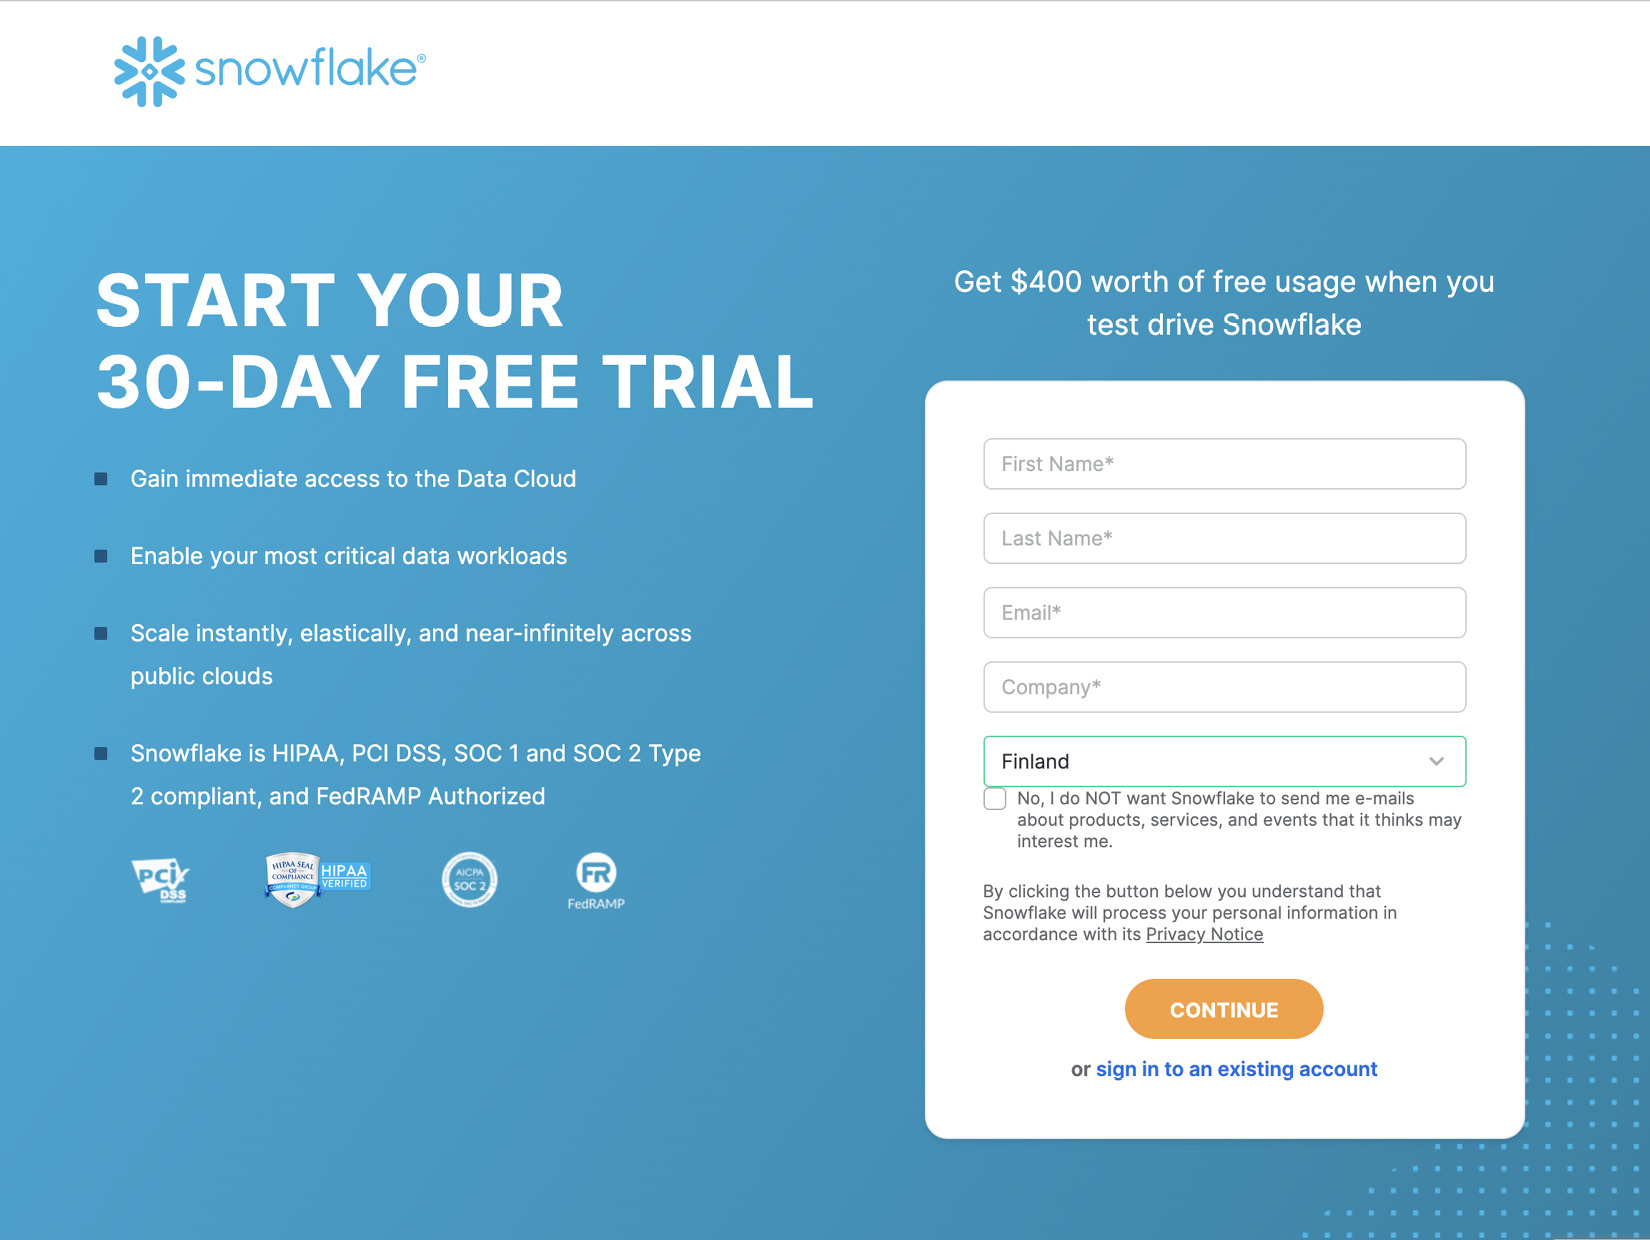
Figure 1.3: Snowflake free trial registration form
- Select the Snowflake edition that you want to use, pick your preferred cloud provider, and click GET STARTED and you will reach a confirmation page.
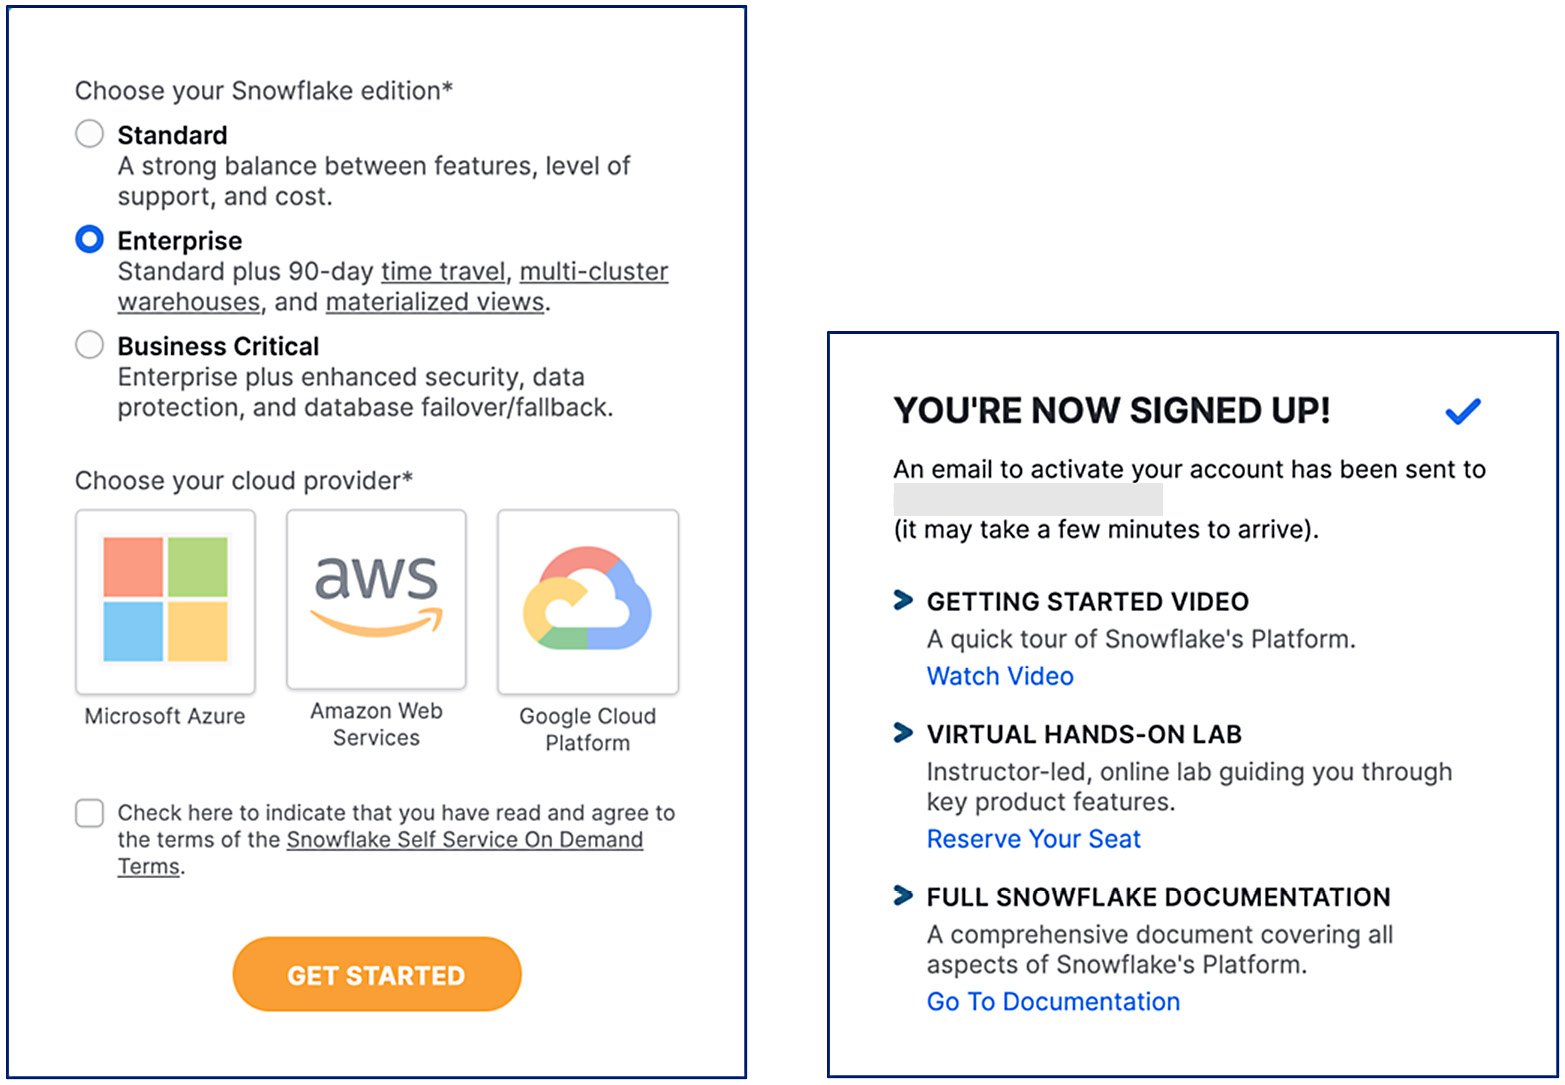
Figure 1.4: Left: Snowflake edition and cloud provider selection form. Right: sign-up confirmation
- Go to your email client and follow the link from the email that you receive to confirm your email address. It will take you back to the Snowflake website.
- On the Welcome to Snowflake! page, enter the username and password for the user that will become your account administrator and then click Get started.
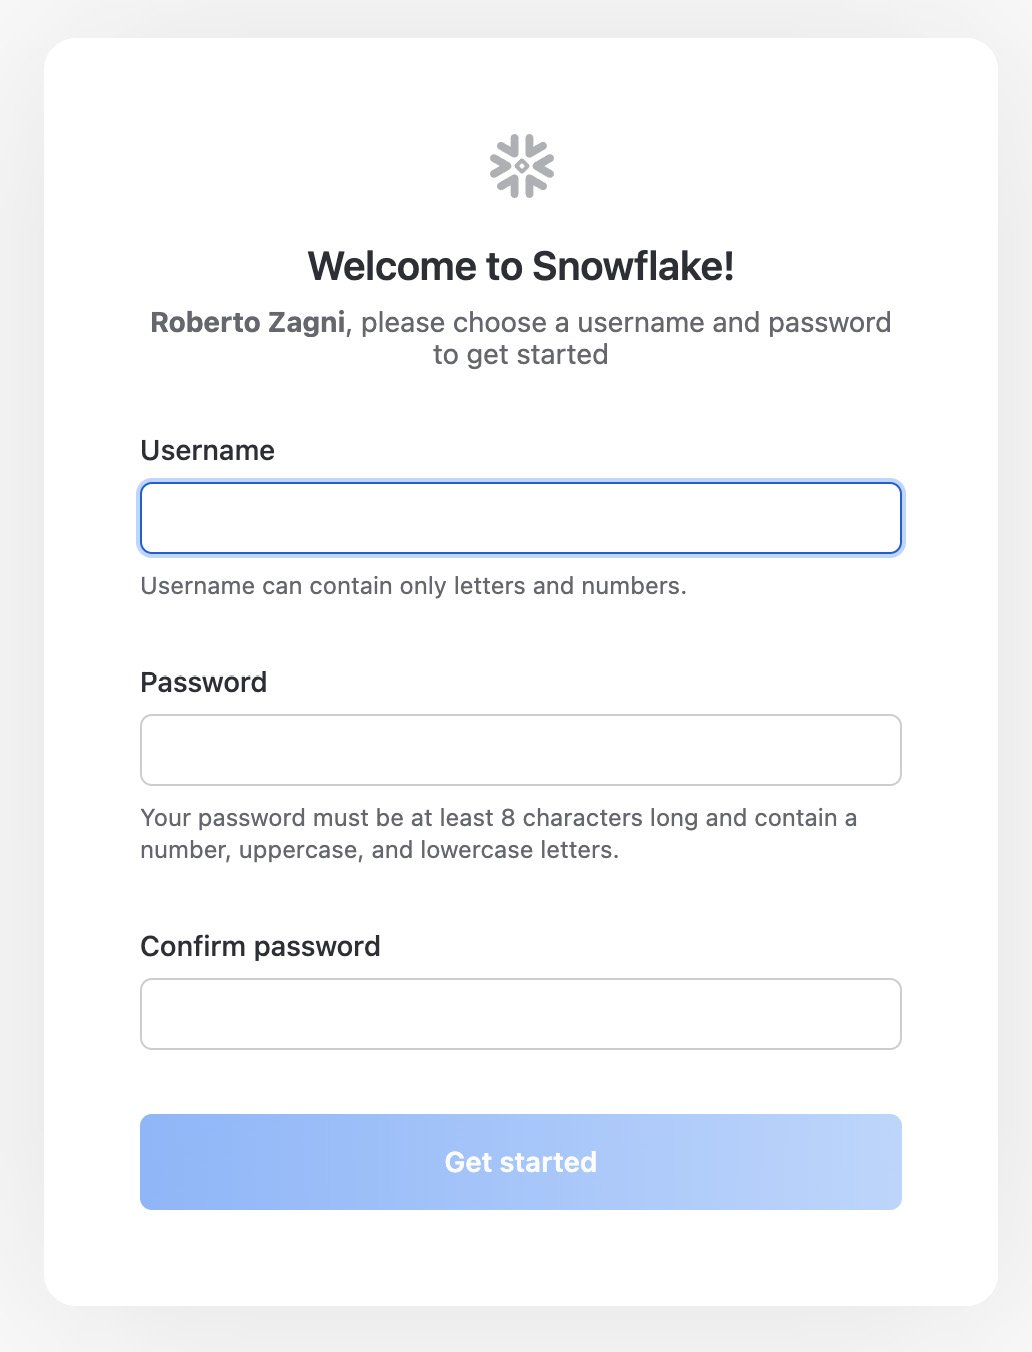
Figure 1.5: Welcome to Snowflake! page
Tip
Later, we will teach you how to create all the roles and users that you want.
Anyway, it makes sense to pick a good name and keep the password safe, as this user has all privileges and can do pretty much everything on your account.
- After clicking the Get started button, you will land on the Snowflake user interface, with an empty worksheet open and an introductory menu with a few topics to get started with Snowflake. If you are new to Snowflake, it is a good idea to go through those topics.
- After dismissing this introductory menu, you are ready to explore and use your Snowflake account, which in the classical console interface will look like this:
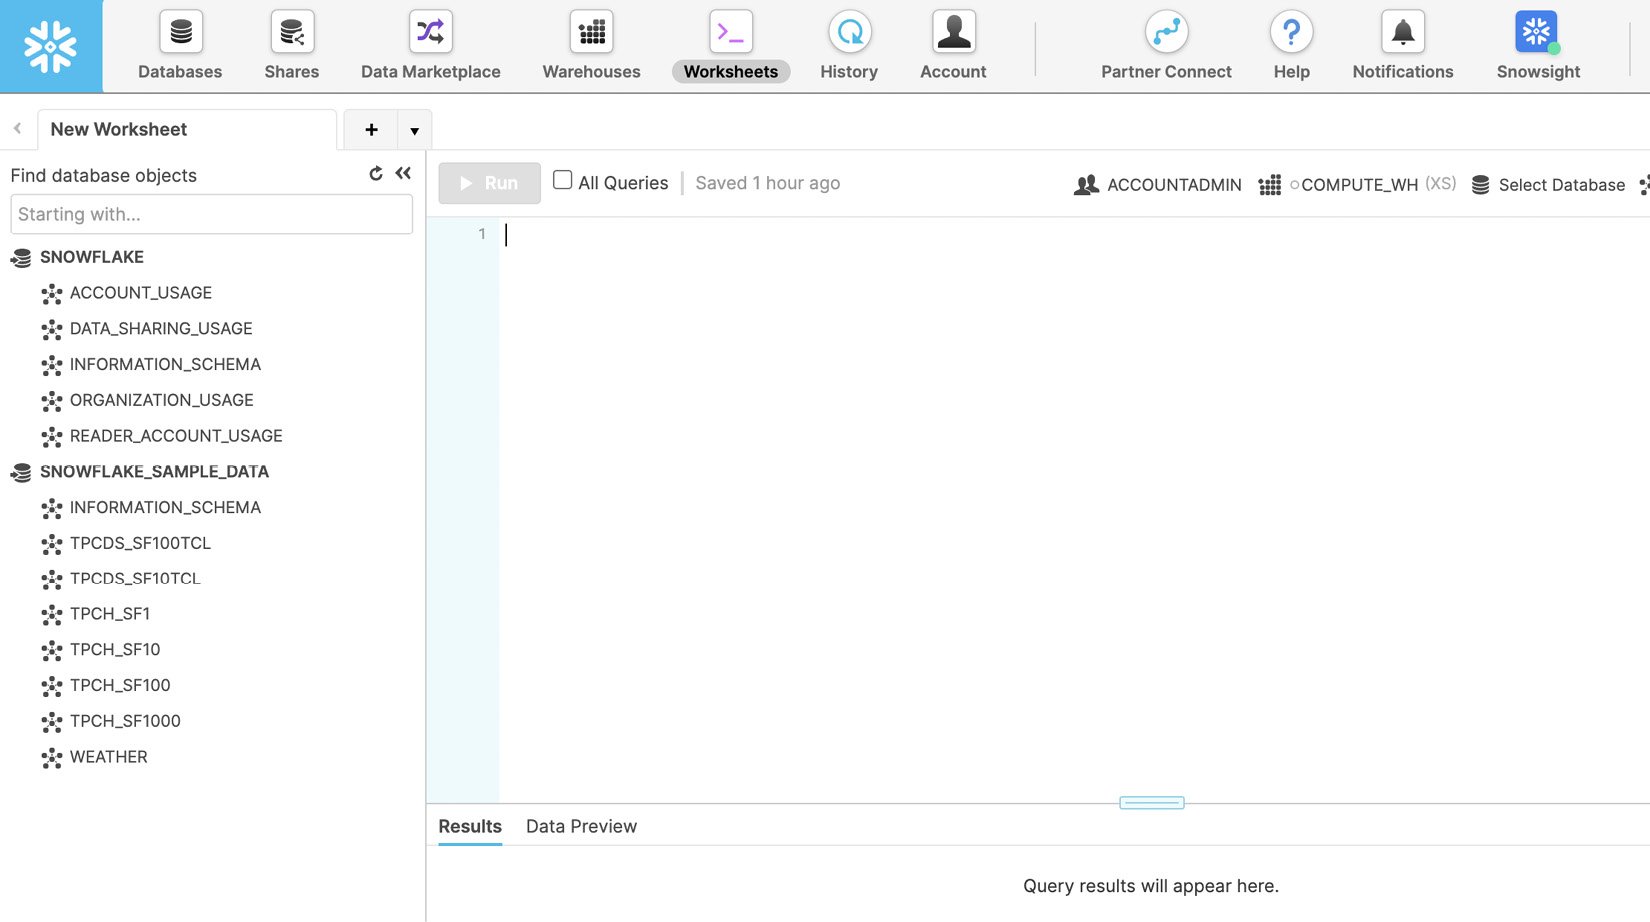
Figure 1.6: The user interface of Snowflake worksheets
If you end up with the new Snowflake interface (called Snowsight) you can work with it or use the Classic Console entry in the menu to switch to the older interface.
Setting up initial users, roles, and a database in Snowflake
Now you have a Snowflake account with a user that you can log in with, and your user has been granted the omnipotent role of ACCOUNTADMIN.
That’s great, but it is not advised that you use this role for normal work. The best practice is to set up a few users and roles to provide the desired access level and use the lowest level that can accomplish a task.
Snowflake allows you to pick the role you impersonate to execute commands in a worksheet between the ones you have been granted so that you do not have to log out and back in to change the role.
Tip
You can change your role, the warehouse to use, and the current database and schema with the selector in the top-right corner of the worksheet editing area.
You might have noticed that in the navigation panel on the left, you have two databases:
- The SNOWFLAKE database provides you with information about your Snowflake account
- The SNOWFLAKE_SAMPLE_DATA DB provides, as the name implies, some sample data
These databases are shared with you by Snowflake, and you can only read from them.
To do something meaningful, you will need at least a database you can write in.
In this section, we will create a database and some roles and users to use it.
Overview of initial roles
In a database a user needs the relevant privilege to be able to perform an action.
A user can have the privilege directly, that is, assigned to the user, or indirectly, through a role that the user can impersonate.
In practice, privileges are assigned to roles, which are assigned to other roles and users, to build the desired security hierarchy, because assigning privileges to users is not scalable.
When you log in to a newly created Snowflake account, you are impersonating the ACCOUNTADMIN role, which has all privileges, but other, more specialized roles are already available.
Snowflake has already set up a few self-explanatory basic roles: ACCOUNTADMIN, SECURITYADMIN, USERADMIN, SYSADMIN, and PUBLIC.
Important note
To create users and roles, Snowflake provides the USERADMIN role by default, which has the CREATE ROLE and CREATE USER privileges directly assigned. This role is already assigned to the initial user that you created.
The initial user could create new users and roles using the ACCOUNTADMIN or SECURITYADMIN roles, because they have been granted the USERADMIN role; SECURITYADMIN had it granted directly and ACCOUNTADMIN indirectly, having been granted the SECURITYADMIN role.
However, this would not be a great idea, as you will see in the following paragraphs on ownership.
The following is an example of how to create a hierarchy of roles.
You can explore the existing roles and their privileges with these commands:
SHOW ROLES;
SHOW GRANTS TO ROLE <role_name>;
Ownership is needed for some operations, such as deletions, which cannot be granted.
It is therefore advisable that a user with the role that we want to use to manage an object is the one who creates it, while impersonating such role.
In this way, the user, and all others with the same role, will have the required privileges.
An alternative is to use the GRANT command to explicitly provide the required privileges to a role.
Important note
An object is owned by the role that created it.
When a user has multiple roles, the role impersonated by the user at the moment of the creation will own the object.
Before creating an object, make sure you are impersonating the role you want to own the object.
Creating and granting your first role
Let’s switch to USERADMIN to create our users and roles, because this is the role that you will probably grant to people delegated to perform user and role administration.
Being the owner will make all operations, including deletions, simpler:
- Switch to the
USERADMINrole:USE ROLE USERADMIN;
Let’s create the role that we will use for all users that have to fully manage a dbt project, humans, or applications.
I usually call this role DBT_EXECUTOR_ROLE because I call the user for the dbt application DBT_EXECUTOR and I like to be crystal clear with my names.
You can of course pick a name that you prefer for both the role and user.
- Create a role for users running dbt models:
CREATE ROLE DBT_EXECUTOR_ROLE
COMMENT = 'Role for the users running DBT models';
We now have a role that we can shape and use to manage a set of database objects, for example, corresponding to one or more dbt projects.
The dbt executor user will be used by dbt to run dbt models in shared environments, while dbt will use each developer’s own user to run dbt models in their own development environment.
The simplest setup, giving all developers the ability to manage all environments, is to assign this role to all developers. An alternative is to have a different role for production and other environments that you want to keep protected.
- Let’s keep it simple and assign the executor role to ourselves:
GRANT ROLE DBT_EXECUTOR_ROLE TO USER <your_user>;
Now, our user has both the account admin and the executor roles. To be able to see and select the role in the user interface dropdown, you might need to refresh the page.
Granting the privileges to create a database
We could create a database while impersonating the account admin role, but this will not help with our plan to use the executor role to manage this database. We must then give our executor role the ability to create a database. To have our SQL commands executed on a database, we need the ability to use or create an existing warehouse.
Important Note
To manage the structure of databases and the warehouse settings, Snowflake provides the default SYSADMIN role, which has the required privileges.
We can achieve our goal of providing the executor role with those abilities by doing one of the following:
- Granting the required privileges directly to the executor role
- Granting the SYSADMIN role to the executor role, which has the required privileges
What would be the difference?
If you grant the privileges directly, the executor role is totally isolated from other roles, and users with that role will just be able to access what the role allows them to access.
If you grant the SYSADMIN role, users with the executor role will also be able to impersonate the SYSADMIN role and therefore also access any object it can access. As an example, they could access a database created by another user that has created it with the sysadmin role.
Let’s assign the desired privileges directly, to keep our dbt objects away from SYSADMIN.
To grant the privileges to the executor role, we need to switch to a role that can grant these privileges and then grant them:
- Switch to the
SYSADMINrole:USE ROLE SYSADMIN;
- Grant the privilege to create a new database:
GRANT CREATE DATABASE ON ACCOUNT
TO ROLE DBT_EXECUTOR_ROLE;
- Grant the privilege to use the default warehouse, named
COMPUTE_WH:GRANT USAGE ON WAREHOUSE COMPUTE_WH
TO ROLE DBT_EXECUTOR_ROLE;
Creating your first database
Now that our executor role can create a database, let’s do it:
- Let’s impersonate the executor role so that it will own what we create:
USE ROLE DBT_EXECUTOR_ROLE;
- Now, let’s create our database:
CREATE DATABASE DATA_ENG_DBT;
-- or pick any name you like for the DB
To see the new database in Snowflake, you might need to refresh the browsing panel on the left of the user interface, with the Refresh button, shaped as a circular arrow, in the top right of the panel.
Tip
Clicking on the new database will show that it is not empty.
The new database has two schemata: INFORMATION_SCHEMA, which contains views that you can use to collect information on the database itself, and PUBLIC, which is the default schema of the new database and is empty.
To reduce Snowflake credit consumption, let’s finish by configuring the default warehouse to suspend after 1 minute instead of 10:
USE ROLE SYSADMIN;
ALTER WAREHOUSE "COMPUTE_WH" SET
    WAREHOUSE_SIZE = 'XSMALL'
    AUTO_SUSPEND = 60
    AUTO_RESUME = TRUE
    COMMENT = 'Default Warehouse';
Tip
To alter the warehouse, you must switch to the SYSADMIN user as it is the role that owns the warehouse; we have granted our executor role only the privilege to use it.
Congratulations! You have now created a role, assigned it to your personal user, created a database owned by that role, and configured the default warehouse. You are almost done setting up.
Creating a user for the dbt application
Let’s complete our initial setup by creating a new user that we will use with dbt and grant it the executor role so that it will be able to manage, as an owner, that database.
To create a user, we need to switch to a role with that ability:
- Switch to the
USERADMINrole:USE ROLE USERADMIN;
- Create the new user for dbt; I have named it
DBT_EXECUTOR, though you can pick any name:CREATE USER IF NOT EXISTS DBT_EXECUTOR
COMMENT = 'User running DBT commands'
PASSWORD = 'pick_a_password'
DEFAULT_WAREHOUSE = 'COMPUTE_WH'
DEFAULT_ROLE = 'DBT_EXECUTOR_ROLE'
;
- Let’s assign the executor role to the dbt user:
GRANT ROLE DBT_EXECUTOR_ROLE TO USER DBT_EXECUTOR;
- Switch back to the operational role, which we should always be working with:
USE ROLE DBT_EXECUTOR_ROLE;
Great! You have now performed a basic setup of your new Snowflake account; you have learned the basics of user and role management and you are ready to learn more SQL to query data.


